Loading
ZUNDEL HOUSE IN WILLARD BUILT IN 1882
The following series of entries explain the need to remodel the old home, the progression of that remodel and pictures that show before demolition began, during demolition and completion of the entire project. Having not dealt with this website prior to now, I am not sure how this will all turn out. Please bear with me on this. I am a work in progress as well as this site is a work in progress. I will try not to bore you too much.
Wynn Zundel
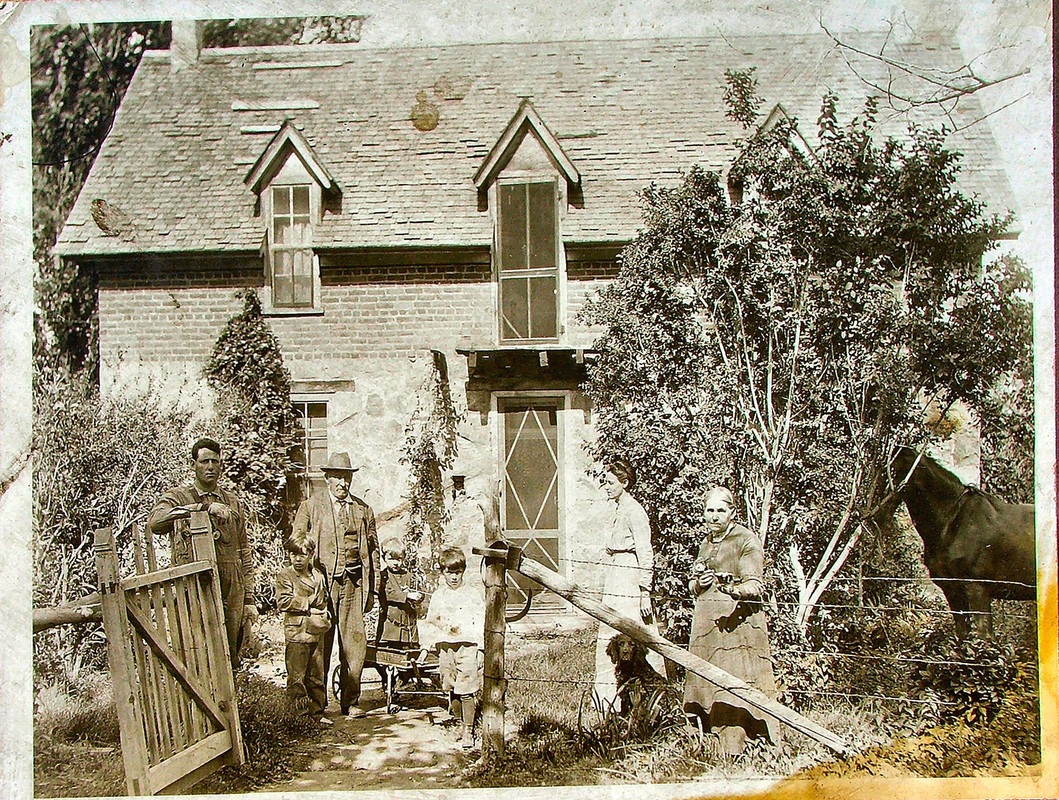
This picture shows how the home looked in the 1910's. In the picture from left to right: Steven Louis Zundel, Abraham Zundel, Maria Estell Zundel and Abigail Abbott Zundel. The young boys are John, Steve and Glen sons of John Henry Osmer and Clarissa Pettingill Zundel.
CLICK ON THE SMALL PICTURES TO SEE THEM ENLARGED
CLICK ON THE SMALL PICTURES TO SEE THEM ENLARGED
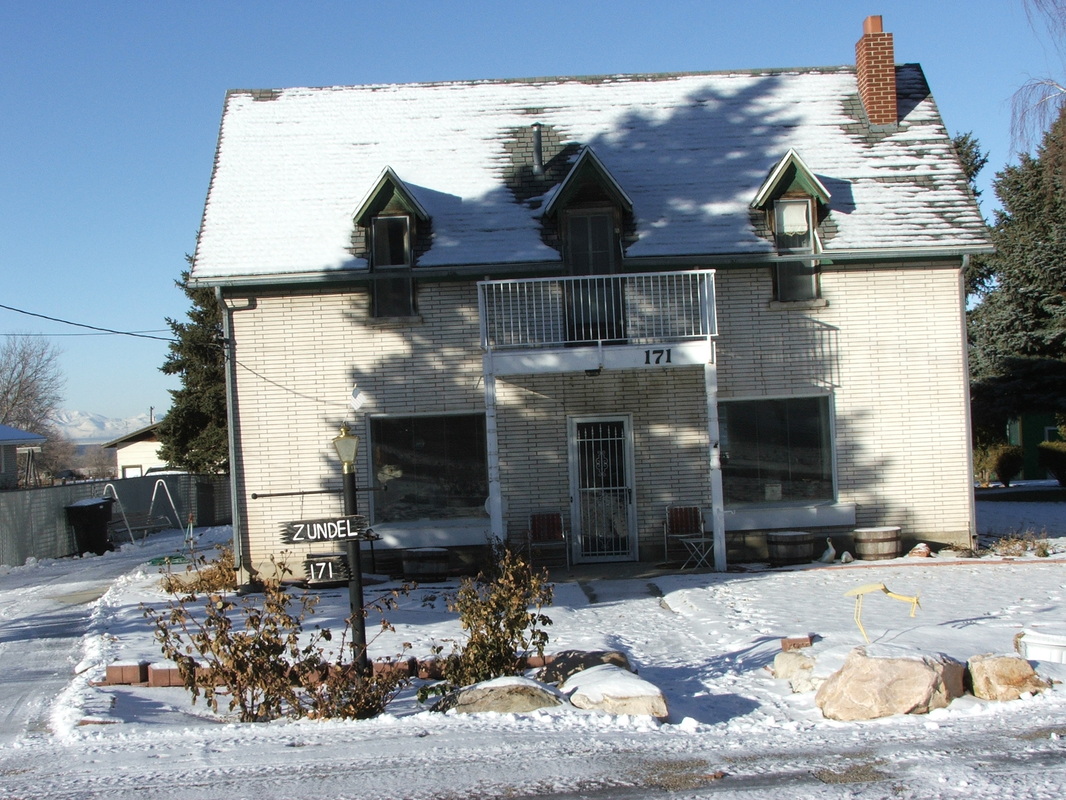
This is the house as it appeared in 2002. A major remodel was done on the home in the 1960's after Stephen U. Zundel took possession of the home. A lot of work had to be done to make it livable and brought up to fire code.
All of the children of Stephen U. and Ethel M. Zundel were raised in this home.
All of the children of Stephen U. and Ethel M. Zundel were raised in this home.
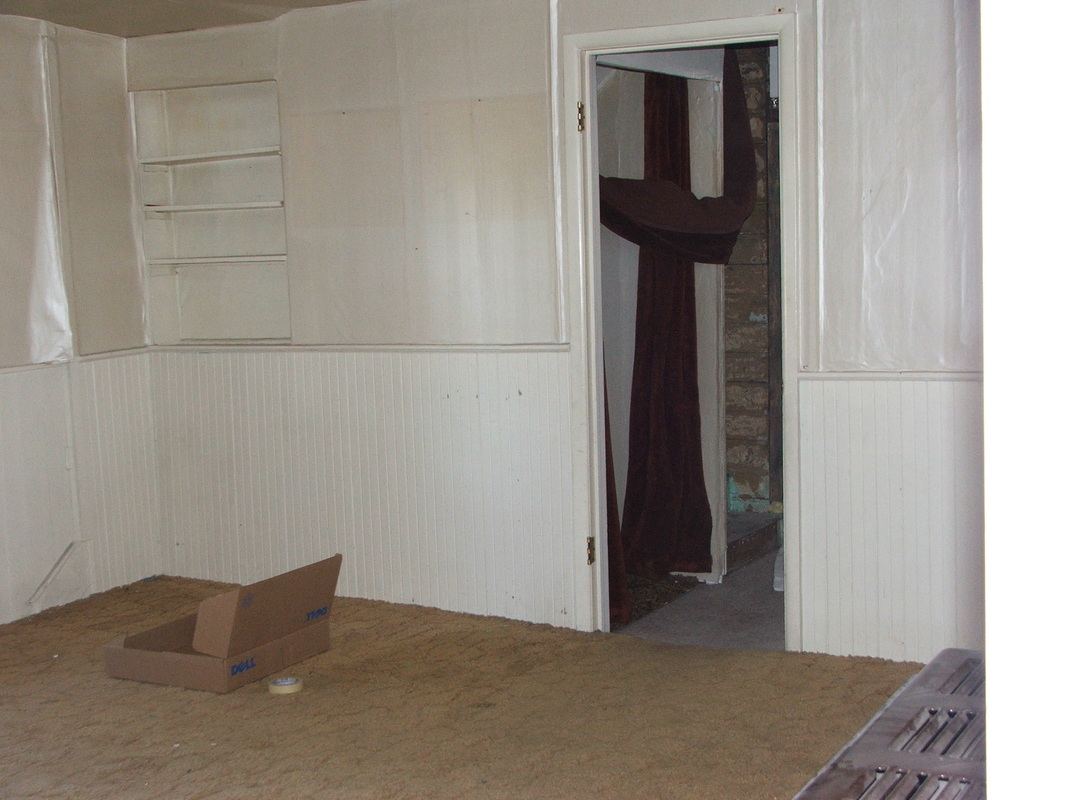
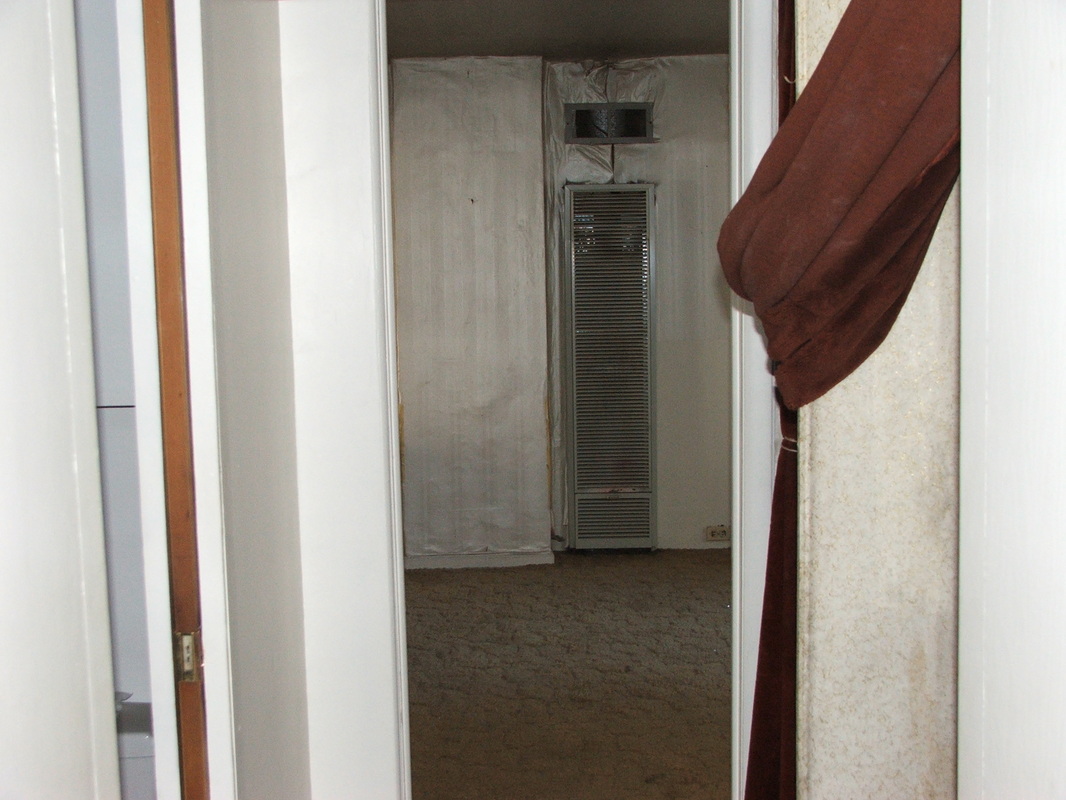
By looking at the pictures it becomes quite apparent the home needed a major make over. It wasn't that it wasn't cleaned while mother occupied it. But after here death it sat empty for over two years. We moved all of the items from the old home to our own homes in order to protect them. When a house sits empty it begins to deteriorate rapidly. We knew a major and costly remake of the home was necessary or we would lose it to the elements.
The story of that renovation is what follows:
CLICK ON THE SMALL PICTURE TO SEE IT ENLARGED
The story of that renovation is what follows:
CLICK ON THE SMALL PICTURE TO SEE IT ENLARGED
JANUARY 10, 2005
Sherry and I have been planning taking over the ownership of the Old Zundel house for about one year. The partners in the Dutch A LLC, Bob, Dee, Steve, Jack, Monie and Rick have verbally said that for part of my inheritance, $99,000, they would sign the house plus the property to the West and the road right of way, over to me as soon as the house is cleaned out of the 5 generations of Zundel stuff.
This has been going on for two years and 10 months, since Mother died in March of 2002. The place is a mess right now, and lots of additional work is needed to get it cleaned out. Monie has contacted an estate auction place in Tremonton that is willing to move in at our call and clear out all of the stuff in the house. Of course they have plans on lots of antiques etc. We, as a family, are picking through the things and taking most of it to our homes. There won’t be much left for the antique guys. Mostly what will be auctioned off will be 50’s to 80’s things. Some is very collectible. However, there is the old pump organ, and some candle making molds, crocks etc.
Sherry and I have ordered respirator masks in order to tear down the old lath and plaster walls. We know we have to replace the wiring and bring it up to code in order to rent the place out. Our goal is to renovate the place inside and eventually take the façade off the outside and make it look like it did when it was built in the 1880’s. We don’t plan on making it look historical, but make it livable and the outside looks somewhat like it did in the 1880’s.
Our plan is this: Build a bathroom upstairs in the “attic” area. This will be the Main bathroom for the house. The current main bathroom is one that Dad and Mom had Roy Torgeson build in the mid 1960’s and has been very functional. Our problem is the placement of the bathroom in its relation to the main entertainment area of the living room. Not too good. This being said, we plan to make another bathroom upstairs, fix up the “old bathroom” in the hallway, and eliminate the current main bathroom. The room will be used as a storage room.
Why? Why undo the bathroom that exists? The main problem is the plumbing. It tends to freeze each year and we have to have a heater put in the crawl space under the house to keep the pipes from freezing. The pipes have a problem in that the water pressure is too low and must have something blocking the water flow. This is a secondary problem to the freezing issue.
By putting the piping internal to the house the freezing problem will go away and the hazard of catching the house on fire with the heater will also be eliminated.
Our plan also incorporates the removal of the lath and plaster upstairs and down. We do not plan on touching the part of the house renovated in the 60’s, only that part that houses the old wiring etc. It won’t be easy and we plan on taking our time.
What funds do we have to do this? We have been saving into an IRA for several years, this is what we plan on using to accomplish our task. It’s not much but should do the job. Once completed, we can recover our investment via renting the house out.
Septic tank: Currently it resides West of the house and slightly North, with drain fields out into the old orchard. We plan on moving it up to the North side of the house, with the drain fields going West and South along the West side of the house. By doing this we will be able to make the house and the property it is on, ONE piece, and not complicated by being on the orchard part of the property. If for some unknown reason the house is sold, it can be sold without involving the old orchard, outbuildings etc. area.
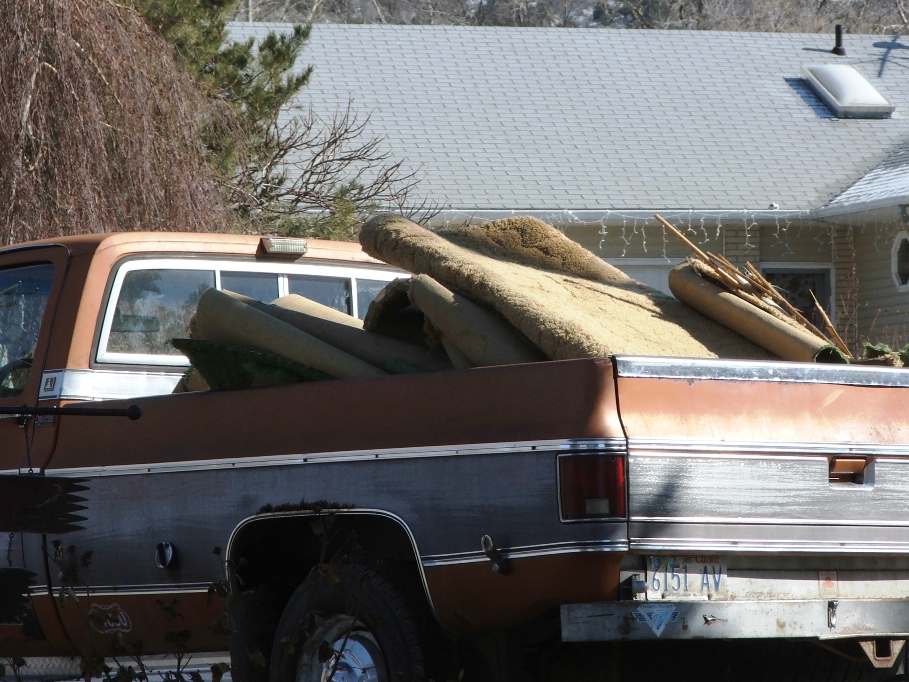
We plan to move in a dumpster to hold the lath and plaster and various junk we end up tossing out in our destruction. The prices for such a unit currently is $40 delivery, $110 per pickup and $38 for each ton of material taken to the dump. We feel this is fair. There is no time limit to keep the unit, and the family can take their time emptying the lower part of the house. We will toss the material we take off the walls out the upstairs balcony.
OK! Today is Jan. 10, 2005, Sherry and I headed to town and bought about $50 worth of gloves, hammers, and a small crow bar. We went into the hours to pull up the carpet on the stairs leading up to the upstairs. It was hard work, because Rick had put A LOT of staples into the carpet when he laid it several years ago. It took us about 2 hours just to get that carpet up. We worked without our respirator masks, as they have not arrived yet, and afterword, we blew our noses and the ugliest black junk came out that you can ever imagine! Never work with old house things without a respirator!!!!!
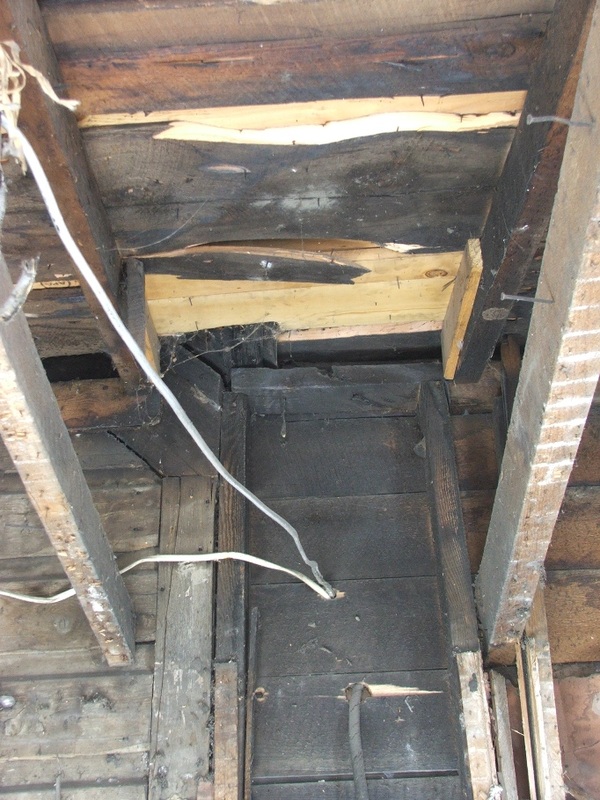
One of the neatest things that happened today. We were working on the stairs, and our curiosity has been for quite sometime about a landing that “just doesn’t seem right”. We tore into the covering etc. and got down to the wood. We didn’t see anything to make us think it was anything but a box built to cover something we don’t know yet. More to come.
Sherry and I have been planning taking over the ownership of the Old Zundel house for about one year. The partners in the Dutch A LLC, Bob, Dee, Steve, Jack, Monie and Rick have verbally said that for part of my inheritance, $99,000, they would sign the house plus the property to the West and the road right of way, over to me as soon as the house is cleaned out of the 5 generations of Zundel stuff.
This has been going on for two years and 10 months, since Mother died in March of 2002. The place is a mess right now, and lots of additional work is needed to get it cleaned out. Monie has contacted an estate auction place in Tremonton that is willing to move in at our call and clear out all of the stuff in the house. Of course they have plans on lots of antiques etc. We, as a family, are picking through the things and taking most of it to our homes. There won’t be much left for the antique guys. Mostly what will be auctioned off will be 50’s to 80’s things. Some is very collectible. However, there is the old pump organ, and some candle making molds, crocks etc.
Sherry and I have ordered respirator masks in order to tear down the old lath and plaster walls. We know we have to replace the wiring and bring it up to code in order to rent the place out. Our goal is to renovate the place inside and eventually take the façade off the outside and make it look like it did when it was built in the 1880’s. We don’t plan on making it look historical, but make it livable and the outside looks somewhat like it did in the 1880’s.
Our plan is this: Build a bathroom upstairs in the “attic” area. This will be the Main bathroom for the house. The current main bathroom is one that Dad and Mom had Roy Torgeson build in the mid 1960’s and has been very functional. Our problem is the placement of the bathroom in its relation to the main entertainment area of the living room. Not too good. This being said, we plan to make another bathroom upstairs, fix up the “old bathroom” in the hallway, and eliminate the current main bathroom. The room will be used as a storage room.
Why? Why undo the bathroom that exists? The main problem is the plumbing. It tends to freeze each year and we have to have a heater put in the crawl space under the house to keep the pipes from freezing. The pipes have a problem in that the water pressure is too low and must have something blocking the water flow. This is a secondary problem to the freezing issue.
By putting the piping internal to the house the freezing problem will go away and the hazard of catching the house on fire with the heater will also be eliminated.
Our plan also incorporates the removal of the lath and plaster upstairs and down. We do not plan on touching the part of the house renovated in the 60’s, only that part that houses the old wiring etc. It won’t be easy and we plan on taking our time.
What funds do we have to do this? We have been saving into an IRA for several years, this is what we plan on using to accomplish our task. It’s not much but should do the job. Once completed, we can recover our investment via renting the house out.
Septic tank: Currently it resides West of the house and slightly North, with drain fields out into the old orchard. We plan on moving it up to the North side of the house, with the drain fields going West and South along the West side of the house. By doing this we will be able to make the house and the property it is on, ONE piece, and not complicated by being on the orchard part of the property. If for some unknown reason the house is sold, it can be sold without involving the old orchard, outbuildings etc. area.
We plan to move in a dumpster to hold the lath and plaster and various junk we end up tossing out in our destruction. The prices for such a unit currently is $40 delivery, $110 per pickup and $38 for each ton of material taken to the dump. We feel this is fair. There is no time limit to keep the unit, and the family can take their time emptying the lower part of the house. We will toss the material we take off the walls out the upstairs balcony.
OK! Today is Jan. 10, 2005, Sherry and I headed to town and bought about $50 worth of gloves, hammers, and a small crow bar. We went into the hours to pull up the carpet on the stairs leading up to the upstairs. It was hard work, because Rick had put A LOT of staples into the carpet when he laid it several years ago. It took us about 2 hours just to get that carpet up. We worked without our respirator masks, as they have not arrived yet, and afterword, we blew our noses and the ugliest black junk came out that you can ever imagine! Never work with old house things without a respirator!!!!!
One of the neatest things that happened today. We were working on the stairs, and our curiosity has been for quite sometime about a landing that “just doesn’t seem right”. We tore into the covering etc. and got down to the wood. We didn’t see anything to make us think it was anything but a box built to cover something we don’t know yet. More to come.
What happened next was the key for the day. Sherry pulled off some of the wallpaper from
the North wall, and behind the wallpaper was a very beautiful Mohogany
wall. I kept working on the East wall
and it too is covered with Mohogany.
These walls will not be covered with sheetrock, but will be restored as
mahogany.
Our plan is to keep updating this piece as we progress.
CLICK ON THE SMALL PICTURE TO SEE IT ENLARGED
Jan. 11, 2005
Weather Very cold, snowing occasionally, very wet snow! I plowed everyone out (all 1 inch of it) and headed to the house to work. No masks yet, so I can only do little things. Today is the day to undo the screw in fuses and stop the flow of electricity to the older part of the house. I did this, and behind two of the four fuses were pennies! Gotta keep the power going ya know! Funny why the house didn’t burn down.
I had turned on lights throughout the down and upstairs and removed the fuses. Checked to see which ones went out and then went back to the fuse panel. I pulled very hard several times on the “main fuse” breaker and finally got it out. In the process one of the pennies dislodged and fell on the porch floor. The other penny appears to be welded in place. I put the main fuse breaker back and went looking to see which lights went out. The downstairs, back room was dark. I went upstairs to the attic, the light burned bright.
Oh well. I proceeded to pull the square nails from the wall and save them in a container. Then the overhead hooks and odds and ends found on the floor. Cool things to discuss later. In the process I found a long piece of wood that could be used to dislodge the penny from the fuse panel. I headed back downstairs. When I touched the side of the penny, trying to pry it out, a large spark blasted forth and the porch light went out. I pried some more, more sparks, the light came back on. I pulled the main panel out and pried like the dickens and finally the penny popped out and onto the porch floor. I put the main panel back and no porch light. I quickly went upstairs to find the light out! This is good! No power to the “older” part of the house (I hope). I headed home.
Today, Jan. 12….No masks means no work. Sherry and I finally got over their about 3:30 to “do something”. She scraped at the mahogany wall while I pulled up some 3/8 inch particle board at the top of the stairs (leveling material). Once that was up, I pulled staples (lots of staples). Under the particle board was linoleum in various sizes and shapes. It appeared the ancestors used pieces to level the floor. I pried it up and found old newspapers under it. I tried to be careful in order to read them…they dated in the late 1942 time range. Lots of stories about European countries doing this and that about the Nazi regime. We haven’t read them yet, but Sherry headed downstairs to take a look. Was down there long enough for me to get the staples all pulled up and find an interesting view of “something” under a couple of pieces of flooring. There was a large crack between the floor boards I could see wiring, an eaten corn cob and something else I could not recognize.
I had to pull up those boards! Trying as I may, I did crack one of them, but managed to get them up and the thing I could not recognize was a partially eaten (mice no doubt) spent shotshell! Also the corn cob and the wiring through the floor joists made me shiver. Why hasn’t this house burnt down?
Tomorrow we have the “Green Disposal” company come with a large disposal unit we can toss old carpet, debris etc. into. The cost will be $40 delivery, $110 for each time we ask them to come and unload it and $38 per ton of “stuff” we put into it. We hope we only have to have them come once and the total tonnage is under 4. That would be around $500 and we feel that’s about right for the service. There is no time limit on how long we keep the 20 yard unit. The game plan is to park it out and under the front porch so we can toss the stuff into it from upstairs. Once we get downstairs, we can toss the stuff over the side of the unit (5 ½ ft.). Wish us luck.
Jan. 20..Cleaned up what was left of the carpet, tacks etc.
and then it was “fun time”!! We started
with the lath and plaster removal in the attic.
WOW, what a dusty mess! We were
glad we had masks and goggles! Goggles
especially when we got up high and overhead.
Our masks were “black” when we took breaks and dusted them off. Three breaks later all of the plaster laid on
the floor.

Sher tried to toss a bucketful off the front porch and it
didn’t get too far. So we decided we
needed a slide or something rigged to carry the stuff at least to the middle of
the disposal. We used one of the large
tarps we obtained from the Saunders Advertising company a couple of months
ago. ($20 for a 15 ft. X 60 ft used sign
made of heavy duty plastic, reinforced on the edges). The slide appears to work just fine and we
managed to get all of the plaster picked up, one bucketful at a time, and
tossed into the bin.
We worked from 10 a.m. till around 3 p.m. with about a half hour bullshit session with Bob and Roy. Next time we work, probably Monday, we will change the mask filters and pull down the lath in the attic.
Jan. 24…The tarp was very tight, so I crawled inside the dumpster and cut it to relieve the pressure on the upstairs railing. This worked well, and still gives us a slide to toss stuff.
We hit the attic hard today, got all the lath down and cleaned up, sure looks different.
This is where the “secret door” used to be. The uprights can be removed as they are not
“bearing” supports as I once thought. We
will most likely leave them, and build some kind of storage between them. Maybe a shelf plus a pull drawer. That would make a lot of storage.
Sherry is some kind of woman, not many would do this sort of work! It isn’t pretty, and you never know from one hit to the next what is going to fall on you…bird nests, bee nests, dried up mice…whatever….always a lot of black ugly dirt.
Sherry is some kind of woman, not many would do this sort of work! It isn’t pretty, and you never know from one hit to the next what is going to fall on you…bird nests, bee nests, dried up mice…whatever….always a lot of black ugly dirt.
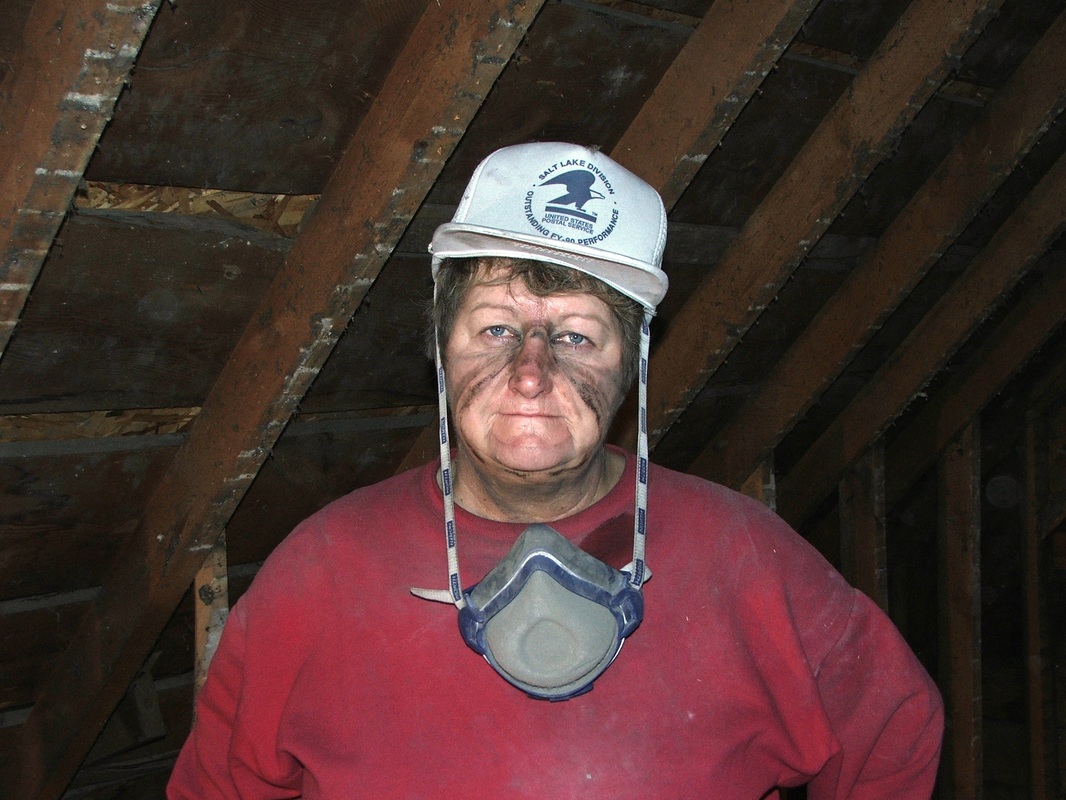
I must say at this point, there just aren't many women who would do what Sherry is doing here. She is really a go for it, hard worker to say the least. She is there for the long haul and had been a rock in my life. Always the "solid" one when things got tough. This task we took on was no easy feat. We both lost weight doing it and probably shortened our lives with the breathing in of that dust, dirt, mouse and bug "stuff" that seemed to be everywhere. Look closely at the mask she is wearing...that started out very white. Every night we would go home and shower and I'm sure the septic tank is layered with that old house.
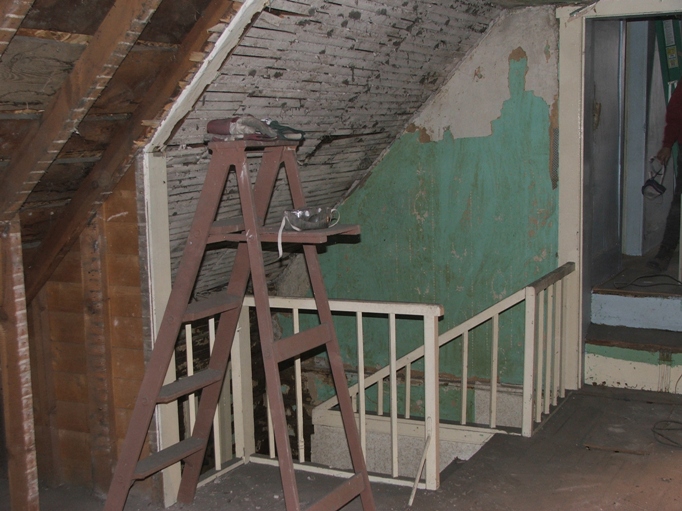
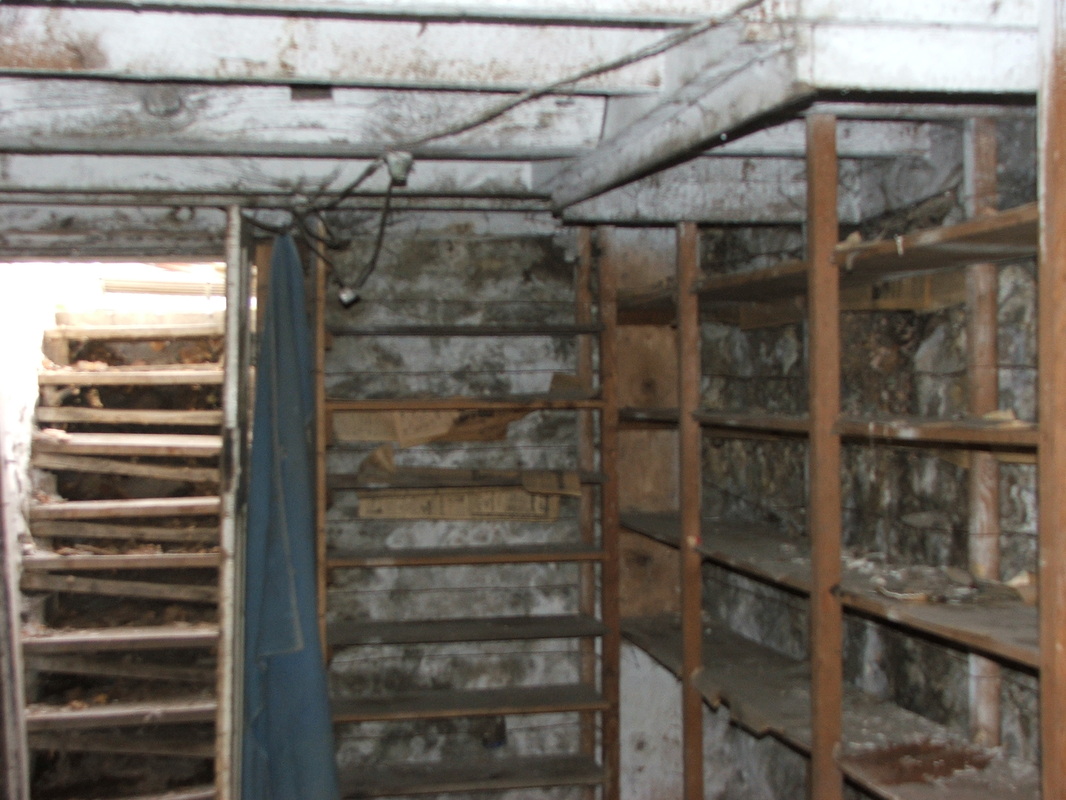
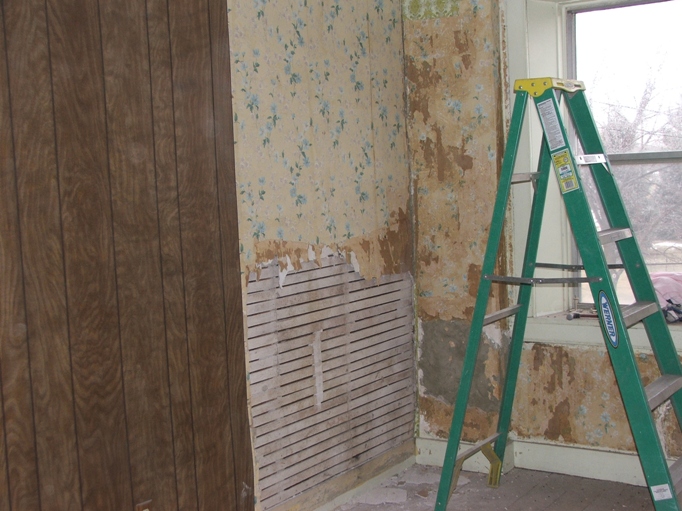
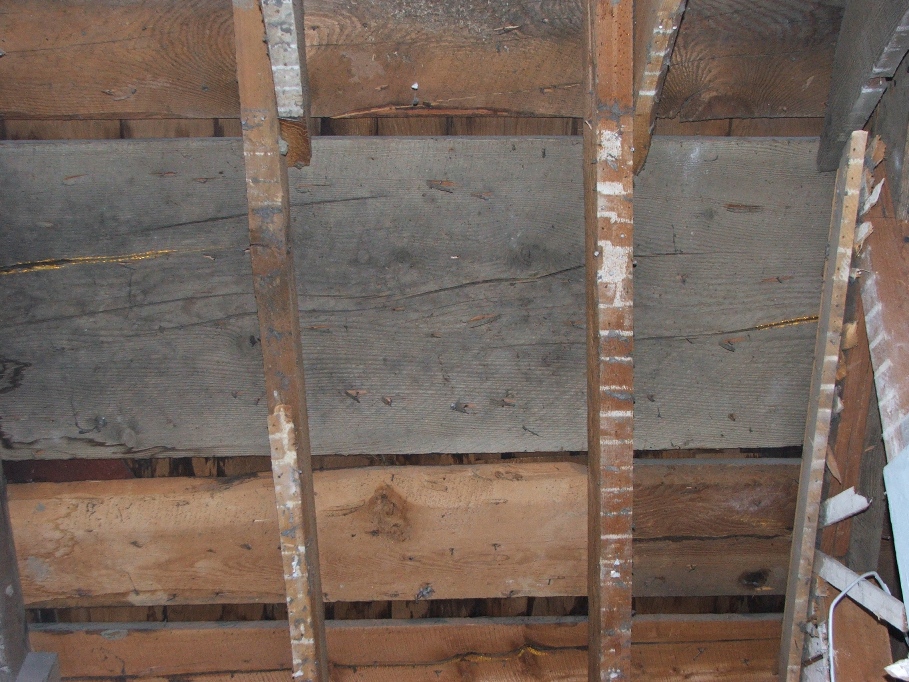
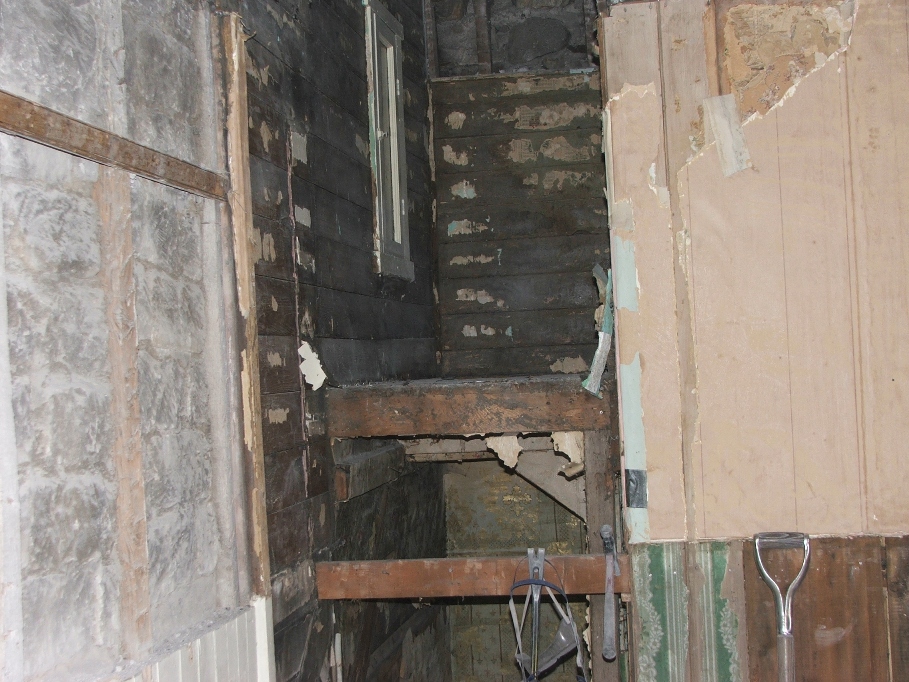
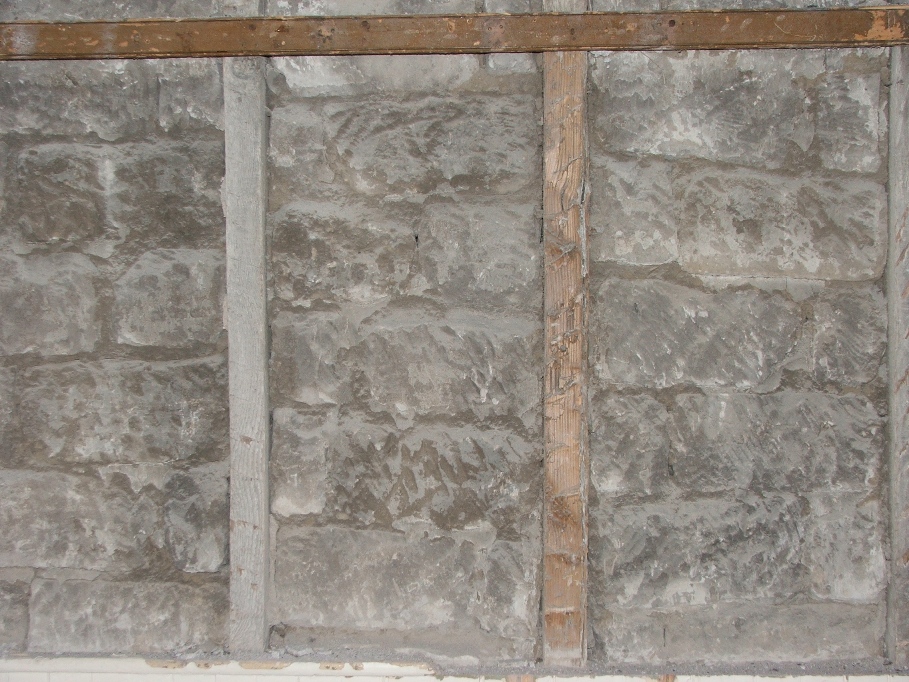
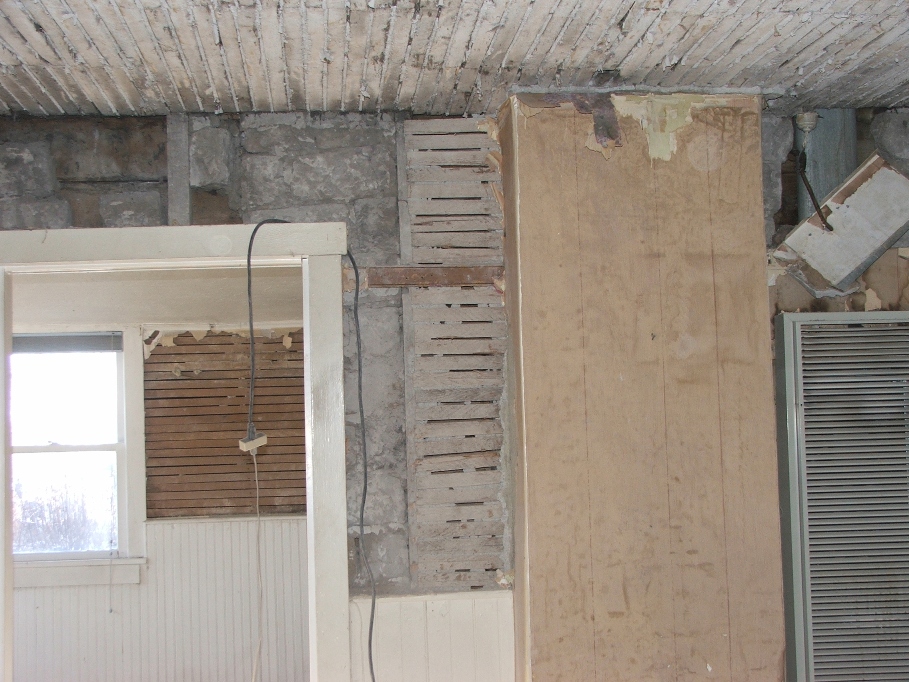
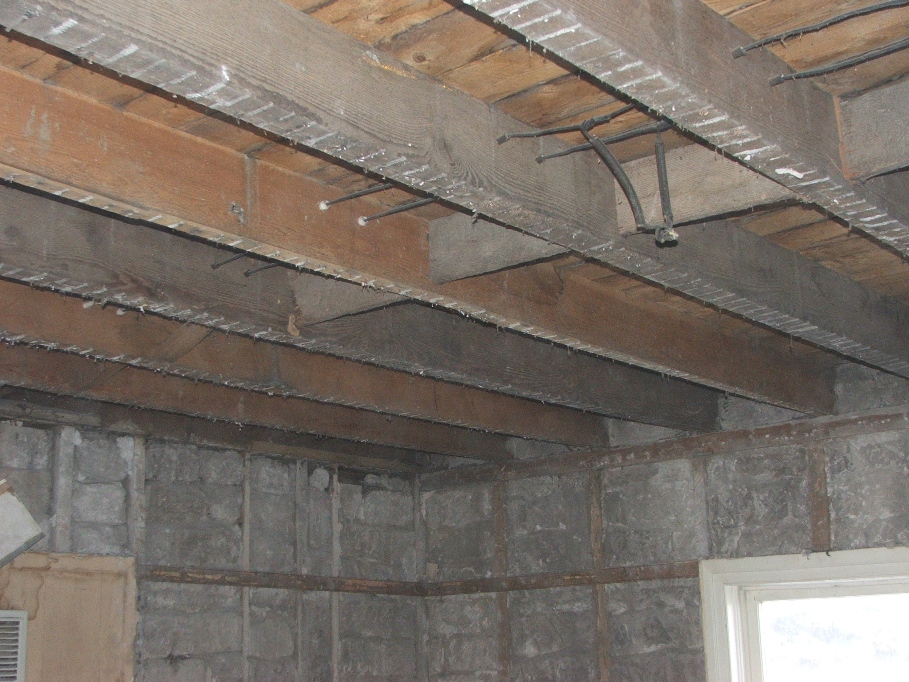
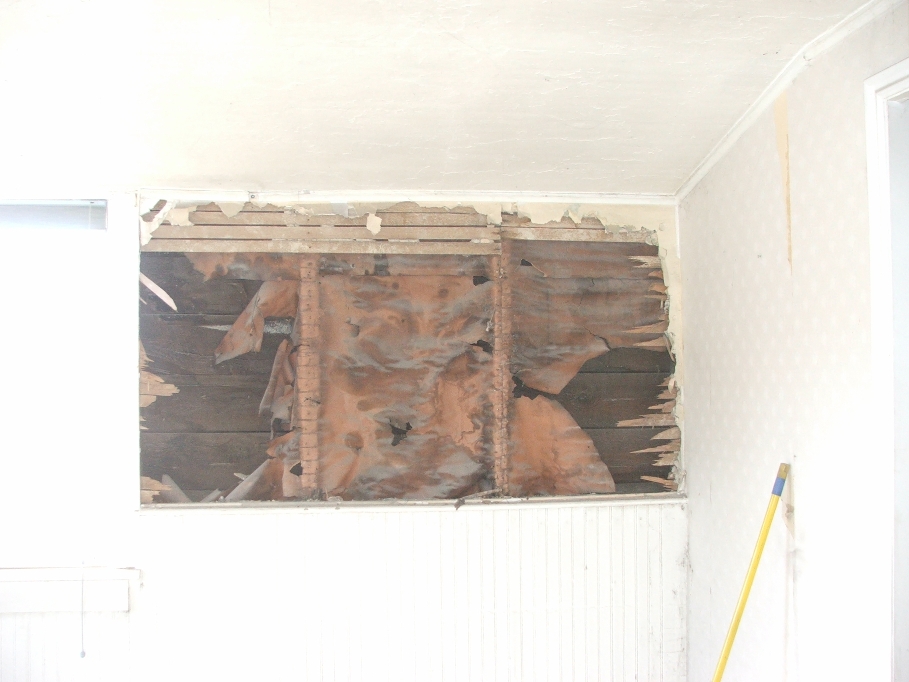
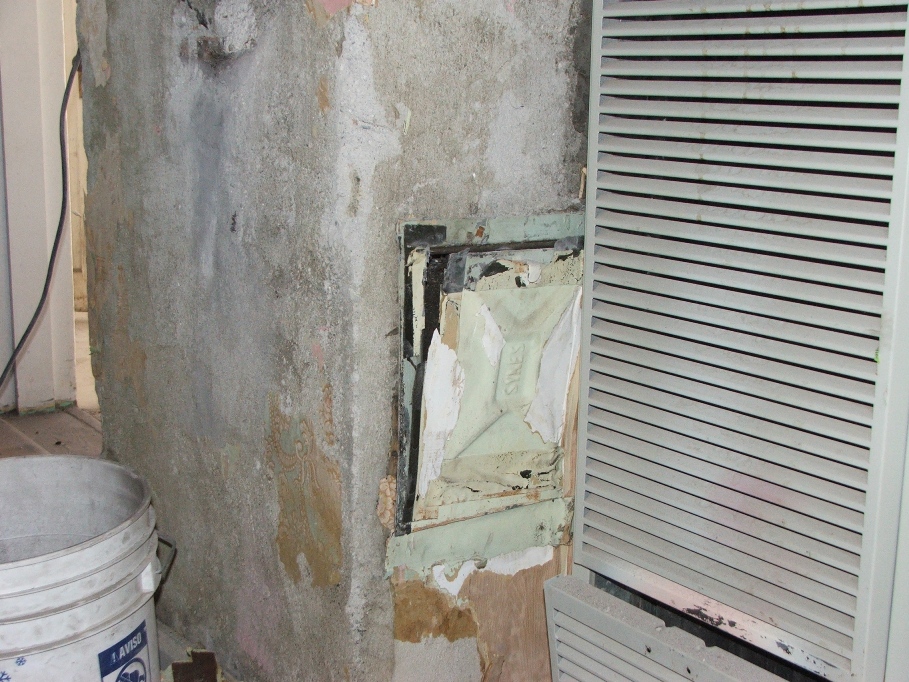
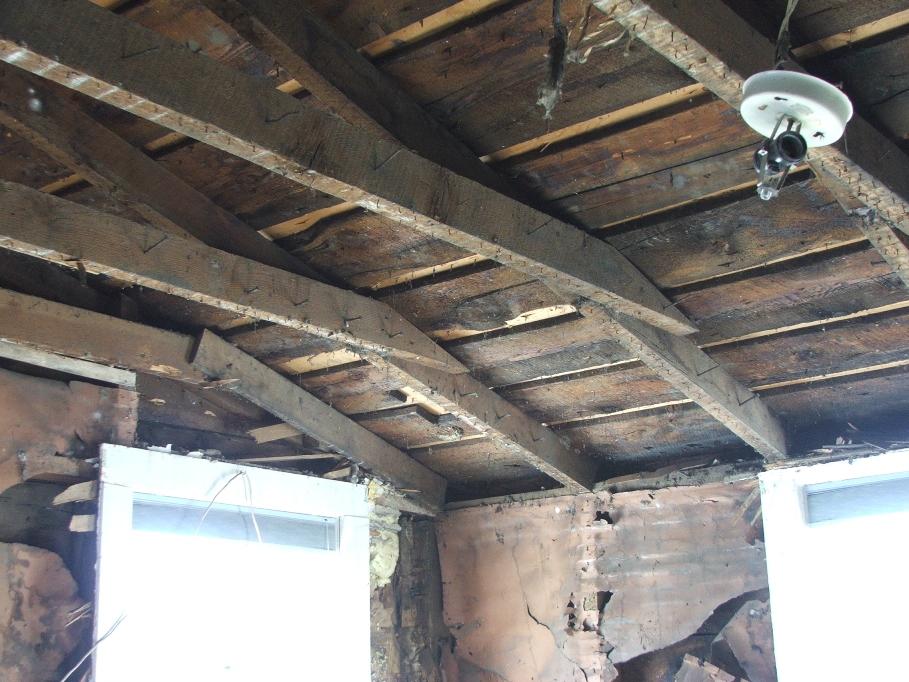
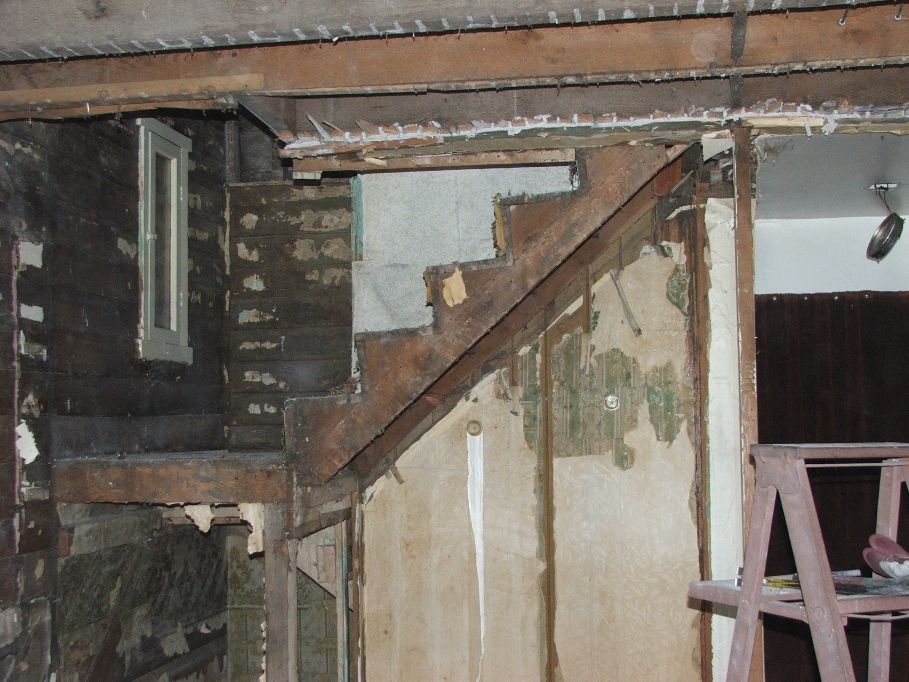
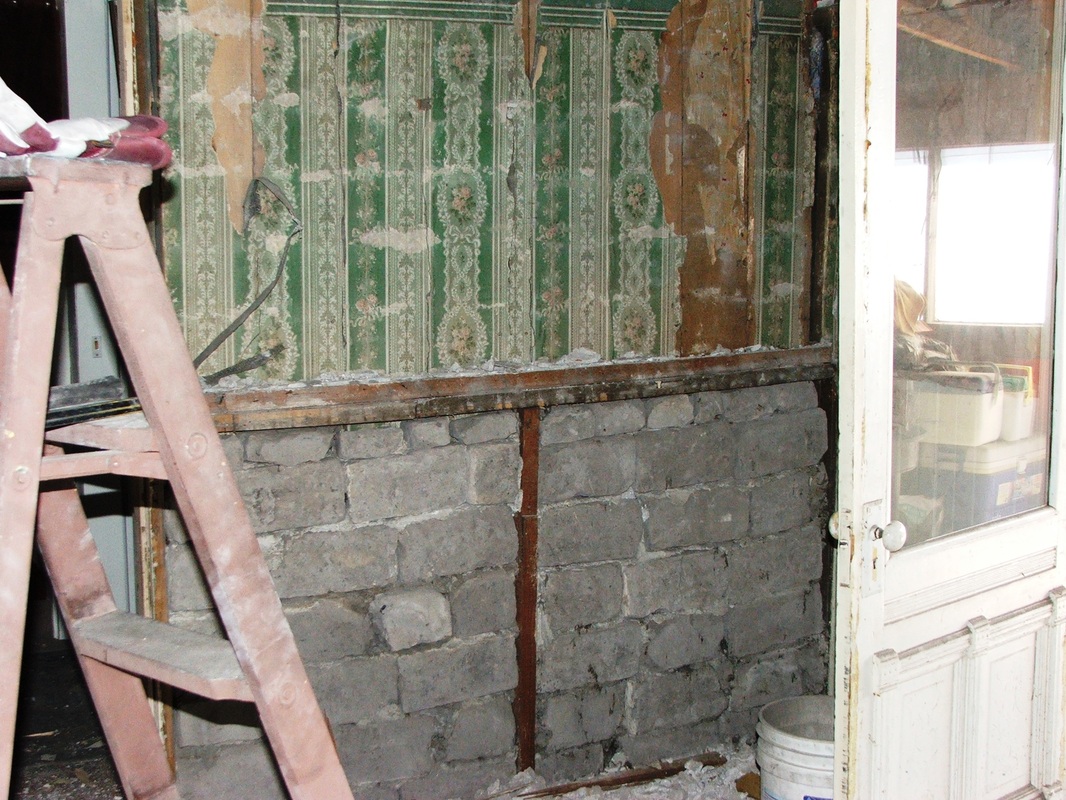
To let you all know what things looked like while we were working. This picture shows what the lath looks like after the plaster is removed from it. You can also see the wall with the green wall paper on it. That is a wall that still has the plaster covering the lath. Our task involved removing the plaster first and then pulling down the lath. The lath is held in place by hundreds of small, square headed nails and once the lath is pulled down, you have to be very careful walking around as the nails are just long enough to reach your foot inside your shoe, if you happen to step on one pointed upwards.
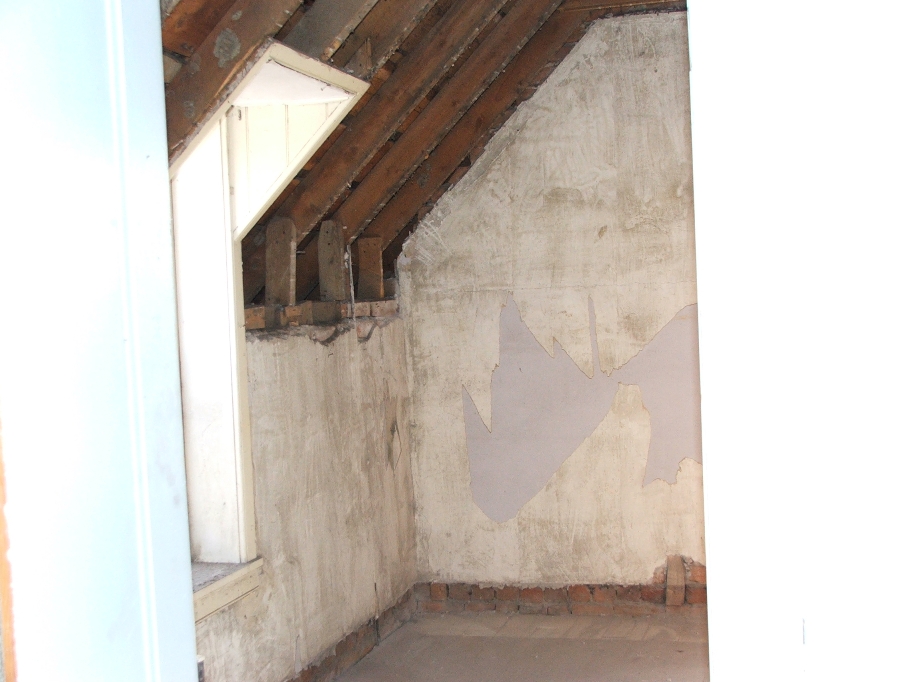
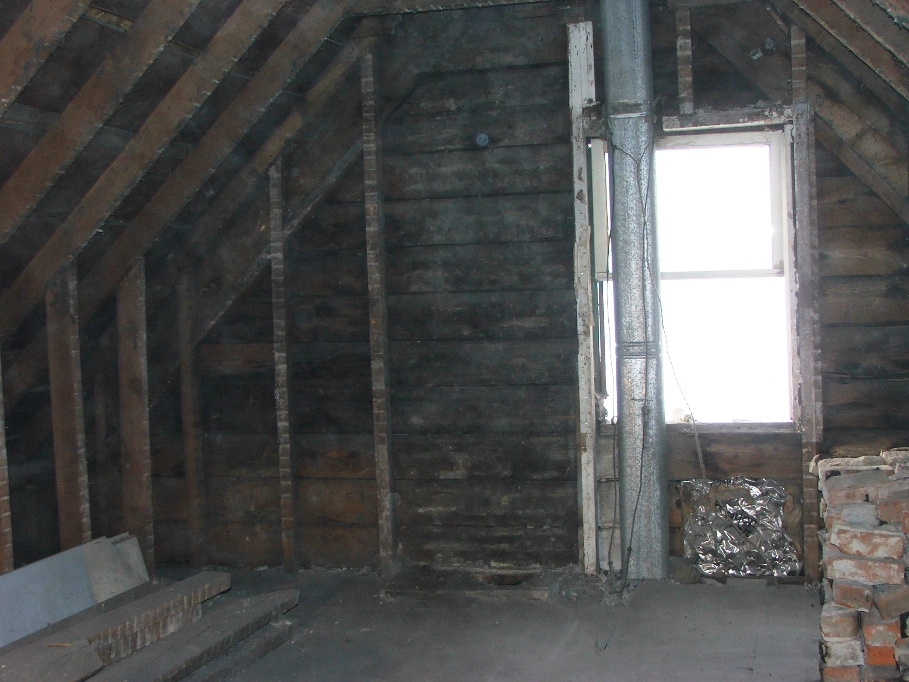
Jan. 25….Today was finish the attic area, knock the plaster off above the stairs and then move into the NW bedroom. Here is what it looks like at that end of the attic now.
Jan. 25….Today was finish the attic area, knock the plaster off above the stairs and then move into the NW bedroom. Here is what it looks like at that end of the attic now.
We are always looking for special things on how
the house was built or finding special hidden treasures. We have had a suspicion that the stairway
came up from another direction and today we found evidence of that fact. We pulled more wallpaper from the wall going
up the stairs and we found where they had stained and varnished from the steps up, below there was just plain wood. Proof positive that the stairs did come from another direction at one time.

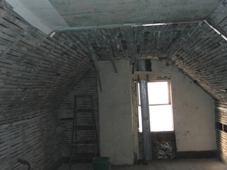
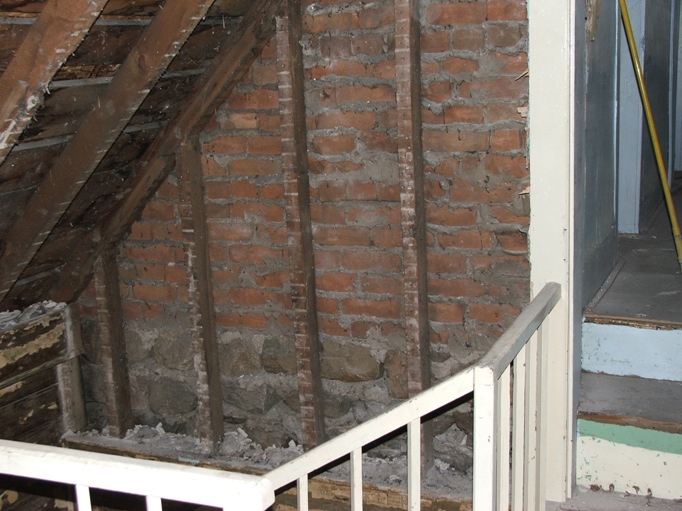
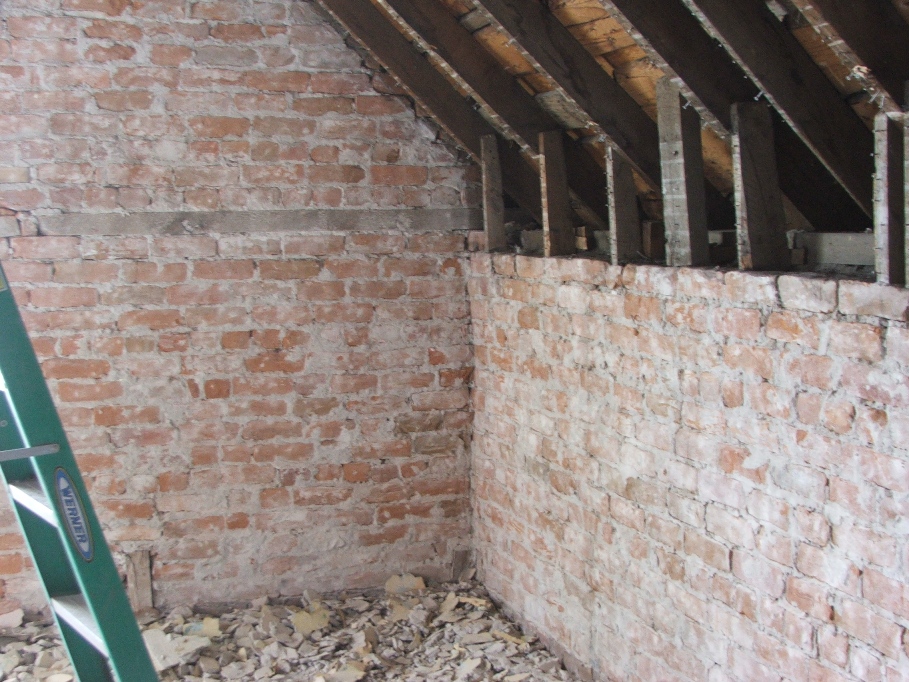
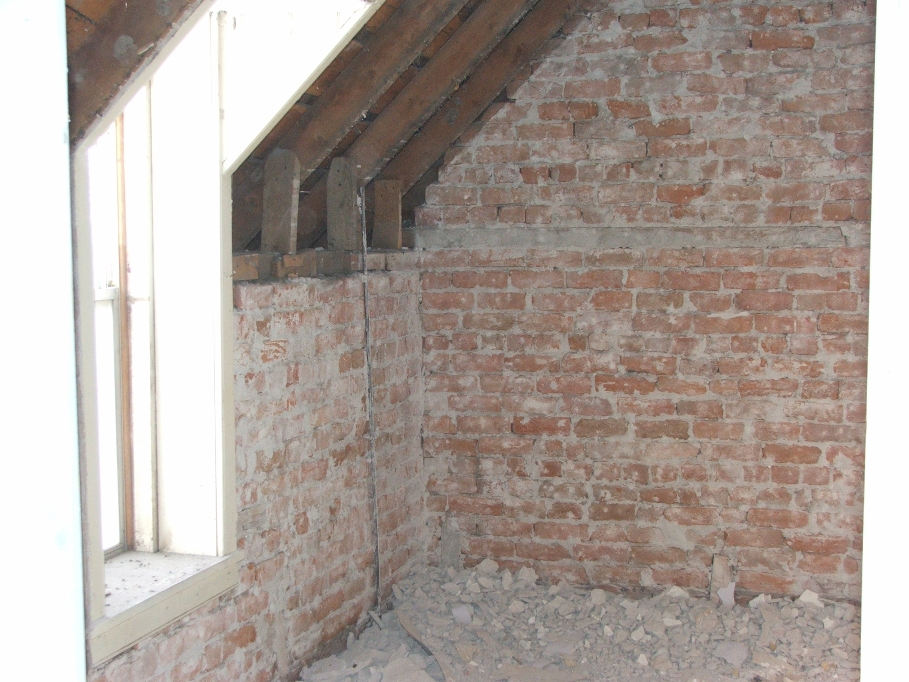
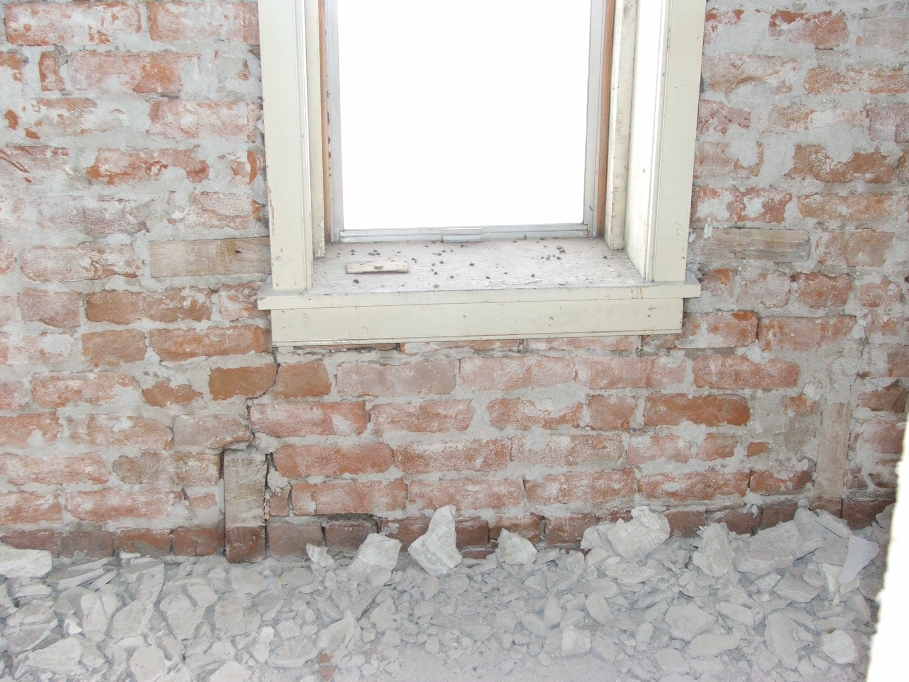
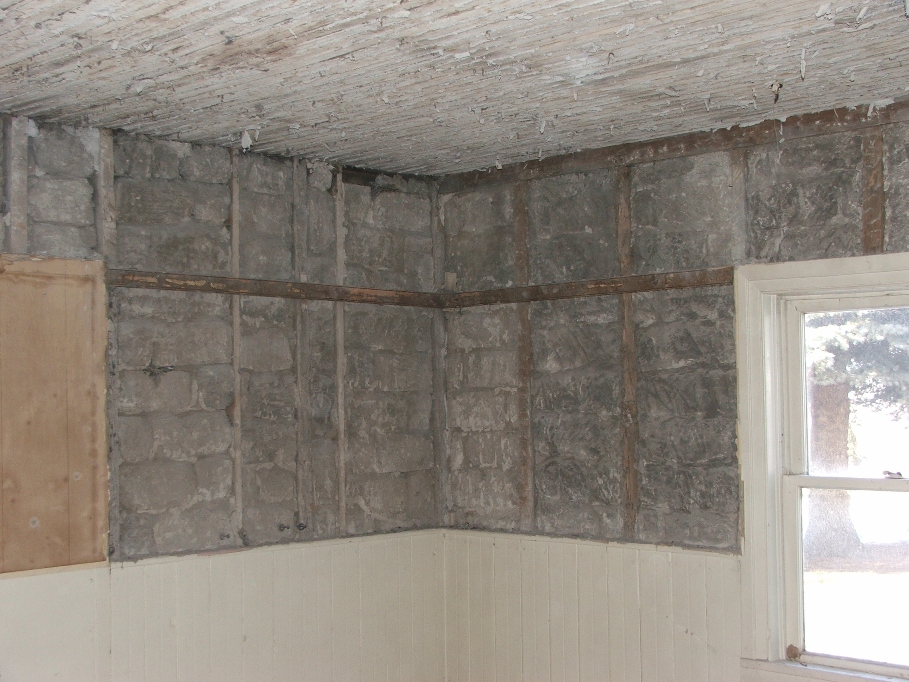
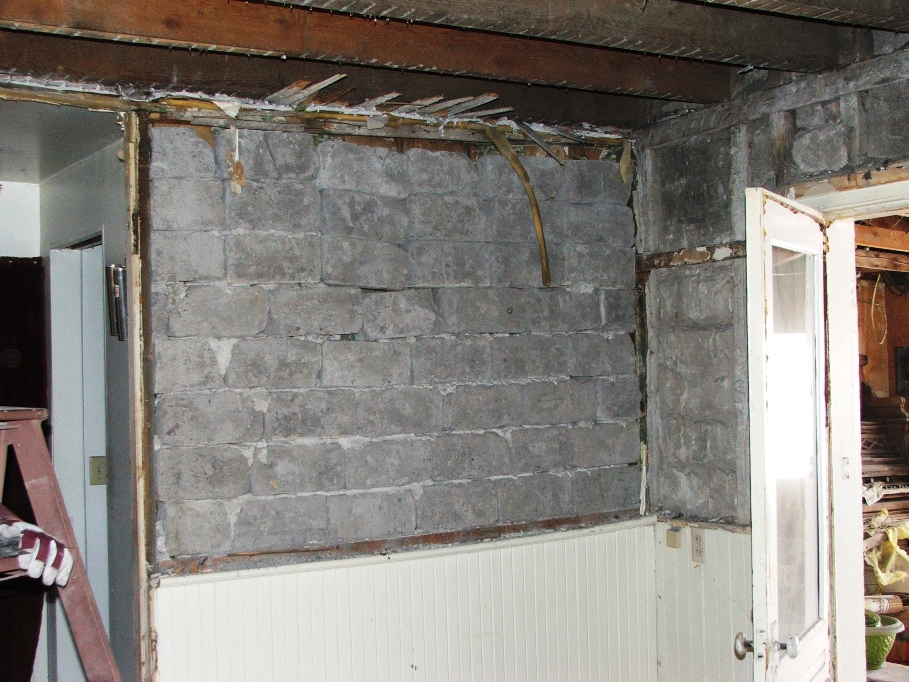
Working on the NW bedroom, we found that the
brick comes from the floor up to about 4 ft. on the West wall and the brick
covers the entire North end of the room, around the window. This plaster is proving to be quite difficult
to remove and so we will do that later.
We plan on having the brick exposed in the room when finished and we
will seal it and varnish it as a final touch.
It should look rather cool. Above
the brick is space, rafters and of course the occasional bird nest. Cleaned out it is fine.
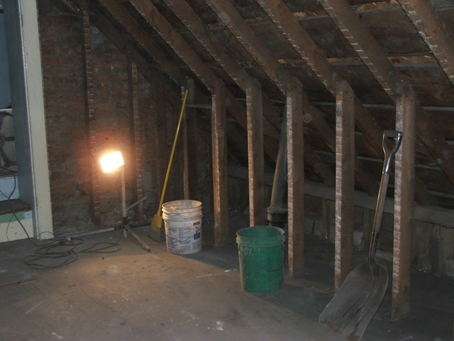
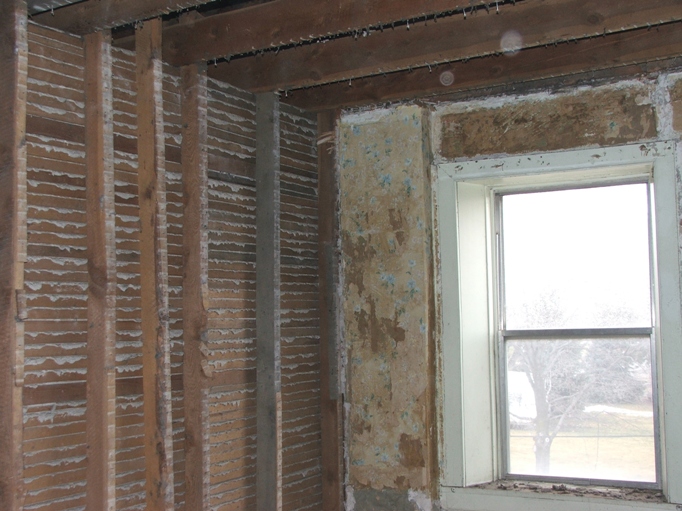
Notice closely the “pipe” that runs down the inside of the wall, left side. It is a solid rod and my guess is it’s a lightning rod. Why it’s on the inside of the wall instead of outside is another point. Maybe it’s not a lightning rod.?!
Notice closely the “pipe” that runs down the inside of the wall, left side. It is a solid rod and my guess is it’s a lightning rod. Why it’s on the inside of the wall instead of outside is another point. Maybe it’s not a lightning rod.?!
Well, as I was bashing the overhead in the NW
bedroom, Sherry was smashing things in the SW bedroom. Tomorrow, we will finish pulling down the
lath in the NW room and hopefully pull down the SW room walls as well. We know the West and South walls are brick
and will not be done tomorrow.

Jan. 26…We hit it hard starting at 10 a.m., I
started on the overhead lath in the NW bedroom…nasty job! The rafters are in pretty good shape, and
there are LOTS of bee and wasp nests.
One huge yellow jacket nest came crashing down from the highest beams
while I was pounding away. Luckily no
bees! Too cold I guess.
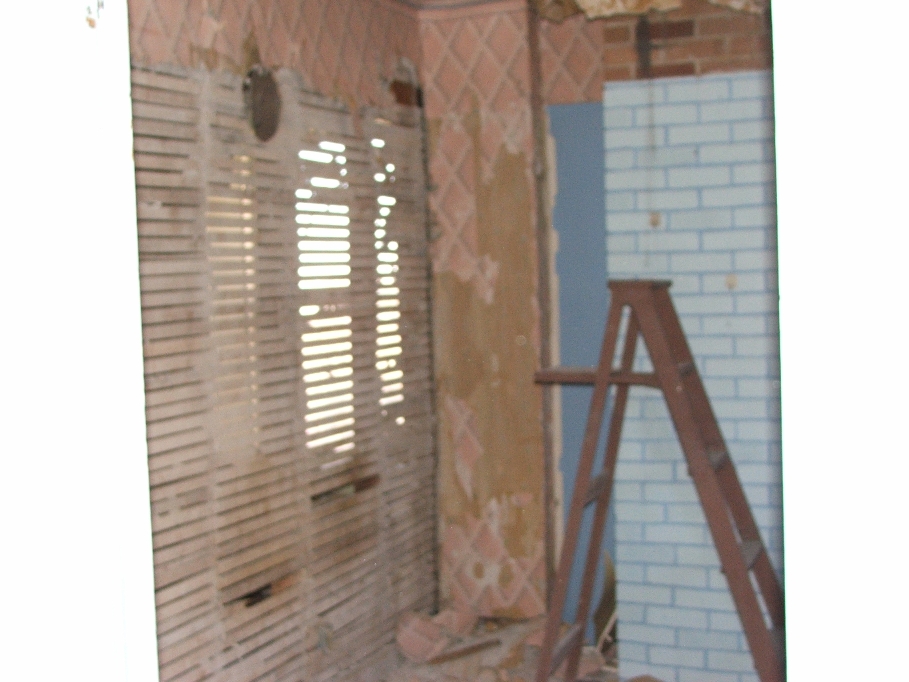
Notice the partial moon shape in the lath of the wall. It is some kind of intentional cutout which may have been an additional heat transfer port. I don’t know, because the lath on this bedroom wall had already been removed.
Notice the partial moon shape in the lath of the wall. It is some kind of intentional cutout which may have been an additional heat transfer port. I don’t know, because the lath on this bedroom wall had already been removed.
Once all of that mess was cleaned up, Sherry had
already gotten a good start in the SW bedroom.
We worked and worked until about 2:15 p.m. to get as much done as we
did. One peculiar thing was a long
grapevine had been pulled into the rafters, probably by a starling. You can see the end of it in this picture.
This light fixture is made of ceramic, and you take the other portion which has a wire and a light bulb, and putting the two together and making a ¼ turn, the power is joined to the bulb. The fixture the bulb screws into has a turn switch for on and off.
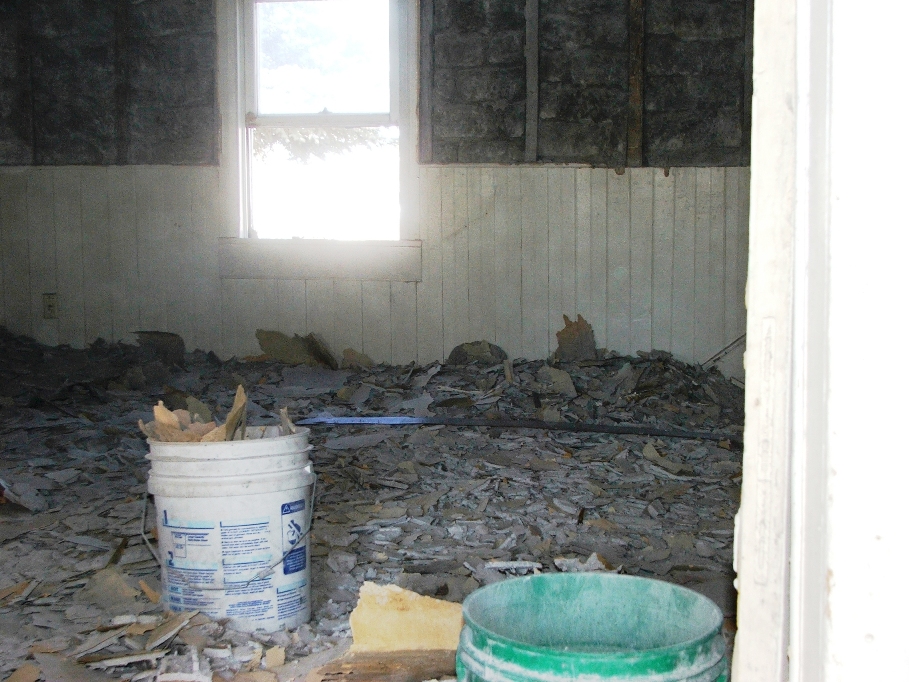
These next two pictures show what the SW bedroom looks like without lath and plaster.
This light fixture is made of ceramic, and you take the other portion which has a wire and a light bulb, and putting the two together and making a ¼ turn, the power is joined to the bulb. The fixture the bulb screws into has a turn switch for on and off.
These next two pictures show what the SW bedroom looks like without lath and plaster.

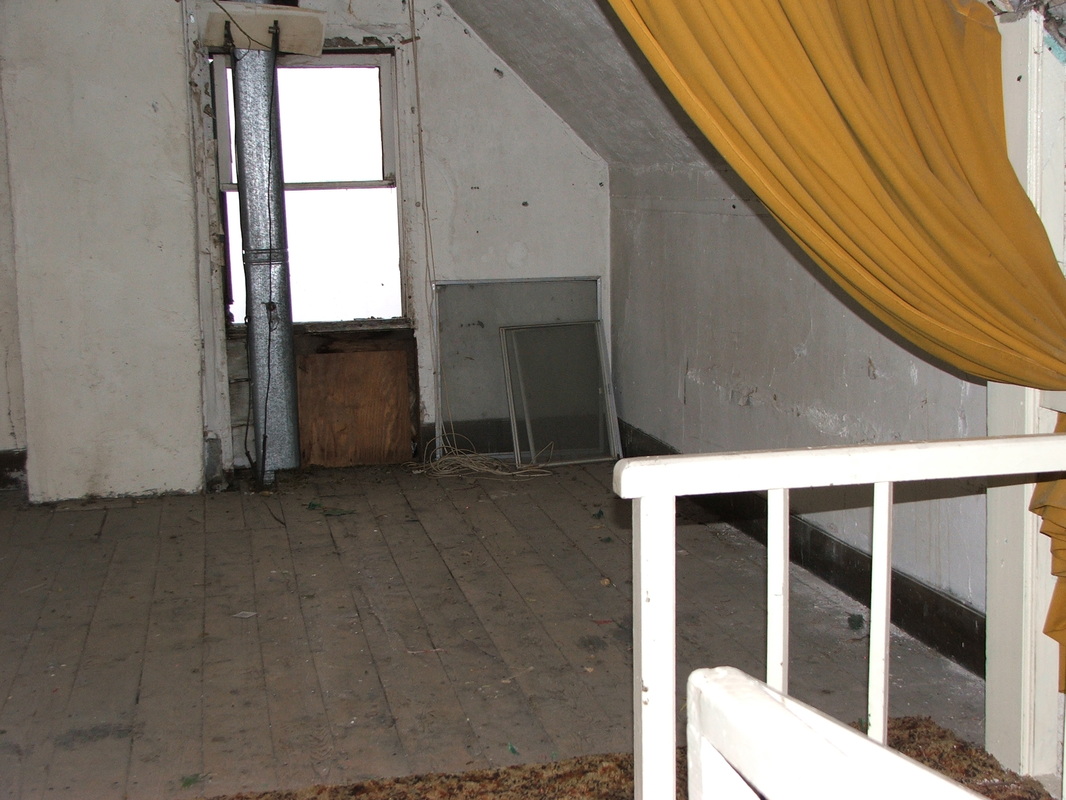
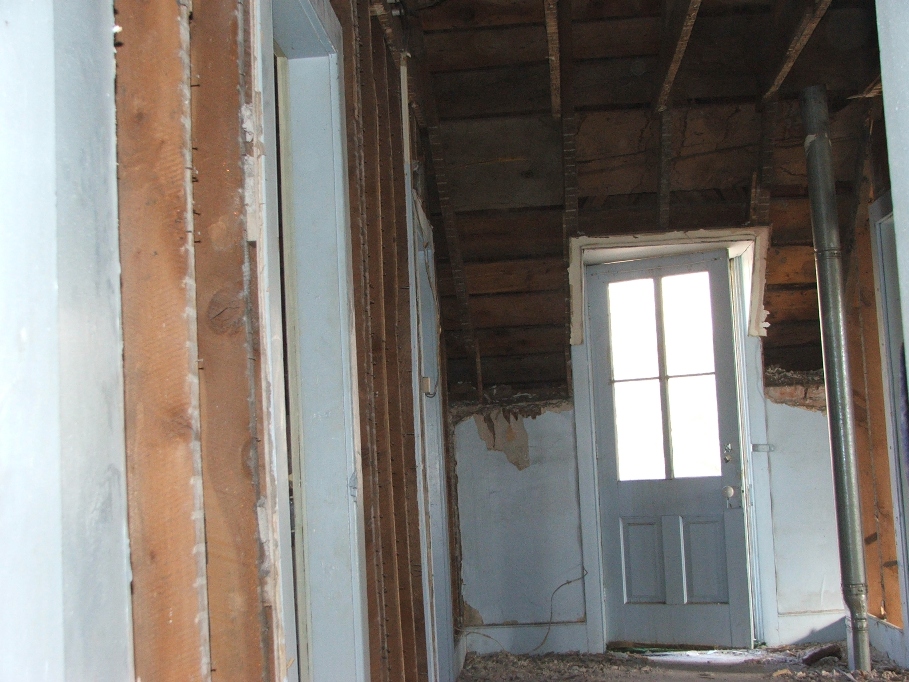
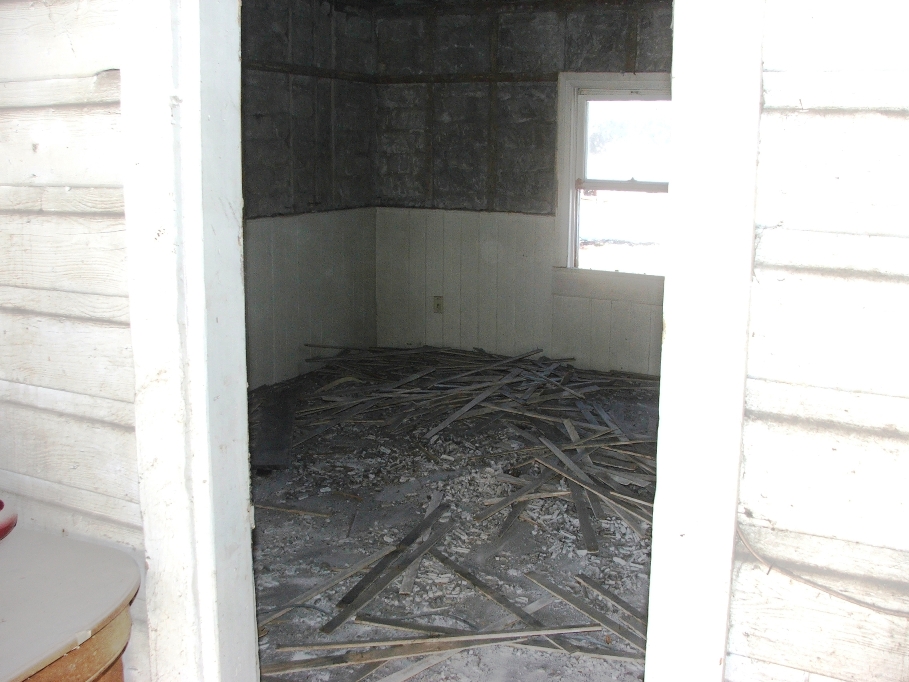
This is looking toward the entry door to this room. We call it the Master Bedroom because it is the largest of the bedrooms.
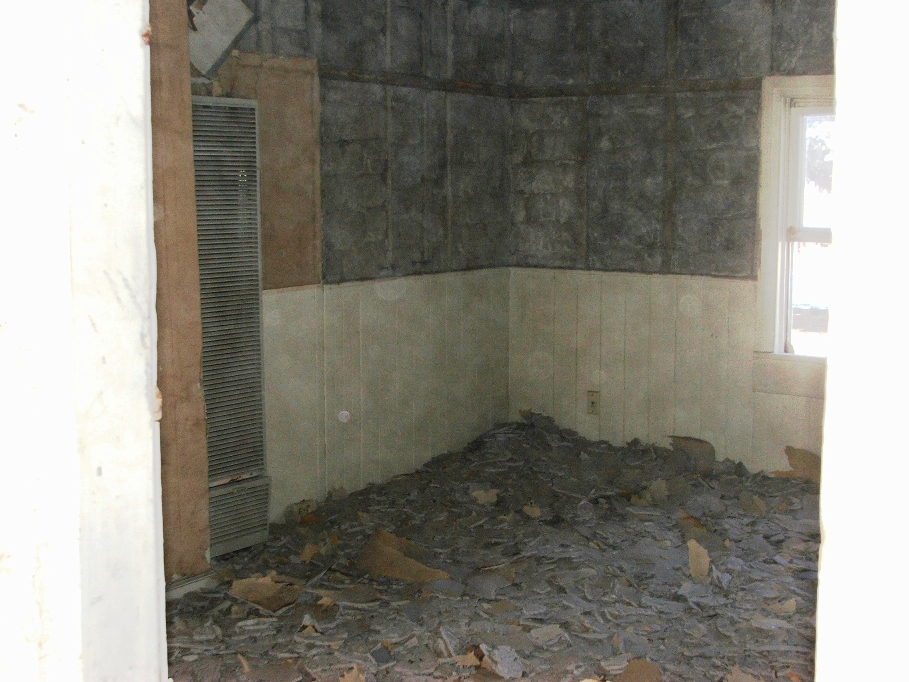
And this is the opposite corner of the master bedroom.
Just like the NW bedroom, this room also has the brick at the South end, and most of the West wall. Some of the bricks are loose and for some odd reason you can’t see plaster between the bricks like I would expect. Because of this, we may have to change our minds about having the bricks exposed on the finished room. Time will tell.
Tomorrow is a clean up day. We still have to pull the baseboard in the SW bedroom, and clean up the plaster that has fallen behind it. Then we need to do a thorough vacuuming of all the rooms we have worked in so far.
Jan. 27…After pulling up the baseboards and cleaning up the bulky stuff, I went into vacuuming the rooms we have worked in. I used the wet/dry vac we purchased and began in the SW bedroom. The going was slow as the dust is sooooooo fine it would plug up the vacuum filter after a short distance. I worked feverishly from 10 a.m. until nearly 3:30 p.m. without a break! Killer move on my part, but the job got done.
Feb 1, 2005…Angela had her baby on Sunday, so yesterday we went to Logan for the day…All are fine!
Today was meet with the electrician and heating people. They showed up about 9 a.m. and saw the damage we had done to date. Both were impressed. The electrician (Delbert Nawyn) will have it easy estimating what he needs to do. The heating man (Scott Pettingill,[by the way, a relative on Grandma Clarrisa Pettengill Zundel’s side]) will have to see more demolition. I told him I would call when we have the entire upstairs down to just studs.
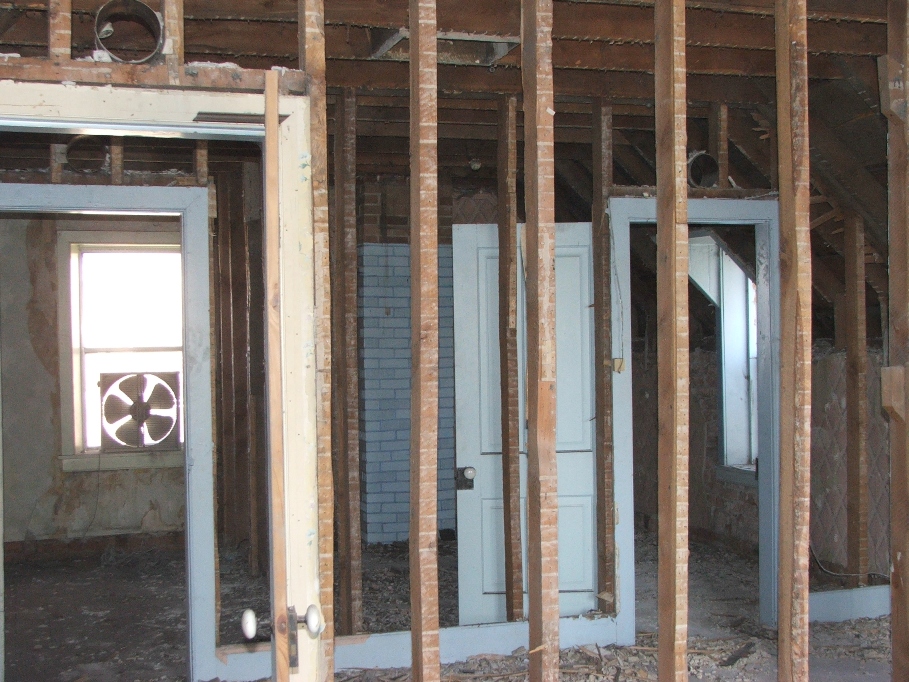
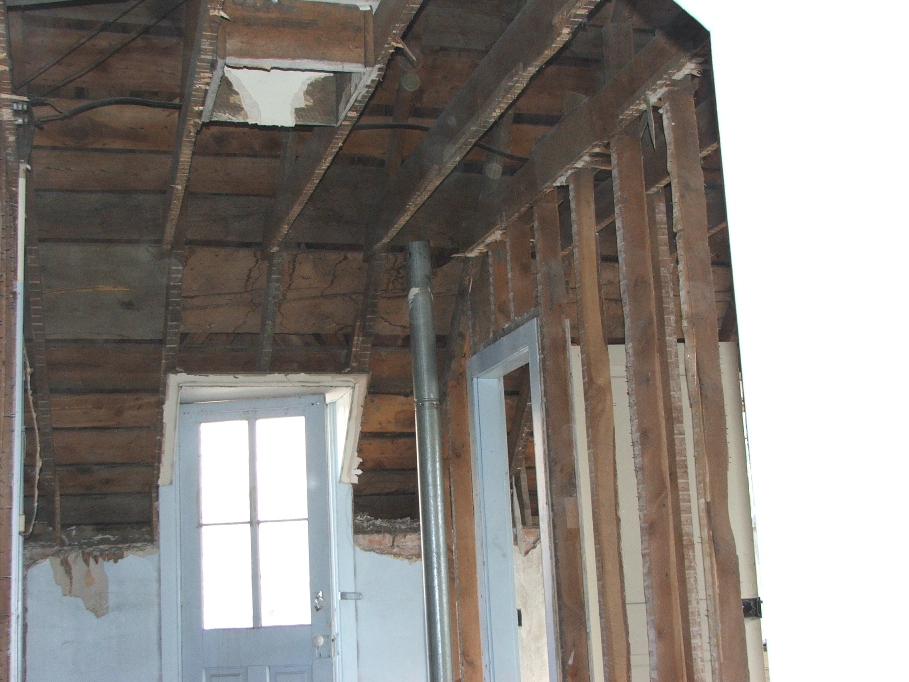
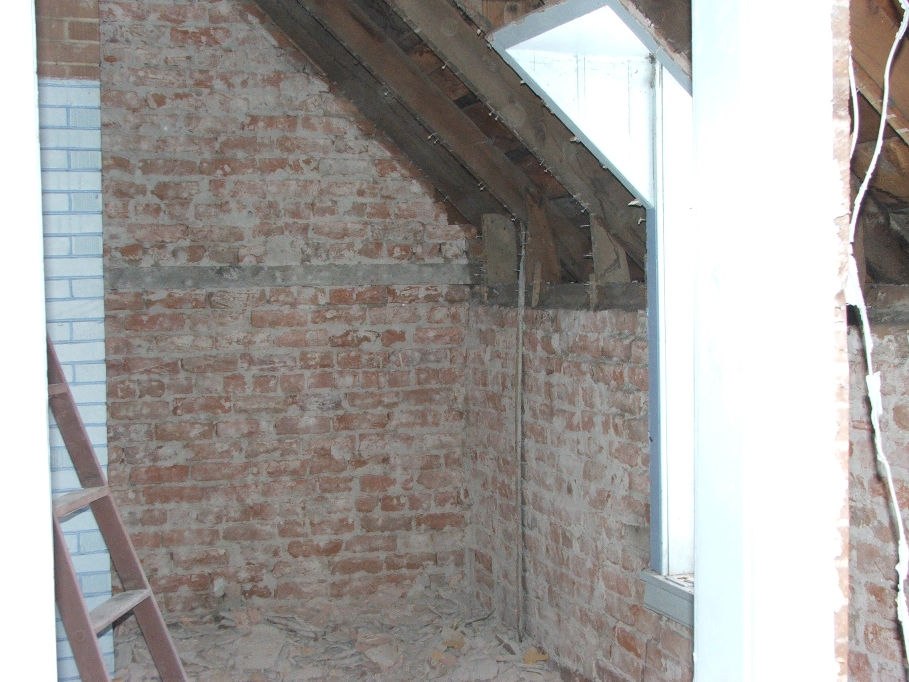
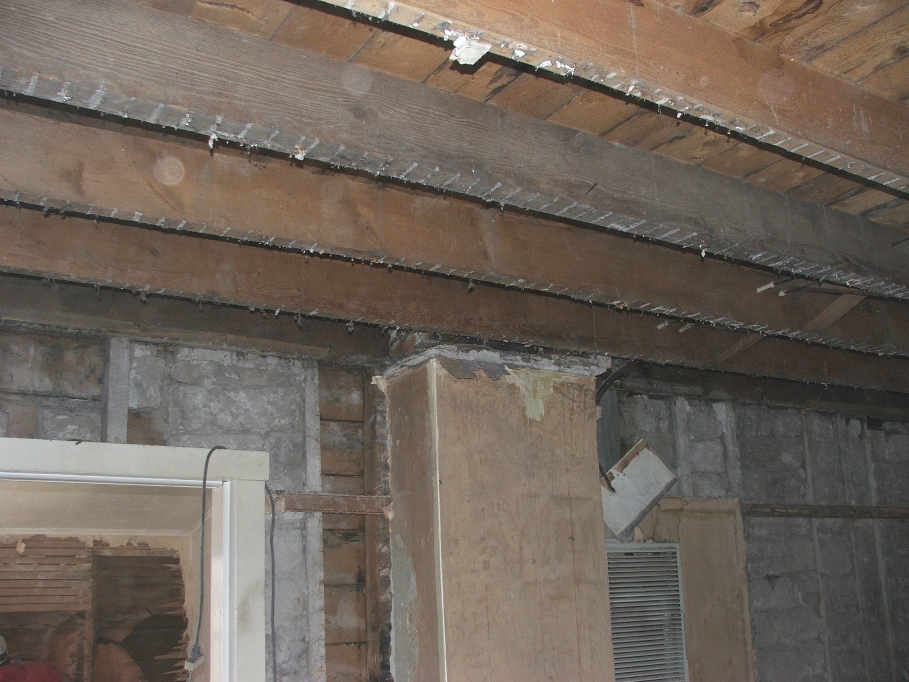
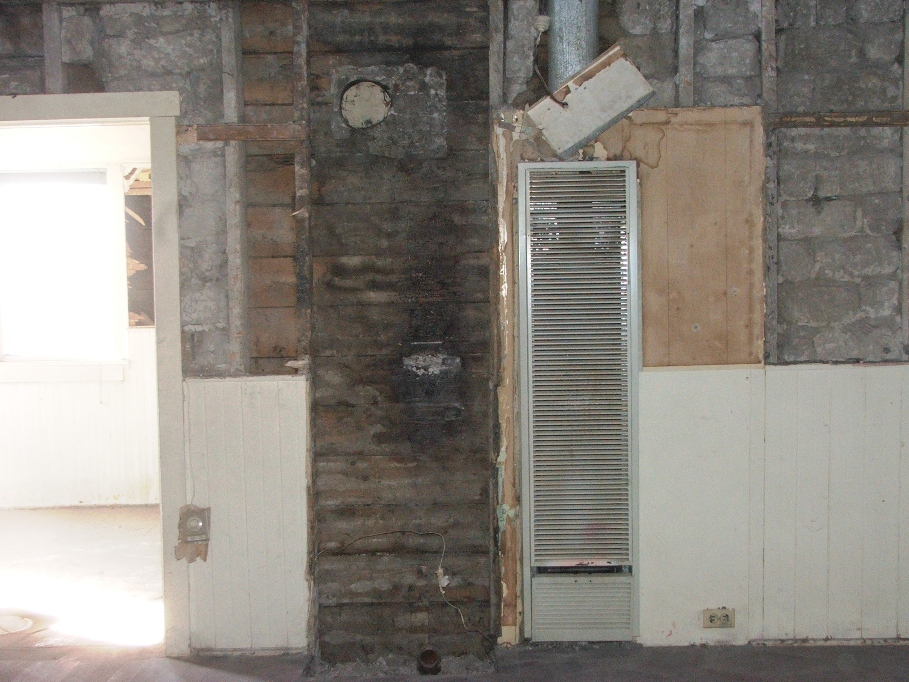
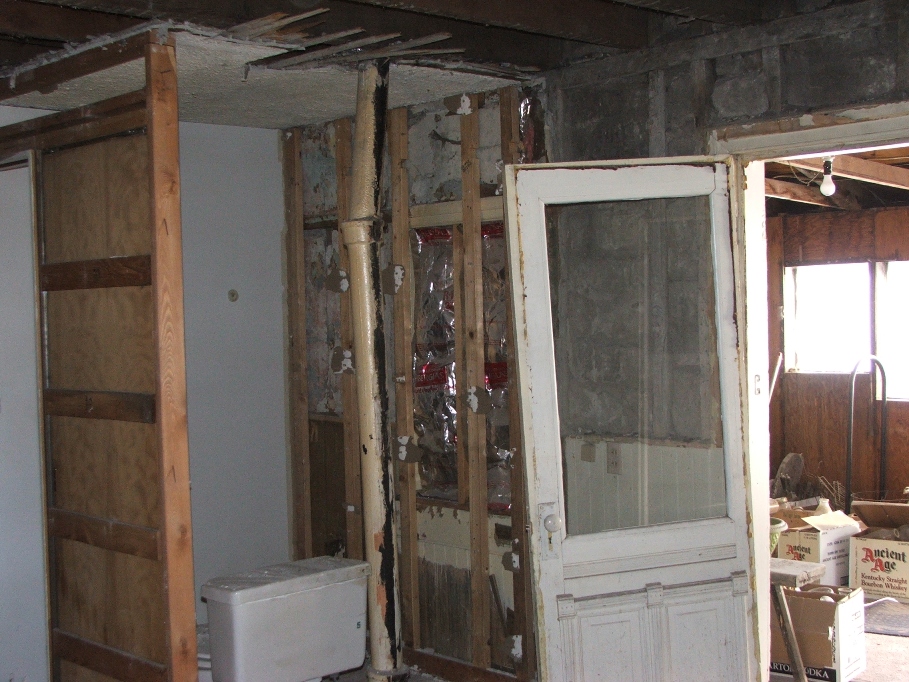
Looking through the studs to the South end of the East wall of the old gun room. Notice the rod in the wall.
We hit the gun room hard today, but had a half hour break with Bob and Roy bullshitting. They have to see the damage and put their two bits in. The room was small, but took quite a bit to get the plaster and lath down and cleaned up. There were more wasp nests on the East wall than in the other two rooms, but none were occupied. The most interesting thing today was the fact that four of the upright beams between the gun room and the SW bedroom were not attached and when the lath was pulled from them, they fell into the SW bedroom with a crash! Also, overhead was a beam which we had noted was not attached to the roof on the West end, was not attached on the East end and it too crashed when the lath was removed under it. There was also a two foot 3 in. X 6 in. rough cut board just laying on top of the lath, which would have really hurt if it had hit someone on the head. Were all of these planted intentionally???
We hit the gun room hard today, but had a half hour break with Bob and Roy bullshitting. They have to see the damage and put their two bits in. The room was small, but took quite a bit to get the plaster and lath down and cleaned up. There were more wasp nests on the East wall than in the other two rooms, but none were occupied. The most interesting thing today was the fact that four of the upright beams between the gun room and the SW bedroom were not attached and when the lath was pulled from them, they fell into the SW bedroom with a crash! Also, overhead was a beam which we had noted was not attached to the roof on the West end, was not attached on the East end and it too crashed when the lath was removed under it. There was also a two foot 3 in. X 6 in. rough cut board just laying on top of the lath, which would have really hurt if it had hit someone on the head. Were all of these planted intentionally???
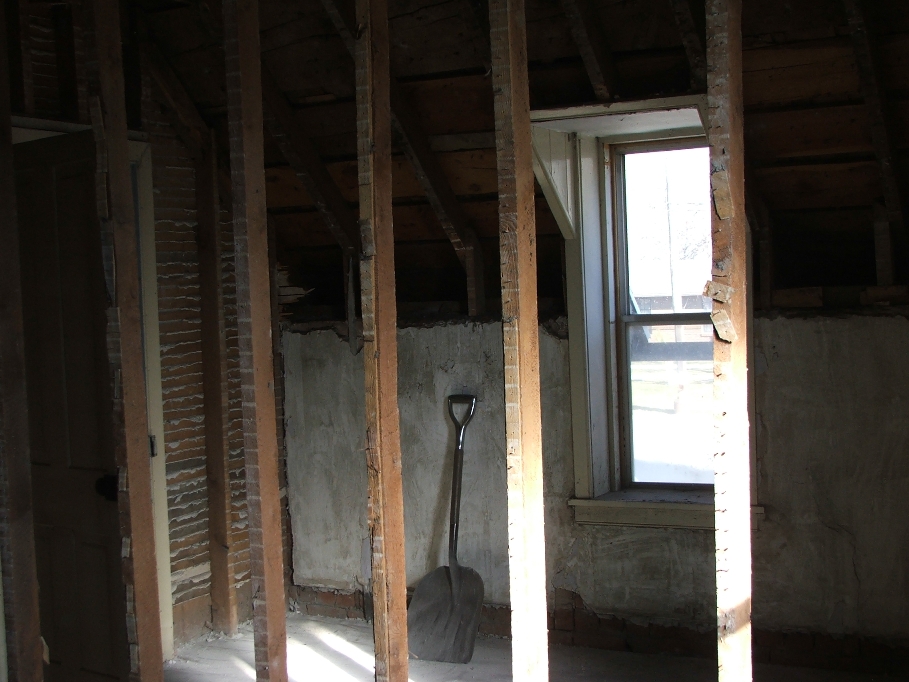
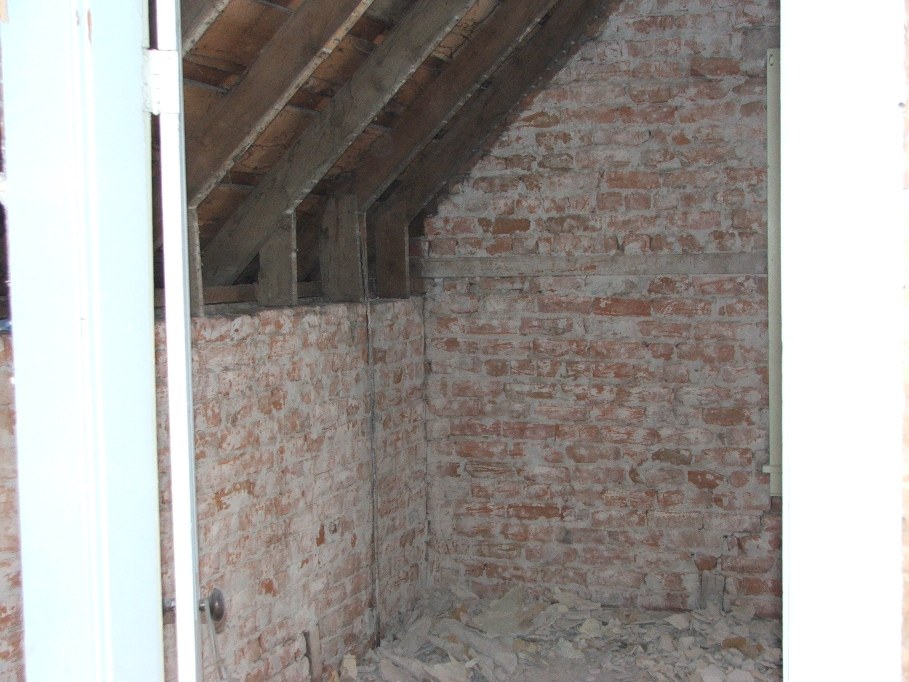
North end of the east wall of the gun room. It’s hard to see, but just left of the shovel
and nearly hidden by the stud, is a “flat” iron rod running down the wall.
South wall of the gun room.
Notice the rod coming down the left wall?
More South wall of the gun room.
After cleaning up most of the mess we had created, we moved
into the last bedroom upstairs. This
room would present special problems in that it was all sheetrocked and the
ceiling had been lowered. I couldn’t get
the old closet out without first undoing the dropped ceiling.
We worked over the wall board on the walls pretty good and then tossed those chunks down to the ground. Sherry went down and picked them up and put them in the container while I proceeded to knock down the overhead stuff and the closet.
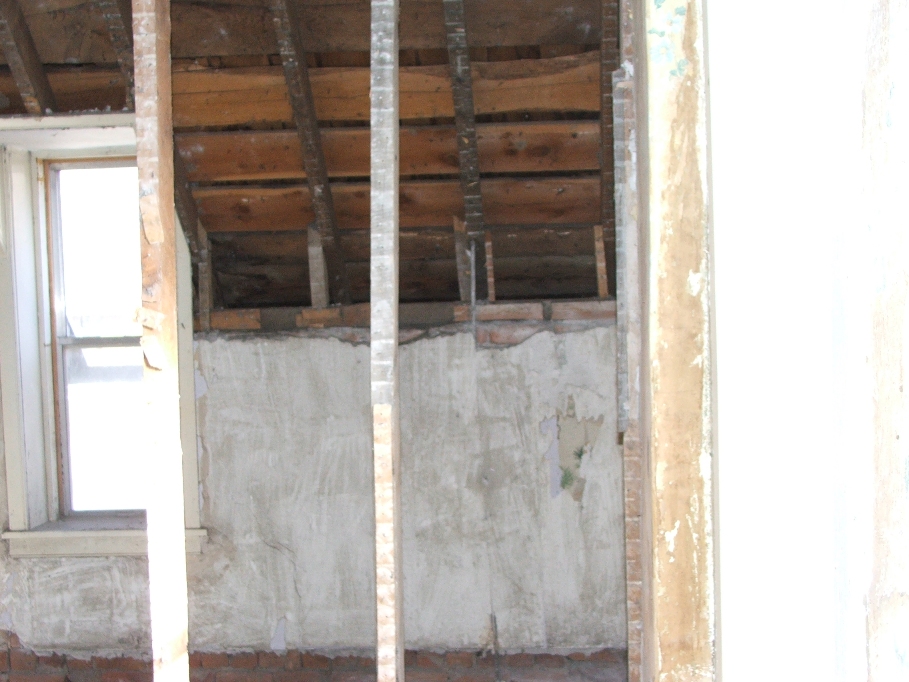
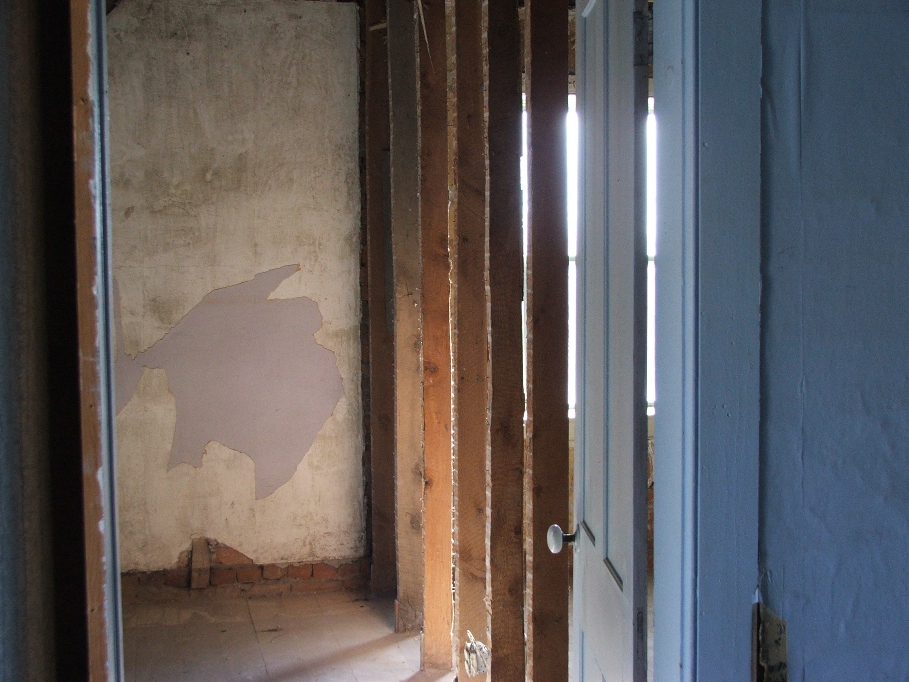
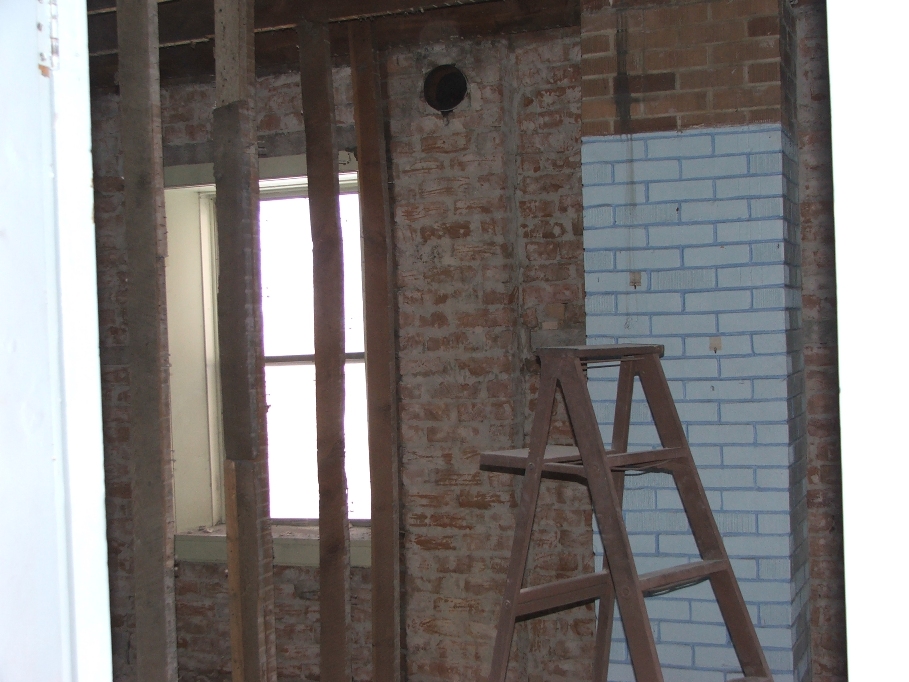
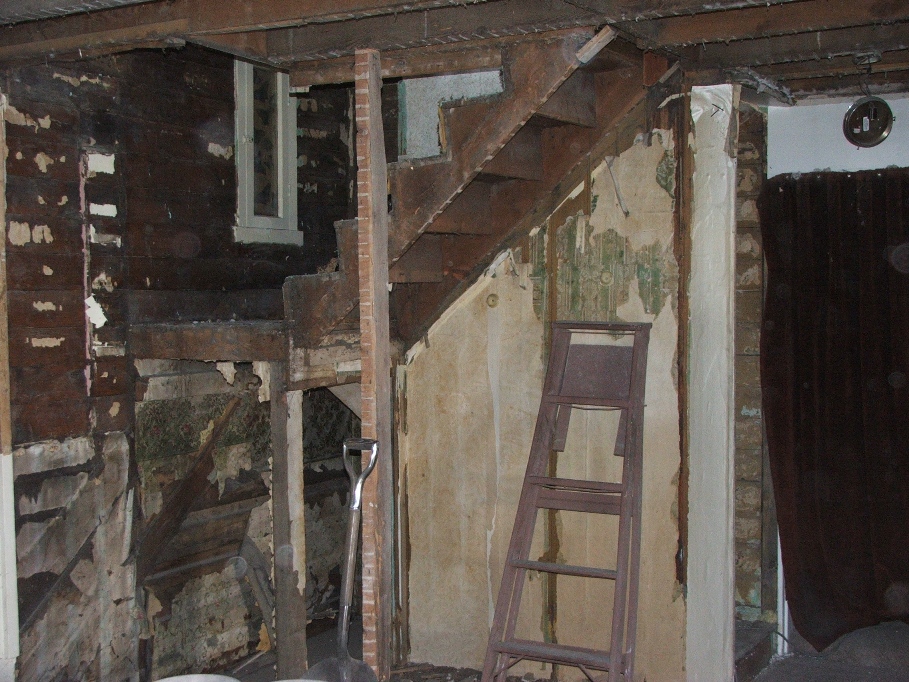
Not the clearest of pictures, but you can see into the NW bedroom through the lath. The “bump out” to the left of the ladder is the old chimney which came through the floor from down stairs. It has been taken down above the roof line and I’m not sure if we will finish taking it down to the floor level or not.
We worked over the wall board on the walls pretty good and then tossed those chunks down to the ground. Sherry went down and picked them up and put them in the container while I proceeded to knock down the overhead stuff and the closet.
Not the clearest of pictures, but you can see into the NW bedroom through the lath. The “bump out” to the left of the ladder is the old chimney which came through the floor from down stairs. It has been taken down above the roof line and I’m not sure if we will finish taking it down to the floor level or not.

Looking into the corner where the closet used to be.
This is the east wall of this bedroom. Pretty cool wallpaper don’t you think? When the sheetrock came down just left of the
window, there was a nest of flys, that numbered in the 50’s. They were not too happy about being
disturbed. Also, notice the rod coming
down that wall. We have found a total of
5 rods, one in each bed room and two in the gun room. The consensus is, they are some kind of
structural support rods.
I took a couple of pictures to show how the
chimney went up the wall from downstairs and then was canted to the center of
the roof where it used to go out.
Interesting.

Looking straight up the chimney
Well, we still have the lath and plaster to pull
down from the NE bedroom and the same in the hallway. Do you think we have enough room in the 30
yard dumpster?
Maybe I should set it on fire.!?.....NOT!
Maybe I should set it on fire.!?.....NOT!
Feb. 3…Wow what a day!
Our backs are sore, can hardly stand up…stiff as heck! To say the least our butts are kicked… BUT we
got all the rest of the lath and plaster down!!!! YEE-HAAA!
Today we had three good head knockers in wood form and several bricks that came down with the lath! One of the wood beams, had the overhead wiring from the NE bedroom, drilled through it. Man, why didn’t that house burn down? I had to chisel my way to the wire, work it out of the board and Sherry held the board while I undid the last of the lath and pounded it away from the roof joist. We then had to twist it and work it between the two electrical wires.
Here are the pictures showing what the upstairs looks like now. Pay no attention to the mess on the floor, we will pick it up next Tuesday.

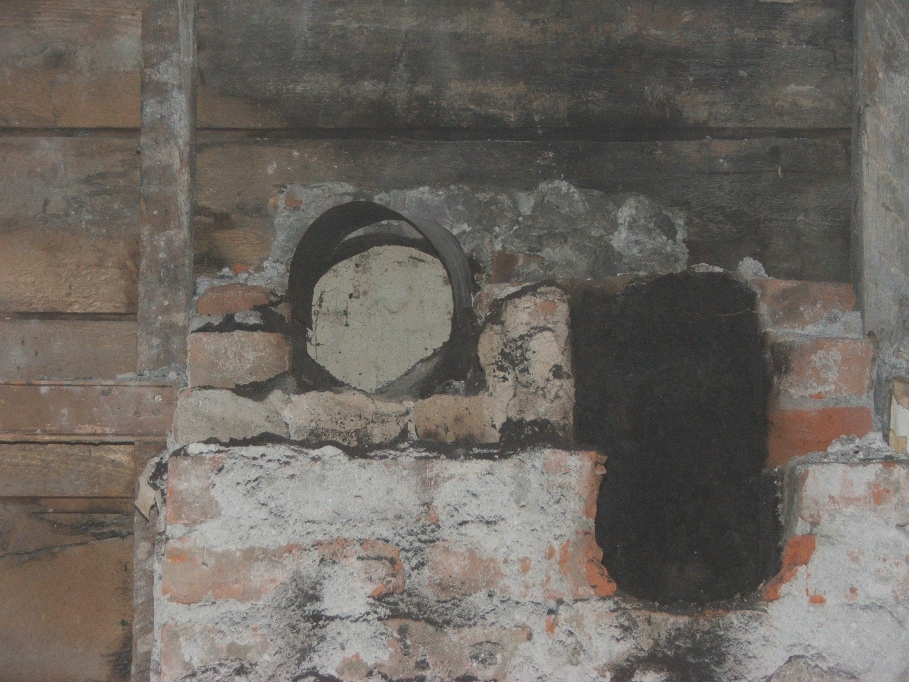
The West side of the NE bedroom. Notice the round cap in the older
chimney. It’s a cover that fills the
hole where the stove pipe used to be. We
will save that, and plug the hole with something else.

There is just enough room in the big dumpster to handle the
plaster we have to chisel from the brick, so this lath had to go to the field.
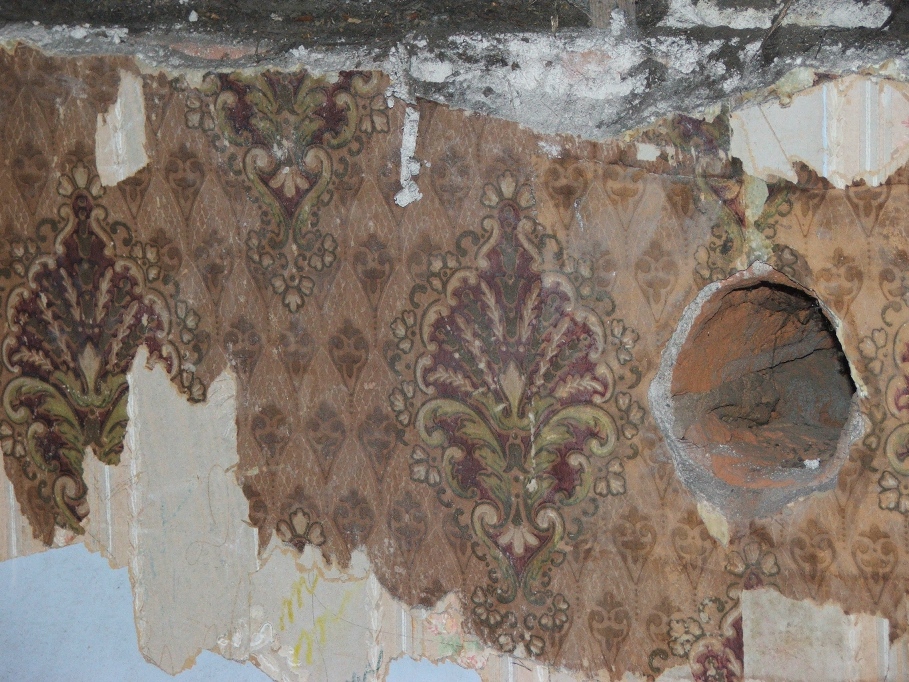
Really cool looking wall paper was used on the West wall of
the hall. It almost feels like cloth. The hole in the brick was chiseled by Dad when
he had the great idea to install a gas furnace upstairs and vent it out this
way. Why he didn’t continue we will
never know, perhaps it was then that he started having heart problems. We will never know.
Feb. 8…Boy did we have fun today! Brick bashing! Started knocking the plaster off of the
bricks and at first we tried the chisels, but found it faster just to use the
hammer and once the plaster was somewhat loose, the claw would pull it
down. We worked very hard and today our
wrists, arms and hands are very sore.
Sherry has a huge blister on the inside of her thumb.
We only took a couple of short water breaks and stayed with the task until just after 3 p.m., but it’s all down!!! Tomorrow, I will do the clean up, as Sherry has a hair appointment.
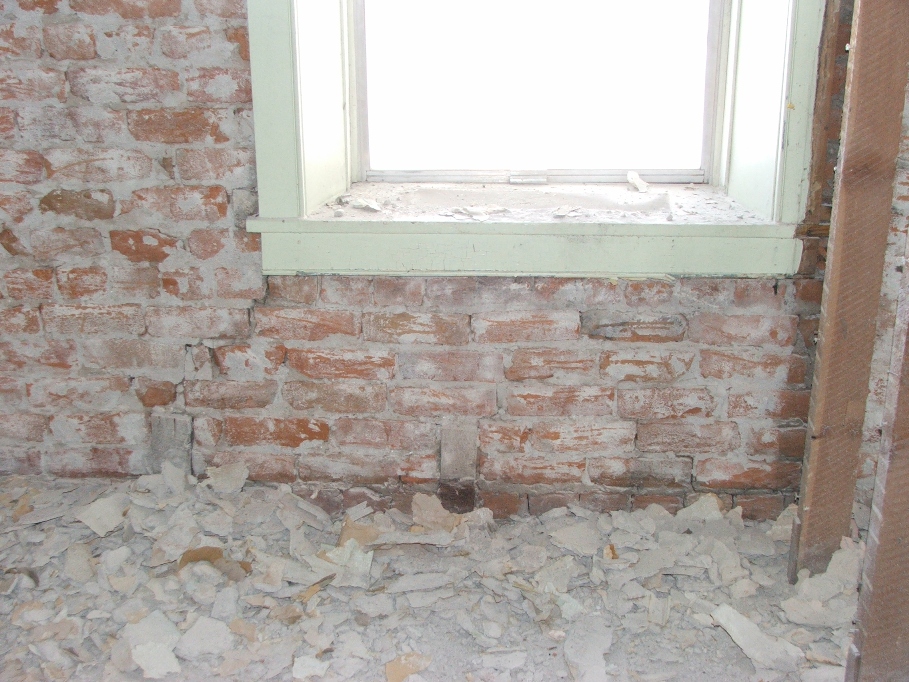
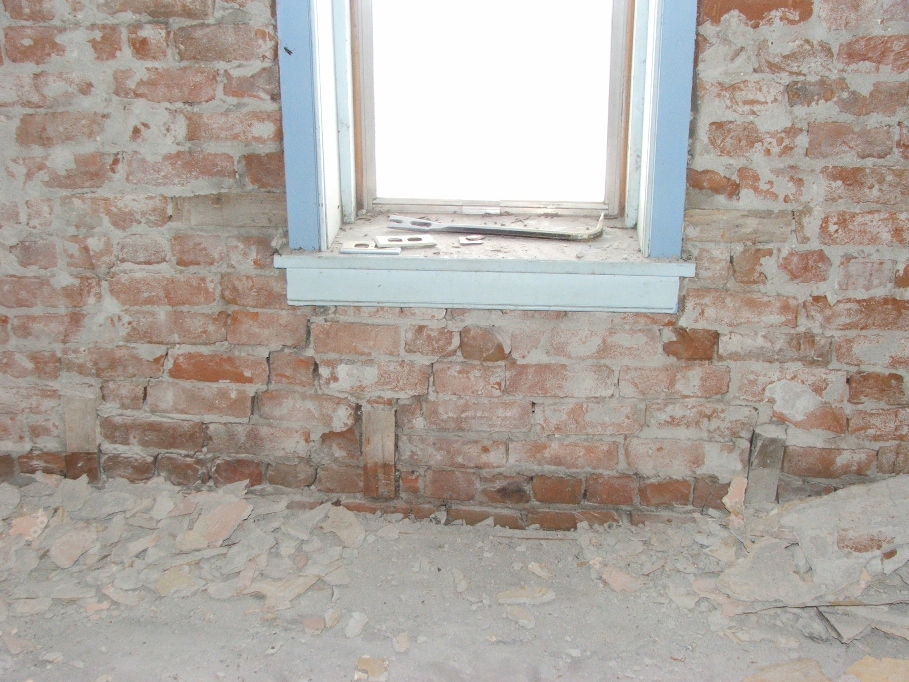
The brick is in a lot better shape than I thought it would be in. Only some minor stress cracks around the windows, and then mostly under the windows. Some rubbing of the brick is still in order, so as to remove the fine plaster that is still holding to the bricks. Then fixing the plaster in the stress cracks and I think we will be able to seal the brickwork with a clear sealer and the walls will look great!
We only took a couple of short water breaks and stayed with the task until just after 3 p.m., but it’s all down!!! Tomorrow, I will do the clean up, as Sherry has a hair appointment.
The brick is in a lot better shape than I thought it would be in. Only some minor stress cracks around the windows, and then mostly under the windows. Some rubbing of the brick is still in order, so as to remove the fine plaster that is still holding to the bricks. Then fixing the plaster in the stress cracks and I think we will be able to seal the brickwork with a clear sealer and the walls will look great!
North East Bedroom, West side, notice the hole in the
chimney. It was covered by a cool metal
plate, with curved wires to hold it in place.
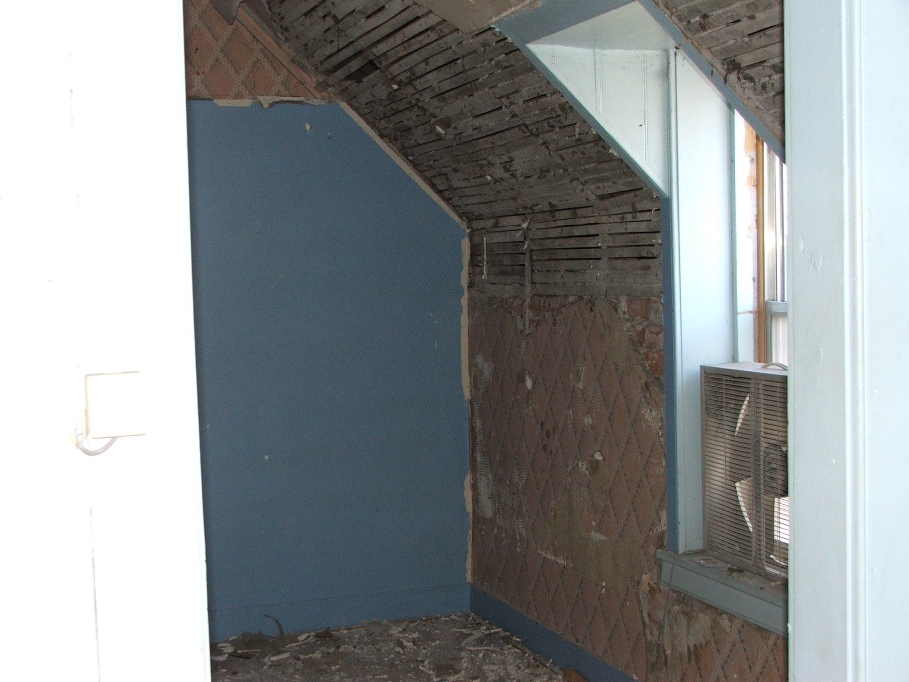
Why the blue paint? Dad had
lowered the ceiling in this room to conserve heat and Mom painted the room
blue. It was horrid! Red carpet and Blue walls! Yuk! I
think this will be blue until someone decides to do something else with the
house.
I mentioned stess cracks, perhaps a structural
engineer would call them something else.
The following pictures show what we have.
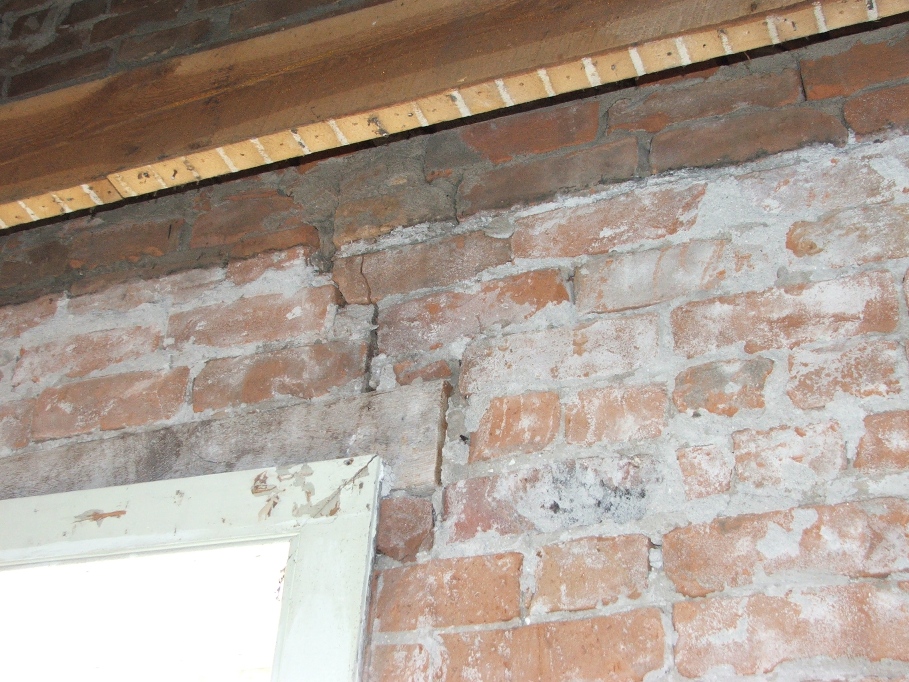
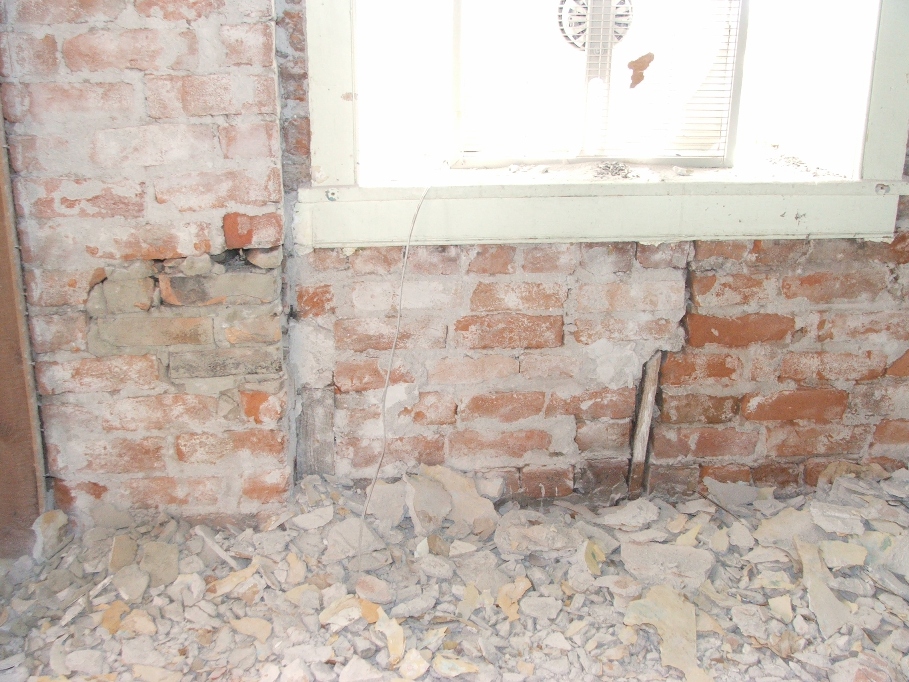
This one shows that the brick is actually cracked in two
pieces. Was this caused by the big
earthquake in the early 1900’s, centered near Kelton?
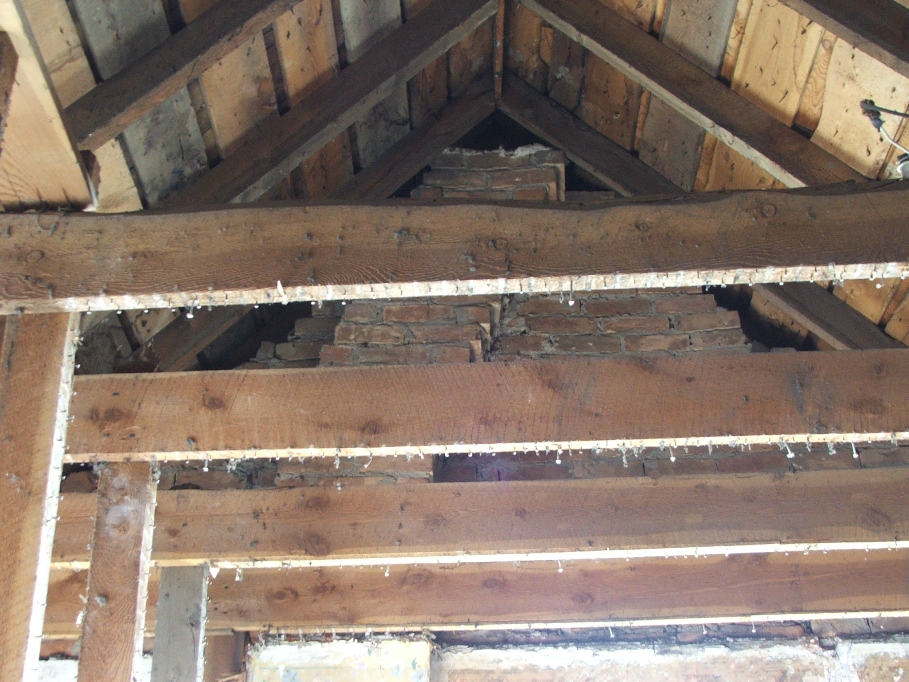
Just for fun, we studied the structure and found this remarkable slab of wood that was placed on the roof. It is 24 inches wide and 10 feet long!
What a huge tree that would have been cut from!
Feb. 9…Today I cleaned up the plaster from yesterday and brushed up the dust one time after getting the big stuff off the floor. I didn’t take any flicks of the rooms, as they are the same except the floor is cleaner. No big deal.
The day was pretty uneventful except that I did take down the chimney in the attic area.
The bricks stacked to the right will be put into the
dumpster tomorrow. We have plans to
save some bricks from the downstairs
part of the chimney for path bricks or to give to those in the family who might
want one or two. The bricks are of two
types, the ones closest to the wood frame of the house are “harder”, maybe even
“fired” brick, while the ones out into the room and on the sides of the chimney
were softer and made from a red clay material.
Very easy to scratch and highly susceptible to breaking when hit with
the hammer.
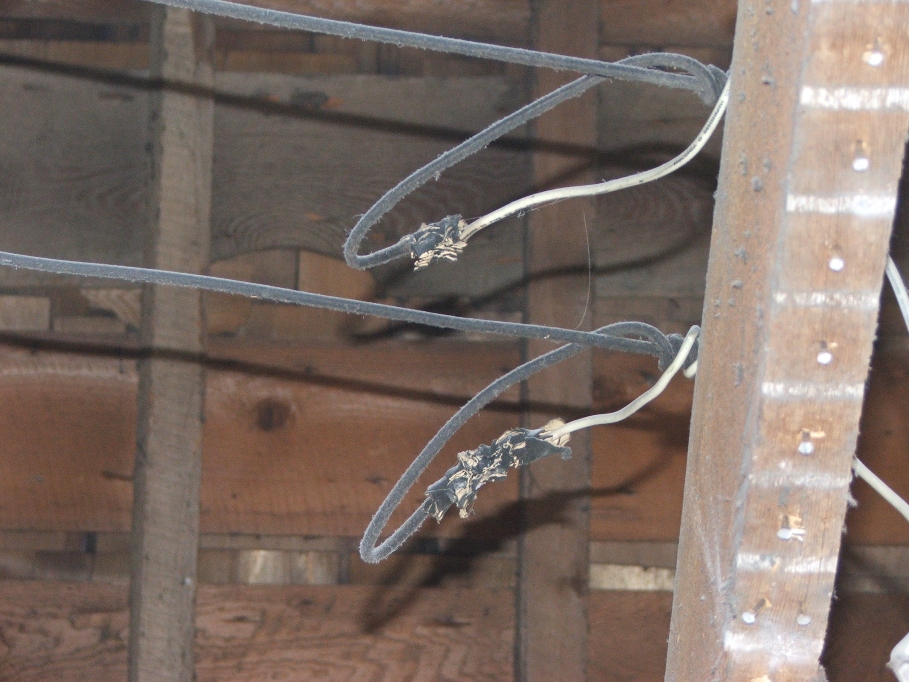
Today gave me an opportunity to take some pictures of the
wiring.
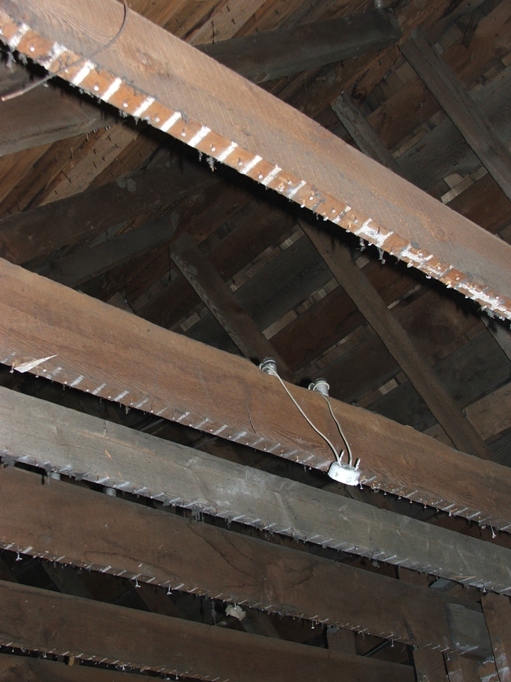
Now I know everyone involved was a professional in every right, but these splices sure do look to be of the type that could cause a fire.
Now I know everyone involved was a professional in every right, but these splices sure do look to be of the type that could cause a fire.
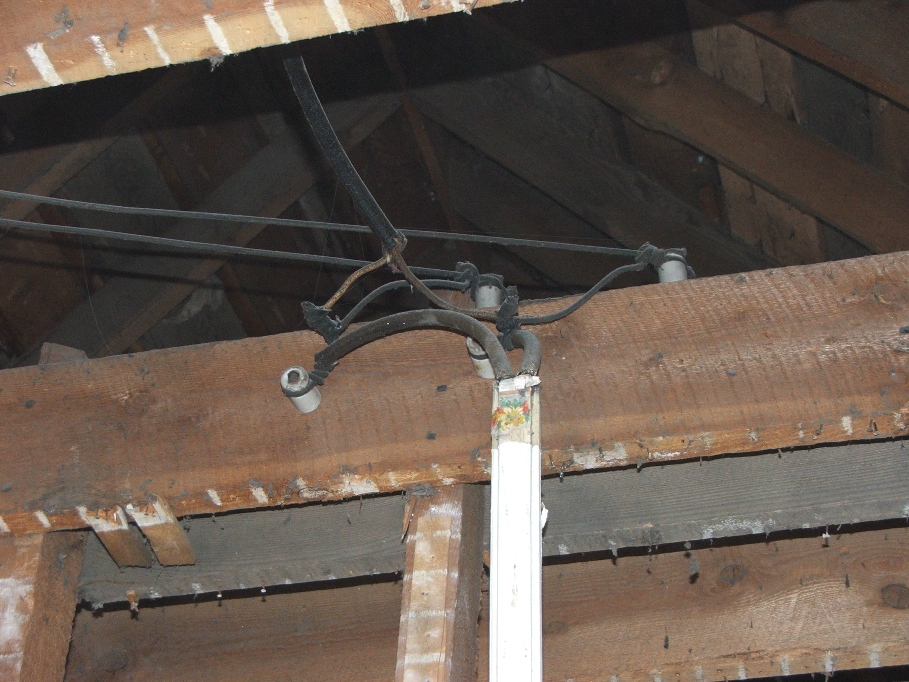
The upright part of this was a covering for the wiring. Of course they didn’t want to make a mess
undoing the lath and plaster, so the wires were laid against existing wall and
covered with this nice decorative cover.
Insulators were used to hold the wires safely in one place and splices
sent wires to their respective lights and plugs. I guess that in another 150 years or so people
will look at our current system and laugh at its antiquated way.
Tomorrow we have to move to the porch and take the wood back to the wood shed, tools to the tool shed and toss the bricks from upstairs into the dumpster. I have called the Green disposal company to come and get the dumpster. They will do this on Friday.
Oh, I killed a hornet today!
Tomorrow we have to move to the porch and take the wood back to the wood shed, tools to the tool shed and toss the bricks from upstairs into the dumpster. I have called the Green disposal company to come and get the dumpster. They will do this on Friday.
Oh, I killed a hornet today!
Feb. 10…Sherry and I went through all of the bricks from the
chimney dismantling from yesterday and picked out those that looked to be the
best. All of the others went into the
disposal. We are now done with this 30
yard unit. I called Greene Company
yesterday and they will come and get it in the morning. I expect we have about 5 tons of material in
it. That’s about 2 ton more than I
thought we would have.
They will let me know after they weigh it as to how much we had, when we get the bill.
After the brick sorting episode and cleaning up from that, Sherry and I went to the porch and took all of the tools and assorted household things of use down to the shed. We also took all of the painting materials (except paint) down there. These things we will be able to use once we have the walls sheet rocked and ready for paint.

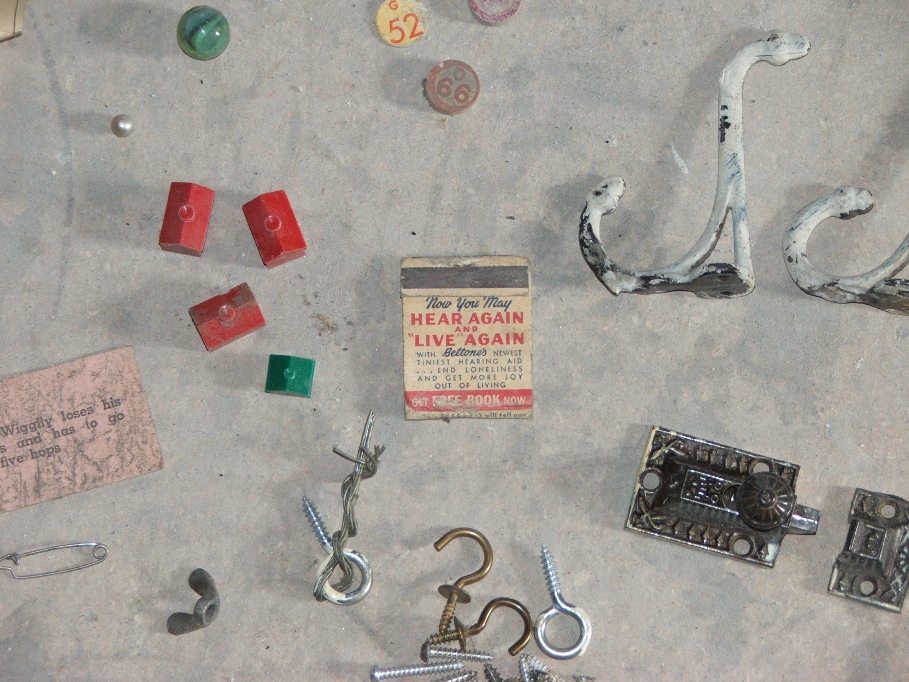
I thought this would be a great opportunity to show what neat things we have found so far. As usual, over time things get lost, fall behind something or are incorporated into a fix up of some kind. During dismantling we found these items and thought they were worth keeping (at least for a short time).
Overview of items: Left to Right…drapery hangers, stove pipe hole plug, assorted nails, washing instruction, sandpaper, post card, torn advertising paper, bank reminder note, round decorative wheel, “Uncle Wiggley” game cards, two small leather pieces, numerous puzzle pieces, assorted hooks and screws, advertising match book, Monopoly hotels and a house, small pearl, marble, bingo numbers, valentines card, 10 gauge paper shot shell, screw in hooks, screw on hooks, three spring catches and two hinges.
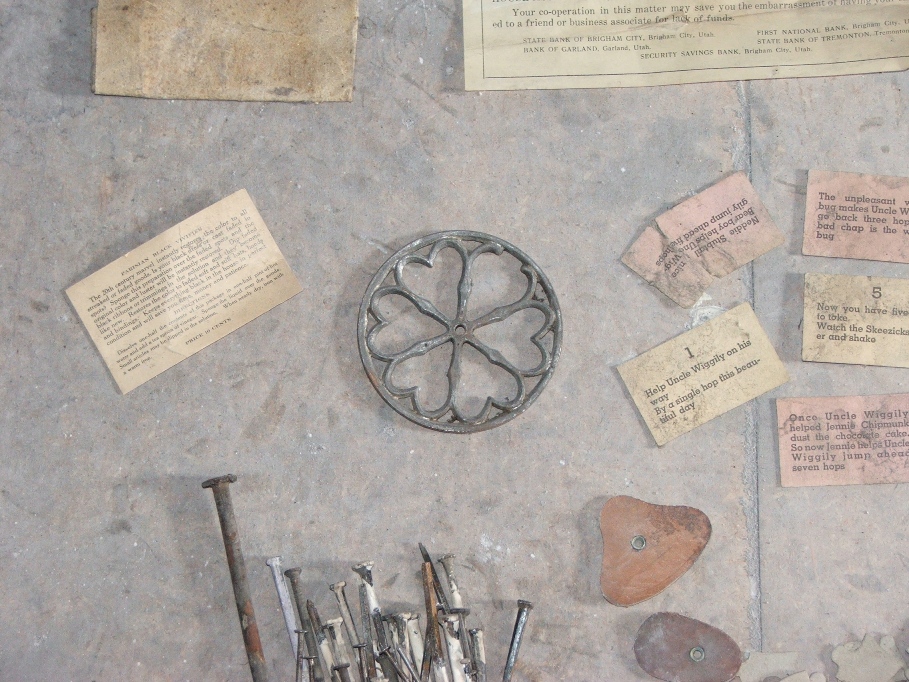
The decorative circle was found in the North
West bedroom, behind the base board and up against the brick. It had to have fallen behind there before the
plaster was put on, as the base board was used to help level the plaster
(screed). The question is: Was this part of a “drapery curtain” assembly
(to hold the curtain back) or was it a part of a toy?

10 gauge paper shot shell, partially eaten by mice was
located under the flooring at the base of the two steps leading into the
bedroom hallway. We also found a corn cob
with all the kernels chewed off. We
didn’t save that.
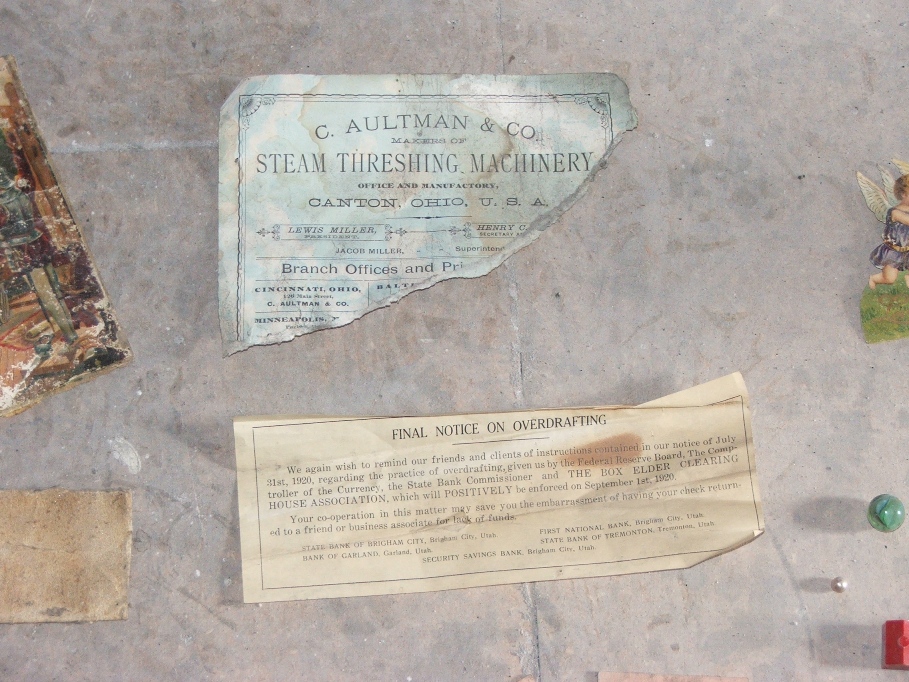
Final Notice On Overdrafting, reminding banking people with
checking accounts that starting September 1, 1920, checks written with
insufficient funds in the account would be sent back to the person they were
written to, causing embarrassment and possible legal action.
This fluttered down from behind the support holding up the closet in the North East Bedroom. That closet had a small door above the one you can see in the “before” pictures, as the ceiling in that room had been lowered. It must have been where they stored important documents, up and out of the reach of the children.
This fluttered down from behind the support holding up the closet in the North East Bedroom. That closet had a small door above the one you can see in the “before” pictures, as the ceiling in that room had been lowered. It must have been where they stored important documents, up and out of the reach of the children.
“Hear Again and Live Again”, Beltone’s answer to ending
loneliness.
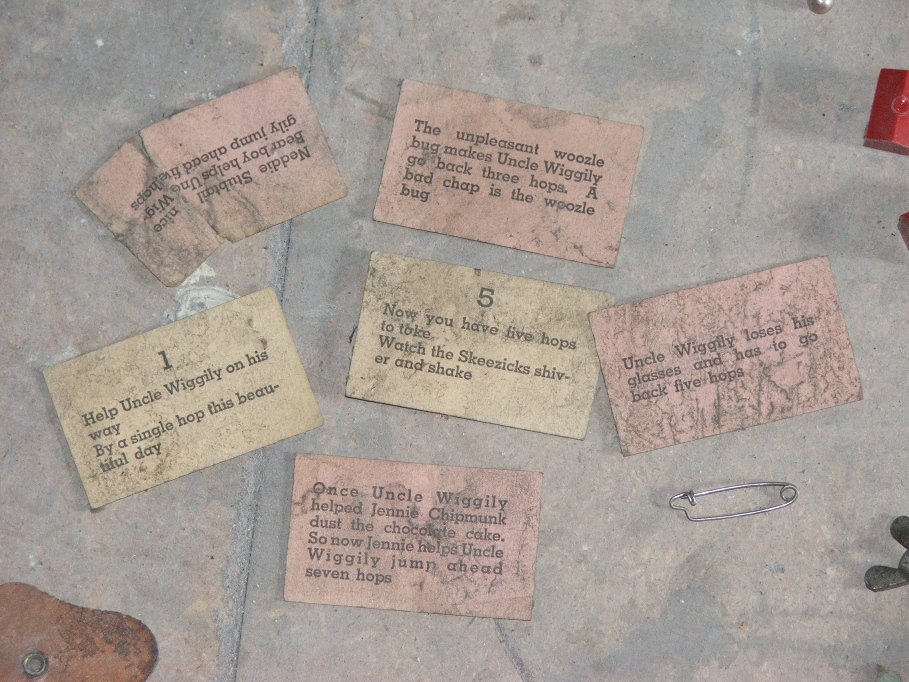
Uncle Wiggily game was where the word “Skeezicks”
originated! These game pieces were found
under the carpet and under the linoleum at the top of the stairs.
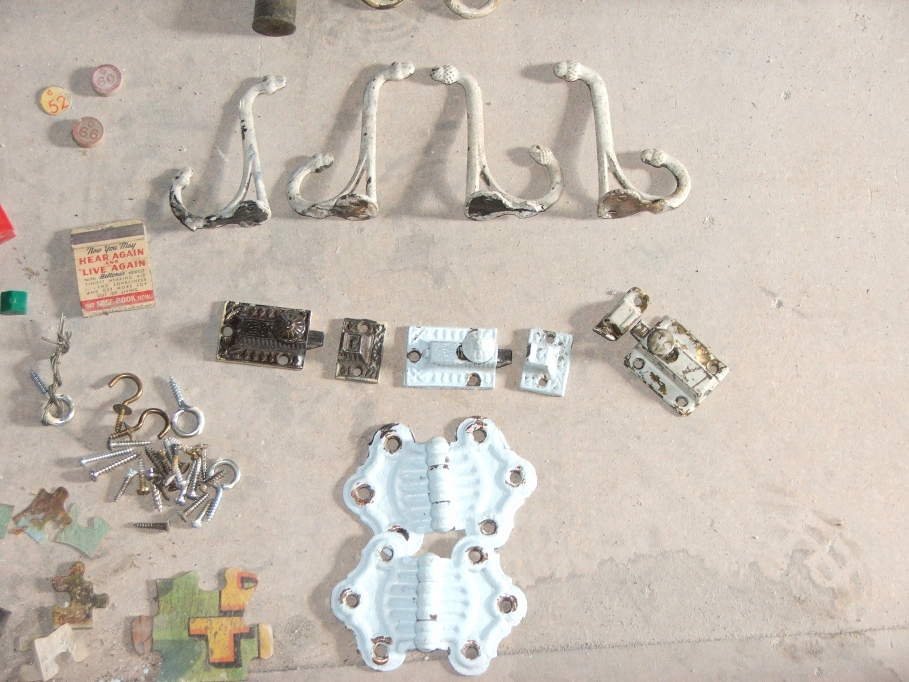
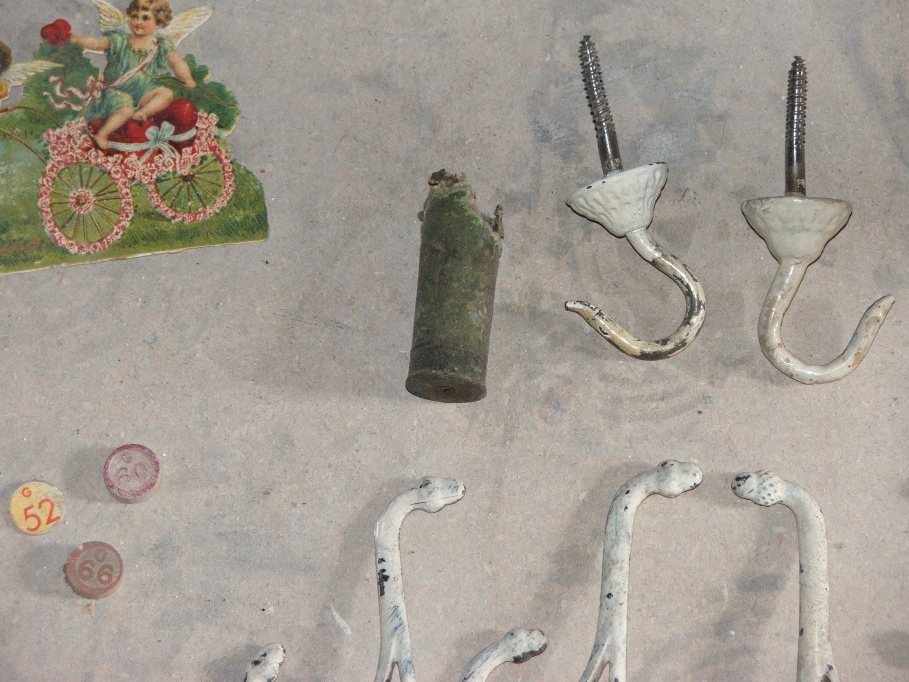
Way cool acorn hooks, and spring loaded door hasps. The hasps would look real nice on a Mountain
Man box.

Love’s Offering was found near where the “Uncle Wiggley”
pieces were located.
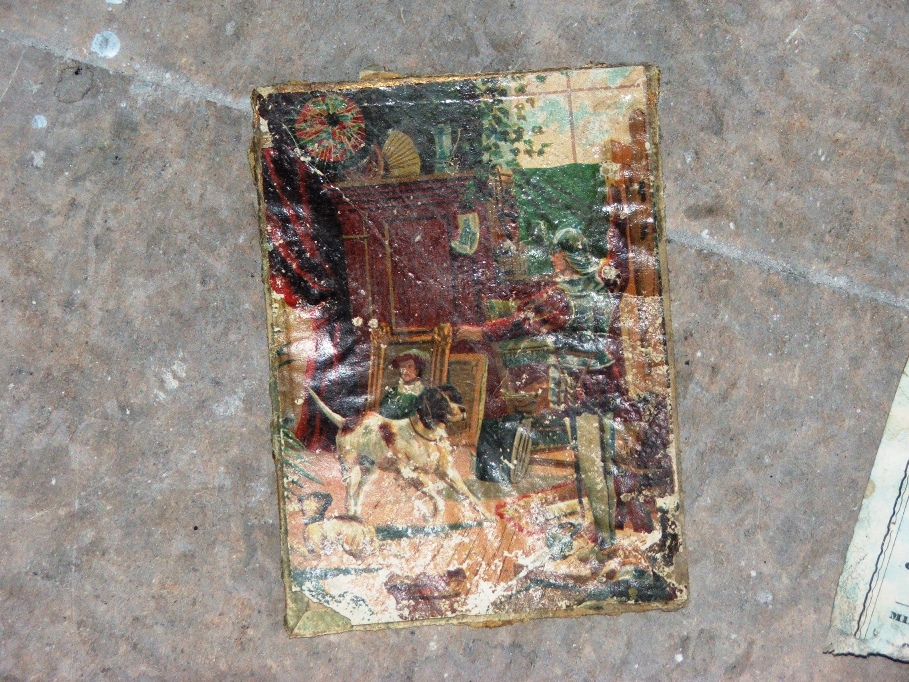
Very detailed picture card (I’m calling it a post
card). Holding the card in your hand
gains you very little detail that isn’t already seen in this picture. It too was found under the linoleum at the
top of the stairs.
This sort of plug was placed in the flue pipe hole of a
chimney when the stove was removed. It
kept the draft from coming down the chimney and into the room, as well as kept
the soot, bugs and birds from doing the same.
The two spring steel hoops held it tightly in the hole.
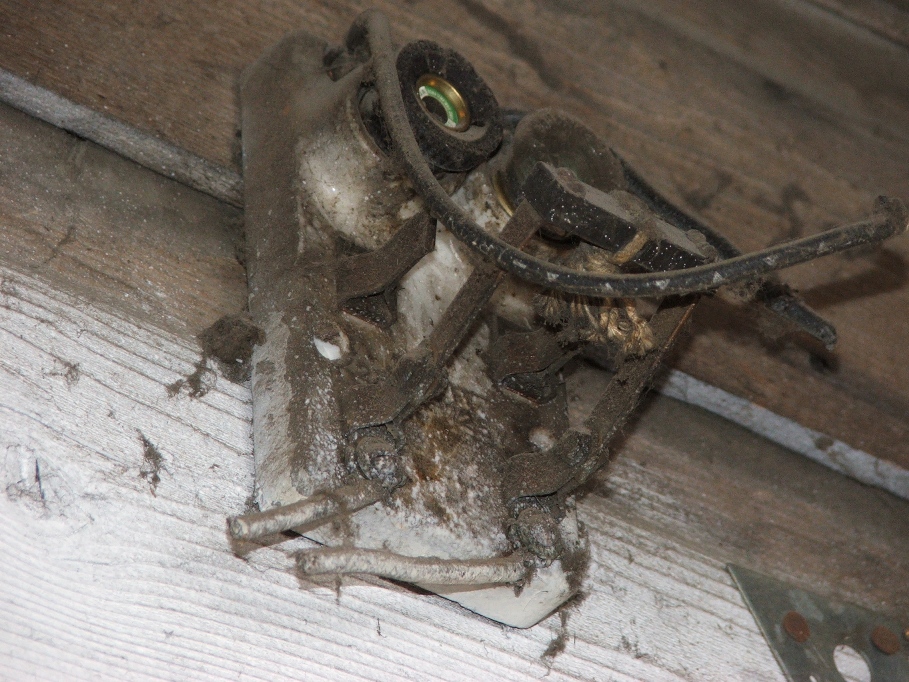
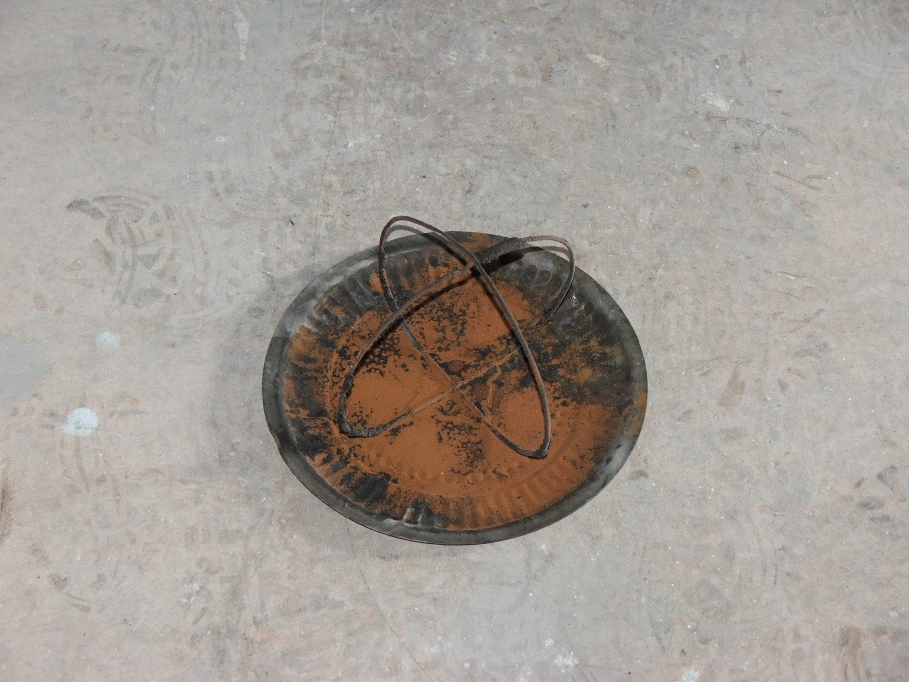
This was the first circuit breaker installed when the house
first got electricity. It would have
been on a wall outside of the house.
When the porch was added, they moved the circuit breaker to the outside
wall of the addition and disconnected this one.
Notice the rope tied to the breaker pull. If needed, who in their right mind would have wanted to reach up there and chance touching one of the exposed metal pieces? Safety has been thought of in this case. “Jerk the cord Maria, I think I’m being shocked!”
Notice the rope tied to the breaker pull. If needed, who in their right mind would have wanted to reach up there and chance touching one of the exposed metal pieces? Safety has been thought of in this case. “Jerk the cord Maria, I think I’m being shocked!”
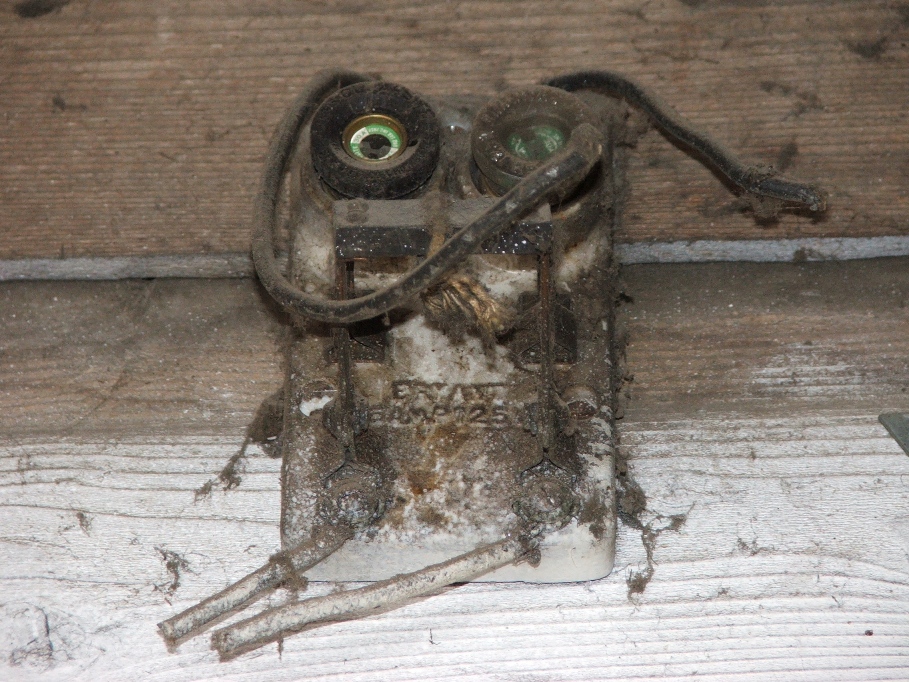
View of front from down below. The two screw in fuses still look good. I plan on saving this with my other wiring stuff.
Well that’s it! We can’t do any more demolition until the remaining house hold items are removed from the house. This has taken three years now, and there aren’t any guarantees that it won’t be another one pass before the stuff is gone. We have every thought that we can resume ripping and tearing within the month. When I start typing again you will know how long it’s been by the date of the entry.
Well that’s it! We can’t do any more demolition until the remaining house hold items are removed from the house. This has taken three years now, and there aren’t any guarantees that it won’t be another one pass before the stuff is gone. We have every thought that we can resume ripping and tearing within the month. When I start typing again you will know how long it’s been by the date of the entry.
Feb. 15….While I was fishing up to Sulpher Creek in Wyoming
at an ice fishing derby, the gang met at the house to discuss what should be
done with items that had been upstairs and other things that were in the
cellar. After they were done taking
stuff the rest was decided to go to auction.
Sherry and I have several boxes of things down stairs that need to be
gone through as well and a lot of it will also go to auction. The personal things that belonged to
individual family members of the past will remain and someone will have to read
through the journals, letters, cards, articles etc.
The main thing now is that Sherry and I were able to move all of the items from the wash room, mom’s old bedroom and the TV room into the front rooms of the house. We did this early this morning in order to allow us freedom to begin destruction of the walls downstairs.
The door leading to the porch had been closed after someone intentionally squirted “Great Stuff” around the frame. When the door was closed it formed an air tight seal around the door. No doubt a way to keep the wind from blowing into the room.
Since the door has a large window in it, I had to tape it in order to be able to work on the seal without breaking the glass and having it shatter all over the place, possibly injuring someone (me). Once done, I was able to use the crow bar and hammer to work on the seal to free it up. The carpet had to be removed in order for the door to open and when it did open the bottom hinge had its screws loose.
After moving all of the items, we started pulling up the old carpet. In the TV room, was a gold colored carpet and under that was a green carpet. Heck why not use the existing carpet as the pad to the new? The room mother used as a bedroom had a pretty blue carpet and under it was a nasty orange one.
It took us longer than expected, but the job is done now.
Looking to the NW, carpet is gone. Check out the way they stained and varnished
the floor. They must have had an area rug, which they pulled away, stained and
varnished the floor, let it dry and laid the rug back.
Since the floor is in such good shape, we will probably sand it, apply a filler and sealer and then re-varnish it. It won’t look too bad and for a rec-room or some other play type room it will be fine. Should save us on carpet.
Since the floor is in such good shape, we will probably sand it, apply a filler and sealer and then re-varnish it. It won’t look too bad and for a rec-room or some other play type room it will be fine. Should save us on carpet.

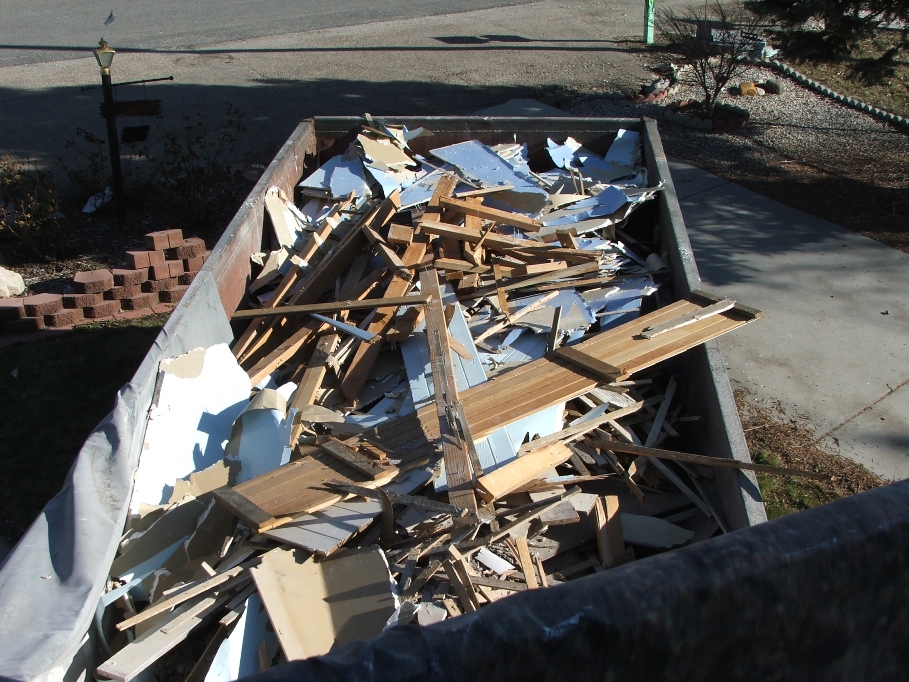
Today the Greene Disposal people brought us our
next dumpster. It measures about 6 ft. X
6 ft. X 6 ft. and holds about 8 yards of stuff.
We think it will hold all of the plaster and the bad bricks from
downstairs. We are “half way” planning
on hauling all of the lath to the field.
All of the carpet we pulled up today went to the field.
Tomorrow we hope to get started with some serious destruction. Our discussion tonight makes me think we will
start where the “suspected” stairs used to go.
We are excited.
Feb. 16…Got a good start this morning. Sherry started on the plaster, I started on the suspected “box”. It didn’t take long for Sherry to begin yelling at me that plaster was falling on her. I was on the stairway banging and crow barring the wood on the top of the box. The ends of the box top away from me were actually the ceiling in the TV room directly over her head. I quit quickly!
Feb. 16…Got a good start this morning. Sherry started on the plaster, I started on the suspected “box”. It didn’t take long for Sherry to begin yelling at me that plaster was falling on her. I was on the stairway banging and crow barring the wood on the top of the box. The ends of the box top away from me were actually the ceiling in the TV room directly over her head. I quit quickly!
After demolition of that corner and the ceiling plaster this
is what it looks like.
After today’s work, we think we will probably leave the
Wainscoting on the North and South walls of this room. We will most likely need to take the East
wall completely out and possibly the West wall.
More to be determined on that as we progress.
The interesting note of the day was the way the plaster and other materials were put together. The upright walls on the North, West and South (all of which at one time were exterior walls) were made with wood siding outside, adobe brick just inside of the wood, then a filler layer of soft plaster like material and finally a finished coat of harder plaster on the inside of the house. The inside plaster was coated with something and appeared to have had a stain included (brownish). Over the years many, many layers of wall paper had been added.
The interesting note of the day was the way the plaster and other materials were put together. The upright walls on the North, West and South (all of which at one time were exterior walls) were made with wood siding outside, adobe brick just inside of the wood, then a filler layer of soft plaster like material and finally a finished coat of harder plaster on the inside of the house. The inside plaster was coated with something and appeared to have had a stain included (brownish). Over the years many, many layers of wall paper had been added.
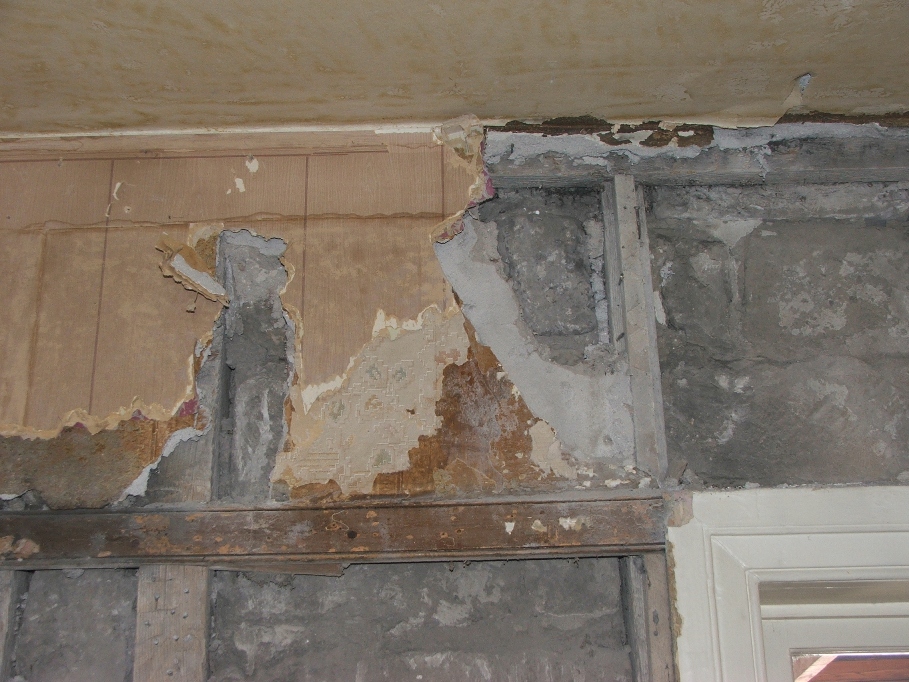
Closer view of the adobe, filler and harder plaster. Note there are no lath on these walls.
This shows the adobe in relation to the studs and decorative
wood.
The structure looks pretty good with one exception and that
is a vertical stud on the North wall of the TV room that has rotted and needs
replacing. I’m not sure how I’ll do
this.
We waited until the ceiling plaster was all down before cleaning up the mess in the TV room. While I worked on the ceiling, Sherry attacked the old bedroom walls. Following are a series of flicks of today’s activities.
We waited until the ceiling plaster was all down before cleaning up the mess in the TV room. While I worked on the ceiling, Sherry attacked the old bedroom walls. Following are a series of flicks of today’s activities.
Notice the small bit of lath next to the chimney. That was all the lath on this wall.
The board just to the left of the window is the one needing
replacing.

This Close up shows the deterioration.
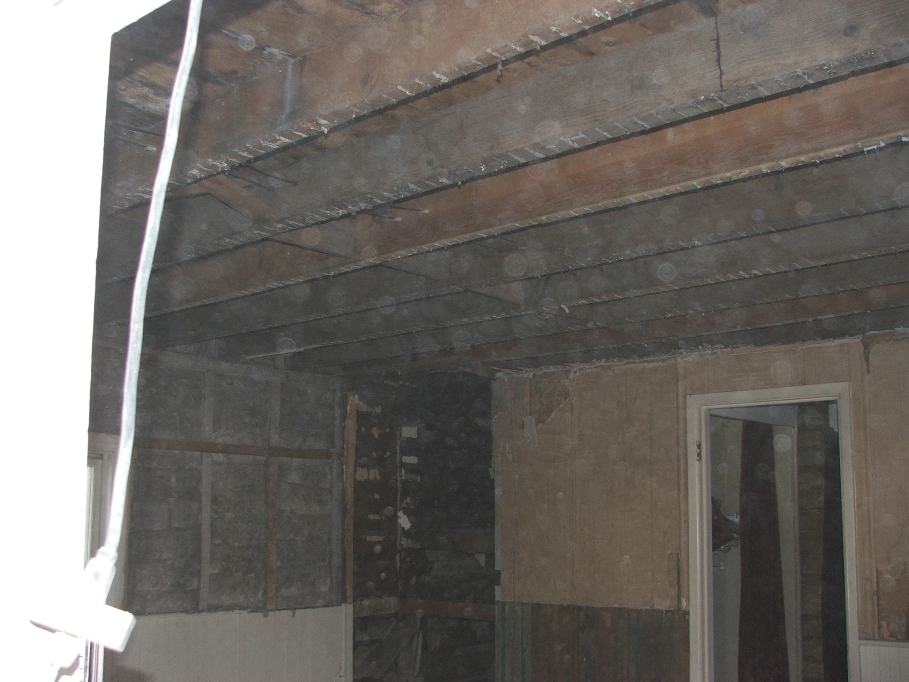
Feb. 17…Today was demolish the overhead
lath! We got a good start just before 10
a.m. It was a real mess. Several mouse nests scattered across the
ceiling and LOTS of mouse droppings, as well as, peanuts, black walnuts, corn
cobs, chicken bones and even a small “t” bone.
We were as dirty and black as could be when the lath was all pulled
down. But like the other rooms, at least
now you can see what the structure looks
like and it’s open in order to install electrical and heat. The following several pictures show you the
lath mess as well as when it is somewhat cleaned up.
Look carefully at the spacers between the overhead
joists. Most are just 1 inch boards
nailed in, but the left side ones have a “herring bone”, obviously from two
different periods of construction. Could
someone have done something more recent, maybe built the chimney?
The wire had been disconnected from the light fixture. Maybe people kept hitting their heads on the
light. Only the walls know for sure.
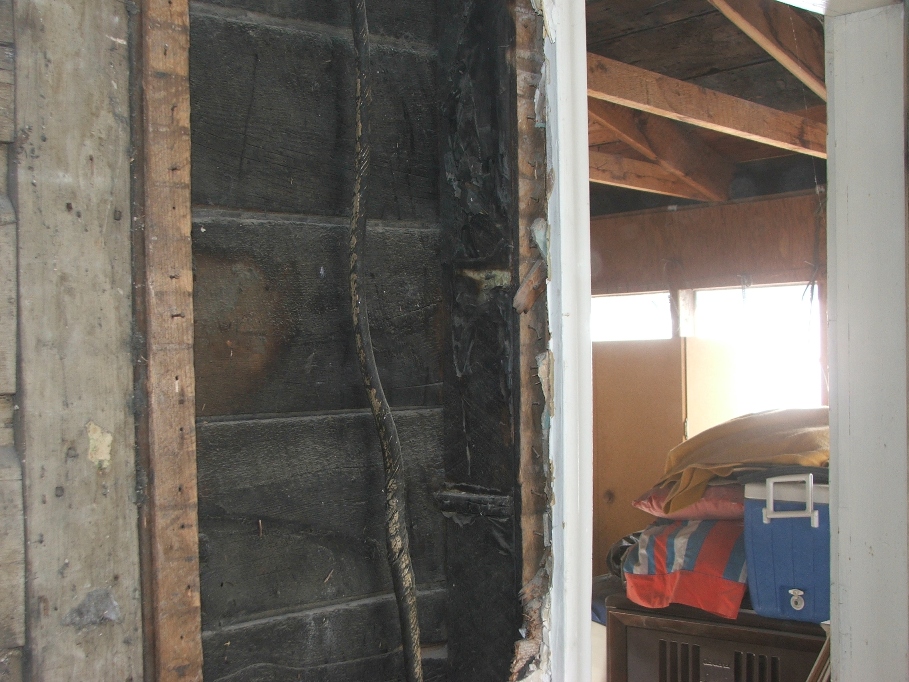
While I was busy in the TV room, Sherry was
knocking the stuffing out of the lath in the old bed room. While doing so, she came across what looked
like an old fire in the wall. AH
HA! This must have been the wall that
Jack started on fire by dropping lighted matches down a knot hole on the porch
side! This is the damage we saw. There is probably more.
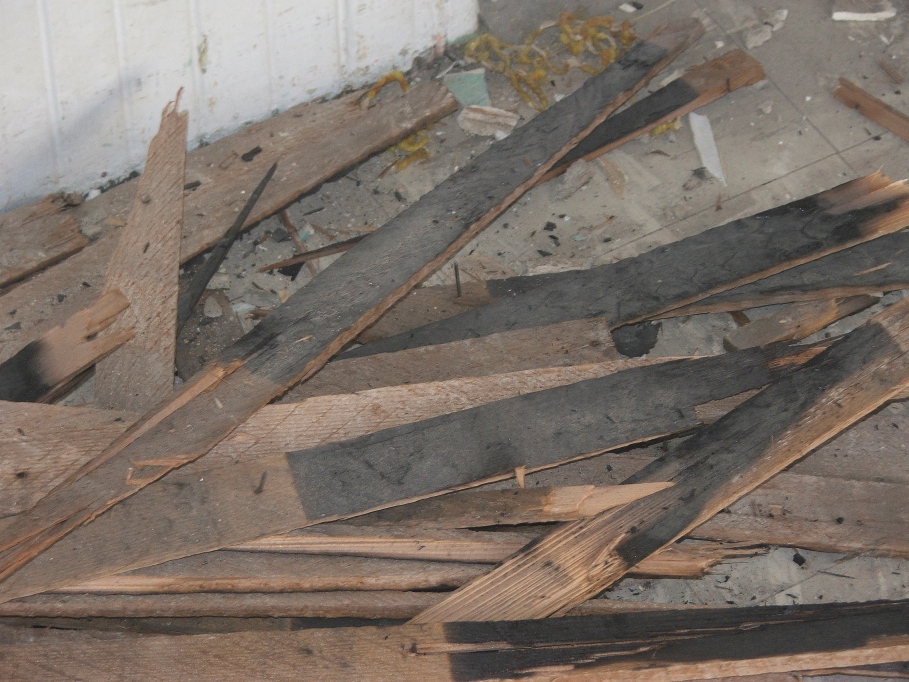
This next picture is some of the burnt ends of
lath. We plan on giving these to Jack.
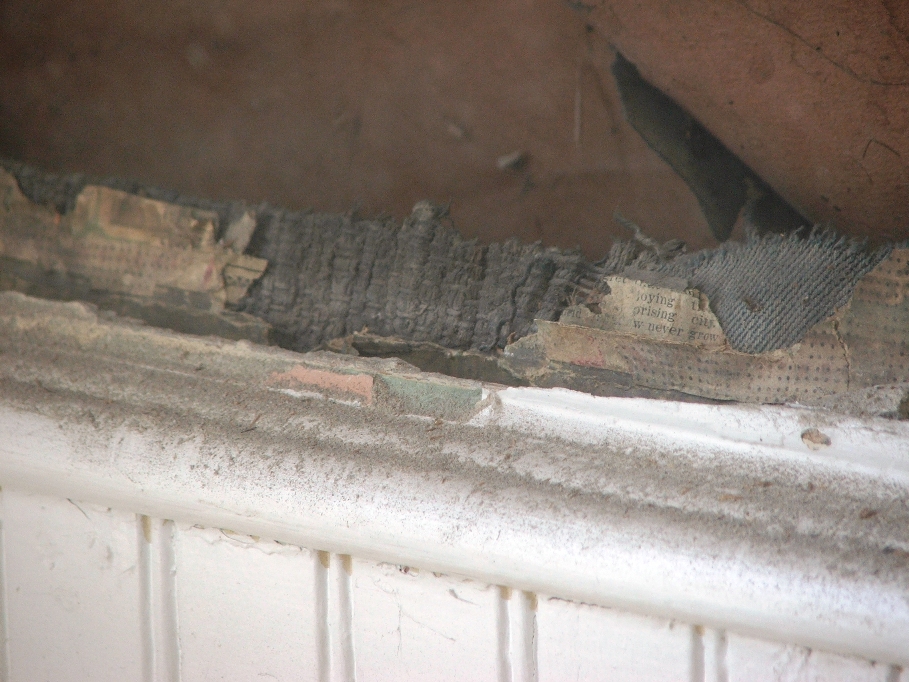
Other interesting things showed up behind the
walls in the old bedroom. Like what
appears to be some sort of “vapor barrier” made out of a heavy paper.

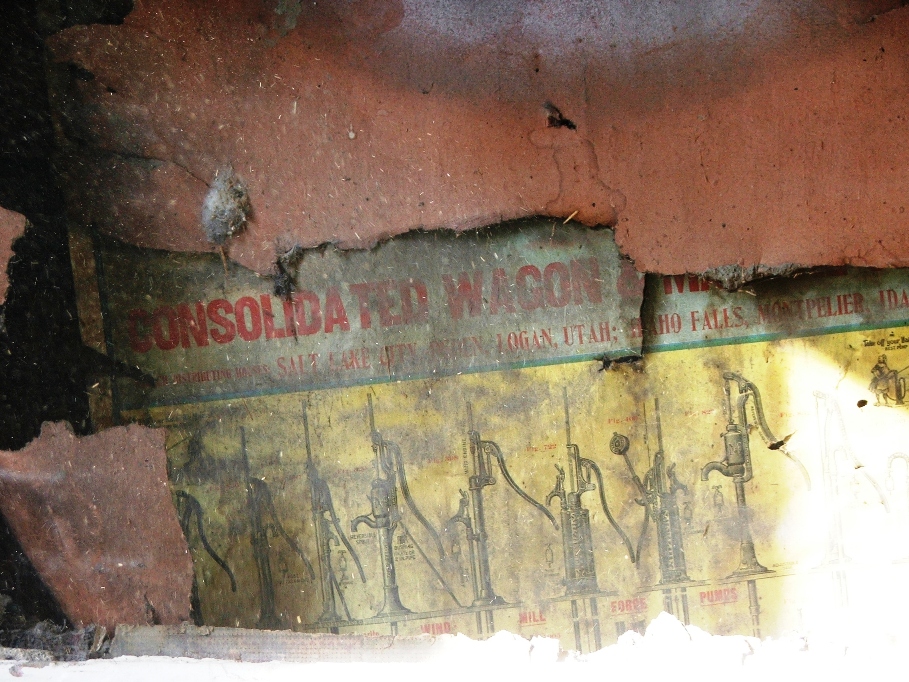
Also, we found an old advertisement and what
looks like an order form for material purchase ($2.00 per piece).
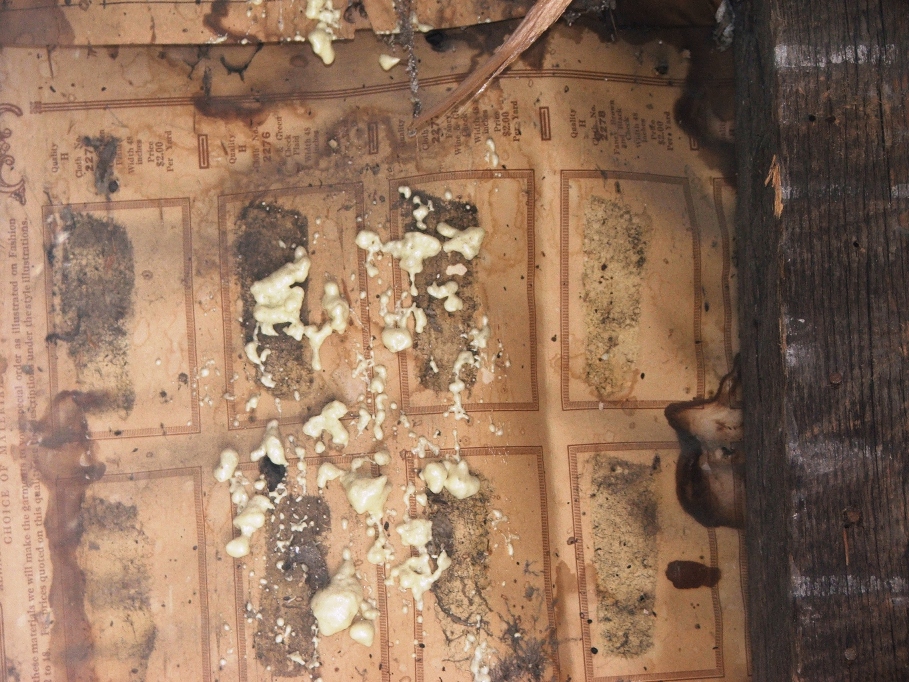
The drippy stuff was overspray from someone filling a hole
with “Great Stuff” expanding insulation foam.
When this portion of the house was assembled there was material and newspapers put together. Most likely a way of insulating the walls a bit more.
When this portion of the house was assembled there was material and newspapers put together. Most likely a way of insulating the walls a bit more.
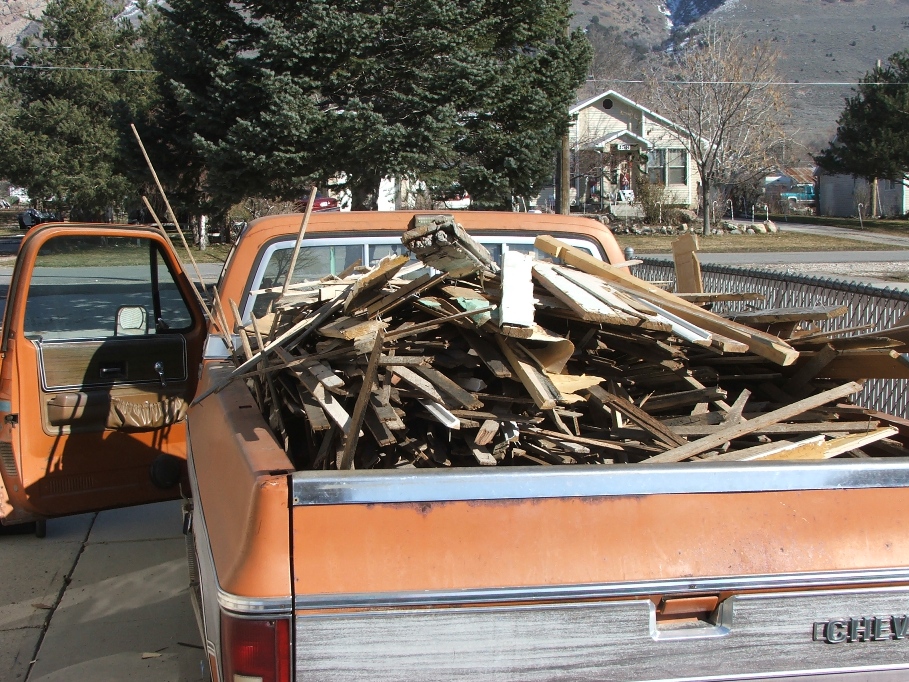
We cleaned up the lath and it went into the pickup truck for
delivery to the field hole. All of the
plaster went into the dumpster. We used
two five gallon buckets to move the plaster from inside the house out to the
dumpster and we dumped it so that the load will be somewhat even all around.
We still have plaster and lath to pull down from the old bedroom and in the wash room areas and I think the lath will fit in the pickup. If not it will mean two loads. The plaster will for sure fit in the dumpster.
Once the plaster was picked up and we had taken a short break, we started to take the chimney down.

Interesting notes about the chimney. On the TV side there were two stove pipe
holes. Does this mean that over time
there were two different sizes of stoves installed, each requiring a different
length of pipe?
Also there were two “clean out” doors, one on either side of the chimney, near the floor.
Also there were two “clean out” doors, one on either side of the chimney, near the floor.

I went upstairs and worked the first two layers off. That put the top of the bricks just below the
ceiling in the TV room. That done, I
moved downstairs and began clunking away.
While I was on the ladder, Sherry would take the bricks from me, one at
a time, and place them in the wheelbarrow.
When the wheelbarrow was full, she would haul them out to the fence and
stack them. There may be a use for these
later in a landscaping project or two.
As we progressed, taking one brick off at a time, I would periodically have to stop and clean the soot and ashes out of the two chimney flew holes. Each one of the flew holes had numerous whole bricks jammed in them from when Rick and I were young and mischievous. We would find ourselves up on the roof, knocking the loose bricks off the top of the chimney and dropping them down the flews. We thought we were way cool to do this.
About one third of the way done with the job we uncovered a blocked stove pipe hole coming from the old bedroom side of the wall. This was the hole where the old wood burning cook stove (Monarch brand), used to vent. Once the folks got an electric stove, Dad plugged this one up.
About half way completed we discovered a very
frightening sight. Burnt wood!!! On the backside of the chimney. How did they ever get the fire out?
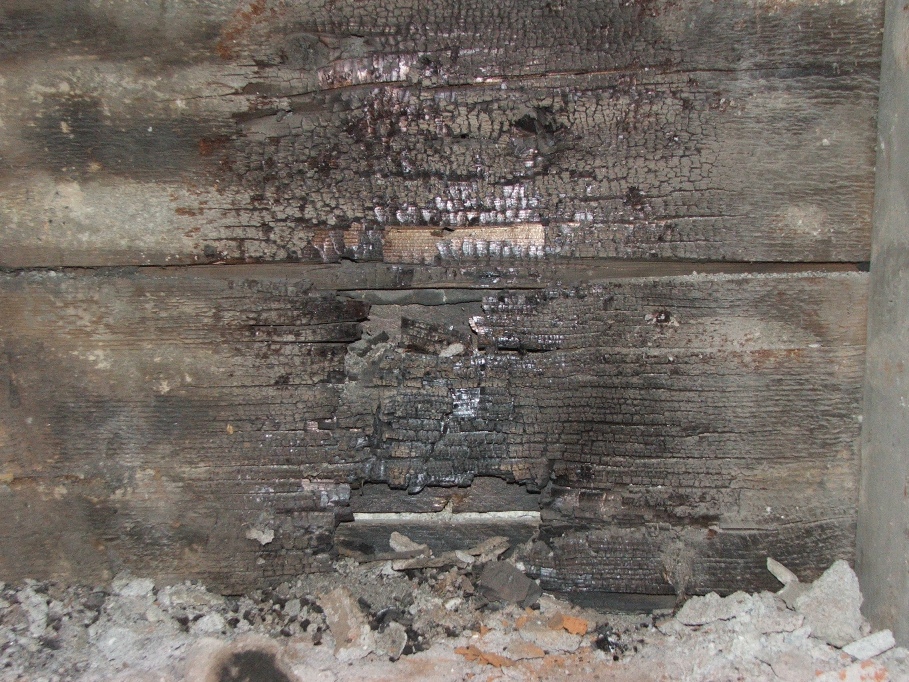
What a frightening thing for them to go through.
The dismantling went pretty routine from that point to the end, with the job of cleaning out the soot and ashes getting more and more intense. As the layers progressed and got under the point of the cleanout doors there was a solid layer of bricks. There were two such layers of bricks we removed by the time we got to the floor level. But, the brick kept going down! How far does it go? One more layer and we soon saw a hollow space with only bricks around the outer edge.
In this hollow we could see a 1 1/2 inch metal pipe standing up. It looks like someone was “aiming it” toward the small bathroom at the bottom of the stairs. Was it intended to act as a sewer drain? No one will ever know. I will remove the pipe before we get too much farther along.
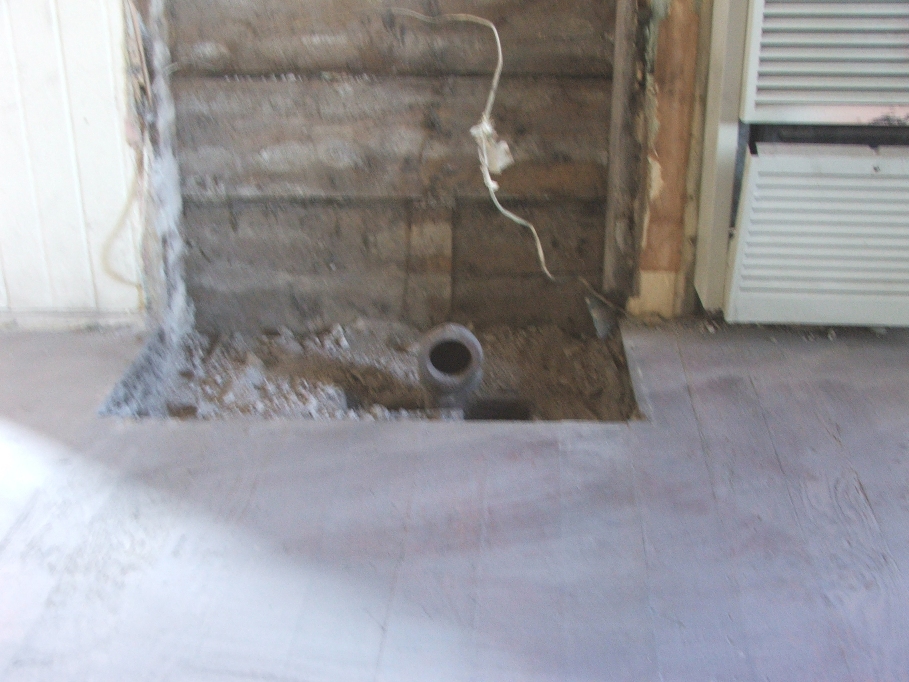
Here is what the room looks like without the
chimney!
Of course, just as upstairs, we are constantly
on the lookout for “treasures”. Here is
what we have found thus far downstairs.
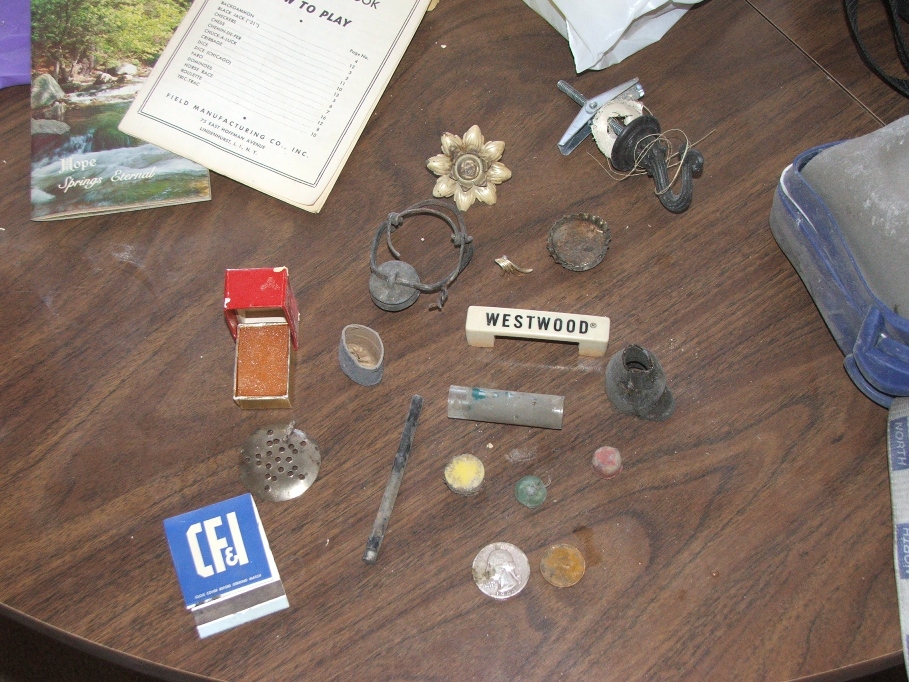
CFandI advertising matches, found in the ashes on left
cleanout, Something with holes in the
shape of a star, a ring box that was used as a leveling devise under one end of
the bookshelf, Ball point pen insides, BB package cap, Poptop bottle lid,
Flower shaped pin, Molly bolt hook, Bottle cap,
Ear ring (found in old bed room), Westwood handle (came off the wall
furnace, Split shot plastic container with yellow lid, Green button, Red lid (probably from a replaceable lead
pencil bottle), above that a lid from a medicine bottle, it’s hard to read but
says “Croop-Like” brand and last but not least…a 1944 quarter and a 1940 penny!
Feb. 25…Sherry and I took a couple of days and “ran away”. We got back to the house work yesterday the 24th. She spent the day at our house fixing and going through old items found in the trunks and boxes of things. I spent it tearing into the overhead of the old bedroom downstairs. It wasn’t expected to be a spectacular day of finding things, but check out the ceiling in this picture.
Feb. 25…Sherry and I took a couple of days and “ran away”. We got back to the house work yesterday the 24th. She spent the day at our house fixing and going through old items found in the trunks and boxes of things. I spent it tearing into the overhead of the old bedroom downstairs. It wasn’t expected to be a spectacular day of finding things, but check out the ceiling in this picture.
This is looking toward the SW corner of the
room. Notice the nails sticking out of
the rafters. Was this room just a porch
at one time, and these nails were used to hang things? Another clue to me that this might have been
such a room, was that as I was pulling down lath, a metal “thing” came flying
from the space between the ceiling joists and the wall plate. The type of place one might put something
they didn’t want to lose, and it got covered with lath and plaster at a later
date. You’ll see that item when I show
you the “finds”.
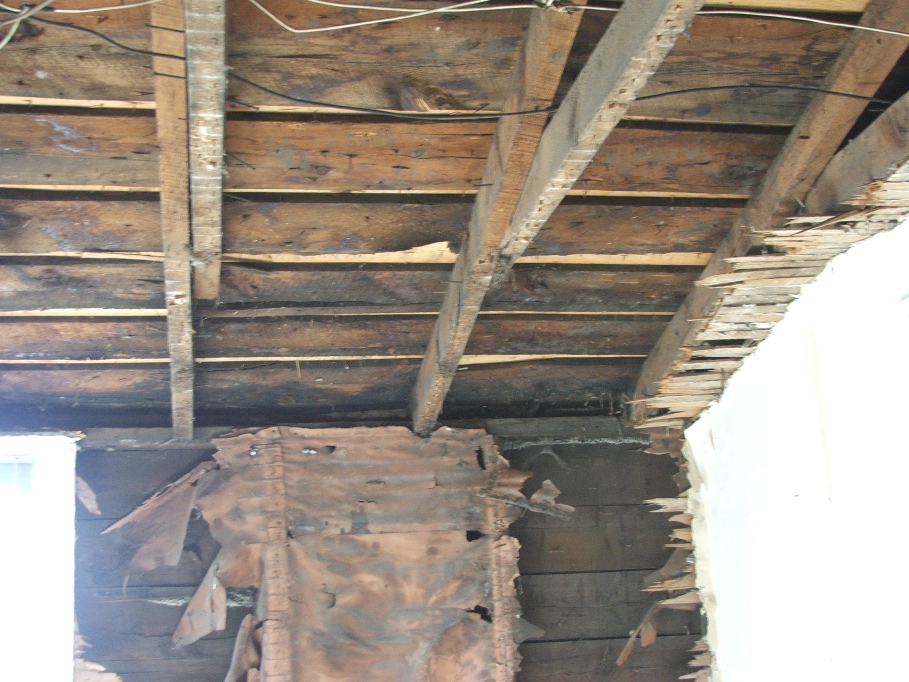
The place the metal thing came from was the plate on the far
right.
I thought it might be interesting to show you
the burned wall where Jack caught things on fire and the hole made in the roof
for the firemen to put the flames out.
The newer wood was installed when the shingles were replace
a few years back, but you can clearly see where they chopped their way in. All of the wires have been added since the fire
and all of them are going to be replaced with modern wire and done to code.
Today I started into the TV room and wanted to get the closet wall down and also the walls to the small bathroom. Our heating and AC man, Scott Pettingill, showed up to look things over now that he can see the structure. We spent about an hour with him going over possibilities. He assures us he can do what we need except in the newer part of the house. We will have to put up with the wall furnace in there just like it is today. The evaporative swamp cooler will have to go however, as he says it is counter productive to have central air and swamp cooler air going at the same time. He suggests we replace it with a fairly sizeable refrigerated unit. More will be discussed on that when we get that far.
Having lost a good hour of destructive time, I went back to my task. The wall leading into the closet was not a big deal, it came down fairly well. What was unique about that was that there was NO support holding up the beam overhead !!! It had been cut to accommodate the stairwell and never supported underneath ( a major “head knocker”). This picture shows the temporary post I installed for the support. When we install the new stairwell we will put a permanent post in place.
The shovel is leaning against the post I installed.
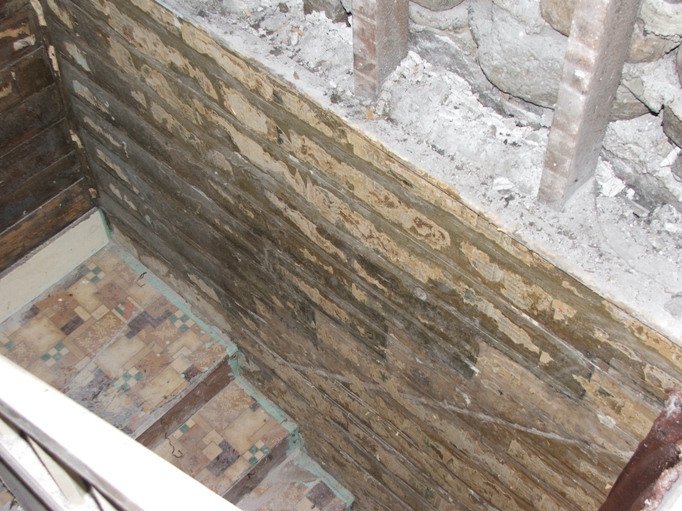
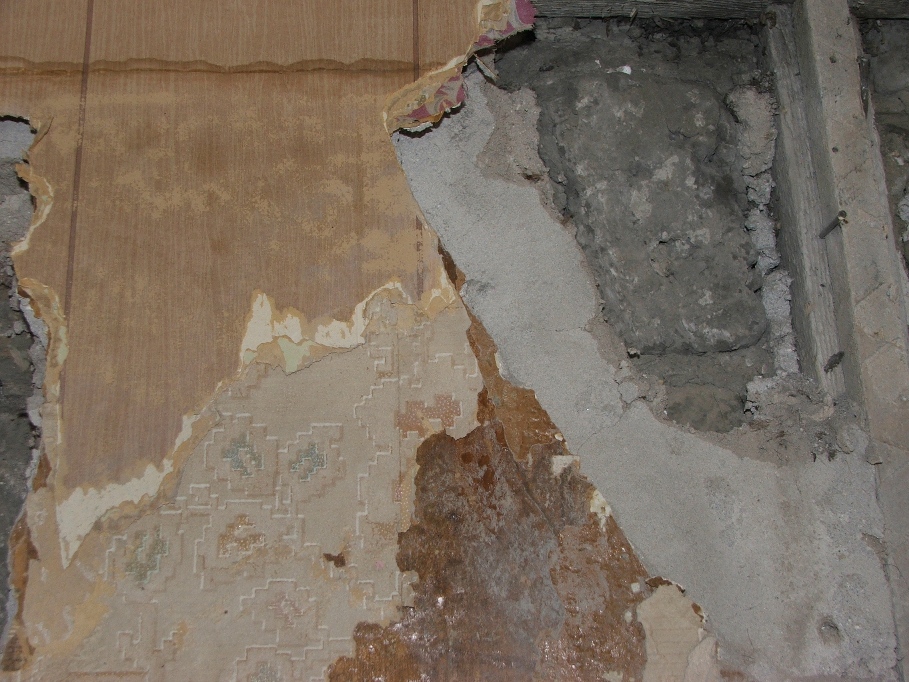
It seems that everyday we play in this endeavor we encounter something interesting about the construction, or special finding, wall paper etc. Today was no exception. The wall that was the West wall of the bathroom contained adobe brick as a filler. Check out this next picture.
It seems that everyday we play in this endeavor we encounter something interesting about the construction, or special finding, wall paper etc. Today was no exception. The wall that was the West wall of the bathroom contained adobe brick as a filler. Check out this next picture.
Was this wall once an exterior wall? After moving the adobe bricks, I pulled off
the Wainscoting (saved it for Dee) and look what I uncovered.
Sure enough more adobe.
Check out the wallpaper that was behind the adobe on top. This adds confusion as to what this wall once
was. You don’t put wall paper on a wall
and then lay adobe bricks. Way
confusing.
The task at hand continued until I ran out of time. I knew I had to clean up at least a little and take the load of lath and wood I had in the truck to the field. I didn’t want to be doing this at dark or even tomorrow. Check out the reflection in the glass of the door…Coolers….Too bad they aren’t filled with cold beer. I could have used one about this time.
The task at hand continued until I ran out of time. I knew I had to clean up at least a little and take the load of lath and wood I had in the truck to the field. I didn’t want to be doing this at dark or even tomorrow. Check out the reflection in the glass of the door…Coolers….Too bad they aren’t filled with cold beer. I could have used one about this time.
The house looks like this now.
Next time I play, I will pull down the pocket door, the fir
studs on the South wall and of course the ceiling lath and plaster. Then I will have to look into undoing the plumbing
and removing the toilet and vent. Oh by
the way, where you see the roll insulation on the South wall, there is a window
behind it! I can hardly wait to expose
it to the world again.
Again here is the second load of lath and wood we are hauling to the field. I still have more to tear out, but didn’t feel I had enough room in the truck this time.
Again here is the second load of lath and wood we are hauling to the field. I still have more to tear out, but didn’t feel I had enough room in the truck this time.
Finds:
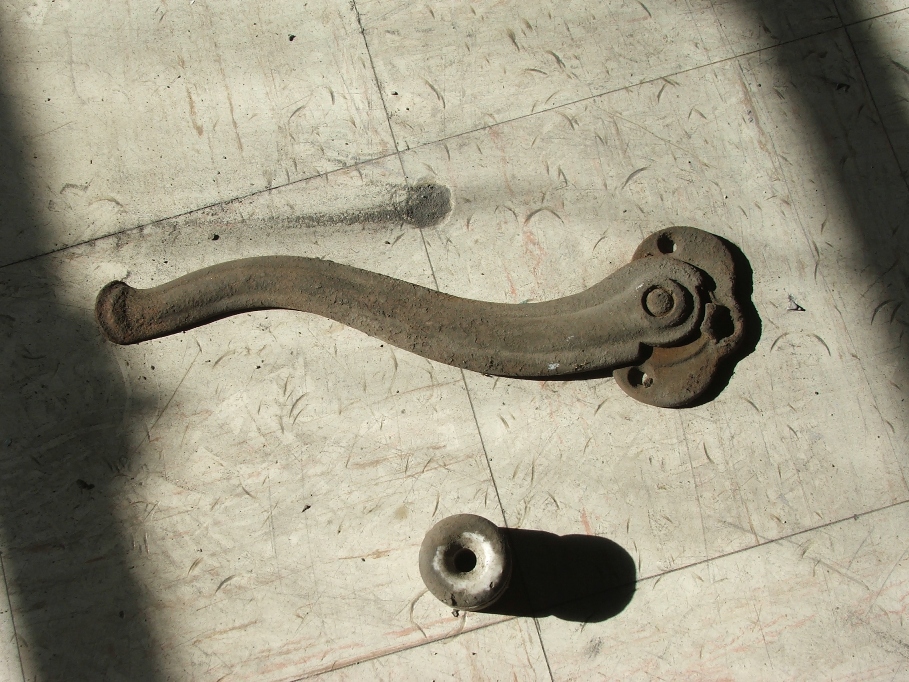
My guess on the metal item is that it was a door latch for a
wood/coal stove. The other item is an
insulator.
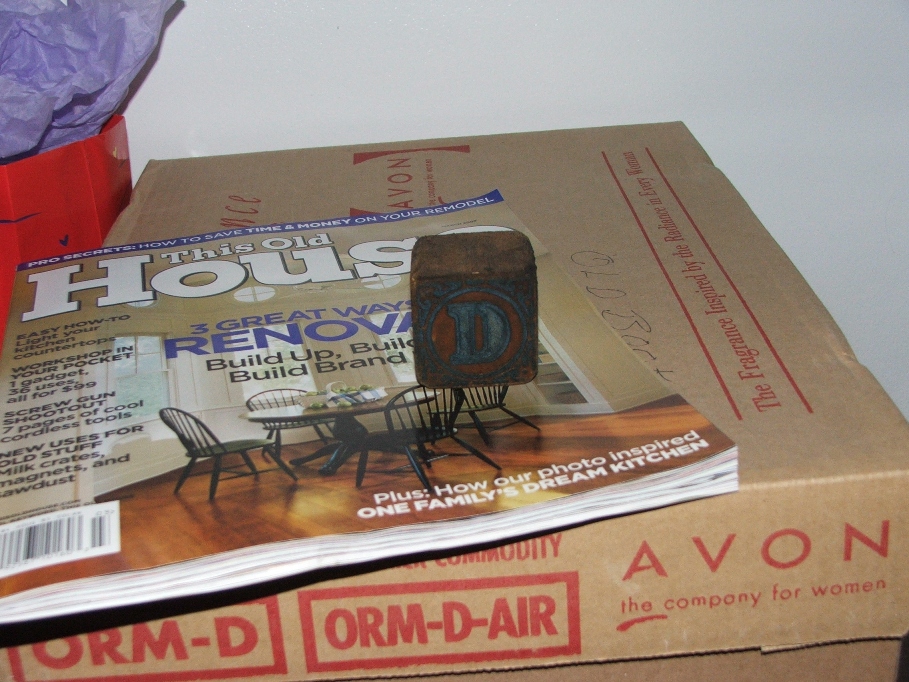
This wood block was discovered with the lath in the truck
when I emptied it. It only has letters
on two opposite sides, “O”…..
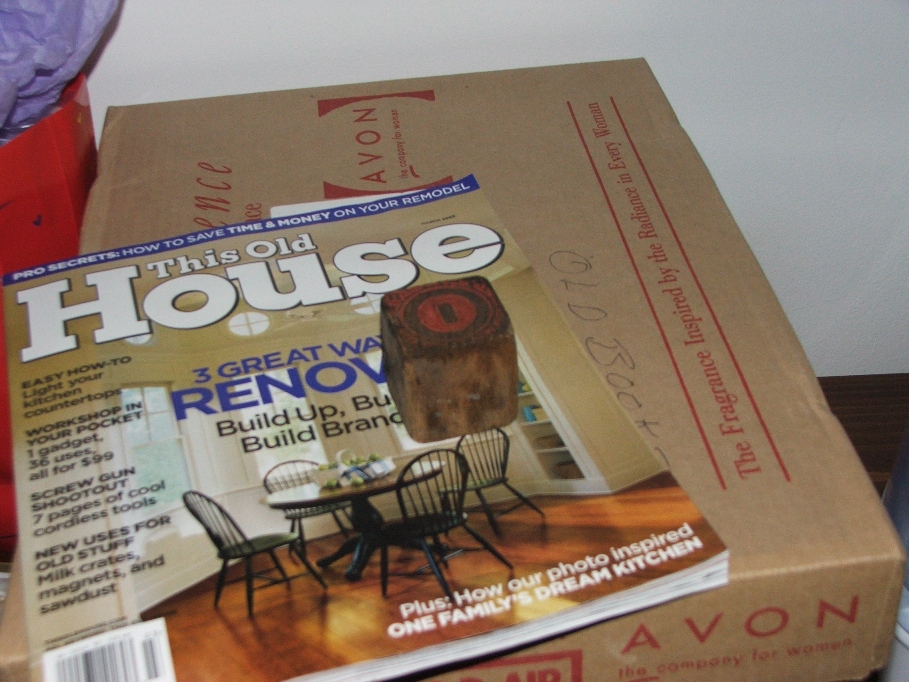
And “D”.
Feb. 28…Today was “appointment day”. We have been given an assignment from the
estate to contact an appraiser to look at the things that were in the safe
deposit box and other items we feel are
valuable. Additionally we need to get
hold of Brian Nawne (Delbert’s brother), to come and look at the house
“structurally”. Brian is a structural
engineer. Last, we need a plumber to
come and give us an idea as to the cost to move some pipes, and plumb for the
two bathrooms. We settled for a young
local guy named Keith Witt.
We made an appointment for the appraisal in Logan tomorrow at 11 a.m. with Mary Palmer. I don’t think this write-up will mention anything more about that. Brian however was free to meet with us this morning at 10. He showed up with a worker friend of his and together they offered us many, many ideas as to what should be done to bolster up the joists, put headers over the doorways upstairs and to add fire blocking between the room partitioning studs.
The big thing he told us about was “termites”!!! The upright in the old TV room is not dry rotted, but termites have eaten it until it crumbles! This is ugly. He says that we need to look for boards, supports etc. that are in contact with the soil. We need a minimum of 6 inches of space between the boards and the ground. This is the minimum to keep termites from being able to access the wood. Brian says that termites live in giant underground colonies and may be hundreds of yards from the house. Sub colonies send out scouts who locate places like ours and then the reinforcements come in to finish off the wood. These colonies may be working on several homes or structures in the neighborhood at the same time. When a termite exterminator comes in, they spray local stuff to kill the termites that are currently on site, then they put dry chemical around which the termites carry back to the colony with them and ultimately kills the whole group.
Since his meeting I have had a couple of restless nights sleep thinking about what I have to do to see the rest of the damage, and you know there has to be more than just the one board. I think about a few years ago when Rick replaced some outside sheeting under the North window of the TV room. At that time, we all thought it was dry rot. Those boards are next to the one we can see in the room. I will have to pull down the wainscoting on the North and West walls in order to see what other damage there is.
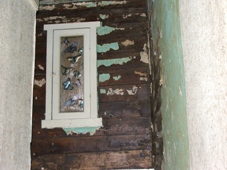
Mar. 2..Yesterday was visit with Mary Palmer in Logan, today is “finish off the TV room, small bathroom and stairs”. Sherry worked outside on the gardens around the front and South sides of the porch, while I destructed inside. It was slow going, as I wanted to salvage the pocket door leading into the bathroom. And when I got to the stairs, I had to watch for “support” boards and beams. As I progressed I also ran into wiring issues that had to be addressed before bringing down some of the boards. Because I didn’t take pictures in progress, the only ones I have are the finished look. I uncovered the old window that was behind the wall in the bathroom. It had been replaced at some time, and the bottom portion of glass was removed and wood put in its place. The upper part of the window was then hinged on the bottom and a short chain put in place to stop the window from opening more than half way. This would allow ventilation in the room as well as some light. The panes of glass had been painted with several coats of paint on both sides, so that no one could see a person inside the bathroom.
We made an appointment for the appraisal in Logan tomorrow at 11 a.m. with Mary Palmer. I don’t think this write-up will mention anything more about that. Brian however was free to meet with us this morning at 10. He showed up with a worker friend of his and together they offered us many, many ideas as to what should be done to bolster up the joists, put headers over the doorways upstairs and to add fire blocking between the room partitioning studs.
The big thing he told us about was “termites”!!! The upright in the old TV room is not dry rotted, but termites have eaten it until it crumbles! This is ugly. He says that we need to look for boards, supports etc. that are in contact with the soil. We need a minimum of 6 inches of space between the boards and the ground. This is the minimum to keep termites from being able to access the wood. Brian says that termites live in giant underground colonies and may be hundreds of yards from the house. Sub colonies send out scouts who locate places like ours and then the reinforcements come in to finish off the wood. These colonies may be working on several homes or structures in the neighborhood at the same time. When a termite exterminator comes in, they spray local stuff to kill the termites that are currently on site, then they put dry chemical around which the termites carry back to the colony with them and ultimately kills the whole group.
Since his meeting I have had a couple of restless nights sleep thinking about what I have to do to see the rest of the damage, and you know there has to be more than just the one board. I think about a few years ago when Rick replaced some outside sheeting under the North window of the TV room. At that time, we all thought it was dry rot. Those boards are next to the one we can see in the room. I will have to pull down the wainscoting on the North and West walls in order to see what other damage there is.
Mar. 2..Yesterday was visit with Mary Palmer in Logan, today is “finish off the TV room, small bathroom and stairs”. Sherry worked outside on the gardens around the front and South sides of the porch, while I destructed inside. It was slow going, as I wanted to salvage the pocket door leading into the bathroom. And when I got to the stairs, I had to watch for “support” boards and beams. As I progressed I also ran into wiring issues that had to be addressed before bringing down some of the boards. Because I didn’t take pictures in progress, the only ones I have are the finished look. I uncovered the old window that was behind the wall in the bathroom. It had been replaced at some time, and the bottom portion of glass was removed and wood put in its place. The upper part of the window was then hinged on the bottom and a short chain put in place to stop the window from opening more than half way. This would allow ventilation in the room as well as some light. The panes of glass had been painted with several coats of paint on both sides, so that no one could see a person inside the bathroom.
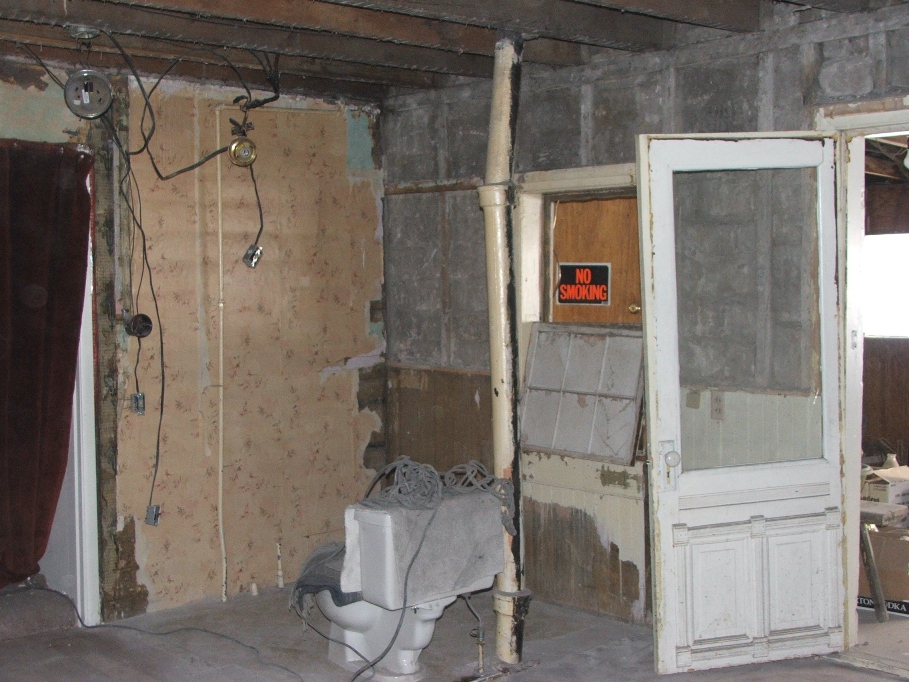
The “no smoking” sign is hanging on the door
leading from the porch to the kitchen.
The plumber will take the toilet out and cut the vent pipe off below the
floor level. He will cap it with a
stainless steel “forever” cap. The pipes
against the wall surprised me at first, but as I recall when I was a youngster
taking a bath in this room, those pipes have always been there. When I take up the flooring to cut the vent
pipe, we will also cut these pipes off below floor level.
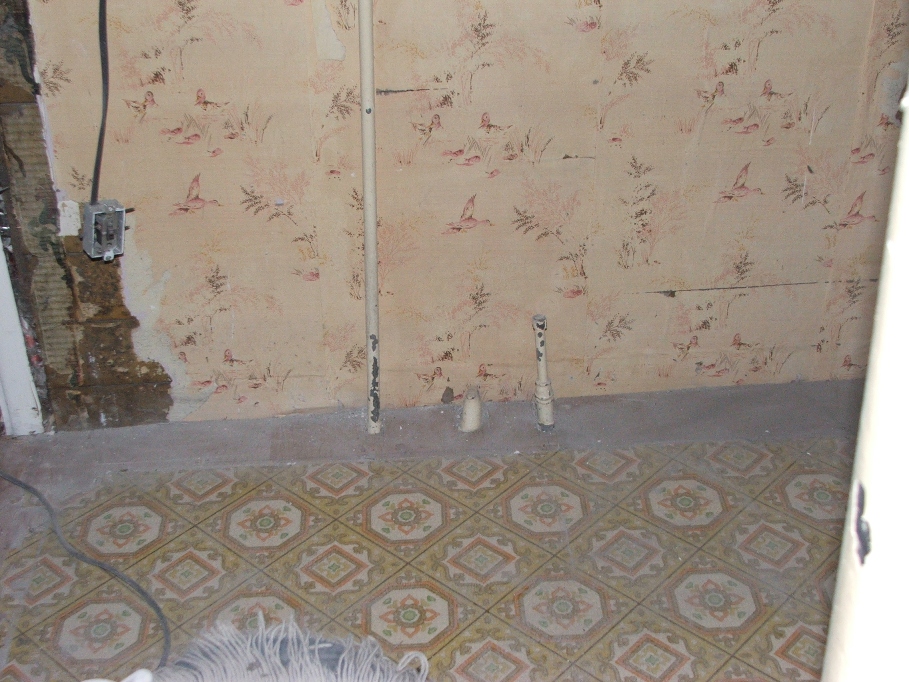
Now there are only the stairs left to take out of this room and it will all be open.

The stairs are now gone! Sherry would like a curved set put in their
place if we can. We would also like to
somehow incorporate a support column that will be needed to support the
ceiling/floor joists above.
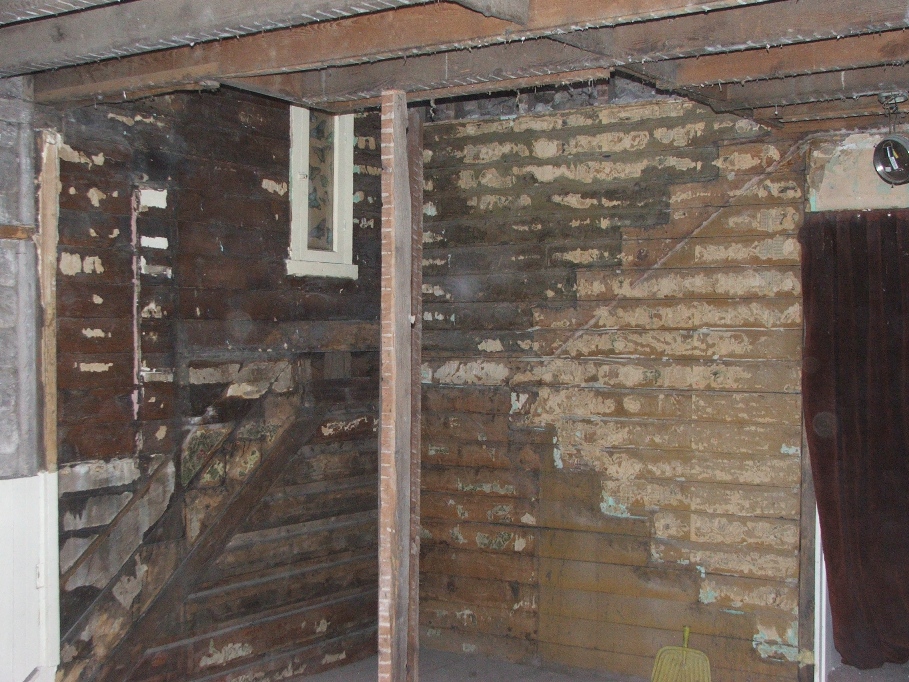
You can sure see the old outline of the stairs. The original steps came up from the left side and the ones we just took down came up from the right.
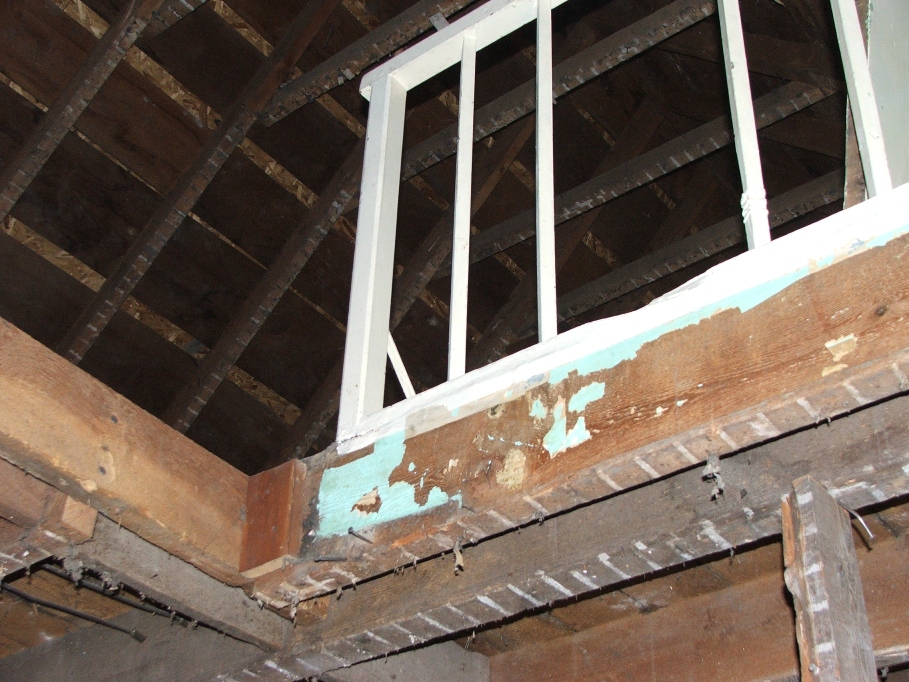
Looking up into the attic area above the stairs.
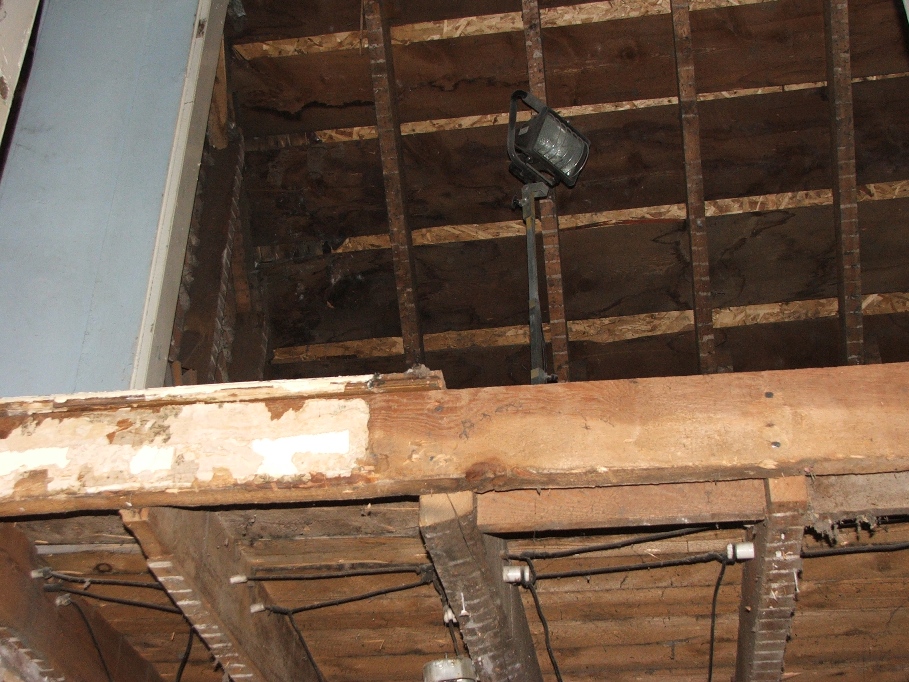
The camera is now at the same level as the old landing on the stairs and the view is of the point where the top of the stairs was braced against the attic floor.
The stairs came down fairly easily, and as it did, I
realized they weren’t very safe! The
bottom of the set that went from the landing up to the attic, was only held by
the upright boards that made up the East wall of the closet. Only a small part of a 2X4 touched the
landing on the West side. I could
picture a couple of healthy guys carrying a heavy “something” up those stairs
and them collapsing. All of the stair
support planks were split lengthways, which showed me there had been a lot of
times where excess weight was put on them.
I’ll have to rig a temporary ladder to get us upstairs for a while. In the meantime, my emphasis will be downstairs to figure out the termite issue and get things straight with that.
Here are some flicks of different viewes etc.
I’ll have to rig a temporary ladder to get us upstairs for a while. In the meantime, my emphasis will be downstairs to figure out the termite issue and get things straight with that.
Here are some flicks of different viewes etc.
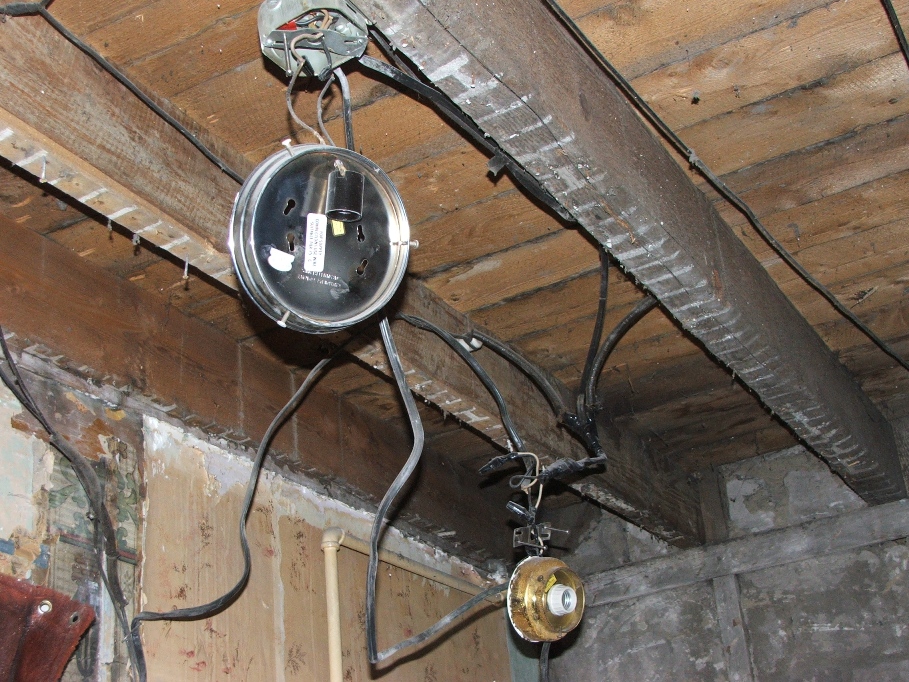
Wiring issue.
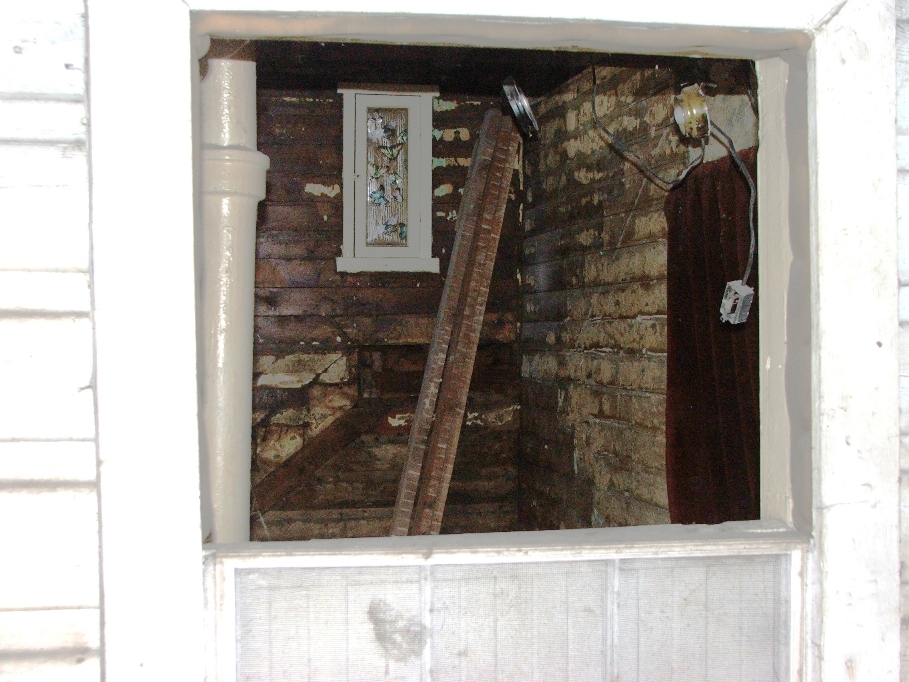
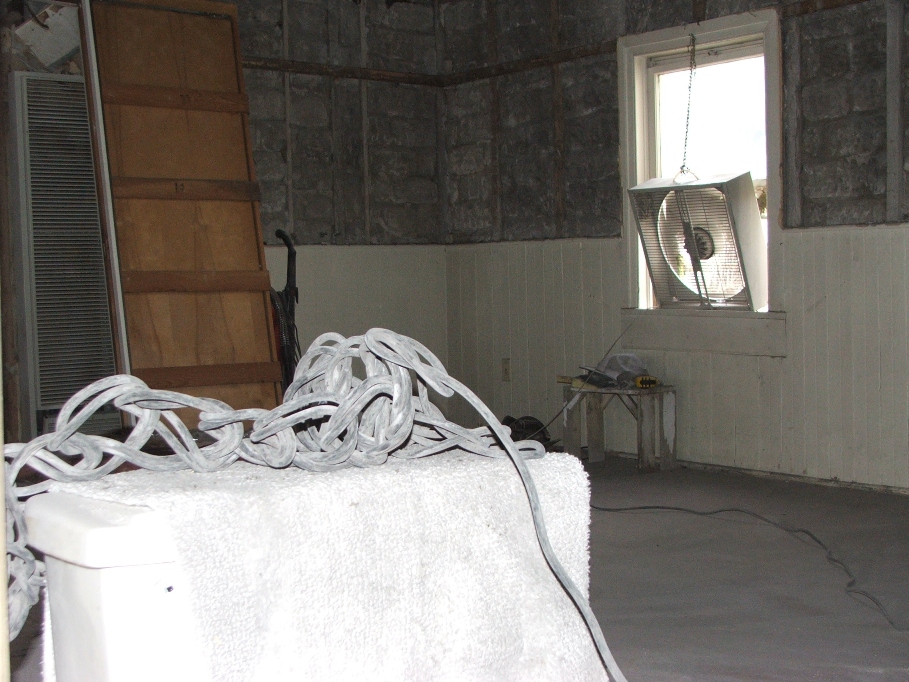
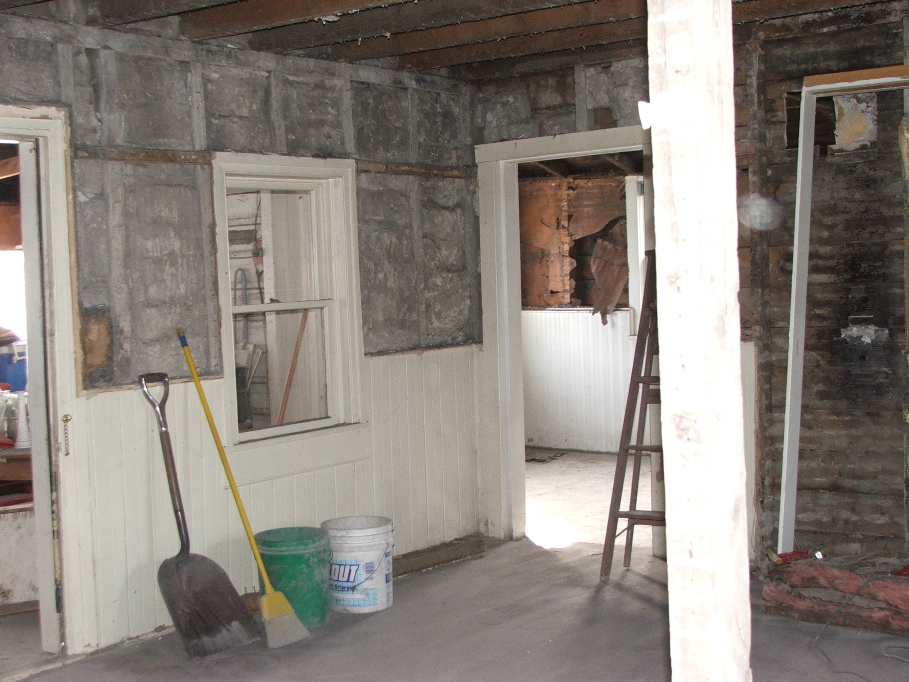
Mar. 4…Today started about a half hour earlier
than we had planned, but that’s ok. I
had asked Rick if he could help me with the sink in the washroom and we had
planned to pull it down about 10 or 10:30, at 9:15 he called and was ready to
move on it. I met him over there about
9:30 and it didn’t take too long to pull it off the wall. It has three mounting brackets that small
tabs on the back of the sink slip into.
That’s all that holds that heavy sink up. The sink is cast iron, coated with porcelain,
and weighs about 125 pounds, maybe more.
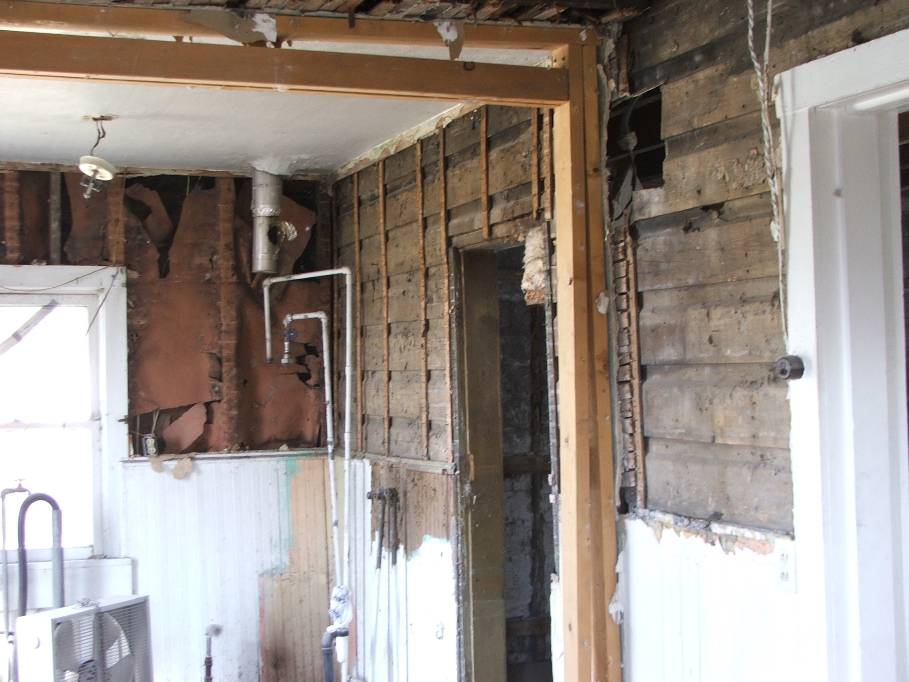
Once that was done, I disconnected the water
heater and drained it. We had to go to
town to get a couple of pipe caps in order to turn the water back on. When the water heater was out, we were ready
to pull out the wall furnace. That took
only a few minutes and it was gone.
Today’s surprise came when we looked at the hole in the wall where the
furnace stood….it used to be a door way!
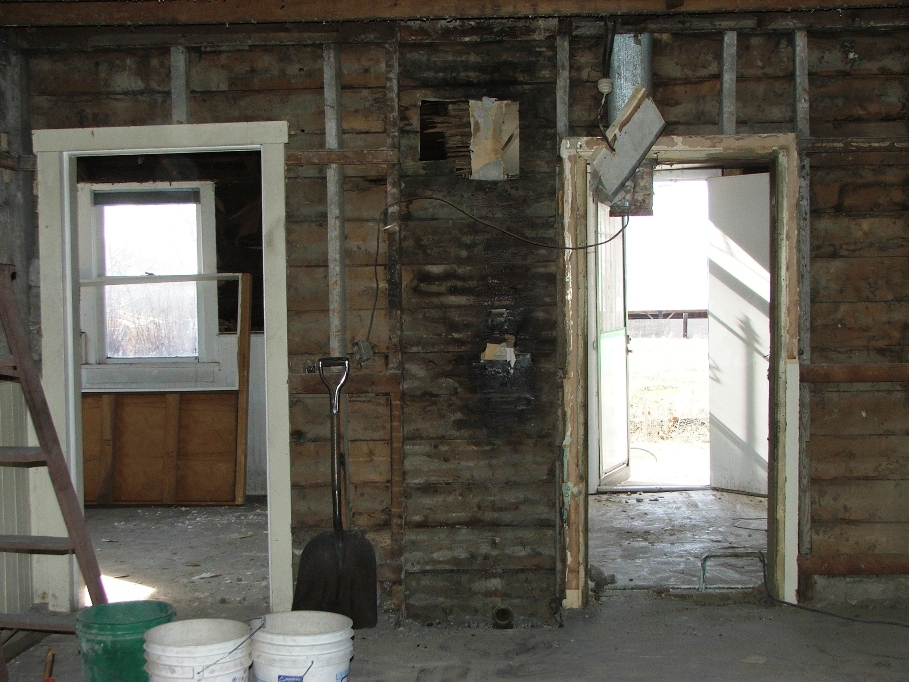
Next, I started by pulling wainscoting off the North and
West walls of the TV room, while Sherry pulled lath and plaster off the walls
in the wash room. With the wainscoting
down, I took the adobe bricks out and stacked them against the fence. We have quite a nice stack of adobe. I’m not sure what we will do with them, but
we have them none the less.
Inspecting the uprights on the North wall yielded a few signs of termites. Enough that I will have to pull at least 10 floor boards up inside the room to give me enough room to work at replacing boards and inspecting the floor joists. We sure are hoping the repair won’t take much of our limited cash.
Next week I will take down the “last” of the lath and plaster in the washroom. Once loaded in the dumpster, we can call Greene disposal to come and get it. We will be done with that phase.
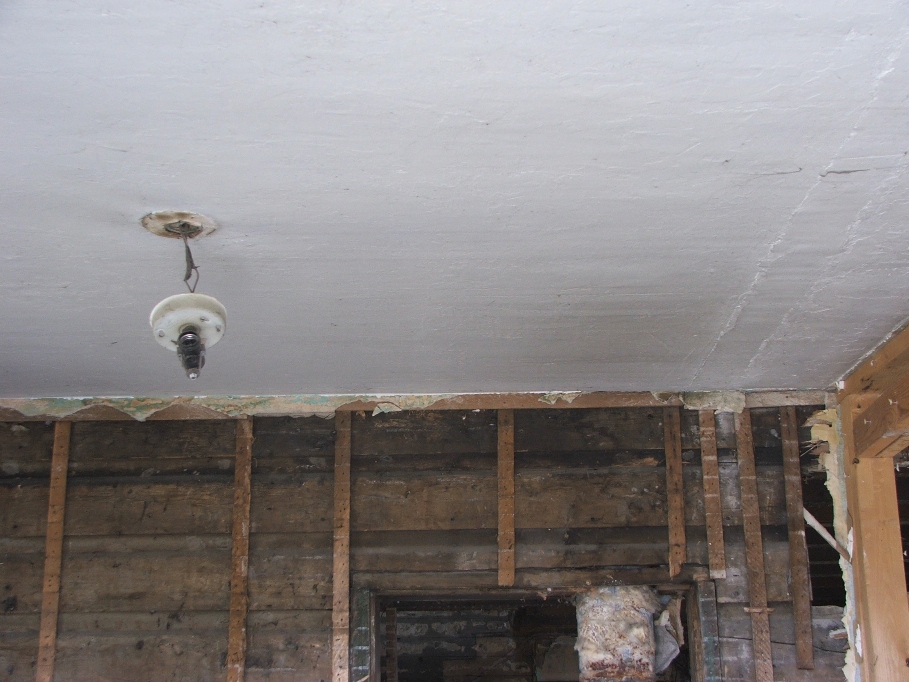
Things sure look differently once the walls are removed and
things are opened up. We did manage to
salvage the two pocket doors. I plan to
use them on each of the two new bathrooms.
We also have to take down the boards separating the washroom from the TV room, remove the old furnace flue pipes and take the wainscoting off the walls in the washroom and little bed room. Quite a bit left to go
New finds: I didn’t take any pictures of them, but I did find a nest of about 6 mice that succumbed some time ago, they were just skeletons and Sherry was OK with that. The other things are in this picture.
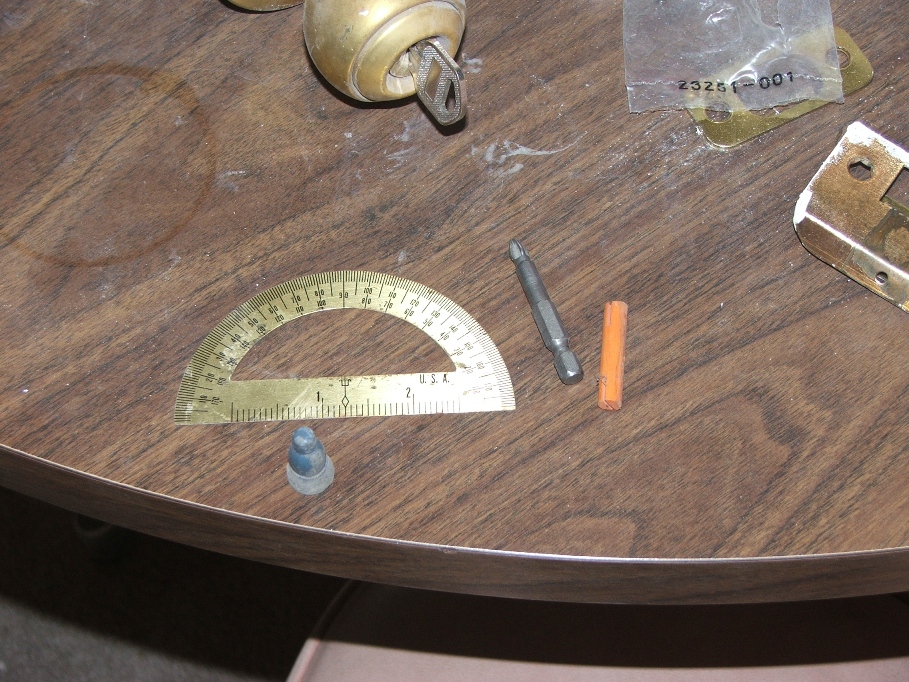
A small brass protractor, a Phillips screwdriver bit, a blue
game “taw” and a small yellow
”Tinker Toy” peg.
Mar. 8…Today is “pull the last of the lath and plaster down”!!!! I started early, as Sherry went off to a yoga lesson. The last of the lath and plaster came down pretty fast, as all I had was that in the wash room. I also took down the frame work that was separating the wash room from the small bedroom. This opened things up real good.
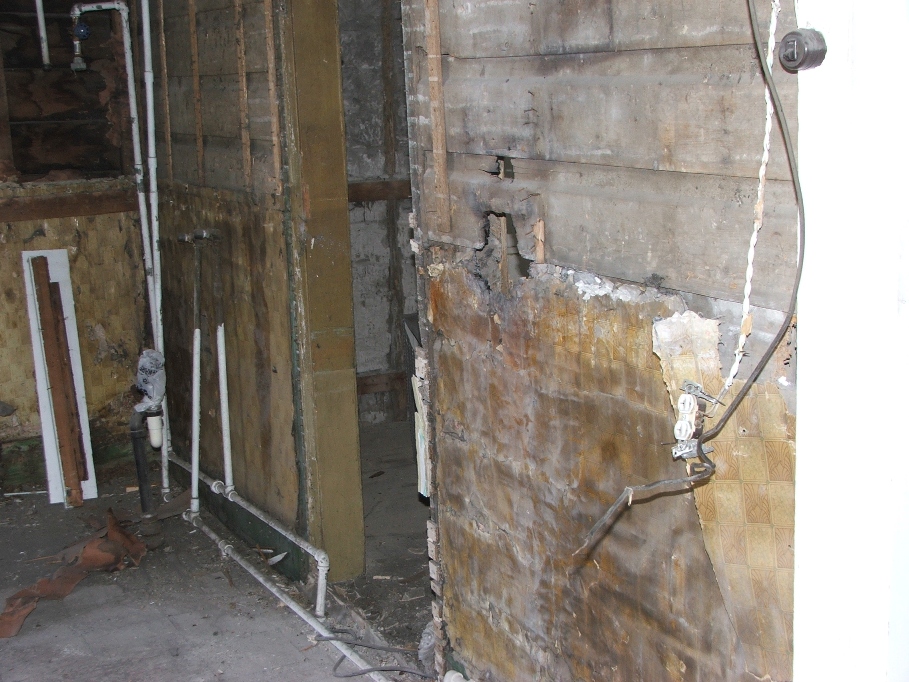
Especially once the wainscot was taken
down. Behind it was a couple of layers
of wall paper. On the East walls the
wall paper had been attached to the wood which was once the outside of the
house. On the North, West and South
walls it was attached to what looked like “rug material”. This cloth material had been soaked in an oil
or wax so as to make it water repellent.
Then the space between that and the outside boards of the house they put
sawdust, as insulation. LOTS and LOTS of
sawdust!
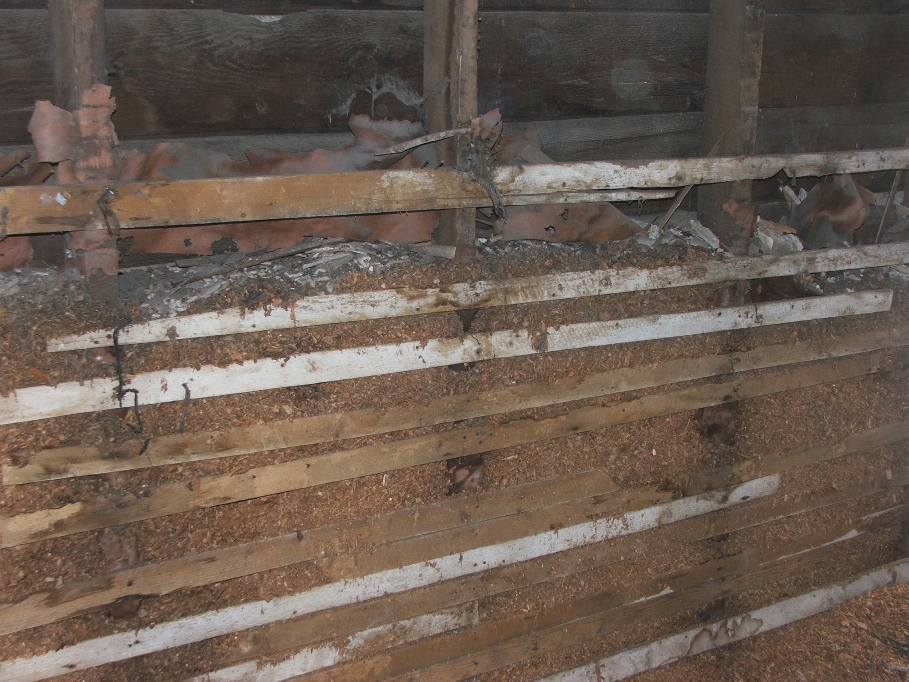
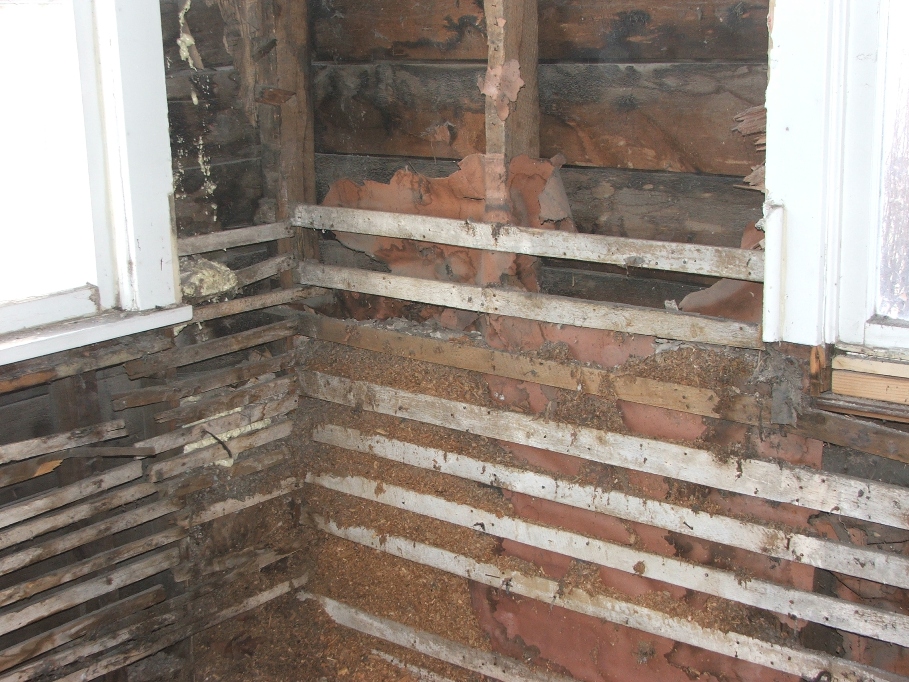
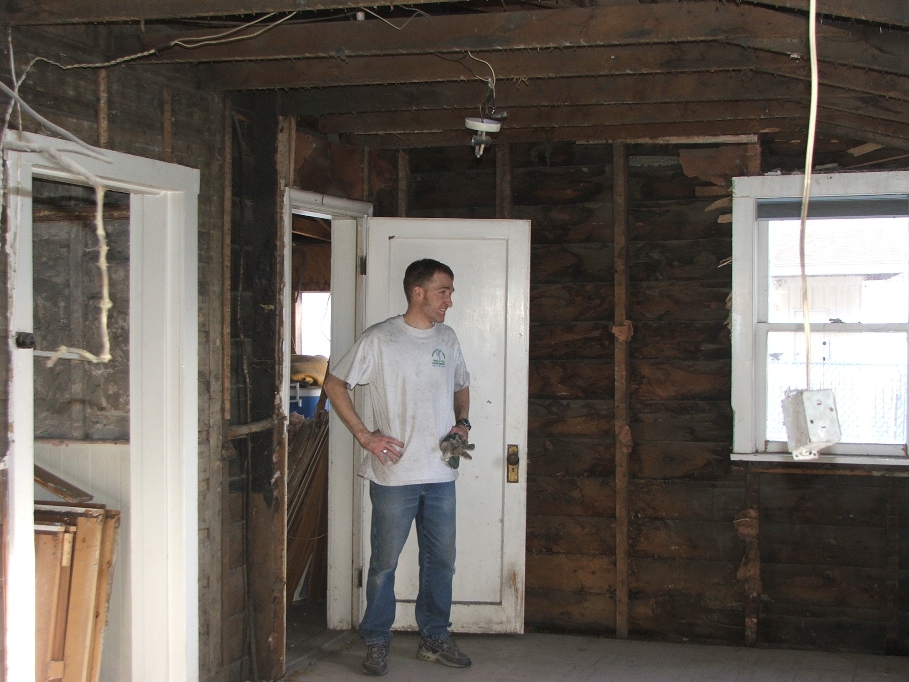
Mitch and Angela came down from Logan to “get away from the
inversion and cold”, and he came to help me out. When the last of the wainscot was put in the
truck, we had to run it to the field and unload. I didn’t get a picture of that load, but it
was nearly as high as the truck cab.
When we came back we started pulling down the wallpaper and cleaning up the sawdust. Those two things filled the truck again.
When we came back we started pulling down the wallpaper and cleaning up the sawdust. Those two things filled the truck again.
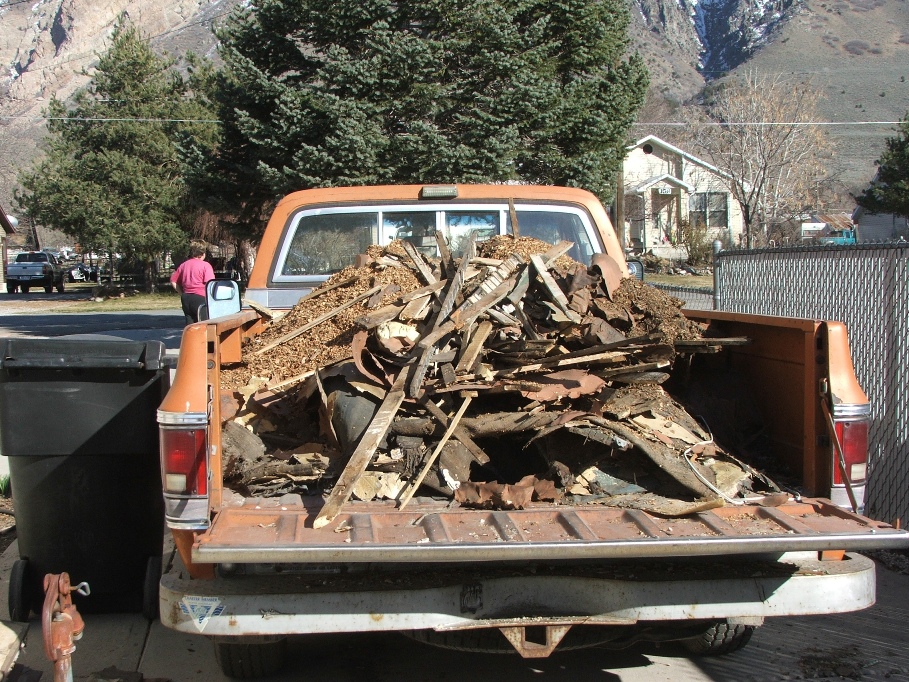
But won’t be heading to the field until tomorrow.
Under the South and West windows we had wet sawdust! And it was really moldy. Not a good thing to be seeing. We also encountered rotten wood! Maybe more of the termite issue. I’ll have to pull the fake brick off the outside of the house to see the extent of the damage. That will be tomorrow’s project.
Todays find was quite a surprise. It just “showed up” on the floor and was quite a nice surprise indeed.
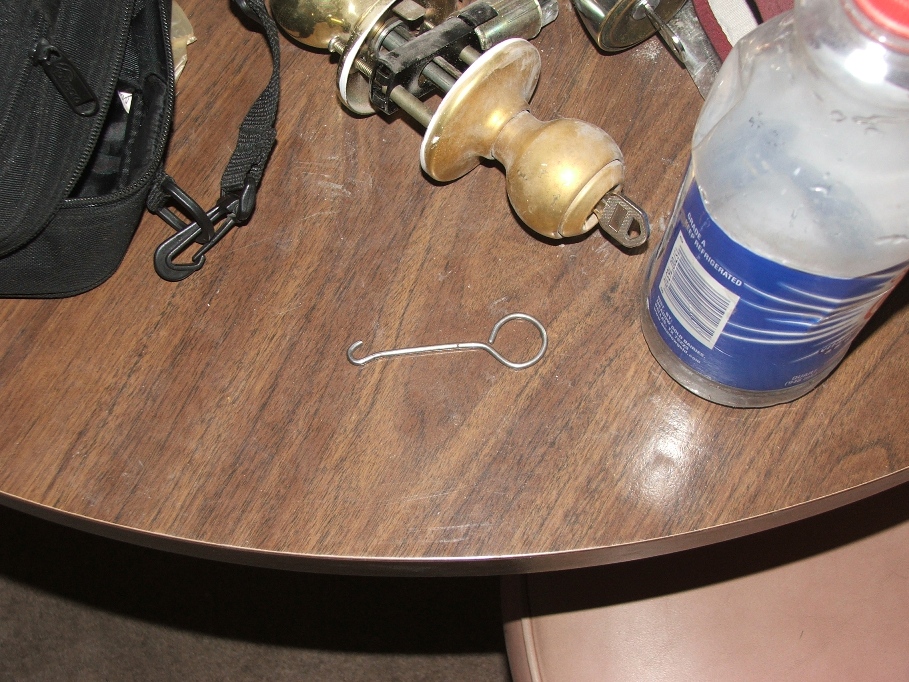
How about that, a brand new button hook. They must have lost it close to the day they
got it.
Mar. 9…Today is the day to rip down some of the outside wall stuff, in order for us to see the termite damage. I don’t relish this day. I took several “Before” pictures and of course lots of “after” flicks. Dad and Mom had a fake brick façade put on the house in the mid sixties so that “Mom wasn’t living in an antique”. She was sick and tired of living in a house built in the 1800’s and wanted something more modern looking. I quess no one can blame them for that. The next series are Before:
Mar. 9…Today is the day to rip down some of the outside wall stuff, in order for us to see the termite damage. I don’t relish this day. I took several “Before” pictures and of course lots of “after” flicks. Dad and Mom had a fake brick façade put on the house in the mid sixties so that “Mom wasn’t living in an antique”. She was sick and tired of living in a house built in the 1800’s and wanted something more modern looking. I quess no one can blame them for that. The next series are Before:

North side of the back of the house.
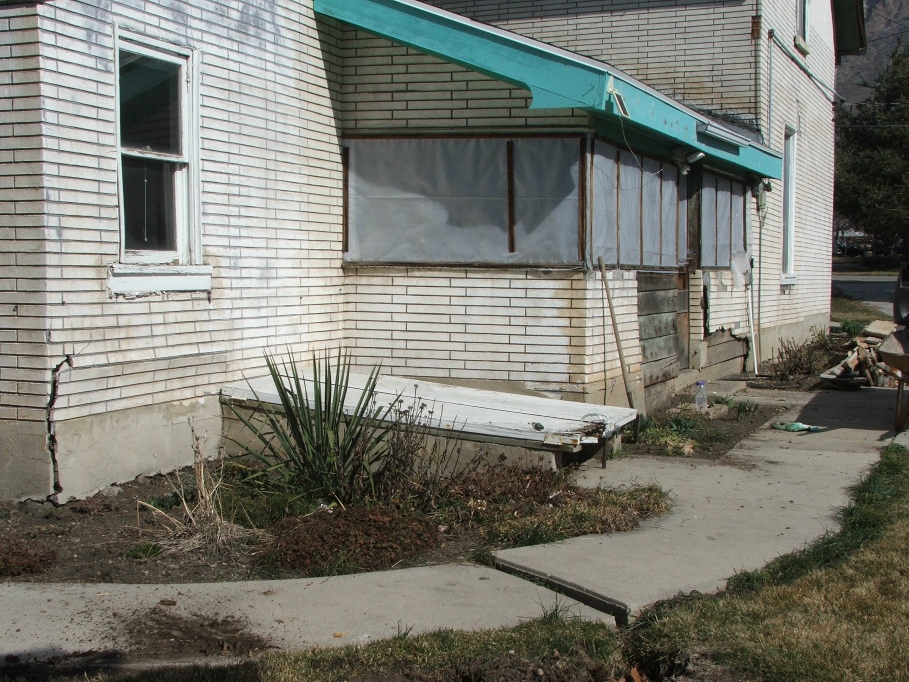
South West corner of the back of the house (looking East).
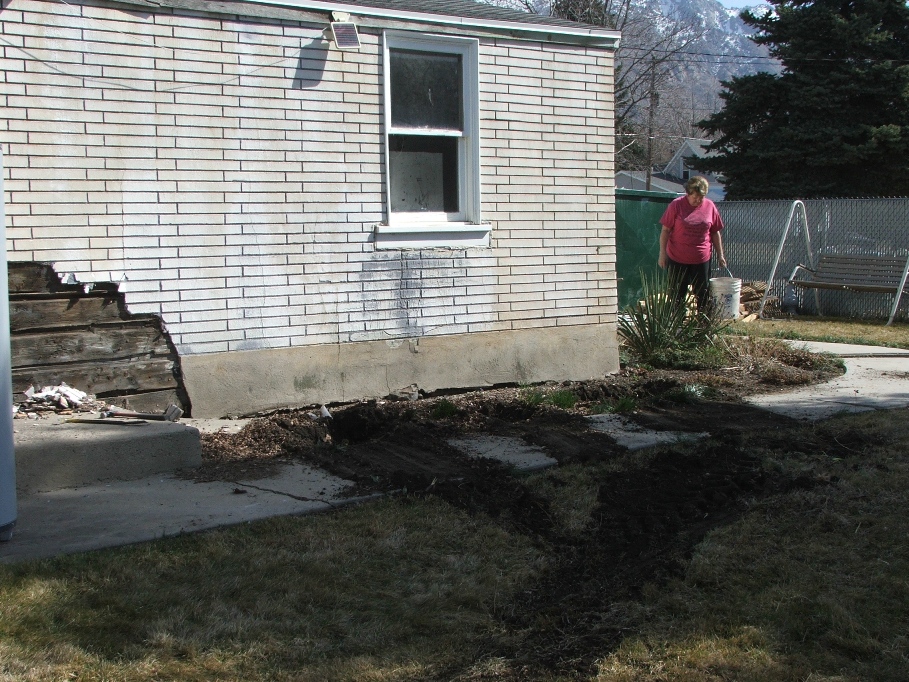
West side of the back of the house.
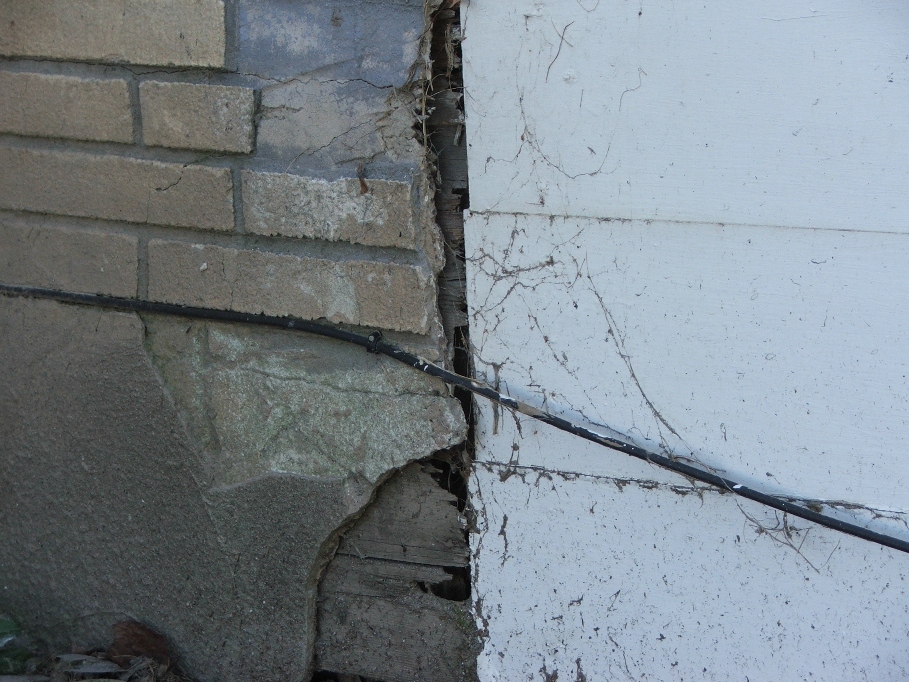
Close up of just East of the “fix” Rick did a few years
back. The wall fell away from the house
just under the window on the North wall of the TV room.
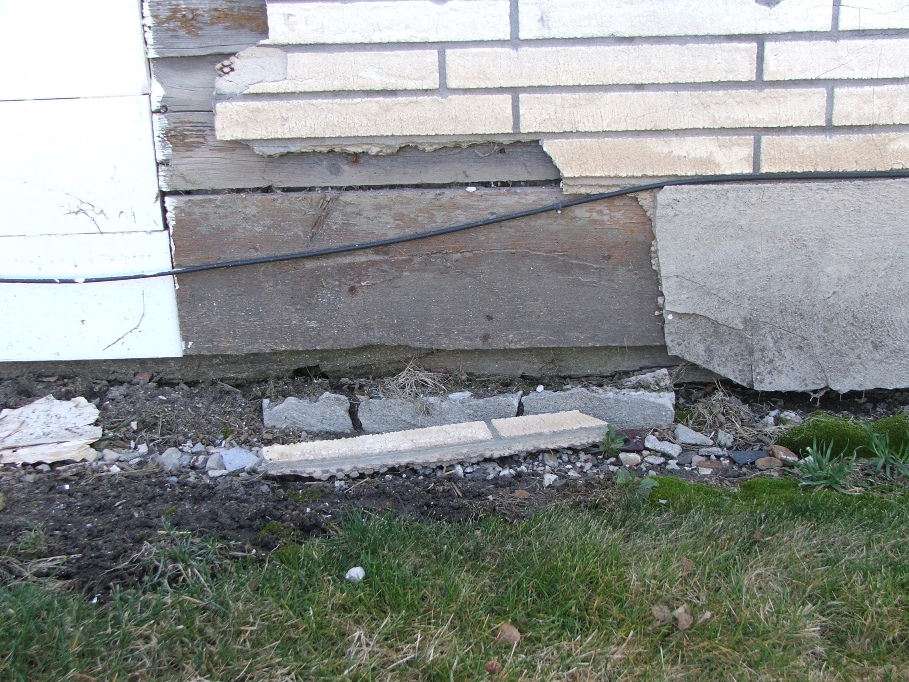
This is the other side of the same window that Rick fixed.
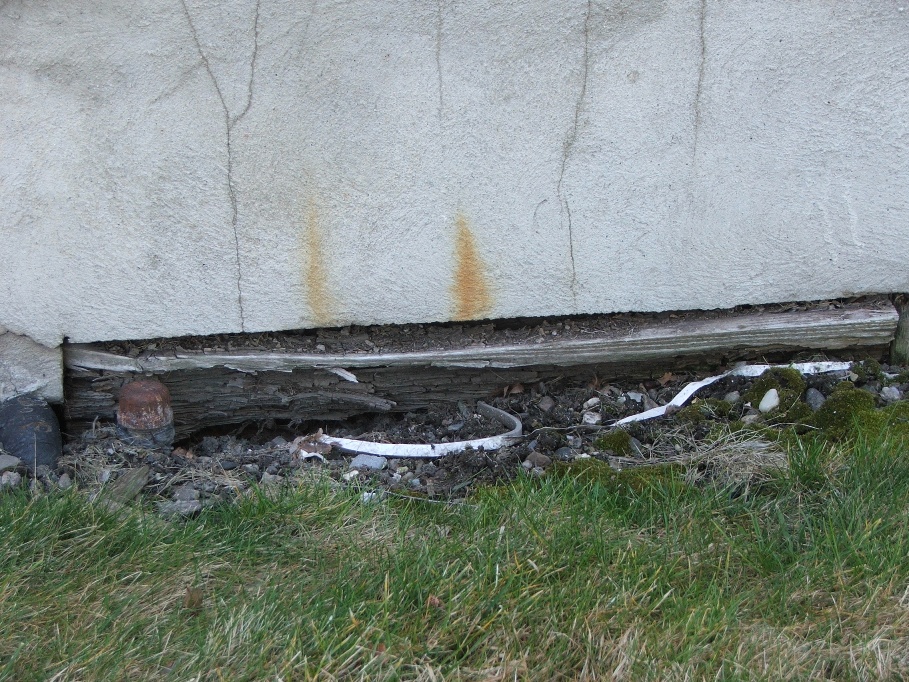
If you were to remove the grass and dirt here, you would be
able to toss potatoes into the fruit room potato bin. Not a very good looking window frame. We will know the extent of the damage as soon
as I can get some of the fake brick plaster off of the house.

I began on the East side of the window and
worked my way to the bathroom, and then down the side of the house toward the
West.
The bulk of the damage is on the bottom, and extends as high as the bottom of the windows. Some areas being worse than others. Some of it looks like it could be termite damage, while other looks to have just gotten wet, and rotted the wood siding. At any rate, the bottom support wood needs to be replaced, and some kind of support layed under that. It will require digging around the outside of this part of the house. I plan on calling in Brian Nawyne again to look things over and suggest a plan. I don’t want to pull up the flooring inside, but I might have to in order to see the extent of the damage.
On the West side, the ground, rock foundation and large cement step seem to each have taken it’s toll on the way the framing sits. There has been water getting behind the cement step, which has not been good for things, and the water dripping off of the “gutter less” eves has caused a couple of foundation rocks to fall into the cellar, consequently washing dirt into it as well. This has given a “freeway” for bugs and critters to crawl in and out at will.
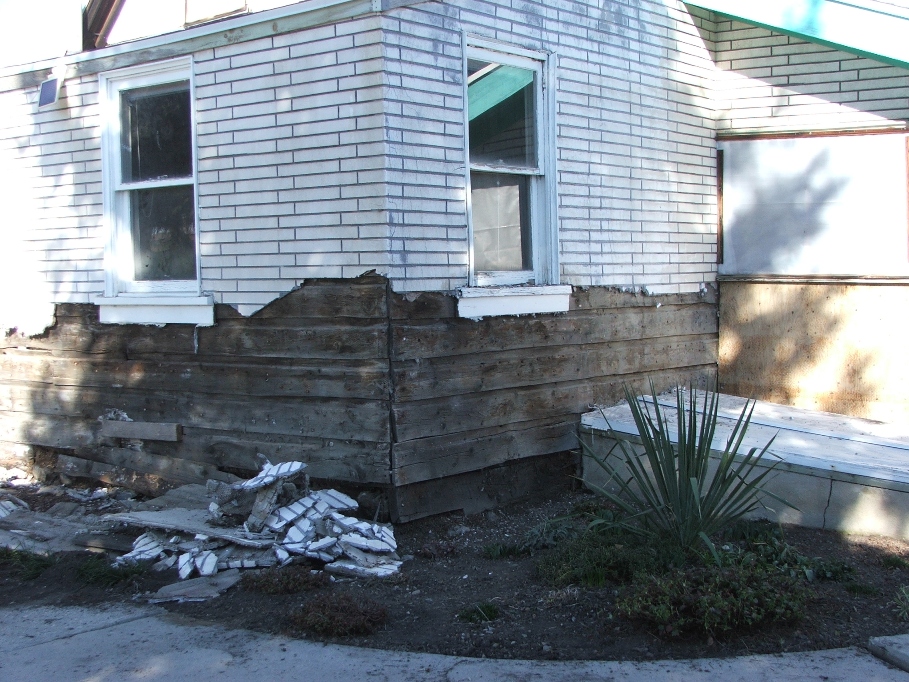
Look close at the bottom of the house, near the Left side of
the picture. The two loose boards are
covering a large hole leading into the cellar.
The 2X4 I tacked above those two loose boards is covering a nice big
hole leading into the small bedroom area.
Water has also gotten between the cellar door and the house and rotted those boards as well. When Mitch and I cleaned out the wood chips, this was one of the wet areas.
It’s sad to think this damage has occurred, but at the same time, this is why we are tearing things apart in order to find exactly what we are faced with on repairs. It’s better to find it out now, rather than after pumping in $20 to $30 thousands dollars in fix up and then find this kind of thing.
Even though it’s been a depressing day of looking at damaged areas needing to be fixed, there is still some bright things that have come from the day. We have again filled the eight yard Greene disposal unit and I called “Jamie” to have it hauled off, and for them to bring another 8 yarder. We were down to their shop last Monday clearing up the billing we had received, and while there I noticed a sign above Jamie’s desk that read something about Customer Service and “If we don’t take care of our customers, who will”? The last sign had the logos of all of their local competition surrounding the words.
The conversation went something like this: “Jamie, this is Wynn Zundel from Willard”, “Hello Mr. Zundel”, “Jamie, before you say you can’t do what I am about to ask, I want you to look up above your desk and see the signs about customer service and who will take care of our customers if you don’t”, with a chuckle in her voice…”You aren’t supposed to notice things like that in my office. Now just what is it that you need”? “I need you to come out here and pick up this full 8 yard unit and bring me an empty one…today”. There was a short silence…”He just left to deliver at another site, I don’t think we have enough time today to do that”. “Jamie, the signs”. “I know, but….” I interrupted her with a laugh, “That’s OK, what about tomorrow”? “Tomorrow it is”.
I had fun with her, even if she didn’t. And now we have another full unit! That makes a total of 38 yards of material that has left this house.
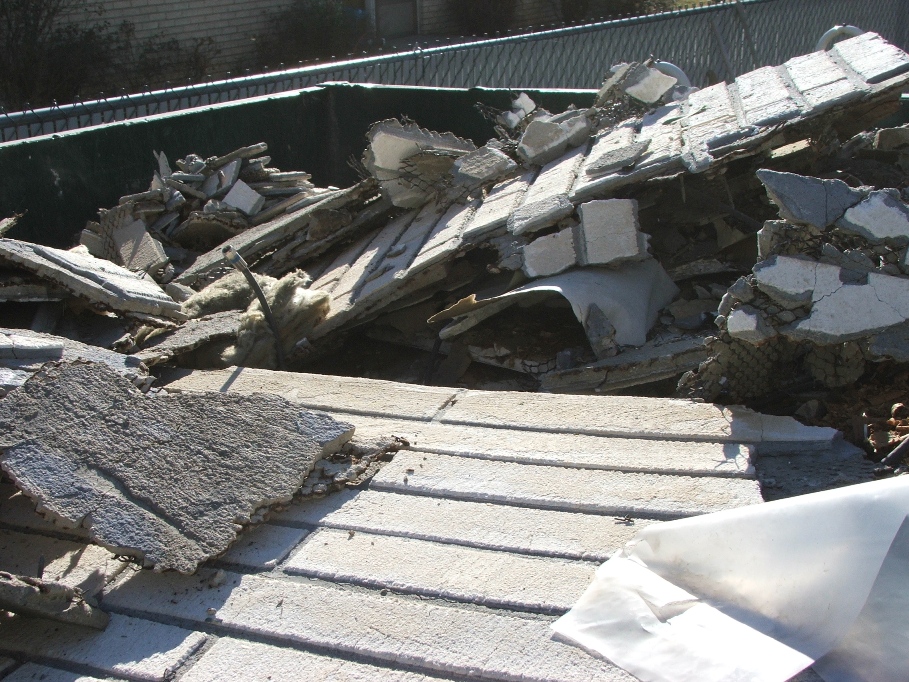
Also, we found where some little “shi_ as_es” did some
carving. Check this out!
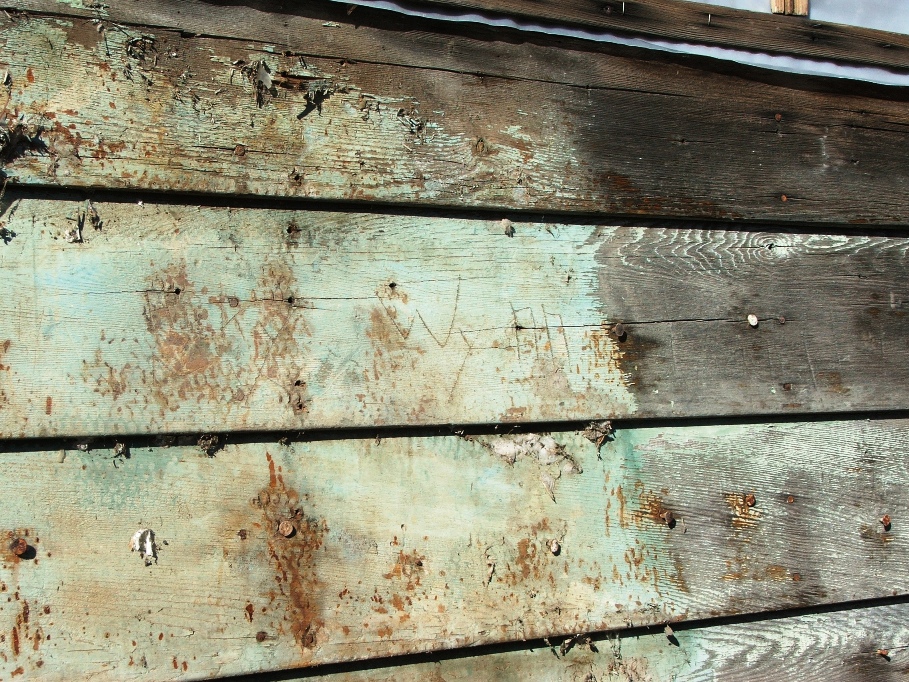
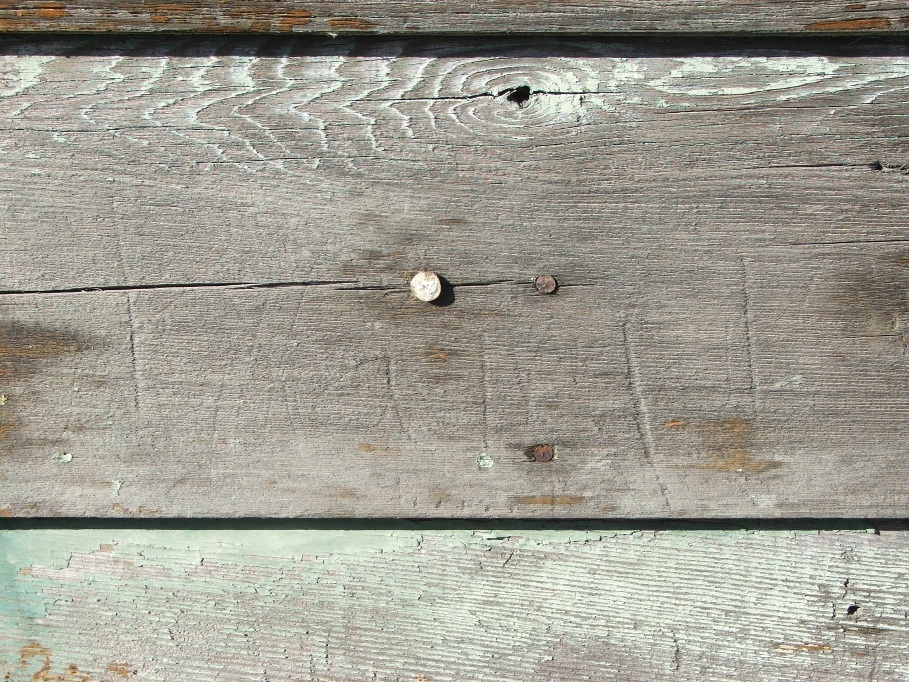
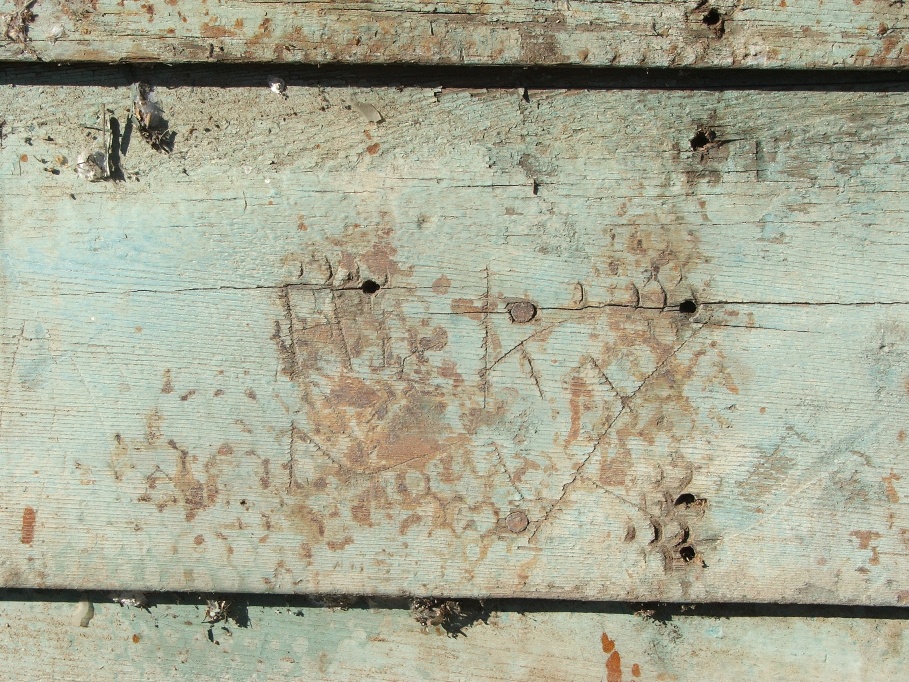
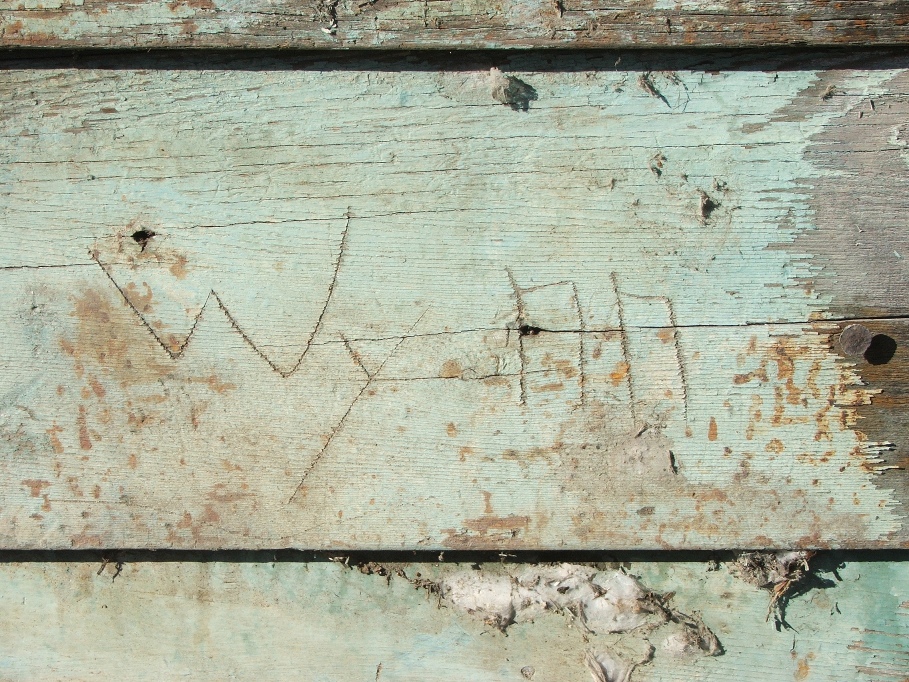
Look closely at the left picture. “Ramona”, not as deeply scratched, probably
because she couldn’t be trusted with a pocket knife, and had to use a rock.

Who was "K"? Dee can probably answer this one!
Also, todays find. It wasn’t until we were emptying the truck in
the field, that Sherry uncovered the find of finds! Where it fell out of in the house is anyone’s
guess.
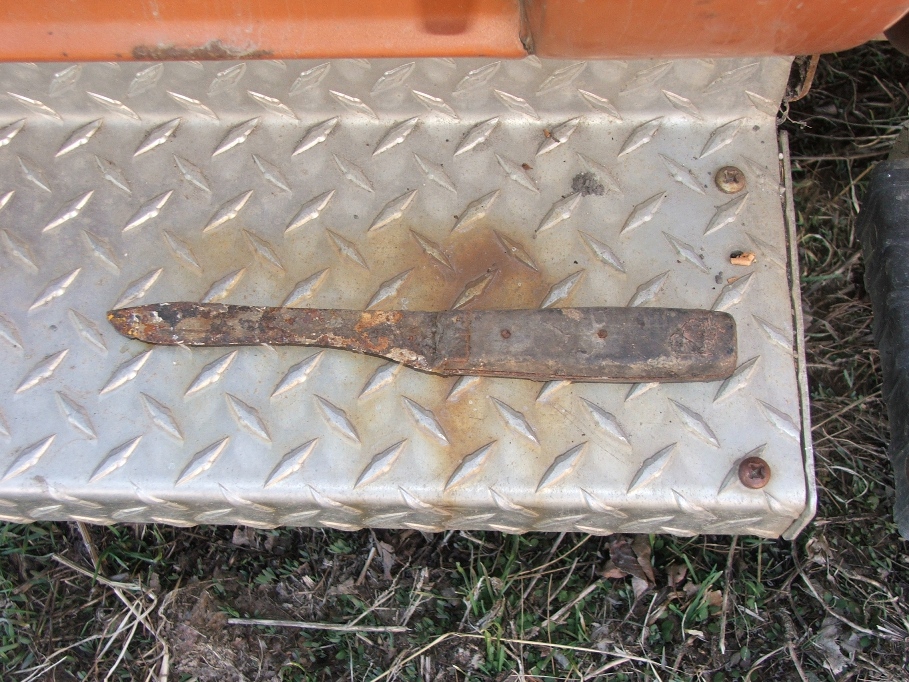
This knife has seen a LOT of sharpening in its day.
Mar. 10…Today is my day to take more of the fake brick off the back of the house. I called Brian Nawyn and asked him to come out and look my situation over and maybe give me a bid on fixing the foundation issue. He said he would later this day, but at that very moment he was picking up a box of items that fell off his truck and onto the freeway. He also had to finish building a bowery before he could come to my place.
I was delayed about an hour while I showed Jeff Beard and Bob the destruction so far. Jeff was impressed by the amount of destruction Sherry and I have done. I really think he can see the amount of work that’s been done. Others look at it, say they can see the work, but I just kind of doubt they realize all that has gone into it.
I had scheduled Greene Disposal to come out and pick up the full can and drop off another. When he arrived he was a bit apprehensive about the trucks ability to pick it up. We put the cover on it anyway. Much to my surprise the results of his attempt ended like this….
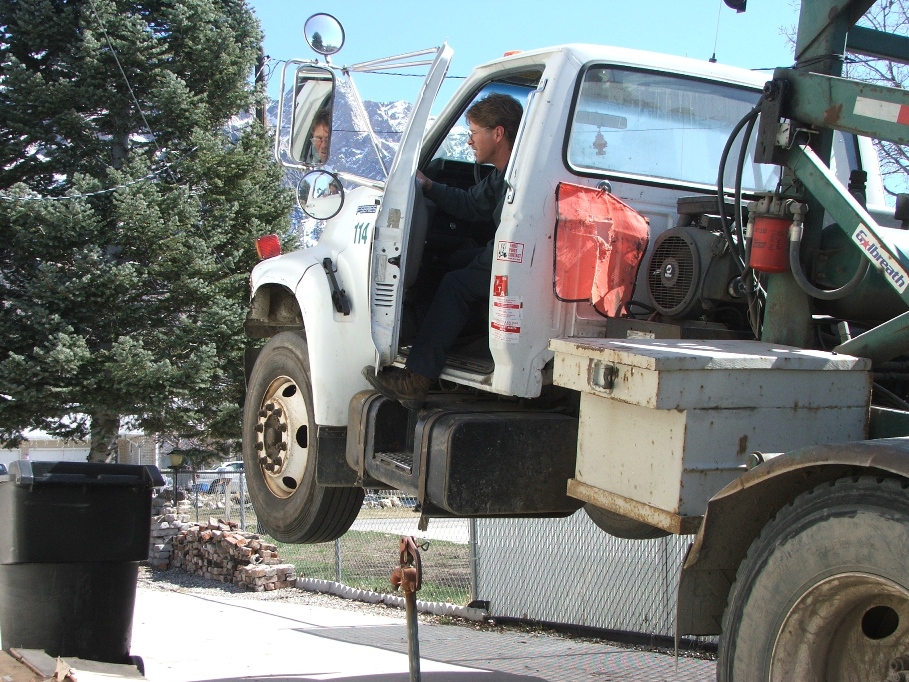
What Now?!?
The only thing that could be done was for him to put the empty one next
to the full one, and for me to move material from the full one to the empty
one. Nasty thought! But that is exactly what I did. Moving that material was a killer. It was mixed up, caught up, jambed up and
every other “UP” you can conceive. My
butt was kicked after only moving about 1/4th of the material.
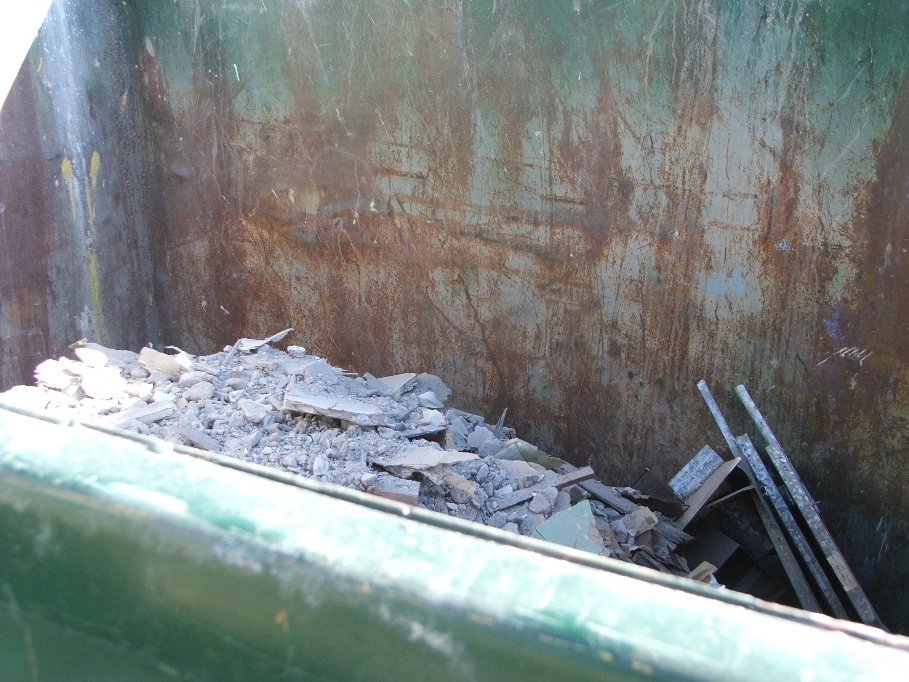
I called Jamie down at Greene and told her I
needed reinforcements. Did they have
another truck that might be able to pick that thing up? She said she would send the same driver out
today and see if he could pick up the two dumpsters. If he can’t he will call a front pickup type
truck that will be in the Willard area to see if it can pick up the fullest
one.

I sure hope they can. Once they are gone, I want Greene to deliver
a 15 yard roll off. I know I can put the
rest of the fake brick in one of those.
This is all going to cost a bunch more than we had planned, but what the
heck! Like they say, “Where there is a
‘WILL’,
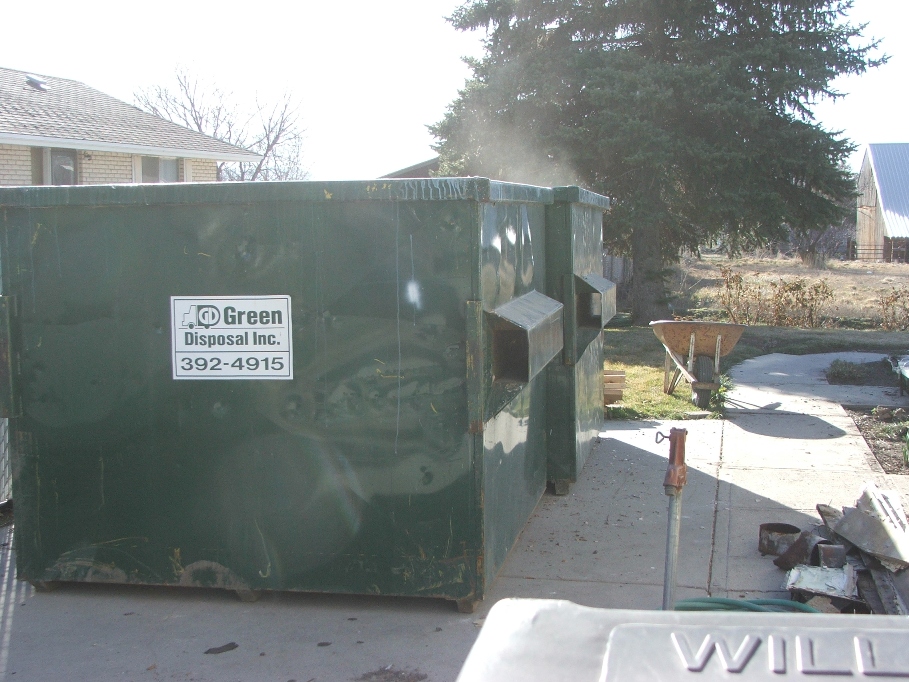
WILL.....There is a way!

At the end of the day this is what the back of
the house looks like.
I have a meeting with Ted Baird on the farm property tomorrow, and maybe Brian will come over, other than that I plan to pull down more fake brick.
Mar. 11…Many interruptions today! Just as Ted Baird was leaving, here came Greene and Company to pick up the two 8 yard dumpsters. He had quite a time getting the fullest of the two out to the front of the house. It was easy for him to “pop wheelies”, which he showed us several times. I had printed two pictures of his truck in the air from yesterday and gave them both to him. One for himself, and one for Jamie to pin on her desk as a reminder to tell customers about loading the bins.
While he was here moving dumpsters, over came Jerry and Roy Torgeson and Bob. Jerry wanted to see the inside of the house, so we went in and made the tour. He offered his company discount on materials through Burton Lumber Co., in Ogden. He also had lots of opinions on how to fix the foundation problems in the back.
When the tour was about over, here came the Greene front load dumper, to pick up the fullest dumpster and empty it into his self container. He commented how heavy it was and that his truck was “barely” able to pick it up and dump it. I watched as the hydraulics strained to do the job. Wow! I really had that baby loaded!
It wasn’t very long and here came another Greene dumpster…this time a 15 yard unit and I had him put it out by the wood shed, so as to not take a chance on cracking any more cement. It will be a little farther to haul the stuff, but what the heck, I’ve already caused myself a lot of extra expense. Labor is cheap.
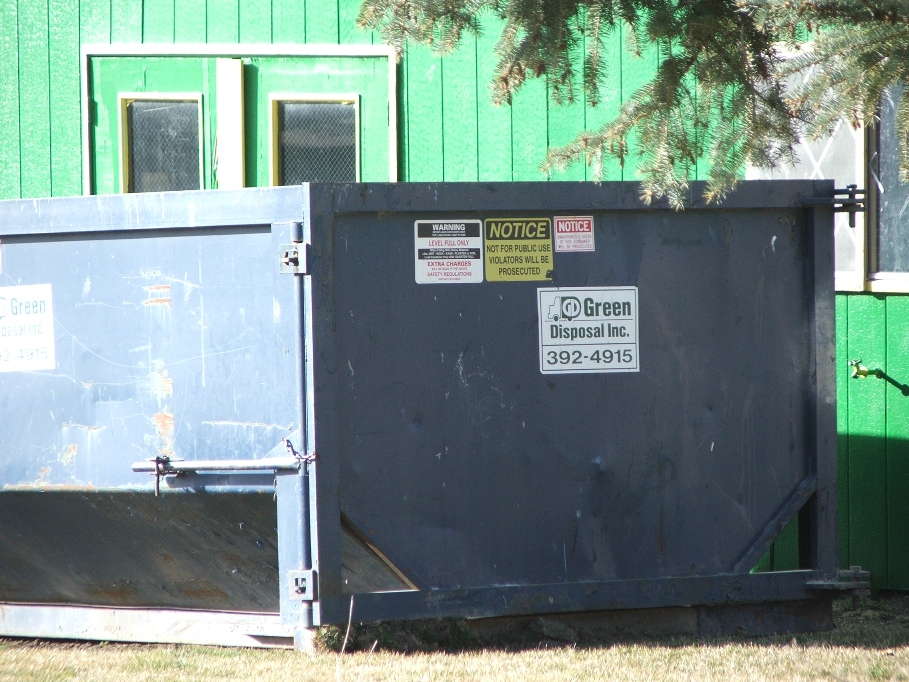

The South side of the house looks empty without
the dumpsters, and we can now use it to pull the truck all the way back to toss
in burnables.
Todays labor ended early with a visit from Lynn Hill and her adopted Grandboy Reshaud. His family moved back down from Jackson Hole and now live in Perry. He just had to have his Grandma take him down to see Bears Butt.
Todays labor ended early with a visit from Lynn Hill and her adopted Grandboy Reshaud. His family moved back down from Jackson Hole and now live in Perry. He just had to have his Grandma take him down to see Bears Butt.

So, with all of the activities and
interruptions, this is all that was able to be accomplished.
The back of the house without the fake brick! Look at all of the holes in the wood! Some of them I caused, but look at the others. How could we have ever stayed warm in that house?
Brian has still not called, and he probably hopes I forget about him. I’ll probably have to seek another avenue to get the foundation fixed.
Mar. 12…Today was not a day to work on this project, but there is rain in the forecast, so Sherry and I took a few minutes to put up some plastic sheeting to cover most of the wood (holes). The wind will probably rip it down during the rain, but at least we tried something to protect it.
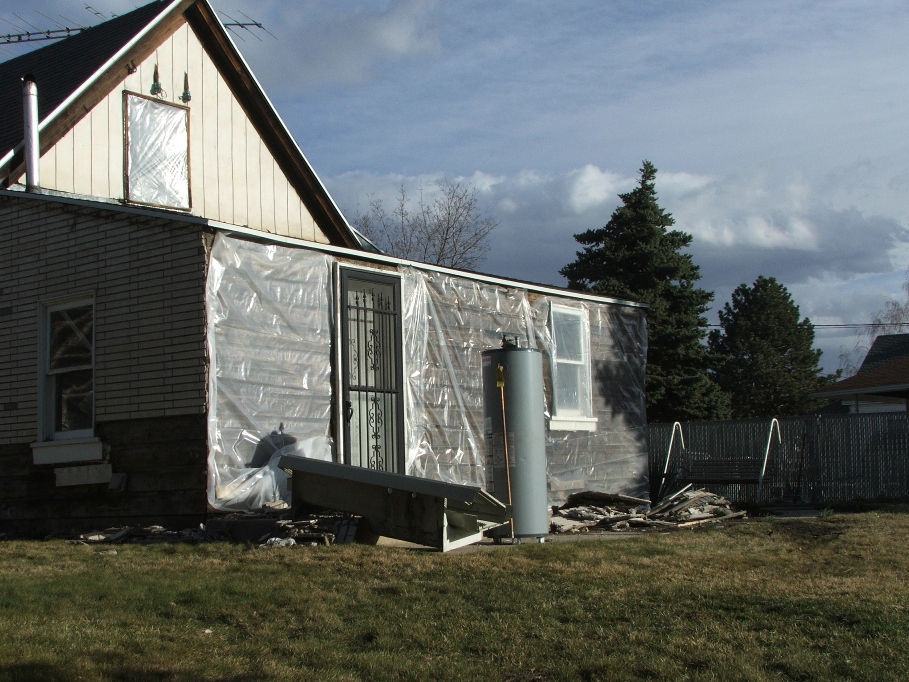
We didn’t put anything up against the North side, so it will
get hammered. The rain isn’t supposed to
be much, and only last one day.
Mar. 15…The rain that was promised didn’t happen, we just had wind. So today I was able to recruit Dale Dixon, April’s brother to come and help me. It will be a chance for him to earn a little spending money, while I get help with clean up and assistance. We started at 9:30 this morning. Dale cleaned up the fake brick stuff, while I knocked down the North wall fake brick and then that little bit above the porch window on the West.
It took until 1 p.m. to get these things done! The plaster just held on and held on, especially that above the porch area. There was little or no weather getting to that part and therefore the metal under the plaster was still mostly like new. Plus they had used a million nails to hold the metal up.
We got the North side done, and put on the plastic, as tomorrow there is a 50% chance of rain.
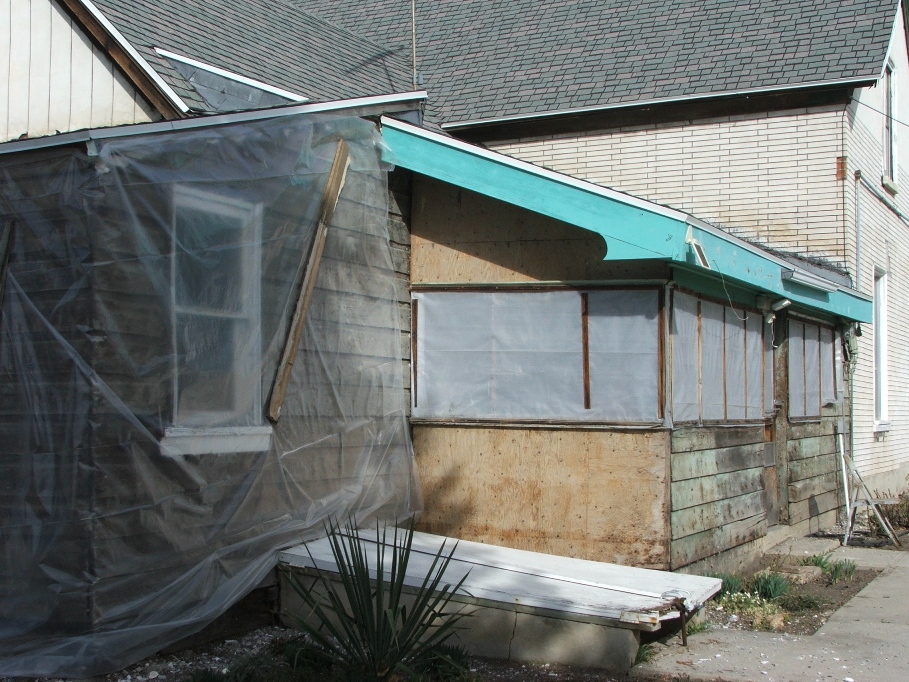
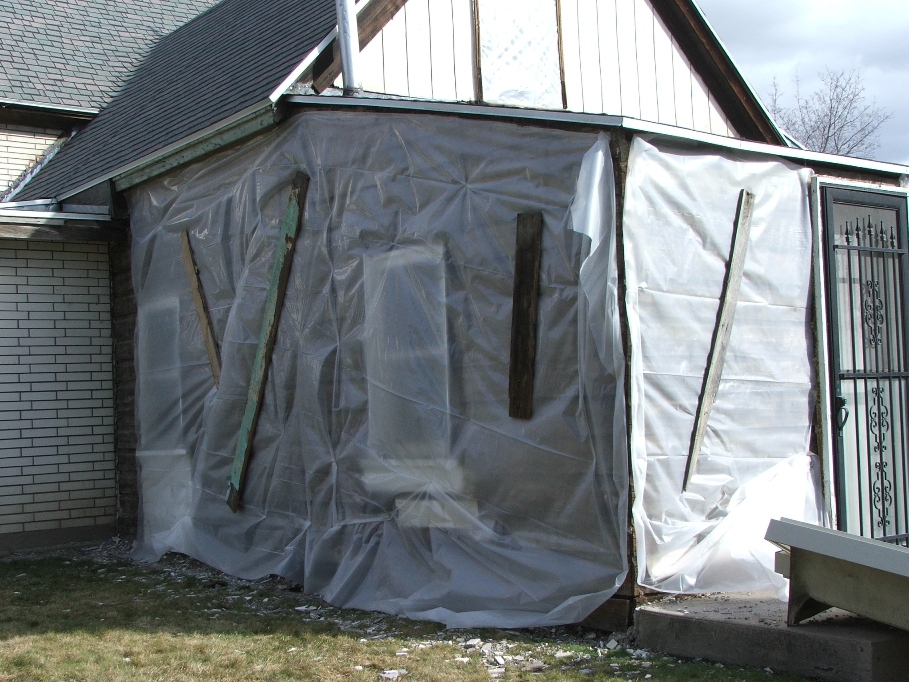
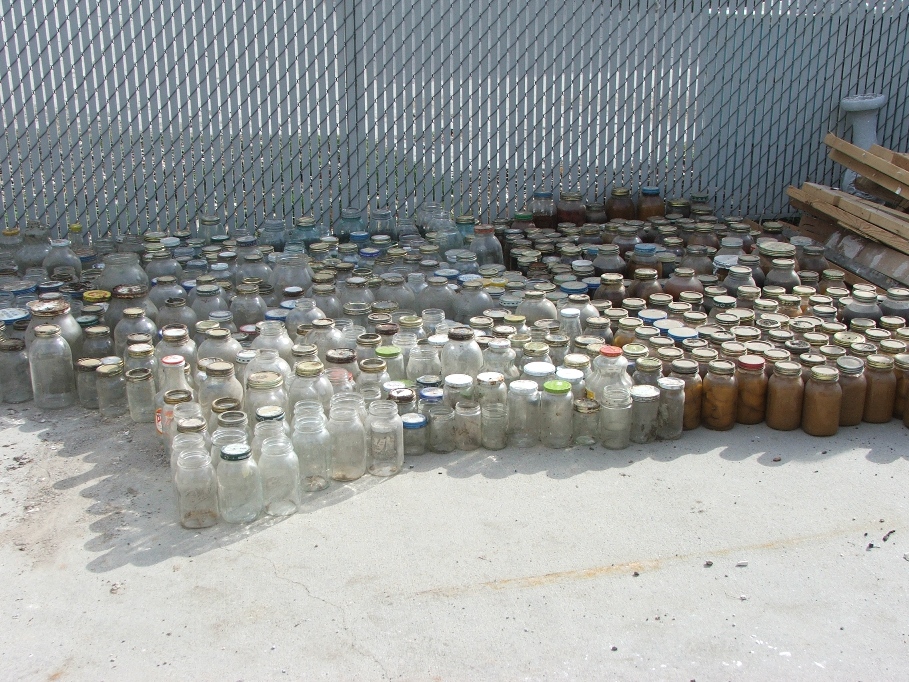
After lunch Dale and I headed for the cellar to
remove all of the bottles that are down there.
I had planned on digging a hole in the field and dumping the contents of
the full ones into it and covering it up.
But when I looked at the bottles, I could not see any sense in saving
any of them. There are no antique
looking ones, only Ball Mason, Kerr and all of the assorted other bottles Mom
saved over the years. Bottles like
mayonnaise jars, ketchup bottles, pickle bottles etc. Take a look for yourself, would you want any
of these?
My next move with these is to email everyone and entice them into coming down and going through them. Then next Tuesday, I plan on tossing all of them into the dumpster bin and being done with them.
My next move with these is to email everyone and entice them into coming down and going through them. Then next Tuesday, I plan on tossing all of them into the dumpster bin and being done with them.
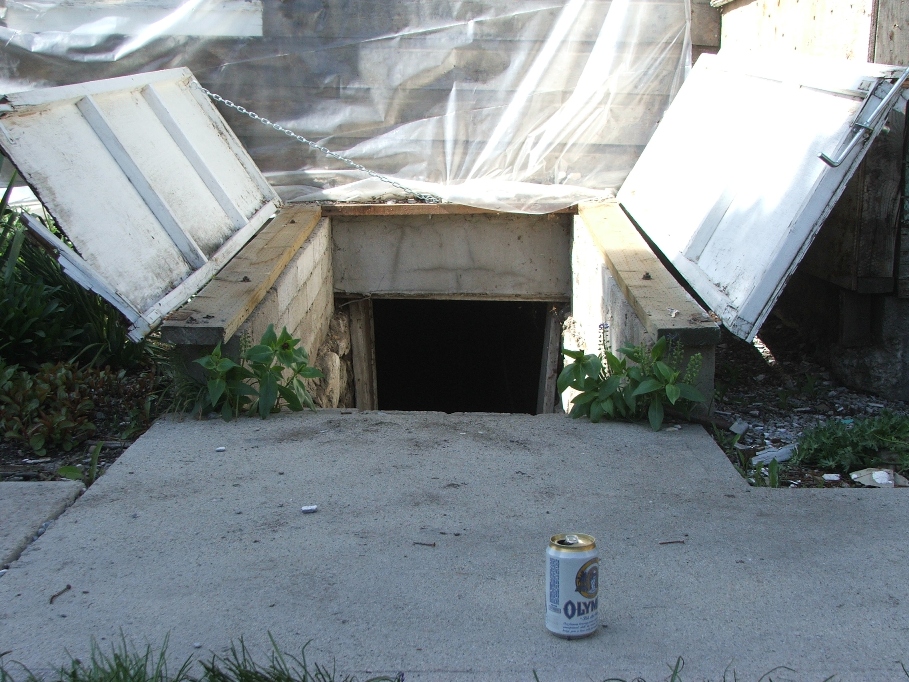
The cellar is now clear of all contents and we
can disassemble the shelving and remove it.
This will allow us room to work on fixing the foundation under the back
of the house.
The next few pictures show you the "dismal" looking cellar....the pictures are fuzzy and it adds to the eerie feeling of being down there.
The next few pictures show you the "dismal" looking cellar....the pictures are fuzzy and it adds to the eerie feeling of being down there.


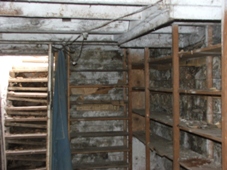
Tomorrow Mitch and Dale will both be here to help. The game plan is to remove the shelving and
ready the cellar for foundation fixing.
Then it’s upstairs into the TV room to start taking up the flooring.
Mar. 16…Mitch showed up late, like noon, Dale was ready, but unable to work because I was in the field with the Corp. Of Engineers guy and Ted Baird about selling the North part of the farm. Anyway, they finally got together and cleaned the shelving out of the cellar and made it ready to fix up the foundation. Later that day, after I came up from the field, we tore into the flooring of the TV room. You have seen the floor as it was, and now we have torn up the hardwood floor that made up the TV room. We saved what we could, but most of it was “tacked down”, with 10 penny nails making it impossible to pull up without breaking it.
We found that the floor under the hardwood was “quite humped”, check this out! The center of the room is about 4 inches higher than the surrounding room sides. Way out!

Believe it or not, from the lower center of this picture to the post, the floor drops 4 inches to that post!
As we progressed, we found surprising things. Like this hole in the floor, what was it’s purpose? Maybe, to see that the supports were failing.


Dale Dixon and Mitch work on the floor in the NW corner of
the room. It’s time to pull up the
flooring!
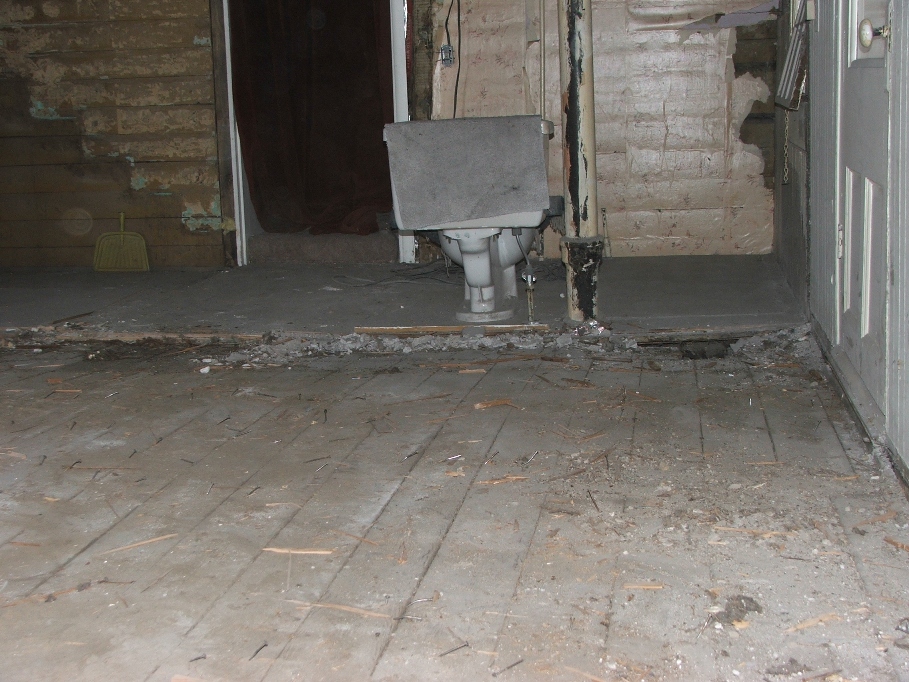
This floor definitely has problems! Maybe we will change our minds about where
the bathroom should be. The hardwood
floor in the TV room was raised about 4 inches next to the toilet, ran to
nothing in the middle of the floor and then up about 1 inch on the west and
North walls.
Progressing slowly, we started to uncover things that had been dragged around under the flooring. Bones, Corn cobs, string, spam can lids etc.
Progressing slowly, we started to uncover things that had been dragged around under the flooring. Bones, Corn cobs, string, spam can lids etc.
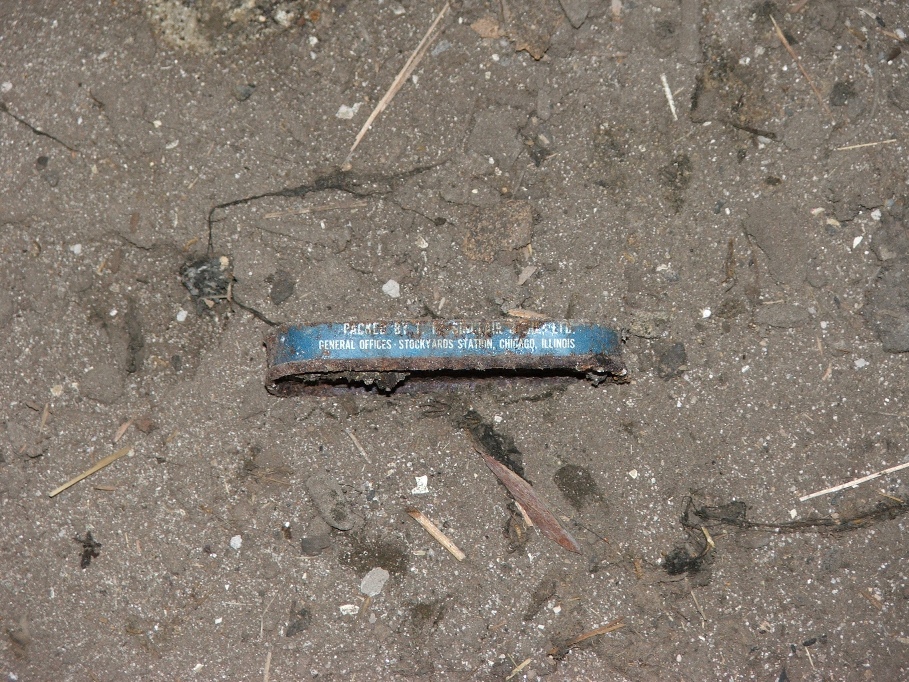

As we progressed, the underneath started to look
really spookie to some of us. Are there
any spiders under here?
Well, now for the finds of the day:
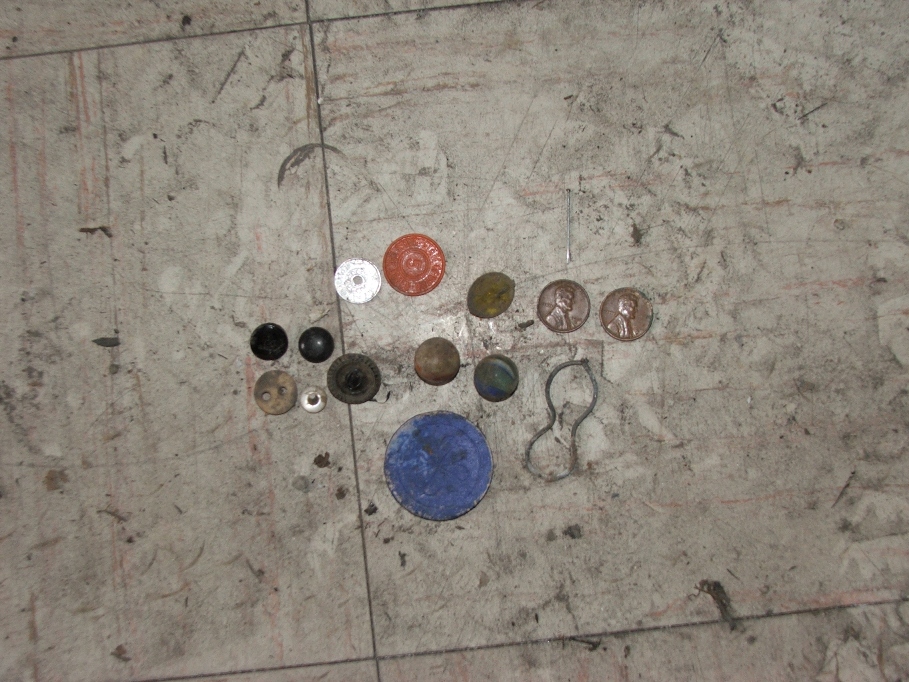
Five buttons, two marbles, a blue poker chip, figure eight
wire, a “1” tax coin, a “5” tax coin, off yellow suction cup, 1943 penny (pin
pointing at it) and a 1945 penny.
Mar. 17….Dale and I started with the intent to pull up all of the floor in the TV room, remove the toilet and get ready for the plumber. Well, we hit it hard, the weather was cold, so we stayed busy. As the floor came up we began to see what our forefathers put together. It was great! Some of the wood used to support (to level), fell out from under the timbers etc. and it’s no wonder the floor sagged and humped.
Mar. 17….Dale and I started with the intent to pull up all of the floor in the TV room, remove the toilet and get ready for the plumber. Well, we hit it hard, the weather was cold, so we stayed busy. As the floor came up we began to see what our forefathers put together. It was great! Some of the wood used to support (to level), fell out from under the timbers etc. and it’s no wonder the floor sagged and humped.
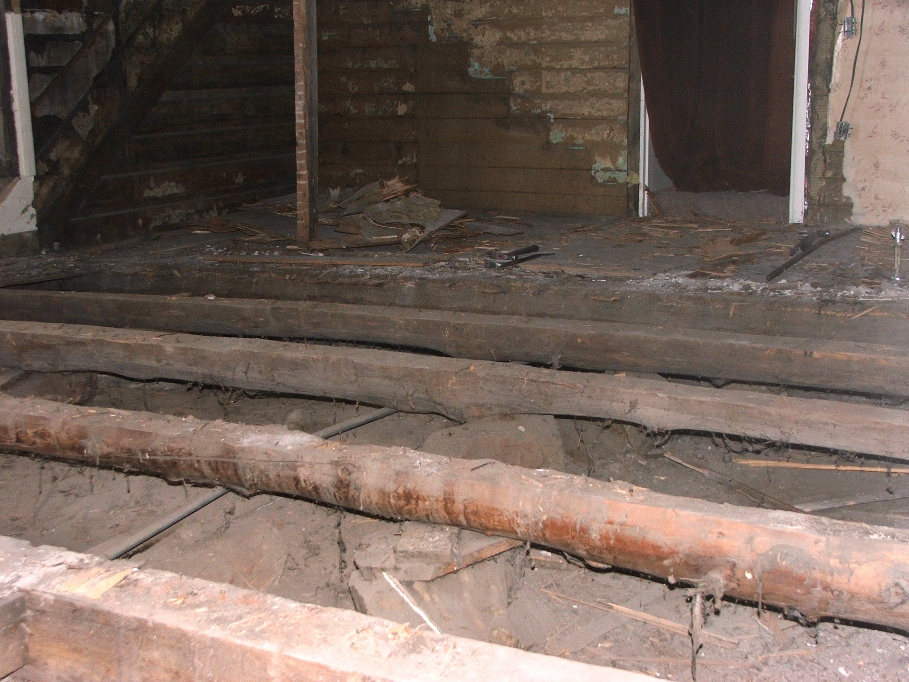
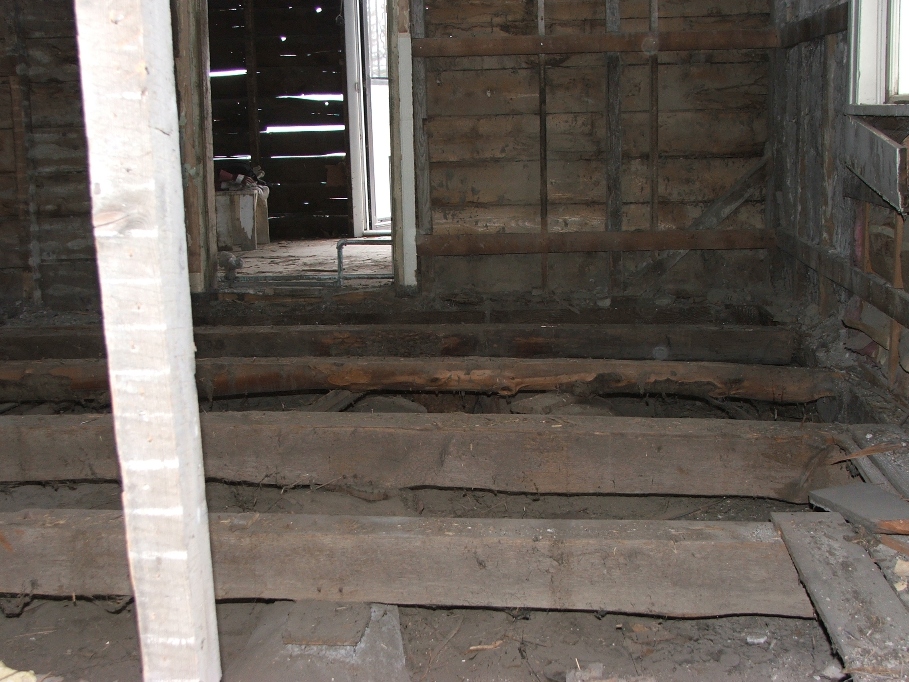
This is looking toward the NW corner of the TV room, where
the termite damage is the worst. It’s
actually concentrated in this corner, thank God. I’m sure glad it isn’t everywhere. There were no finds today, and our goal to
get all of the flooring up didn’t happen, so we will be back tomorrow.
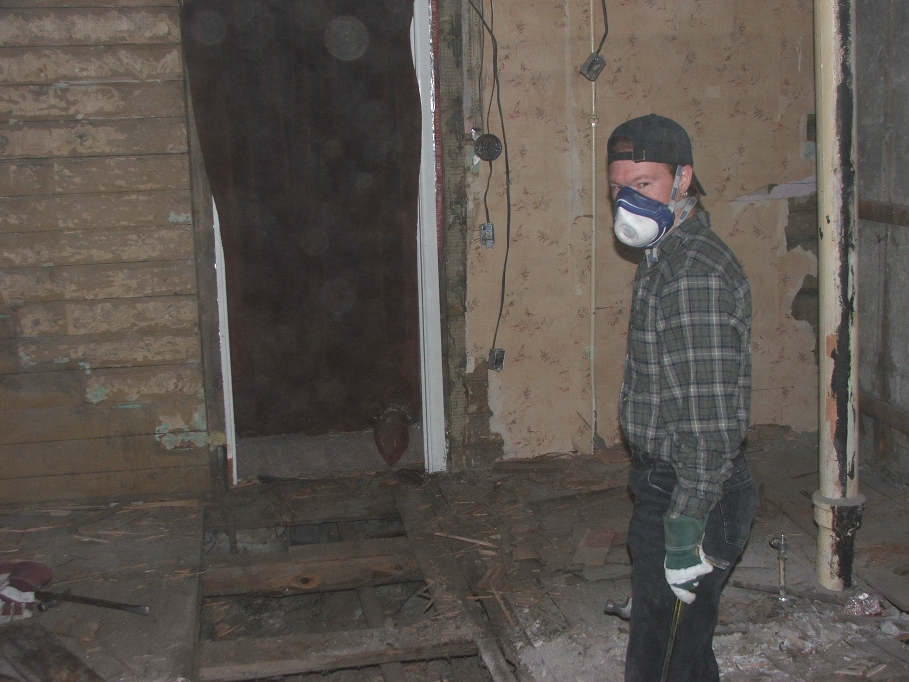
Mar. 18…Back at it at 9:30 sharp. Our goal today is to finish pulling up the
flooring and empty the truck. The
earlier the better.
As we began, we immediately started finding neat stuff. Two pennies quickly surfaced just under some old linoleum, with that our eyes were constantly focused.
As we began, we immediately started finding neat stuff. Two pennies quickly surfaced just under some old linoleum, with that our eyes were constantly focused.
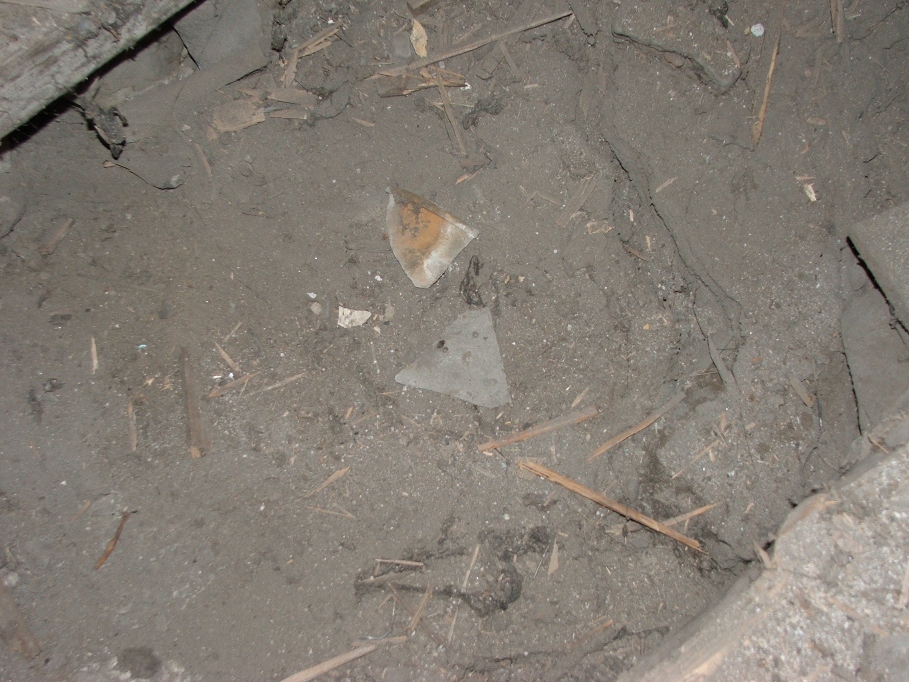
Broken pot and ledger plate.
These were not saved in our finds for today.
Pulling up this last part of flooring meant we had to reposition the support beams holding up the ceiling joists. The one support I put in several weeks ago will have to be removed. This meant that I would have to span the joists overhead with a 2X4 and use two other supports. I figured it would be best to have them touch the ground and not be attached to the beams. Mostly because if I remove the beams later, then I would be redoing the supports.
Pulling up this last part of flooring meant we had to reposition the support beams holding up the ceiling joists. The one support I put in several weeks ago will have to be removed. This meant that I would have to span the joists overhead with a 2X4 and use two other supports. I figured it would be best to have them touch the ground and not be attached to the beams. Mostly because if I remove the beams later, then I would be redoing the supports.
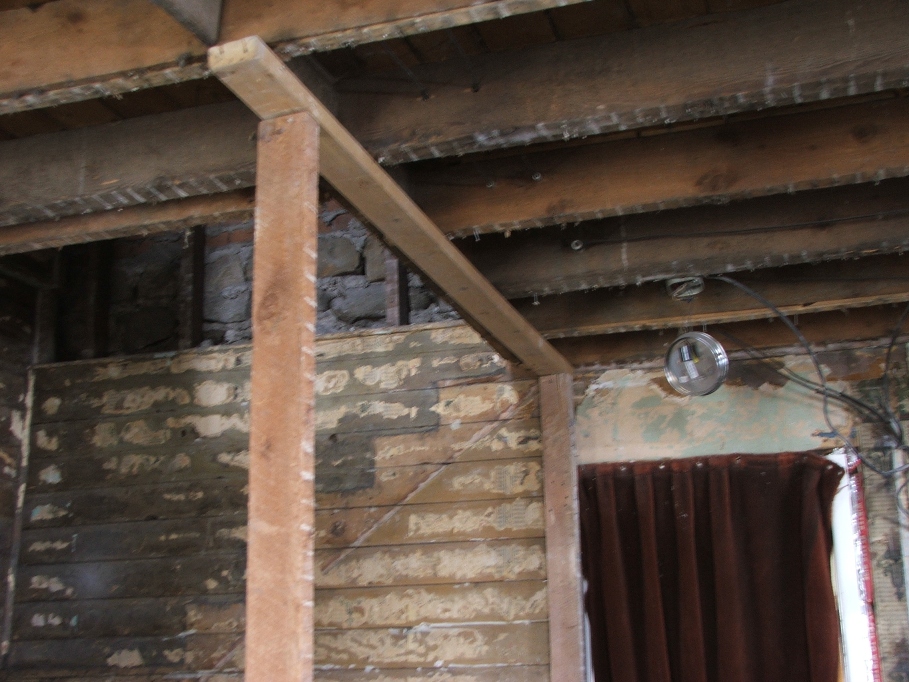
Once done, we started lifting up more boards.
Under the entry point to the living room we found this interesting little item.
Under the entry point to the living room we found this interesting little item.
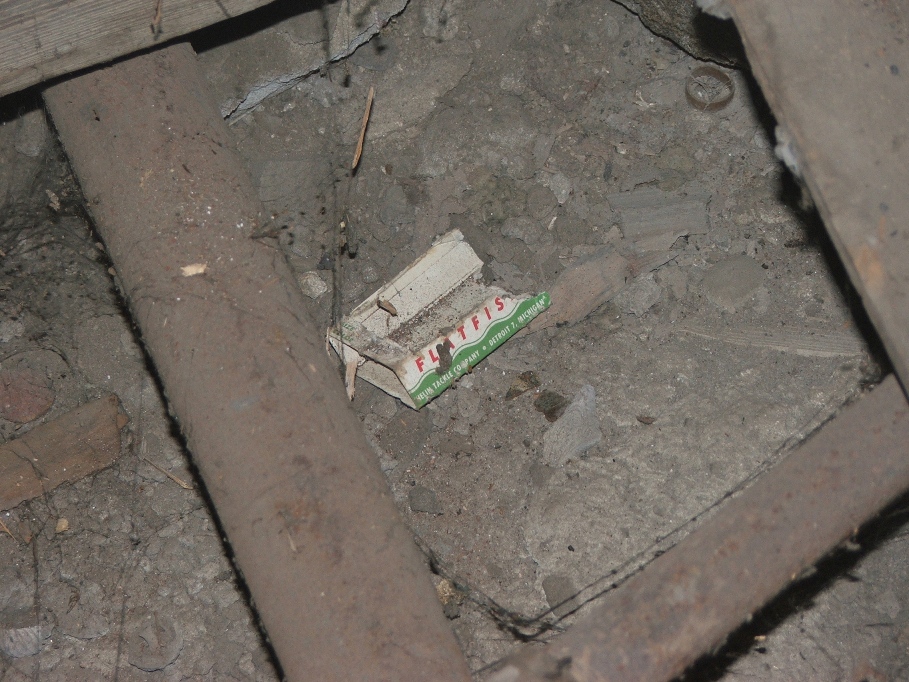
My guess is it was going to be a nice mouse
house. Hey! Look closely in the upper right corner of
this picture! Is that a man’s wedding
band? I just saw it as I inserted this
picture. WOW! Sherry and I have to go right over to the
house and check it out!
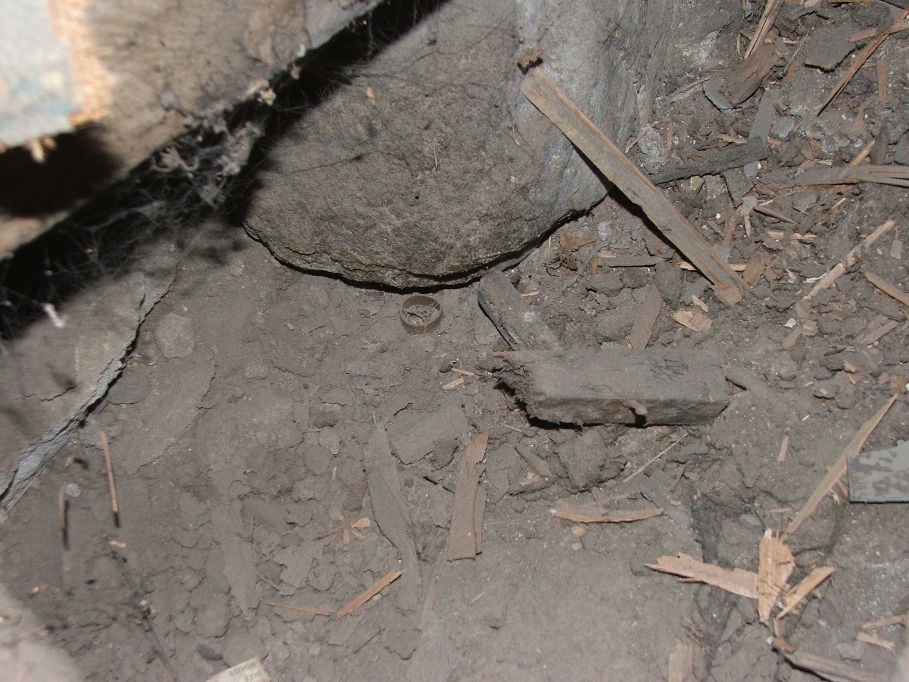
As expected, there it is! Man O Man!
But….it was just a small rubber band!
Dang. When Dale and I had picked
up all of the wood and tossed it into the truck, we were almost done for the
day. I was tossing in a couple of larger
pieces of plywood when I had an idea to keep people from walking off into a
room with no floor. I spray painted the
board and put it in the living room.
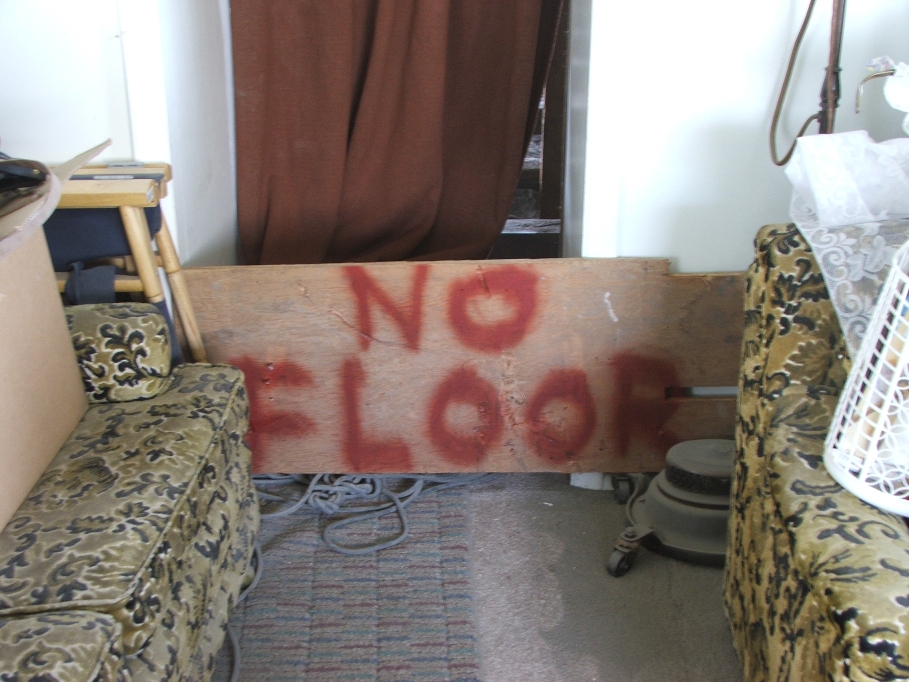
Today was Dales payday as well, and since I told him I would
give him $25 each day he helped me, we paid him his $100 and he was a happy
guy! He doesn’t leave for Montana until
next Friday, so maybe we can get more help from him next week. We will see.
I have to admit, he is really a hard worker.
In our zest to pull up boards, we didn’t see that one of the floor support beams was “floating”, and it came down pretty hard carrying the pipe that fed the toilet. The result was a leaking pipe. It’s not so bad as to warrant immediate repair, so I’ll let it go until next week when I plan to call KeithWitt, the plumber.
In our zest to pull up boards, we didn’t see that one of the floor support beams was “floating”, and it came down pretty hard carrying the pipe that fed the toilet. The result was a leaking pipe. It’s not so bad as to warrant immediate repair, so I’ll let it go until next week when I plan to call KeithWitt, the plumber.
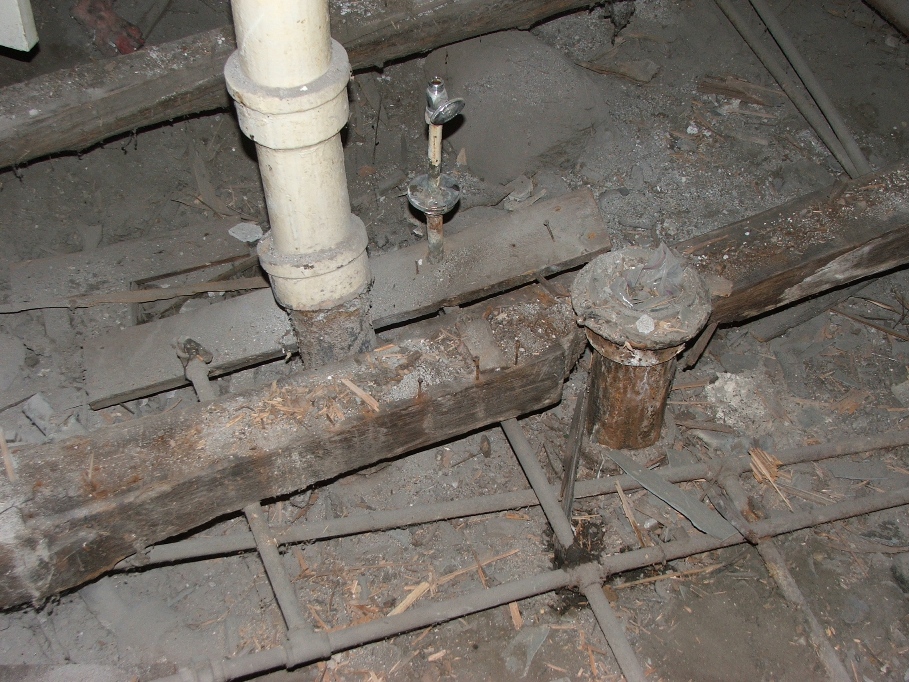
When all of the flooring was up, I tried to get
a picture of the tops of the floor beams, but the highest one kept getting in
the way. Here are a couple of pictures,
one from each side of the room. Humpie
is the one that stops any view of the joists past it.
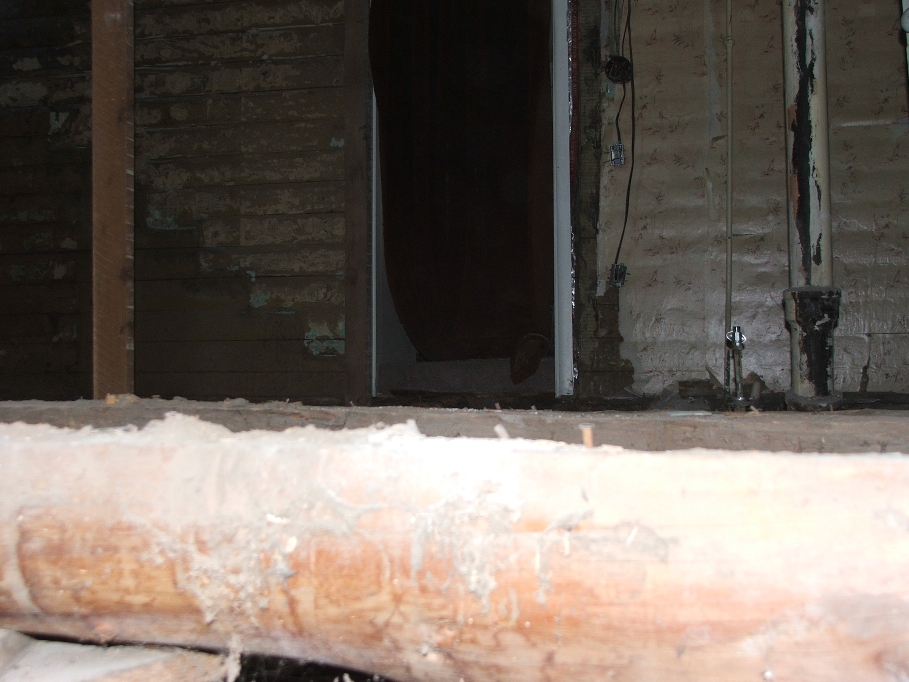
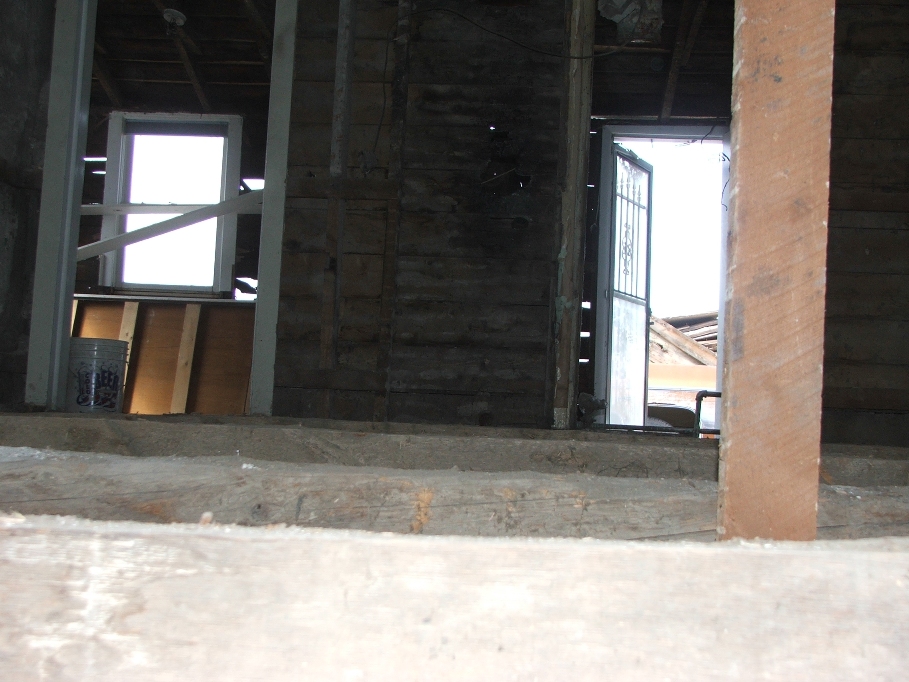

Todays truck load marks number four topped with
wood that went to the field! Will there
be another load go to the field? I don’t
think so, but who knows for sure.
A couple of weeks ago Sherry was reading a hand written autobiography of Great Gandmother Abigail Abbott Zundel. In it she said that her second house had “all the modern conveniences, including radiant heat”…we wondered where that house could have been, or if she was confused in her older days. Well, the following pictures should be convincing enough that this is the house.
A couple of weeks ago Sherry was reading a hand written autobiography of Great Gandmother Abigail Abbott Zundel. In it she said that her second house had “all the modern conveniences, including radiant heat”…we wondered where that house could have been, or if she was confused in her older days. Well, the following pictures should be convincing enough that this is the house.
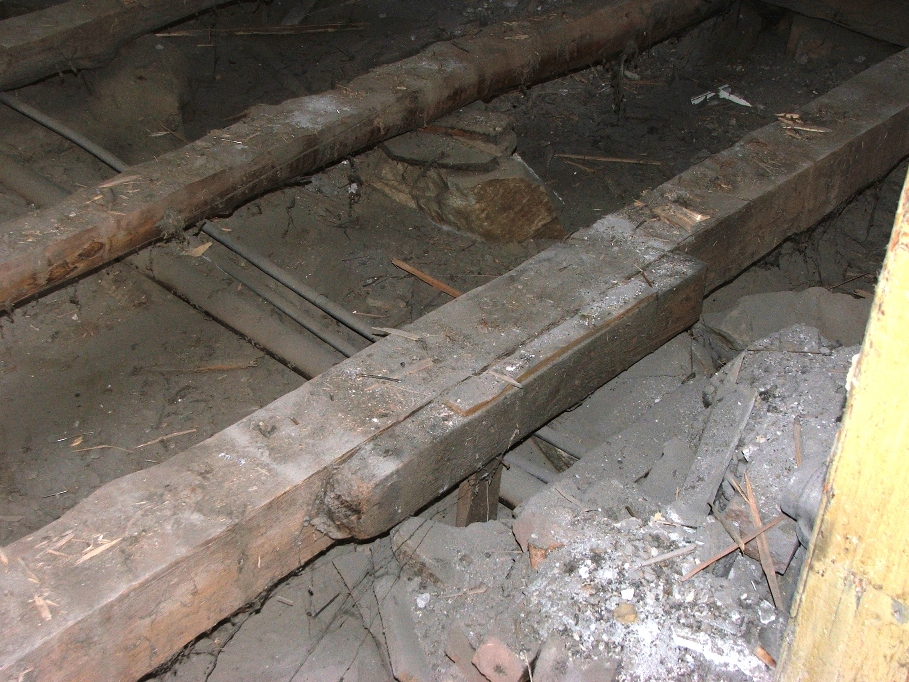
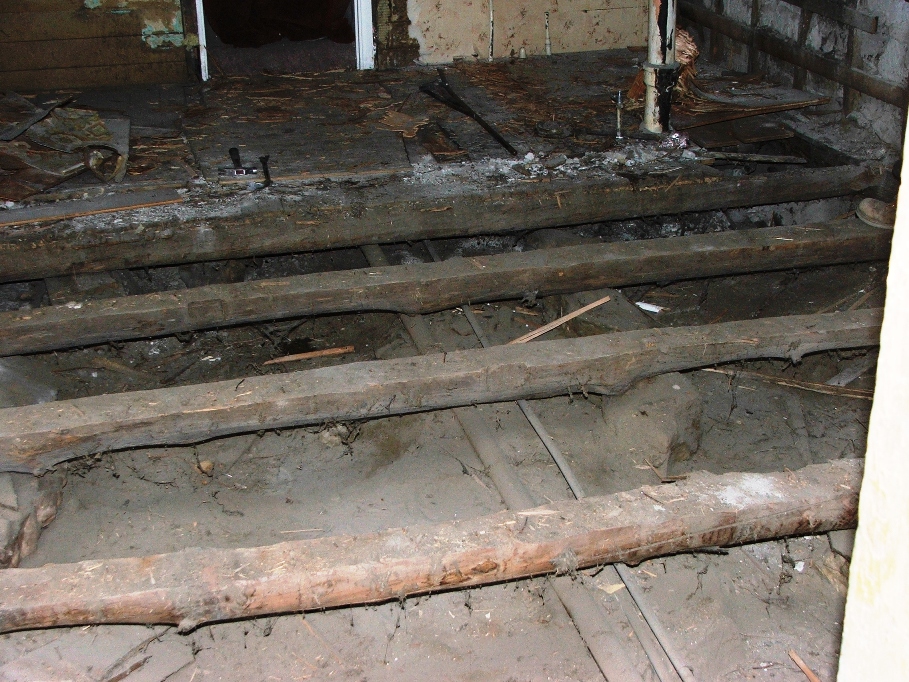

On the lower far right you can see the pipe that sticks out of where the chimney was. We originally thought that dad may have been trying to do something here, but it is clearly a connection for a heating unit, that would run hot water toward the front part of the house.
Large pipe would have been the heated water moving toward the radiators.
In the third picture, this would have been a radiator connection for the bathroom to be heated.
Questions continue to arise in my mind as I view this system. First, shouldn’t there be a “return” of colder water, back to the heating area? Why was the system abandoned? Was it too much work to keep the heating stove stoked up, or cleaned out? Was this the problem that caught the back wall on fire, and so as to be safe, they discontinued using it and eventually abandoned it? Perhaps some of the answers will be in Aunt Maria’s journal.
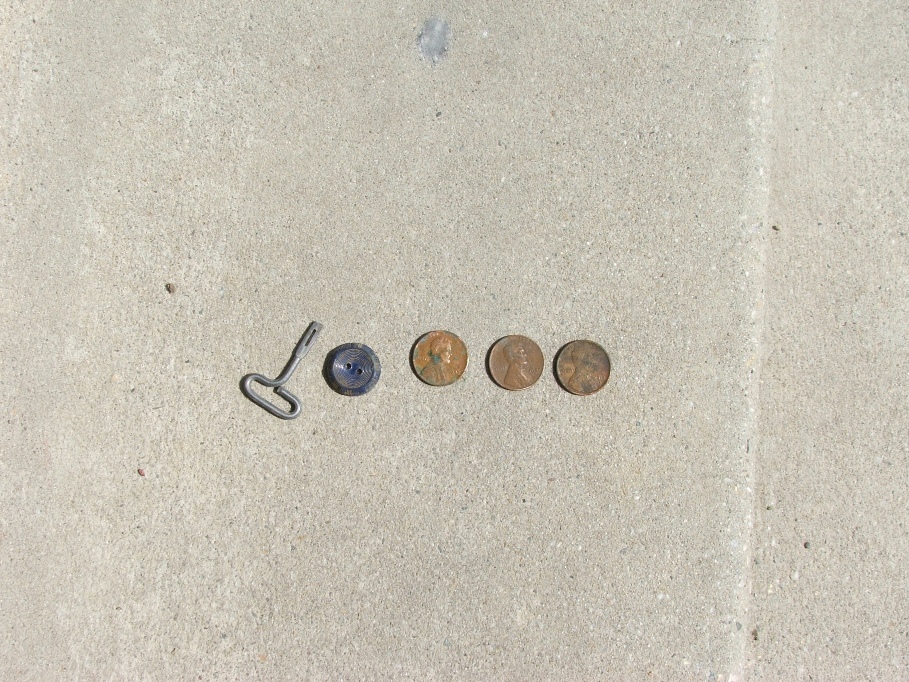
Todays finds:
Can opening key, button (actually found two days ago), 1914, 1936, 1945 pennies.
Tomorrow is Saturday and we are all heading for Wendover the the annual “Sherry’s Birthday” gathering. The next scheduled day of work on the old house is Tuesday.
Mar. 23…No work was done yesterday (Tuesday), for some reason the enthusiasm just isn’t there. We awoke this morning discussing this fact and decided that we needed to renew the energy. It’s been raining very hard last night and this morning. What a better time to make some plans.
I ran over to the house and took the measurements of the old TV room. Since I was by myself, I had to break it down into short runs. I measured from door, to window, to door, to window etc., marking each measurement as I went. Then I came back home and began to plot it all out. When the outside dimensions were drafted I began to look at the bathroom layout for this room.
By using the smaller of the two pocket doors (4 ft. 9 inch), the plan looks best this way:

I had planned on the shower being 36 X 42 inches, but have
seen nice looking shower stalls with sliding doors, in the 32 X 32 inch size
that would fit just right and allow us to keep the existing window. Without a lot of hoopla, I think this is
going to be the plan. I can now call the
plumber and let him know he can begin his work.
Mar. 24…Dale has to head back to Montana tomorrow, so I thought today would be a good “last day” to let him make $25 bucks. I called him last night to make sure he was available and made a plan to call him about 9:30 in the morning. My plan was to have him dig up the septic line just outside the NW window, but it was raining and snowing way too much for that. So, I asked him to help me inside with the old floor beams.
The beams had been cut on angles and pounded into slots shaped the same as the cut. No nails were used to hold them in, just plain old pressure. Some of the wood had shrunk over the years and the ends could be easily picked up out of the slot, but then there were those that we had to cut off.
I used a reciprocating saw to do the cutting and it worked very well. The beams were hauled outside one at a time and for their size, were quite light weight. All but one of them were made from pine, the other was a quakie. Next, came the huge rocks that were used to brace the underside of the beams. I know they would be in the way when I go to putting up 2X8 floor joists. The rocks were heavy and several of them took Dale and I both to pick them up and set them on the laundry room floor and roll them outside. Those that could be picked up we did, using our knees and legs of course.
When the job was done to that point, we took a lunch break.
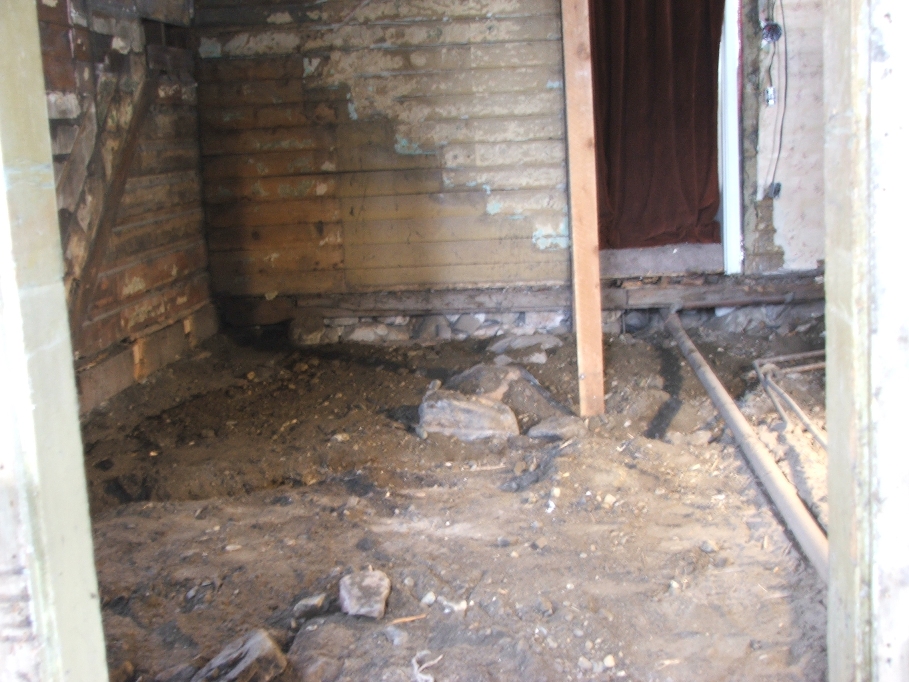
A couple of rocks were left because we think they are narrow
enough not to get in the way, plus they are at the end of the room where the
floor will be raised quite a bit.
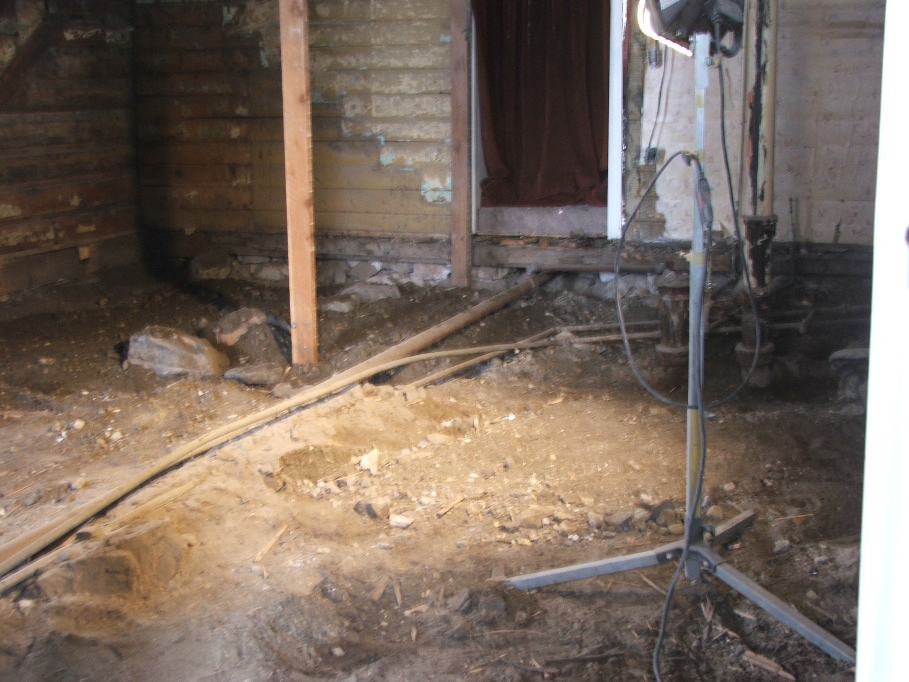
It really looks a lot different with those beams removed.
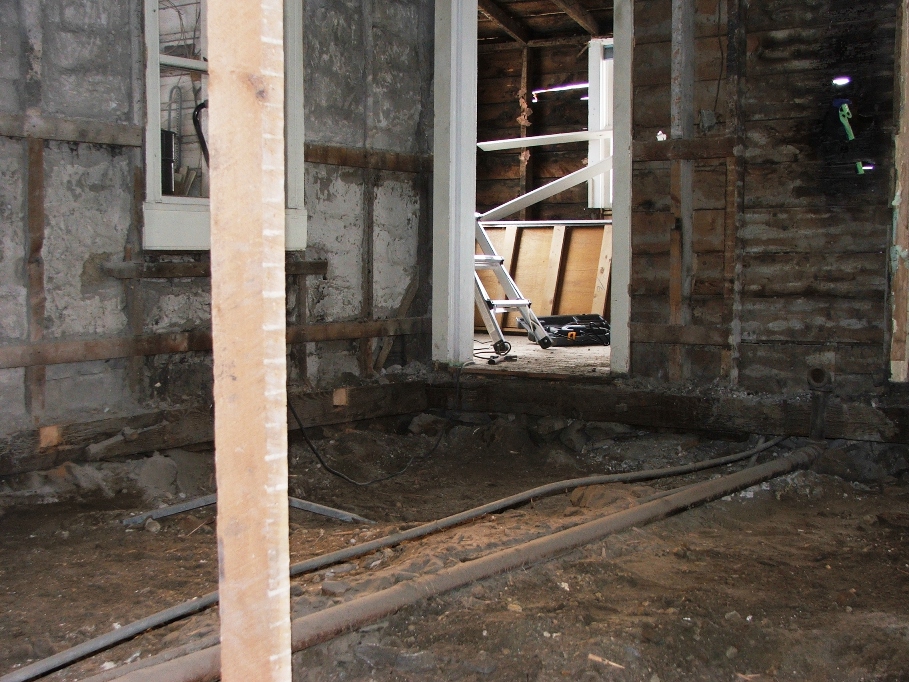
My goal is to replace the floor to the height of that
doorways threshold.
After lunch came some digging. We had a corner that needed the dirt pulled away, plus I wanted to uncover the old bathroom plumbing so as to make things easier for the plumber. By the way, I called him last night and he might come by today, or tomorrow, but for sure next Monday.
I was very much surprised today, to find that the sewer line actually goes in the direction of the septic line! All this time I had thought it went out under the porch floor and into the cesspool on the South side of the house. This is a very good surprise and when I dig outside on the North I will make certain it is connected. The plumber should not have any problem connecting to this pipe and it looks sound, so as not to need replacing.
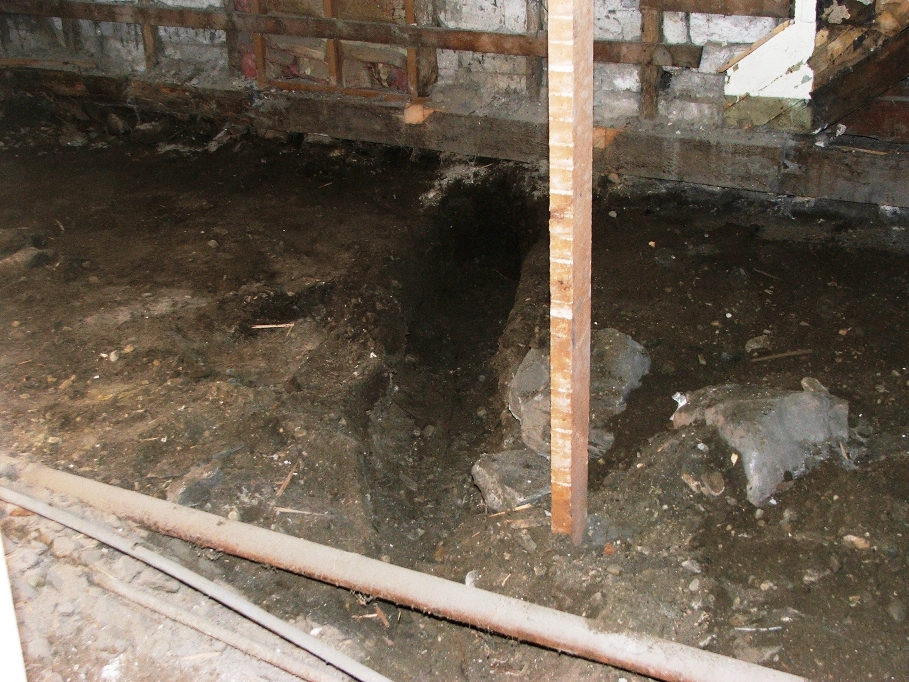
The plumbing is sort of a nightmare, but Mr.
Witt should be able to fix it all with new stuff, with one exception and that
is the incoming water point.
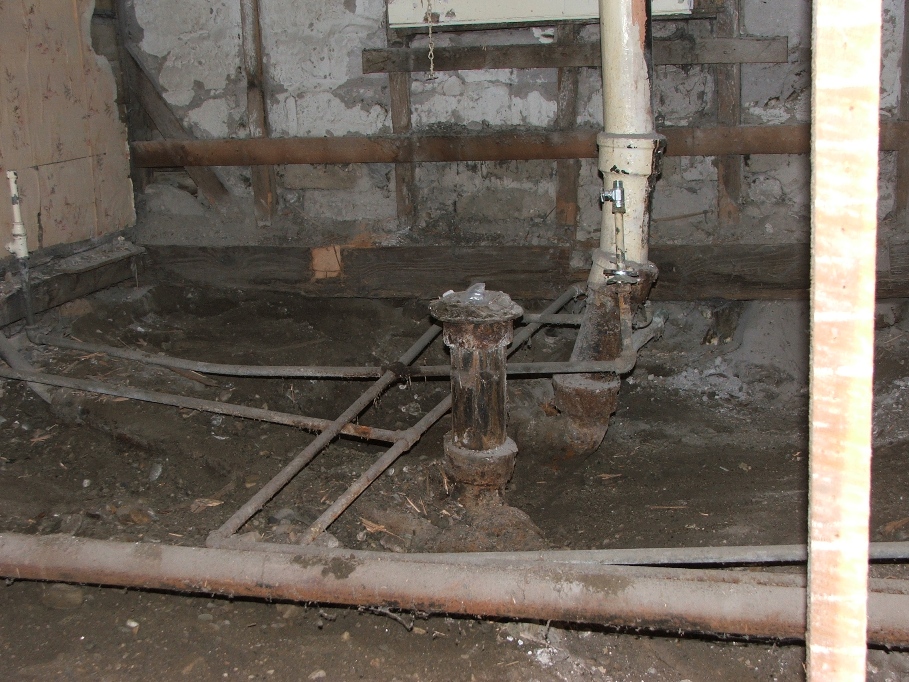
The water comes in just out of site in this picture right
behind the toilet stand pipe. I was
again in hopes of re-routing the water lines and making them more accessible
when the floor is put back, but it doesn’t look like that will happen. I’ll talk to Mr. Witt about what can be done
to make the pipes as accessible as possible, but we will probably have a scene
very similar to what we see here when we’re done.
I really thought we were through finding “stuff” because we were scratching into the dirt and what are the chances that interesting items would be scattered under the floor. But to my surprise todays finds were quite interesting, just like all of the other times:
I really thought we were through finding “stuff” because we were scratching into the dirt and what are the chances that interesting items would be scattered under the floor. But to my surprise todays finds were quite interesting, just like all of the other times:
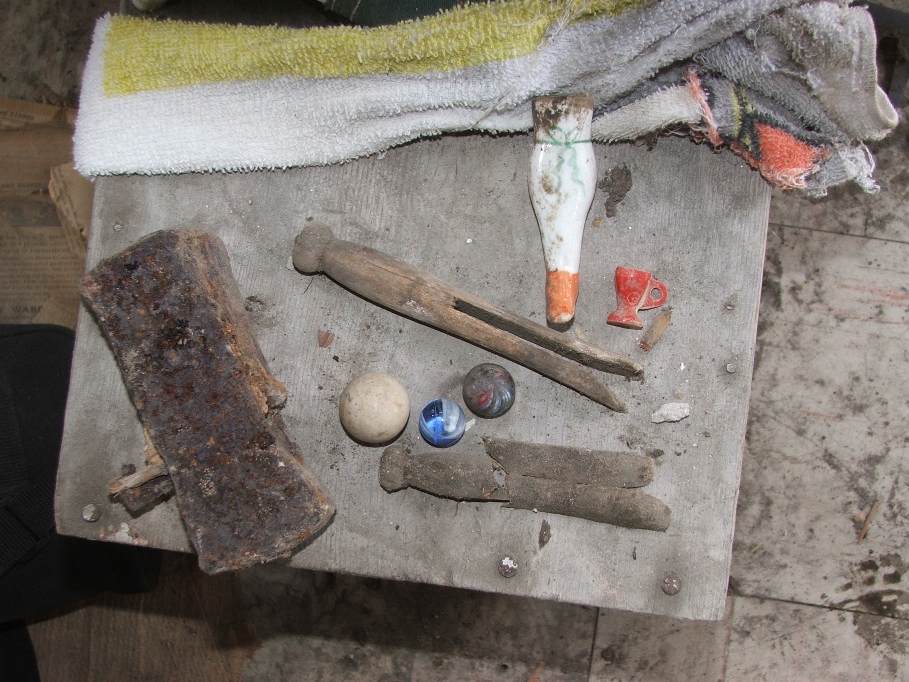
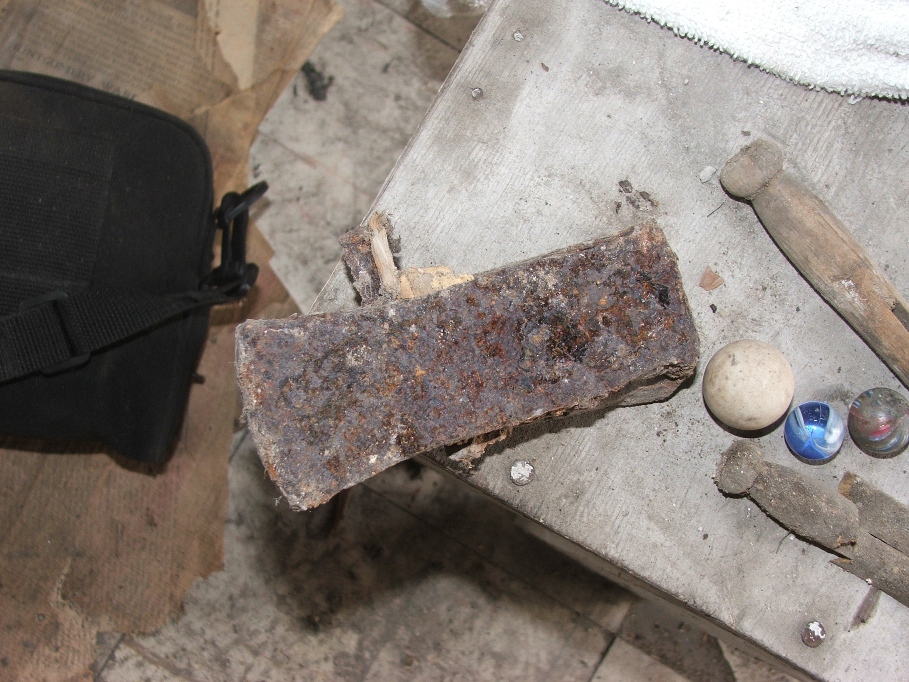
Rusted hammer head, blunt on both ends, Two wooden clothes
pins, Three marbles, Plastic cup (game piece) and a Ceramic doll
leg.
The doll leg has a hole in the top, which makes me think it was mounted on a dowel that allowed it to pivot, but then again what do I know about ceramic dolls? I had stepped on the smaller of the two clothes pins and broke it (dang), and the mid sized marble with the multi blue/red combo, is made of glass and is not very round, more oval. The large white marble seems to be made of clay.
Investigating the hammer head, it wasn’t real clear which way was “up”, but further investigation found that a nail was sticking out which would have been the top of the head.
I just suppose the next work day over at the house will be
Monday. Tomorrow is Sherry’s birthday
(55)!!!!
Mar. 30…Well it is now Wednesday, we had some things to do on Monday and Tuesday, and so the work at the house has been delayed. I talked with the plumber, Keith Witt last night over at the house and we went over some of the things needing to be done. He promised he will be here Thursday and continue until he is done with us. My job was to finalize the upstairs bathroom layout and to dig up the septic line outside.
This morning I went over and took the necessary measurements of the attic area and then started digging outside. I started in the corner where the new bathroom meets the North side of the TV room. This is where that pipe on the inside was heading. The weather was off and on snow/rain mixed and the water melting off the roof was coming right down my neck and on my back. Very cold, but I kept at it as long as I could stand it.
I took the dirt out down about 4 feet and only hit the water lines and a gas line that went to the wash room. NO septic drain line. With the water pouring off of the eves, I moved down the North side of the house, exposing the wood that has rotted or been eaten by termites. When I got to the back step, I decided that I would try to locate the septic line down at that end. I figured the sink and washer drains should be attached to that line and it would be simple to follow them down to the main septic line.
I dug and dug and dug and dug! But, at about 2 ft. the two drain lines from the washroom turned from metal pipe into plastic and bent toward the West! Dad was famous for not wanting “water” dumped into the septic. He claimed it would fill it up too fast and have him pump it more often. Plus the fact that a lot of detergents and soaps tend to kill the septic bacteria. SO…I suspect he ran those lines parallel to the septic drain and ran them into a rock filled pit out in the West forty someplace.
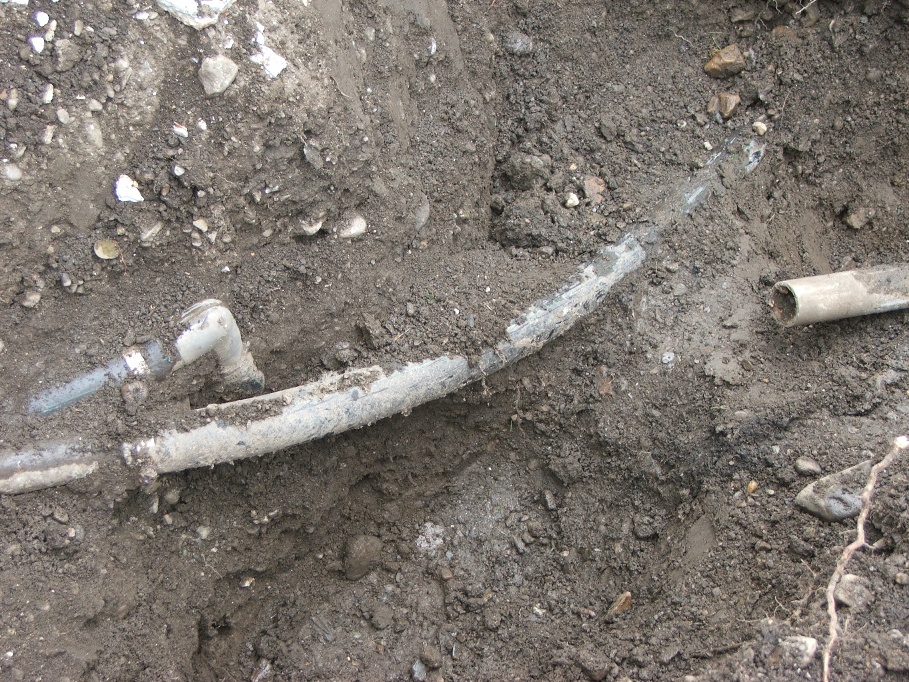
Notice the cut pipe on the right side. That would have been the drain line leading
into the septic. I have decided to
follow that and perhaps it will lead to the main line.
Again, I dug and dug and dug. The weather proceeded to get worse, with heavier rain and large wet snowflakes. Pretty soon it drove me inside. The following series of flicks show you what I did get done before retiring to drier climates.
Again, I dug and dug and dug. The weather proceeded to get worse, with heavier rain and large wet snowflakes. Pretty soon it drove me inside. The following series of flicks show you what I did get done before retiring to drier climates.
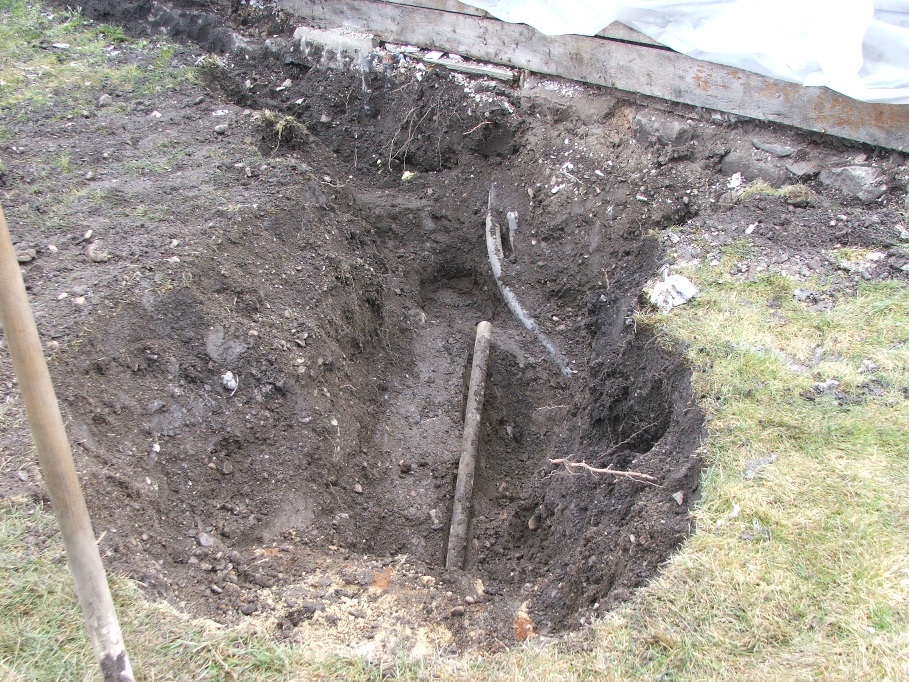
The next picture shows you I “hit” something. It appears to be a cover of cement with a
metal bar or something above it. Perhaps
under it I will find a junction and the main pipe. I sure hope so, because that’s where I will
begin tomorrow.
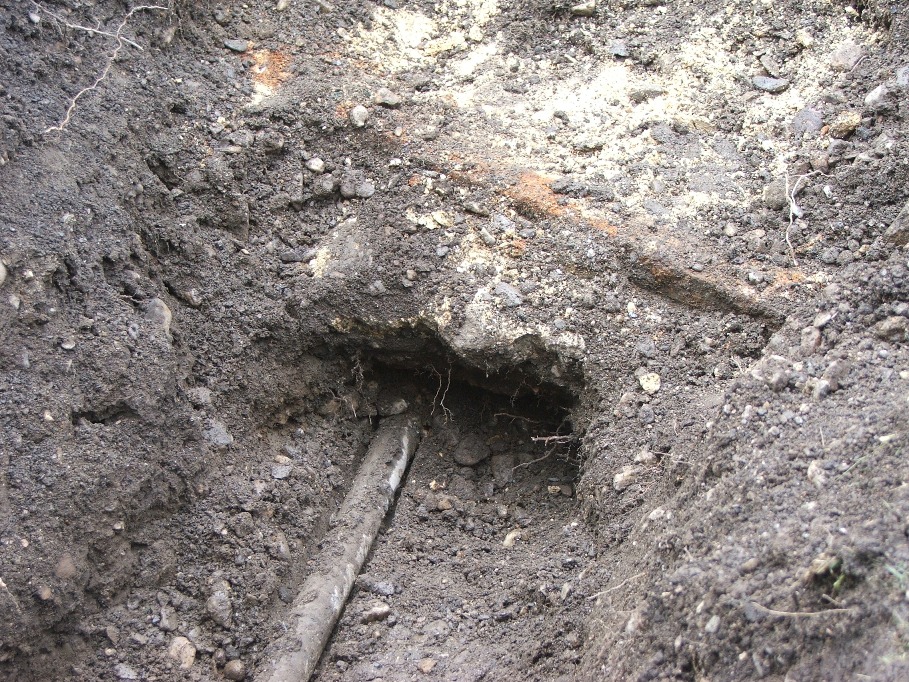
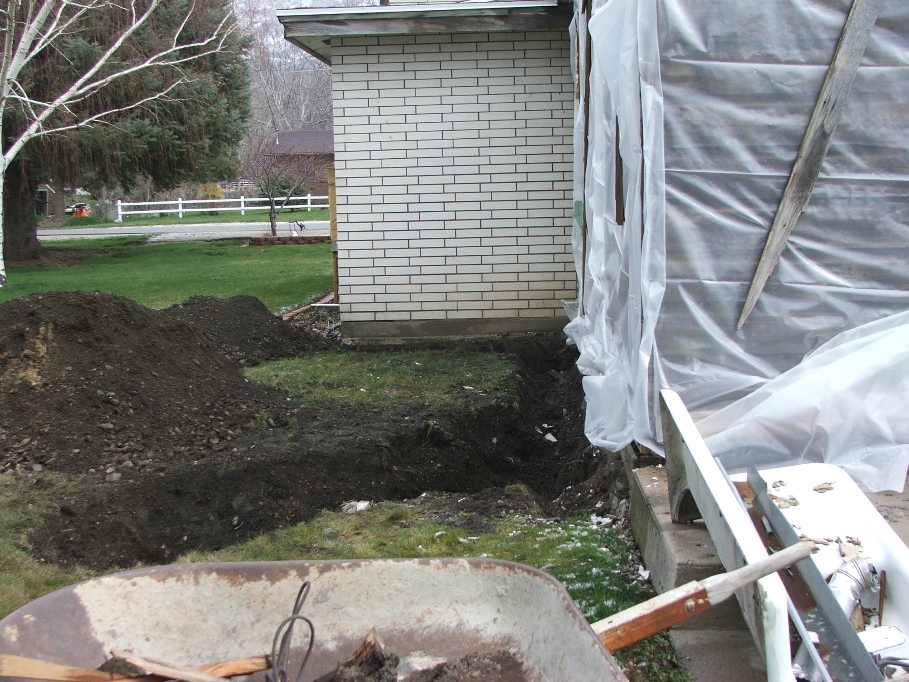
This is the trench I have dug so far. The next two pictures show what I found up
next to the bathroom wall.

Look closely..The larger of the pipes is a gas line wrapped
with black plastic tape, the smaller line is the cold water line. Under that I should find the hot water pipe
leading into the bathroom.
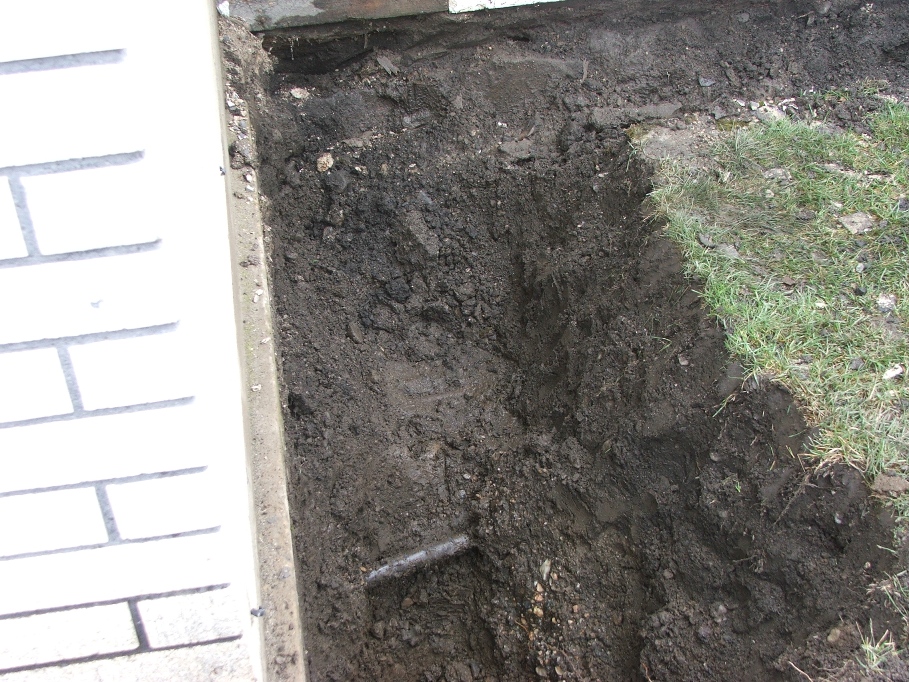
As you can see, I dug quite deep on the North side of the
gas line hoping to find the sewer, but it isn’t down there, at least not down 3
½ feet. Tomorrow I will stick my head in
the crawlspace under the bathroom and see if I can tell which way the sewer
pipe is heading. I might find it
directly beneath the water lines. That
would be nice.
Meanwhile, I am drenched and it’s time to do something different. I had gone into the attic and took all of the measurements of the room in order for Mom and I to sit down and decide the layout of the upstairs bathroom. Keith will need to know something rather definite very soon. Since I was cold and wet, I went home and sat down to do some “scaling” and planning before Mom came home from working at Willard Bay Gardens.
I had several plans in mind, and had printed them out for her to see. I had both a floor layout view and a horizontal view, so that she could better relate to the look of things. Here are a few of the layouts I had come up with.
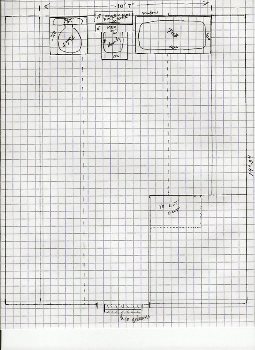
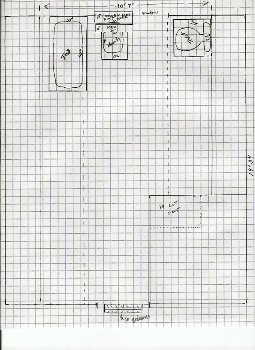
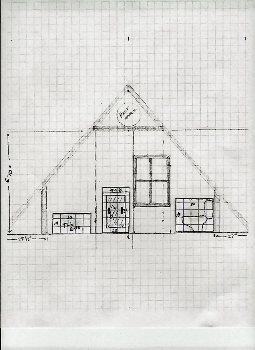

Long story short, I had done 5 of these and when
Mom saw them she rejected them all.
Either the toilet and vanity were not on the same side of the tub, or
the overhead space was too little to accommodate taller peoples heads. Notice in the drawing the highest point in
the attic is only 6 ft. 9 inches and that space is only about 5 ft wide,
running the full length of the attic.
This creates a very interesting challenge to plan a bathroom
upstairs. Anyway the following is the
“final” layout:
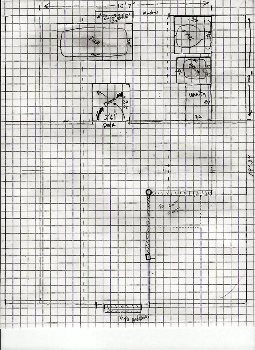
It’s pretty simple, but by putting the tub in this place,
you have over half of the tub where the ceiling is highest, and it accommodates
the door placement better. Sherry also
wants the tub to be one of those with the spigot and mixer knobs on the side of
the tub and centered. We also plan on
the shower head to come directly down from the ceiling overhead. This is called a “drencher” type shower. It will be kind of neat.
Mar. 31…Well, well, well…That’s what I felt like digging today…digging a well. During the night I awoke with a dream that paid off today. I dreamt that Dad would have only put those two water pipes down a trench that was already dug. So, the sewer pipe must be nearly directly below them. My digging started there and sure enough! There was that damned pipe.
Mar. 31…Well, well, well…That’s what I felt like digging today…digging a well. During the night I awoke with a dream that paid off today. I dreamt that Dad would have only put those two water pipes down a trench that was already dug. So, the sewer pipe must be nearly directly below them. My digging started there and sure enough! There was that damned pipe.
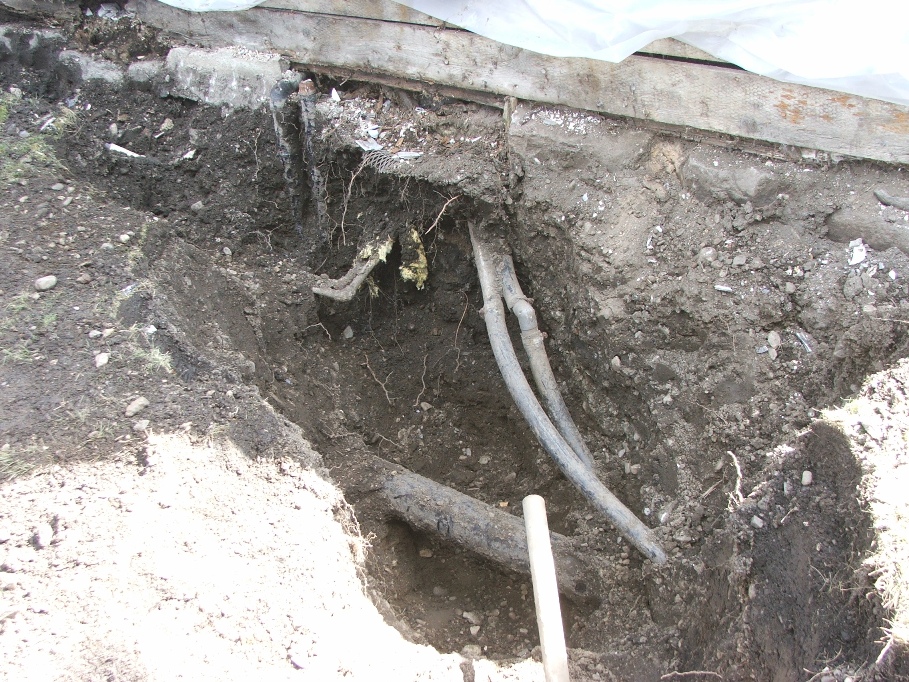
I’m happy again.
Now I should be able to readily find the other end and see if the old
bathroom pipe is hooked to it. As I dug,
I had to contend with the two water lines and the gas line as they converged
together. It made for some very hard
digging, but sure enough, I hit cement, which meant there was a junction. More digging produced the end results I had hoped
for. The lines were connected and life
is getting better all the time.


For the record and since we will probably be
getting sewer in 5 to 10 years (2010 to 2015), I have included a couple of
pictures to show whoever gets to dig, just how far the junction is from the
side of the house and in relation to the North window of the old TV room.
Half a shovel out from the West side of the window casing. And down just short of 4 feet. Be sure and watch out for the gas line as it will still be active. The water lines will be cut off of use before I backfill. I will probably cut them off and save someone some grief in future years.
Half a shovel out from the West side of the window casing. And down just short of 4 feet. Be sure and watch out for the gas line as it will still be active. The water lines will be cut off of use before I backfill. I will probably cut them off and save someone some grief in future years.
I had actually thought Keith Will (plumber) would have wanted to connect the upstairs plumbing
to the sewer line down by the West window, but he told me today, his plans have
always been to run the line into the one we located from the old bathroom and
then into the sewer pipe. Oh well, I did
a lot of digging for nothing.
While I was outside, Keith was inside cutting out pipes and snapping off cast iron. When he took the vent pipe down, little things started to fall out of it. Things like squirt guns, darts, hoses, shingles etc. He was quite amazed. You never know were you are going to find treasures.
I on the other hand thought the finding of treasures was over, but while digging down under the “Y”, up popped a pretty red finger nail polish bottle. It looks to still have stuff in it and it would probably still be good. Also, other things popped up….take a look.
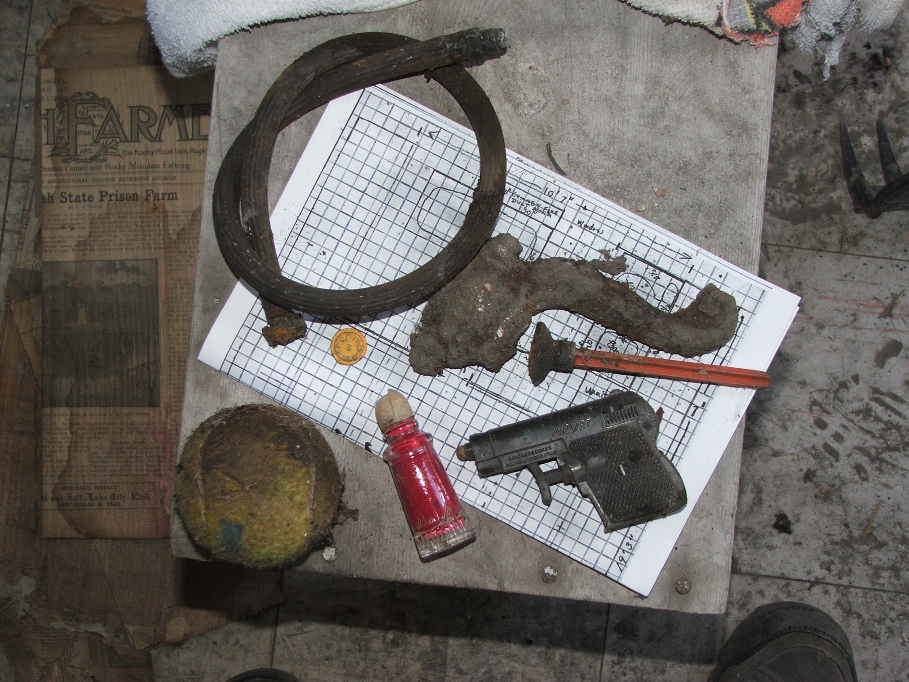
Found in the vent pipe:
Tennis ball, squirt gun, dart and hose from a hand air pump. Meanwhile I found the nail polish, a metal
handle of some sort and a small yellow candy company tab (probably came off the
end of a plastic container). When do the
finds stop?
April 1…No Foolin. Today I started a bit later than I wanted, but started none the less. I had about an hour to dig around the rest of the back of the house and expose the “ugly” that I knew was there. Digging was easy, as I only had to dig down about the depth of the shovel. What I exposed caused chills to run down my back! NO SILL! Oh my God! Now what? From outside I could see the ends of the floor joists, resting on top of the rock foundation (where there was rock foundation). In another spot there were no rocks and the joist looked like it was sagging down. I almost cried. Another setback and decision to be made. Do I continue or tear the entire back of the house down, fill in the cellar and be done with it! Take a look at what I saw….
April 1…No Foolin. Today I started a bit later than I wanted, but started none the less. I had about an hour to dig around the rest of the back of the house and expose the “ugly” that I knew was there. Digging was easy, as I only had to dig down about the depth of the shovel. What I exposed caused chills to run down my back! NO SILL! Oh my God! Now what? From outside I could see the ends of the floor joists, resting on top of the rock foundation (where there was rock foundation). In another spot there were no rocks and the joist looked like it was sagging down. I almost cried. Another setback and decision to be made. Do I continue or tear the entire back of the house down, fill in the cellar and be done with it! Take a look at what I saw….
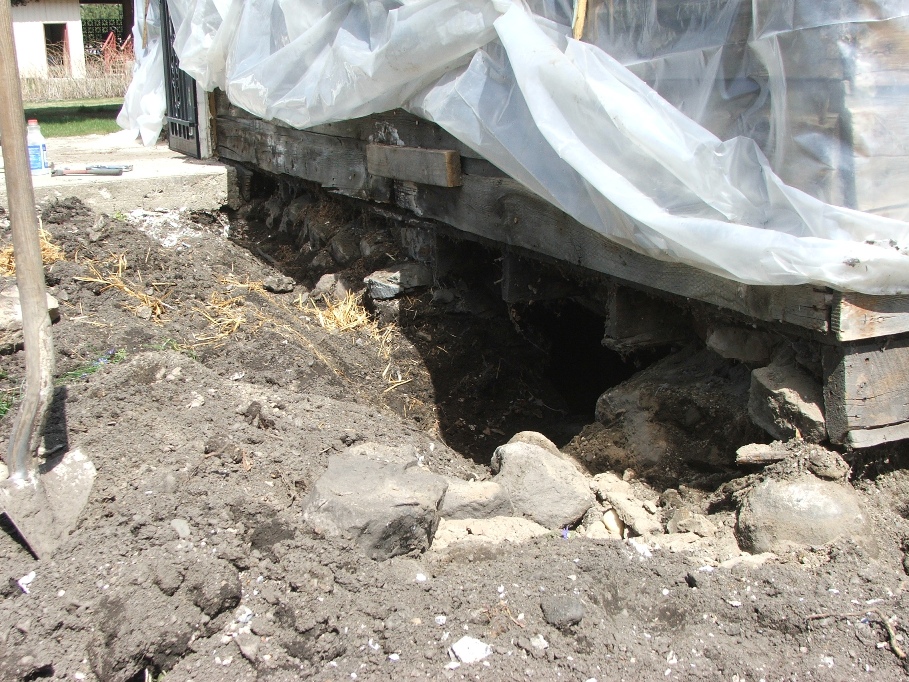

Pretty flower, huh?
This means that there must be some ray of hope to all of this.
I went into the cellar and looked around at the situation from underneath. It was bleak at best and my thoughts raced to figure out how I was to lift up the joists and insert a sill etc. Nothing was coming to mind, even though I knew from reading a old home fix up book that people had raised whole houses and built foundations. I just don’t have that kind of money! My God, this will be a killer task. I figure I will have to raise this part of the house at least 4 inches and probably 6, and what will that do to the way the ceiling joists are attached and the way the roof is pitched etc.?
The scene from the cellar view looked like this….
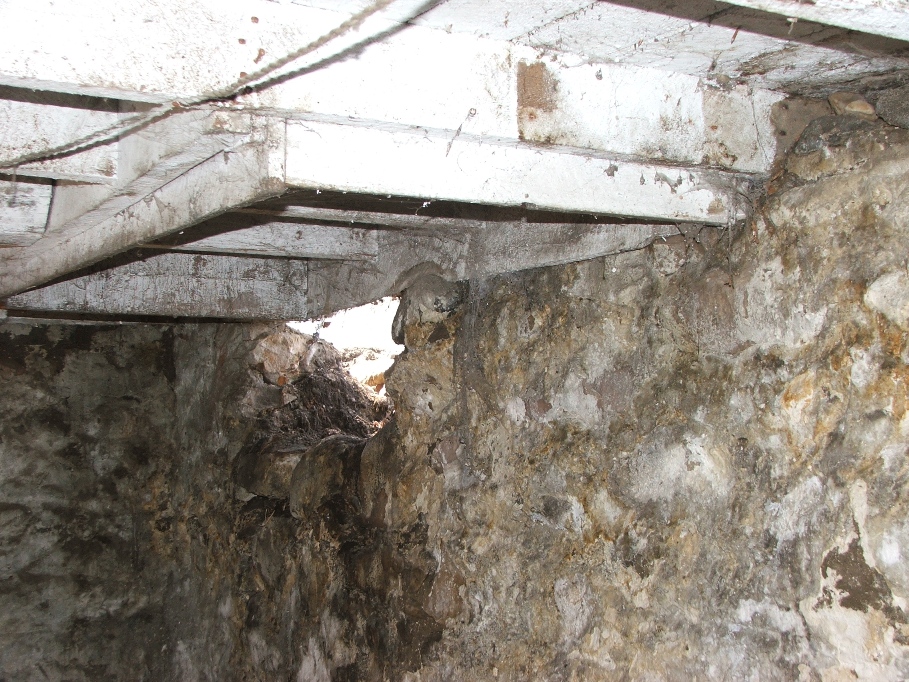
This hole is the same as the one you just saw from the
outside looking in. It was a window of
some sort when it was built, but the frame work had collapsed under the down
pressure from above, and allowed water, bugs, critters etc. into the cellar. This isn’t the only place those things could
enter however, as there are a lot of holes all around the cellar that would
allow that. This one would allow the
biggest of them in though.
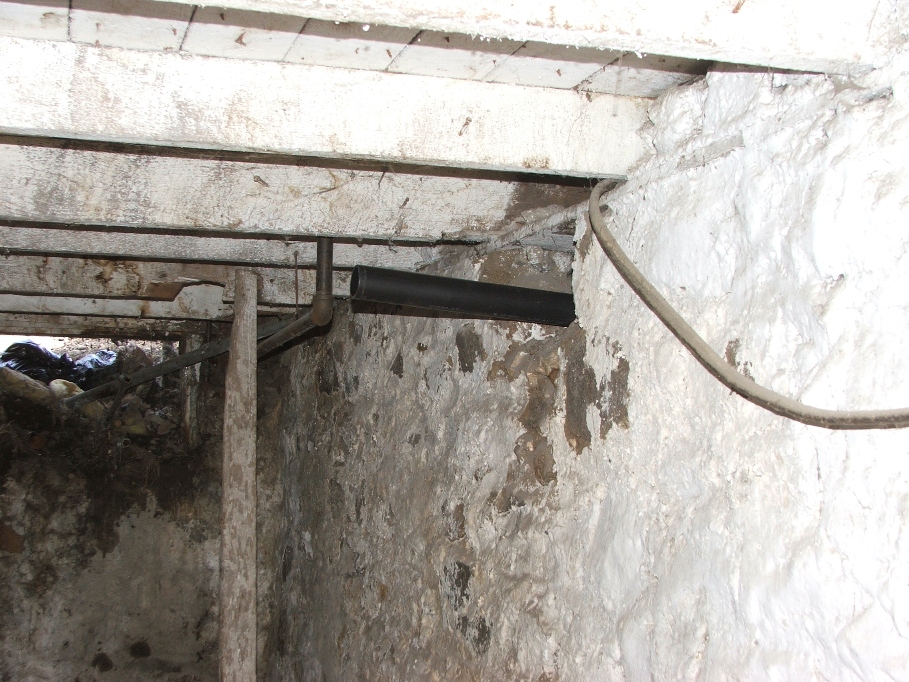
The window on that end was used to pitch potatoes down into
the potato bin. We did that several
times as kids growing up.
It wasn’t long until Sherry came over to see how I was doing. I wasn’t a happy guy, but I tried to shed some light on the situation. I showed her the outside and said that there should have been a sill placed between the rock foundation and the floor joists when it was built, but there wasn’t any sill. We went into the cellar (which she hates to do…spooky you know). I explained the fact that three of the joists were not even full length and that they were cantilevered out and had no support underneath. It’s no wonder that part of the house sank. These would have to be lengthened via sistering the wood, and then raised using hydraulic jacks etc. and once raised to the proper height I could then insert a sill to take the weight. Do I have the knowledge? Hell no!
She calmly looked things over and said : “What about building a brace or wall or something under the floor that would support all of these floor things from down here in the cellar? Then you could seal off the outside with cement and get on with the rest of what we have to do to this house.”
Wholly Chit Man! What an idea. (Later I told her that was the best idea of the entire month, and she reminded me that today was April 1st.) So, I proceeded to write down all of the material I would need to build such a support and will go to town very soon to get the stuff and put the bearing wall in place. The game plan is to use 2X4’s as the main support beam. I will nail two boards together side by side and have them support by standing up, I will then nail another 2X4 to the under side of the others, which will act as the sill. My upright wood will be pressure treated 4X4’s and I will place them under each of the floor joists (11 total). These 4X4’s will be attached to metal saddles, placed in cement buried into the floor of the cellar. I should be able to jack up the three joists that need sistering and raise the floor a little, maybe even an inch. Anything would be good at this point.
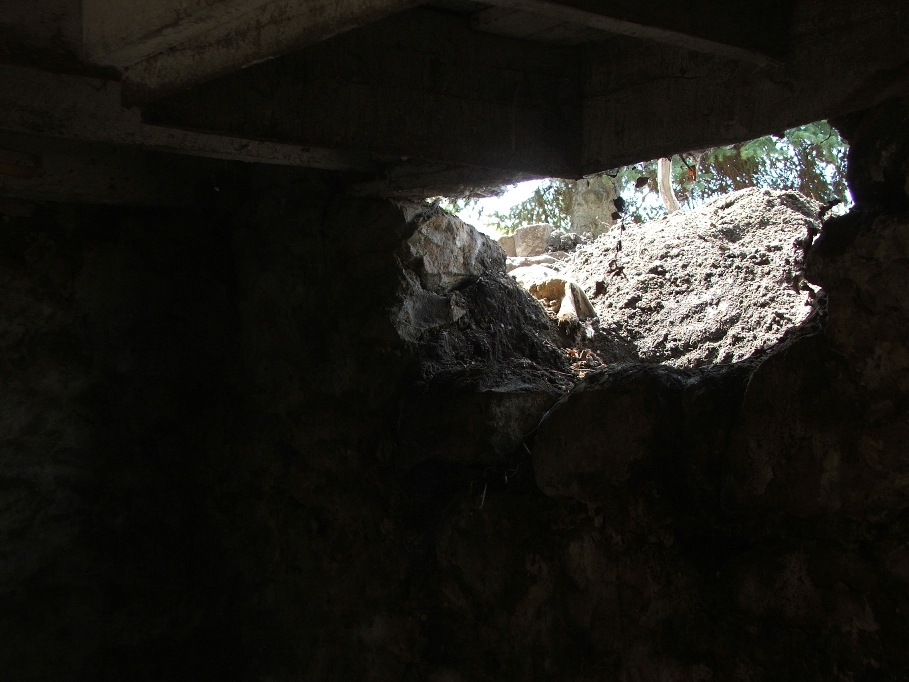
It’s not all dark, there is a light at the end.
Todays finds:
I thought we were through finding stuff several days ago, but I will
quit saying that. Today the finds were
not as plentiful, but still finds none the less. The marble was found in the cellar next to
the East wall in the dirt. I saw it as a
round rock and when I dusted it off it turned out to be one of the prettiest
marbles I have ever seen.

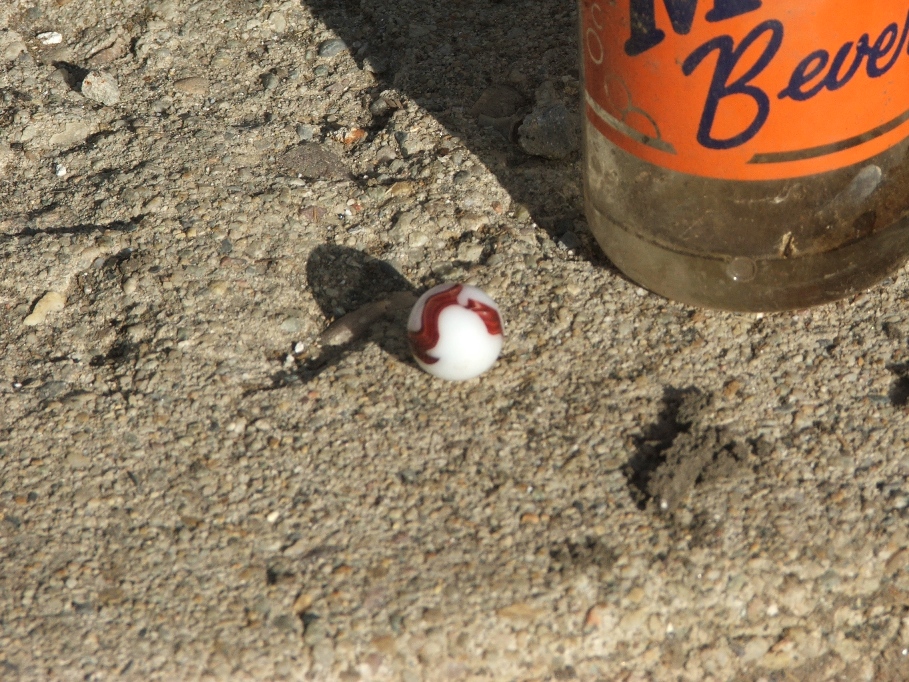
The bottle was under the potato bin, which I
only was able to move a couple of boards before having to go help load a wagon
of hay. Check out this close-up of the
marble.
I’d have traded two steelies for this one!
I’d have traded two steelies for this one!
Between April 1 and the 9th…Mr Witt
has been digging, glueing and otherwise having a great time doing plumber stuff
in the house. He removed all of the old
plumbing and replaced it with new plastic pipes and such. He also put the drains in for the upstairs
bathroom. Here are the series of
pictures on all of his work to date.

Upstairs bathroom drain connected to new drain for
downstairs bathroom. Just under the
North window.
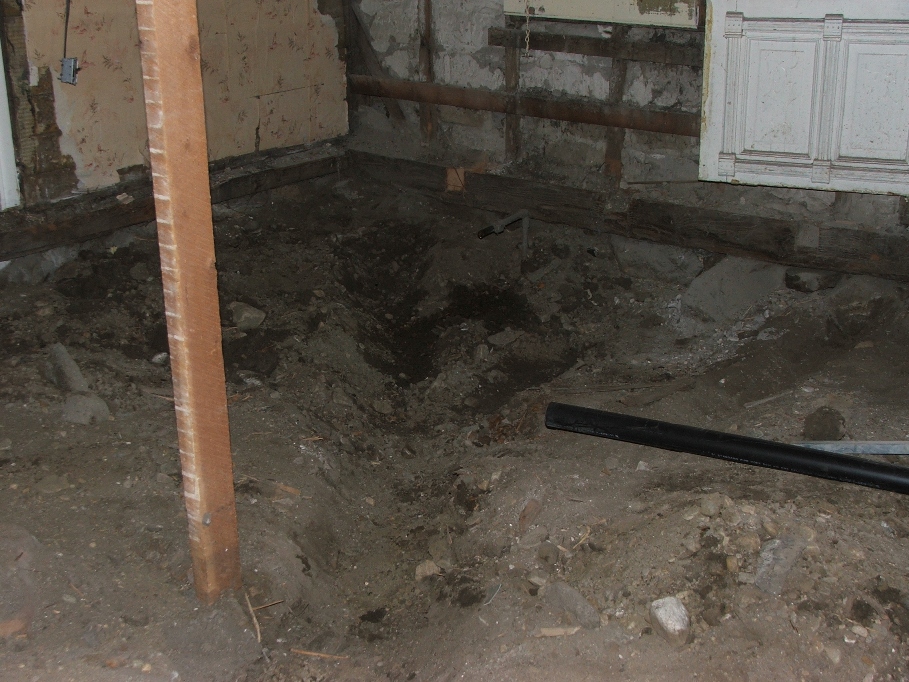
Direction of drain line from window toward bathroom.
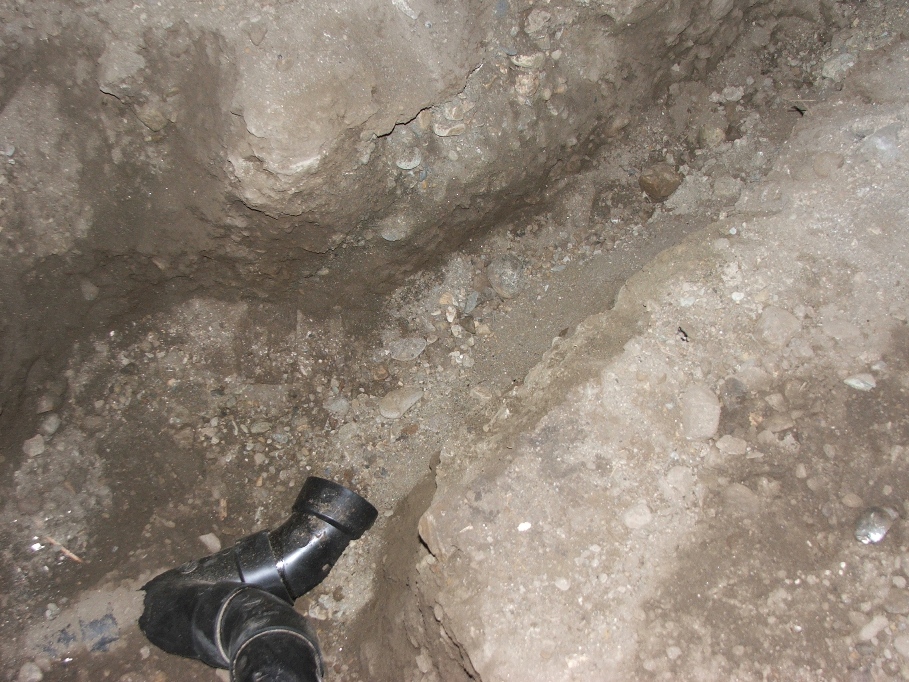
The “Y” before the two bathroom drain lines were connected.
This is located just inside the room under the North window of the TV room.
This is located just inside the room under the North window of the TV room.

This is in the cellar and will be the drain for the heater
and air conditioner when that is installed.
Today is April 9….I have been very busy doing lots and lots
of things and have neglected to write in this journal (or whatever it’s
called). Sherry and I have been looking
at motor homes, plus we are trying to sell the farm, take care of normal duties
around the house and also continue to “construct”. I’ve been pulled many directions this week.
I’m not sure anymore what day things happened, but it was between Apr.1 and today for sure.
My 2X8 wood around the outside of the old TV room, and the center beam did not meet up exactly perfectly and so I decided to try something different. I pulled down the three boards from the South wall, and used the center beam as my level point and re-positioned the boards running up the South wall to level with the center. I worked from both ends toward the middle and it worked out quite well, even if I do say so myself. At least the outside wall boards look “level”, even if they aren’t, which they are.
One thing is certain. It is nice to be putting things back together and not ripping them apart.
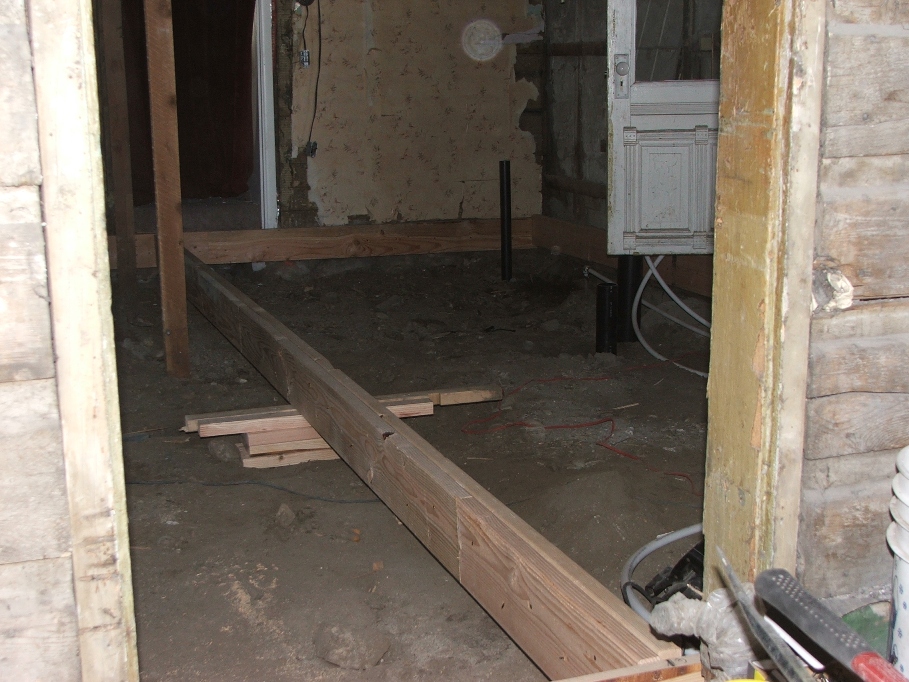
This picture shows you the height of the
South East corner board after I ran it what I called “level”, from the
beginning point to the end. It’s about 1
inch high meeting the other board.
Totally not acceptable. The South
wall boards were the ones I took back out.
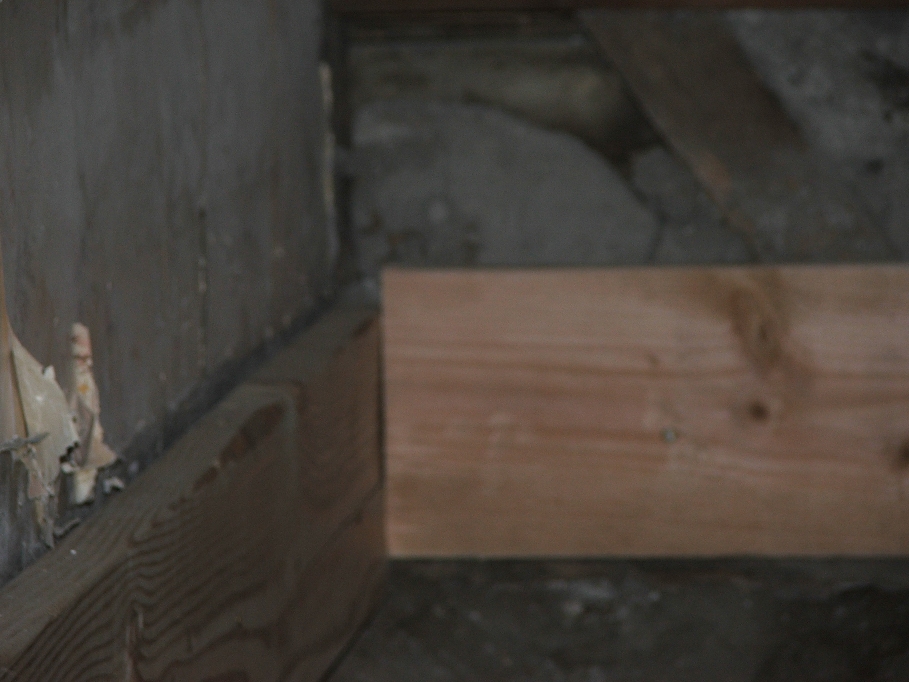
Both of the boards are level, but did not match up...Not acceptable!
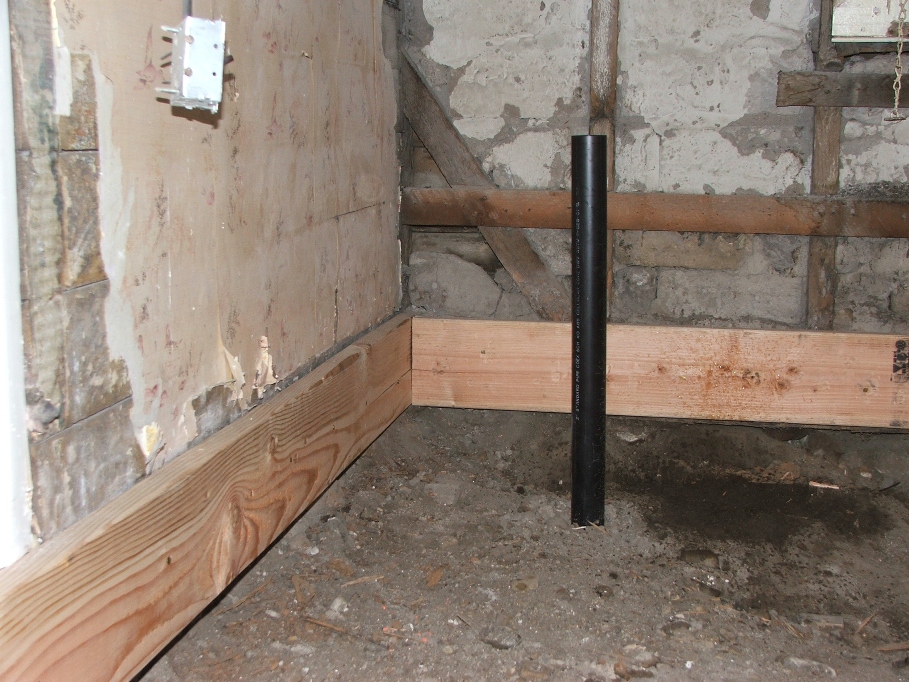
This is what it looks like now, nice and even and level with
the center beam.

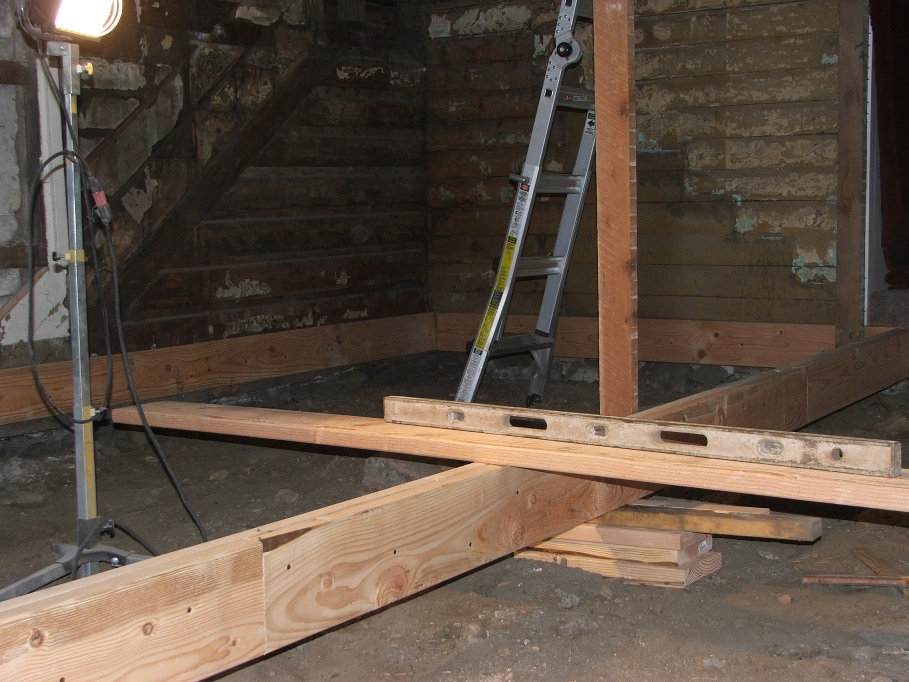
I’m now ready to run the joists across the rest of the room,
and support the center beam with cement and 4X4’s.
There is something mystical to me about carpentry, why do the pros know exactly what needs to be done to get the job done quickly? Why can’t I do it right the first time? I try and think out all of the angles before ever beginning the project. Oh well!
April 9…The other day we went to “Home Depot” and bought the 2X8’s and were “under charged” by many dollars. The register person didn’t charge us for 10 of the boards, which added up to nearly $80. We went back and made the deal right, by explaining and making up the difference. The manager gave us a 10% off coupon for our next purchase, which was great, but not necessary. The problem with that coupon was that it expired tomorrow (10th). So today, we went in and bought all of the subfloor and underlayment material we will need to finish the rough floor in this room, the coupon saved us about $35.
That material currently rests in the bed of the pickup and is covered by a tarp to keep the rain from getting to it.
The next planned work day is Monday, after I take the motor home in for inspection. Also, some time next week a man from Logan wants to come down and review all of the old books that came out of the old house and give us an offer to buy them. Between all of the “other things” in the mill, I might just get this old house rebuilt after all.
April 12…Today is Tuesday, I took Monday off to goof with the motor home. I fixed up a few things and Sherry and I took a short drive….its cool.
All I can do today is dig under the center floor beam and pour cement. I dug about 12 inches down and 12 inches square in three places under the center beam. One in the middle and at equal intervals out each side from that. It only took about an hour and now it’s time to wait.


Between the cement and the wood, I will cut a 4X4 treated
timber and toe nail it in place to support the beam. I plan on spray painting the 4X4 all around
with that black tree trimming paint to discourage bugs from eating it.
April 13….today I got started late (10 or so), but I have big plans to complete the floor joist installation. I have the material, the drive to get it done and the radio on. Let’s go!
I worked until about 2 p.m., when Sherry called on the two way radio for me to take a break. I took a short time for lunch and she went off to town for groceries, I hit the floor joist operation again. Sometime about 3 or 3:30, she paged on the two way again and I asked her to please bring a couple of beers. She did, but didn’t stay long, and I enjoyed them as I proceeded to do more work on the floor.
At 6 p.m., she called and asked if I was going to quit and I told her I was just taking pictures and I’d be home soon. This is how the joists turned out.

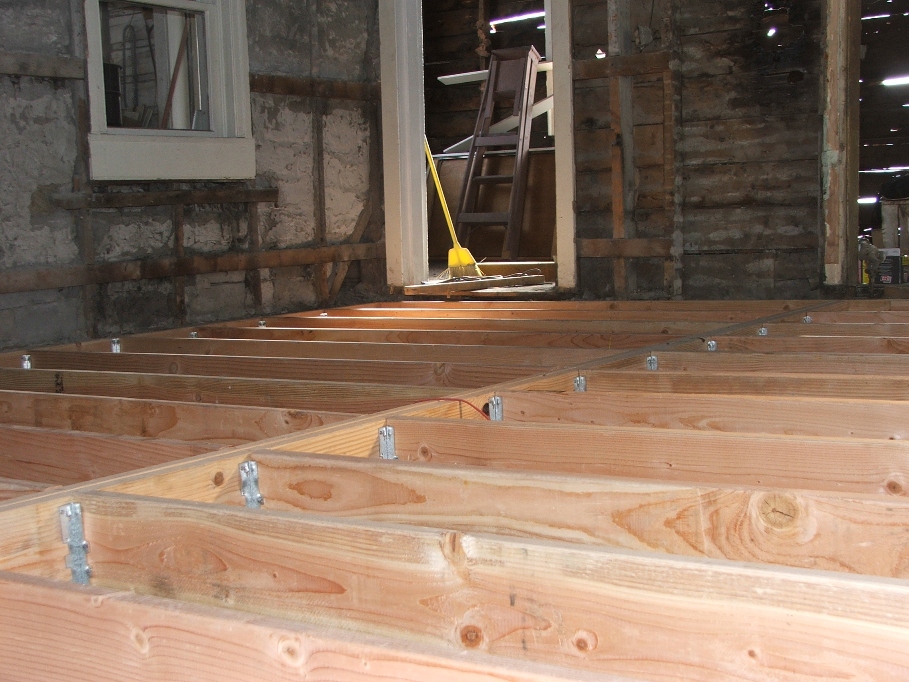
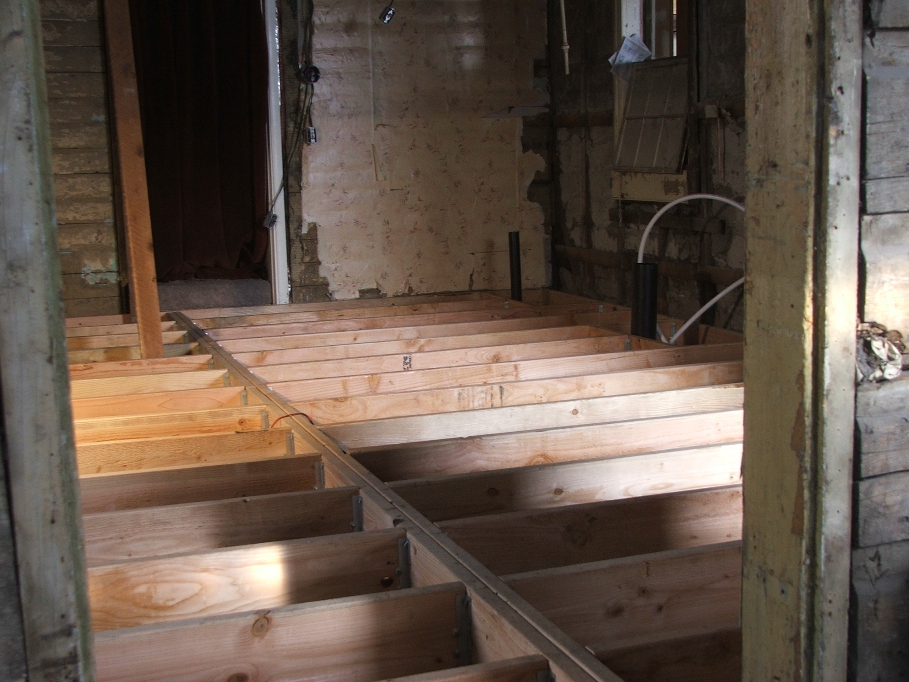
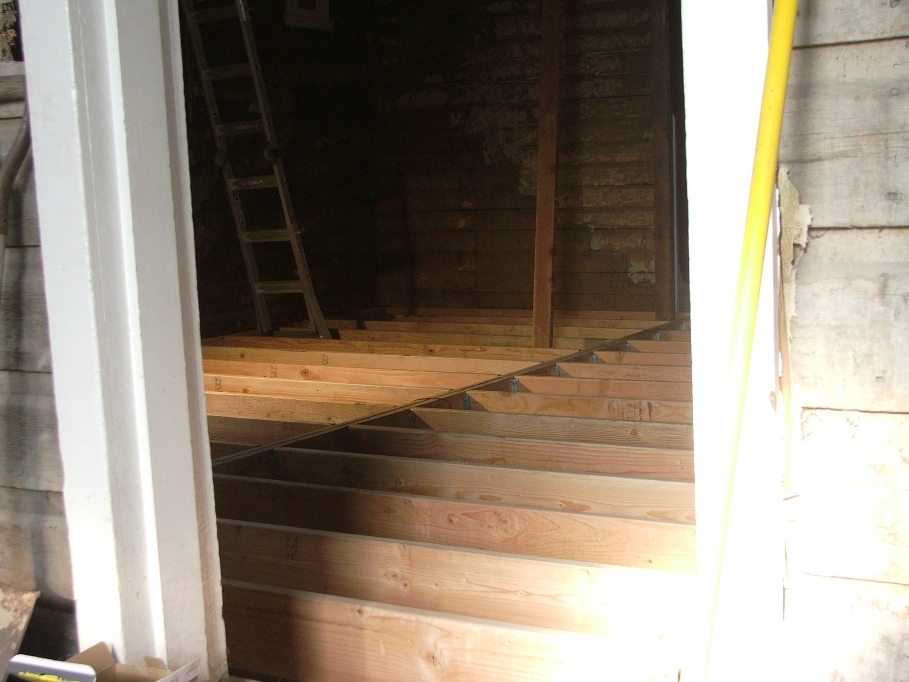
I must admit, I don’t know what I am doing, but it looks
like it turned out pretty good! If I do
say so myself!!!!
The next thing to do is put braces between each of the stringers, and it will be ready for subfloor and underlayment. I need to get really busy tomorrow, because I have the termite folks coming to spray the floor on Friday morning at 10 a.m. After they spray, I am not to disturb the dirt. When the spray is down, I can place a plastic tarp under the joists as a vapor barrier and then go ahead and attach the subfloor.
The guy is coming to look at the old books tomorrow at 1 p.m., (what a pain), and so I will have to have him set up in my garage before that time. I also have to go to town to get some more materials for the braces. I will be busy!
14 April…Well I got a good start with a trip to town to buy 5 more 2X8’s to complete the floor joists. Then, once back, I had to clean the garage and get ready for the book man.
When done with that, I only had about an hour, so I played a little with the motor home and the boat. I found that the wiring on the motor home needs some work, as well as the boat trailer. The tongue is too short, wiring not long enough, safety chains not long enough etc. I’ll deal with all of that later.
Next came the book man, he spent a couple of hours looking at the old books from the house, and offered us $2100 for about 50 books, the rest are junk. We will decide later. In the mean time I am excited to head to the house to work.
I made the best of the time and managed to get half of the room done with bracing boards. Sherry came to my rescue about 4 p.m. with a couple of cold beers. Thanks! What a welcome surprise. She still feels ill, coughing and hacking and with a fever. I’m not real happy about her illness. More work is needed tomorrow to finish these braces, and I’m not ready for the spray man to show up.
Sherry called the termite spray guy and delayed my need until next Tuesday. I figure I can get the rest of the floor braces on, and clean off the walls of the old TV room, getting the dirt and plaster off, that still hangs up there. It will be easier to do it now than if I had plywood on the floor.
Once the spray is done, I really should not disturb the dirt, even if the spray man doesn’t think its’ a problem.
Here is what things look like tonight. More to do tomorrow and then I need to contact the plumber again, once the spray is done and the plastic is laid down as vapor barrier.
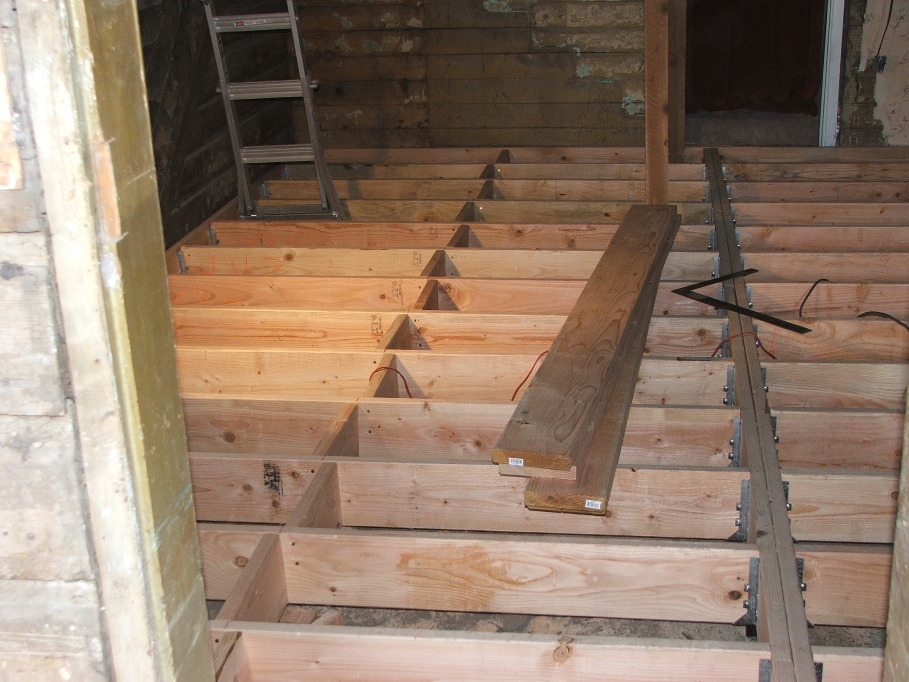
The braces aren't perfect, but they should
support the movement from east to west.
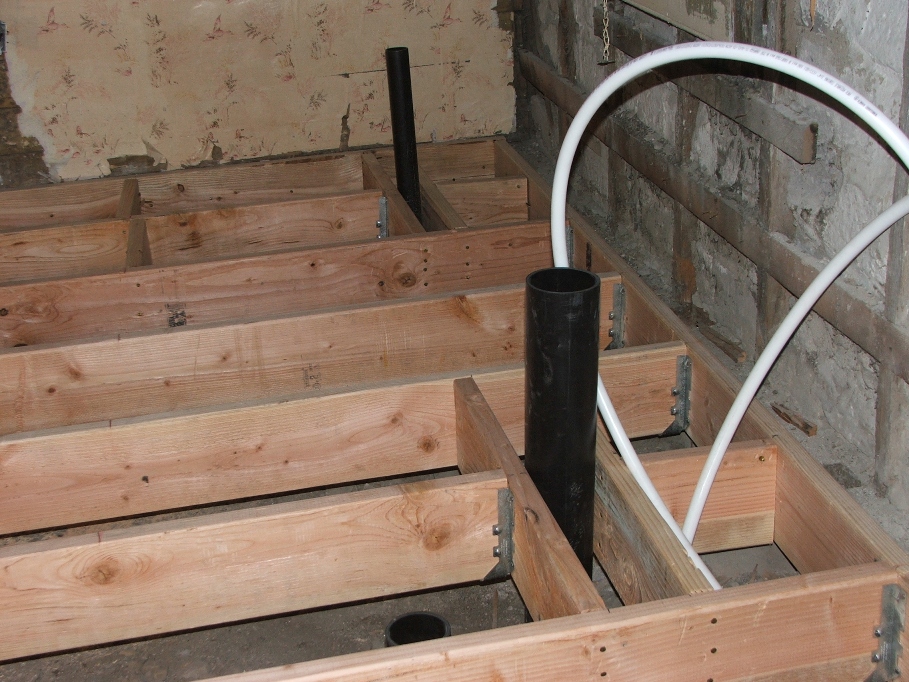
These “boxes” should support the shower and the toilet in an
adequate way. I hope! Maybe in 50 to 100 years someone will rip
this floor up and say “Wow! What a dumb
way to build a floor!” Who knows.
Next is to finish this part of the job, lay down the subfloor and underlayment and then get back to the cellar problem.
April 15 (Tax Day), 2005….Well I was able to get over to the house and do a little work. I finished putting the floor bracing in, knocked down the loose material off the wall, mixed and placed some cement, and made it ready for the bug spray man to come on Tuesday. The pictures only show what’s under the floor.
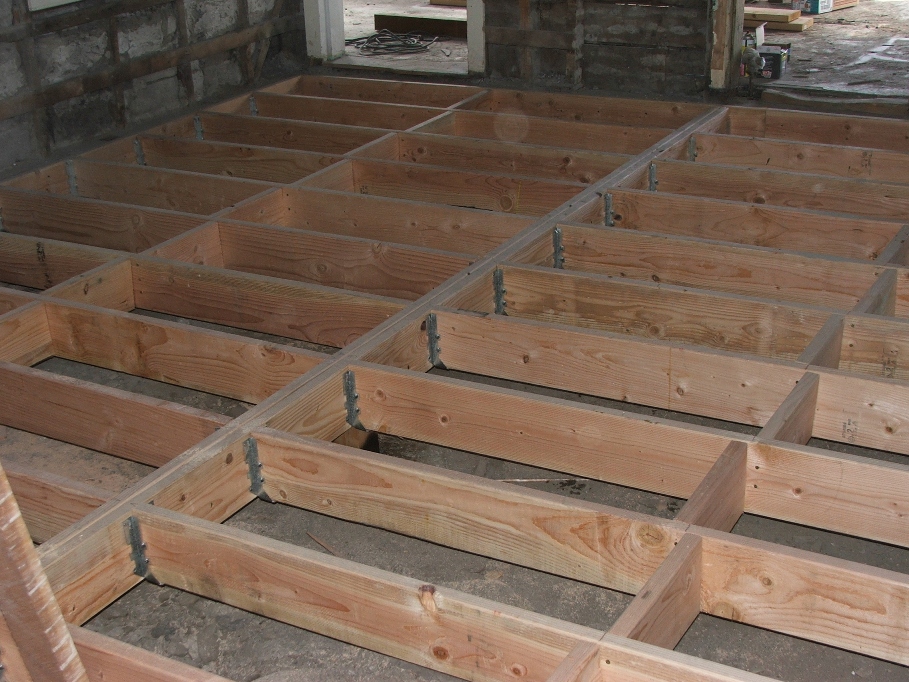
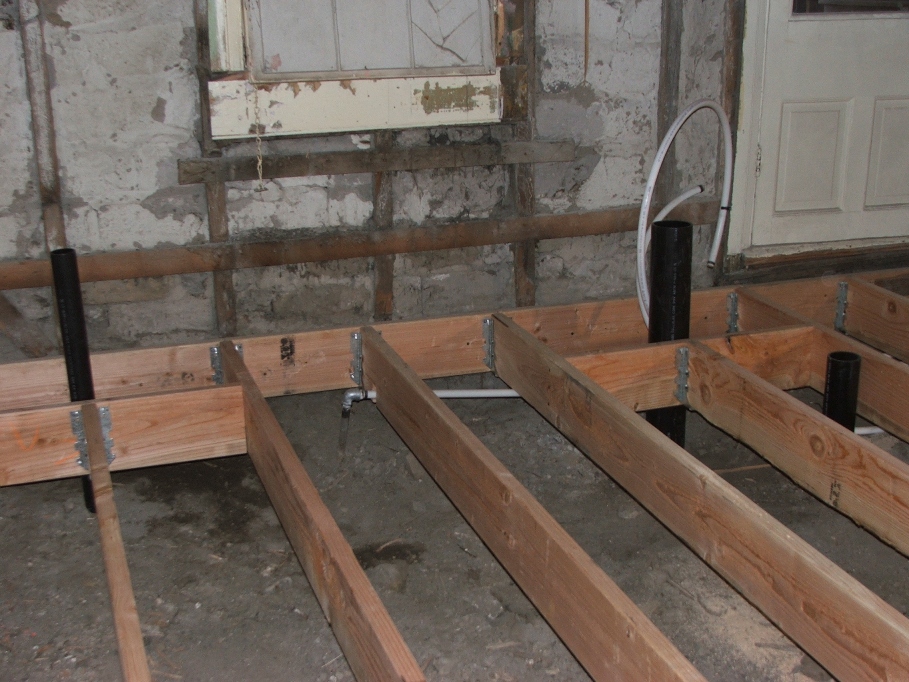
The rest of the room.
Pretty good if I do say so. I
think there will be a slight rise going into the utility room (that’s what I am
calling the small bedroom and washroom now days).
April 19…The guy from Western Exterminators (Franklin, ID.) came today and hosed the cellar from spiders and everything else, and then added a termite protector to the mix and really soaked the tv room down good. Not only did he spray the dirt floor, but he sprayed the ceiling, walls and everything in there.
When done, he told me not to go in there until it had a chance to dry, maybe 4 hours. So, I went home. A couple of hours later Keith Witt came over to see about doing some of the plumbing he had to do. We went in, and it was still wet. We were only in there for a few minutes and when we came out, both of us had slight headaches. Powerful stuff!
It rained all afternoon, and is expected to rain tonight and tomorrow morning. Hopefully it will dry, because Sherry and I plan on hitting it first thing and lay the plastic vapor barrier down.
Apr. 20…After breakfast I went over to the house to inspect the dirt floor, only to find it nearly as wet as it was yesterday. I was a bit down because of that and it didn’t look like it would dry enough to let us work. It is still raining and will do all day long, which will make it slower to dry. I set up the fan to blow downward into the floor joists and headed back home.
It seemed like a wasted day, but because of the upcoming auction of the old “stuff”, we spent the day going through old books and odds and ends deciding if it should be auctioned or held onto. Tomorrow, the auction people are coming to look at what is left of the books and a few other things. Plus take some more pictures to post on their website.
Apr. 21…A beautiful Spring day is ahead of us! AND, I will be able to go to work on the flooring in the TV room! YEA! Sherry was going to be tied up with the auction people and the books etc. so I will have to work alone. First task…vapor barrier!
I rolled out the plastic (6 mm) put it under the joists and pulled the folds out, spreading it as evenly as I could. It worked out just fine, with two layers overlapping about 4 feet in the center area.
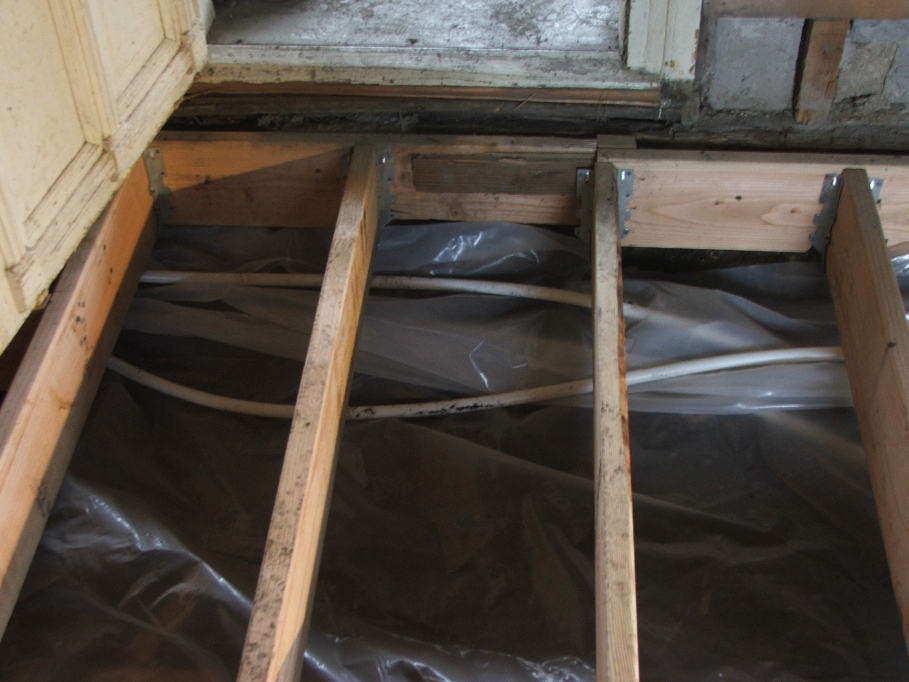
I had to cut here and there to get pipes to ride on top, and
or to make a way to spread it around the center support posts.

It should keep the moisture out for at least another 100
years! I should have put a “surprise”
down for the “next guy”. Maybe I will
tomorrow, before I cover it all up with subfloor.
Once the plastic was down, I unloaded the plywood and other materials to be used on the floor. It all had been in the back of the truck, covered with a tarp, but still managed to get wet with all the rain we have had.
As I stood there pondering how I should start the project of laying the subfloor, Roy came over to see the progress. I thought I would start with a full plywood 4X8 ft. sheet centered on the doorway coming from the living room. And then I would work out both sides, cutting and matching as I went. He questioned my approach and told me it would be much simpler, and “normal”, to start in the NE corner, mark a chalk line out at the 4 ft. point and work down the North wall in that fashion. Then place the next full sheet alongside the ones that were laid and move East, etc. etc., until the room is done.
He helped me with the chalk line and setting the first board. Bob came over and the three of us BS’ed for about half an hour before they left. Then I went to work hammering number 8 penny ringed shaft nails. Roy also advised I should glue and nail so that there wouldn’t be any squeaks in the floor. I told him I didn’t want to go to town and waste my day. Since it isn’t “necessary” to glue down the boards, I am counting on the nails holding and God to be looking after us because of our honesty of the past.
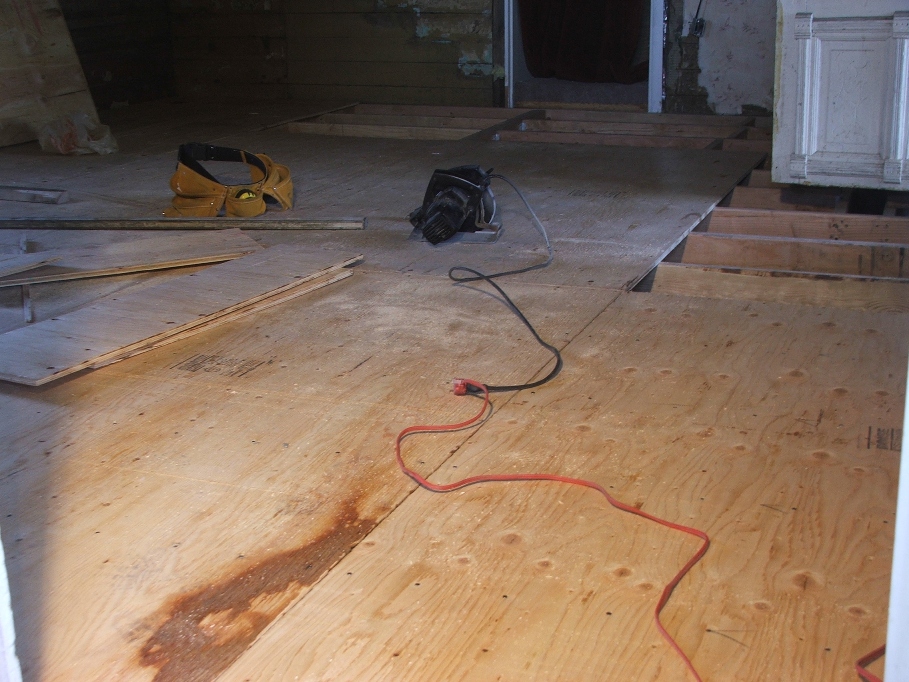
The dark stains are from the water that got on the
wood. It’s CDX plywood so structurally
it is still in good shape and will dry.
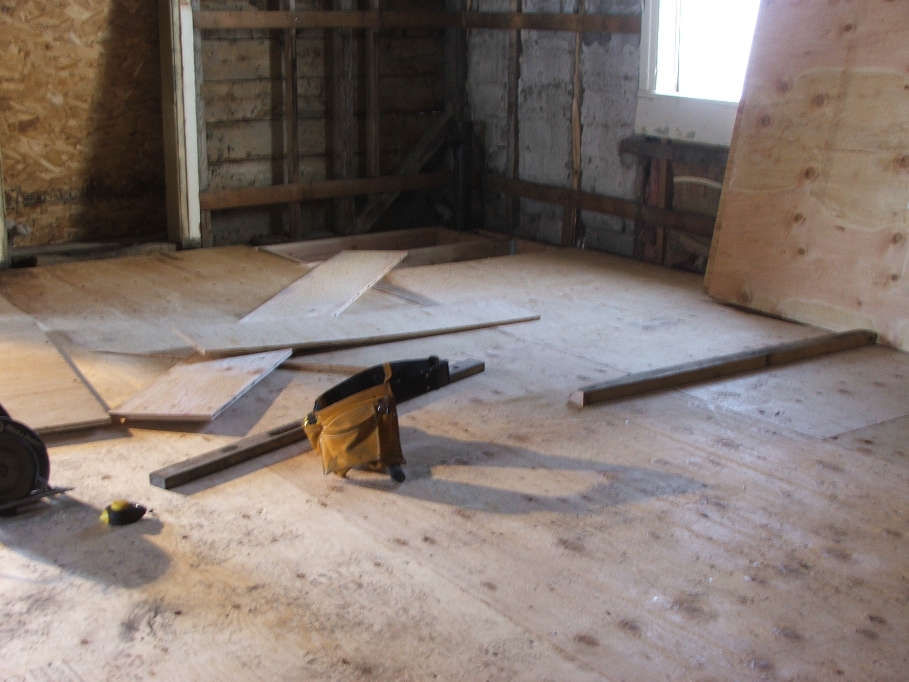
This is looking into the NW corner of the room. I have to work a piece of ply around the
plumbing in this corner. Tomorrow I plan
on finishing placing the subfloor down, around all of the plumbing fixtures
etc. This will take all day I
expect. The room is far from square and
I have to do a LOT of cutting and “scabbing” to make it solid. When I’m done, no one will know what I had to
do to make it work. Only until someone
tears this apart will they know! Good
luck to that person, should there ever be one!
Apr. 22…Excited to get started today! We got up in the normal fashion, sloooowwwwllllyyy! Had a good breakfast and Sherry headed into her garden, while I headed for the house. Today is the day to finish the subfloor. To make the matter short, I didn’t have any major problems, just the slow going of measure, re-measure, mark and cut. The room is not square and so every piece had to be custom cut today. Here is the end result in a series of four pictures. One from each corner of the room.
Apr. 22…Excited to get started today! We got up in the normal fashion, sloooowwwwllllyyy! Had a good breakfast and Sherry headed into her garden, while I headed for the house. Today is the day to finish the subfloor. To make the matter short, I didn’t have any major problems, just the slow going of measure, re-measure, mark and cut. The room is not square and so every piece had to be custom cut today. Here is the end result in a series of four pictures. One from each corner of the room.

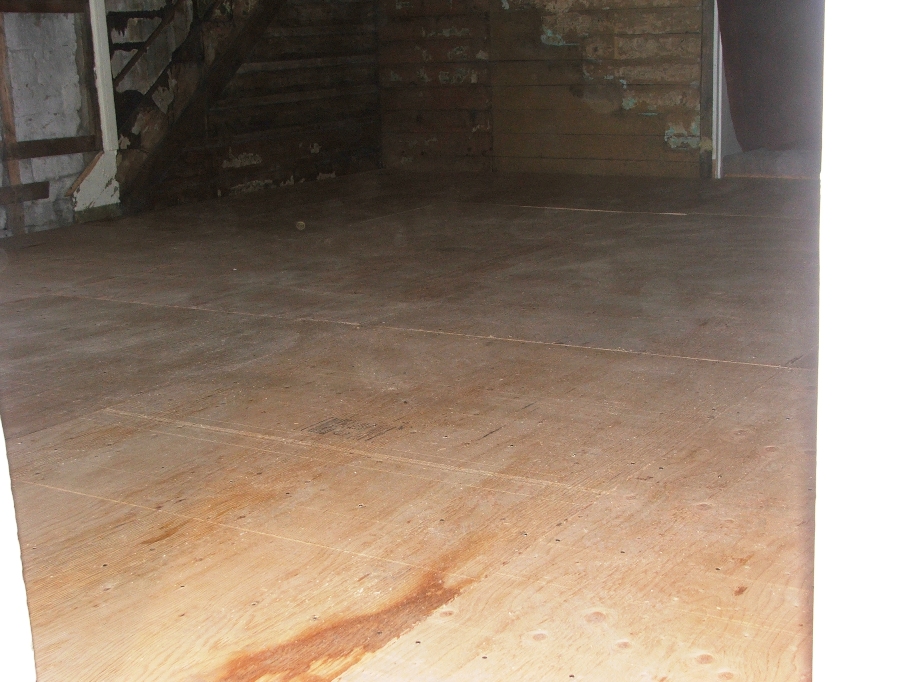
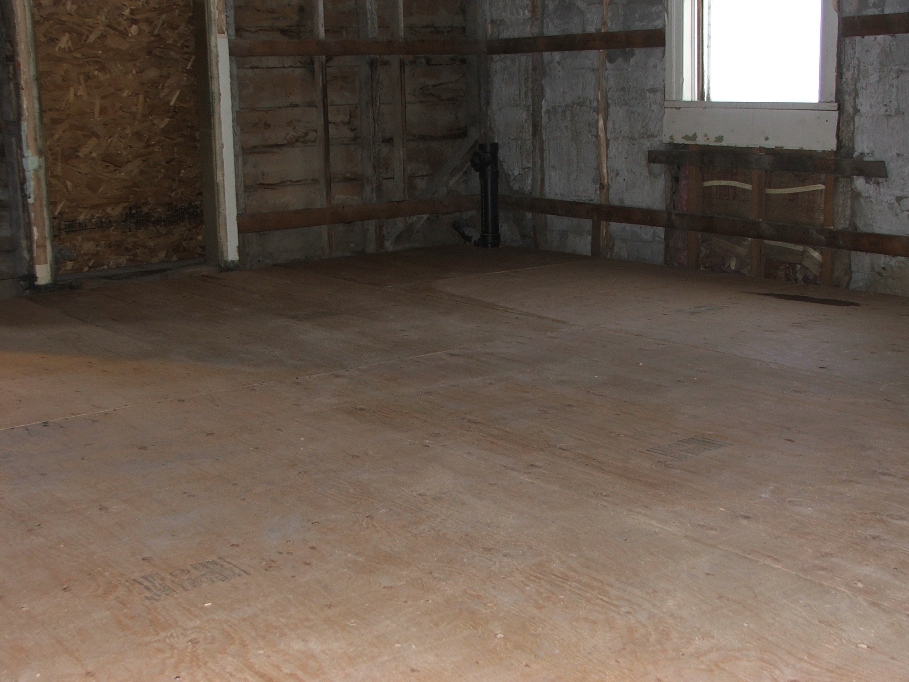
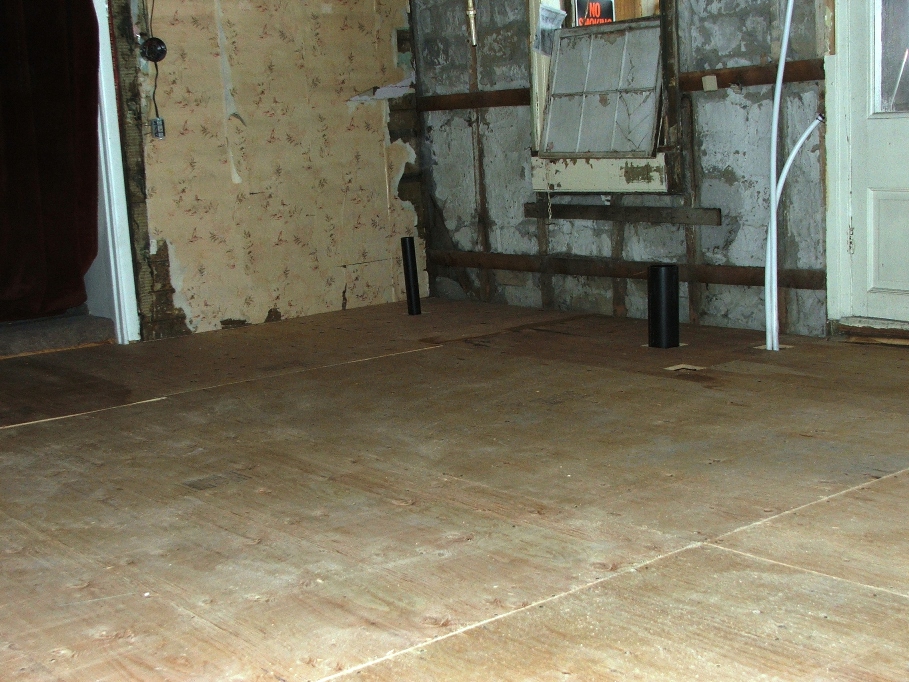
Finally, from the NW corner toward the bathroom. Note an imperfection…the board to the far
left is up about 1/8th inch.
I had to scab a 2X4 to the floor joist in order to have something to
nail to and I got it too high. Oh well,
it’s my mark! Never perfect!
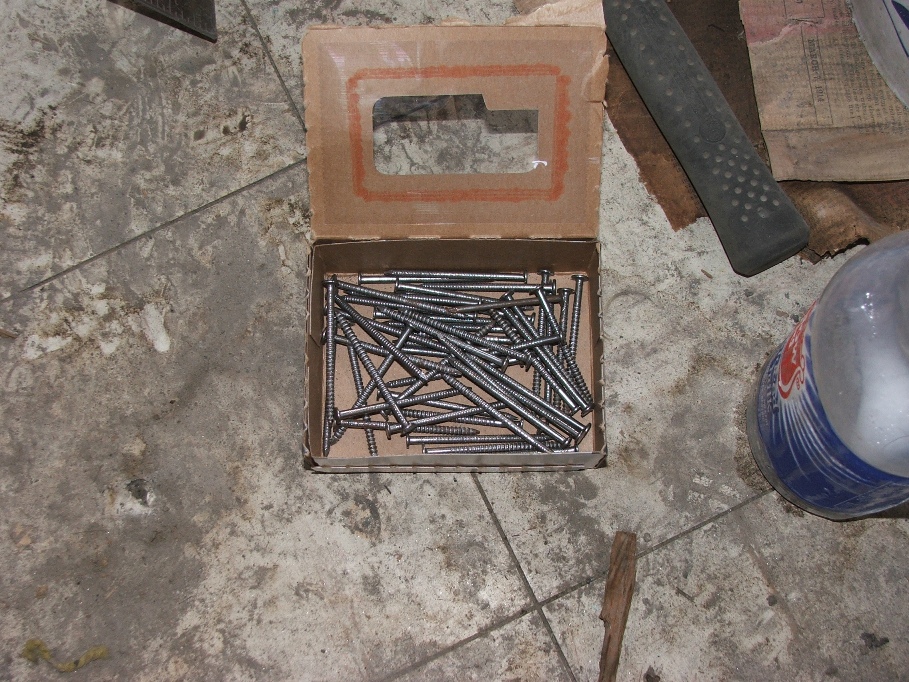
This room is only 15 X 19 ft. (give or take a
few inches here and there), I used nearly 8 pounds of number 8 penny nails with
only these left of the 8 pounds….
For the underlayment, I have purchased 9 pounds, but I doubt I’ll need that many. I don’t know what code is on any of this, but I suspect I will be using about ½ the number I used on the subfloor.
Once the sub was done, I marked out where the 2X4 walls will go for the bathroom walls because I plan on laying cement board in the bathroom. This is required in order to lay tile later on. So my underlayment will be just under the walls and then extend out into the rest of the TV room.
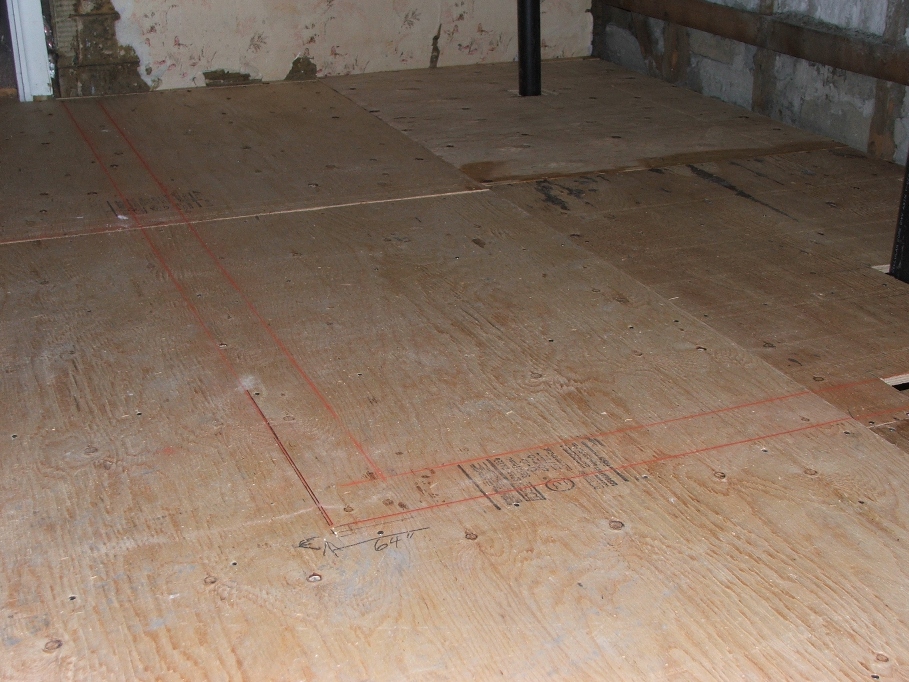
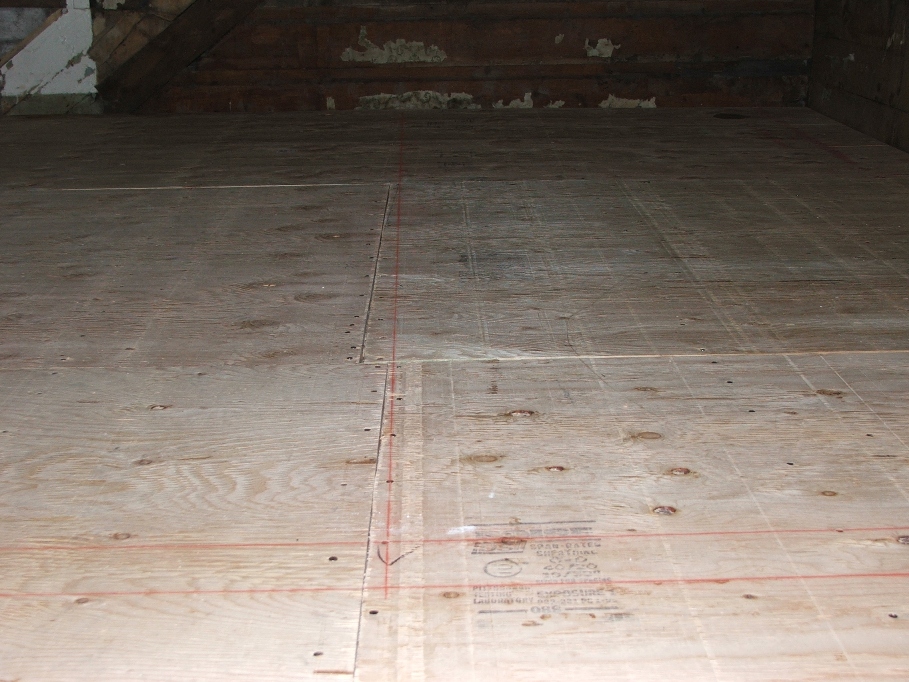
Then a marked 4 ft. line to keep me straight
with the East wall and intersect it with the bathroom wall.
I’ll place the underlayment along the closest red line in the picture, this is the side closest to the inside of the bathroom. The wall will be placed on top of that and should line up nicely when finished. The cement board will be placed adjacent to the underlayment along this same line.
I’ll place the underlayment along the closest red line in the picture, this is the side closest to the inside of the bathroom. The wall will be placed on top of that and should line up nicely when finished. The cement board will be placed adjacent to the underlayment along this same line.
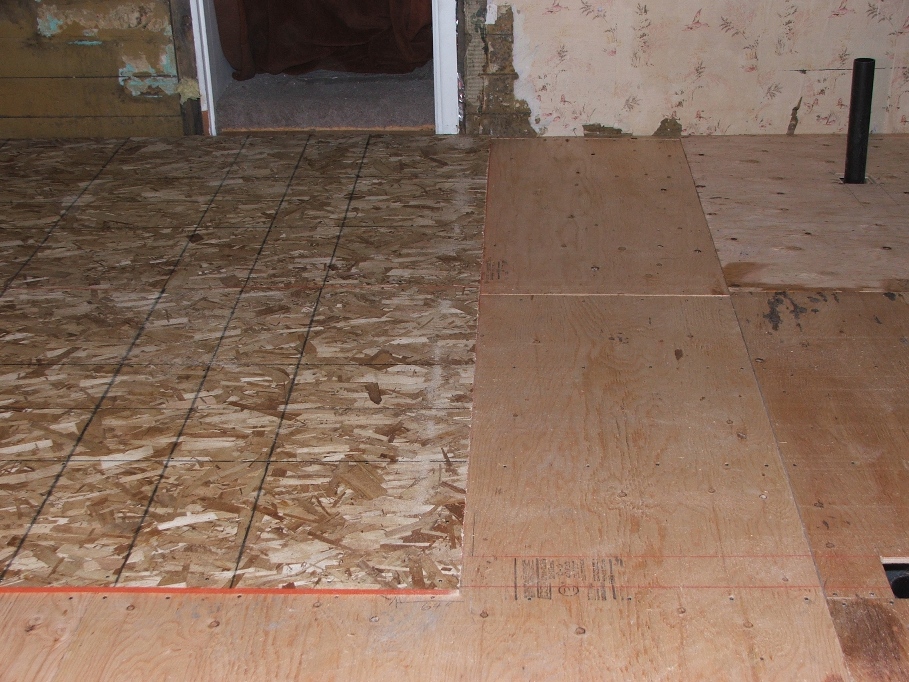
I layed the first two boards and then called it
quits for the day. I’m excited to get
back at it on Monday or Tuesday of next week.
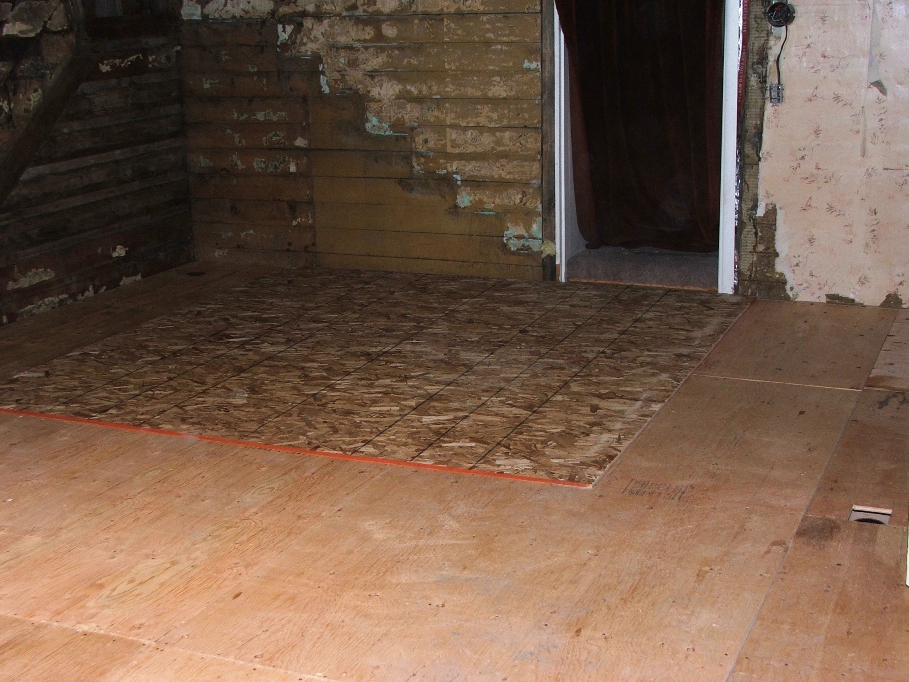
Apr. 25…The start of a great day! The plan is to complete the laying of the
underlayment in the TV room and get Mr. Witt over to finish his plumbing, at
least the part he can do up to this point.
It took until about 1 p.m., but I got her done! Here are the looks.
It took until about 1 p.m., but I got her done! Here are the looks.

I actually moved the stuff from the utility room into here
so I could clean up that area.

I will be furring the old door way soon, so that wall will
be a complete wall when I’m done.
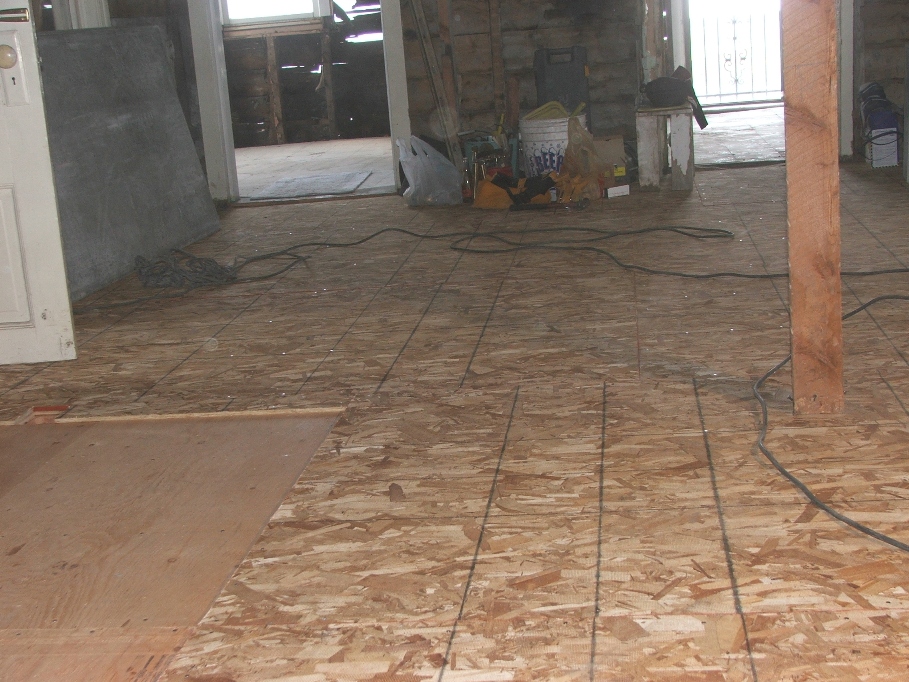
The space where the bathroom is, will be filled with “cement
board”, so as to be able to tile it when we get that far.
I cleaned up the mess in the utility room, and then headed to the cellar to prepare for footings. The old potato bin is now history and the wood will be put in the hole to be burned today. During the cleanup down there, I found another marble. Not as cool as the last one, but OK. This picture of the finds, includes a pop bottle we uncovered a couple of days ago in the excavation of the sewer line. The rains had uncovered it in the side of the dirt wall.
I cleaned up the mess in the utility room, and then headed to the cellar to prepare for footings. The old potato bin is now history and the wood will be put in the hole to be burned today. During the cleanup down there, I found another marble. Not as cool as the last one, but OK. This picture of the finds, includes a pop bottle we uncovered a couple of days ago in the excavation of the sewer line. The rains had uncovered it in the side of the dirt wall.

Finds:
Apr. 25…
Bireley’s pop and a cool blue marble. The pop bottle still has a lid (rusted) on it, but nothing inside the bottle. The way the marble is setting on the floor it almost looks like it’s floating.
Tomorrow is more footing preparation in the cellar. I need to lay a 12 X 18 inch footing to support a wall which will then support the utility room floor. I get a very uneasy feeling being down in the cellar, but I have to do it!
Apr. 26…Cellar day! YUK! I procrastinated all I could before heading over and down into the cellar. It’s very damp down there from all of the rain washing in from the two open window areas, but it made for easy digging. I marked out with a string the area needed for the footings and dug it out.
Next I scrounged materials for a form and put it all together, then back filled for support. It doesn’t look too bad for an amateur and should hold the cement when it’s filled up. I was happy to have this much done and get out of that room.
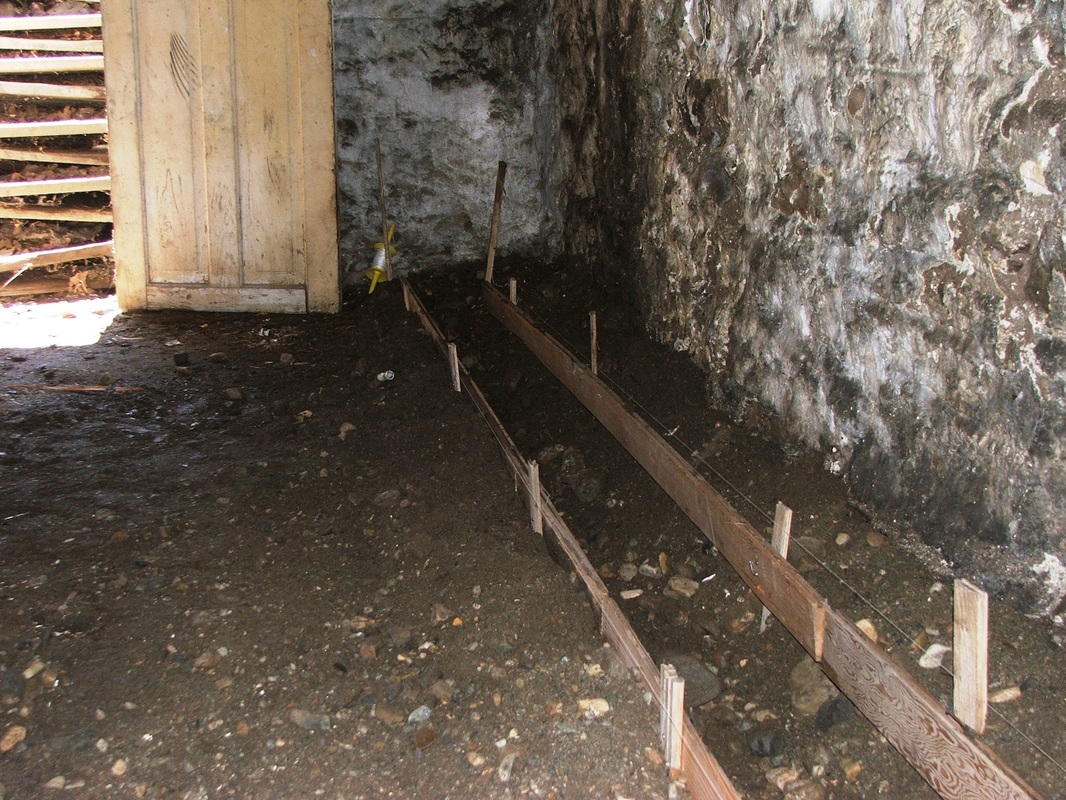
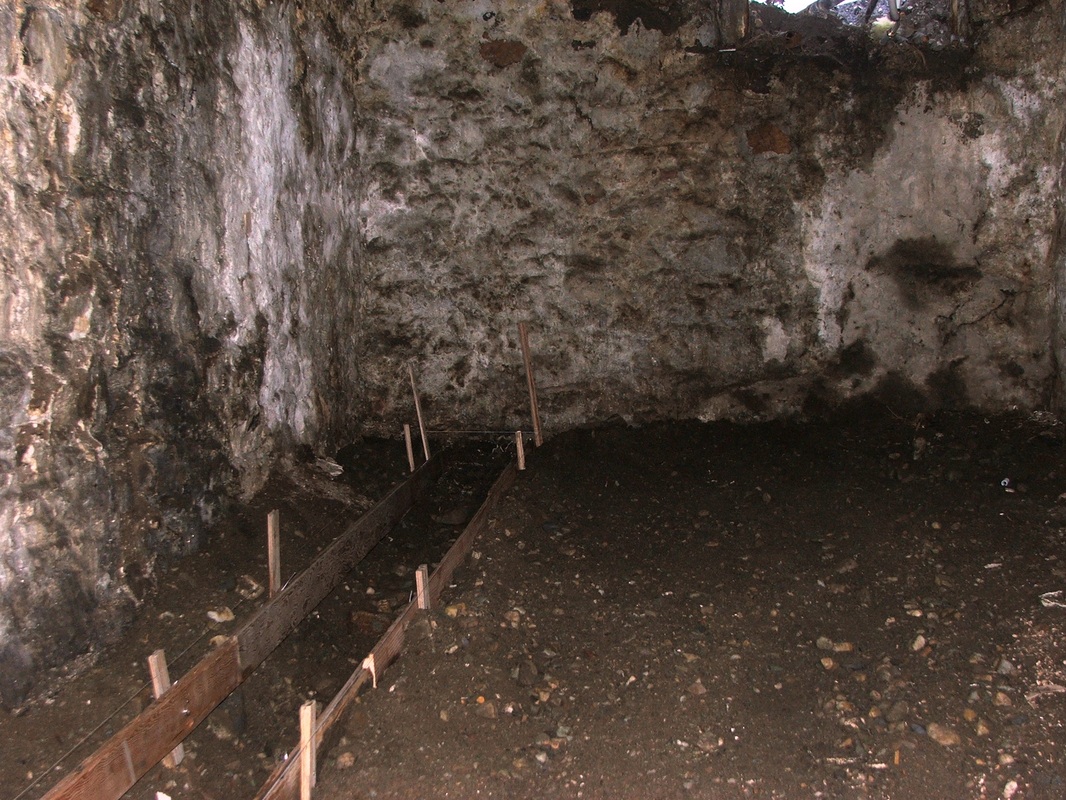
May 2….Well I got Mitch and Brandon to offer their help for
this day and I’m sure glad they did. I
doubt I could have done it by myself. I
called “Wisco” company in Brigham and asked about their “haul it” wagons and
they told me all about them. They can
put up to 1 ½ yards of cement in one and let you drive it off to your cement
needs site. Then clean it up and bring
it back.
I waited until Mitch arrived from Logan and then I called Brandon, who had just woke up! My hell, we start work at 9a.m., Why is he still in bed at 9:15!!!!????? As it turned out he played on the computer (poker) until wee hours in the morning and drank way too many beers.
Mitch and I headed for Brigham to pick up the cart of cement. We were back at the site by 9:40 a.m. Bob showed up just at that same time to talk about yesterdays catfishing trip to the river. He had one huge strike, but missed it and then the cops showed up and had them move because the river was running so high, they were going to have to break a hole across the highway.
Anyway, I asked if he was ready to go to work because we had cement setting up. Without hesitation, we started filling 5 gallon buckets with cement and hauling them down into the cellar. Bob helped by moving the empty buckets over and underneath the cement hauling unit. Brandon hauled the cement filled buckets into the cellar, and Mitch emptied them into the forms. It only took about an hour to empty the cart of cement (1/2 yard) and the forms were filled and Mitch and Brandon smoothed them with the trowels.
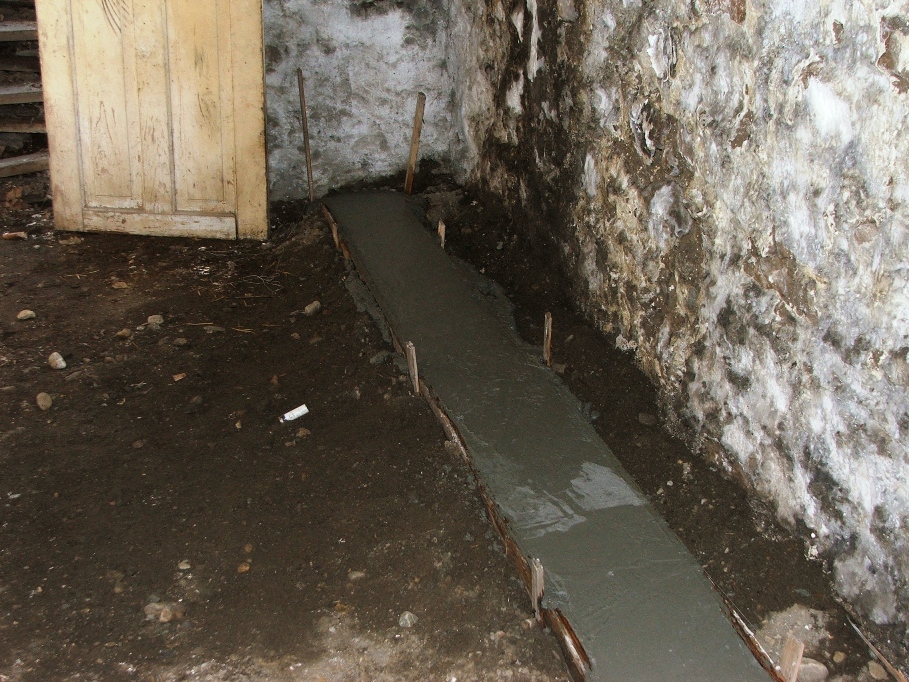
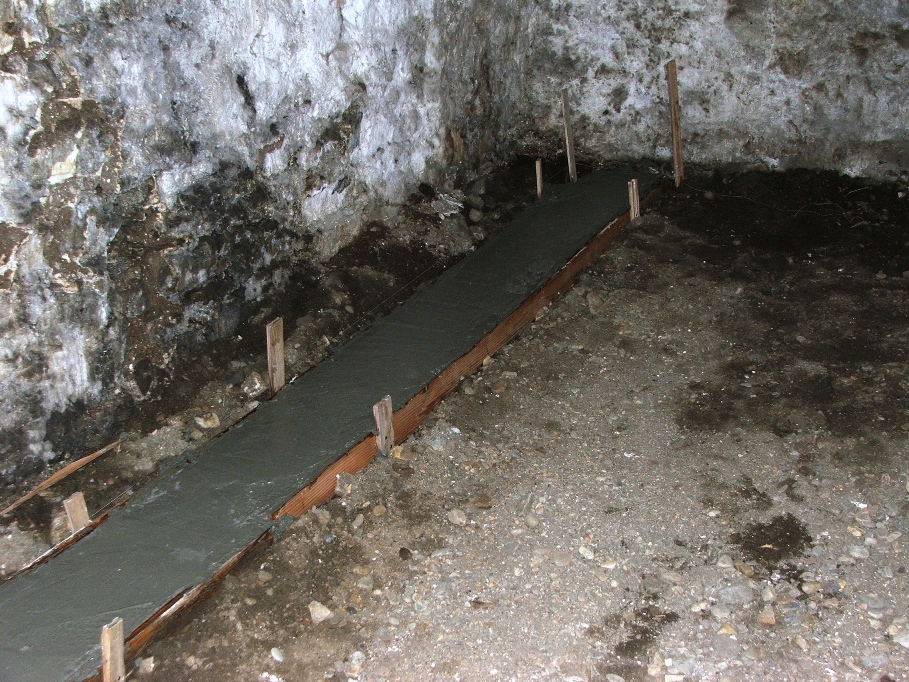
The boys did a great job of leveling and smoothing!
We still had cement in the hopper when Mitch called “enough”! Well we didn’t want to waste it and he suggested we us it to fill the cinder blocks he had given us the day before. Great idea!
We still had cement in the hopper when Mitch called “enough”! Well we didn’t want to waste it and he suggested we us it to fill the cinder blocks he had given us the day before. Great idea!

These bad boys are intended to go into the two cellar
windows when we get to that point (next week).
Break away from it all: The auction went very well last Saturday. The auction people (Livingstons Auctions) out of Malad were great to work with..Linn and LuAnn and Betty…They sold EVERYTHING in the house and we will net about $8,000 to be used for surveys, wetlands analysis and assorted other things we need in order to sell the farm property. The auction was fun and the oddest thing was that things you would expect to go for a lot of money, went for cheap, while other items went for LOTS, when I expected I would be tossing them in the garbage! Point to be made…If you have an estate auction, DO NOT THROW ANYTHING AWAY!!!!!!
May 10…While the cement cured, Sherry and I headed out in the motor home over to Flaming Gorge. Had a great time, left on Wednesday about noon, and came back Friday about 4. We had a wonderful time and the picture coming up is a composite which explains nearly all of the trip.

Enough on that….let’s get back to work!
Today was put in the bearing wall down in the cellar. Roy came over, thank God, and got me started on the right track. I would have used a lot more lumber, and would have spent all day on the task to get it done. He showed me how, and helped with half of the job, then left me to do the rest. A great learning experience and now I know how the pros do it.
Today was put in the bearing wall down in the cellar. Roy came over, thank God, and got me started on the right track. I would have used a lot more lumber, and would have spent all day on the task to get it done. He showed me how, and helped with half of the job, then left me to do the rest. A great learning experience and now I know how the pros do it.
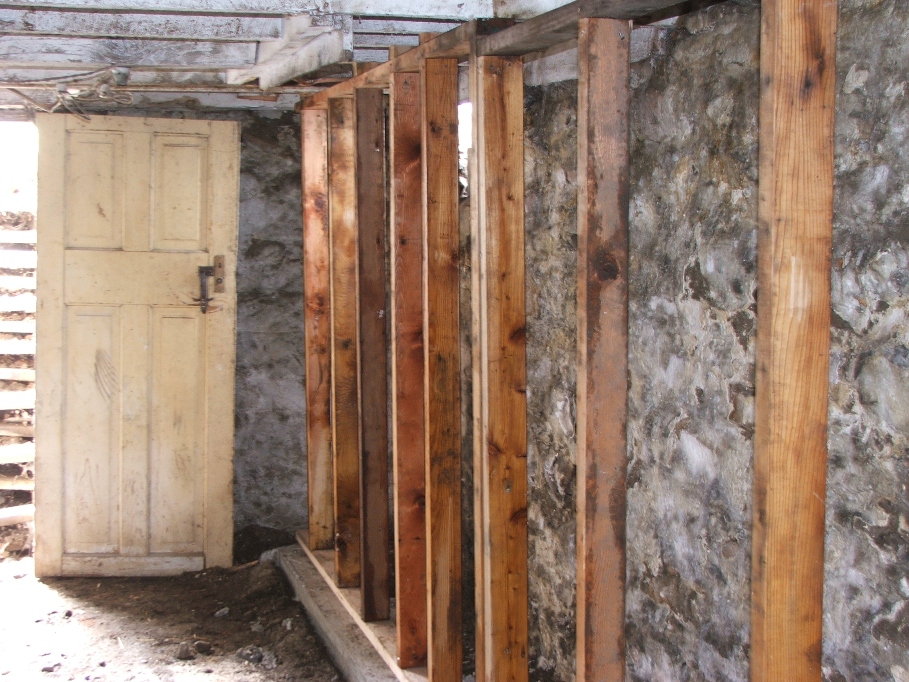
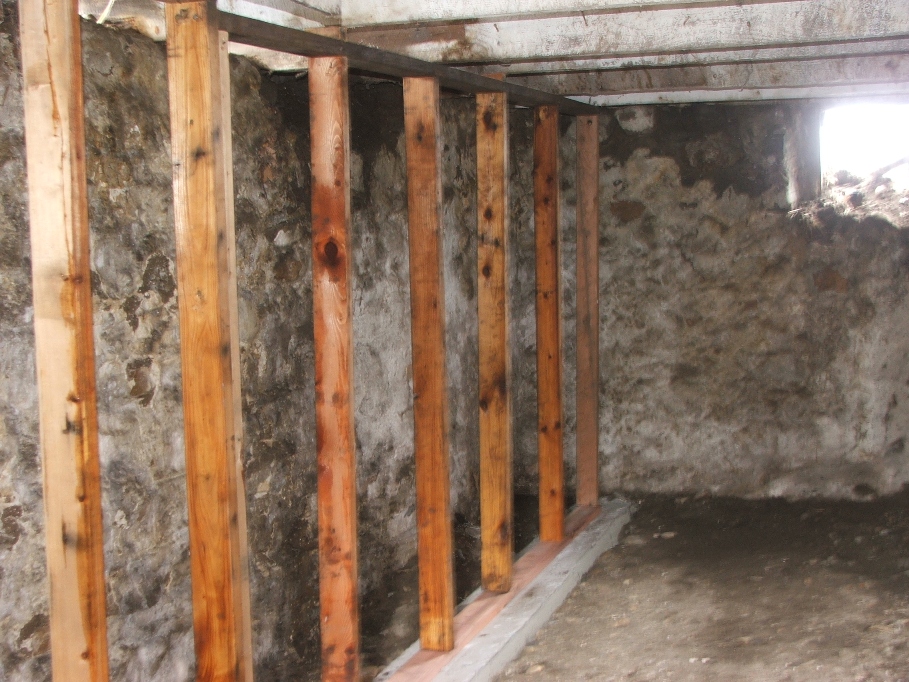
Redwood on top of the footing, fir studs every
where else. You have to start with the
joists that are closest to the footing.
The studs are nailed to each plate and then stood up into place and
nailed. Then you cut spacers between the
upper plate and the joists. Fit them in
and measure and cut a stud that will fit tight.
Nail them off and go to the next.
Pretty simple.

The two far studs fit tight against the joists, as did the
closest one. The spacer can be seen
above the other. It all fit real tight
and the floor in the utility room is very solid now.
My next project is to cement in the two windows and all of the spaces between the joists. This will not only add support and keep the rock foundation in place, but will slow down the entry of bugs, spiders and drafty winds.
May 11-12…It’s been raining now for two days straight, we can’t get anything done, it’s crazy. I called Brian Nowyne and he said he could come out and do the stairs maybe today. He called early and will be here. He works fast and with the material he bought did a good job on the stairs. He had to leave us and go on an emergency call to a satellite dish out on the mountain near Riverside, but he came back late and did some work which set him up to finish on the morning of the 12th. Here is the results of his efforts.
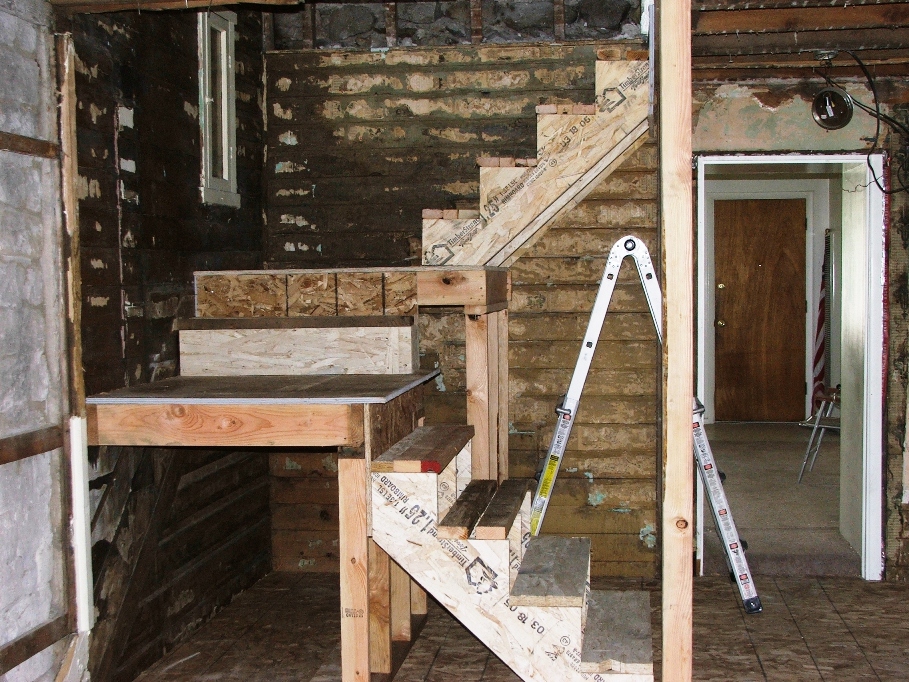
They did a good job of roughing in the stairs. The rest is mine to do, with a door
underneath the platform and sheetrock
along to finish it off.

It should make for an interesting addition to the house and
will work out fine. The final cost of
his material and labor was close to $900, but well worth every cent. I don’t think I could have done stairs like
this. I would have, but I’m glad he was
there.
May 13…Today is my day to work on the cellar and the cement work needed to close in the windows and spaces. I attacked them early and got a bit of work done. Fabricating the forms needed to hold the cement is always a challenge to me. I jerry rigged these and mixed bucket after bucket of cement to complete what I was able to do. I mixed a total of four bags of cement, each at a different consistency in order to do the job. Some was mixed wet, others very dry. I hand packed several places and used the shovel in others. The following pictures will show you what I did.
May 13…Today is my day to work on the cellar and the cement work needed to close in the windows and spaces. I attacked them early and got a bit of work done. Fabricating the forms needed to hold the cement is always a challenge to me. I jerry rigged these and mixed bucket after bucket of cement to complete what I was able to do. I mixed a total of four bags of cement, each at a different consistency in order to do the job. Some was mixed wet, others very dry. I hand packed several places and used the shovel in others. The following pictures will show you what I did.
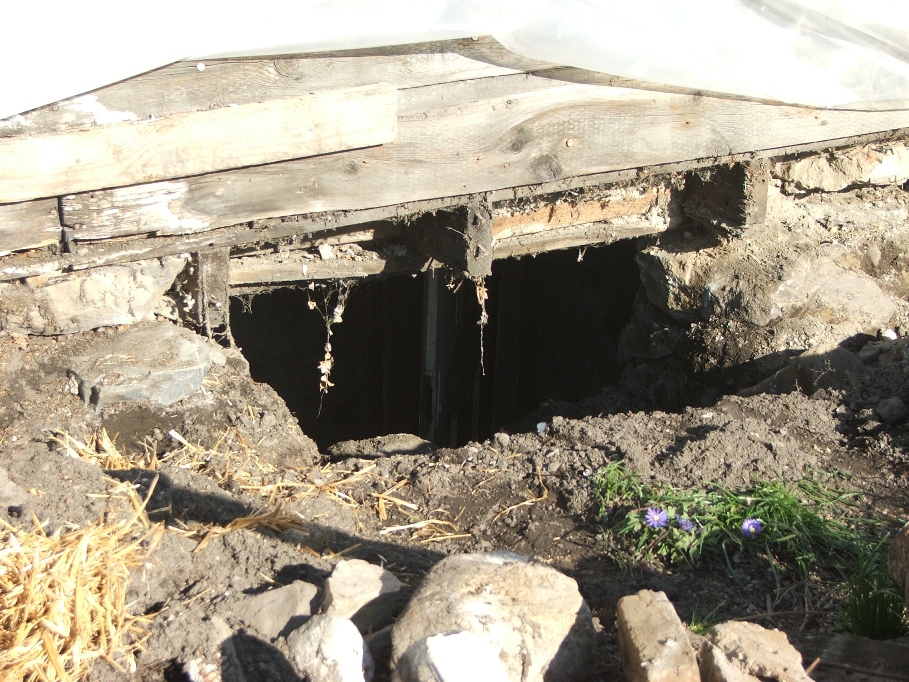
This is what the “window” looked like before, from the
outside looking in. We did not know it
even existed! But I excavated and did a
little work to get it into a position I could cement it.
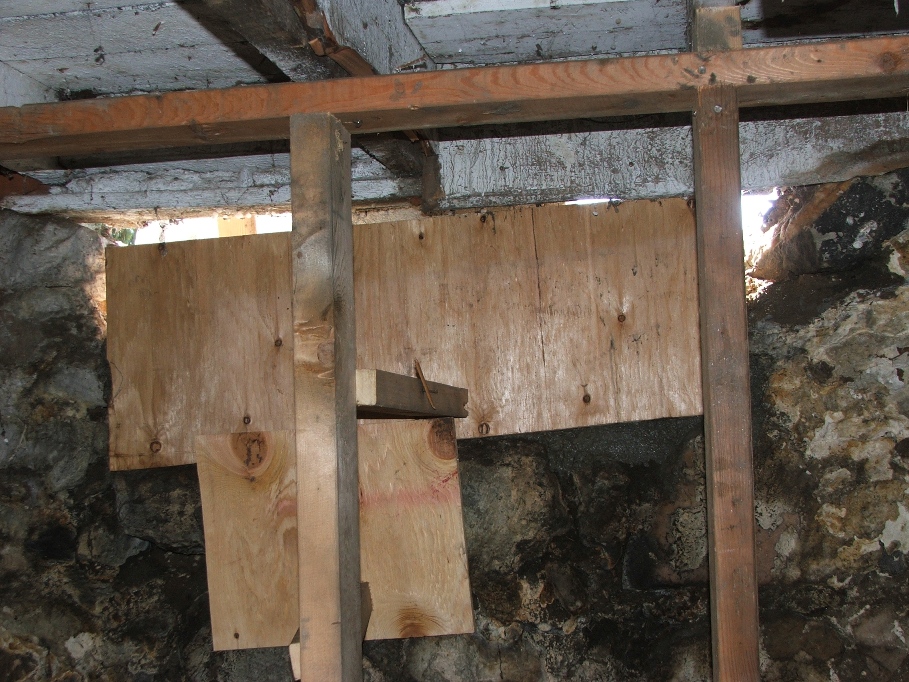
This is from inside the cellar, looking out, of
course the forms block the view. Notice
I have also raised that one beam overhead.

This is the look from outside. I will continue to put cement and cinder
blocks in this space until it’s all enclosed.
Those dirty little mice and f-n cats won’t get in after I’m done!!!!

This is the before look at the Potato bin window!

This is it with some cement in place. The pipe on the right only carries water from
the sink in the utility room the other (just out of site) will carry the water
from the washer. Both of these will
empty into the field drains area and not into the septic system. Something my Dad insisted on.
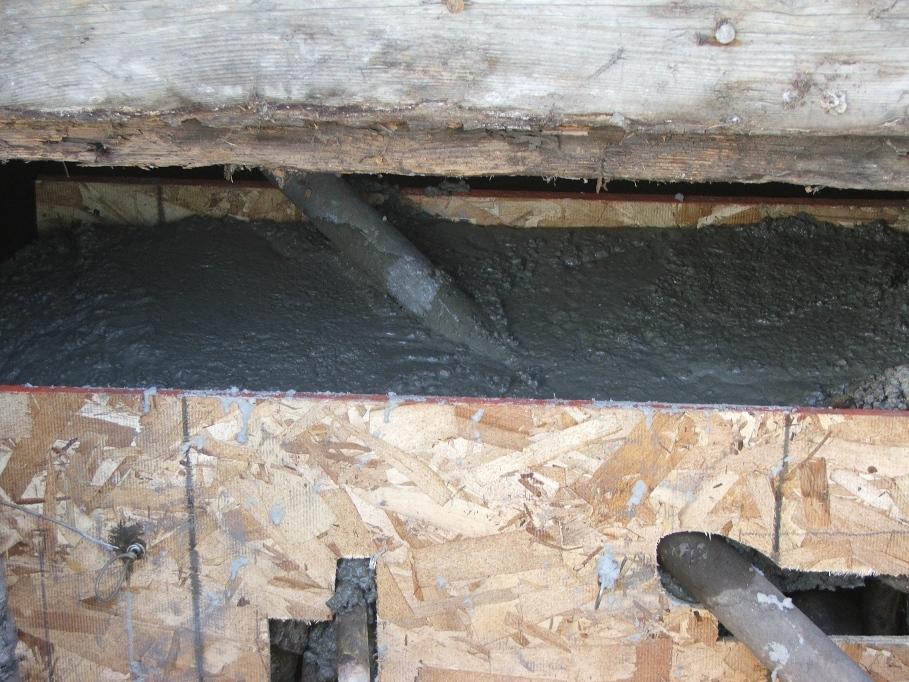
This is a close up of the cement work. I can still fit a cinder block between the
cement and the floor joist above. You
will see that later.

Cats have been getting through this window, shitting on the
floor and making a really big mess! I
hate cats!!!!!! This is the form I used
on the North window to cement things in.
It is held together with old coat hangers twisted and such. The water pipes (small pipes in picture) will
be cut once the bathroom downstairs is made available. They will no longer be needed. The larger pipe is from from the sink in the
utility room and will carry water to the field drains. There is another pipe which will carry water
from the washer to the field drains as well.
It is currently twisted outside and will be in view shortly.
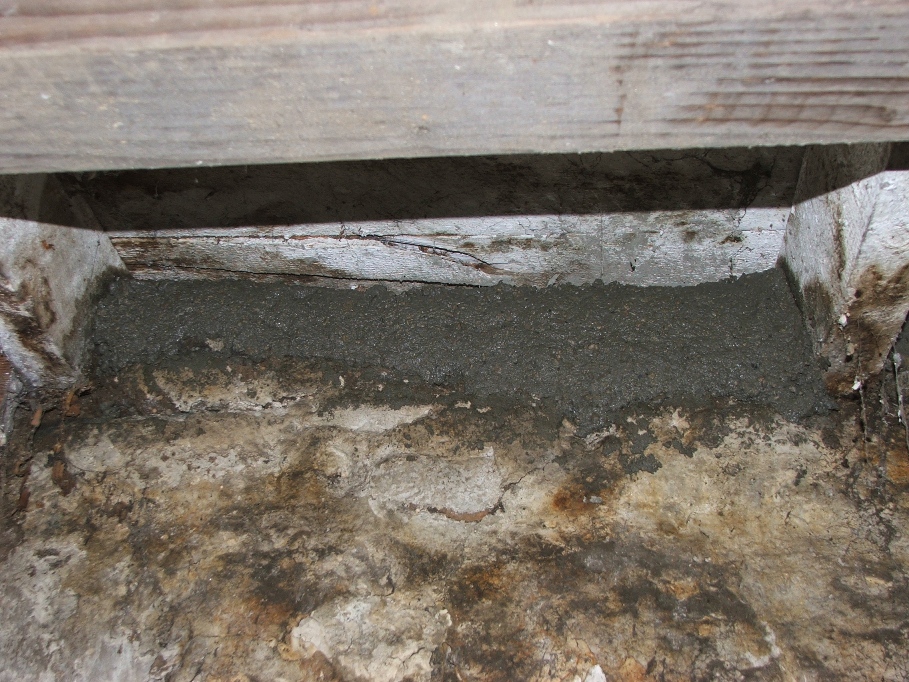
Inside the cellar, I hand packed cement into cracks between
the joists and the foundation. My task
is to close off areas that spiders and
mice and get into the cellar. The small
spaces left I will fill with “great stuff”, which will expand and fill and
close off any space left. It insulates
and stops the breezes from coming under the floor.
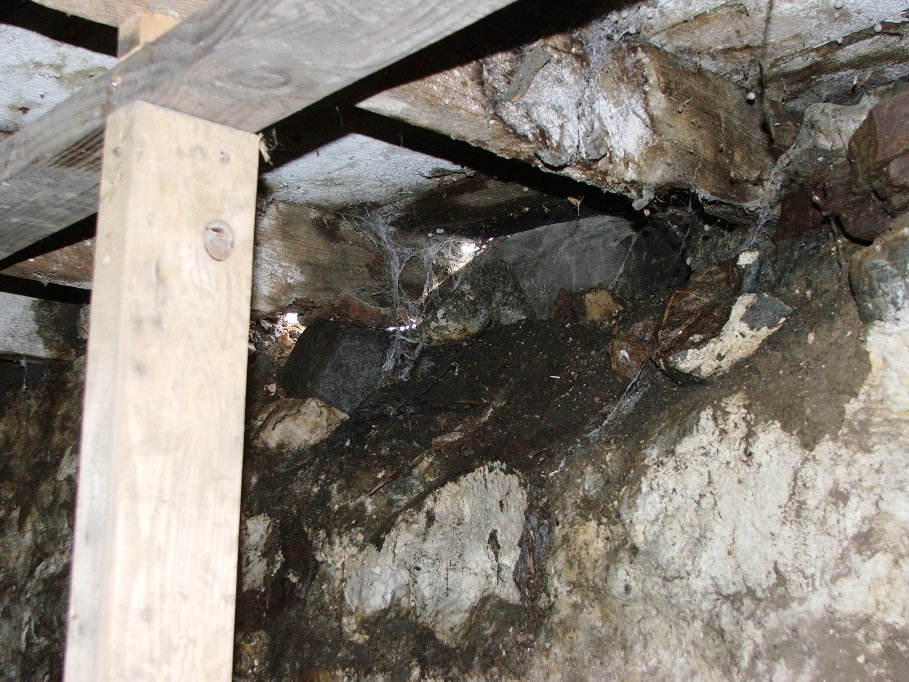
This is a large area I will have to deal with as far as filling with cement. I think I will form to the joists, and hand pack until filled. Then allow to dry and hand pack the rest. Of course Great stuff will finish the job.

I hand packed this corner space with relatively dry
cement. Nasty job, considering all of
the spider webs and nests! YUK!
More to come as I progress with cement in the future. I plan on closing off the cellar like it has never been closed before! Cement at the entry door and all of the under the floor stuff locked in solid! Especially for cats!!!!!
More to come as I progress with cement in the future. I plan on closing off the cellar like it has never been closed before! Cement at the entry door and all of the under the floor stuff locked in solid! Especially for cats!!!!!
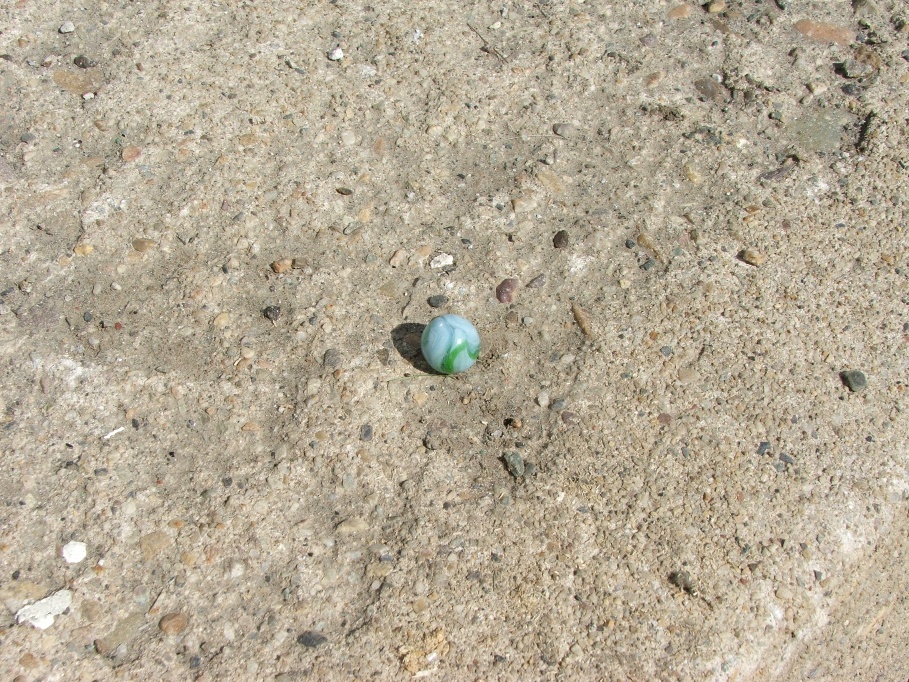
Finds…It still amazes me that there are still
things to find. This marble showed up
while I was preparing to form up the North Cellar window. Cool Huh?
May 16, 2005…Today was a day to get sod for Brandon and
Aprils house and put it down. The
weather was pretty good this morning and the sod was taken care of. A quick trip to town to buy materials for the
old house, lunch and I was ready to go.
The weather changed from nice and calm, overcast, to windy, more
overcast and my desire to work with cement went out the window.
I attacked the old house with the intent to “shore up” above the overhead of the stairs and then to build a temporary stair rail. The 2X8’s went in well over the West side of the stairs. I cut off the flooring and nailed on a couple of boards to fill in gaps. Now I was ready for a temporary railing system. This might be in place for a few months so I made sure it wouldn’t fall down and should stand up against someone pressing pretty hard against it. The idea behind a temporary rail is to let them know they are at the “edge” and to back off some. It didn’t take too long to put in, but for an amateur it had its challenges.
I attacked the old house with the intent to “shore up” above the overhead of the stairs and then to build a temporary stair rail. The 2X8’s went in well over the West side of the stairs. I cut off the flooring and nailed on a couple of boards to fill in gaps. Now I was ready for a temporary railing system. This might be in place for a few months so I made sure it wouldn’t fall down and should stand up against someone pressing pretty hard against it. The idea behind a temporary rail is to let them know they are at the “edge” and to back off some. It didn’t take too long to put in, but for an amateur it had its challenges.
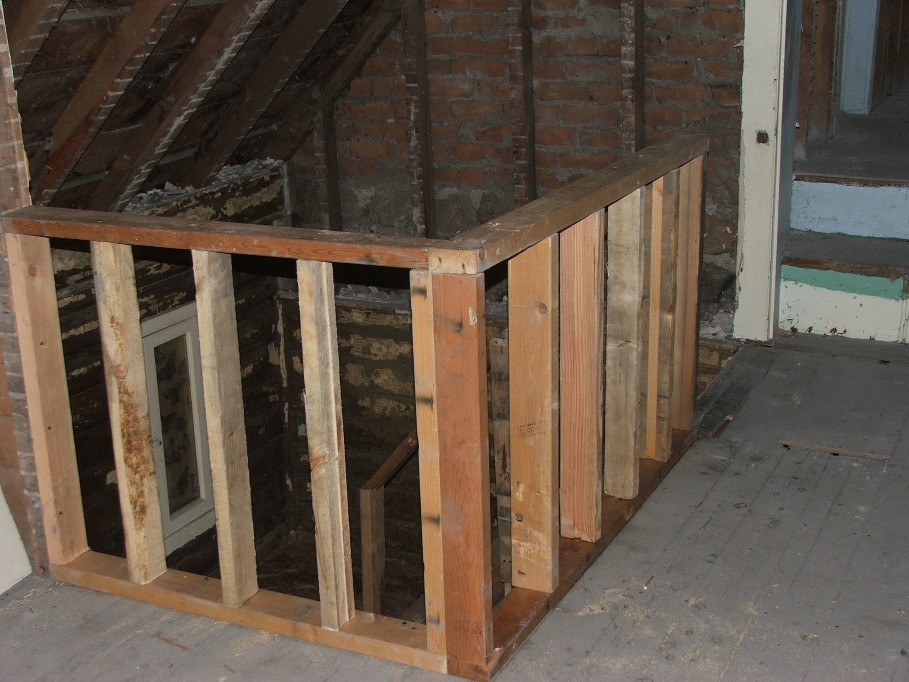
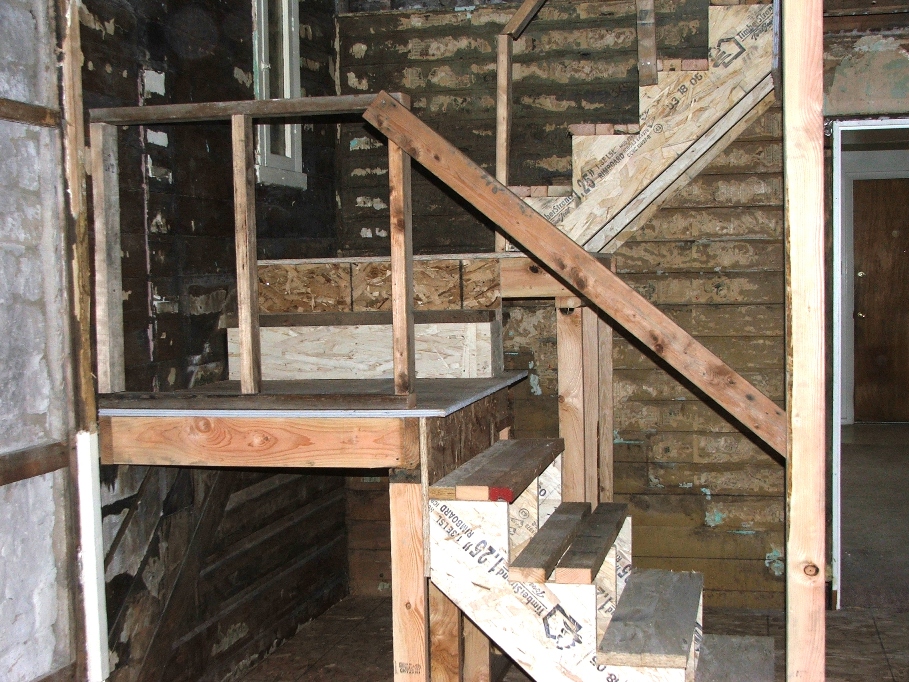
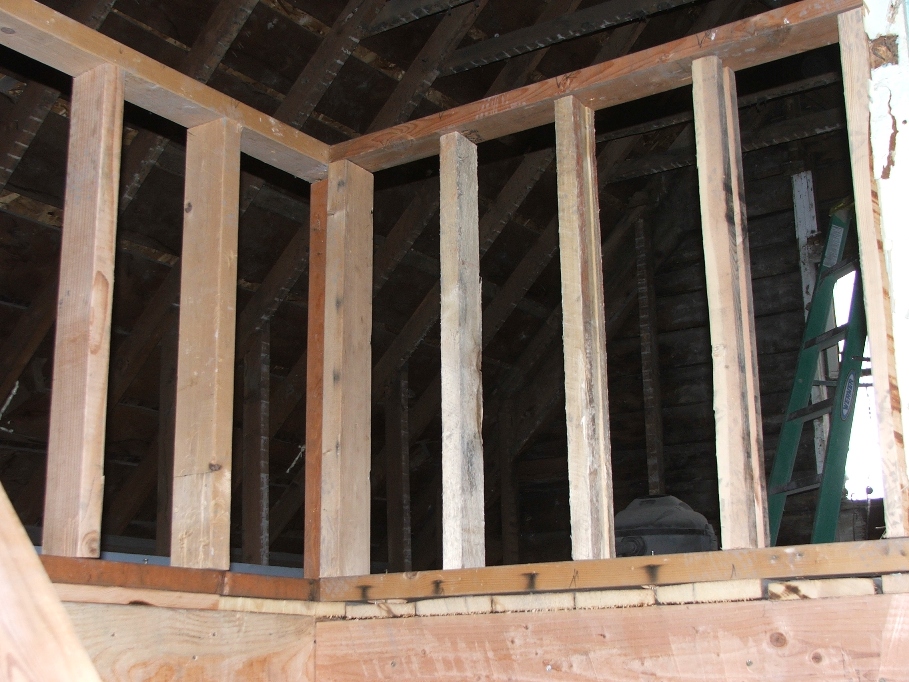
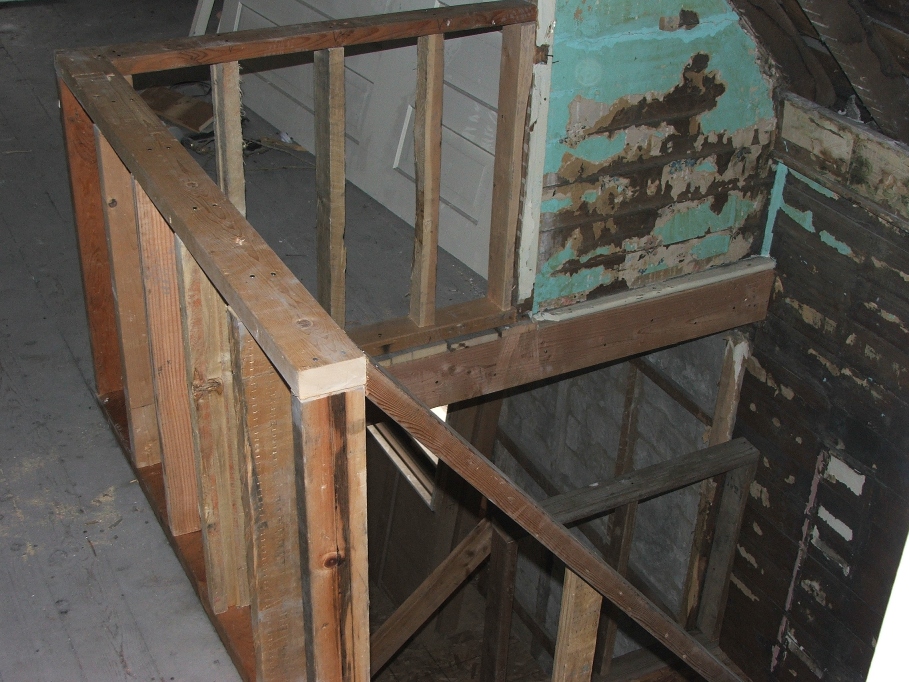
The finished rail will be a bit more fancy, and the uprights
spaced at 4 inches. There will be
“official” newel posts and ballasters when it’s all done. We plan on keeping as much of it open as we
can, but this section upstairs “may” be sheetrocked. Not real sure about that.
My plan for the next work session is to continue to do cement work in the cellar area. I need to close it in to keep those *?#@*)#$^*.@ cats out!
May 18….Went fishing yesterday with Brandon and Bob out to the river. I caught an 8 lber. Nice cat. Ate well too.
Today I attacked the Cat blocker with interest. I started at the usual time (late), and worked pretty diligently. I managed to get the windows both blocked with enough cement that it would take a pretty “flat cat” (one of my favorites) to get through into the cellar. I then spent time packing more cement here and there to get things “shored up”. I used another 3 ½ bags of cement mix today.
In the process I saw where the rain had helped make me some more work. The rocks of the foundation fell into the excavation of the septic connection for the new bathroom downstairs. Nasty! There is always something coming up to change my direction! Oh well. I called Witt, who showed up about 4:30 to do his thing. He connected all of the pipes to the septic and cut all of the ones from the old downstairs bathroom. Now there is no bathroom in the old house. But that’s ok! At least I can pour cement and redo the foundation and backfill the pile of dirt out on the North side of the house.
Here are some flicks from today’s activities. Don’t look like much, but it is a lot of work mixing cement from the bags in a bucket and hand pressing it into place. My thumb has a big old crack in it from the moisture and lime.
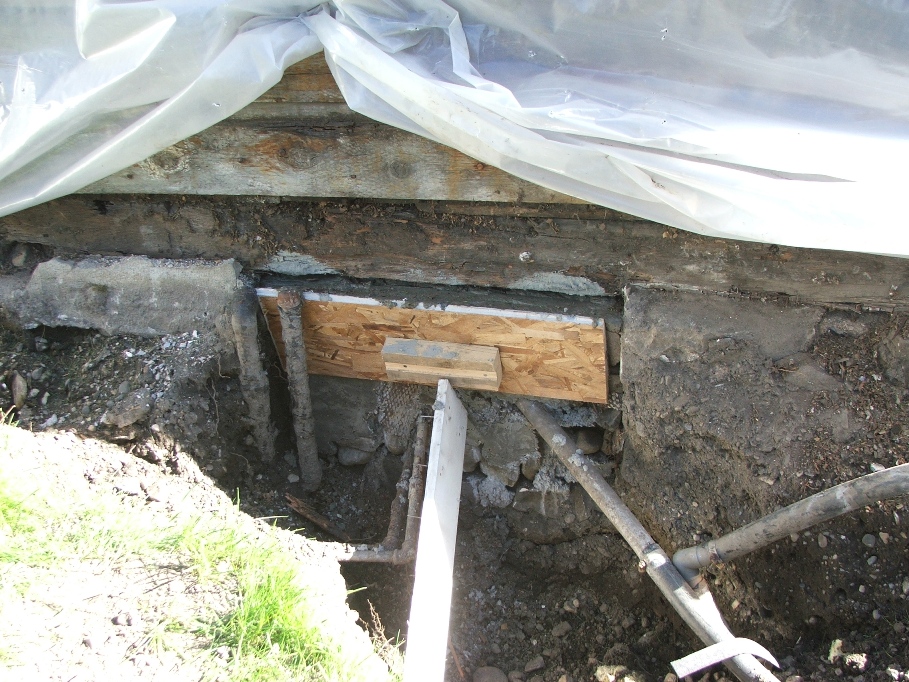
This is outside the North Cellar window…Nice Cat blocker!

This is the view from inside the cellar! No way will they get in! HA!
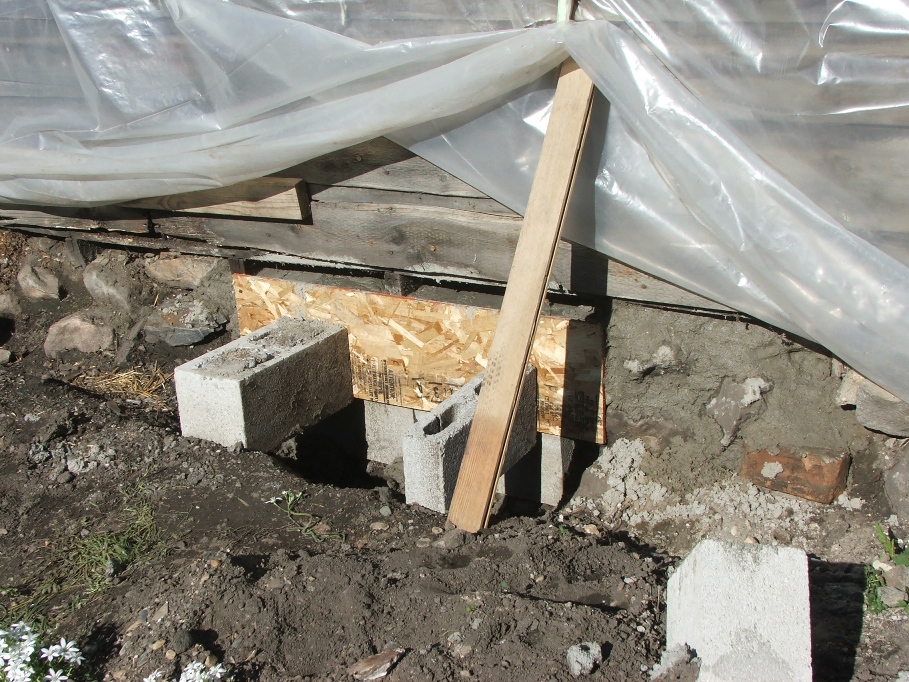
The West window, still has a tiny space to fill with
concrete! This is where a “flat cat”
might still get in. I’ll fix that
tomorrow.
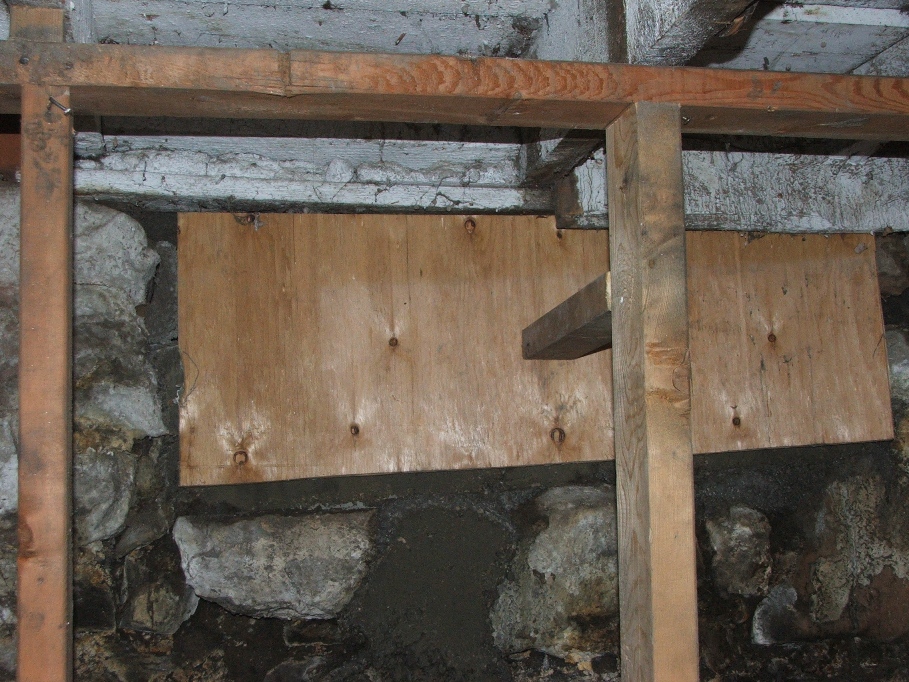
Again the view from inside the cellar looking at the back of
the West window.

The final connection for the septic from the downstairs
bathroom. All of the pipes are now
severed from the bathroom. Hurry I’ve
gottago!
The rocks were part of the foundation that fell into the excavation. Look closely and you will see part of the plastic I put down under the TV room floor. I have to figure out a way to build up this foundation area!
The rocks were part of the foundation that fell into the excavation. Look closely and you will see part of the plastic I put down under the TV room floor. I have to figure out a way to build up this foundation area!
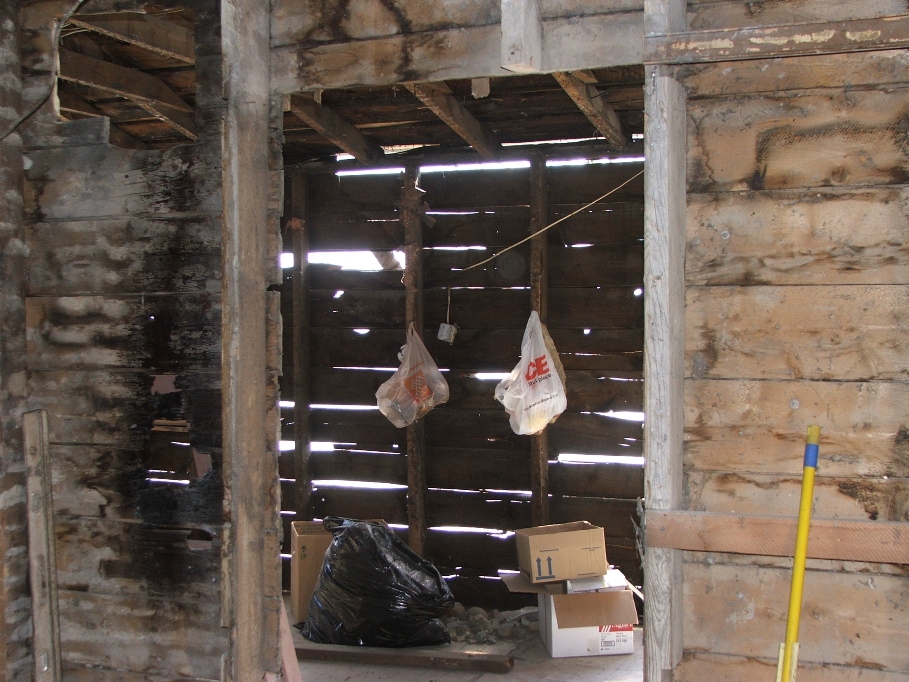
While Witt was coming down anyway, today, he brought the shower stall. It measures 32 inches square and about 6 ½ ft tall. The problem we had was getting it into the TV room. We jockeyed it around and got it through the porch door, but no way would it fit through any of the other inside doors. I had to remove the casing around the porch door into the utility room and the frame of the “old door casing”. Here is what it looks like now.
This door way is one you should be used to seeing with a wire and metal piece hanging in the upper left corner. That’s all gone now! As is the frame around the entire door way.
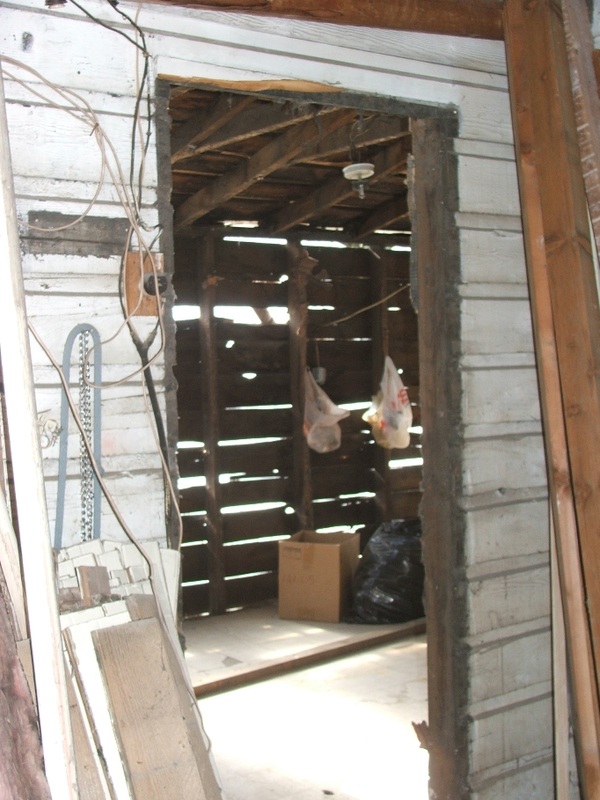
This looks into the utility room from the porch. You can see the knot hole Jack dropped
lighted matches down on the right side.
Naughty boy!
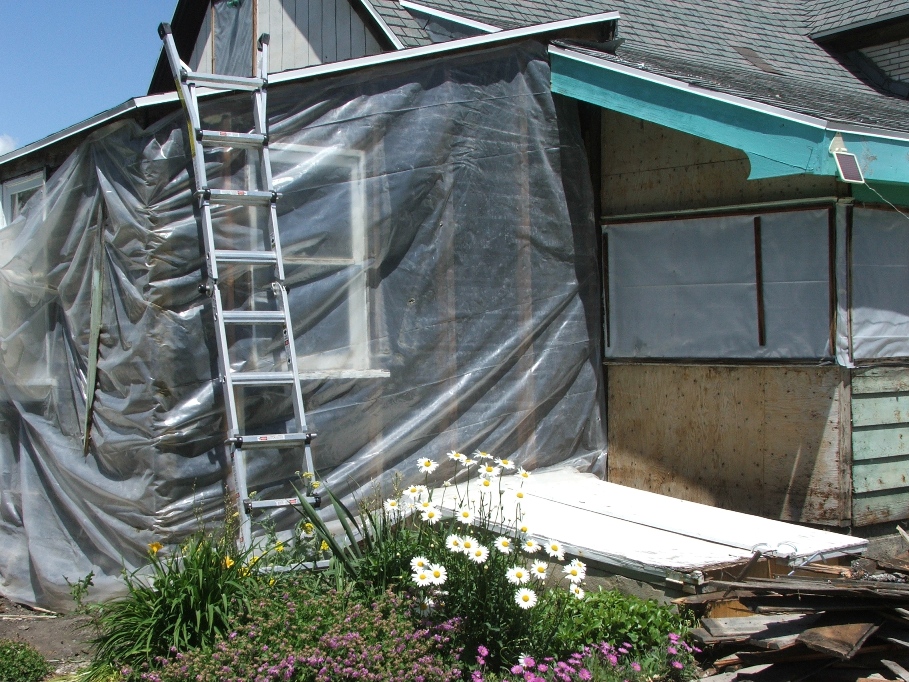
June 2, 2005….We took some time off to go to
rendezvous…Cache Valley Boys had their 30th year anniversary. So we all went and had a great time.
I didn’t take pictures yesterday, but I finished the cement work around the foundation and prepared to put some plywood on the siding. Sherry and I went to town and bought 17 sheets of 7/32 chip wood boards and are now ready to start ripping down the old siding and putting up the new stuff.
Today I began the ripping and tearing and managed to get all of the South end of the utility room removed. I don’t want to take it all down at once for fear it will tip over. So I’ll do it in sections. After much trial and error I finally figured out which way to go about it and now the old siding is off. I promised April I would watch the kids this afternoon so I had to put the plastic back over it. There is a 50 % chance of rain tonight.
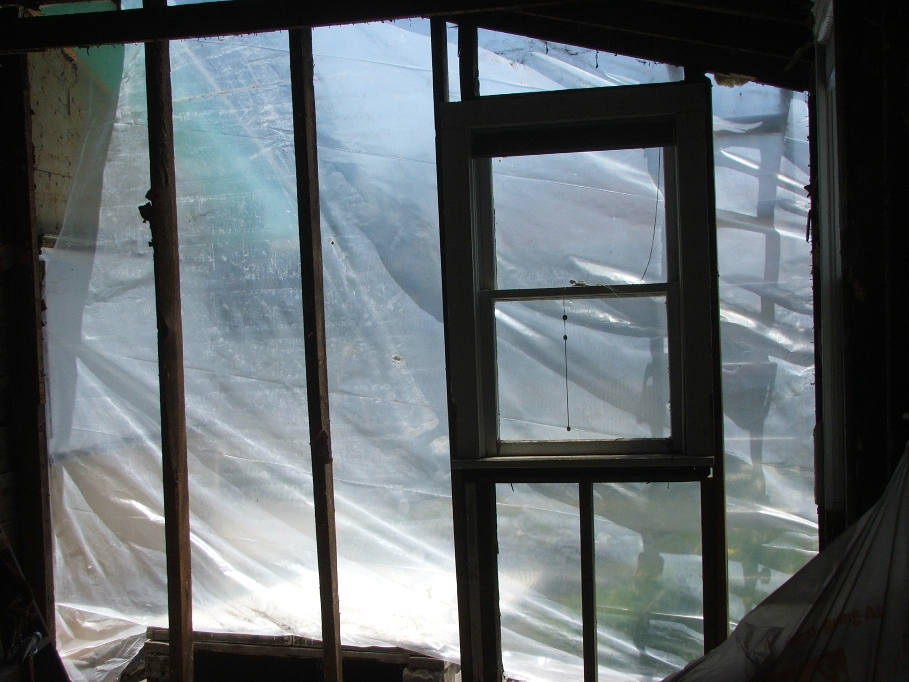
I still have to pick up the old wood and put it
in the hole. Maybe later today. The look from the inside is quite
contrasty but you can still see what’s
going on.
The opening to the cellar is in the lower left corner. With the kids, we are planning to go to town and buy some 8 penny nails and some silicone sealant. I will have to use it where the cellar meets the house and also where the back step meets the house.
Tomorrow I’ll put up some wood.
The opening to the cellar is in the lower left corner. With the kids, we are planning to go to town and buy some 8 penny nails and some silicone sealant. I will have to use it where the cellar meets the house and also where the back step meets the house.
Tomorrow I’ll put up some wood.
June 3…I had to begin by fixing the frame around the
window. The old 2X6 shelf under the
window was hashed and when I removed it, there was no support for the
window. Plus the sides were loose. The West most one wasn’t even connected to
the floor. So I sistered boards to both
sides and added a new support in the center.
There is now a very solid window frame.
Next came the sheets of chip board and even though I took lots of time to install them, it paid off in a pretty nice looking job.
Sherry was a big help in holding the boards and encouraging me to build a couple of saw horses. My knee is killing me and all this time I have been cutting wood on the floor, using 2X4’s or 4X4’s to hold the wood up. Saw Horses are much nicer! Thanks Sher!
With still some time before quitting time, I fixed the window frame at the opposite end of the utility room in preparation for next weeks chip board installation. I plan on doing the North wall next and then finish with the West wall. Why? Just because that’s my plan.
When all of the chip wood is up, I will cover it all with a vapor barrier called Tyvek. It’s a breathable, waterproof material which seems fashionable in today’s building trade. I see it everywhere on new construction.

Since June 3rd, we
have been busy battling the weather. I
have had to take advantage of the times the weather was clear to do outside
things, and work inside when the weather changed to rain. We even had snow on June 6th. The following is what has transpired but the
dates aren’t going to be listed.
Outside, we managed to complete the North and West sides of the house. Every window frame had to be rebuilt, as each was totally rotten from decades of wet weather. In some places we even had to rebuild the flooring under the window. All is well now and it should last at least another 50 years.
Outside, we managed to complete the North and West sides of the house. Every window frame had to be rebuilt, as each was totally rotten from decades of wet weather. In some places we even had to rebuild the flooring under the window. All is well now and it should last at least another 50 years.
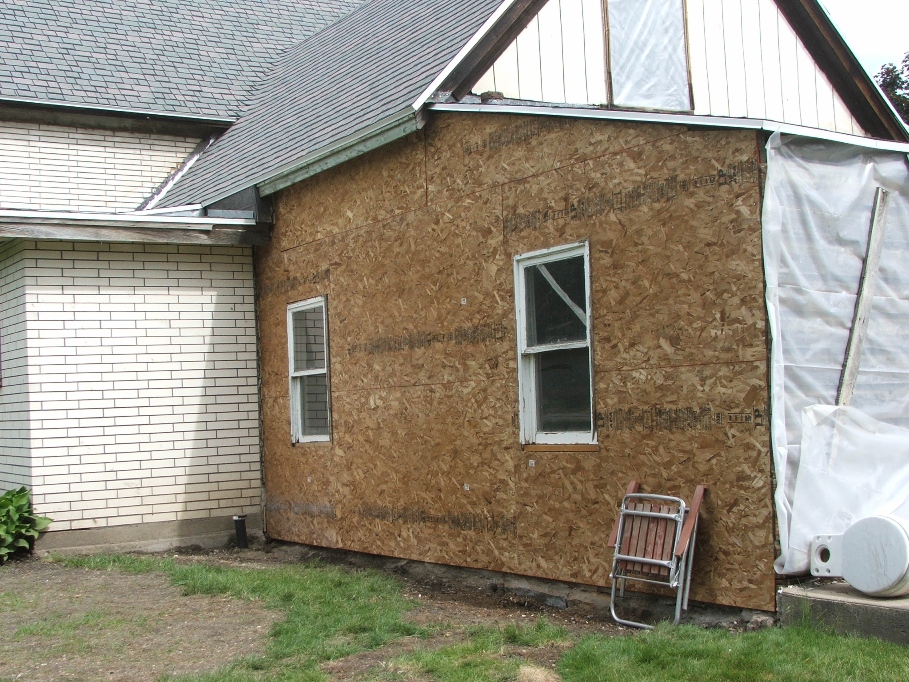
While putting up this siding we had to be
concerned about the adobe brick that is between the studs. As I was hammering from the outside, the
bricks were moving around on the inside, crumbling and dropping to the
floor.
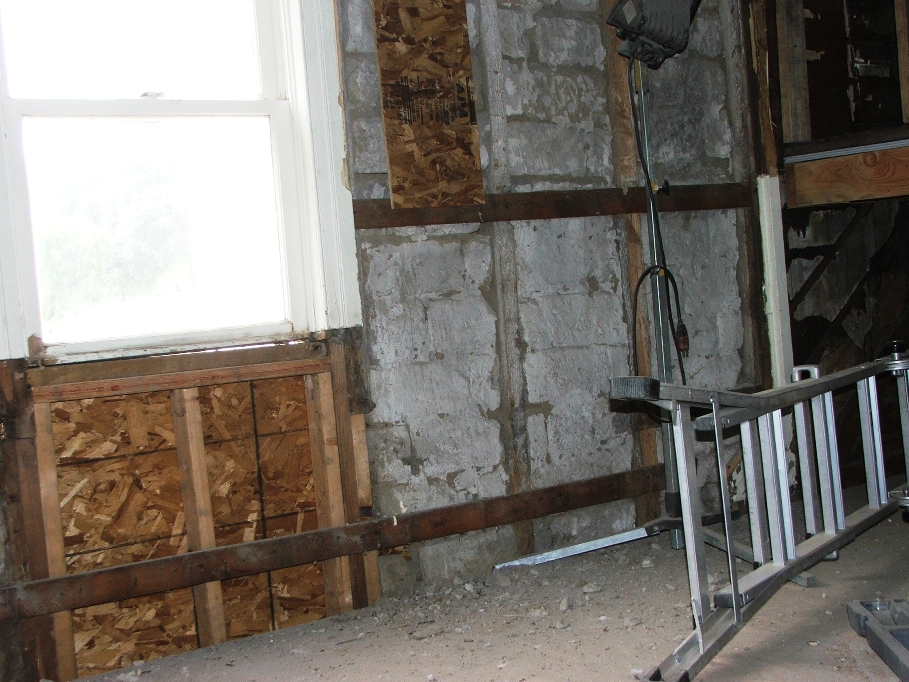
When we noticed the mess, we put up a board to
keep the big bricks from falling.
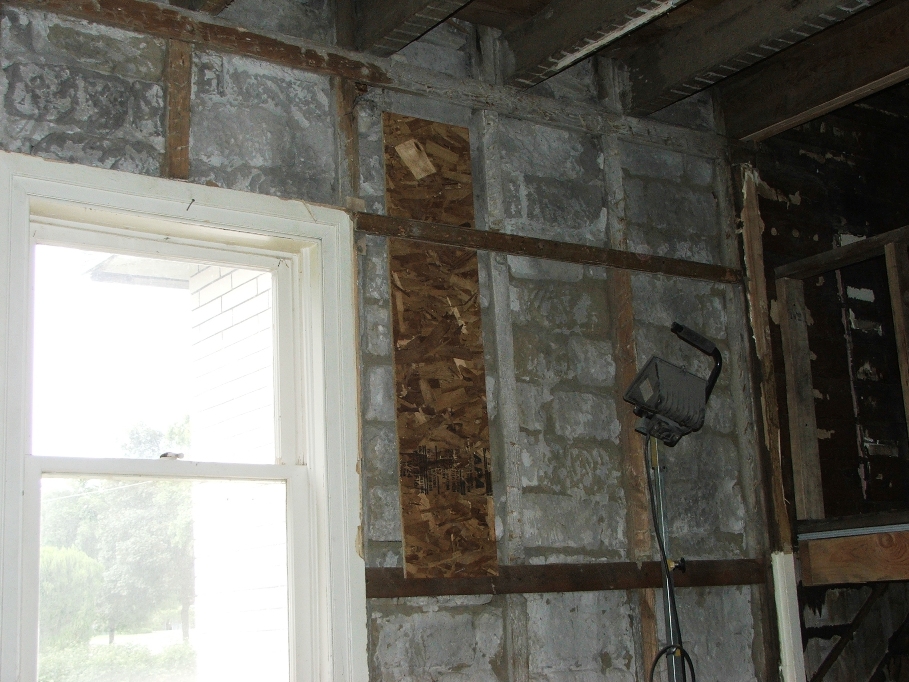

West Side
showing the old siding that still is to be removed and the new siding going
up. Mitch came down from school in Logan to help me out
today. We had quite a time with
measuring problems, cutting problems, bending nails, getting smacked in the
face with boards, having to remake the window frame twice, and assorted other
problems that slowed our progress. But
it’s done now and looks pretty good.
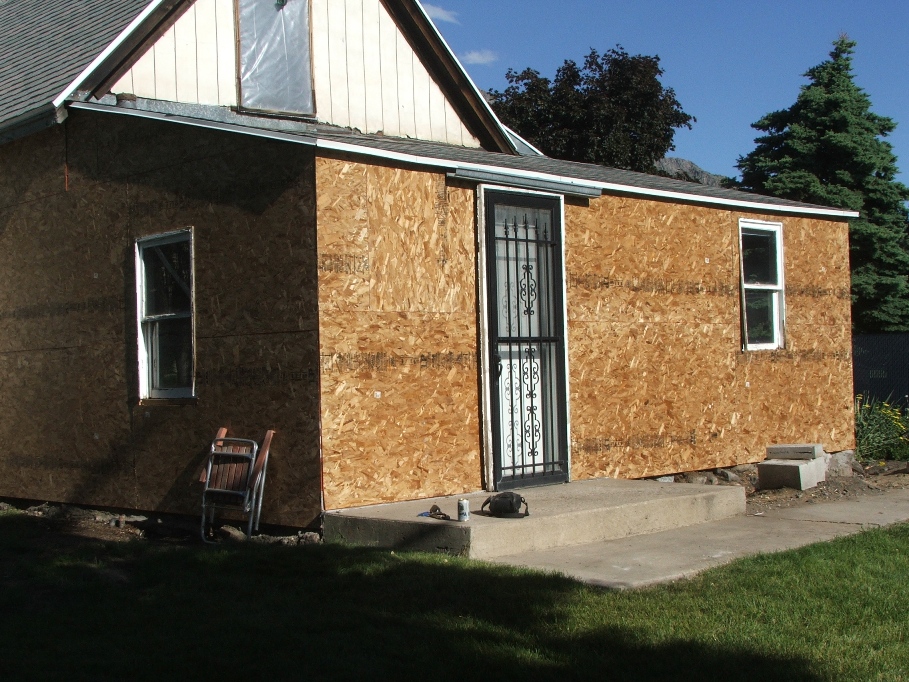
The next is the final look with the chip wood paneling in
place and all of the mess cleaned up.
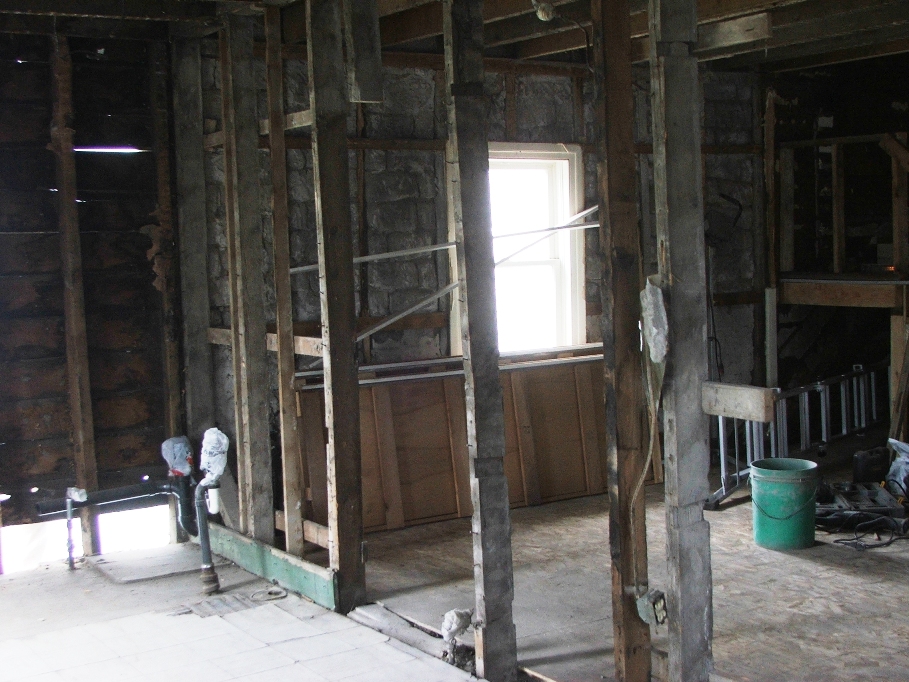
Now for what was done when the weather was not
nice to work outside. I started by
pulling down all of the wood paneling
that separated the old tv room from the utility room.
Notice the large hole in the middle of the wall. This is where the old doorway used to be. I decided to fit a stud in the middle of that space in order to later attach sheetrock etc. I used one of the “head knockers” that I saved from upstairs to fill this job.
Notice the large hole in the middle of the wall. This is where the old doorway used to be. I decided to fit a stud in the middle of that space in order to later attach sheetrock etc. I used one of the “head knockers” that I saved from upstairs to fill this job.
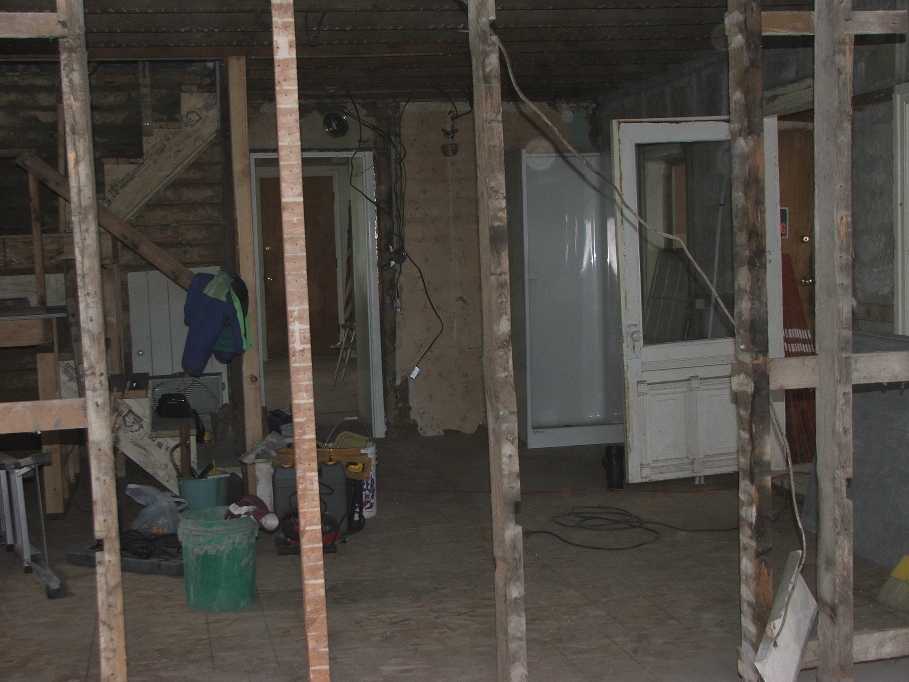
Life is good now!
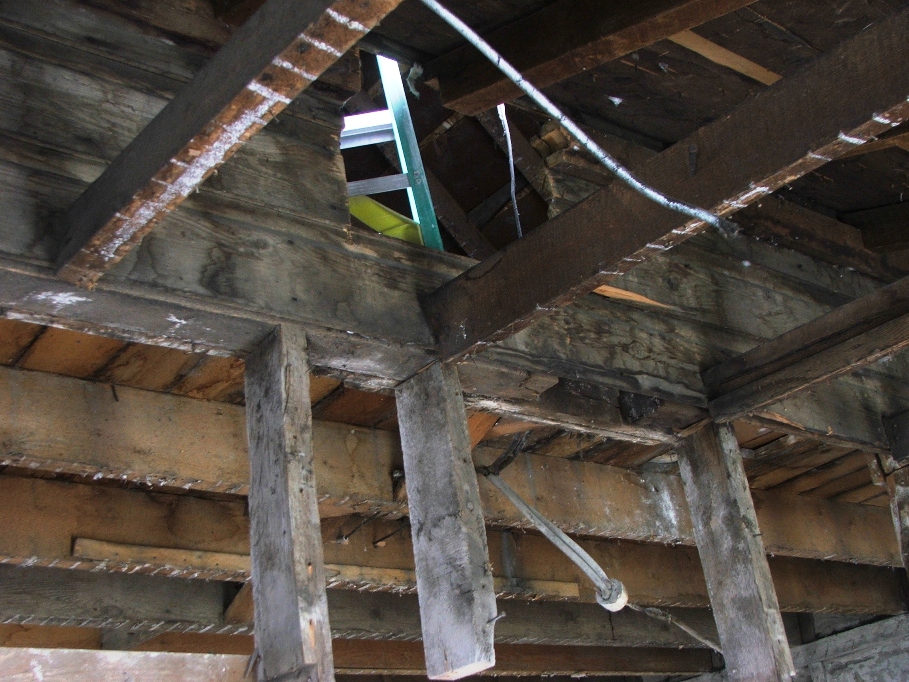

Over head
the ceiling joists are attached to the siding that remains, but they
have no real support under them.
The ceiling could fall any time. So, I had to put a 2X4 across and nail up some joist hangers to give it the support it needs. Since the joist hangers are made to handle today’s 2X4’s and not the old timey true 2X4 inch boards, the hangers got a bit out of whack. They still work however.
The ceiling could fall any time. So, I had to put a 2X4 across and nail up some joist hangers to give it the support it needs. Since the joist hangers are made to handle today’s 2X4’s and not the old timey true 2X4 inch boards, the hangers got a bit out of whack. They still work however.
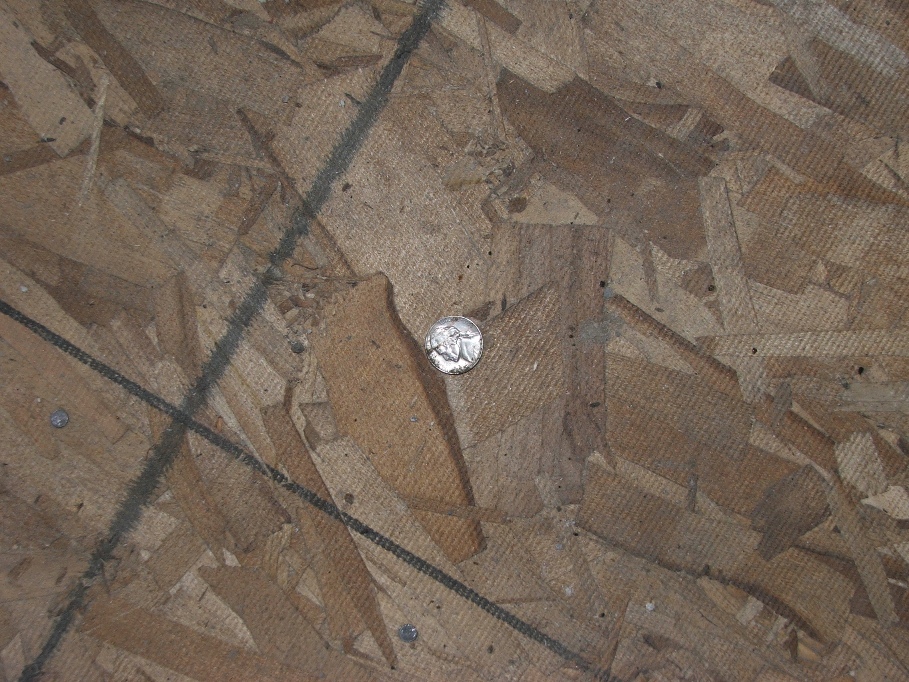
FINDS:
While knocking down the inside siding panels, I heard the distinct
“clink” of money hitting the floor. When the dust all settled, I found a 1951
nickel! This I suspect will be the end
of the finds, but then I’ve said that before.
June 14…Yesterday we went to town and bought the next set of
wood for the house. 35 2X4’s and 7, 4X8
ft. sheets of 3/8 CDX plywood. Total
cost around $277….nasty wood costs these days.
Today, I got a late start because of two things…I had to empty the truck from last nights neighborhood cleanup project of Carol Barkers place and the house next to hers on the North (a new lady bought the house and needed help). Then when I got back from the field, here came the Duck(my brother Steve) and Hunter (his son in law, Karl) to load the four wheeler onto the trailer for this weekends outing. My work day on the house didn’t start until 11 a.m.
The days tasks included fixing the flooring between the studs and placing 2X4’s between the studs to nail sheet rock to. In some cases I had to build up the floor a little and all in all it took longer than expected.
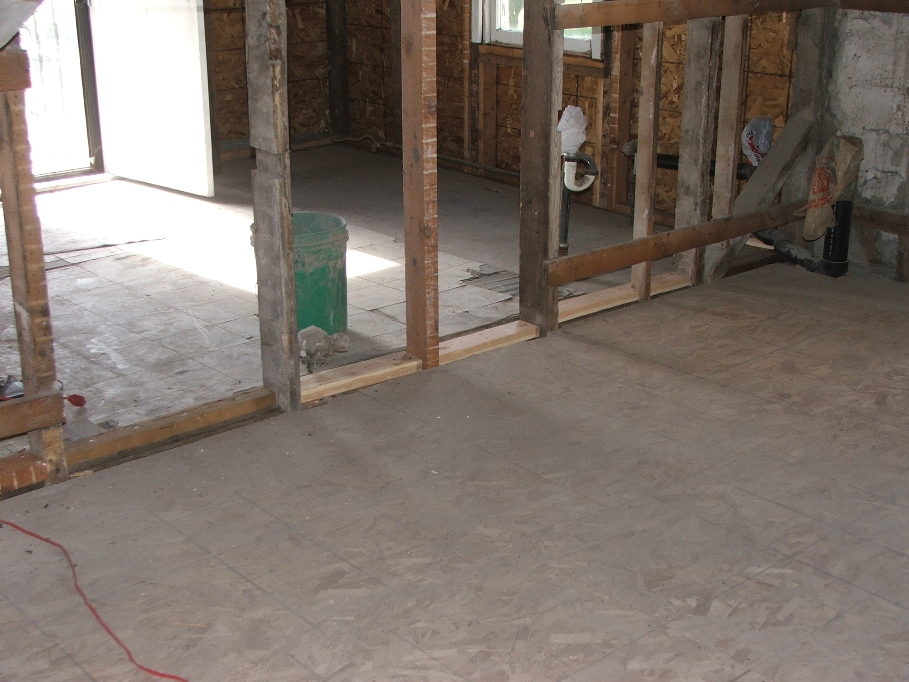
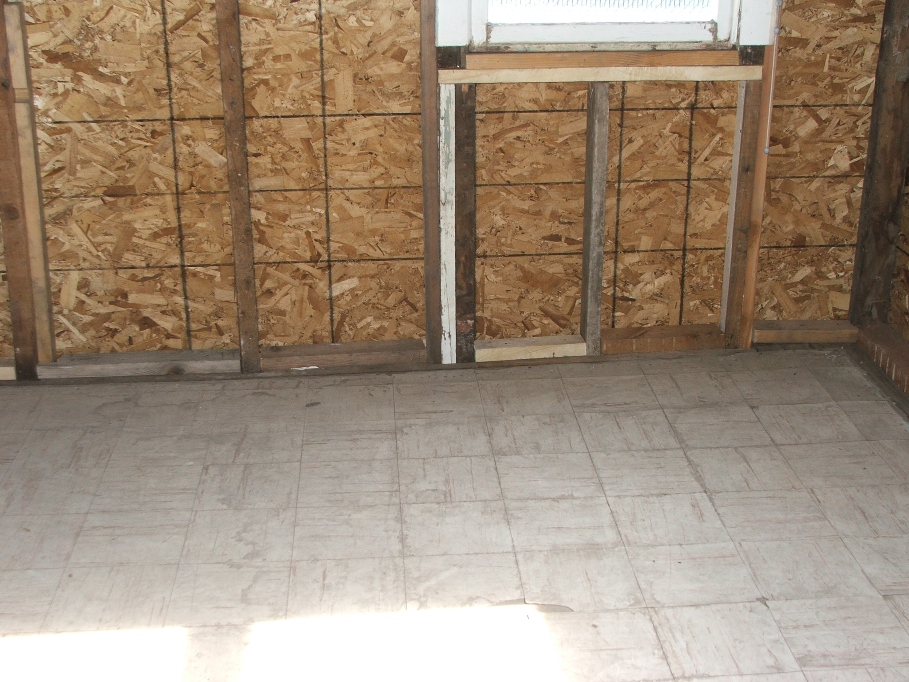
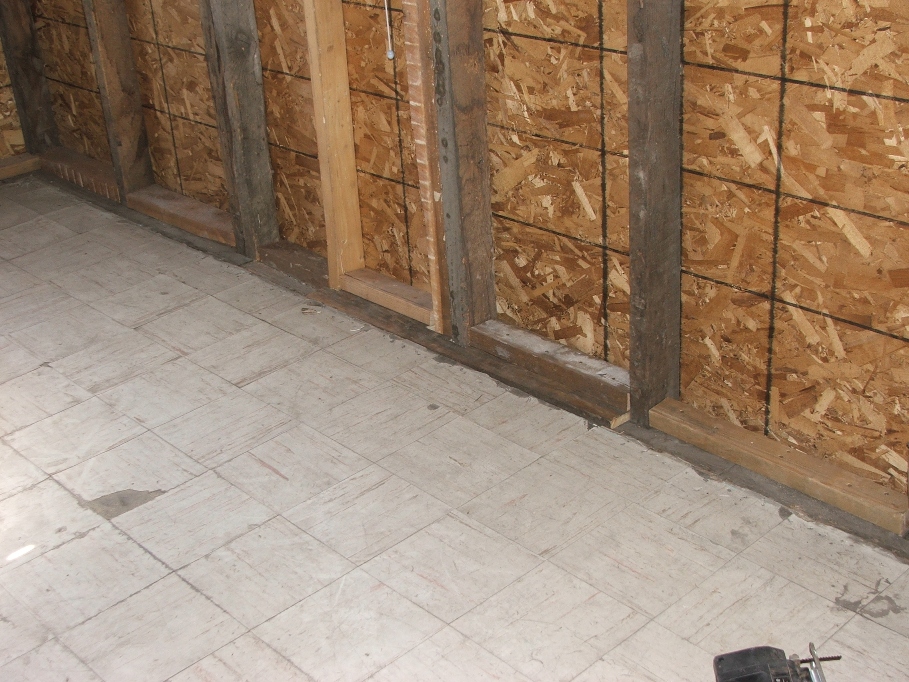
I decided today would be just as good as any day
to redo the doorway between the tv room and the utility room. So I tore out the old threshold and put in a
new base material. Then framed in the
new door way. A door can be put up in
the future if we want. I plan on just
having an opening there and if the renters complain I will put in a door. Until then, here is what it looks
like…..
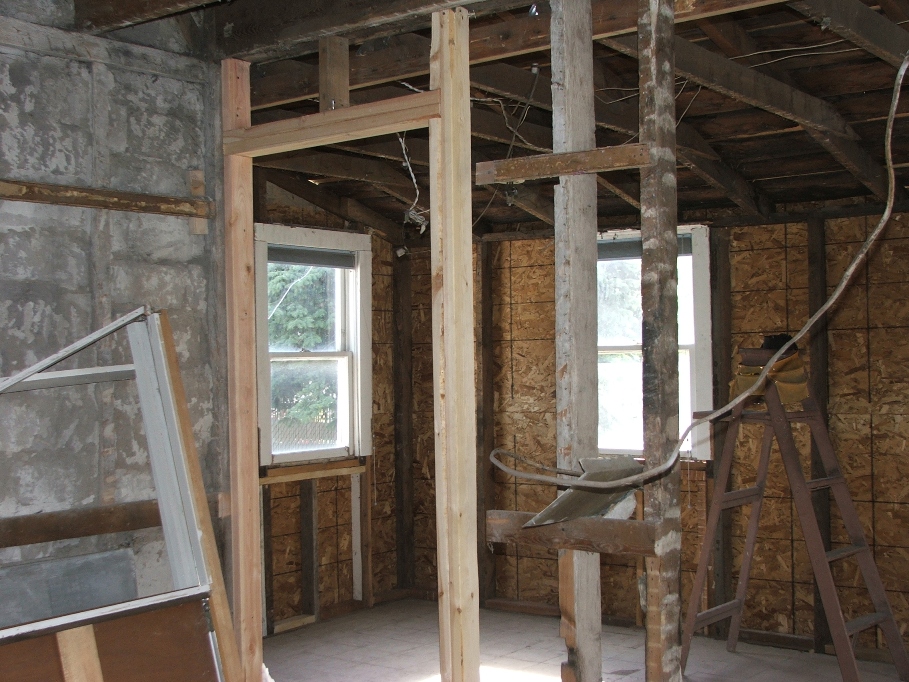

Not too bad for an amateur.
The floor from the tv room into the utility room is lower and therefore
there will be a “tripper” of about ½ inch as you step into the utility
room. I hope the trippee has an arm load
of clothes when they trip. At least that
way they will be cushioned by the fall.
Tomorrow I plan on putting in a fire stop where the old door way was,
and then frame in the upstairs bathroom wall.
After that, mow the grass and get ready to head out for a Father’s Day 4
wheeling fun weekend. Yeeeee! Haaaaaaa!
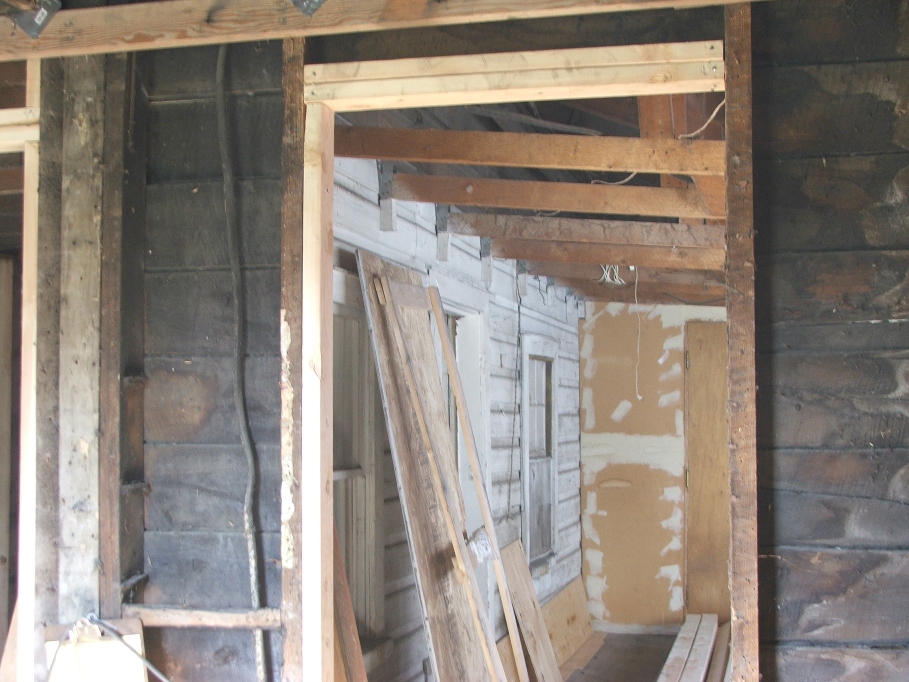
June 20…Well the weekend is over and we did indeed have ourselves one GREAT time!!!! Now it’s time for some more work! We slept in, cuz the weekend took sooooo much out of us, plus the fact that the house is air conditioned and we had a couple too many cocktails last evening!
Anyway, I got started about 11 a.m. and managed to get the door way from the porch to the utility room framed out. It’s all I could do because of the spacing between the existing 2X4’s. I might have some problems fitting a 30 inch door into that space.
Maybe not!
Anyway, my goal today was to get this door way in place and then put the CDX plywood down on the floor. It was one VERY hot day here in the valley, but I managed to get it all done. Sherry and I had to take a trip to town to get some “stuff” for Melissa’s surprise wedding party tonight, and I ran out of nails. So it worked out OK for me.
Anyway, my goal today was to get this door way in place and then put the CDX plywood down on the floor. It was one VERY hot day here in the valley, but I managed to get it all done. Sherry and I had to take a trip to town to get some “stuff” for Melissa’s surprise wedding party tonight, and I ran out of nails. So it worked out OK for me.
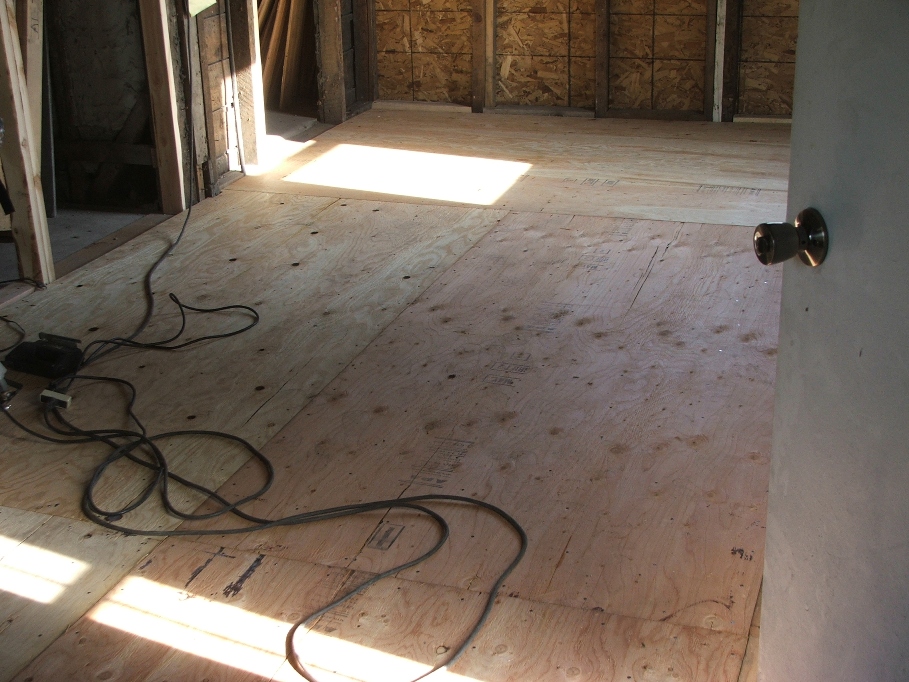
I managed to finish off all of the cutting and
nailing, and the job is done.
Tomorrow, I move upstairs to frame in the upstairs bathroom
and then I call Scott Pettingill to “Come On Down” and install the
furnace!!! What a great time! We will have heat when we need it this fall! Right now we could use the air
conditioner. The weather went from nice
Spring time temps…right into SUMMER….95 degrees today!!!!
June 21… Today’s goal is to frame in the upstairs bathroom wall. This is in order that Scott can see where the bathroom will be and can drop a duct in place. I got a good start and it was definitely going to be a hot day! Working upstairs, the temp is at least 10 degrees hotter than down stairs. Sweat is prevalent.
June 21… Today’s goal is to frame in the upstairs bathroom wall. This is in order that Scott can see where the bathroom will be and can drop a duct in place. I got a good start and it was definitely going to be a hot day! Working upstairs, the temp is at least 10 degrees hotter than down stairs. Sweat is prevalent.

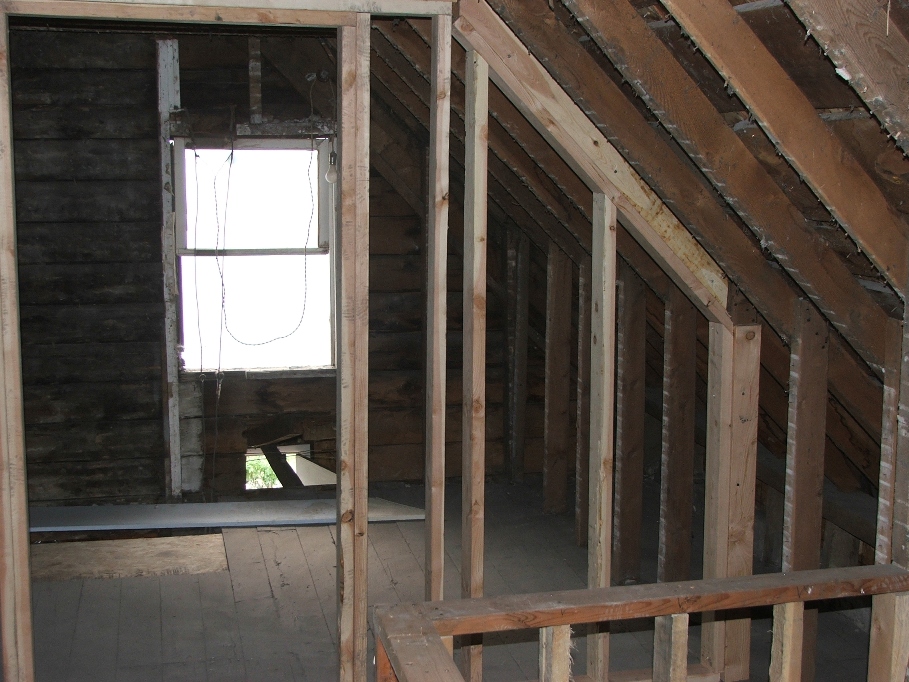
When it was all said and done, it didn’t look
all that bad.
Notice on the floor toward the window a patch in the floor. There was a very dangerous situation that existed there, as the floor extended about 4 inches beyond the floor joist and into the space left from where the chimney was. I cut that out and removed the boards. Then installed a ¾ inch composite board in it’s place. It withstands a man’s weight, but will need additional support from underneath. I’ll do that later. Additionally, at the top of the stairs, the floor was very weak and I patched that also.
Notice on the floor toward the window a patch in the floor. There was a very dangerous situation that existed there, as the floor extended about 4 inches beyond the floor joist and into the space left from where the chimney was. I cut that out and removed the boards. Then installed a ¾ inch composite board in it’s place. It withstands a man’s weight, but will need additional support from underneath. I’ll do that later. Additionally, at the top of the stairs, the floor was very weak and I patched that also.
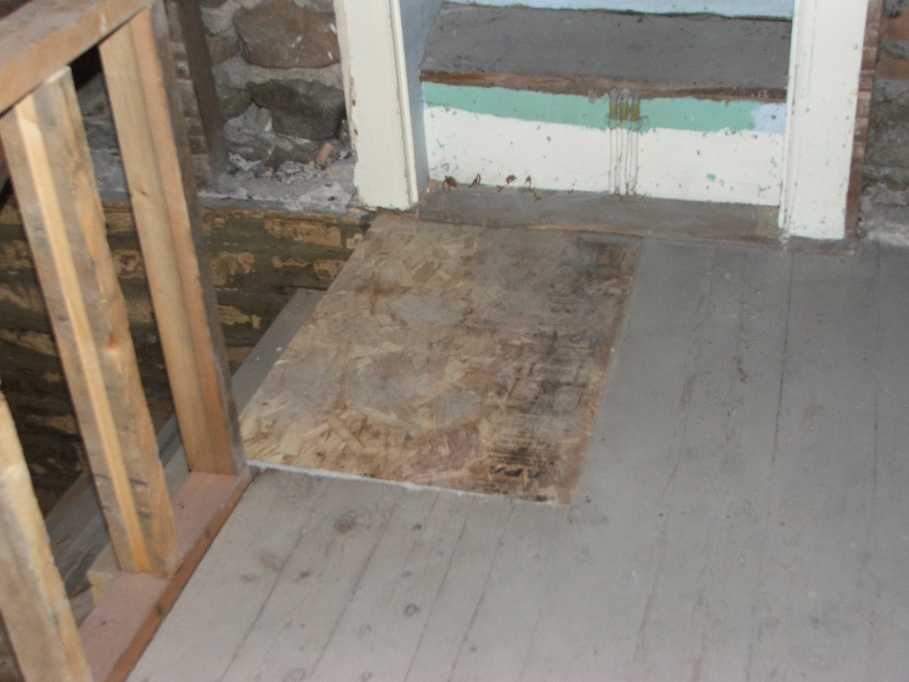
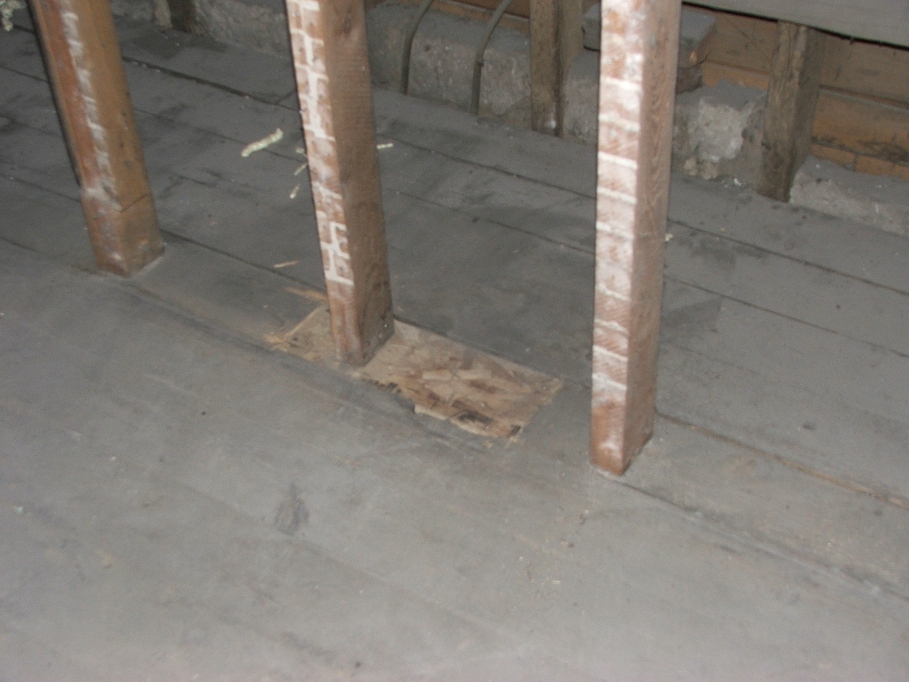
While I was at it, there was a hole where the
old bathroom vent had come up through the floor, so I put a plug in that as
well.
I think the floor up here is now ready for an underlayment level. It will keep the dust from filtering down through the cracks in the existing boards and ending up in the tv room. That will come in the near future. I have to frame in the downstairs bathroom and prepare to frame the shower down there. I can’t do anymore framing in the upstairs bathroom until the heater is installed and I can frame around the duct work.
As I was cleaning up the mess I had created upstairs, low and behold, here came Scott to look over the heating situation one more time. He commented on the floor downstairs, the pipe for the condensation water (located in the cellar), and the ease of piping upstairs. His concern was still the return air from upstairs. He wants to put in the largest pipe he can to suck the air back down to the furnace and out of the bedrooms. This will create a more efficient furnace and air conditioning unit. After a little debate, he decided he would cut a circular hole in the brick at the top of the stairs, and return the duct inside the “hidden crawl space” on the South side of the attic, and then back down the old chimney hole. This will work, it just cuts out some of the storage idea I had for this space. Perhaps I can work on another way to use what space will be left.
June 22…Another hot day expected. Today’s goal is to frame the downstairs bathroom and get the pocket door installed. As with all of the projects in this house, there has to be a lot of work done, just to do the work you want to get done. For instance, where the West wall of the bathroom will go, there isn’t anything to nail to overhead. So, in comes the innovation and the creation of something to nail too.
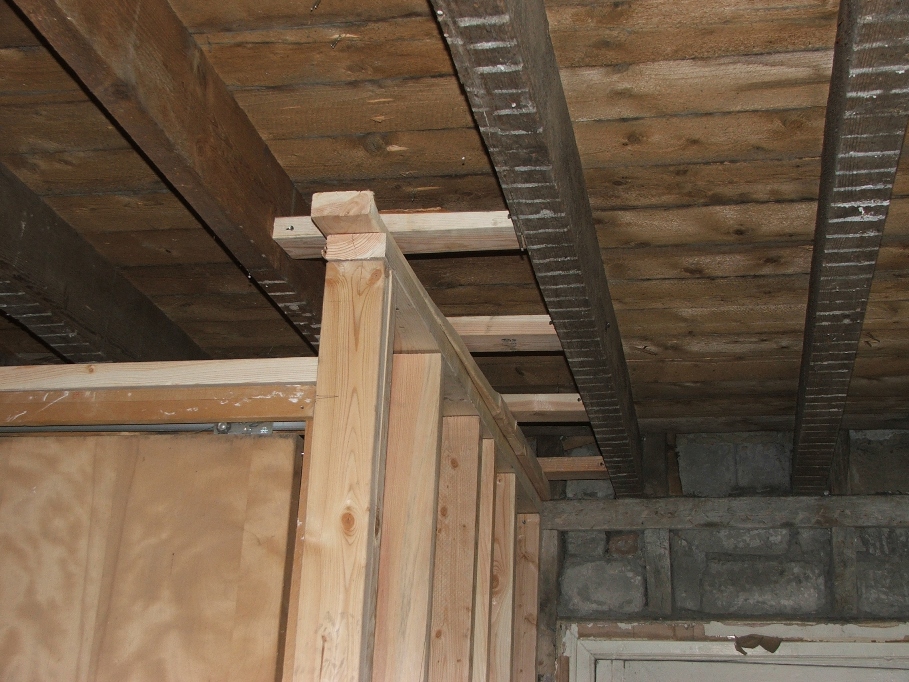
It isn’t pretty, but it works and is very solid. I was able to use scrap wood for all of that
above the wall. I have used a lot of
scrap lately, for shims, spacers etc. It
has saved a lot of money, as 2X4’s cost $2.75 each these days!
As the day progressed, it got hotter and hotter. I was glad I was working downstairs, at least I wasn’t sweltering like I was yesterday. When the day was done, I had the pocket door temporarily in place while I took measurements for the rest of the studs. I ran out of lumber and needed 3 more 2X4’s to finish the task. Another trip to town. Oh well, we had to pick up some things from the grocer anyway.
All this week while I was busy in the old house, Sherry was pulling weeds, fixing up the yards and getting ready for Mellisa’s wedding. She is the “grounds keeper”, and Rod’s mother is handling all of the decorations. It will be an experience none of us will soon forget.
June 24…The wedding decoration crew is here to put things together and to get out of the way, I have work to do in the old house! I’d rather be cutting and hammering than decorating for a wedding. My goal is to finish the frame work around the pocket door and then add the support under the piece of work I fitted in the floor upstairs.
The pocket door I had intended to go into the space, was too narrow. When it was closed, the back of the door came out of the frame. So I took the larger door out of it’s frame and fitted it into this one. I hope we never have to replace it, because it will mean a total dismantling of the pocket door to get the larger door out! Wish us luck in the future. I could have used quarter round to make up the difference, but by the time I thought of that, I already had the door secured in place.
The frame went up fairly fast, but the overhead spacers, took a long time. I had quite a fit getting one of them to hold still long enough to nail it. I ended up using 12 nails to get it to stay. It should have only taken 4 to do the job.
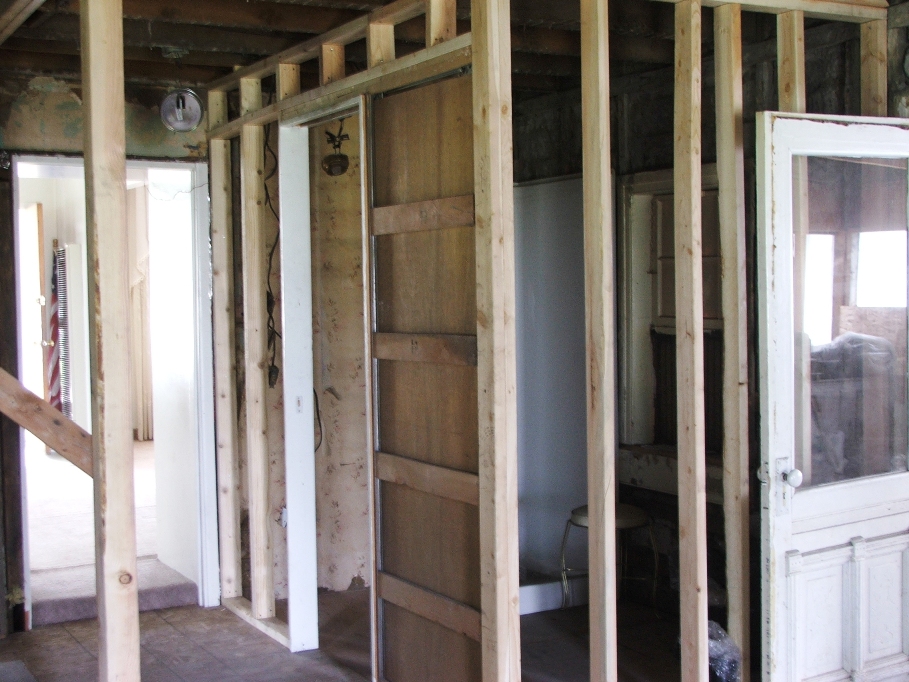
Again, not to bad for a “non carpenter”.
One last task for the day and I can clean up and go out to the wedding install. Fitting the boards under the wood I installed the other day should be easy. I figured I would cut them a little big, and pound them into place. That would allow me to nail them from the ends without having to hold the wood up. This worked very well and made for a nice solid floor upstairs.
One last task for the day and I can clean up and go out to the wedding install. Fitting the boards under the wood I installed the other day should be easy. I figured I would cut them a little big, and pound them into place. That would allow me to nail them from the ends without having to hold the wood up. This worked very well and made for a nice solid floor upstairs.
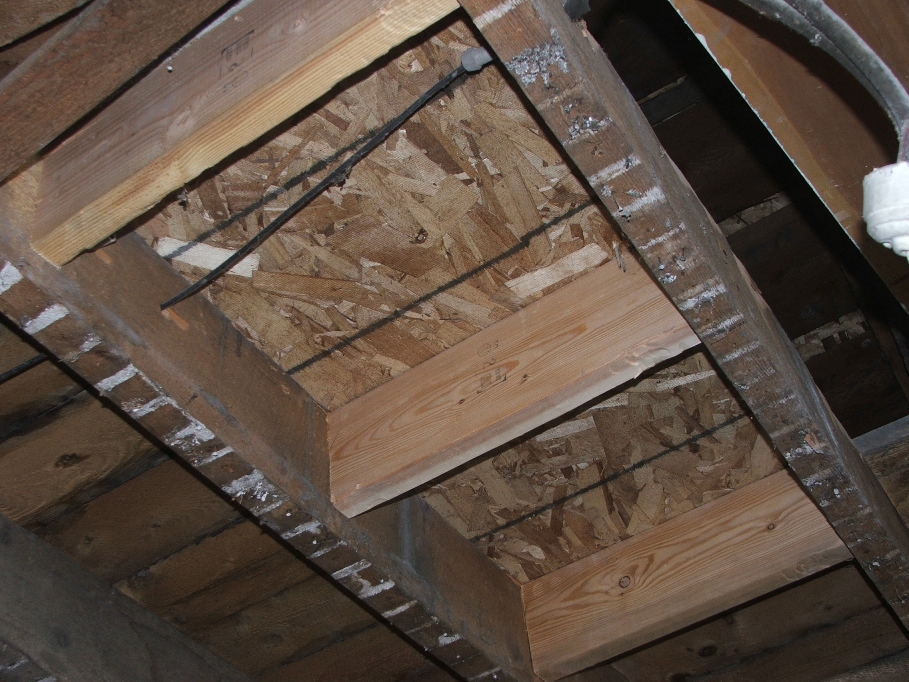
Monday the electrician (Delbert Nawyne) will be here to
evaluate the situation. He can’t start
until the furnace is installed and I still have some work to do on the outside
of the porch. I still have to pull off
the wood siding that is there now, and put up the chip board. The electrician is going to bring new power
from the street to the house, and then begin with a new fuse panel and all new
wiring in everywhere except the downstairs kitchen, dining, living room and
disconnected bathroom areas. I want him
to disconnect the plugs that are currently upstairs, so that the circuit
breakers can be separate for upstairs and downstairs.
I expect Scott will be here no later than next Tuesday to install the heater and AC. It should only take him a day to do that.
June 28…Well, last night I had several night mares….woke up sweating several times and my mind was racing about changing out that pocket door. I told Sherry I just had to go over and change the door back. So that is what I did…It didn’t take me long and when I was done it looked great. Why I did the door change over is beyond me. This one will allow us to change out the door if it gets damaged and life will be good in the future. Also, I needed to put in the flooring. I used CDX plywood, as Sherry and I have decided to put in linoleum instead of ceramic tile. Good choice in my opinion, after all it is just a rental unit.
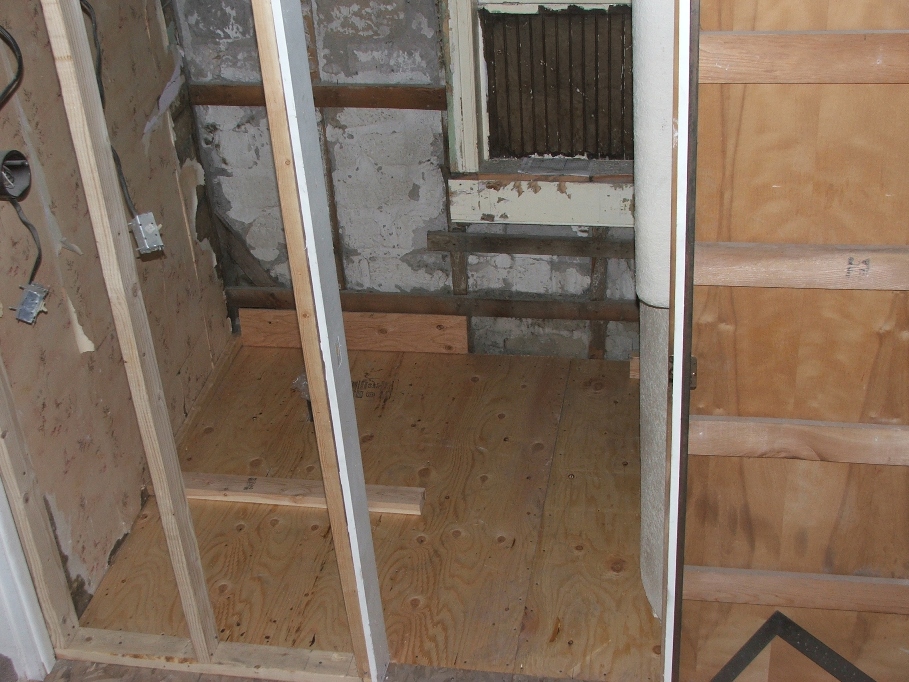
I also wondered about the shower wall work. What do I do?
How do I frame it so that it will stand straight and be level etc. when
I have such unleveled and un-straight walls to work with? I guess I’ll figure it out. I spent several hours measuring, cutting,
looking, marking etc. until it was time to call it quits.
June 29…Today was the day to frame in the shower..I am determined. My walls are not square, but what the heck. I have to do this. I measured against yesterdays’ measurements and changed some of them. Marked the floor accordingly and rechecked everything. Apprehensively, I proceeded to cut some wood and put it into place. I really don’t know what the heck I’m doing. I started on the East wall which seemed to be the most logical, making things come into the room squarely, and then moved to the South wall. Again making things come into the room square. My problem is the floor drain for the shower. It is where it is, and I have to work with that. 15 inches, one way, 16 the other. Here we go. I fought the thing the whole way and it took ALL day to get it done, but here it is and it should work. I even called Keith Witt to get advise on a 3/8 th inch difference, he said go for it, and here it is.
June 29…Today was the day to frame in the shower..I am determined. My walls are not square, but what the heck. I have to do this. I measured against yesterdays’ measurements and changed some of them. Marked the floor accordingly and rechecked everything. Apprehensively, I proceeded to cut some wood and put it into place. I really don’t know what the heck I’m doing. I started on the East wall which seemed to be the most logical, making things come into the room squarely, and then moved to the South wall. Again making things come into the room square. My problem is the floor drain for the shower. It is where it is, and I have to work with that. 15 inches, one way, 16 the other. Here we go. I fought the thing the whole way and it took ALL day to get it done, but here it is and it should work. I even called Keith Witt to get advise on a 3/8 th inch difference, he said go for it, and here it is.
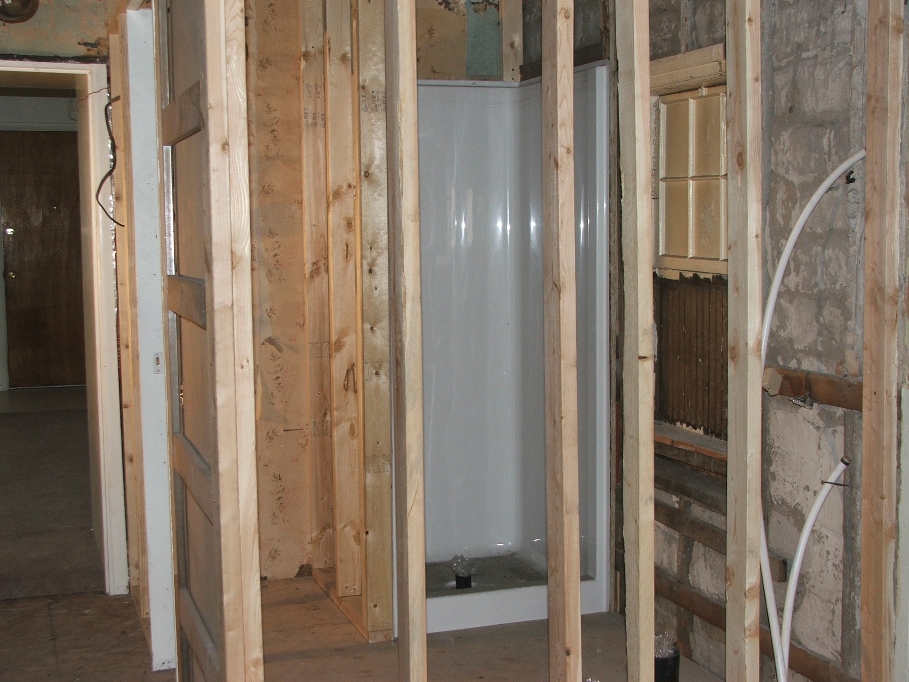
It looks pretty good for this unknowing person. And I think it will hold up someone in it and
drain properly. The little space between
the door and the shower will make a nice place for shelves to put towels and
wash clothes on. Maybe even some toilet
paper!!!
June 30…Well, as usual, one thing leads to another. I contacted Delbert Nawyne about the
electrical work and asked if I needed to have the exterior skin on the porch
before he could begin his work. The
answer was a definite yes. So the plan
is to finish this task. Meanwhile Scott
is here to put in the furnace and AC. We
ordered a 80K 96.6 efficient furnace, a 14 seer AC and a 4 ton blower. Now, for those of you who know what I am
talking about, please let ME know.
Anyway, it has a 10 year parts and labor guarantee on all of it. I’m pleased with that.
Scott and I went over the plan one more time, about where the piping will be put etc. He asked if he could remove a 2X4 in the wall. We looked it over and YIPES!!! NO! Don’t move that one!!! I have been in and out of the TV room how many times, working and pounding and never noticed that this one 2X4 was “barely” supporting the main peak beam from upstairs. All would have been OK except that Dad had cut the main cross beam that supports the floor in the attic in order to put the vent pipe for the tv room wall furnace. At that point, there really wasn’t anything supporting the beam that goes to the peak of the house in the back. I didn’t take any pictures of this “before” I fixed the problem, but you can see from this picture the old structure.
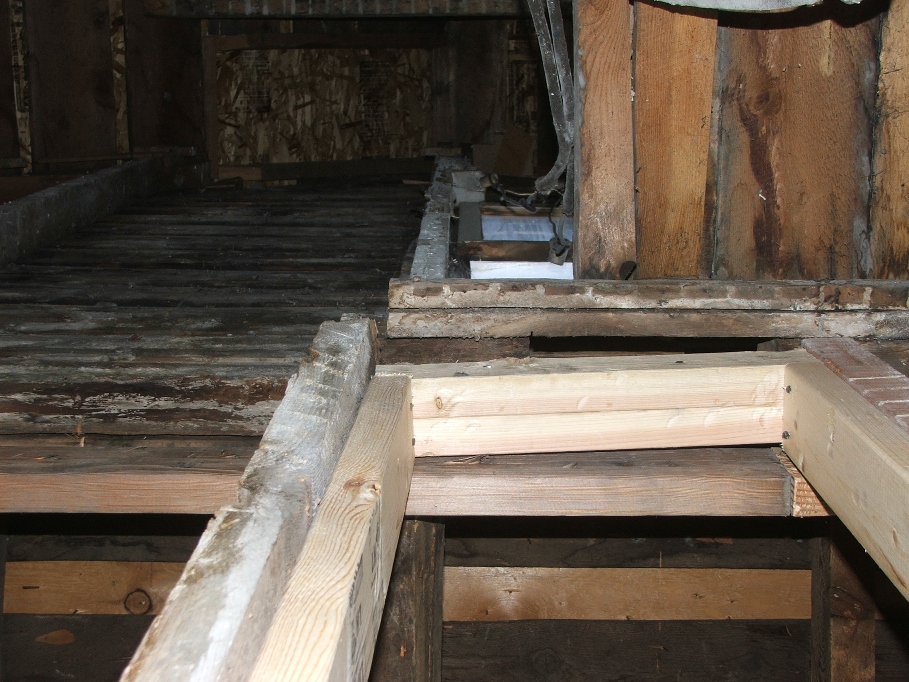
Looking straight up toward the peak. See how the lower 2X4 is on the edge of the
large beam that has been cut. I put a
double 2X4 bracing expanding the cut, and supported it on either end with new
2X4’s. That should hold a good snow load
in the future.
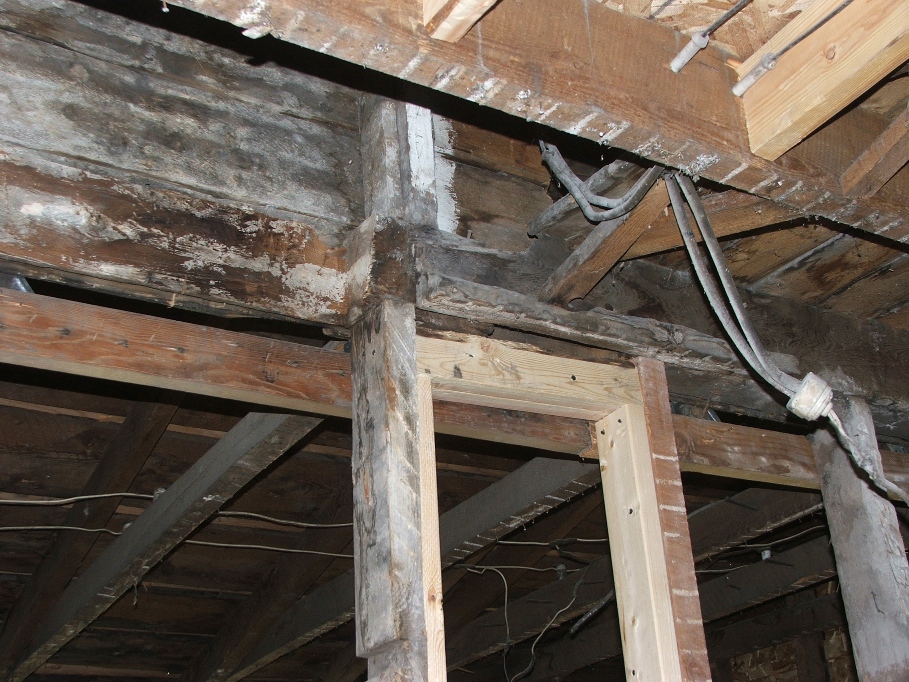
This is the view of the top of the “fix”. I still can’t believe I didn’t see that
problem before.
Ok, while Scott goes about his task, I move to the outside
of the porch to do mine. First is to take
off the outer wood, kill all of the wasps that are hanging around, put
insulation between the studs and add the outer chip board skin. Easy!
Today is “HOT”, nearly 90 degrees and I’ll be working on the South side
of the house. Bring lots of water.
Progress is being made, and no stings from the nasty little wasps. I went through about a half a spray can of wasp and hornet spray, and when the wood was off the outside of the porch, the wasps were few and far between.
Progress is being made, and no stings from the nasty little wasps. I went through about a half a spray can of wasp and hornet spray, and when the wood was off the outside of the porch, the wasps were few and far between.
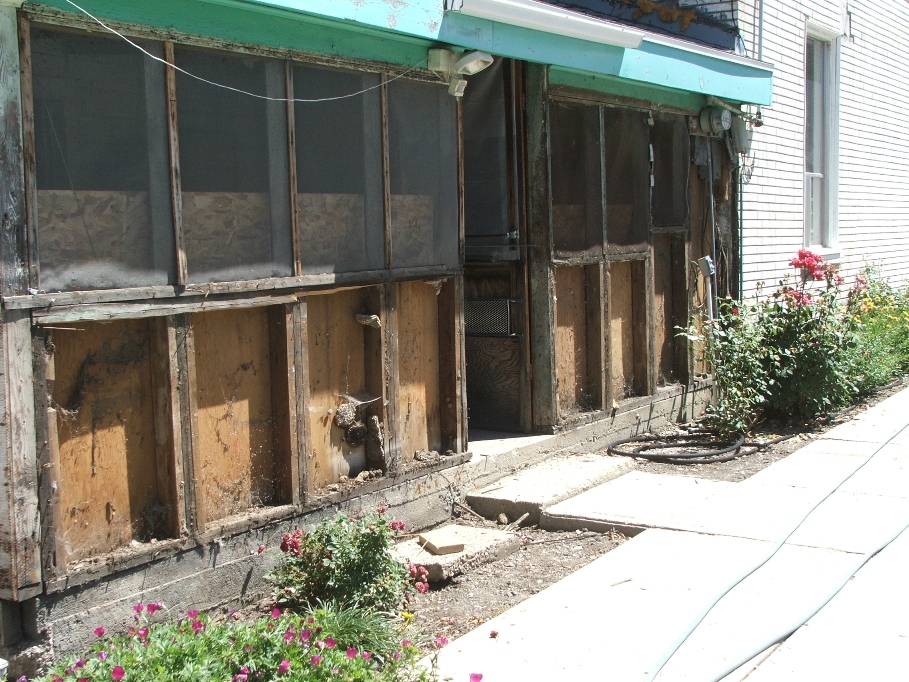
See the large nests in that one panel? Most of those are old nests from over the
years, but there were plenty of new ones that held several wasps each. I battled them one at a time, as I uncovered
them.
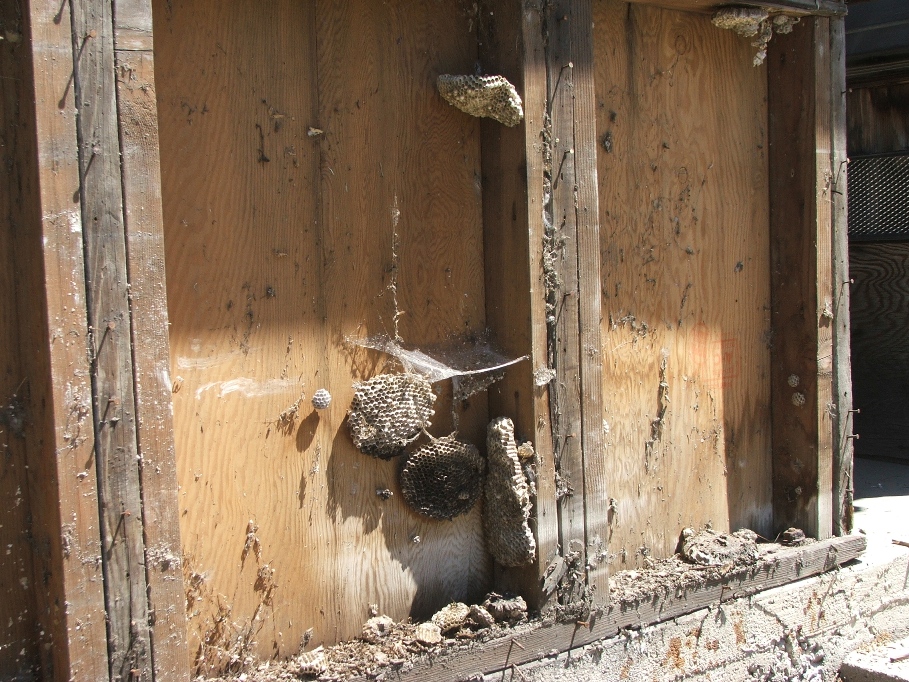
They are all gone now, and I made sure there weren’t any
entry ways back into this area. They
will play hell building in this area again.
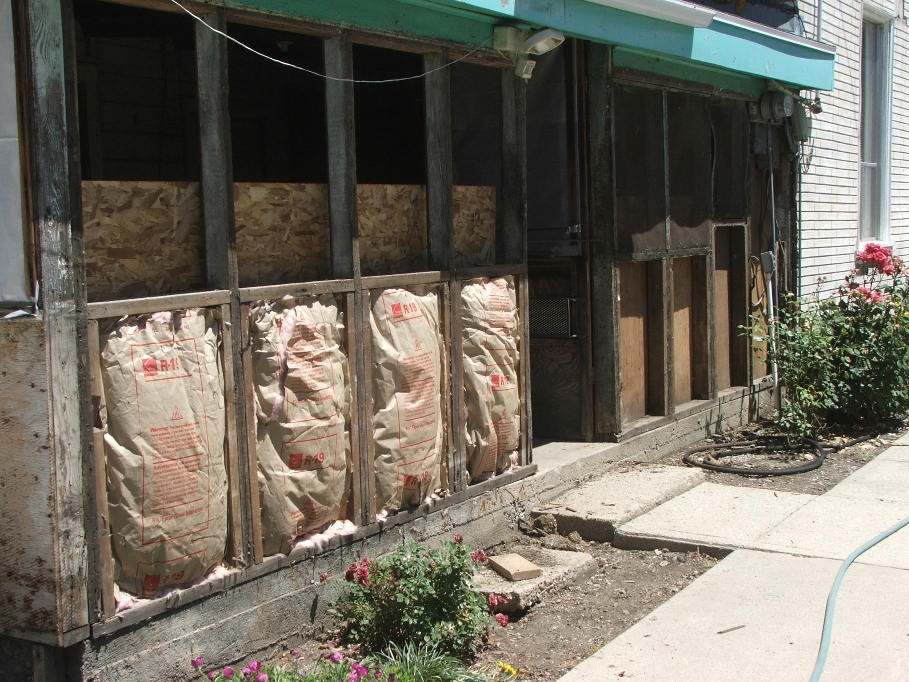
When the mess of these was cleaned out, I put in
the insulation. I had to buy R19, in 23
inch widths to accommodate the width between these studs. Insulation goes for $50 a bag. The bag has 6 lengths at 8 ft. each. Pricey!
It should help in the future, should the porch get windows.
By now it’s beastly hot outside. I’ve gone through almost 2 quarts of
water. Because the screen is off, I have
to keep working. Not only to keep the bugs
out, but also those ugly cats. I continued to work, and at the close of the
day, I scabbed the screen back on temporarily.
That will work for tonight, and tomorrow I’ll take a trip to town to buy
new screen.
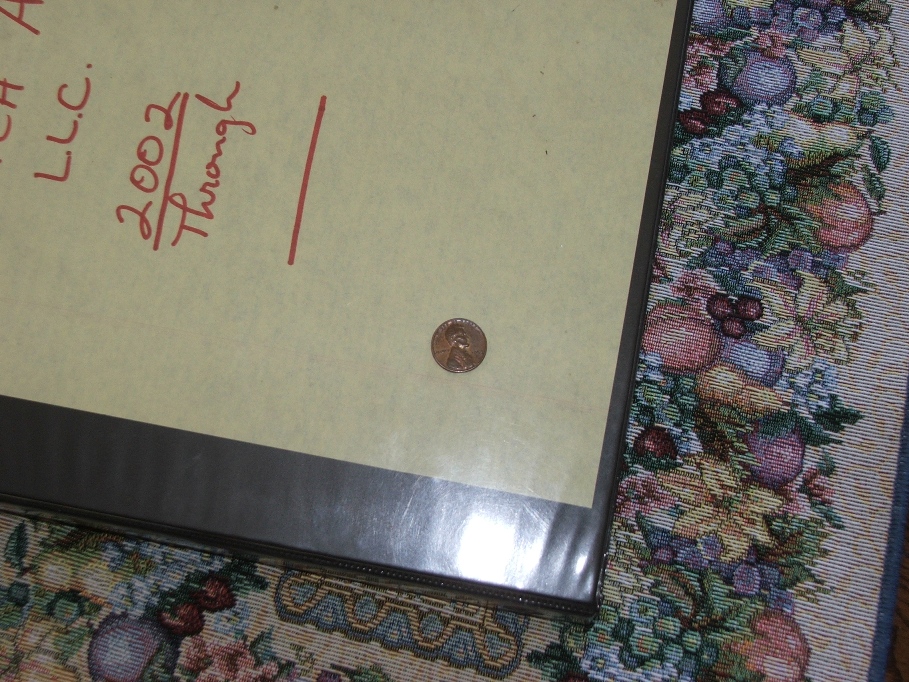
I said it before, that I thought the “finding”
would cease, not yet! I found this penny
under the electrical panel. It was
probably one used to keep the fuses from blowing. 1959, not too old, but a find no the
less.
July 1…Man, it’s July already! I had a bit of a problem when I uncovered the
electrical on the East side. A splice
just didn’t look good to me, so I called Delbert to come out and look at
it. He was there at 8 a.m. and agreed
with me that it needed to be undone. He
cut it and fixed the wiring so as not to be a problem. What that did however, was disconnect the
power to the front light! Oh well, he
will fix that when he does the rest of the electrical.
I was able to insulate the remainder of the porch and put on the last of the skin. Then the new screen. I still have to put strips of wood around the edges and up the center posts to make it look finished, but here it is so far. Guaranteed no bugs are going to get through that.
I was able to insulate the remainder of the porch and put on the last of the skin. Then the new screen. I still have to put strips of wood around the edges and up the center posts to make it look finished, but here it is so far. Guaranteed no bugs are going to get through that.
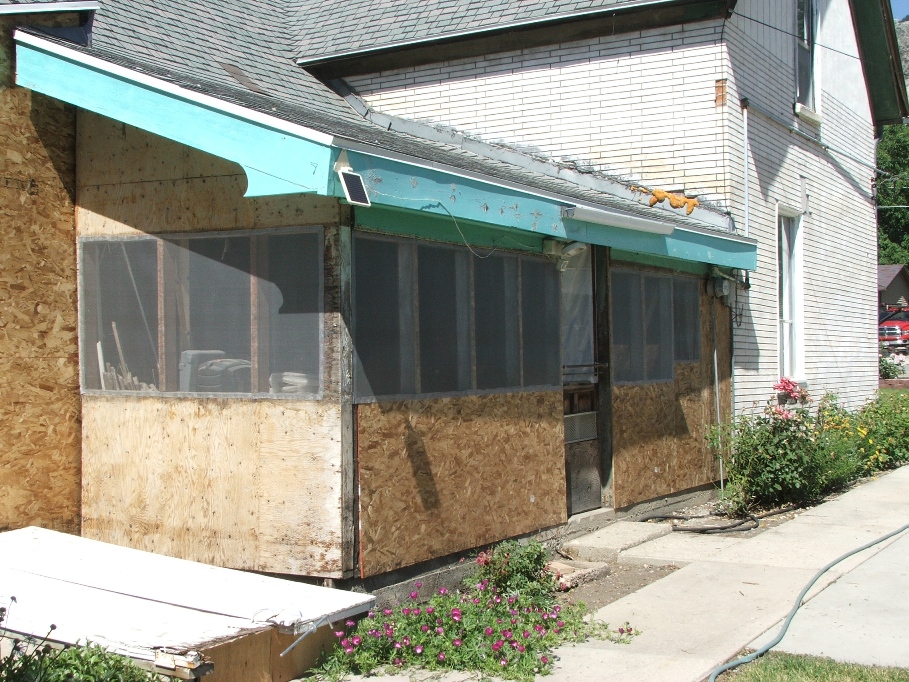
They still have access through the door however, but I won’t
tackle that until later. Right now I
have other priorities. Before Delbert
can do his thing, I have to have the “fire stops” installed, and a building
permit purchased.
I don’t have any pictures of the work inside the porch area, but I did remove small panels above the screened in area to install insulation in there and I found a number of interesting things inside these panels. Why nobody removed them before covering them with plywood is another thing. But look at this picture of the things that was inside.
I don’t have any pictures of the work inside the porch area, but I did remove small panels above the screened in area to install insulation in there and I found a number of interesting things inside these panels. Why nobody removed them before covering them with plywood is another thing. But look at this picture of the things that was inside.
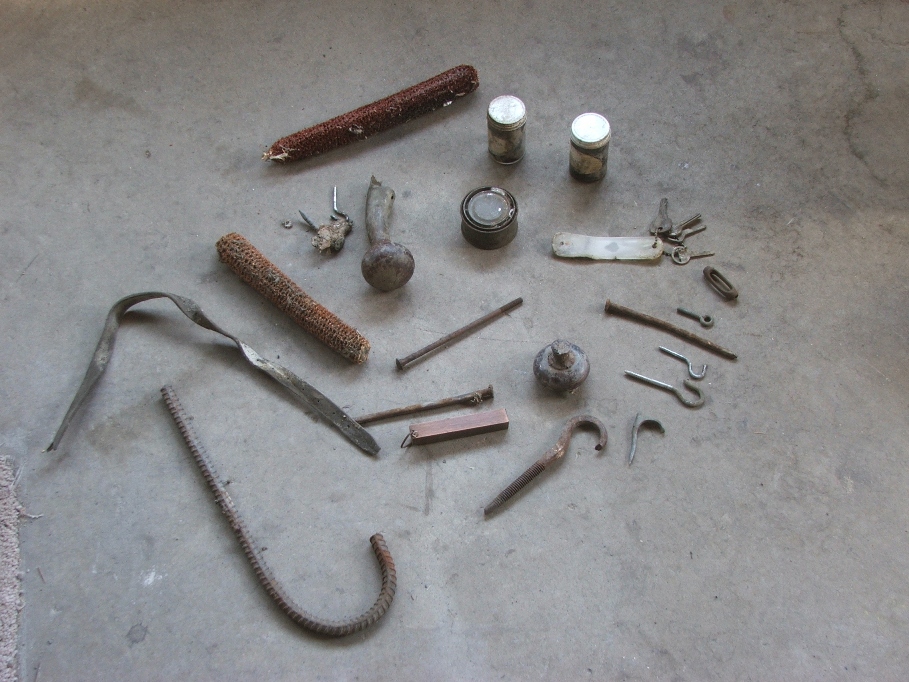
Can you believe corn cobs?
Canned heat? Two bottles of fish
bait? The lost keys? Door knob, horse haim cover etc.???
Work will not be too quickly for the next couple of weeks because it’s time to put the hay in the barn. Donnell Anderson is coming in the morning to cut, and will bale late next week. In the meantime we have lots to do down in the field.
July 12…The hay is all in the barn now, and the yards are in recovery mode from being neglected while we worked the hay. It’s been hot, and the hay process worked out real good. A great crop, 2035 bales, no rain and 1200 bales were sold in the field!!!
Now it’s time to get back to work on the house. Today the temp hit 101 degrees and I had to work in the bedroom area upstairs! Sweat, sweat, sweat!!! To assist the guys installing the heat and AC ductwork, I crawled up into the rafters and nailed some “flat wood” down so they could walk on it. The flat wood also helped stabilize the joists minimizing the movement back and forth.
Next I had to pull down some of the wall partition boards and install a pocket door between the master bedroom and the old gun room. I’ll call the old gun room “the small room” from now on. We wanted to put a door here, so that the people renting could use the small room as a closet and/or an infants’ room. We think it’s a good idea. The door went in without too much trouble.
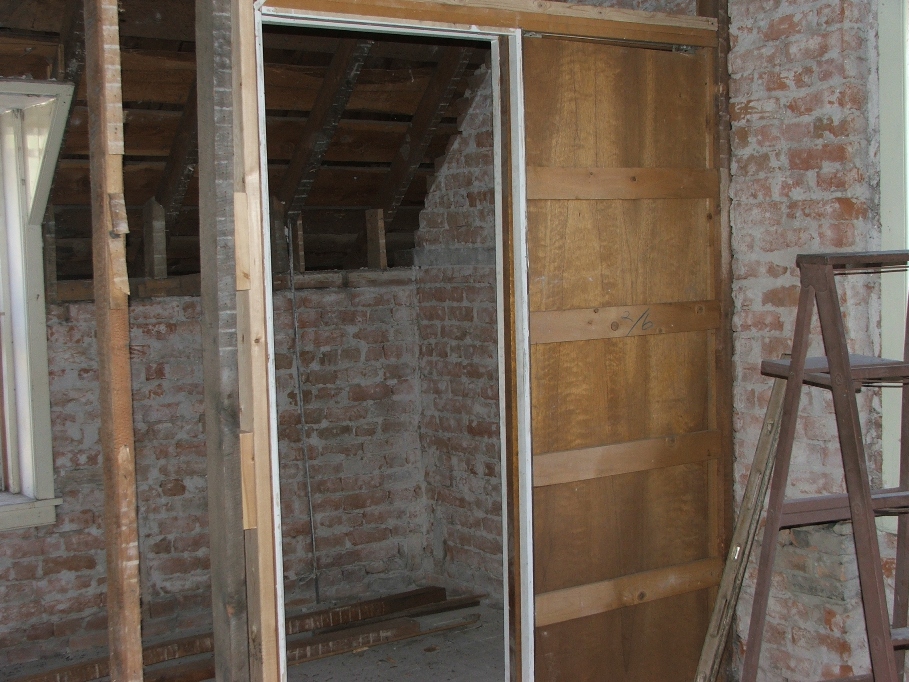
This is all I could do today, as I was extremely hot and
dehydrated.
July 13….The weather is calling for 104 today, so we got up and skipped breakfast and went right to work. The heat/AC guys were busy as well, with the same idea in mind…get the work done while it’s coolest. They should finish today.
I went right upstairs and started cutting and nailing. I built the rest of the framing above the pocket door and installed it. Next was to start in with the “fire stops”. I decided to utilize the wood I took out of the walls to make way for the pocket door. This wood is the same width as that which is still standing. It would make a better fire stop than one of today’s 2X4’s which are narrower. I cut and nailed and even pulled a few of the nails that were sticking out from the lath and plaster job. When I had consumed a full quart of water, I figured it was hot enough and anything beyond what I had accomplished would have to wait until tomorrow.

Fire Stops slow the progress of a fire in the walls from
getting into the attic. This house had
no fire stops at all and we are blessed it didn’t catch fire. I still have to put wood between the studs
next to the floor in order to have something to nail the sheetrock too later
on. This type of work takes a lot of
time and is not noticed in the end, but will make future owners of the home
much more appreciative. I also have to
reinforce the door jams, with additional studs alongside each of the uprights
on either side of the door frame, and doubling the header wood over top of the
doors.
When I get the fire stops and floor space wood installed, the electrician can move in. Once he is on line, Sherry and I will take a short vacation. Go somewhere cool.
The heat and AC guys did a great job and here are some pictures of some of the work they did. Testing can’t be done until electricity is in. I’ll explain what they did with each picture.
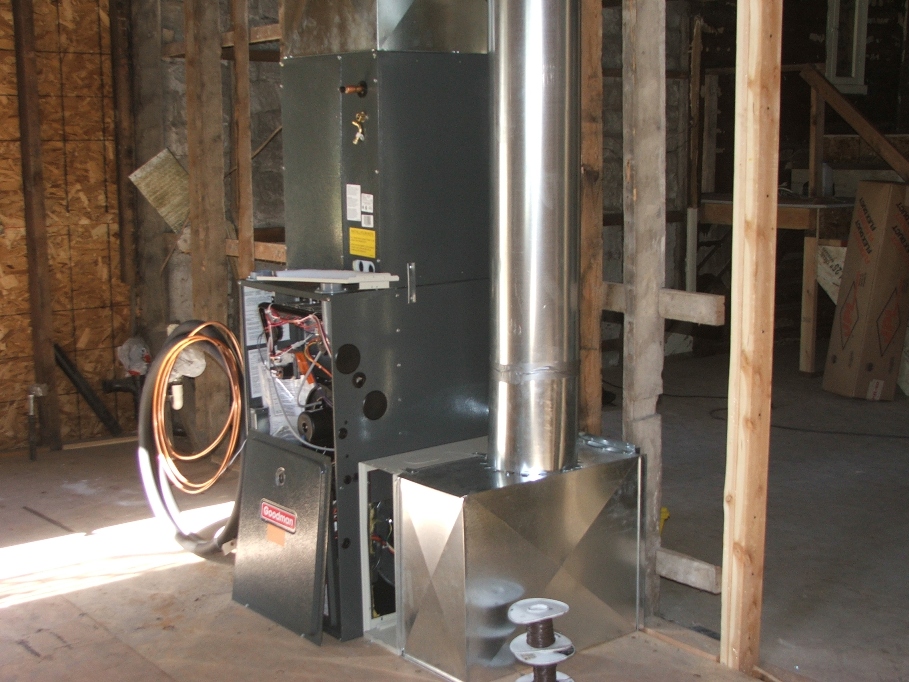
This is a 140 K BTU furnace with a 4 ton
blower. The tube on the right is a 12
inch air return coming from upstairs in the bedroom area hallway. He chose to overdo the BTU, to get the 4 ton
blower and like Scott says, you can always tune down the blower speed, but you
can’t increase a blower beyond it’s capacity.
His thought is to get as much air conditioning into the bedroom area as
quickly as he can to help cool it down.
Heat won’t be such a demanding issue, but the AC is.
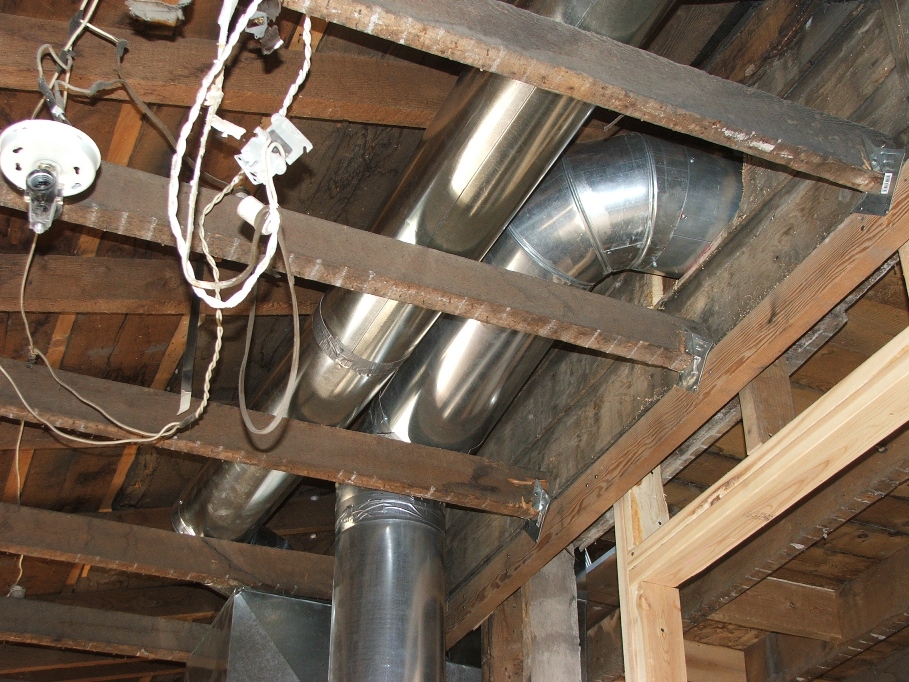
Vents above the furnace.
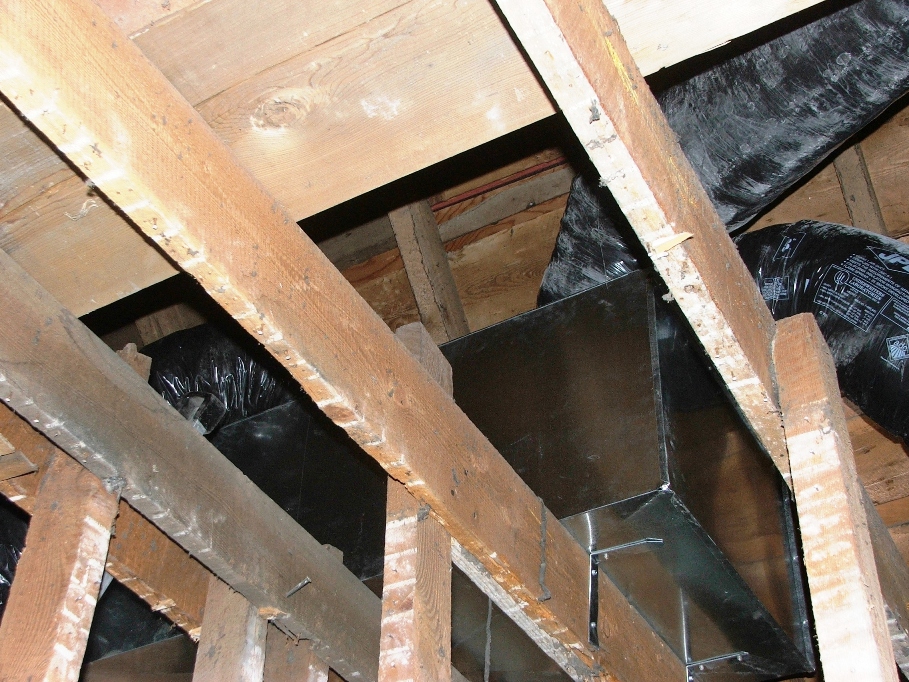
Box splitter in the attic upstairs that sends
the air to each of the rooms.
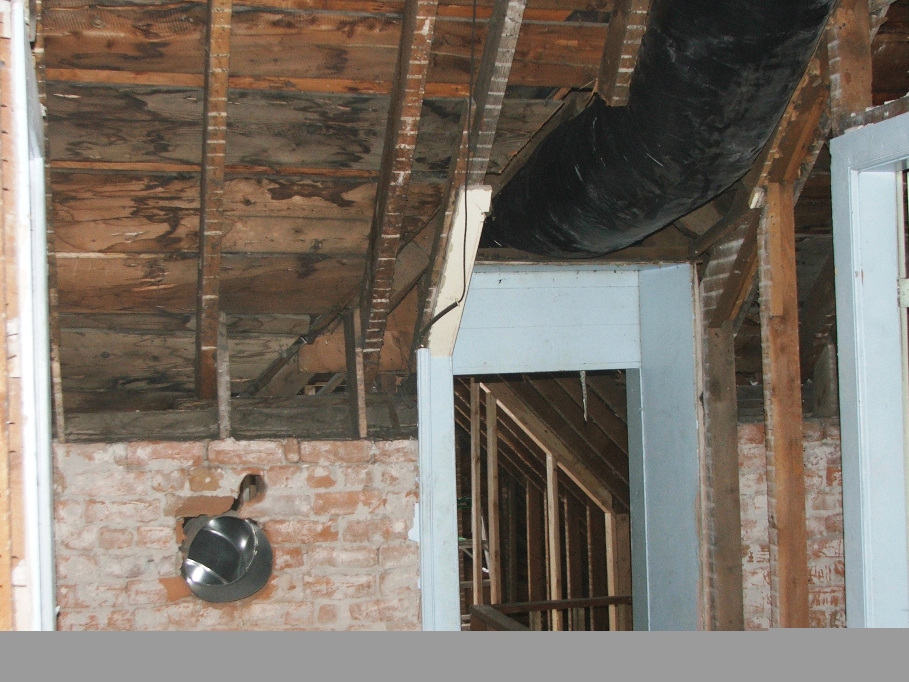
The big black tube over the door is a 14 inch
insulated flex tube that will bring up the hot/cool air. The tube in the wall is the 12 inch tube that
will suck the air back out of the upstairs and recycle it to the furnace. This will get a vent cover on before he is
through.

This is the backside of that return pipe. He chose to route it through the old
crawlspace to hide it. Thanks
Scott. I can handle that. I only have to box in the part that sticks
out into the room.
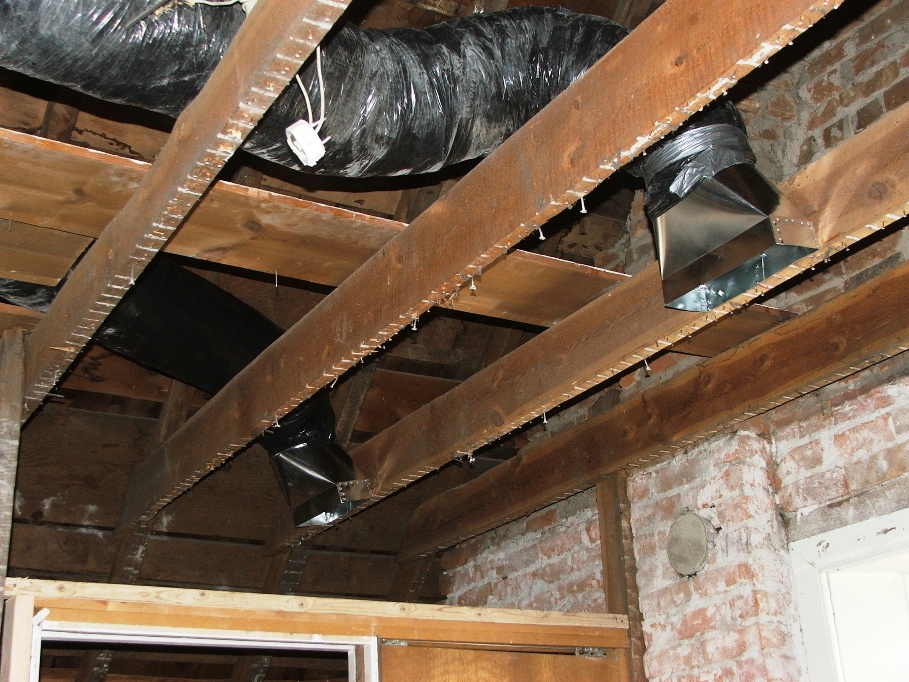
Vents in the master bedroom and small room.

Vent in the upstairs bathroom.
Scott is a great guy, and works very well with
others. He has a need for a window mount
swamp cooler, so I traded him the cooler that has been on this house for quite
a few years for a bit of additional work.
In anticipation of some day closing in the porch and making it part of
the living space of the house, I asked him to pipe and cap a run of vent pipe
to the porch. He was happy to do this
and the end result is this….
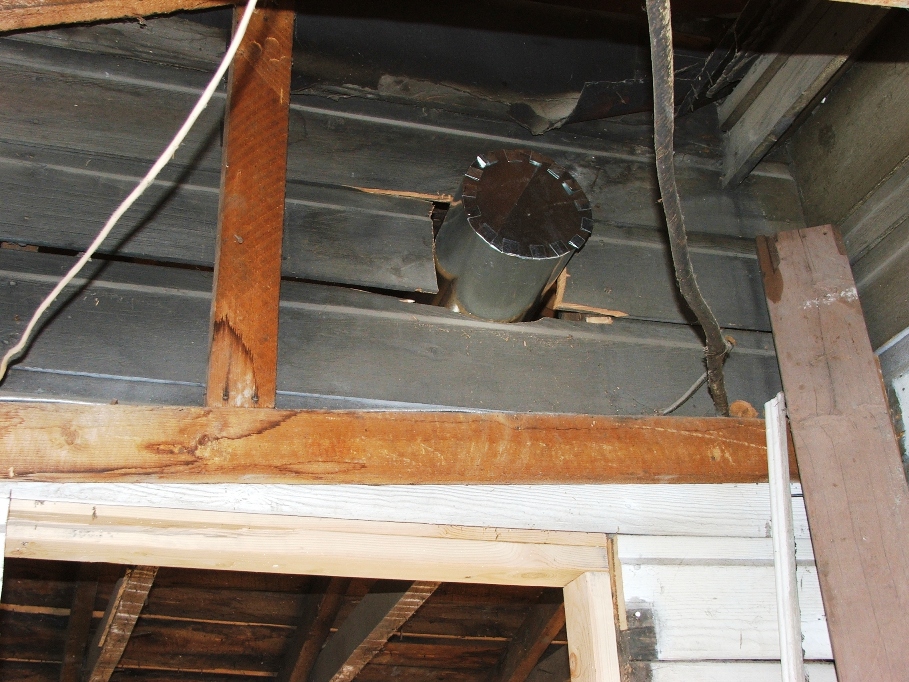
It will make life a whole lot easier on someone
in the future just to have to attach the vent pipe to this one, and put on a
vent. We are also looking at windows for
the screened area of the porch. So far
the bids are a little high for us to make the decision at this point. I have insulated the walls, above and below
the screened areas though.
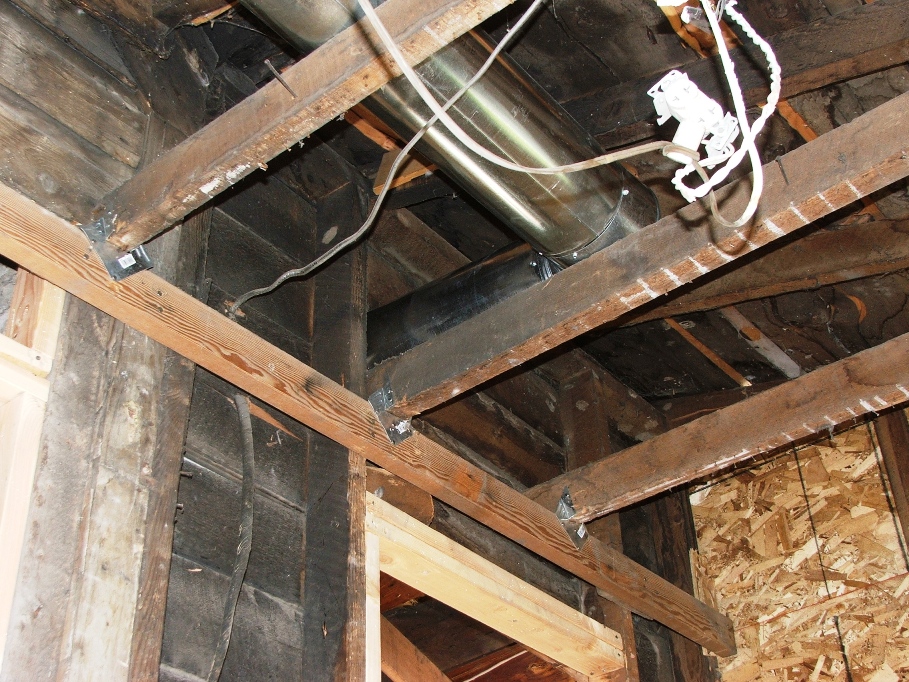
Vent pipe heading to the porch. Of course all of this will be hidden behind
the sheetrock some day.
July14…Mitch came down from Logan today to help with the work, it’s going
to be a very hot day today, so we want to get an early start and work in the
cool. Some time ago, the structural
engineer, Bryan Nawyne, told me I would have to redo the framing around the
doors upstairs. Mitch and I looked into
this and realized that what the doors are hinged to, are actually the door
frame. This will have to be removed and
new framing installed. Another
setback! Pre-hung, paint able doors cost
around $60 and we will have to purchase 4 of them. The good news in doing this is the fact that
if a door gets damaged in the future, then we won’t have to disassemble framing
to replace it.
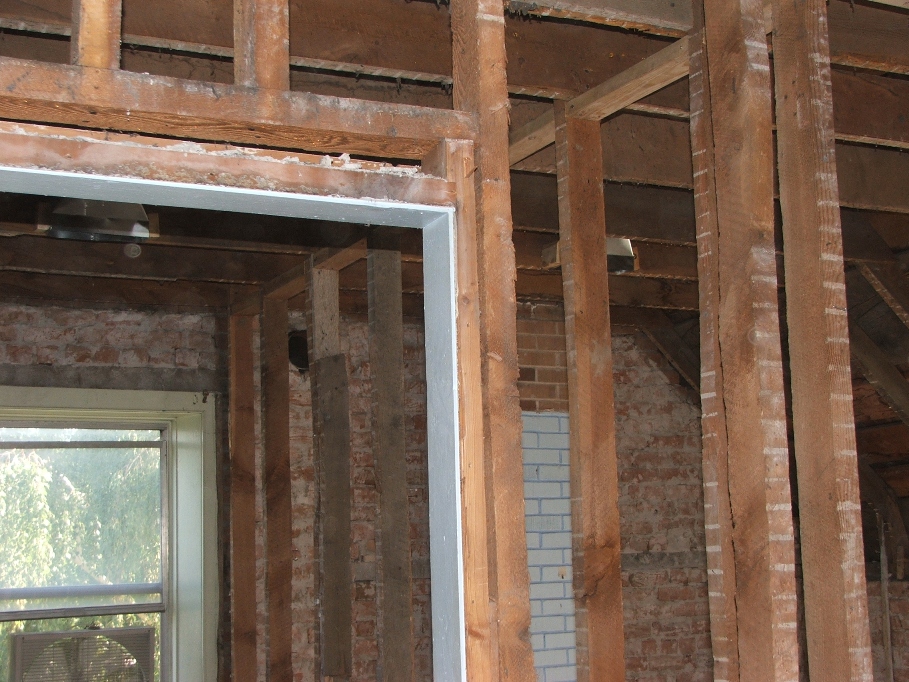
I can also make them standard to today’s width
and height for inside doors, as well as bolster up the header. Because I really don’t know what I’m doing,
this should be quite a learning experience.
The old doors would have been a treat to leave in place, but they have
to go. Here are a couple of pictures
showing what is about to go.


With the old frame removed….
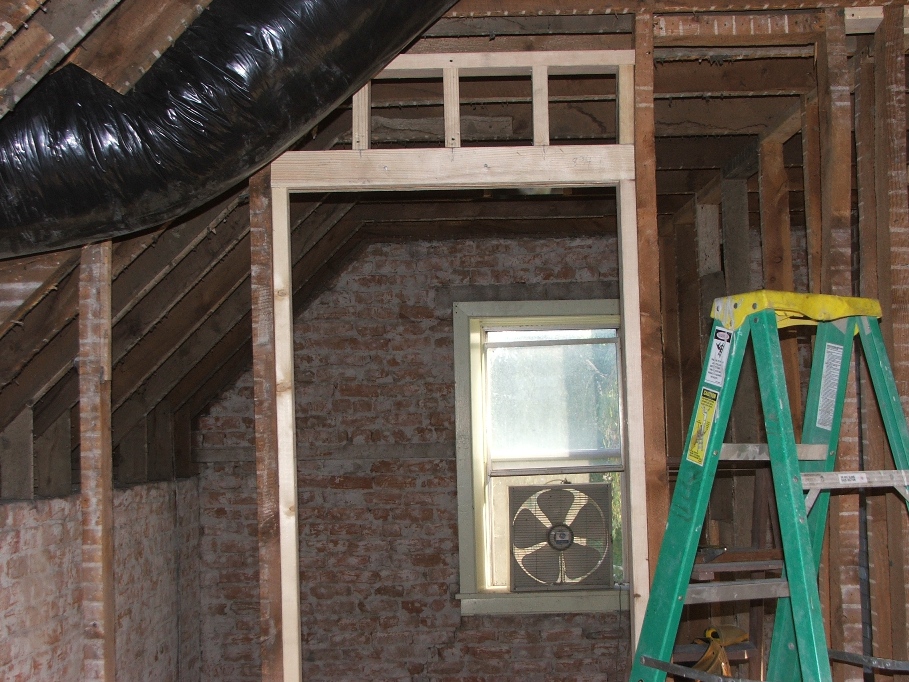
We were able to build in the proper framing to
be able to hang a door properly.
32 inches wide, 83 inches high. Somewhat “plumb”, given it’s me that built it. I was only able to finish this one before it got too beastly hot to continue working. Meanwhile Mitch hammered out the rest of the door frames, and left me with an awful mess to clean up…tomorrow…
July 15…Started early to work in the cool. My goal is to get the remaining three doorways framed in and possible do a cleanup of the entire house. It took until noon to get the three doorways done, but they are finished.
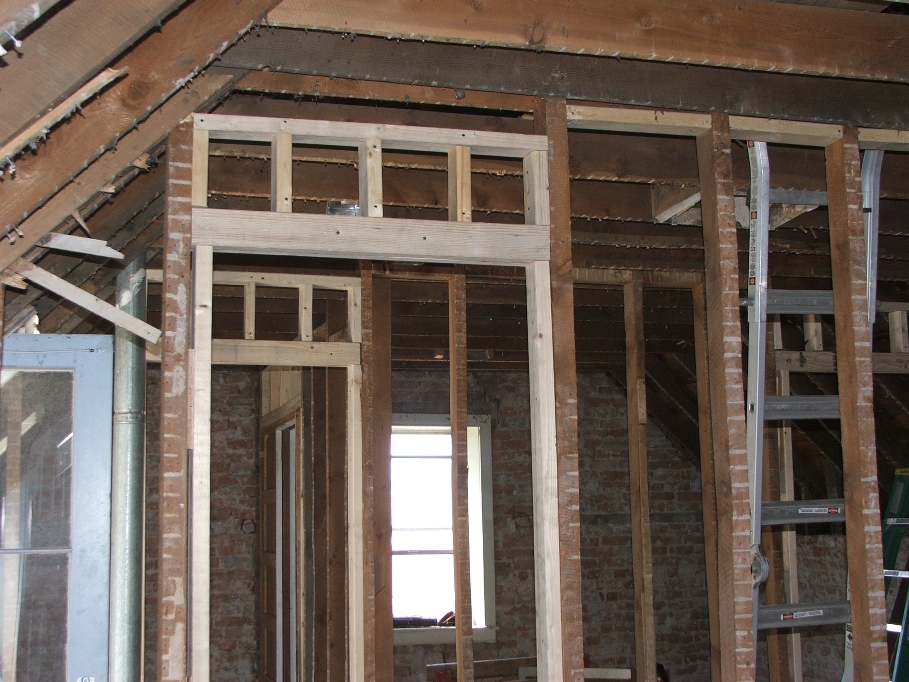
Next comes the cleanup…tomorrow.
July 16…The cleanup was hot, and a small load of wood went to the field, I failed to take a picture of it. I was able to salvage a bit of wood, for use later, if needed. A lot of what I’ve saved will probably end up in the field, but for now, I’ll hang on to it. I have used quite a bit of what I saved in different places, and believe me, the price of lumber is outrageous these days.
I have to tell you a story now…remember when I gave Scott Pettingill the swamp cooler in trade for a stub into the porch for future use? Well he came and got it and what we ended up with was a hole in the window where the cooler was placed. The sliding window that was removed to accommodate the cooler has been lost and therefore I will have to have one made to fit. In the meantime, I cut a board and put it in there.
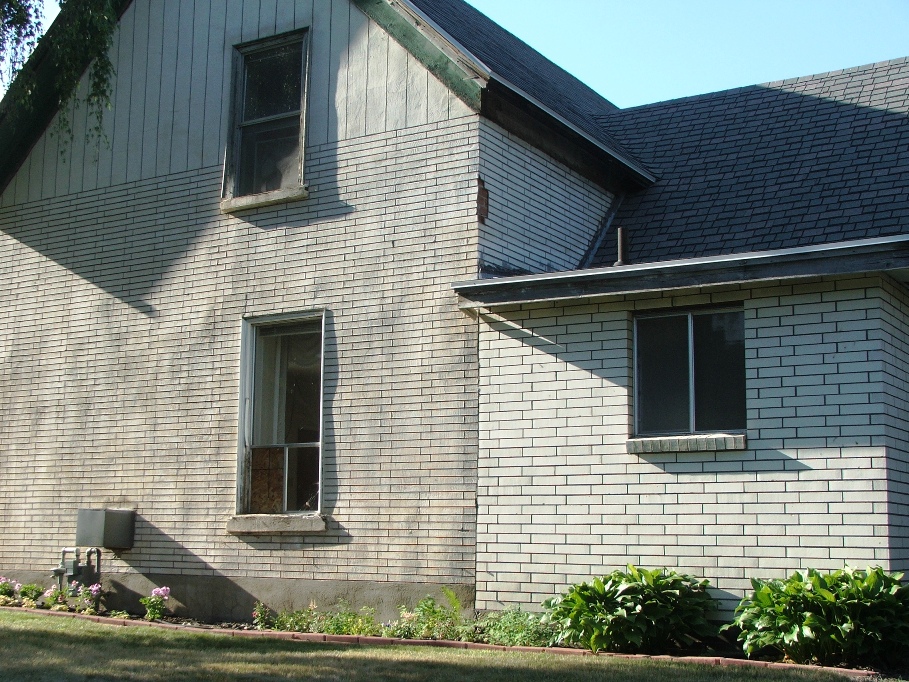
After that I called the window man…Dean Mellen in
Brigham. I asked if he could make me a
slider for the window…Is it a metal frame?
He asked. Yes it is. Sorry, they don’t make metal window
“anythings” now days. You’ll have to
replace the whole window.
I was bummed! Another money eating setback. I had him send his guys out to measure and give us a bid. It will take two weeks to get it at a cost of $302! Man! Does it ever end? I ordered the one, and will probably order a matching one for the South side later on. I know I have to replace all of the windows in the house before it’s over, but I would like to recover some of the money we have put into this remodel before that happens. Oh well! Life goes on.
We have approached the bank about a line of credit to be used as we need. The big expense coming up will be for sheet rocking. I can’t do that. A man has to know his limitations.
July 18…Monday and Mitch is coming down from Logan to help out. He has now graduated with a Masters Degree in Business Admin. We are very proud of him. His task is to find a suitable job for his education and get on with his life. Until then, he will move into our basement and continue to look for work. This week we plan on helping to move him from Logan to Willard. In the mean time work on the house must go on.
Today’s tasks include adding blocking between the studs and figuring out what to do with the door way at the top of the stairs. Mitch will do blocking while I rip out the door casing and see what we have to work with.
As work progressed, it became obvious to Mitch that I was having all of the fun, so he finished the room he was in and came to help me. We ripped the framing down, which really opened up the space. Then worked on the step landing by tearing out the old structure, down to the top of the rock and reworked it. We gained an inch or so of head room by lowering the step, while still maintaining a good footing.
Overhead, we raised one of the braces about 5 inches and when we framed in the 14 inch heat/AC pipe, the final product is a space about 73 inches (after drywall) high. Under todays specs, it should be closer to 80 inches, but where we are under a grandfather clause, we can get by. 73 sure beats the 62 inches that was there. We shouldn’t have any heads get knocked on that. These pictures show the work that we did today.
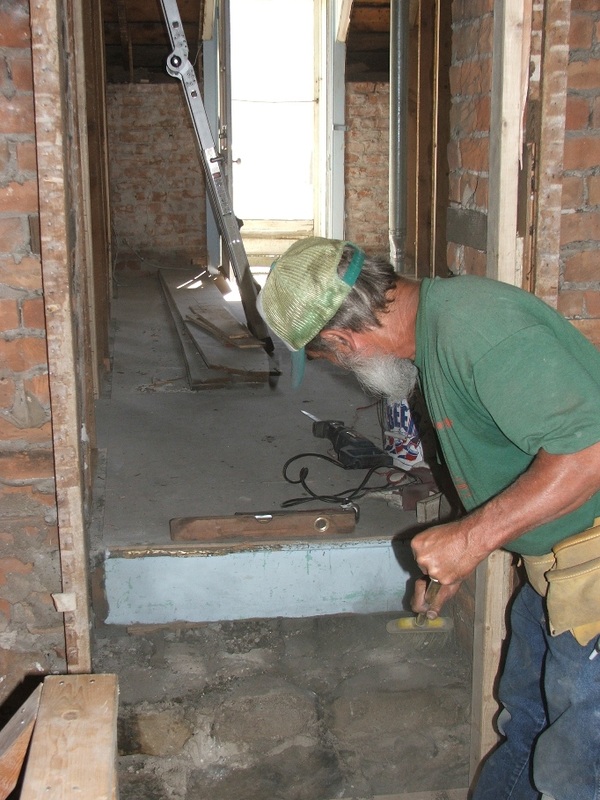
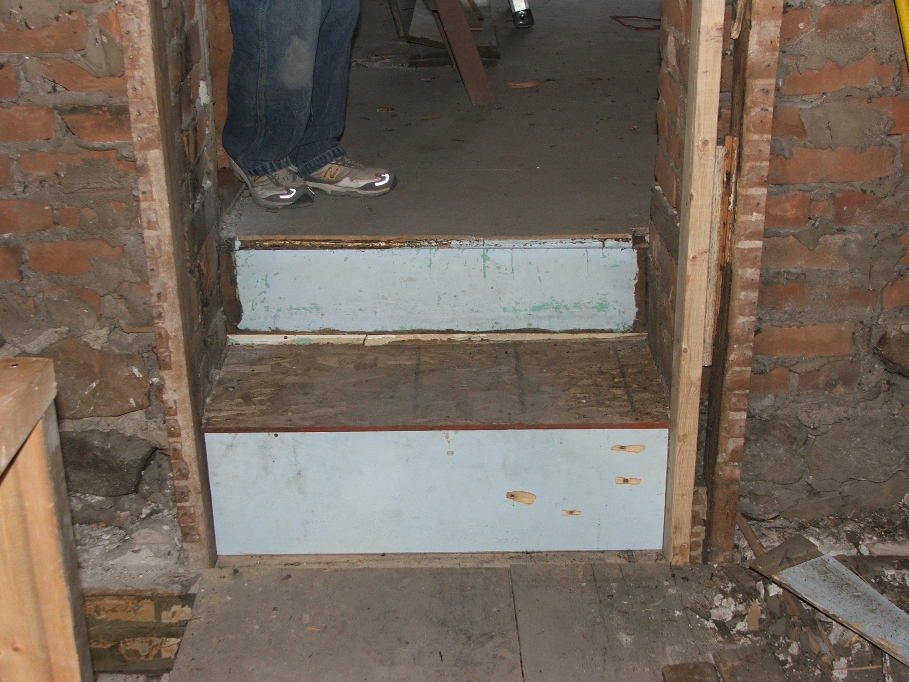
The rocks under where the step was. We did a little chipping and cut the end off
one of the supports before we recovered with wood.
Using scraps, the one with the four holes had been shot from the other side at some time or another. I can fill the holes with putty before painting or carpeting. The mess you see in the corner is part of the frame. Now check the next flick out.
Using scraps, the one with the four holes had been shot from the other side at some time or another. I can fill the holes with putty before painting or carpeting. The mess you see in the corner is part of the frame. Now check the next flick out.
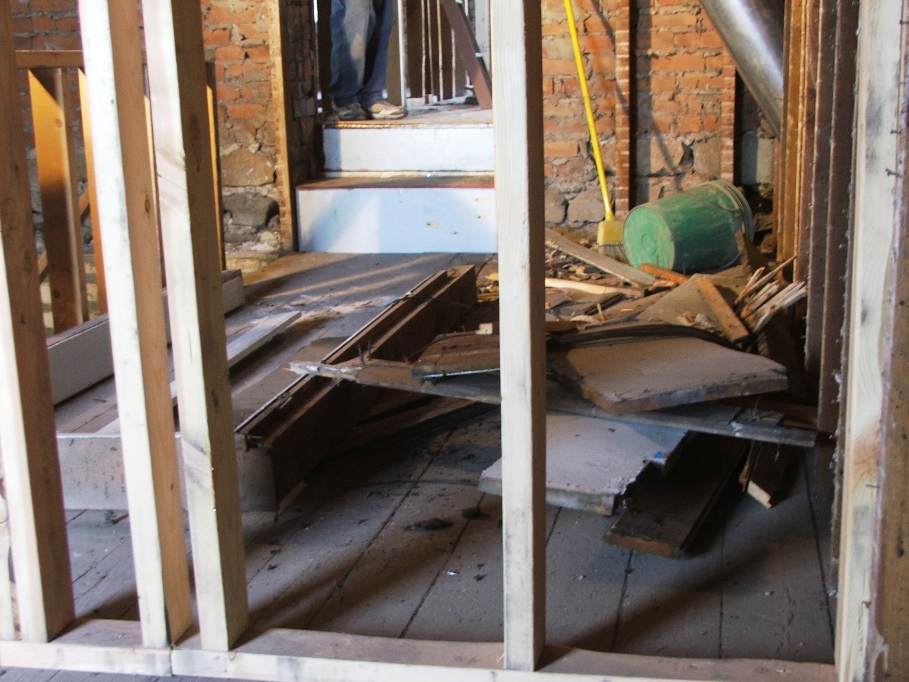

The frame came out “in tacked” and Mitch wanted to stand it back up where it used to be so that you can see how much head room we gained. It’s amazing what we were able to accomplish.
At least a foot of additional headspace. Good job Mitch! It’s a dirty job, but someone has to do it! At this point the outside temp is 100 degrees, and the inside of the house must be 110, we have drank all the water we brought over and it’s time to quit for the day. Leave the mess for another day.
July 20…I called Bryce Wheelright about giving us a bid on sheetrocking and today he and one of his boys came over and measured. He also gave me some duties to prep the rooms for sheetrocking. There is a lot yet to do. Today is mow the lawn day, and we are also going to town, so no work on the house. Tomorrow is Thursday and Mitch wants to move back to Willard. So no work then either.
July 22…Friday! Mitch is moved in and he and Angela are cleaning up their old apartment. I get to work on the house by myself today. Lots to do. I started by finishing the framing of the vent pipe.
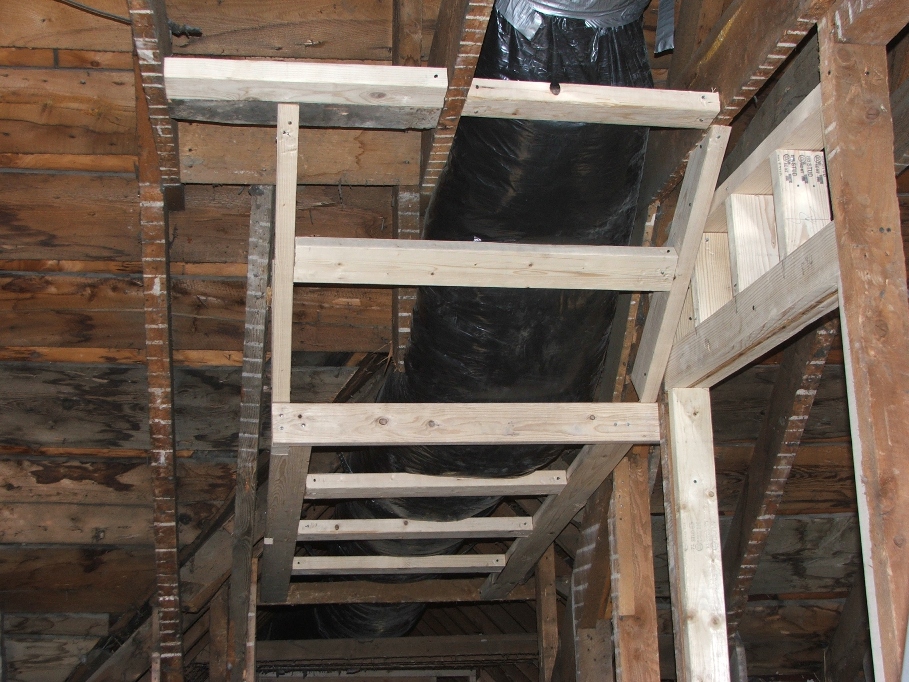

Then went to completing the inserting of the
floor blocks between the studs and then doing what I needed for the
sheetrocking crew. I added boards where
there would be something to nail the edges of the sheetrock to. And think I got it all done.
It’s hard to see what this is, but the newer boards form corners to work with.
It’s hard to see what this is, but the newer boards form corners to work with.
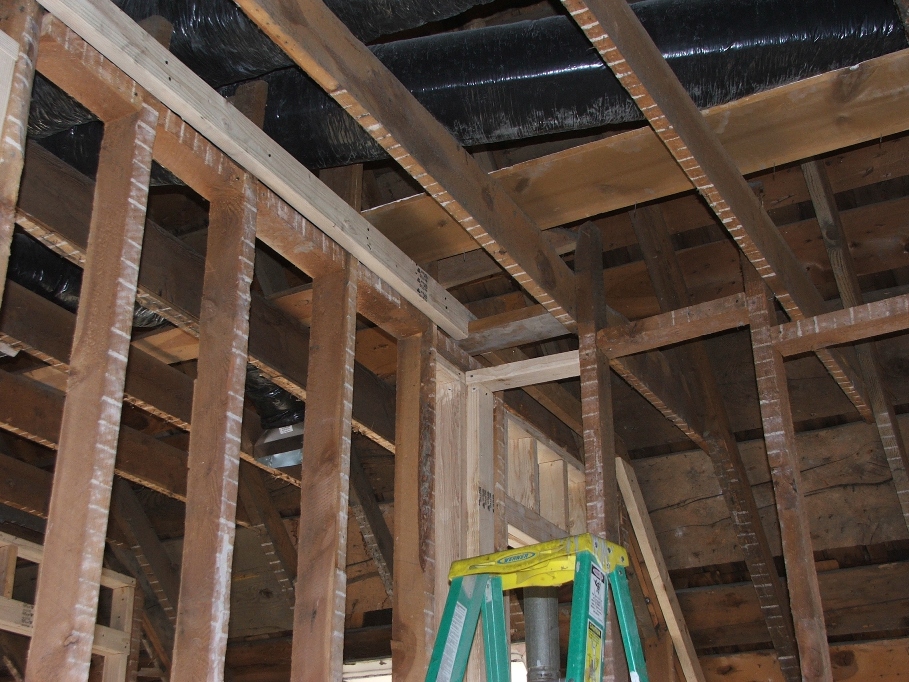
This one is on the ceiling.
It’s now about 3:30 p.m., and the temp must be back near 110 in this
part of the house. My water is gone and
I’m ready for a shower. Sherry says I
“stink”. Clean up will take place
tomorrow.
July 23…Saturday and Mitch will help me today. The goal is to knock a small bit of lath and plaster down in one of the corners, fix that up with a sheetrock tie point and build the access to the attic. Clean up the mess and be done. We got a good start and when Mitch and I did a walk around, be found some small areas that still needed sheetrock tie points. We worked on different parts at the same time and then went to work on the attic access box.
July 23…Saturday and Mitch will help me today. The goal is to knock a small bit of lath and plaster down in one of the corners, fix that up with a sheetrock tie point and build the access to the attic. Clean up the mess and be done. We got a good start and when Mitch and I did a walk around, be found some small areas that still needed sheetrock tie points. We worked on different parts at the same time and then went to work on the attic access box.
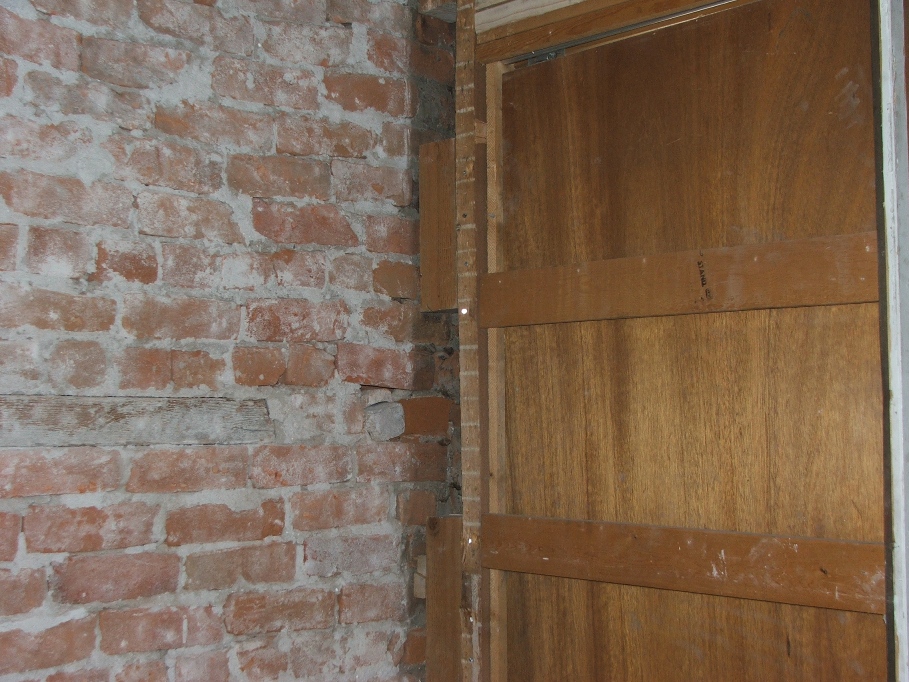
4X4 blocks between the brick and pocket
door.
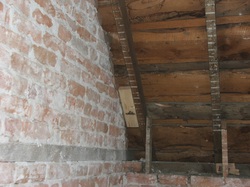
Single block at a point where someone might cause the
sheetrock to break on the edge.
There were lots of small pieces stuck here and
there, but we think we got them all.
Bryce will let me know soon enough.
Now for the attic access box. We
scrounged some material that would support a man’s weight, first putting in two
2X6 studs between the rafters. By
supporting these very well, the end pieces of the box can be tied solidly to
these. The longer side boards will be
supported by the length all along the rafter, so they won’t be any problem with
structural stability. Here is the end
result, 21 inches wide, 36 inches long.
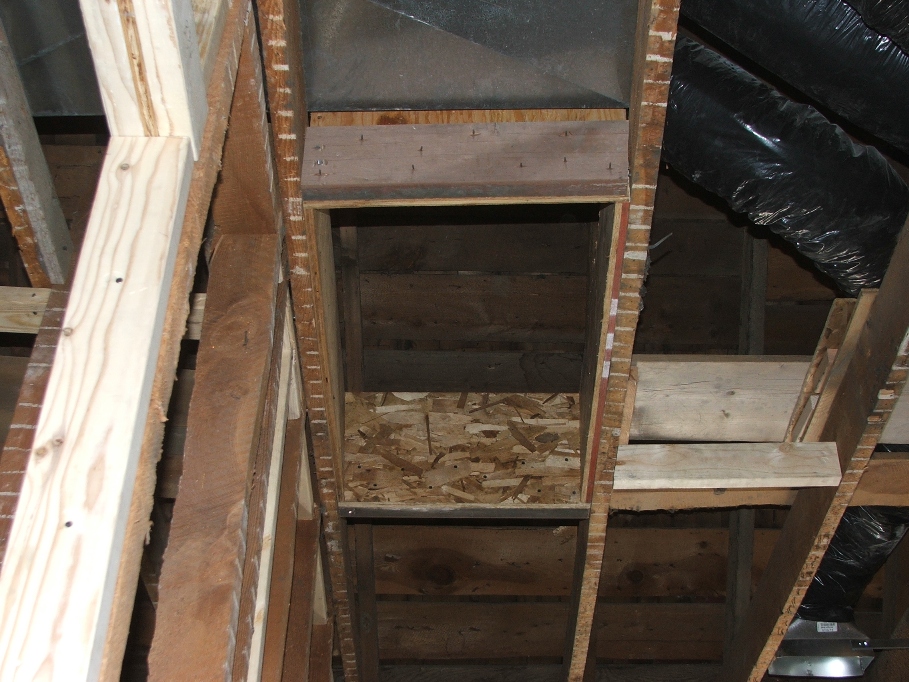
When the sheetrock is cut to accommodate the hole, the piece
that is cut out will become the lid to the access. I will put some wood trim around the bottom
of the box and the sheetrock piece will set in the hole and rest on the trim. Access will be by pushing up the sheetrock piece
and setting it on the insulation in the attic.
I’ll have the electrician install
lights up in the attic, with a pull chain or switch. I think the lights should be like small flood
lights, one pointing toward each end of the attic. I’ll talk to Delbert about that idea.
One last thing to do…I remembered that I needed to add support wood for a fan light in the master bedroom. We used a string to locate the center of the ceiling by coming from opposite corners with two pieces of string. It probably isn’t perfect, but it will do. Then Mitch scrounged a really pretty (NOT) piece of wood which we cut two pieces to length and put them side by side. This will be more than enough to support a ceiling fan.
One last thing to do…I remembered that I needed to add support wood for a fan light in the master bedroom. We used a string to locate the center of the ceiling by coming from opposite corners with two pieces of string. It probably isn’t perfect, but it will do. Then Mitch scrounged a really pretty (NOT) piece of wood which we cut two pieces to length and put them side by side. This will be more than enough to support a ceiling fan.

The temperature is nearly 100 now, and it’s time
to clean up and call it a day. Both of
us are dirty and smelly.
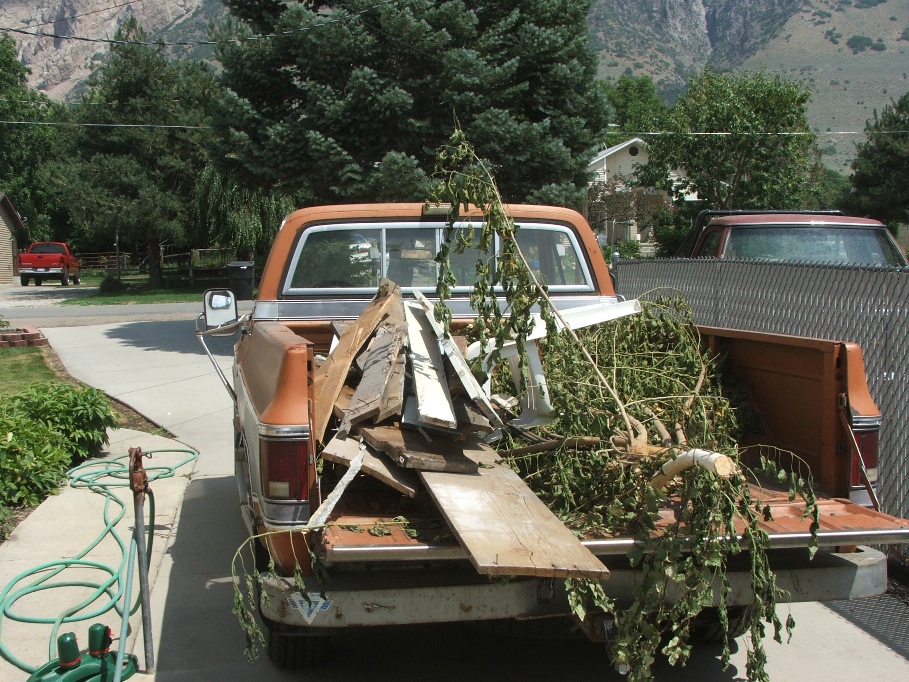
The load of stuff to the field is now large like
the ones before, but still a load.

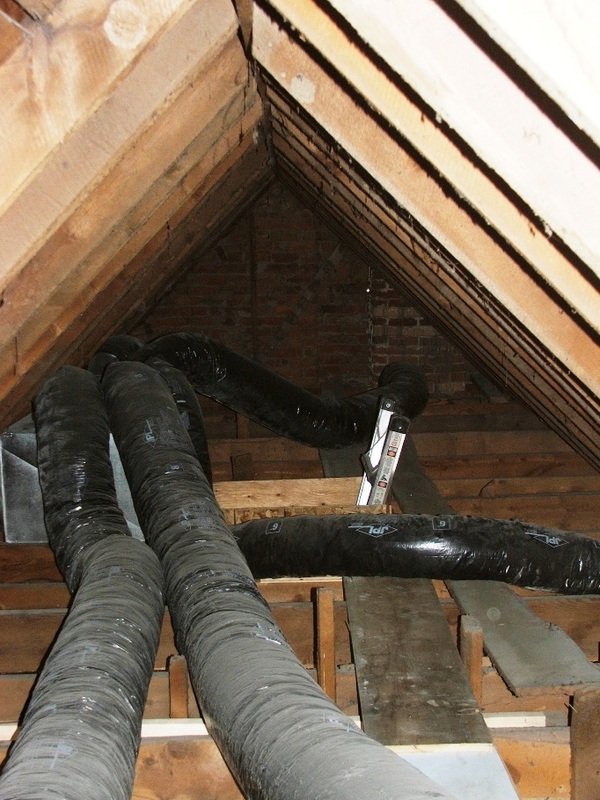
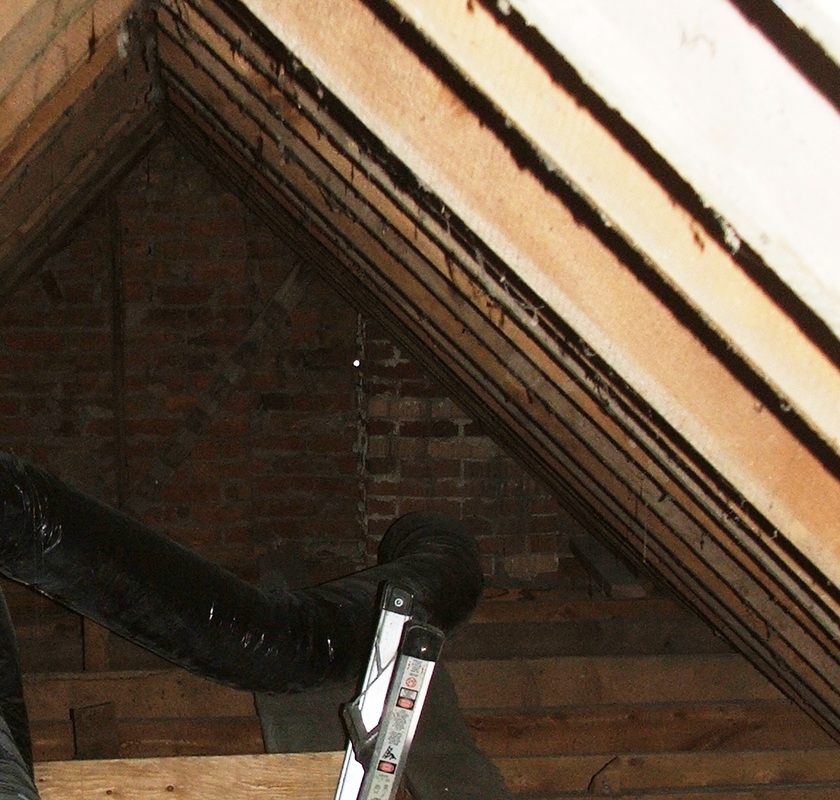
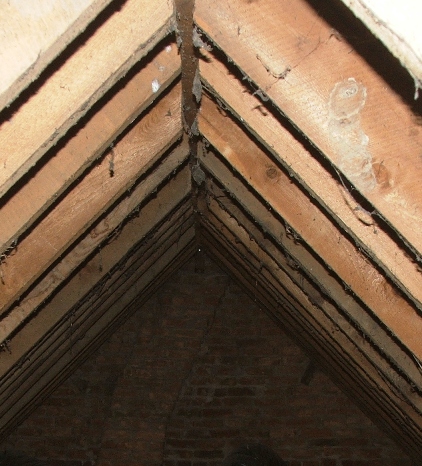
Mitch hadn’t had enough heat, so he crawled up
into the attic and took these pictures.
The “above” view of the heat/AC exchanging box with all of the piping going to the various rooms. Looks like a giant spider or octopus. Notice how the ladder comes up through the access box. Good job fellas.
This is looking North while standing at the South end. Notice the hole. This is where the power used to come into the house.
This is looking South while standing at the North end. Notice a bit of light coming in just under the peak. Mitch decided he needed to fill both of the holes with some “great stuff” before we quit. What that will mean, is he will fill these two holes, and then I will have to run all over the house finding more places to use the great stuff on. We did this and filled in many places where bugs and air could get in. Day is done, house is cleaned up and we are off.
Next week Sherry and I are heading for Montana on a week or so vacation! It’s our 31st anniversary on the 28th. Time to go dangle my worm in a hole. Our plan is to hit Henry’s lake, maybe Wade lake, possibly Hebgen, and see the sights around Virginia City, Dillon and maybe get over to Darby to see our friend Helen. No real plan, just go North!
Oh Yea. I almost forgot. While working on installing sheetrock attaching wood, I noticed some writing on one of the beams that go from the top of the brick, up to the point of the roof. It says “pattern”, written in pencil. Can you read it?
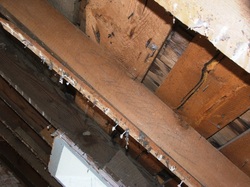
They must have fashioned all of the boards from this one for
length and angle cuts.
August 14…Sherry and I headed North on a weeks vacation in the coach and so no work has been done until this past week. Our electrician was supposed to be working on the house while we were gone but he never showed up. We called him yesterday and he said he will be here no later than next Tuesday (August 16). In the meantime, we had Bryce Wheelright measure and give us a bid for sheetrock. He will start as soon as we are ready for him. His bid was MUCH lower than I expected, $6300 plus change. I really expected 16K at least. I’m glad and this will give us a bit of financial room to work with.
After coming from vacation, and getting caught up on yard and house work, I was able to spend a couple of days working on the old house.
August 8…I called the window guys and told them we would accept their bid on the windows. But, I reminded them that they had to take some final measurements to make sure of the sizes they needed to order. They came out and measured again, and told me that I needed to rebuild the frame work around all of the downstairs windows. I have about two weeks to get this done.
Just to make sure I have plenty of things to do, I took on the assignment for the Dutch A LLC, to contact a private company to do a wetland delineation, and another company to do us a survey of the North property. I spent most of Monday and Tuesday on the phone.
Between phone calls, I was able to do a little work on the house, but I didn’t take too many pictures at the end of each day. Rather, I took a series at the end of the week. On Wednesday of this week, Brandon and I worked on replacing the sod in his backyard, after removing the old sod, and digging out 4 truck loads of gravel. Thursday, August 11, I was able to spend all day on the old house working in the bathroom area upstairs, putting down flooring and preparing for the tub and sheetrock.
Friday the 12th, I worked with Bob and Tracy on putting in a duck box down by the lake. A guy might as well stay busy.
Saturday, 13th….I worked most of the day on finishing the area where the tub goes, and getting it all ready for sheetrock. Here are the pictures of the progress so far.
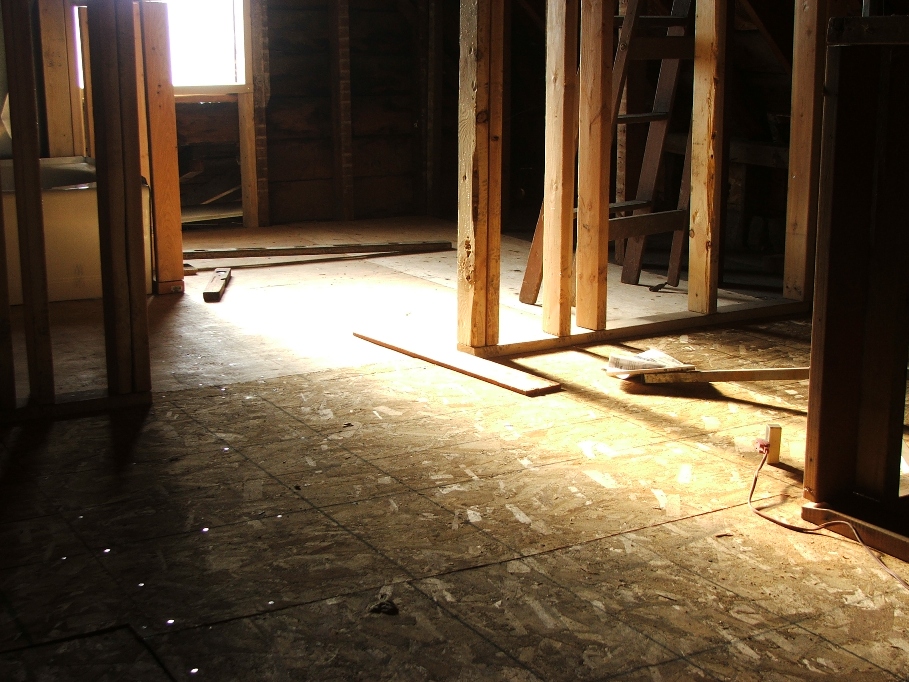
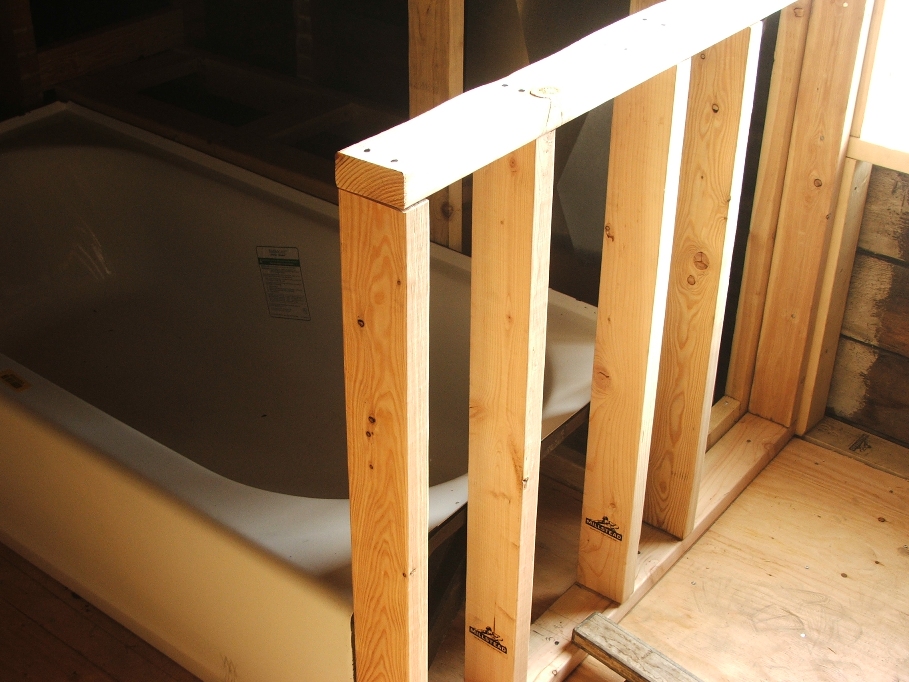
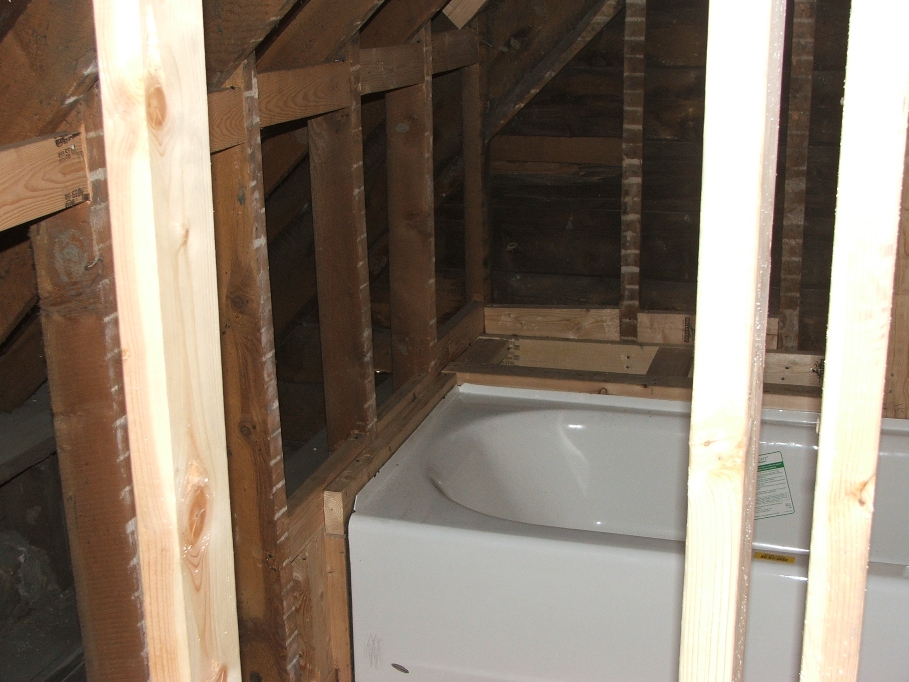
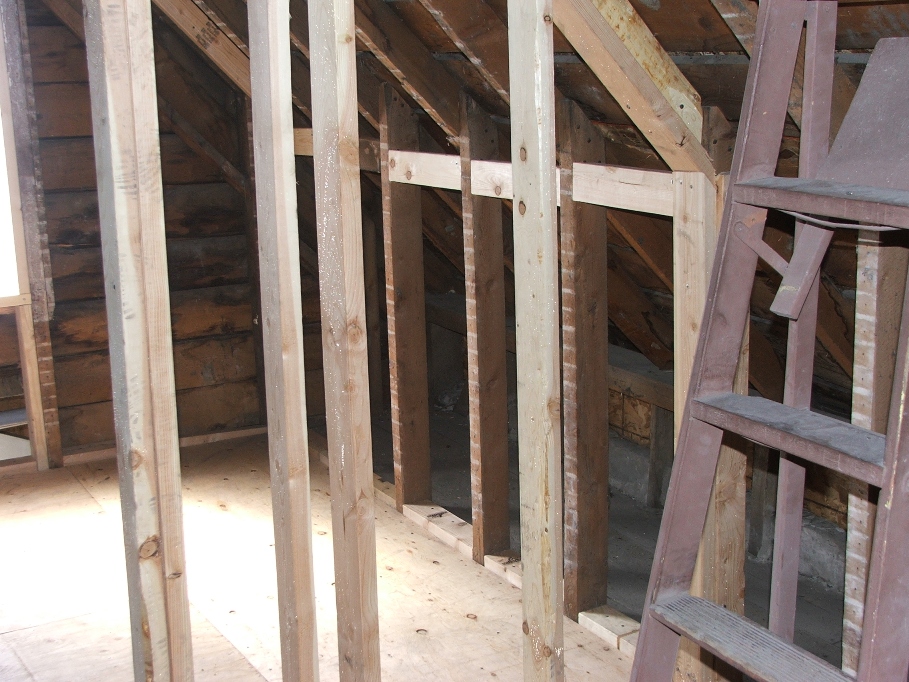
Tomorrow, Monday August 15, will be to finish preparing for sheetrock at the top of the stairs. My next priority will either be to frame the windows or build a 2X2 wall for the TV room down stairs. My priorities are being dictated by “which contractor is coming next”.
August 15…I got a very early start considering everything, but it wasn’t a very productive day. My goals were to complete the prep work for sheetrock at the top of the stairs and also box in the return air pipe. I had “one of those days”, nothing seemed to go right. My cuts were bad, measuring was wrong, nails bent…you have the picture. Mitch came over and helped me finish the box around the vent and it has it’s problems, but the sheetrock will cover most of the mistakes.
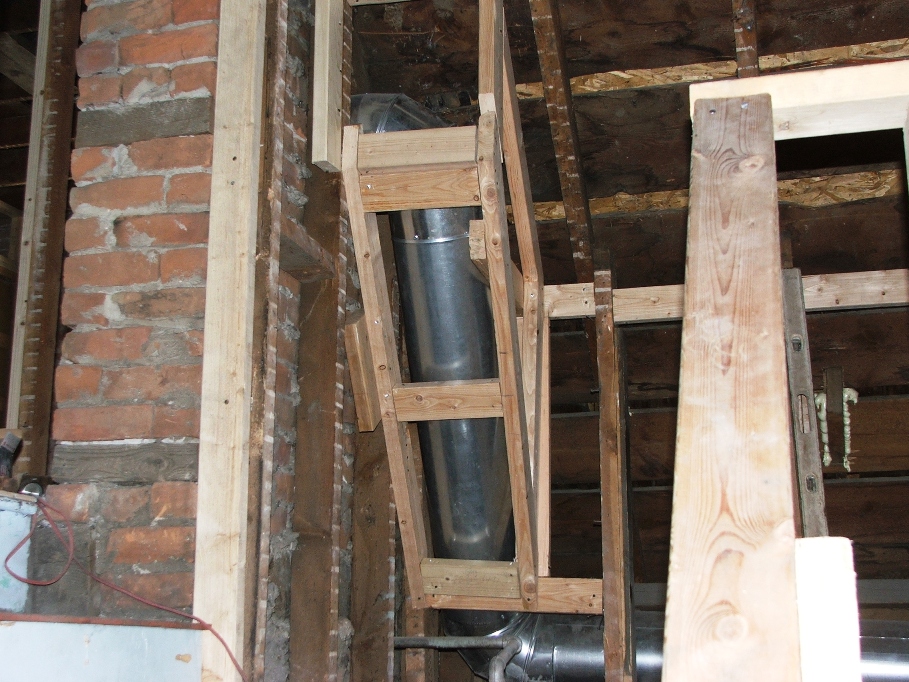
Not much for a full day of “hard” work. Hopefully, tomorrow will be better.
August 16…Delbert Nawne, my electrician promised to be here to start the wiring today. The weather has changed and it actually “rained” early this morning and then about 8 a.m. it poured like it had never poured before. I had to stop working and just watch it rain, because it was so dark in the house I couldn’t see to measure or cut.
My goal is to fir out the West wall in the old TV room and hopefully make it straighter and more plumb. I laid out all of the 2X2’s and then nailed them once I was satisfied with the whole thing. Sherry was home doing her thing and waiting for me to call for her assistance in raising the wall. She came when I called, and about the same time Mitch came home from taking his last “practice” test to get his real estate sales license and the three of us lifted the wall into place.
At the same time “here came Delbert”!!!! He brought his son who is a two year apprentice electrician and the two of them dove right into their work. While I was busy tacking up the furring strips, they were hammering, drilling and making quite a mess. I thought I was making good time, and suddenly they were surrounding me with the need to get their work done. When the day was over, they had installed all of the receptacle, switch and light boxes throughout the entire house and had began to run wiring!

And I had just barely finished the wall.
During the course of the day, I called Keith Witt to come
and get his trailer from the driveway, and he came and measured for pipe and
what he has to do to complete his job.
He is to schedule me in for this week to finish his task. My next goal is to complete the framing in
the downstairs bathroom in order for Keith to lock down the shower.
Tomorrow, Delbert tells me they will complete the electrical work on the house and be done! He says his daughter will be there to help the two of them and that she is quite the worker. It’s hard for me to believe they can complete a job this big in just two days.
Aug 17…Got a good start with the goals of the day to make the bathroom downstairs ready for Keith and to start on framing the windows in preparation for the Mullen Glass guys. I began by removing the one stud in the wall centered on the shower and moved it about 5 inches to the East. Then installed a second stud 5 inches to the West. This gives Mr. Witt 10 inches of space to work with. As I finished this, in walked Mitch. He was going to mow the grass, but it was too wet from last nights beautiful rain.
So, I put him on the task of installing a mounting board to the wall, which the back of the shower will be attached. Measure, cut, install only took a couple of minutes. Then it was upstairs to take off the old screen and plastic covering on the window in the new bathroom. I was out on the roof when Mitch came up from the inside of the house. I was anticipating “Dry Dog” to come and discuss this years rendezvous and the gun range we are in charge of taking up. Plus the targets and shooting we will conduct. He showed up about 9:30 and I disappeared from the work scene for better than an hour. Meanwhile Mitch kept up the good work.
When I got back, he had the old frame all torn out, the wood cut to accept a larger window and was about to install the new frame. But, it stuck out too far from the outside of the house. We redid the work with 2X2’s and it worked out perfectly. Installed and caulked, it was now ready to have the plastic put back over it to keep out the crawlies and the rain. Mitch noticed that the ceiling joist under this window did not have any support, as it had been cut at some time years ago to allow someone to access the space above the utility room, most likely to install wiring.
We had to do something about that. So I went to scrounging some wood and fix the problem. Mitch did the hammering from above while I worked on the top of the ladder below. The final work looks atrocious, but it supports quite well.
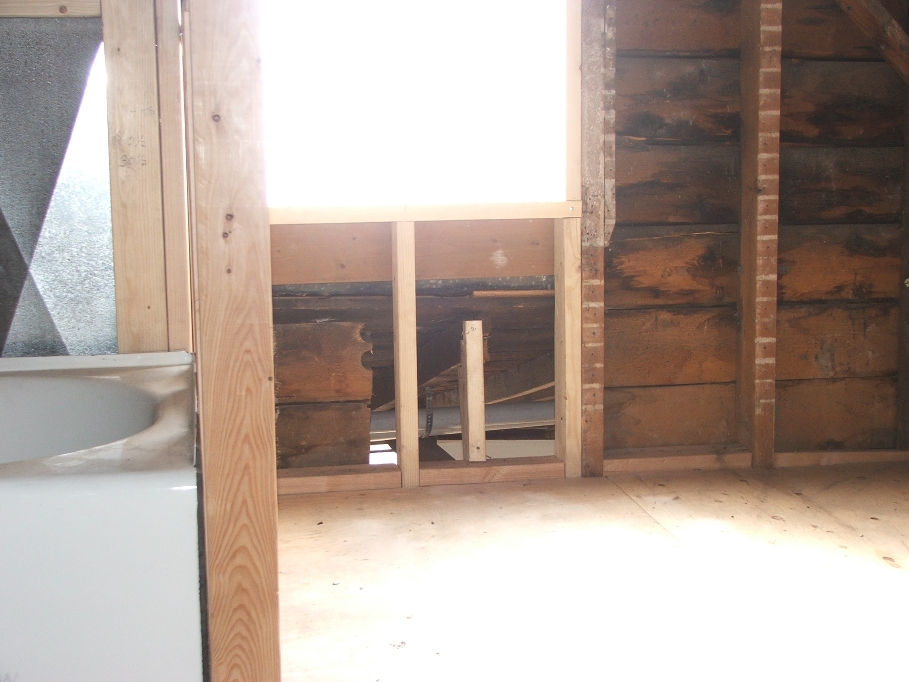
As we were working so was Delbert and his daughter. His son, Bryce, had a court date later in
the day and chose not to work. Delbert
would be ending his work day early in order to also attend the court. Together they completed the wiring in the
upper part of the house and were ready to move downstairs.
At one point I went up to do something and noticed they were cleaning up their mess. I said “Hold it, your job is to wire and make all the mess you want, mine is to clean up”! Delbert stopped his daughter and said “You are too nice”! And the two of them went back to wiring.
Mitch and I had our job ahead of us. I was to take the old frame down from the tv room window, while he did the utility room North window. My frame was supporting adobe bricks above and I wanted to do the job without disturbing the bricks. Nice try, but it didn’t work. Mitch came to my rescue and the two of us worked together and finally got the job done. Both window frames got put together and covered with plastic before the day was done. Sherry came over and cleaned up the mess upstairs and by the time we were all done, the day came to a close.

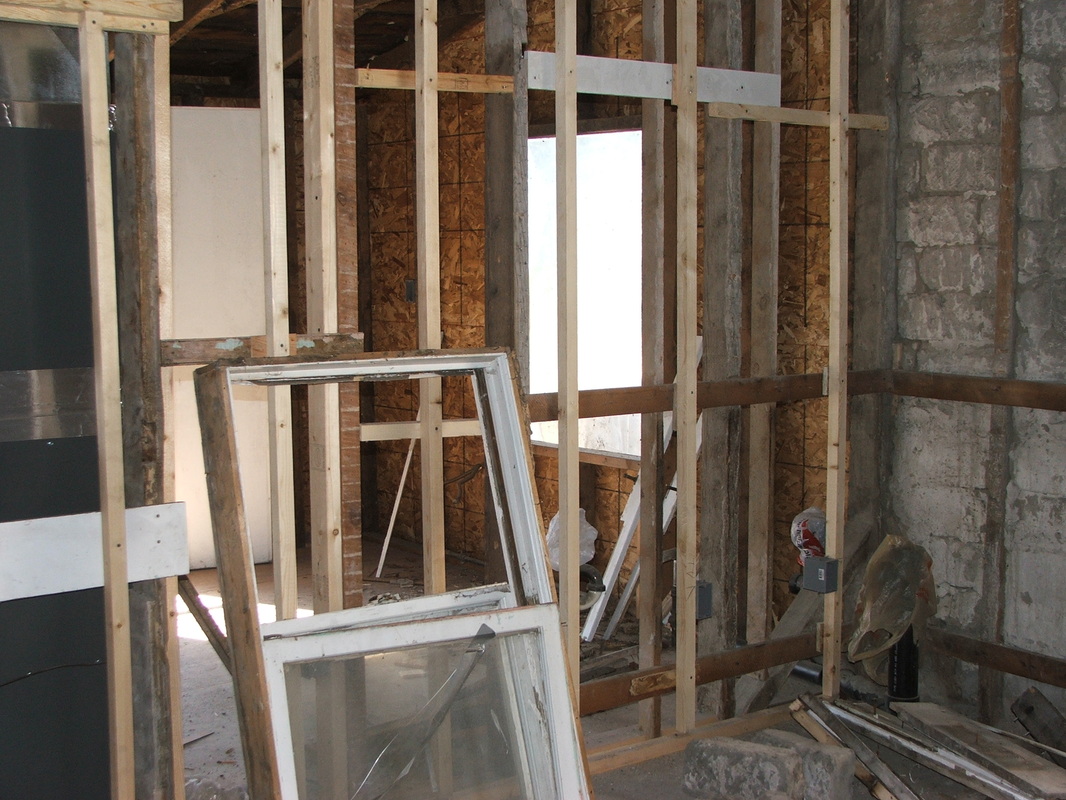
Those poor old windows have seen their better days. I think there is someone “out there” who can
use them, so I’ll try to keep them in tacked and try to sell them.
We still had to mow the lawn, so I did the lawn around our house and Mitch did it around the old house.
We still had to mow the lawn, so I did the lawn around our house and Mitch did it around the old house.
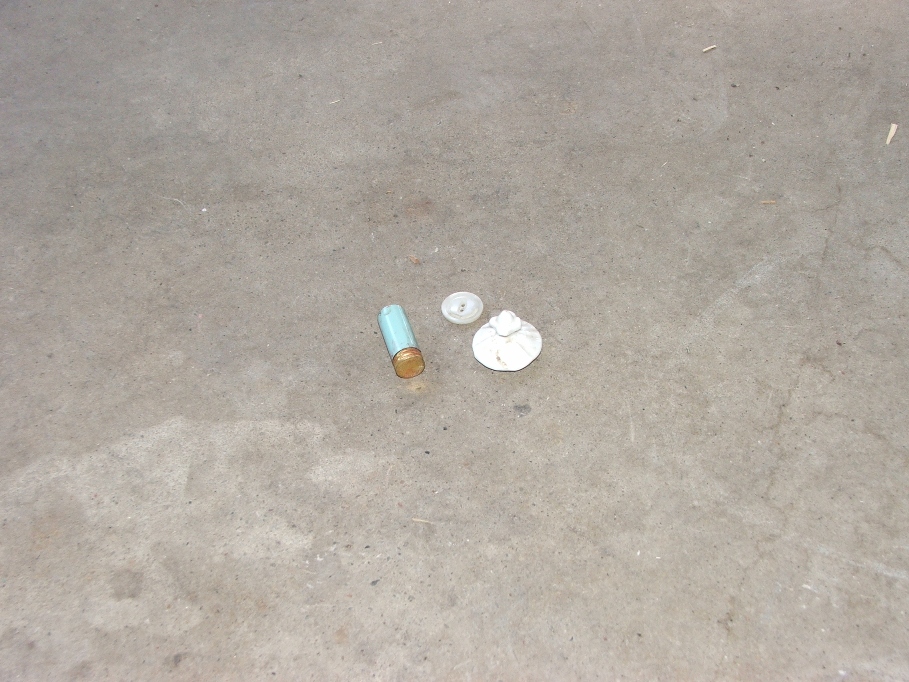
I almost forgot…remember when I said I thought
we were through finding stuff? Well
today was another “find” day.
Small lipstick with lipstick in it still usable, a button and the ceramic top to a childs tea pot or sugar bowl. The lipstick came out from somewhere around the utility room window, the ceramic piece was in the loose adobe above the tv room window frame and the button was upstairs where Sherry was cleaning. Will finding things ever end?????
Small lipstick with lipstick in it still usable, a button and the ceramic top to a childs tea pot or sugar bowl. The lipstick came out from somewhere around the utility room window, the ceramic piece was in the loose adobe above the tv room window frame and the button was upstairs where Sherry was cleaning. Will finding things ever end?????
Aug. 18…The start of the day wasn’t very early today as I
slept in, but it ended with a great cheer.
I hit the house about 9 a.m. and began tearing into the last two windows
that needed framing. The first one came
out frame and all and is pretty cool to look at. All I had to do to get that frame ready was
to add some thin shims at the top and shape up the exterior wall boards. The last window took a bit longer, but not
too bad. Both windows took less than an
hour to complete.
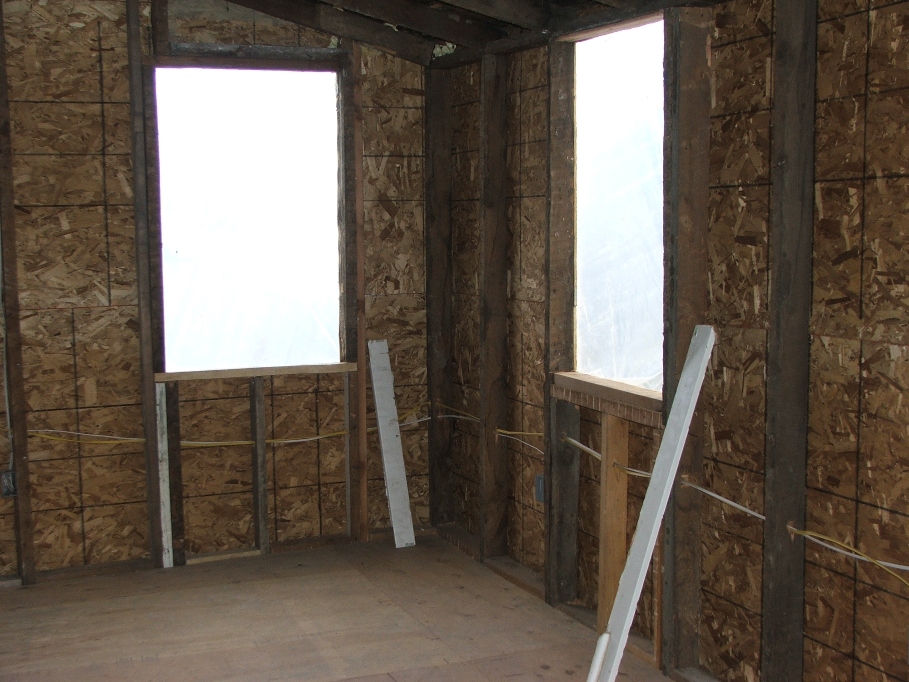
With the electricians coming soon I had to clean up my mess,
move the extra boards I had laying around and give them the entire
downstairs. They move fast when things
are not in their way.
Mitch came over about 10 or 10:30 to help and we moved everything upstairs into the master bedroom. We worked as a team at that point, I cut 2X4’s to fit in the spaces between the verticals just above the bricks. Mitch nailed them down. We then pulled all of the nails in the beams upstairs. Mitch bonked his head with the side of the hammer and has quite a knot on his head.
While we were making the noise upstairs, the electricians were all over the place, pulling wires, cutting holes and striping the insulation. It was a day to remember with all of the noise. Roy came over and hired Delbert to do the electrical in a house he is about to start building in Perry. I showed him all of our progress so far and he was very impressed. It gives me a great feeling to know someone who is in the business can appreciate a novices work.
The wiring is done for now. Delbert says I can contact the inspector anytime I’m ready. He won’t be back to finish and “power up” until the painting is done. That means the time line is pretty much on the insulation, sheetrock, brick finishing and painting. Go, Go, Go is what I say!
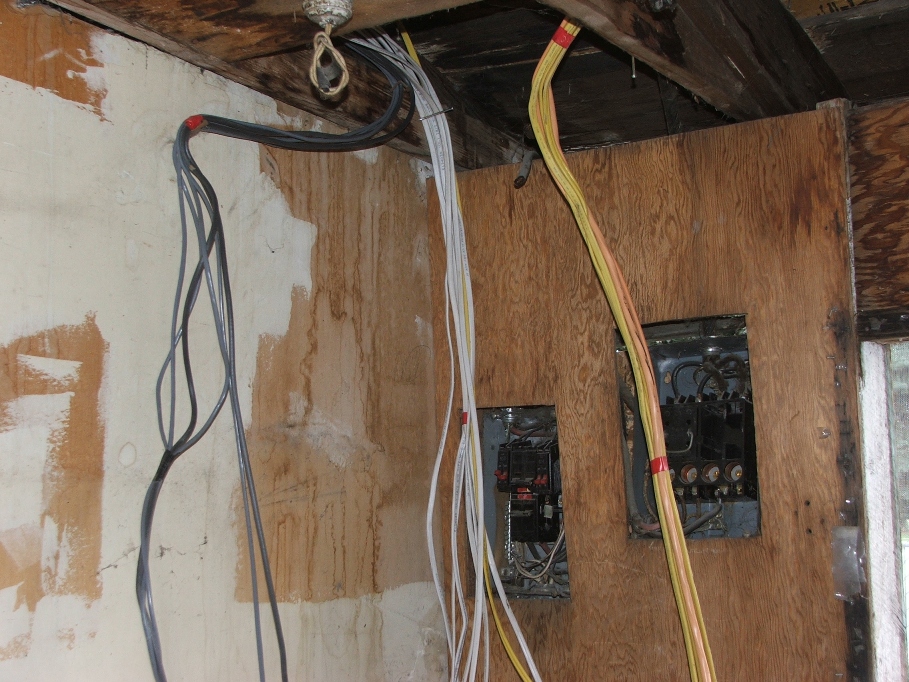
The two old panel boxes will be replaced with one large one
when it’s done. The days of the screw in
fuses are over!!! All of the old wiring
has been removed. Notice the color
differences in the wires. Yellow are for
GFI recepticals, Orange
carry the heavy loads for high amperage users like the furnace and dryer. They even wired us with cable and
telephone! Great job guys!!! And girl!
Delberts daughter “Lisha”??? Was
a huge player in getting this all done.
She is a one year apprentice in the field and seems to know quite a bit
about what she is doing.

Mitch seems to attract a lot of dirt while he
works and he blames his gloves. I don’t
understand why the gloves is the factor, but he said….
Next is to purchase the 4X8 sheets of flooring material
needed to finish the floors upstairs and get it installed. Followed soon by insulation material. The place is coming together rapidly at this
point and we are sure glad for that. I
suspect that the whole process will slow down now, unless Bryce and his boy are
faster at sheetrocking than I think. We
will see.
August 22…We hit the house early today and put down all of the flooring we could. Starting with the full sheets and then moving to the cut pieces. It took us all day, but it turned out pretty good. Mitch helped until about noon, and then had to go for an interview with Century 21 real estate. I continued to cut and place wood. I was unable to complete the job, as all that remains is the pieces around where the old flooring had been placed. I will have to “fill” in these tomorrow.
As for today, here are the results.

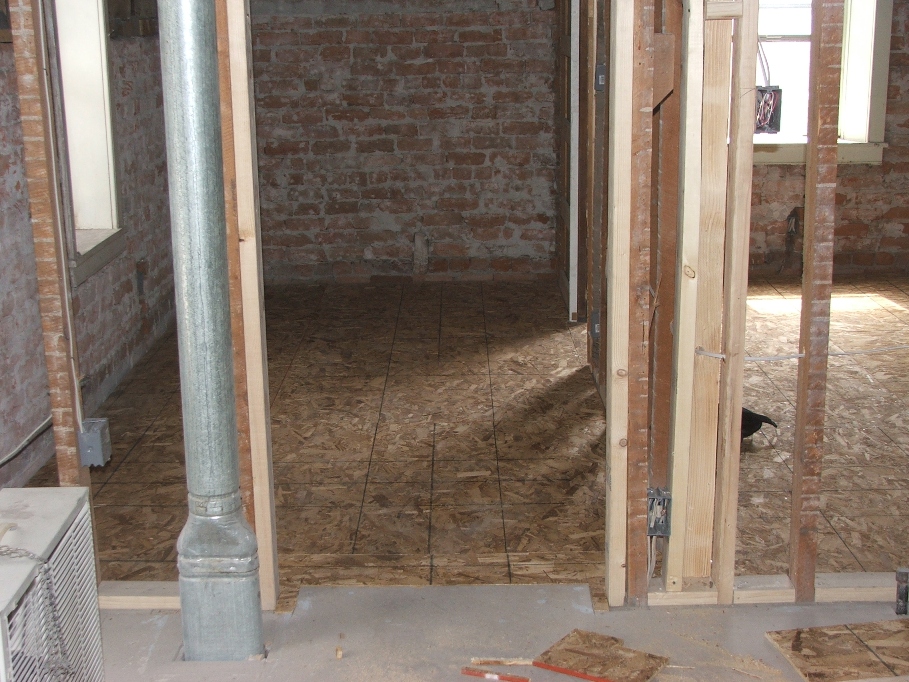
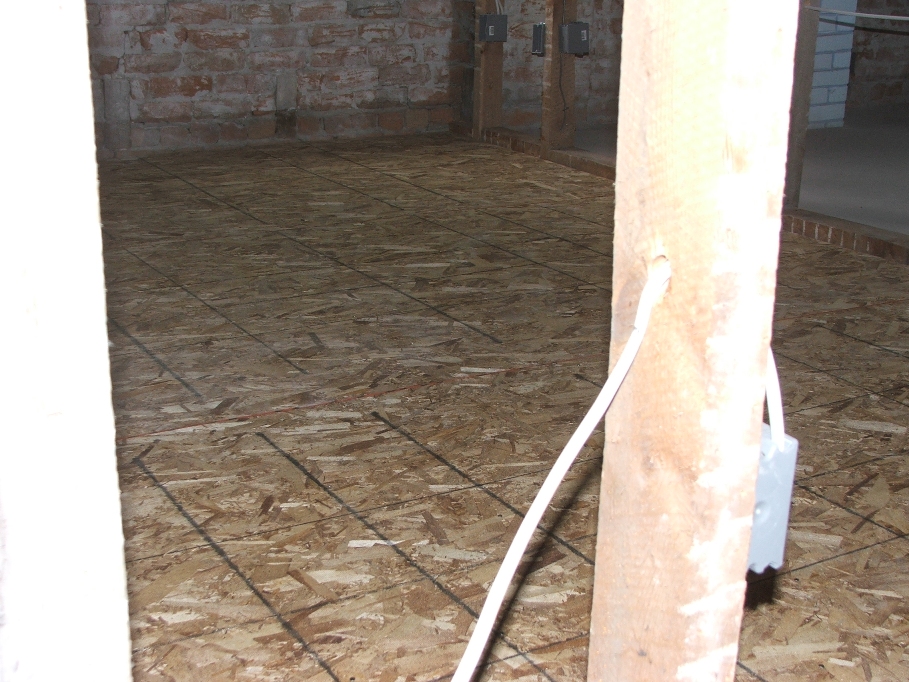
August 23…I finished the flooring by placing in the pieces
around the edges. I did not bother with
pictures and they wouldn’t show much change over what you see here. It did take until after noon to get it done,
but at least now it’s done.
My next task is to remove the window from the down stairs bathroom and frame in a wall. I think I will retain the “indent” where the window was, and have it available as a magazine rack. The window I will salvage, but I don’t know where I might use it. It is a very cool window.
My plumber showed up just as I was finishing with my task for the day and he should complete all of his work up to the setting of toilets and connecting water to the other furnishings.
August 25…It’s nearly time for the Fall Rendezvous and I still have lots of work to do here at the house before we take a week off to play. I got an early start today and the goal is to box in the window that exists in the downstairs bathroom. The window looks like this from inside the bathroom.
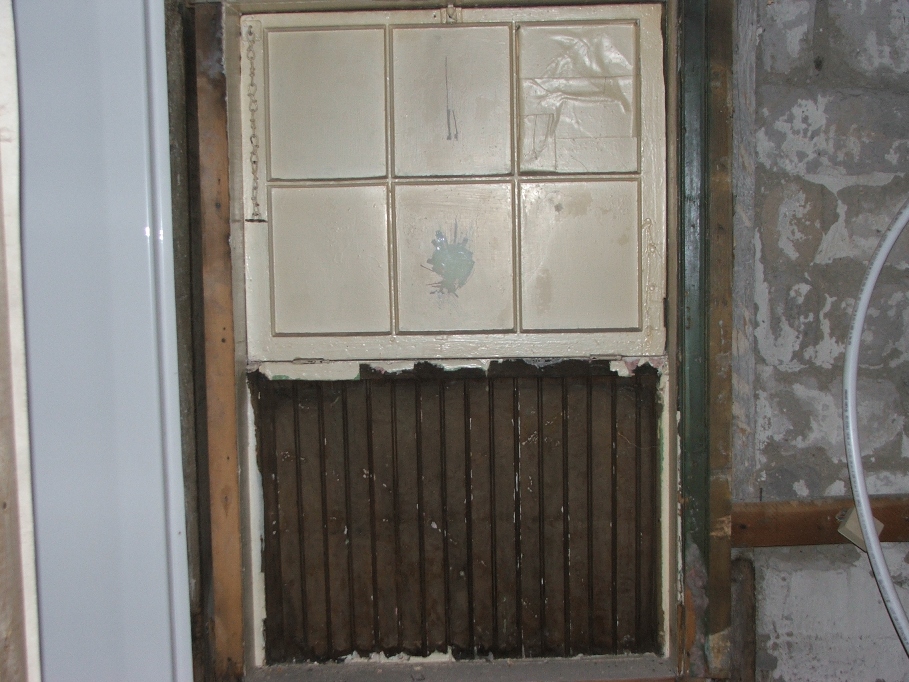

And like this from the porch view
It’s a pretty cool window where the glass portion hinges into the bathroom area and is attached by a chain to keep it from coming open too far. It just lets the steam out of the room. But since we will have a vent fan, there is no need for this window.
It’s a pretty cool window where the glass portion hinges into the bathroom area and is attached by a chain to keep it from coming open too far. It just lets the steam out of the room. But since we will have a vent fan, there is no need for this window.
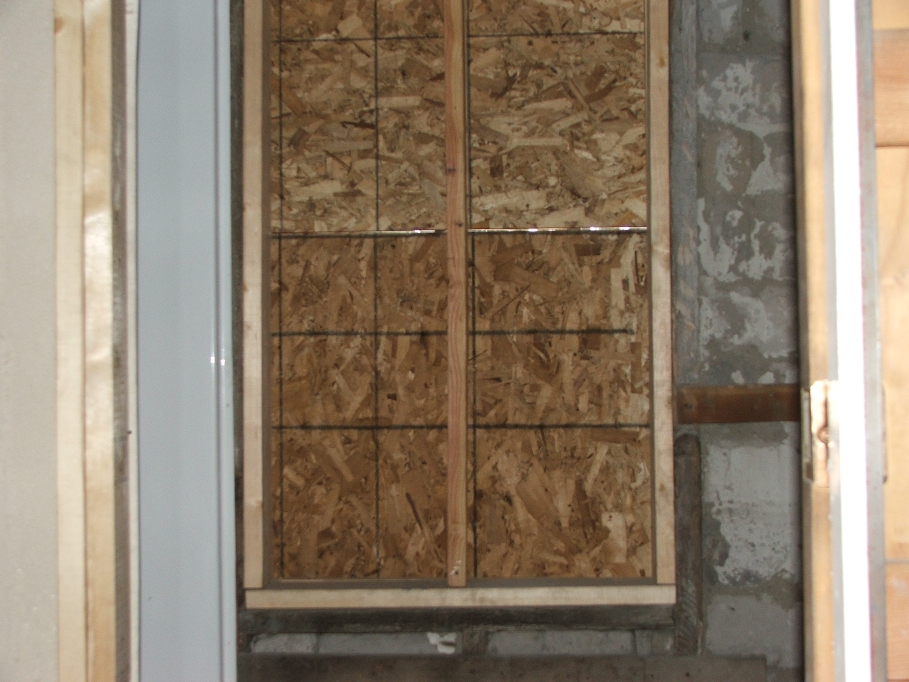

My day is just partly over and I still have time. On the porch next to the doorway into the
utility room, there the siding is coming off from the wall, and will need
replacing. Also some caulking needs to
be done to keep the critters out.
I removed the old siding and installed new, it looks like this now.
I removed the old siding and installed new, it looks like this now.
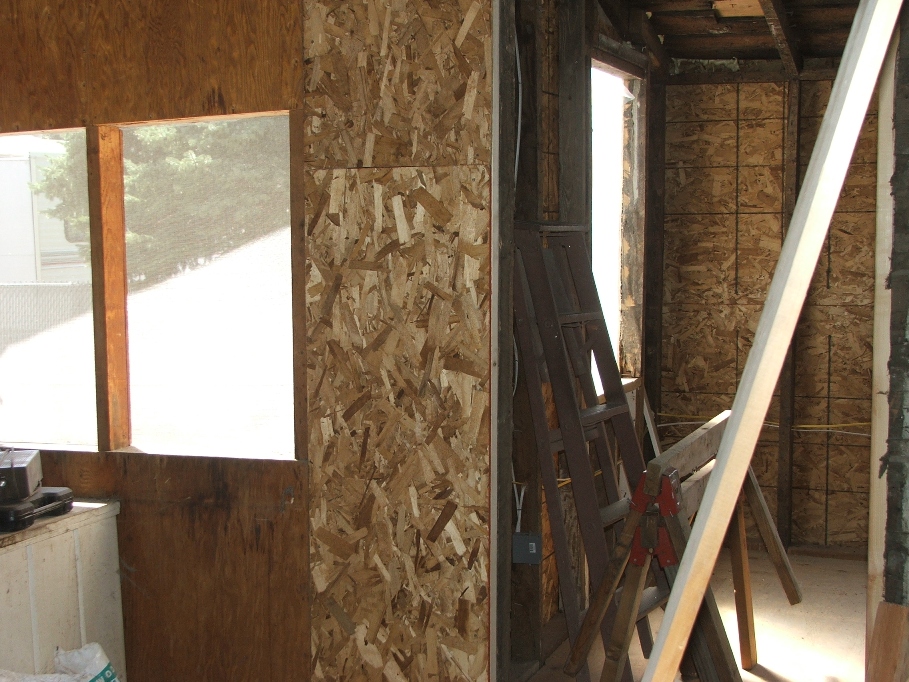

But requires insulation after the wiring is inspected.
I then used a full can of “Great Stuff”, to fill the gaps from the outside and also went around all of the exterior receptical boxes and closed them in. I’ll bet the critters are beginning to hate me. By the time I cleaned up the place, it was time to call it a day.
I then used a full can of “Great Stuff”, to fill the gaps from the outside and also went around all of the exterior receptical boxes and closed them in. I’ll bet the critters are beginning to hate me. By the time I cleaned up the place, it was time to call it a day.
August 26…Lots to do today, this is the last day
I have to work on the place before we head off to rendezvous. Mitch is going to help and we have great
plans. First we need to install some sort
of flashing material to keep water from going into the cellar via the
doorway. The plan is to install flashing
up the wall, extend it over the opening on the end of the door way and somehow
bend it up a little to form a channel for the water to run off. The old doors look like this closed.
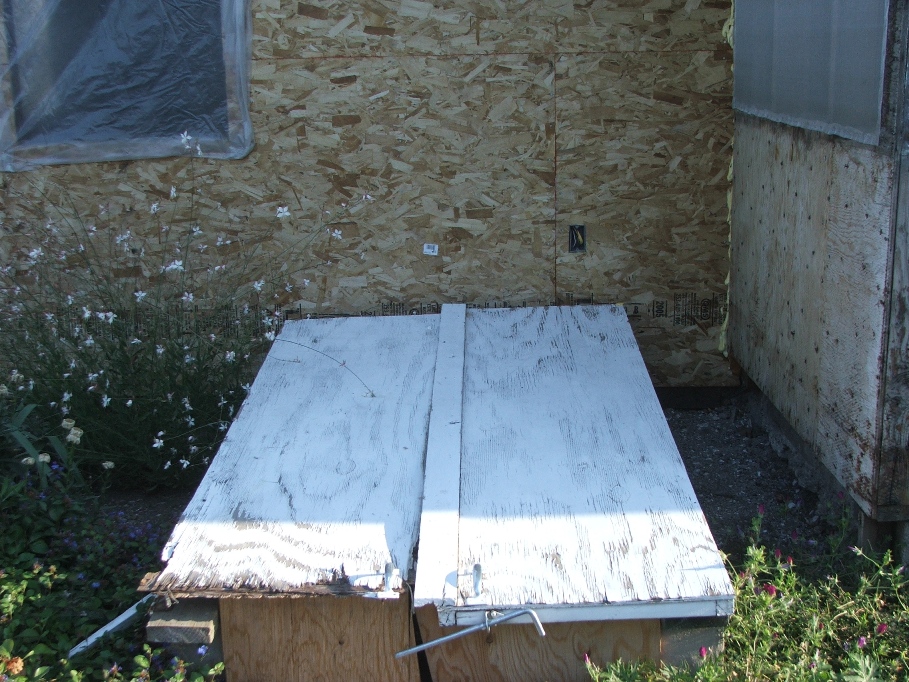
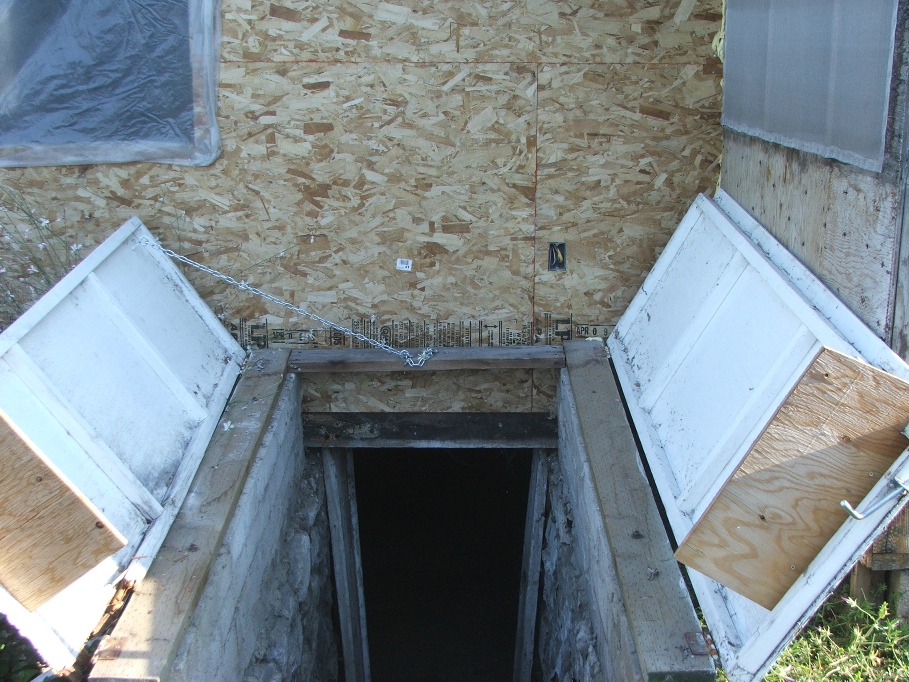
What happens is, when it rains the water hits the wall and
runs straight down into the cellar, we need to block it off and hopefully run
it to the West and away from the house.
We assessed the situation and removed the doors. Mitch killed a huge black widow spider next
to the house hiding under a rock. That
was a good start for the day.
We then made a few cuts and bends to the metal, put some caulking on the wall and nailed it up with roofing nails (lots of them). It will have to be caulked somemore before siding, but it will do for now.
We then made a few cuts and bends to the metal, put some caulking on the wall and nailed it up with roofing nails (lots of them). It will have to be caulked somemore before siding, but it will do for now.

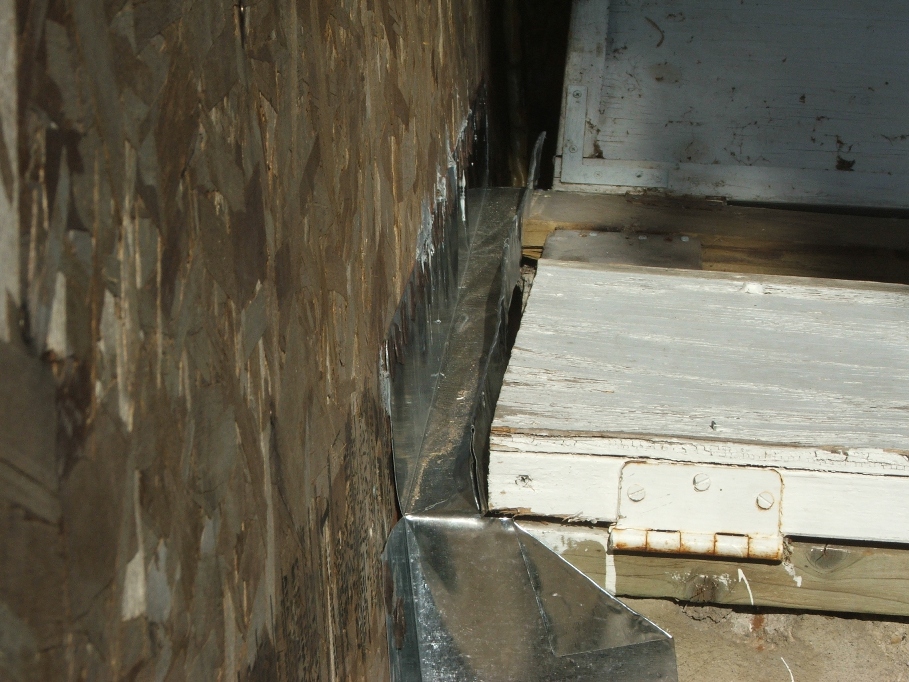
When I rebuild the doors, I’ll extend the top sheet of
plywood about halfway across the “channel” and virtually eliminate water from
getting into the cellar. Good job Mitch,
but we have more work to do!
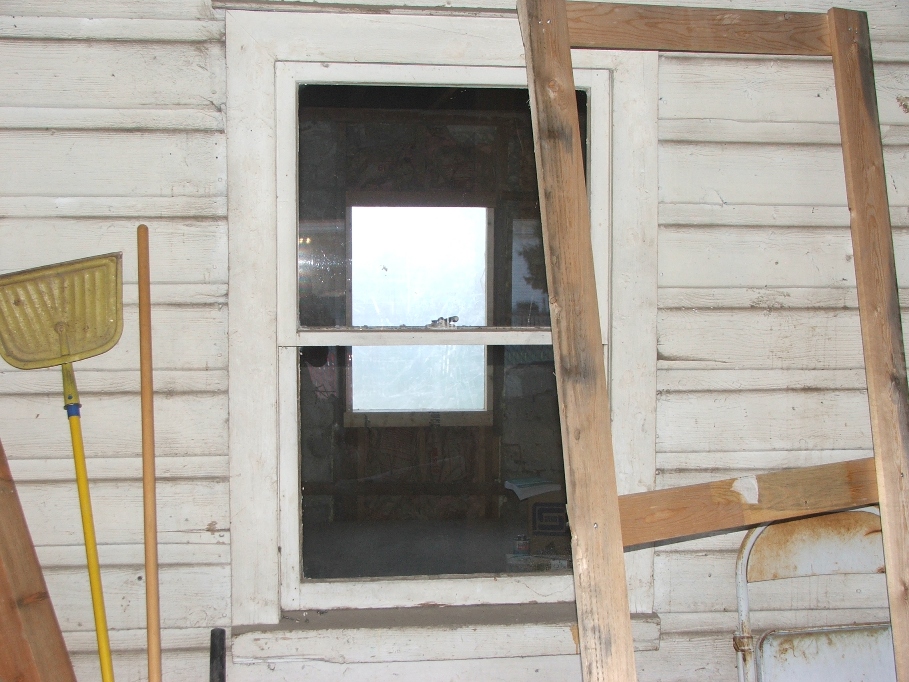
Moving into the porch, we have decided we will
replace the window that looks from the TV room onto the porch. I tried to talk everyone into just covering
it like I did the one in the downstairs bathroom, but lost the argument
bad. This is the window we need to
replace.
It would cost too much just to replace the glass with insulated glass, plus the frames would still allow air to flow and cold to get in, heat to get out etc. Out with the old, In with the new!!!
It would cost too much just to replace the glass with insulated glass, plus the frames would still allow air to flow and cold to get in, heat to get out etc. Out with the old, In with the new!!!
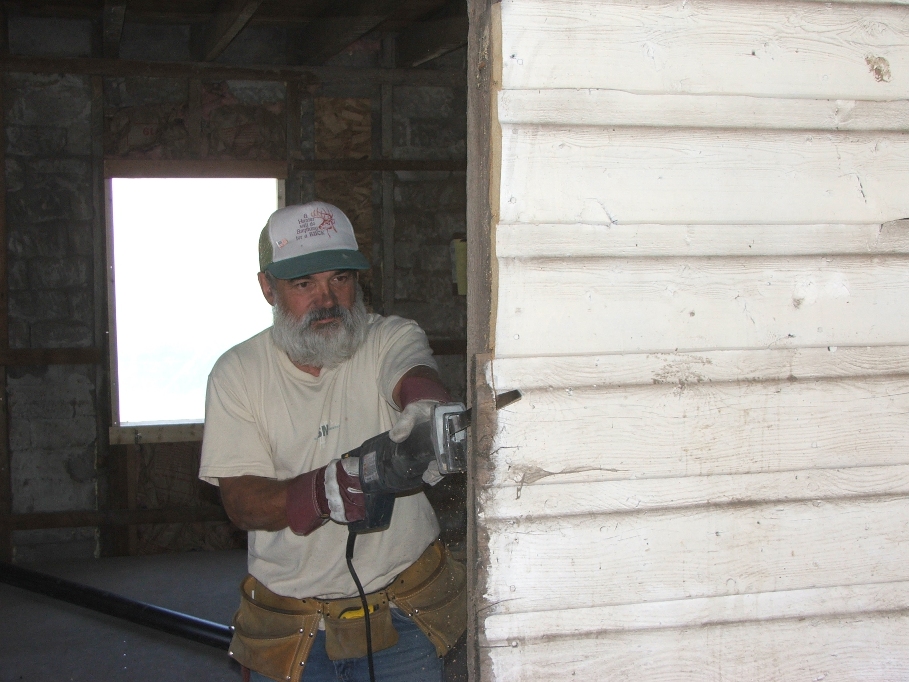
With the frame out of the way and the window
removed, we did a little trimming and got it ready for new framing.
The framing went pretty well and pretty soon we had a “nearly” square frame, ready for a new window. Sherry called in the dimensions and ordered the window. It will match the others which are scheduled to be installed on Sept. 7th! We can hardly wait. They will make the house look sooooooo much better! Back to the framing. This is what it looks like now.
The framing went pretty well and pretty soon we had a “nearly” square frame, ready for a new window. Sherry called in the dimensions and ordered the window. It will match the others which are scheduled to be installed on Sept. 7th! We can hardly wait. They will make the house look sooooooo much better! Back to the framing. This is what it looks like now.
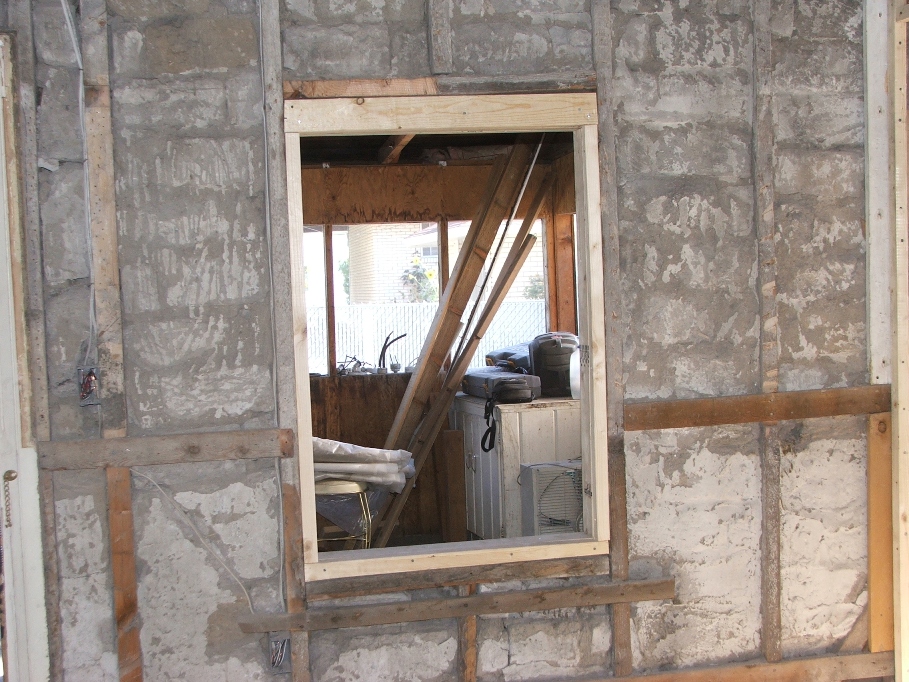
View from the TV room side. Notice the three layers of wood. We had to do some creative cutting to get the
wood to match on the inside of the room, so that the sheetrock will look good
against the window sill.
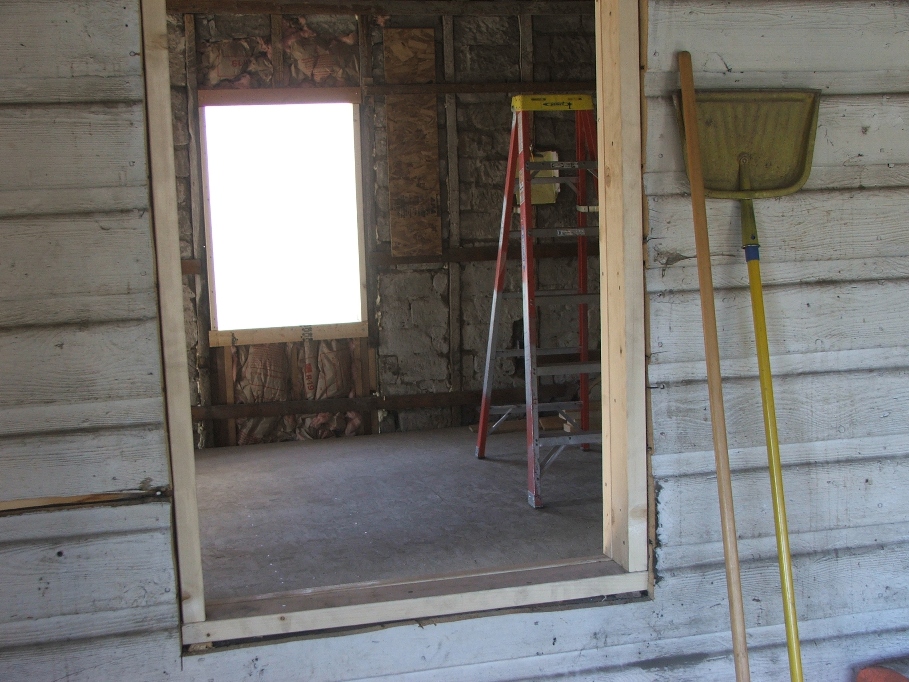
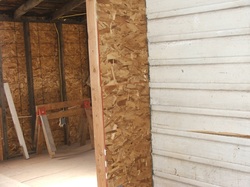
Mr. Witt showed up and was making good progress
while Mitch and I were doing our thing.
Next we had to remove the old siding from the North side of the doorway
leading into the utility room, and get it ready for insulation. This only took a half hour or so to do.
Meanwhile Mr. Witt, finished with his plumbing in the TV room, and we went to boxing in around the pipes and heater vent pipes. We finished about 5:30 p.m., just in time for cocktails and cold “other” drinks! It’s looking real good now, and time for rendezvous. I think we are nearly completed with cutting wood. There is still the door frame to the new bathroom upstairs to “narrow down”, and then I think we are done!!!! Yea ha!!!!
Meanwhile Mr. Witt, finished with his plumbing in the TV room, and we went to boxing in around the pipes and heater vent pipes. We finished about 5:30 p.m., just in time for cocktails and cold “other” drinks! It’s looking real good now, and time for rendezvous. I think we are nearly completed with cutting wood. There is still the door frame to the new bathroom upstairs to “narrow down”, and then I think we are done!!!! Yea ha!!!!

A little “jog” down into the room from the tub
piping will look odd in the room, but we can’t help it! Another good job of boxing around the
pipes.
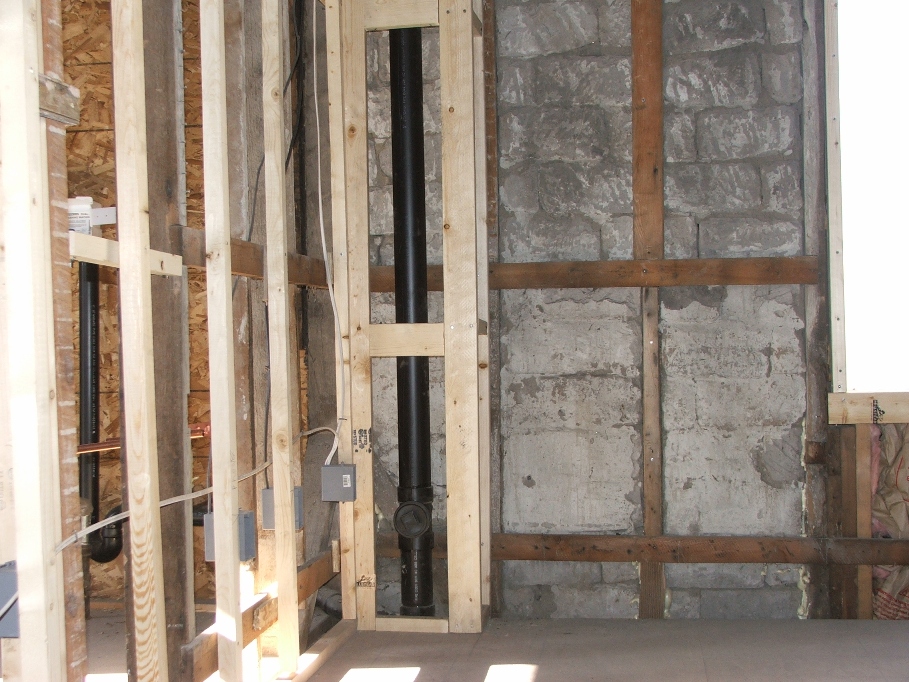
And last but not least is the box around the
vent/drain pipe and we are out of here!
Please take note of the “clean out” point if you ever need to access it. My choice if the system plugs up, is to try the outside clean out first, then the shower drain, then the tub drain or toilet upstairs, and lastly this drain which will be behind the wall. Good luck and I hope nobody ever has to use it.
As usual, today was another good day, and I have said it a lot, that we should be finished finding stuff! Well, when Mitch was removing the siding material from the North side of the doorway leading into the utility room, guess what he found, deep down between the siding and the porch cement floor…..
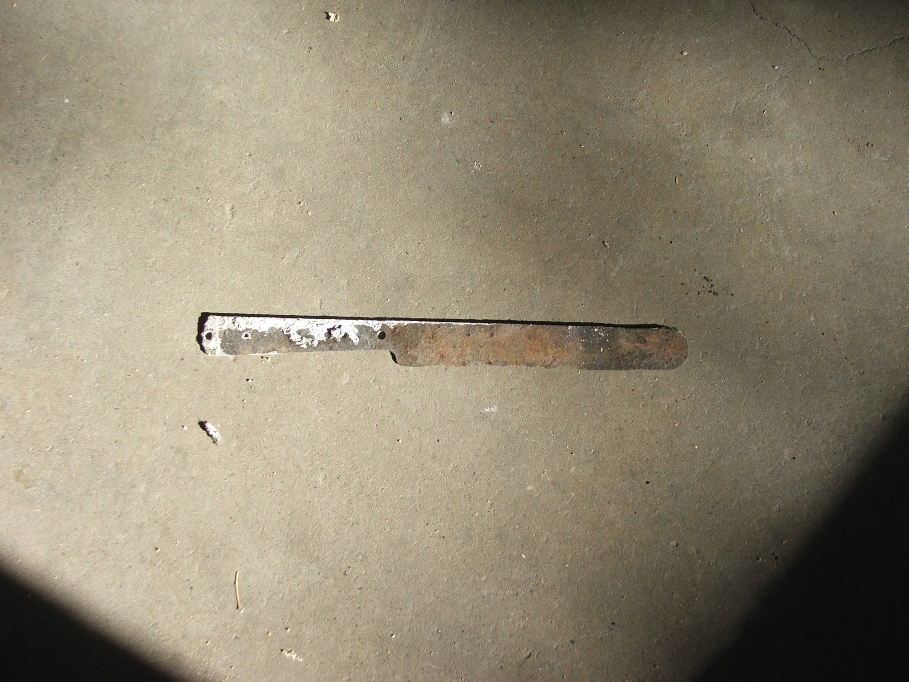
An Old Butter Knife.
Sept. 22….I haven’t made an entry to this since August 26 or
so, and now I’ve got to catch up. We
went to rendezvous and had a wonderful time.
The meadow at Hardware was open to us again this year and the weather
was great. A little bit of rain on
Thursday, and the rest of the time was wonderful. Lots of folks came and enjoyed the
weekend. Once we were back home and
cleaned up from the time off, it was “get back to planning and doing”.
On September 7th, just as planned, the guys from Mellen Glass, came in with the windows for the house and put them in. It sure looks different, and they slide up so easily it’s almost scary. Here are the views of the house as it looks today.
On September 7th, just as planned, the guys from Mellen Glass, came in with the windows for the house and put them in. It sure looks different, and they slide up so easily it’s almost scary. Here are the views of the house as it looks today.

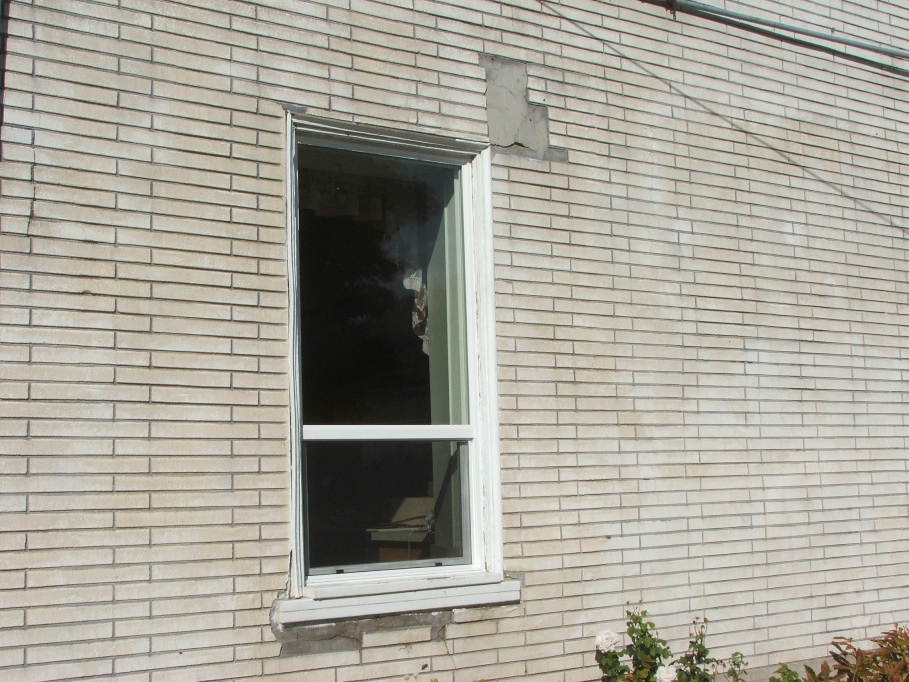
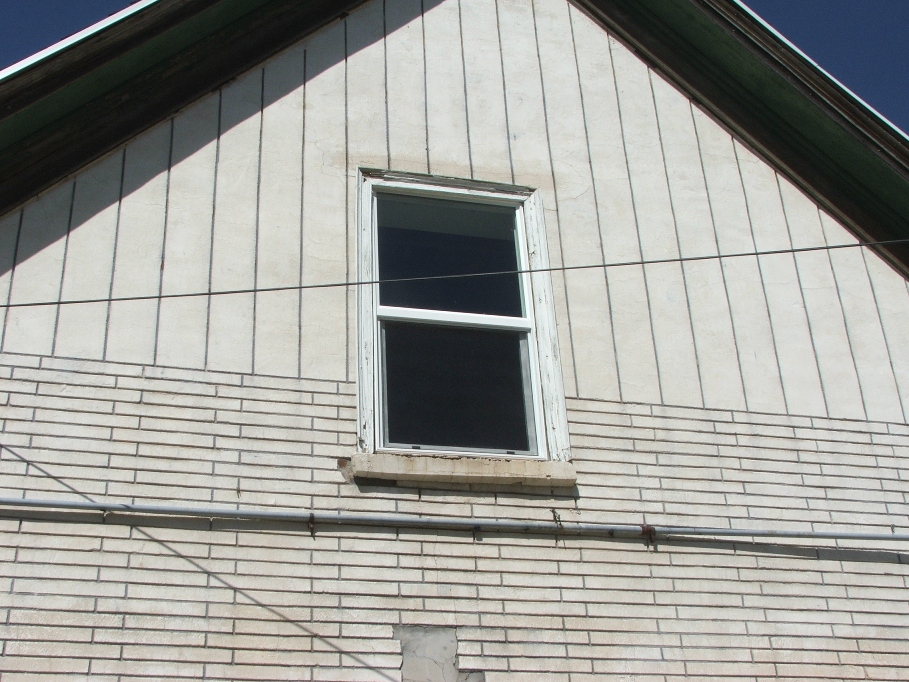

We ordered the two large windows that you can
see in this picture and the one downstairs on the South side of the house and
they should be here before the first of October. There isn’t any sense leaving these “single
pane” windows and letting the heat and cool air just go out.
Meanwhile, I have been busy inside doing various things. Somedays I had help from Mitch and Sherry and I hope I don’t forget to mention them in this writeup. We are on a tight schedule to get things done in order for the sheetrock to be put up while I’m on the Muzz deer hunt which begins Sept. 28. We are planning to head for the hills on the 27th to set up camp and before that Sherry and I are going to go out to Wendover for a needed break the weekend before that.
The plumber had come over and finished up all of his needed work before I called for an inspection of the wiring. We figured that without a building permit the inspector would not say anything if the plumbing was completed. I called for the inspector and he came out the next day to look things over. After about 15 minutes he wrote a note that it was “OK to cover”, the electrical. And then he discussed the vent pipe upstairs and later the windows upstairs.
I told him I just had the windows replaced and that I wasn’t about to take them out and redo the window frames and compromise the structure of the house. There must be some sort of Grandfather clause that would protect me. He said that the windows needed to be a size that could allow a fireman to enter through the window in case of an emergency. Then he talked to himself about the fact that there was an upstairs door etc. Before he left he said that when he comes to do the final inspection he did not want to see a bed in either of the rooms upstairs on the East side of the house. That these rooms were storage or offices and not bedrooms. I agreed.
Now it’s back to work getting ready for sheetrock. I figured the next thing would be to order doors and get them hung. It didn’t take them long to build them and since I had never hung a door before I thought it would take quite a bit of time to get it done. Little did I know, it only took one day to hang 5 doors and just a couple of hours to hang the last one down stairs.
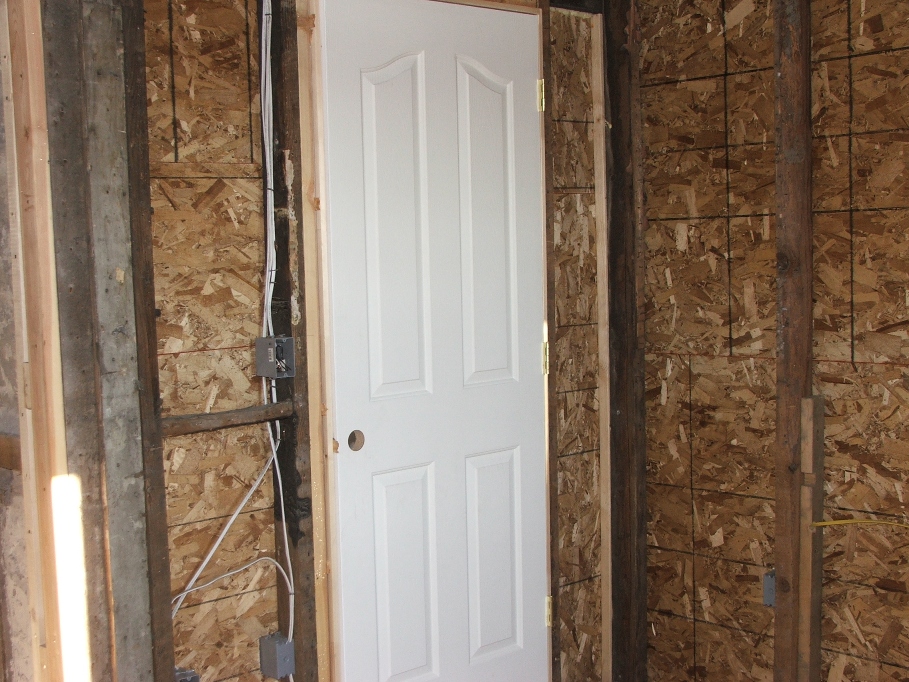
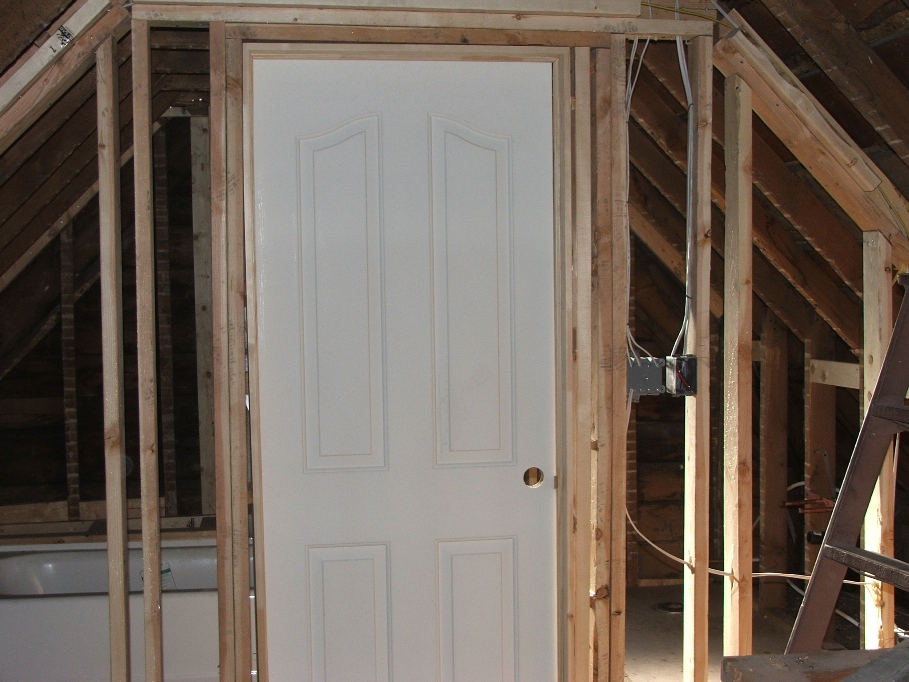
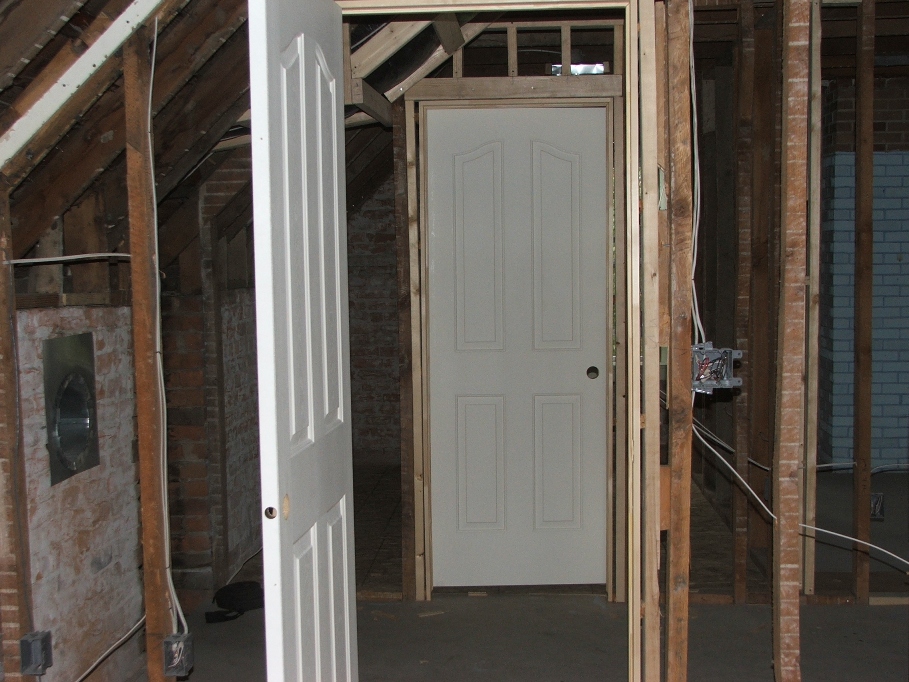
I looked around the house and decided I needed
to call Bryce Wheelright over to look at things and tell me what else I needed
to do to get ready for him and his sheetrock crew. He came over and I listed the things he
needed done before he could start. The
list you see has some things crossed off, the picture was an after thought as I
started doing the things he told me.
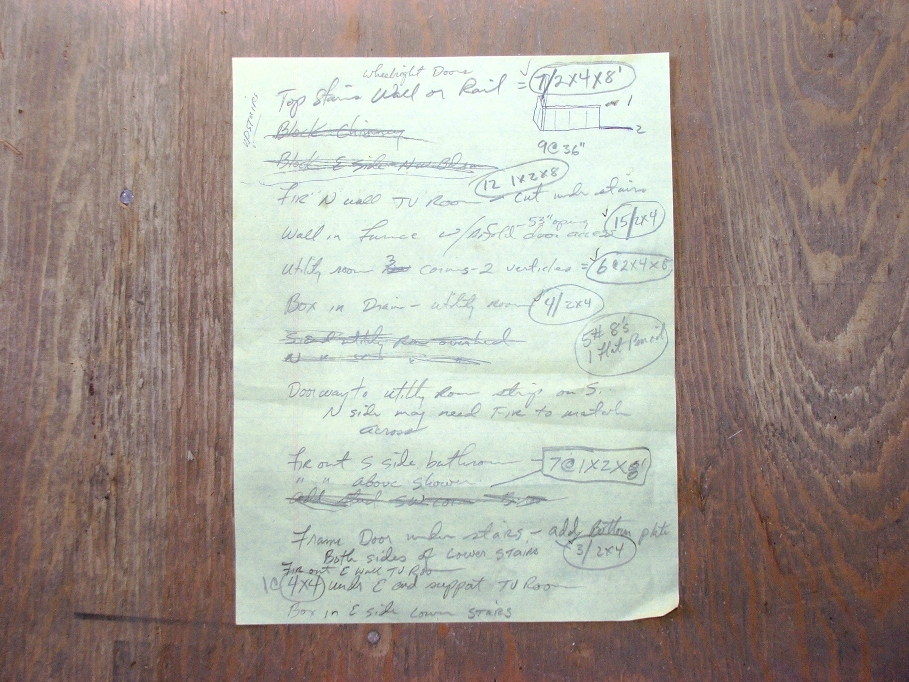
The circled numbers are materials I figured I would need to
accomplish the tasks listed.
Most of the things on the list are backing materials, blocking in pipes and drains and assorted other things that will make the place look better when the sheetrock is done. I started upstairs with blocking and putting in a permanent short wall at the top of the stairs.
Most of the things on the list are backing materials, blocking in pipes and drains and assorted other things that will make the place look better when the sheetrock is done. I started upstairs with blocking and putting in a permanent short wall at the top of the stairs.
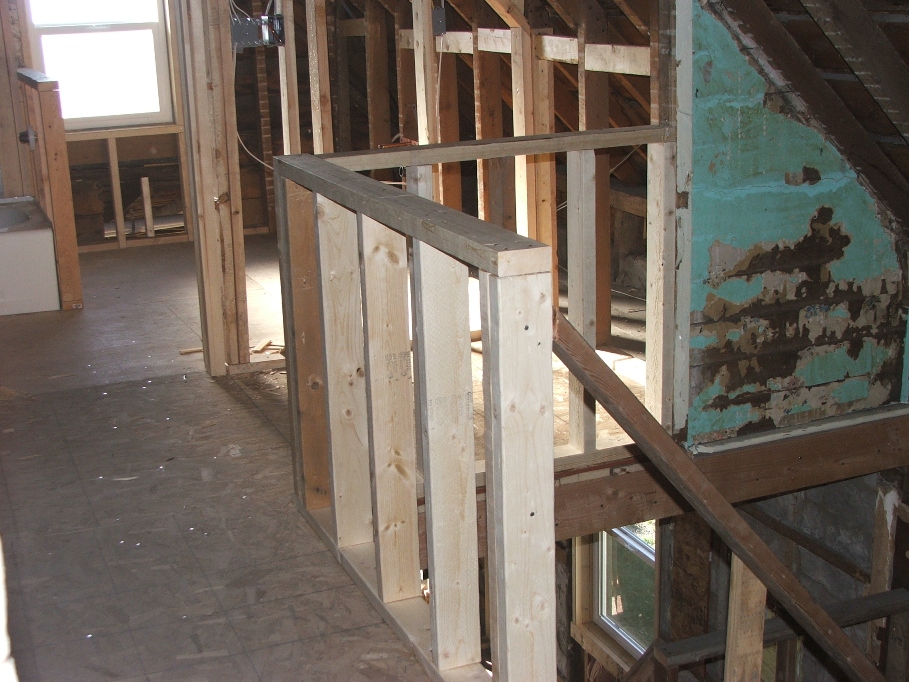
Bryce will sheetrock both sides of this short wall, and the
handrail will be made of wood with vertical spindles spaced 4 inches or less
apart going down the stairs. We plan on
keeping the stairway as open as we can.
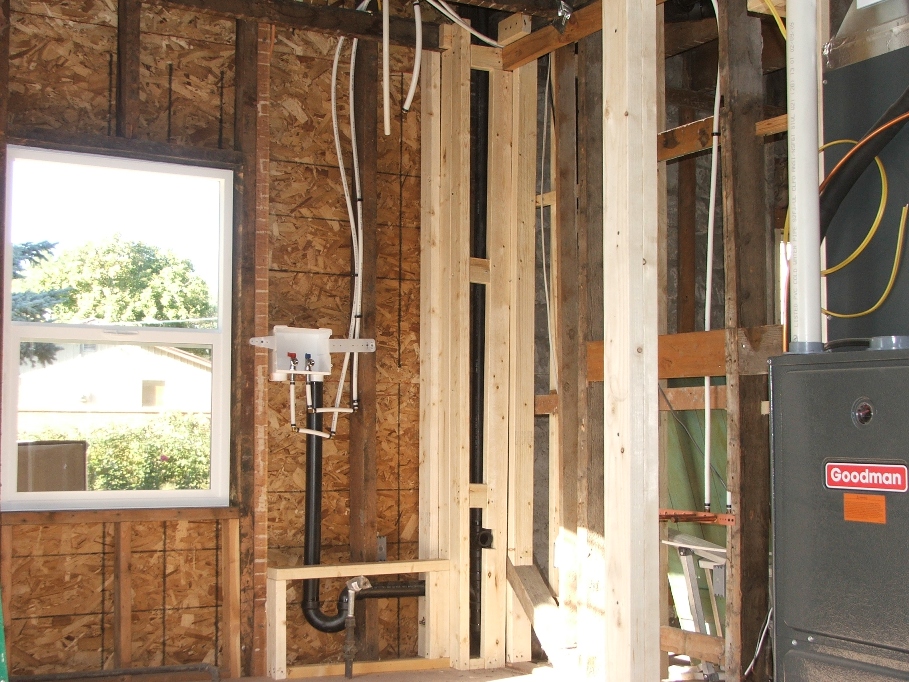
Next came blocking around pipes and the
furnace.

I will install bi-fold louvered doors to cover the opening
to the furnace. This will allow air to
get in and a large opening in case the furnace ever needs to be worked on or
replaced. It amazes me the amount of
lumber it takes to do a simple job!
I realized too that I still needed some backing
in order to hang the old cast iron sink, so I put in these 2X6’s to hold up
that heavy old sink.
Keith Witt also told me the pedestal sink in the downstairs bath would need a backing as those type of sinks are really hung on the wall and not self supporting. So I fixed that too.
Keith Witt also told me the pedestal sink in the downstairs bath would need a backing as those type of sinks are really hung on the wall and not self supporting. So I fixed that too.
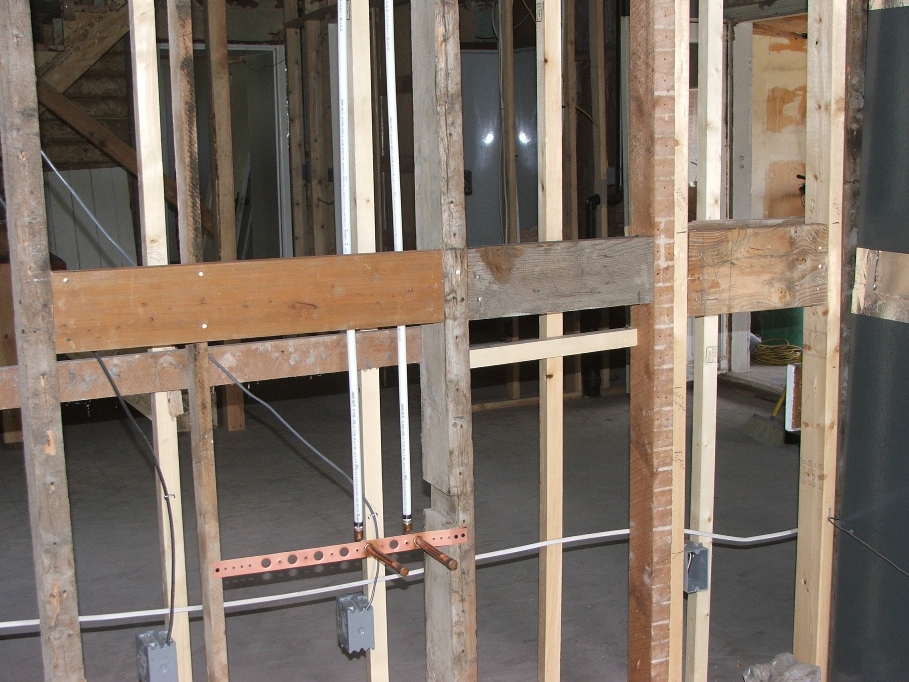
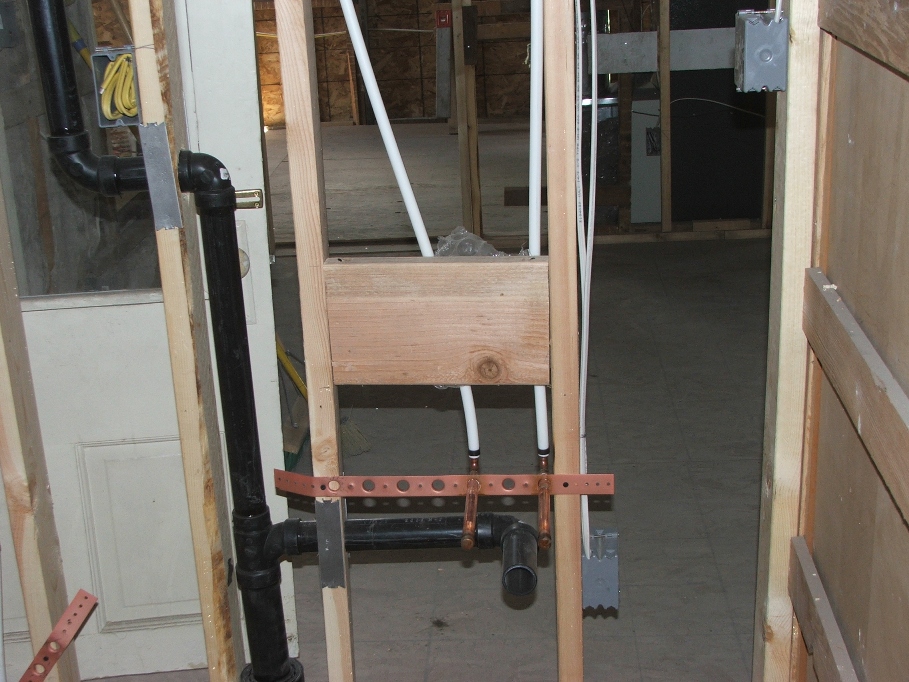
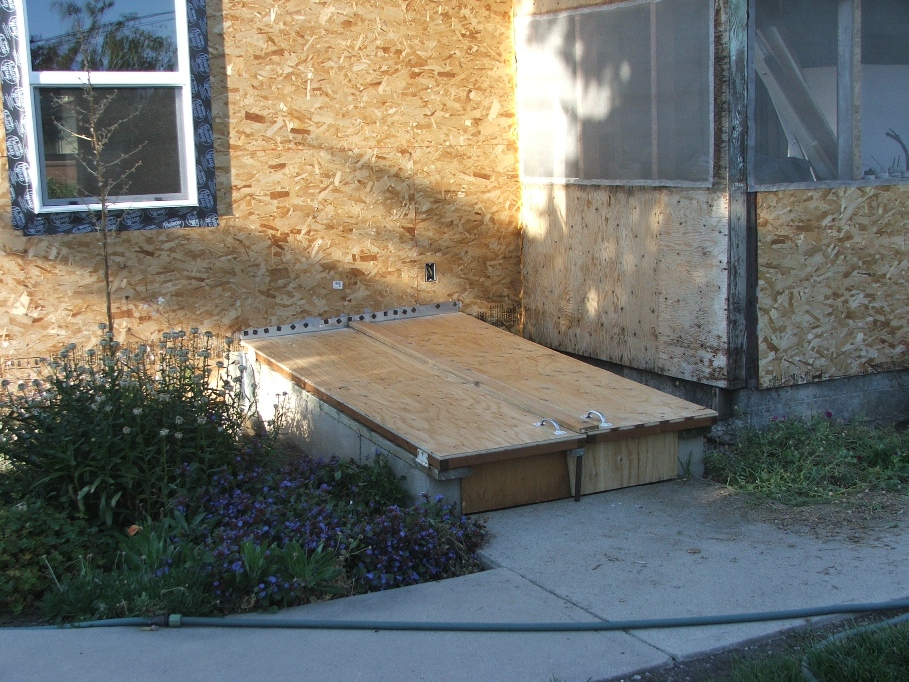
There was a small storm approaching with the possibility of some rain, and I wanted to get the cellar doors replaced before any more rain got into the cellar. I took some time and got that done before any weather came. It didn’t take long to do, as the framing on the one side was still pretty much in tact and I liked the design. My idea was to extend the plywood over the metal that Mitch and I had put up several weeks ago. This in combination with using redwood framing and CDX plywood should make the doors last many years to come.
Notice the “cat blockers” on the bottom! Now the only things that can get into the cellar are the bugs and spiders.
Notice the “cat blockers” on the bottom! Now the only things that can get into the cellar are the bugs and spiders.
The place is really starting to shape up. Sherry and I headed to town and bought insulation materials enough to insulate the entire place (we thought). I’m not sure if I had mentioned this before, but a couple of months ago I was looking in a classified ad on line and found where a guy in Willard has some insulation he wanted to sell. He was asking $50 p/bag for two bags. I called him and talked him into selling it to me for $20 for both bags and he was happy to do that as the material was in his way. Well as it turned out, it was R30 insulation, 23 inches wide, just what I needed to do the upstairs bedroom areas. What I didn’t know was the price I would be paying for enough to finish the upstairs. Those bags cost $63 apiece!!!!! He saved me $100!
Sherry and I hit the installation hard. We had to wear our masks and I’m glad we did. That fiberglass is nasty stuff!

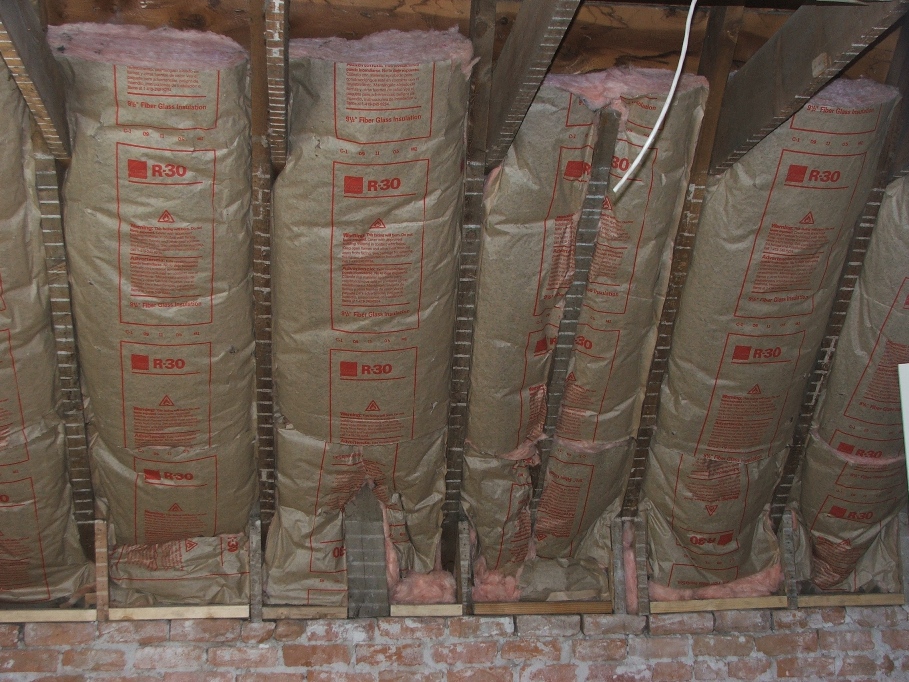
As you can see, not all the stud placement was on 23 inch spacing. Most was about 20 inches, just too much for the 15 inch stuff to span, and too little for the 23 inch stuff and so it bulges out. The sheetrock should press it back, but will reduce the R factor to about 20 or so. What the heck, it’s better than the place has ever had!
Mitch was able to join us the next day and he and I worked on the area above the stairs and in the upstairs bathroom, while Sherry worked on the utility room. It was a hot day, and we all suffered a great deal, what with the itching of the fiberglass and the sweating and barely able to breath with the masks on. We got all of the work done upstairs and nearly all in the utility room.
Oh, ya, I mentioned the inspector asking me about the flu pipe coming up from the downstairs wall furnace and what was I going to do about that. I have Scott Pettingill coming back to inspect the furnace, clean it and fix that pipe. Code says the pipe needs a minimum of 1 inch clearance to any flammable material. It’s a wonder the place didn’t burn down, as the pipe actually contacts the wood going through the roof, all around the pipe.
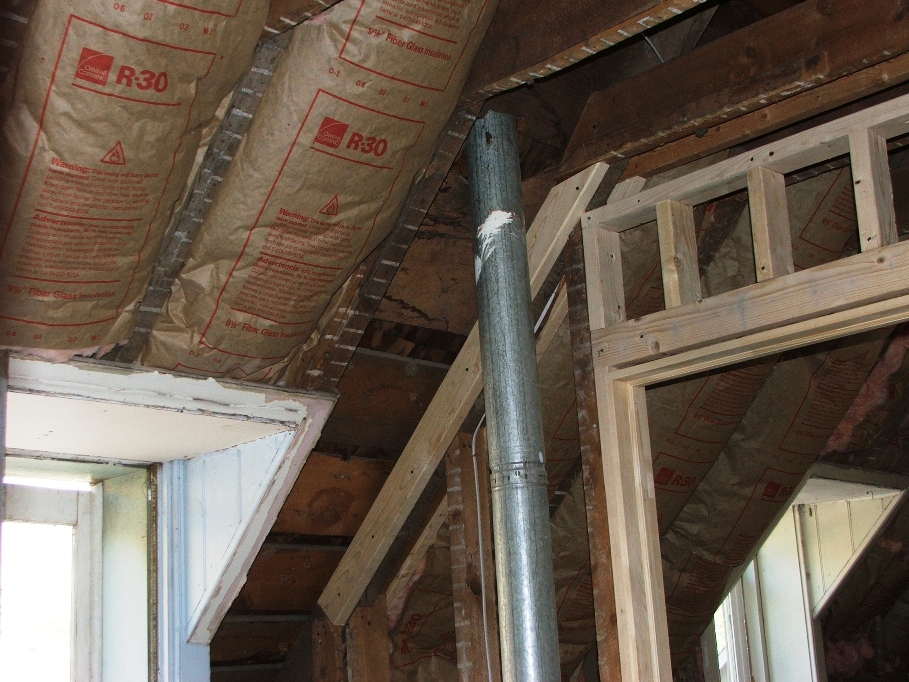
I’m hoping Scott will put in a triple wall pipe. We will see, but at any rate, I will box it in when he is done.
Sept.22….Mom and I are going to head over to Wendover for Friday night and Saturday, so today is my last day to be able to work on the house this week and then I will be getting ready for the Muzzleloader deer hunt which begins next Wednesday. So in essence, today is the last day I have for the next two weeks! Still lots to do to get ready for sheetrock.
My goal for today is formidable, with finishing the insulation downstairs, furring out the bathroom South wall, squaring up the passageway to the front of the house and framing and furring out under the stairs. Let’s go!!!!
Picking up where we left off yesterday Sherry and I cut and fit the rest of the insulation in the utility room. We left two pieces of insulation cut but not stapled that will go into place once the vent pipe is fitted for the water heater. Scott will do that for us.
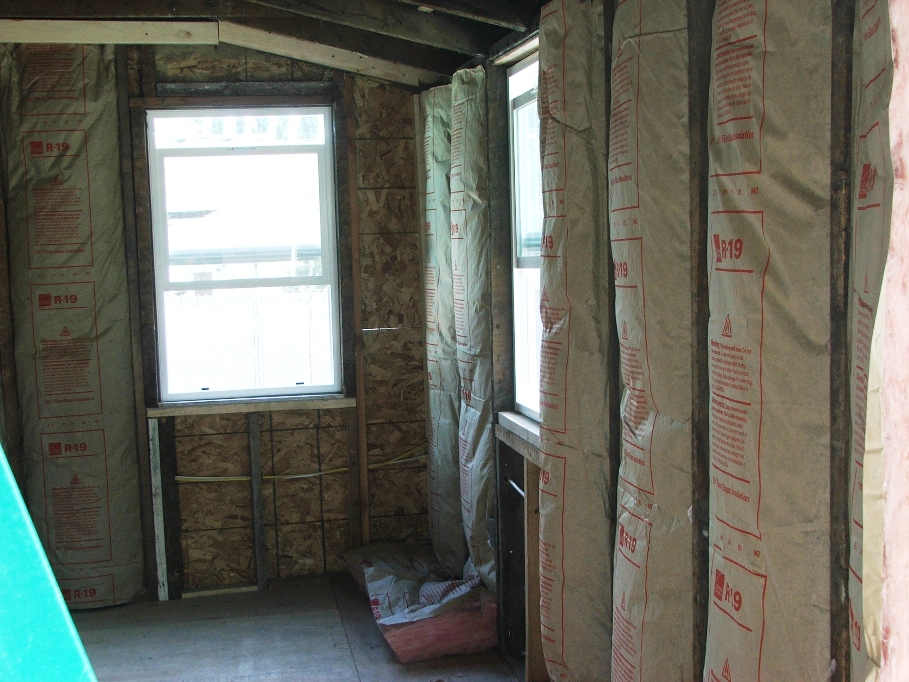
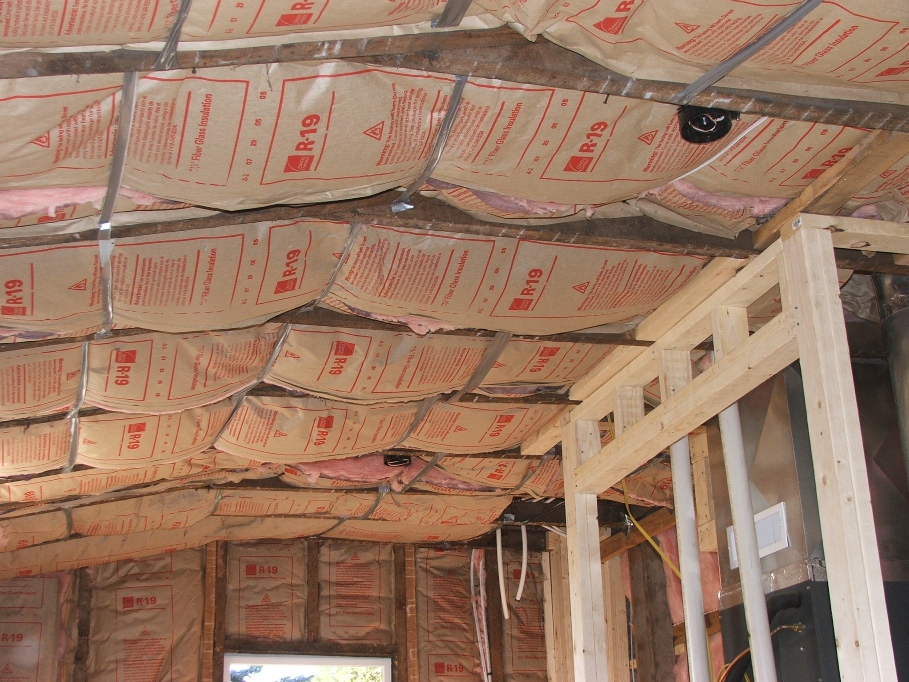
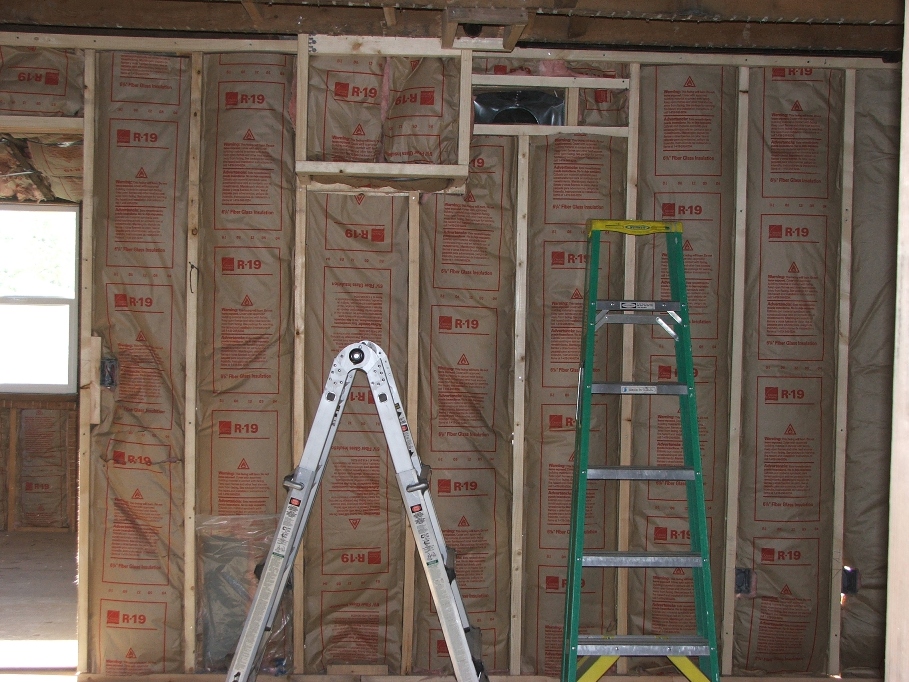
From this angle you can see the two missing pieces that will be fitted later. Notice too, the duct tape used to hold the insulation up. Eventually it will rot and allow the insulation to settle on the sheetrock.
It took until almost 11 a.m. to get the insulation installed in the utility room and also in the furred out wall between the tv room and the utility room. Our thoughts on that wall being insulated is as a noise barrier rather than needing to retain heat/cold.
It took until almost 11 a.m. to get the insulation installed in the utility room and also in the furred out wall between the tv room and the utility room. Our thoughts on that wall being insulated is as a noise barrier rather than needing to retain heat/cold.

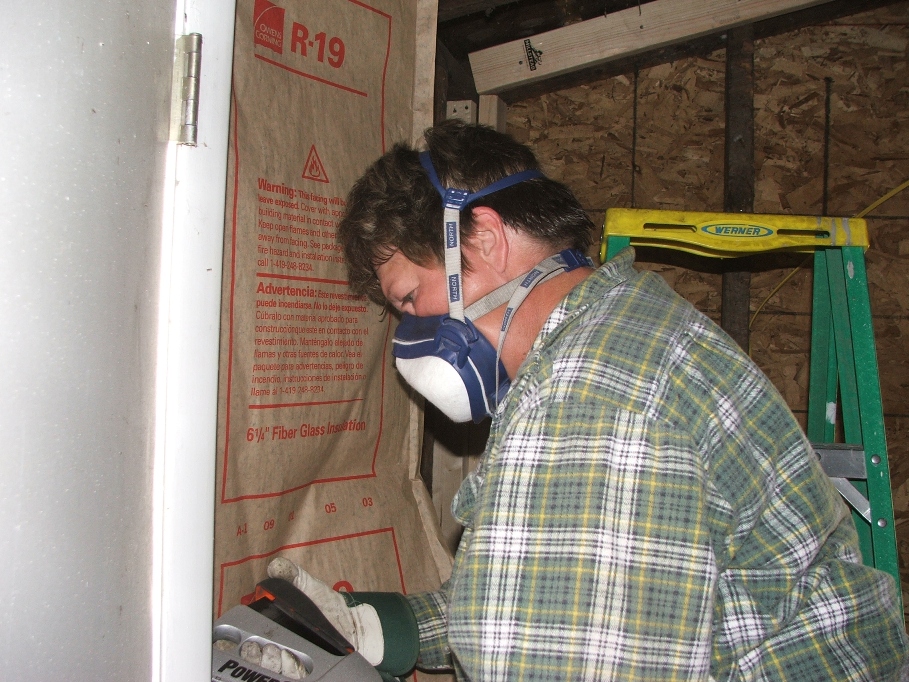
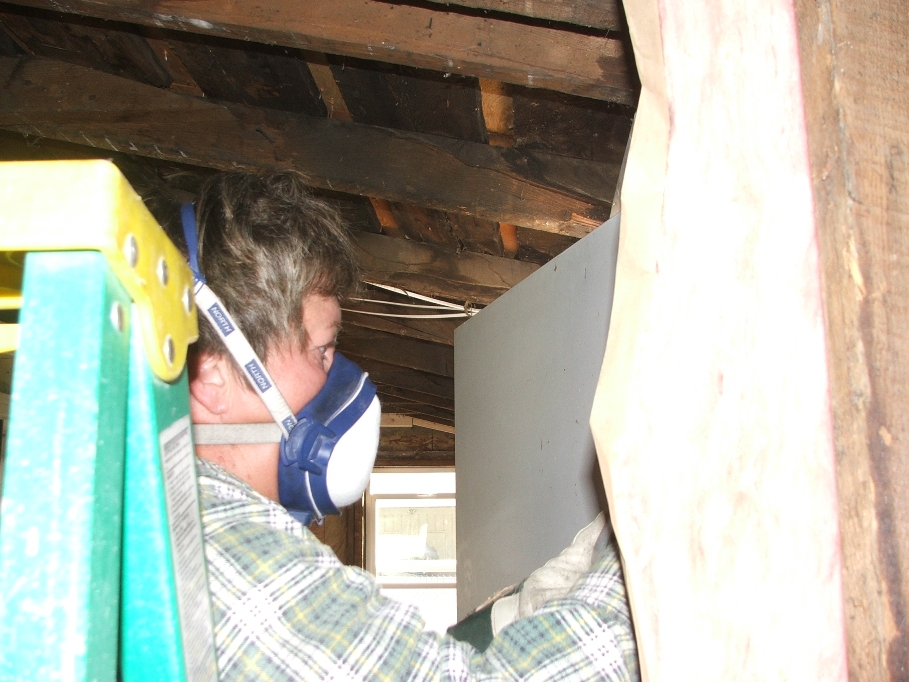
Those masks have really come in handy. We are done with them for now, but will be getting them back out when we get to the brick work upstairs.
Mitch cut his work day short and came over to help in the afternoon. Before he arrived Scott was here looking over the situation and deciding what he needed to do to fix up the vent for the water heater and to do the cleaning and repair of the wall furnace in the front of the house. He had to leave before he could do any of the work…problems at home.
With a fever to get everything done that was left on the list, Mitch and I began by cutting the wood flush with the wall in the entryway to the front of the house. I didn’t take any pictures of that. It took us awhile to get that done, but it will cover nicely with sheetrock and then we will trim the edges.
Next came the furring of the South wall of the bath downstairs and also above the shower. It has to match and cover the edge of the shower stall. I had purchased 1X4’s at the lumber store and we had to cut them down lengthways using the skill saw. That done, and we were off to build a wall.
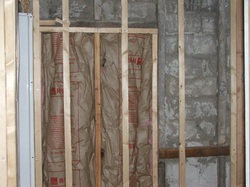
The old window space will be covered forever! Only those who have seen it in the past and those reading this will ever know it was there.
Once this wall was up, Mitch had to go and I was left to fix a large gap between the floor and the wall in the TV room, North side, and then sweep up a little. The time was 5:45 p.m. when I quit. The only thing left on the list is under the stairs! What a nice feeling.
I called Bryce Wheelright and told him he could move in anytime he was ready. He said that if all goes right on his other job, he will begin our sheetrock on October 3rd! Yee Haaa!!!
Oct. 11…Well we took some time for the Muzz deer hunt…3 bucks killed and I had a fair shot at a large 4 point at 80 yards, but I missed his head and he ran off a smarter buck!
Back to work on the old house. While I was off hunting Sherry decided to refinish the old door that mounts between the porch and the tv room. It’s a really pretty door but has many, many coats of paint on it. She started by putting paint stripper on it, but it only took some of it off and made the rest real gummy. But with perseverance and elbow grease it will come off. I had the camera so she didn’t get any before shots, but here is part of the door in progress.
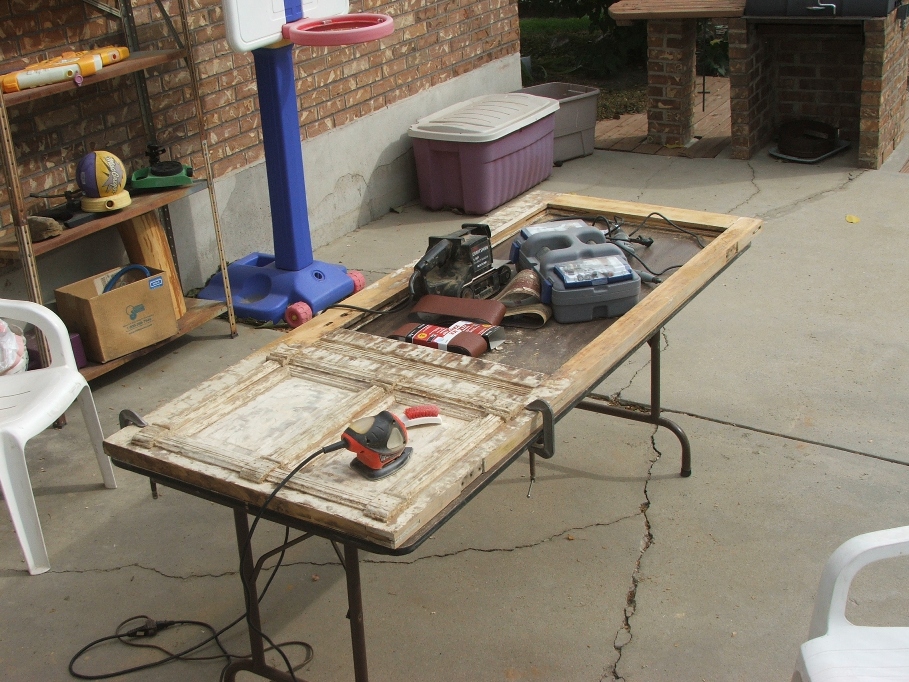
From this view and for the next 3 days, she and I worked feverishly on the door and finally got it to where we think it will look really good when stained and oiled. There is still some white paint in some of the cracks and stress points, but it is a very nice door. Tomorrow we will go to Mellen glass and order a tempered window to replace the one we took out. Sherry wants one with a design in it and maybe one that isn’t clear, but more distorted. We will also order a replacement tempered glass for the little window on the stair landing.
Meanwhile, Scott came back and made the wall furnace in the front of the house safe, by cutting away the flammable wood away from the heat duct. My job now is to add some 1X2 strips and screw sheetrock up to cover the pipes downstairs. Then in the future if we ever decide to get rid of the furnace, or have to replace it, we won’t have to tear the wall down to do it.
Meanwhile, Scott came back and made the wall furnace in the front of the house safe, by cutting away the flammable wood away from the heat duct. My job now is to add some 1X2 strips and screw sheetrock up to cover the pipes downstairs. Then in the future if we ever decide to get rid of the furnace, or have to replace it, we won’t have to tear the wall down to do it.
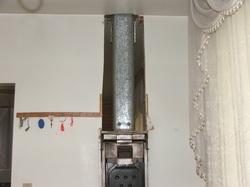
So, there have been things getting done, even though I have been off playing in the mountains.
My final job before the sheetrock can be finished, is to add strips around the stairs and make a door frame (of sorts) for access under the stairs. Bryce is going to rock both the outside and inside of the stairs. This will make it better for storage. I got that job done today.
My final job before the sheetrock can be finished, is to add strips around the stairs and make a door frame (of sorts) for access under the stairs. Bryce is going to rock both the outside and inside of the stairs. This will make it better for storage. I got that job done today.
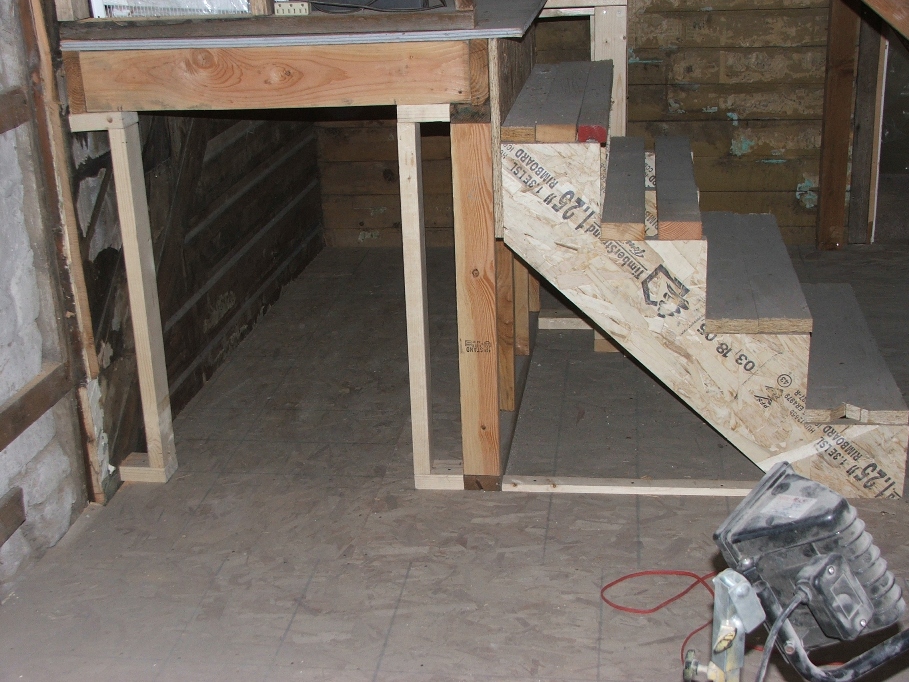
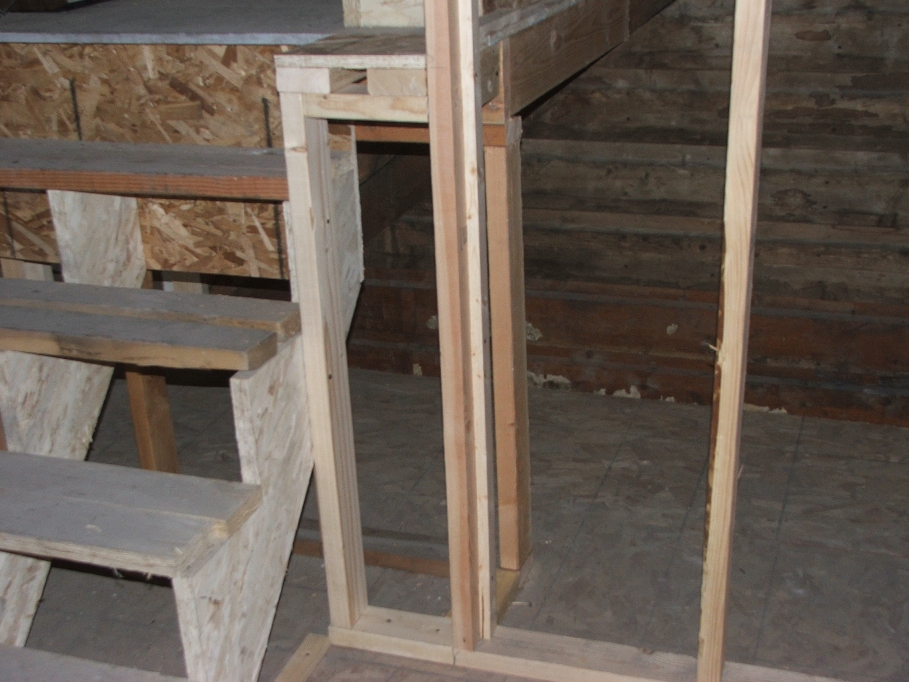
There will be wasted space under the lower steps, but what the heck. I can see from this picture I still have to add one more strip of wood under the steps, guess I’d better go do that.
While I was busy doing this task, the guys from Mellen glass showed up with the downstairs South window and the two big windows for the front of the house. They work really fast and are quite good at what they do. Here they are pulling out one of the old windows and hauling it away.
While I was busy doing this task, the guys from Mellen glass showed up with the downstairs South window and the two big windows for the front of the house. They work really fast and are quite good at what they do. Here they are pulling out one of the old windows and hauling it away.
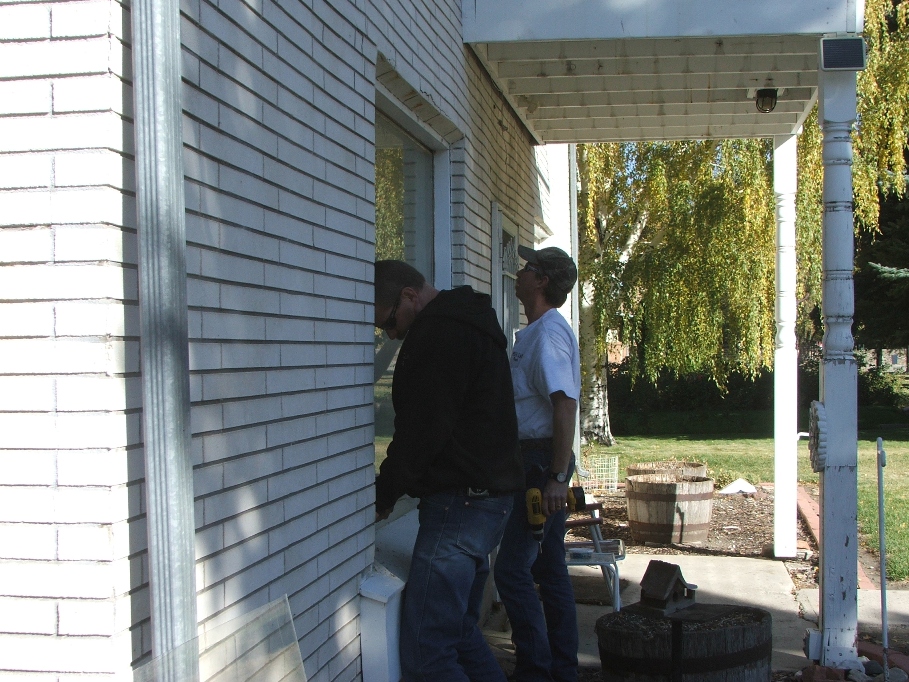
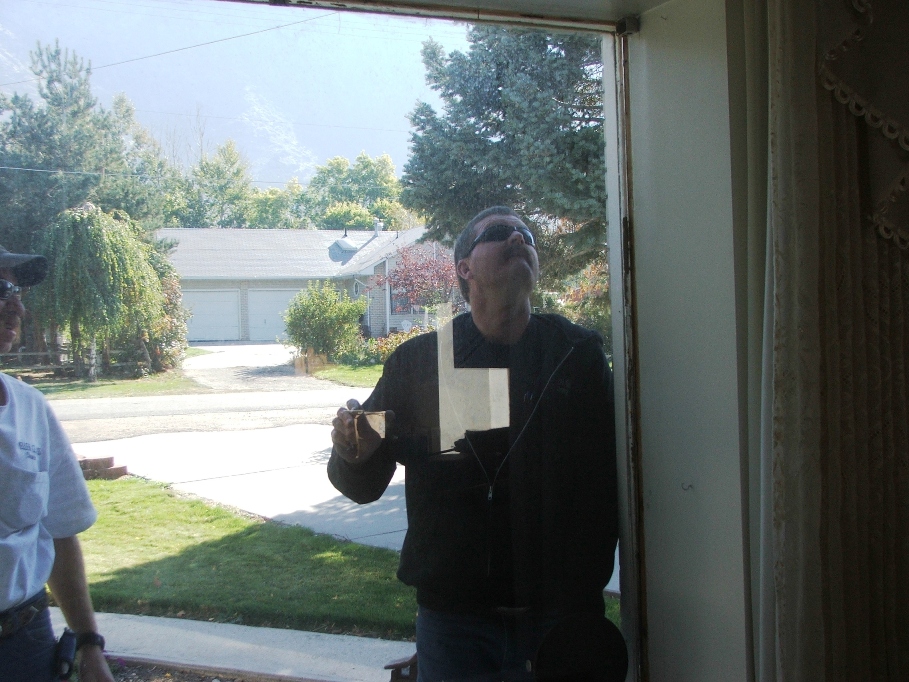

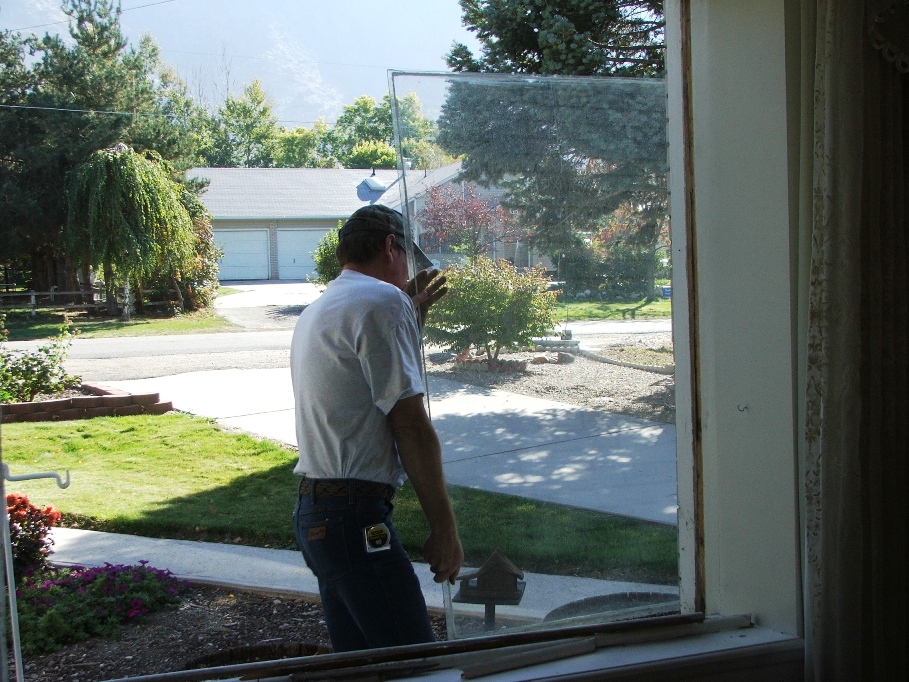
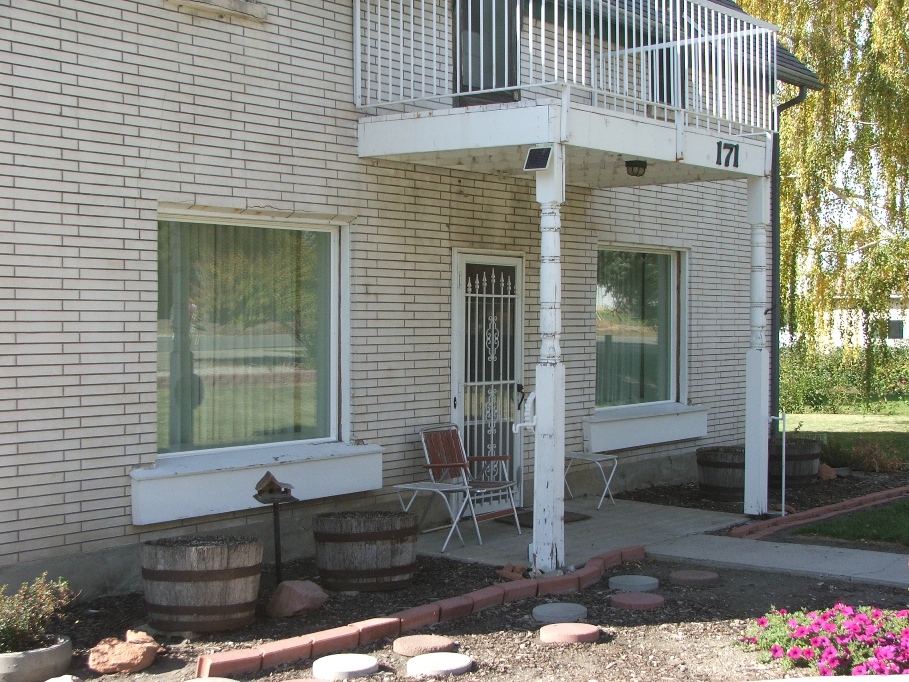
Next they will fit in the new window and caulk it. I’m excited! We all wondered why those big panes of glass didn’t pop out during an East wind. Lucky for us they didn’t.
With these new windows installed that makes every one of the exterior windows new, double pane and insulated! Things will be warmer in the winters to come.
With these new windows installed that makes every one of the exterior windows new, double pane and insulated! Things will be warmer in the winters to come.

_ New downstairs South window! Easy sliding window that could allow emergency exit if needed.
Another thing that was going on is painting the cellar door. See, I can be a busy guy when I want to be. Yesterday I put a primer coat on the doors and today the first of two finish coats of exterior flat white paint!
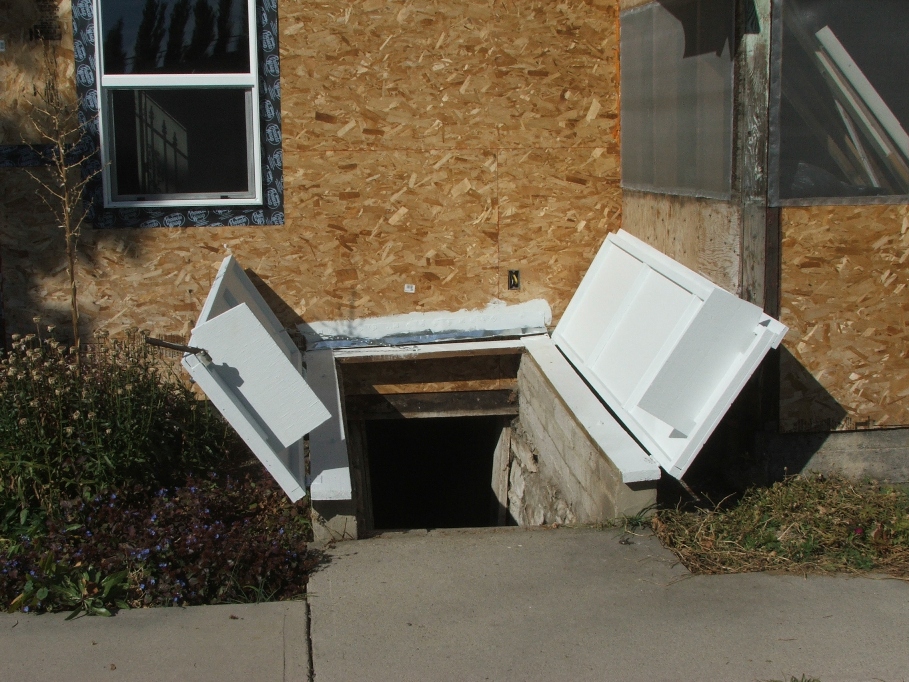
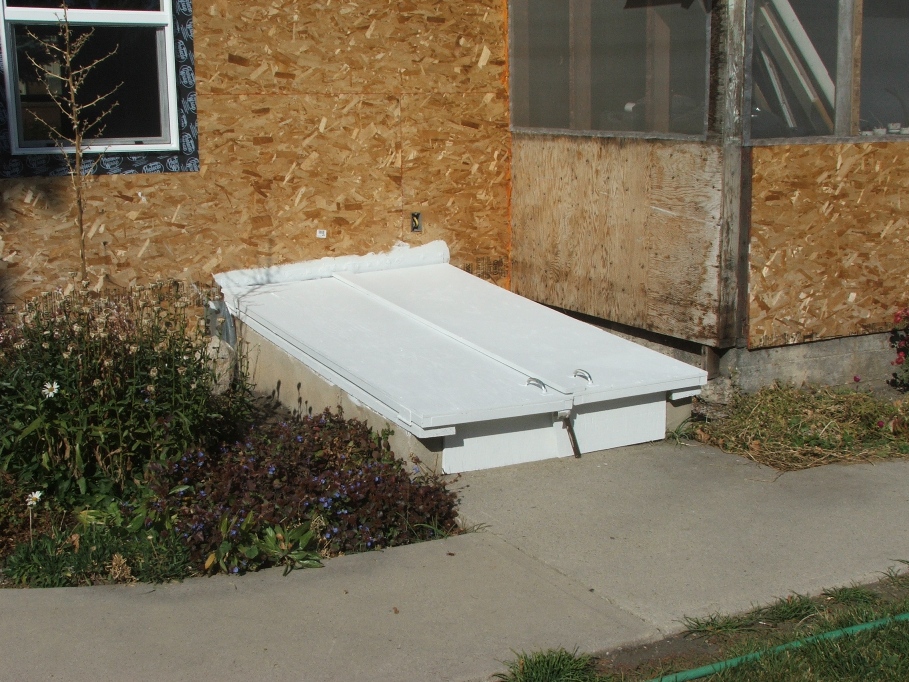
Between the exterior grade plywood, redwood framing and three coats of exterior paint, these doors should last 10 or more years. The boys will have to deal with replacing them in the future.
Bryce was not able to start when he said he would, and only yesterday did he stop and tell me the rock will be delivered this Thursday. They will put some upstairs via a lift and the rest downstairs. He will begin hanging the rock next Monday and figures it will take him about 3 weeks to finish. He is planning on going deer hunting during this time as well. I can’t blame him there.
Sherry and I are going to Wendover with Bones and Dee this Thursday and spend the night. So no work will get done until after we are back. I have lots still to do, like fir out that furnace pipe, sand and put mortar between the bricks and sand the wood going up the stairs. Once the rock is hung and sanded, then there will be painting and finish work on the wood, plus installing cabinets, shelves, large sink, bi-fold doors and many other finish type jobs. This is all hoped to be done before snow flys! Wish me luck! Oh ya, I plan on taking a couple of weeks off to go Muzz elk hunting up on the Gilmore Ranch, near Kamas on the 2nd of November. Life is good!
Oct. 19…Well the sheetrock was delivered on the 13th and Bryce started putting it up on the 18th. They started in the bathroom downstairs which surprised me. I figured they would start upstairs and work their way down. Oh well…They decide! It’s amazing how the place looks as the rock is being put up. It closes it in, but at the same time gives you a feeling of a place you could live in.
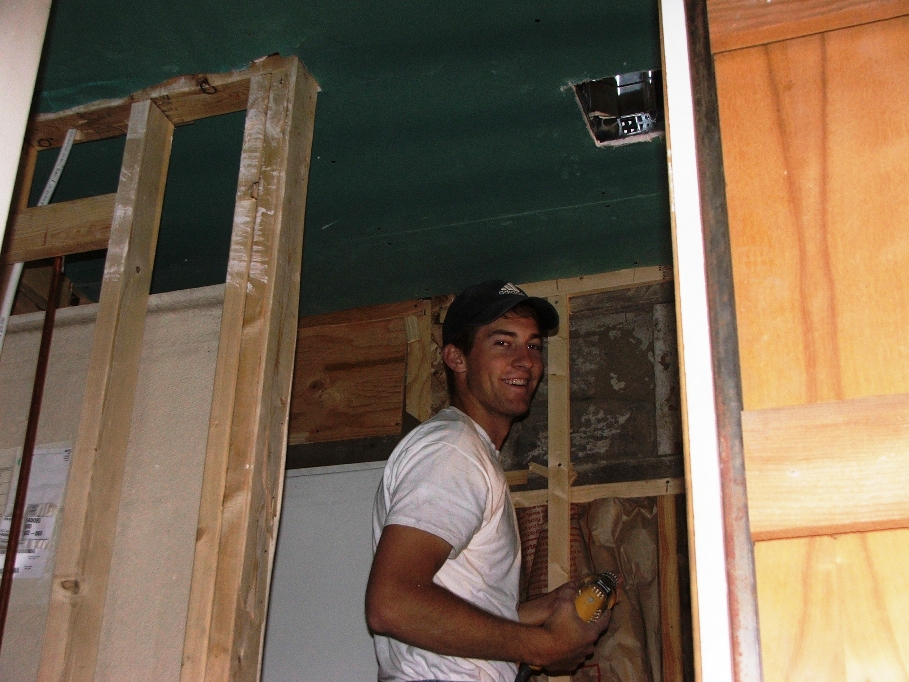
This is the first piece of sheetrock installed. Green board through out the two bathrooms and at the North end of the utility room.
Oct. 21…Well, Bryce and Ben worked most of three days this week and have now taken some time to go deer hunting. I guess they will be back on Monday. In the meantime, I needed to clean up some of the excess sheetrock and make room to move around a little. I am not sure which rock pieces are scrap and which are not, so I organized them by size and put them all in the utility room up against the wall out of the way until I can ask Bryce whether they are garbage or not.
The have managed to get nearly all of the TV room and the “white board” part of the utility room completed and here are some of the flicks.
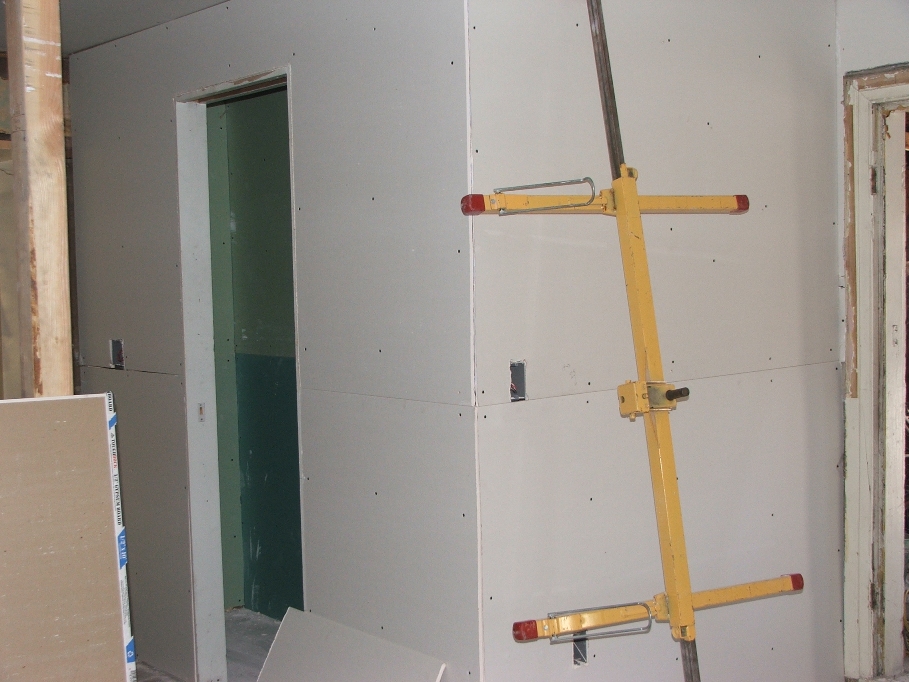
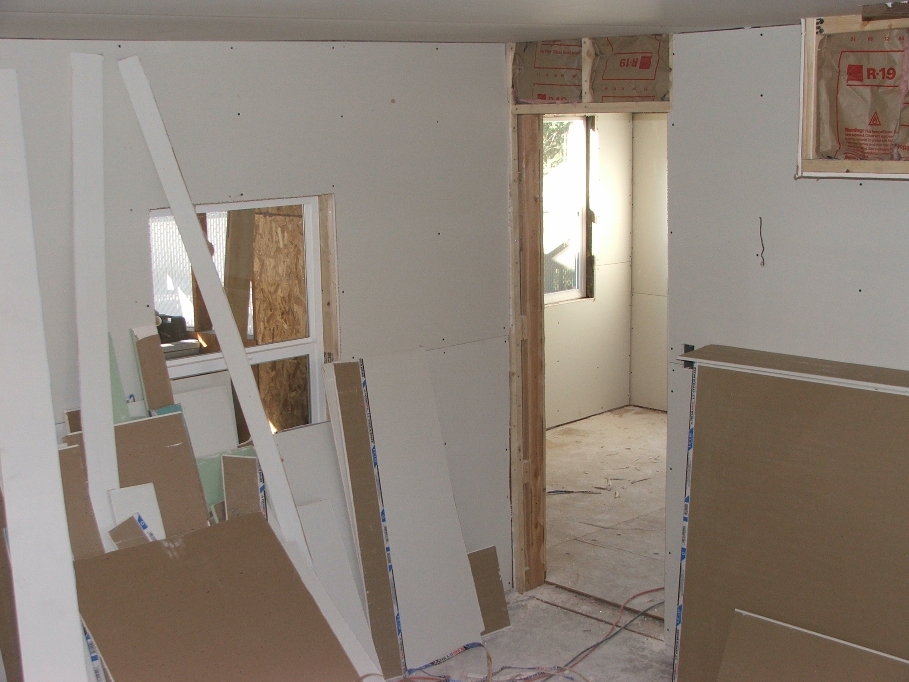

_ This is the doorway to the downstairs bathroom. All green board in the bathrooms!
Since they are out of the way and the mess of scrap is cleaned up, Sherry and I decided we needed to start on the re-pointing of the mortar and start sanding down the brick upstairs. We don’t want to be in the rockers way, so this will be a good time to start that project. My job is to mix the “spec mix” and put the mortar in the holes and cracks between the bricks. Sherry will begin the sanding. We are using a modern brick to sand with, as it is harder than the old bricks that are in the bedrooms. A lot of work ahead, but it will look really nice when it’s finished.
Since they are out of the way and the mess of scrap is cleaned up, Sherry and I decided we needed to start on the re-pointing of the mortar and start sanding down the brick upstairs. We don’t want to be in the rockers way, so this will be a good time to start that project. My job is to mix the “spec mix” and put the mortar in the holes and cracks between the bricks. Sherry will begin the sanding. We are using a modern brick to sand with, as it is harder than the old bricks that are in the bedrooms. A lot of work ahead, but it will look really nice when it’s finished.
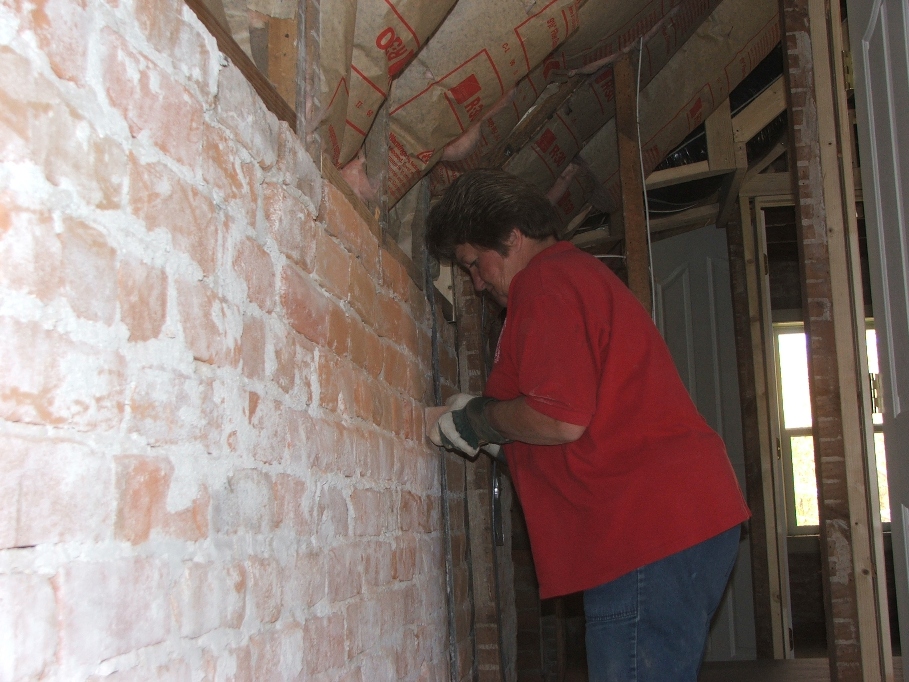
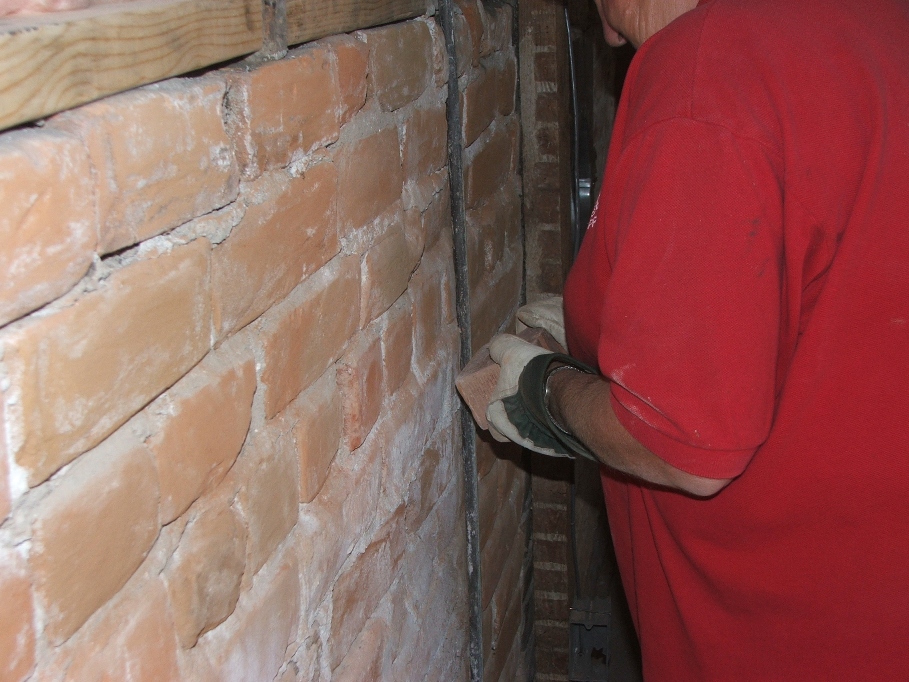
Sherry beginning the long arduous task of sanding brick with a brick!
Mostly knocking off the white plaster from the lath and plaster job. But some shaping of the brick and cleaning out mortar from between bricks.
Mostly knocking off the white plaster from the lath and plaster job. But some shaping of the brick and cleaning out mortar from between bricks.
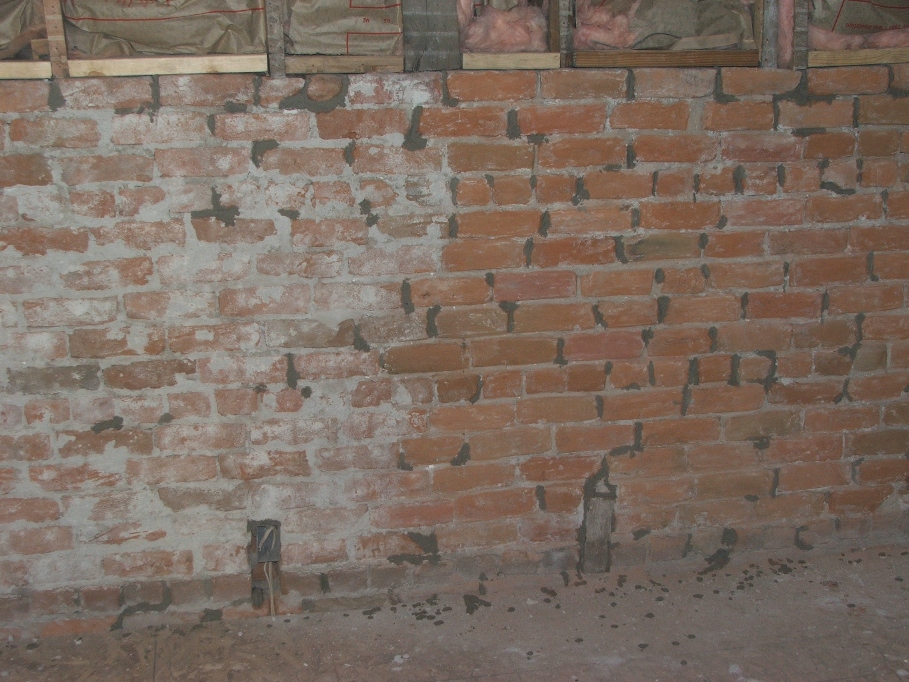
Sanded v.s. Not sanded. The dark splotches are re-pointed mortar. Once it’s dried the job of sanding again will be much easier than the original sanding job.
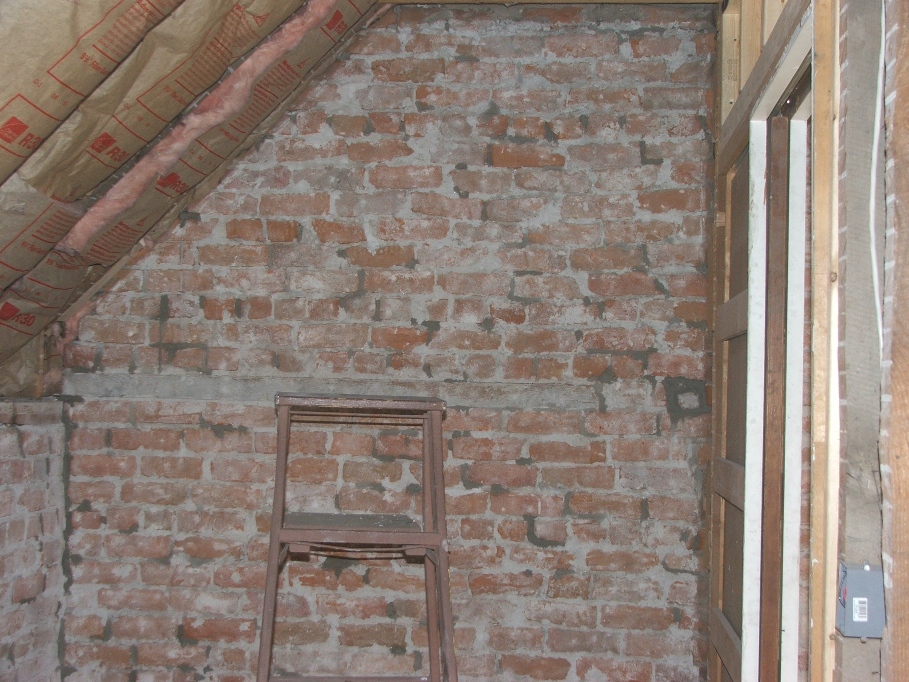
This is the South wall of the old gun room, which will be a closet or infants room in the future. You can see the re-pointing that’s been done. We think re-pointing before sanding the brick will make the job somewhat easier. We do expect to have to re-point more after the sanding, because of knocking off plaster and exposing more holes between the bricks. Just a part of the work that is not seen in the finished product.
Our goal is to complete this brick work before Bryce moves upstairs to lay the sheetrock. We won’t finish the job until after the painting of the walls and ceiling is done. Any paint spilled can then be cleaned off before sealing the bricks and putting on a finish coat of clear material.
Re-pointing: Putting mortar in cracks and spaces between bricks. We are using a mortar mix called “Spec Mix”, which is mostly cement and lime with a bit of really fine sand. I have found mixing two cups of mix with one of water makes a slurry just the right consistency to be squeezed out through a funnel looking rubber device that is fashioned after a cake decorating tube (or vise verse).
Bryce and Ben have been really busy with the sheetrock. Sherry and I have been trying to stay out of their way and doing a pretty good job of it. Our task is mostly to clean up after them for now. Bryce said once the rock is in place, they will put the tape on the joints and then begin the mudding and sanding. He figures it will take three coats of mud to cover the gaps and cracks and make the seams flatter. Usually it only takes two coats, but since the house is so out of square the third coat will help in the appearance.
Here are some of the views to date.
Here are some of the views to date.

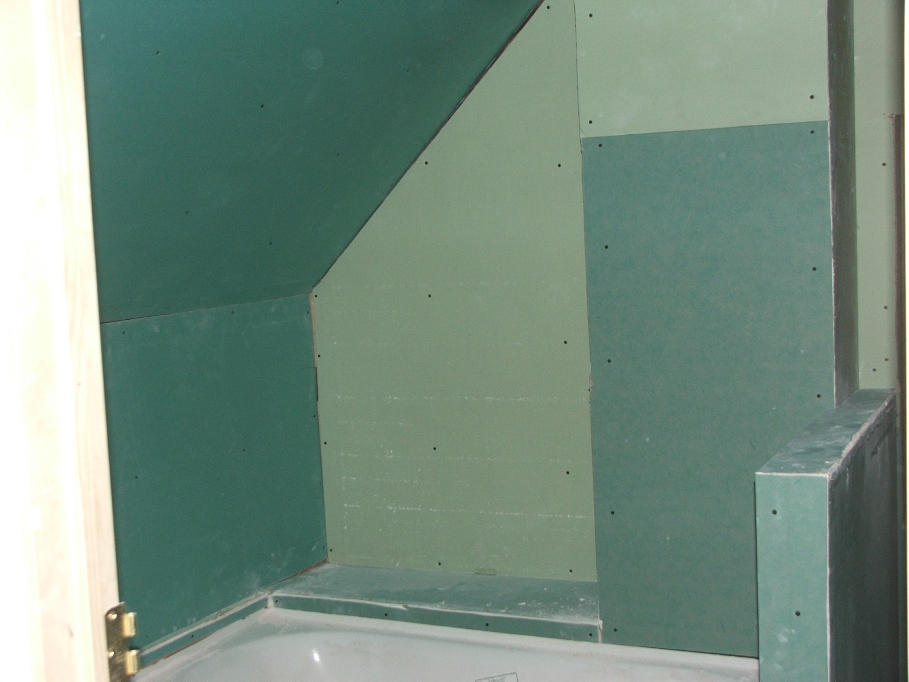
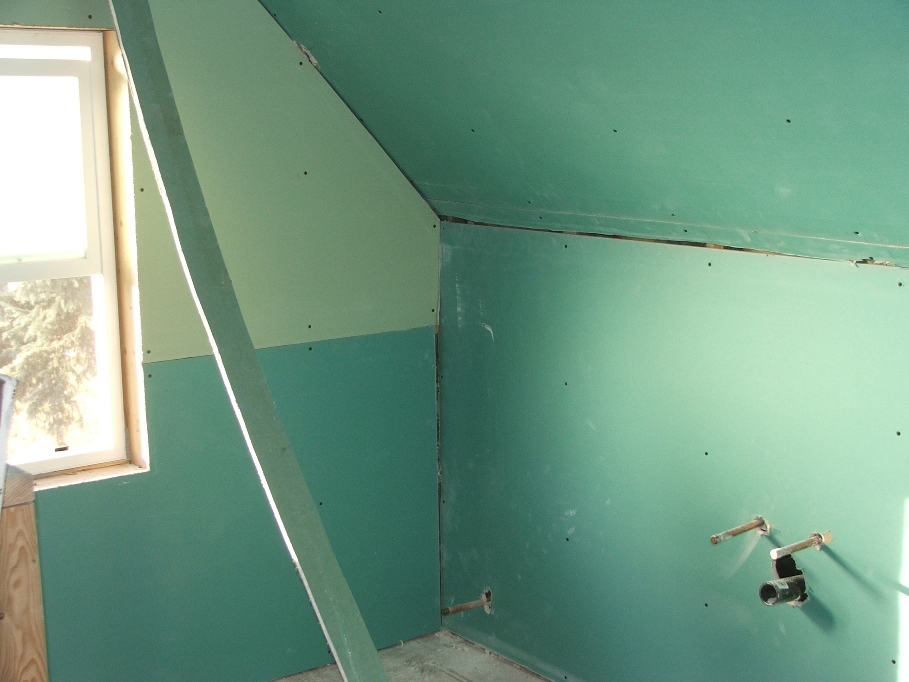
Bryce also bid to put in our attic vents and they took a few hours one day to get this done. They wanted a day that wasn’t too hot, so as to minimize the damage to the shingles. They picked a cloudy day where rain was in the forecast for the next day. By doing this, they can check for leaks around the flashing and get it fixed before they sheetrock the bedroom areas upstairs.
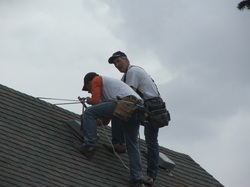
They installed four vents, even though I only told them to put up three. Four will be better in the long run.

They tied themselves from falling by using the rail on the front porch to tie the ropes. This is a very steep roof and I’m glad they used the safe route.
The next day they went hunting deer and on Oct. 25th were back at the sheetrocking.
The next day they went hunting deer and on Oct. 25th were back at the sheetrocking.
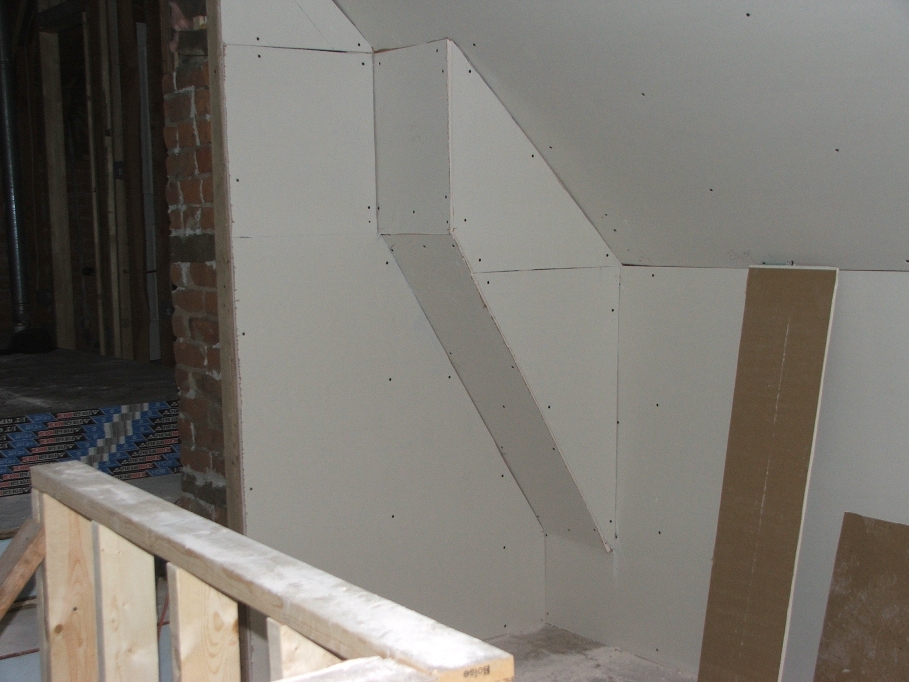
This is the area at the top of the stairs where the last picture showed exposed insulation and framing. Good job guys!!!
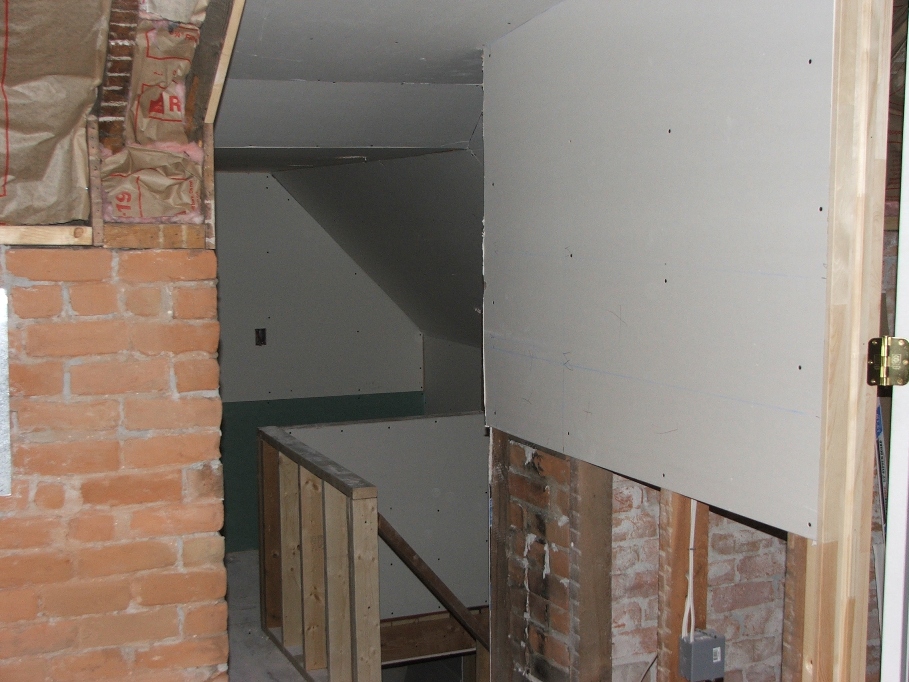
This is a picture from the bedroom area looking back toward the top of the stairs. They haven’t covered the pony wall at the top of the stairs, because they might have to move sheetrock up or down the stairway and didn’t want to ruin it. Smart!
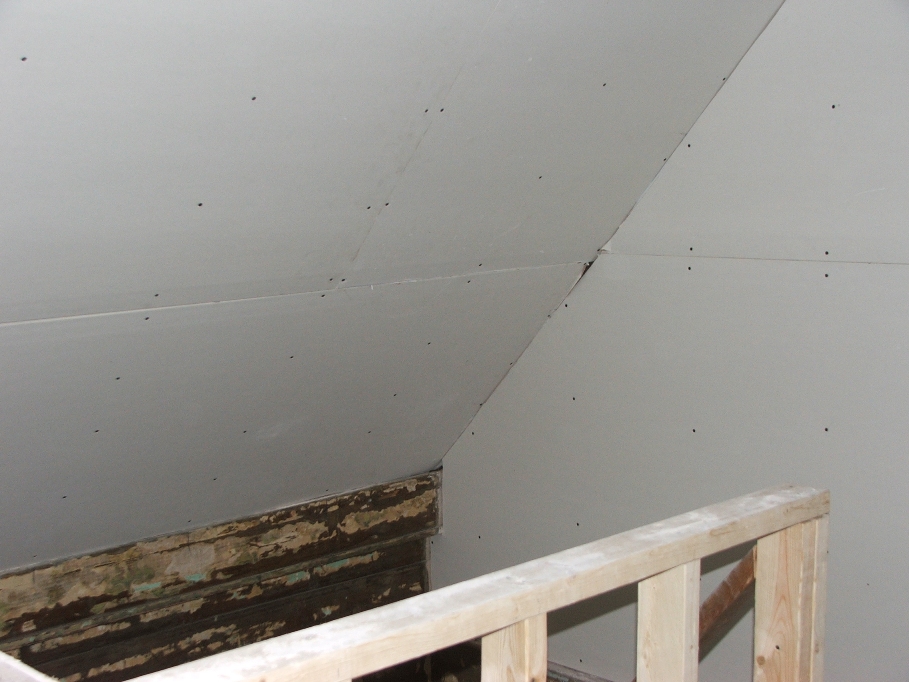
Here the brick and rock are covered as you go up the stairs toward the bedrooms. The wood wall you see will be sanded, stained and varnished one of these days. Sherry and I will do that once Bryce is done with the rock work. We still have to finish the brick work as well and have chosen to stay out of the way. We will get to it when we can.
The next two weeks I will be gone hunting elk with my trusty muzz. Sherry plans on cleaning up the kitchen cabinets downstairs. That way she has something to do while I’m gone, it will get her away from the house and kids, and get a job done that desperately needs doing.
Nov. 11…History was made today!!!!! Scott Pettingill came over, hooked up the gas to the furnace and fired the motha up!!!! First time in the history of the old house to have forced heat in the upstairs part of the house!!!! Wonderful!!
Lots of things have happened in the past two weeks. First off, I did not get an elk! Boooo. But Sherry and Mitch finished the sanding of the bricks and Brice did a lot of mudding on the sheetrock. It really is taking shape and looks great.
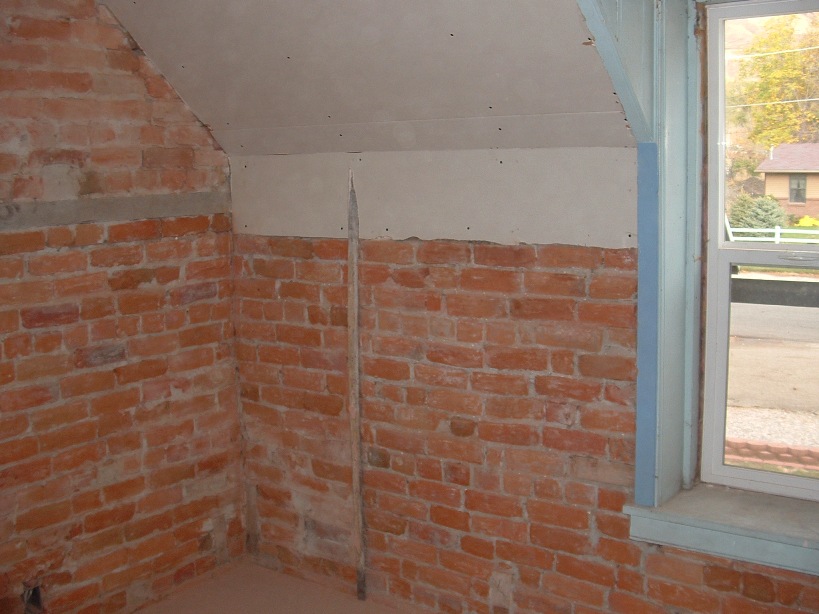

Sheetrocked and sanded bricks!
You have to see what the “modern” bricks look like now that the old bricks have been sanded. Keep in mind these bricks started out as a full size brick, fired and hard. I broke it in half, so that two people could work at the same time using them as sanding blocks.
You have to see what the “modern” bricks look like now that the old bricks have been sanded. Keep in mind these bricks started out as a full size brick, fired and hard. I broke it in half, so that two people could work at the same time using them as sanding blocks.

Rounded corners, thin sections! A lot of rubbing went into making the bricks this worn.
The following are a series of pictures of the upstairs areas showing them all sheet rocked and ready for mud!
The following are a series of pictures of the upstairs areas showing them all sheet rocked and ready for mud!
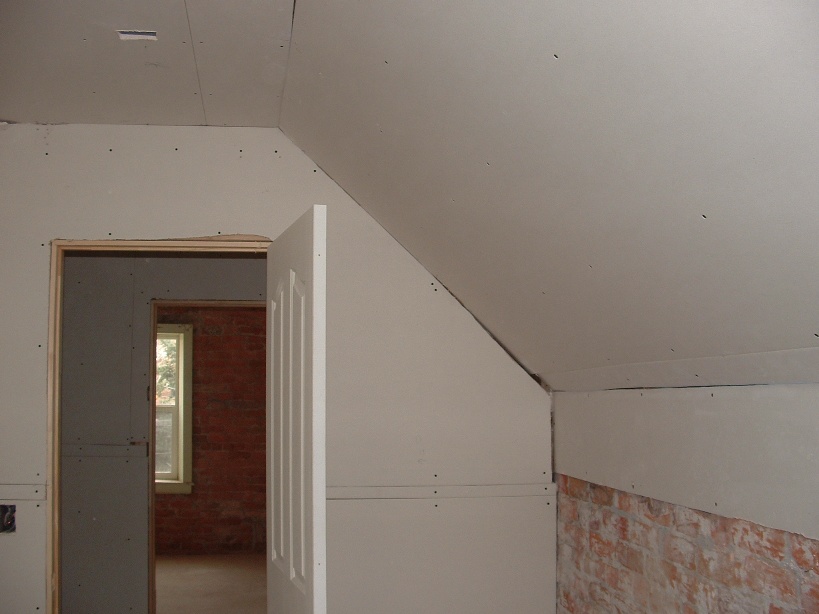
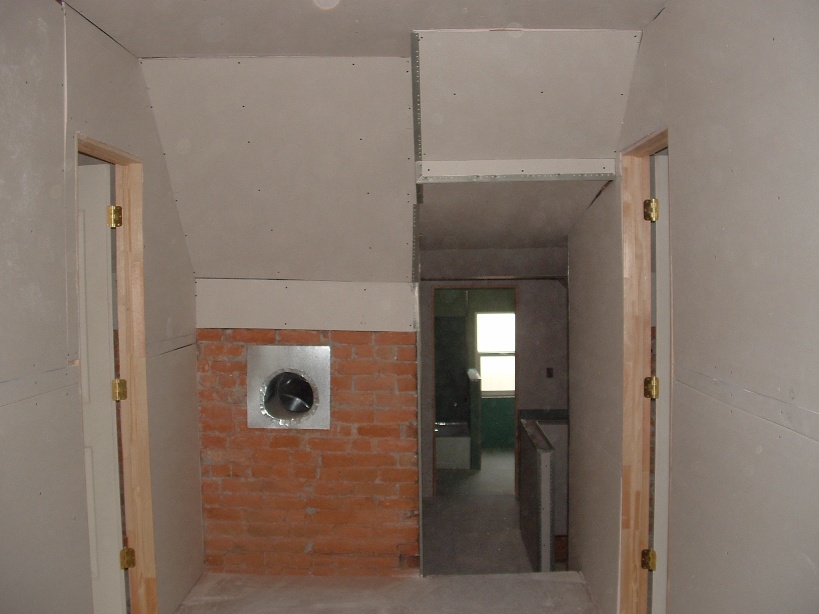
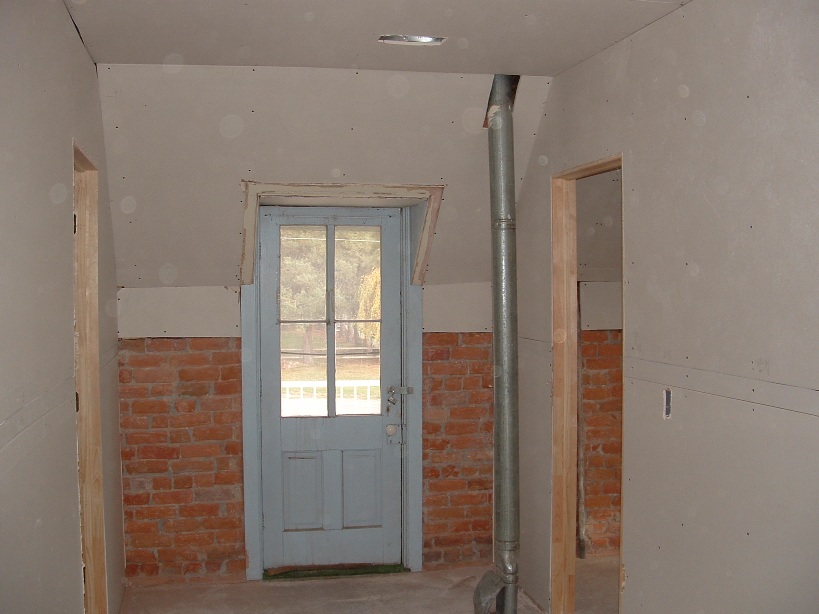
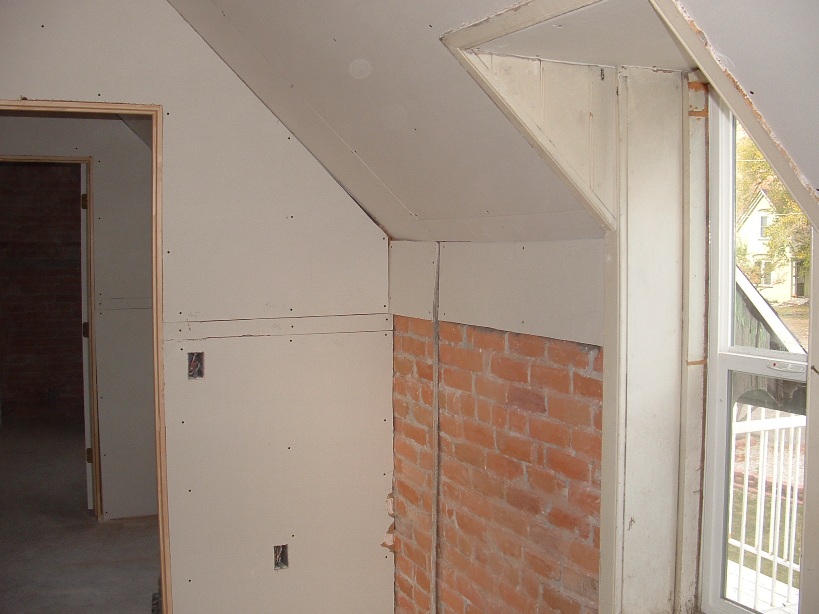

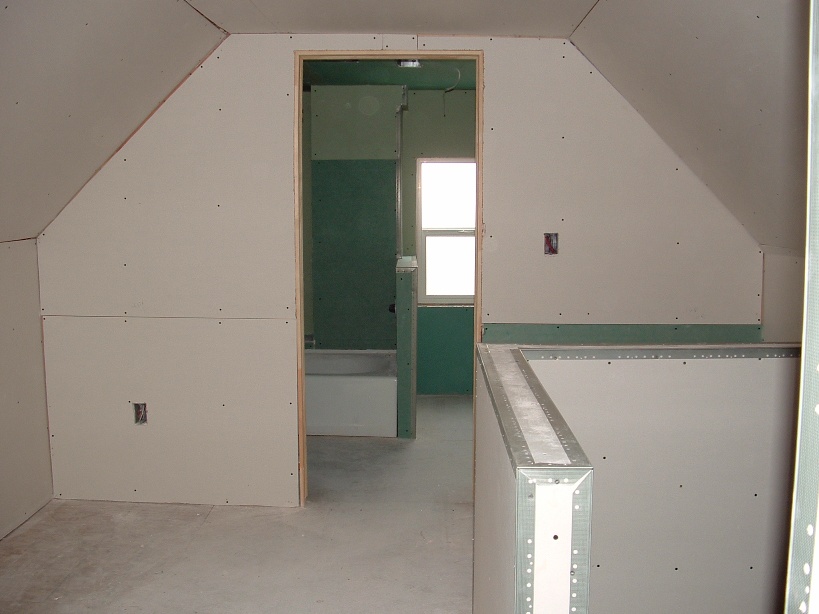

Under the stairs ready for mud! Posts wrapped and ready as well.
What a nice job and every day it looks better and better! We are loving it now!
Nov. 12…While I was away hunting elk, the windows we ordered for the porch came in and Sherry went to Mellens and picked them up. So, we went to town yesterday and picked up the material we needed to “fill in” the spaces on the porch where we were not going to put windows. They needed 2X4’s for framing and 7/32 inch wafer board to form walls. Insulation will be put in the space and we sure have lots of bags of that laying around.
Mitch was there to help with this and we went to work as quickly as we could. There is a cold front on its way and the sooner we get this job done the better. The screens I put up last Spring had to come off and I didn’t try to salvage any of it. Then the 2X4 framing went in and the wafer board cut to fit on the outside. As the spaces were filled and finished, I put the windows in last so as not to crack the glass with our hammering. The windows fit very well and appear to be straight and square. I’m glad too, because I didn’t have any room to move them once they were in the space.
It closed off the porch and the only down side is now there is less light coming in. It will help with the heat and forever there will not be a need to screen or put up plastic sheeting.
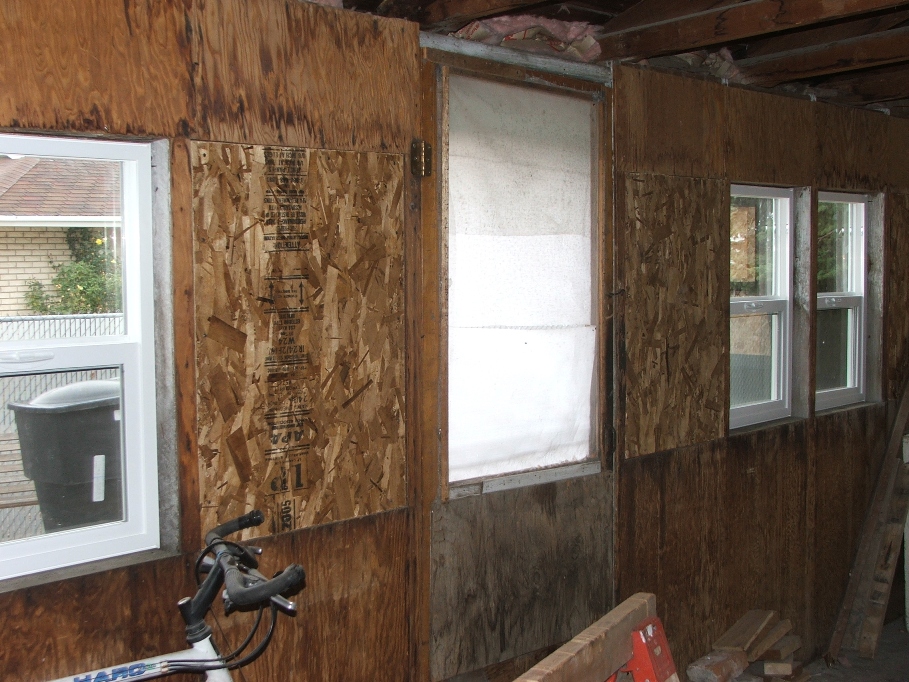
This view shows the three windows on the South side of the porch. We have a replacement door ordered and will install it when it comes. It will have glass from the top to nearly the bottom of the door and a section of it will slide to allow air in the summer time.
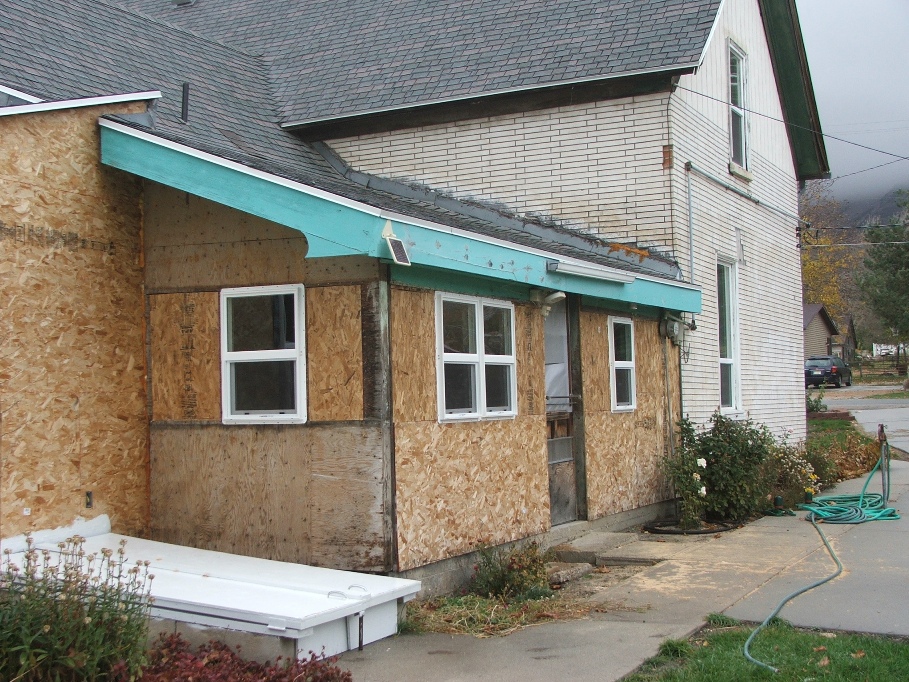
There is the view of all of the porch windows and the “new look” to this side of the house. Notice the clouds in the canyon…snow is falling in the red rocks as this picture was taken. The house can now be heated with minimal heat loss. The loss will occur through the porch roof area right now.
Nov. 14…I don’t have any pictures of the finished “re-pointing” of the bricks upstairs that I did today, it doesn’t look much different than the other side of the house, but it’s now completed!!! We will “seal” the bricks and mortar with some sort of material very soon. We want to do this before we paint.
Speaking of painting. Bryce and Ben have been working very hard to finish the sheetrocking and mudding and only have the four bedrooms upstairs to do the textured ceilings. It looks very nice and absolutely like a house at this point. Bryce said he should be completely done with the mudding by Wednesday! After that we can paint and begin the finish work. We are excited (but running out of money very quickly).
Bryce created a special tool to help him texture ceilings and I thought you might like to see it in action. It’s some sort of padded circle on a stick. He places mud on it and presses it against the ceiling. Pulls it away and moves to a different place and presses again. It creates a mass of hanging down mud of various sizes, shapes and thickness’. When he is done using this tool, he then takes a trowel and smooths the hanging mud out. He trowels this mud in light strokes and in different directions to form the textured ceiling. It looks absolutely great!

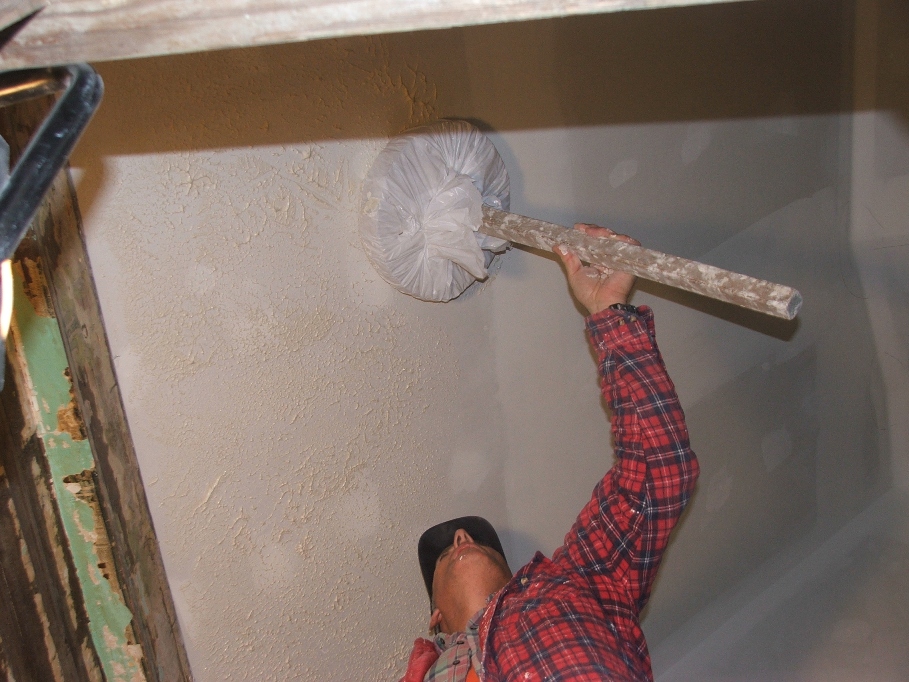
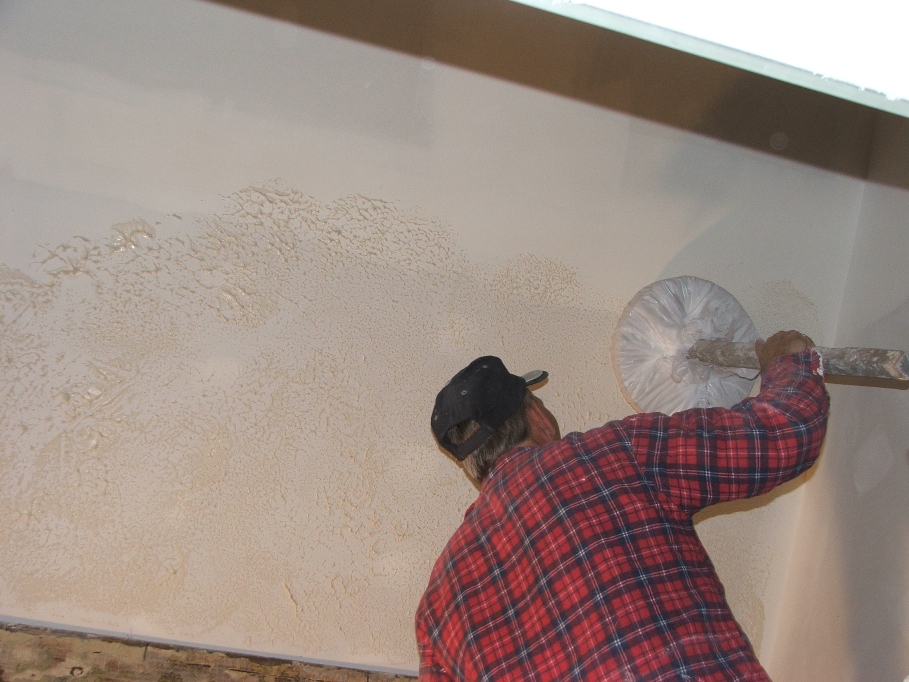
Nov. 16…Bryce and Ben finished the sheetrocking!!!! Another mile stone! We can now begin the finish work! They were paid their final amount plus about $80 or so as a reward for putting up with some minor changes and cutting sheetrock for the gas furnace hookup. Bryce didn’t want to increase the bid for under the stairs rocking and mudding, nor any of the other inconveniences we put him through. Good job guys!
Nov. 16 through 19…Bryce suggested that we use a material called MDF to trim out the inside of the windows, so we included a 4X8 sheet of that in our latest purchase of finish materials. We plan on using 1X4 pine for the base wherever the sheetrock comes in contact with the floor and where there will be carpet laid. In areas like the bathrooms and utility rooms, the linoleum will be coved; therefore no base will be required.
Other trim will be a more decorative type around the door casings and windows. The window seals will be cultured marble and has already been ordered.
I measured each window and custom cut the MDF to fit, as each window has it’s own unique shape and degree of “squareness” (or lack of square, as you see fit). Here is one example of what the MDF looks like installed.

Any gaps will be filled with wood putty and the entire frame and trim will be painted white to begin with. In the future the trim may be painted other colors as accent. We are choosing “easy” right now, just so we can get Mitch and Ang moved in. The paint has been delivered and we now have 3, 5 gallon containers of primer and 3, 5 gallon buckets of finish…100% acrylic latex…at about $55 p/bucket. Not a bad price for that much paint.
Sherry and I made another trip to town to try and find some sealer material that would seal the sanded bricks and hopefully bond the brick material together. We hit several places and none of them knew of any material that would work for us. Interstate brick manufacturing company in Harrisville, suggested we hit some of the paint stores behind the Newgate mall, so our travels eventually lead us to ICI Paints company. They specialize in paint and supplies for contractors and people like us. Sure enough they had a material called “Bond-Prep” and they reassured us it was exactly what we were looking for. Coat one, would penetrate the pourous brick material and bond the loose material together. Coats two and more would add a “sheen” to the finished brick and we could coat it as much as we wanted to get the look we desired.
They sold us a 5 gallon bucket and suggested we spray it on. I have a two gallon sprayer I bought a year or so ago to spray water repellent material on the deck (which didn’t work for that), so I’ve been using it to spray insect spray on the roses. I will use that.
My fingers were crossed as I filled the sprayer with the liquid. It came out of the bucket like milk…watered down white milk. The sprayer worked like a dream as I painted the milky liquid on the brick walls. The bricks sucked up the liquid like no tomorrow, and I was having doubts about it actually bonding the loose material together. Time will tell, as I had to wait for it to dry before touching it. What a welcome feeling when I first touched a dried brick and felt a rather hard finish, with none of the reddish dust coming off on my hand. I pressed harder and still no dust! YEEE HAAA!!!!!! Success again!
A second coat was all that was needed for us to get the desire we wanted. Just a slight sheen to the finish, and a harder finish on the outside of the bricks!
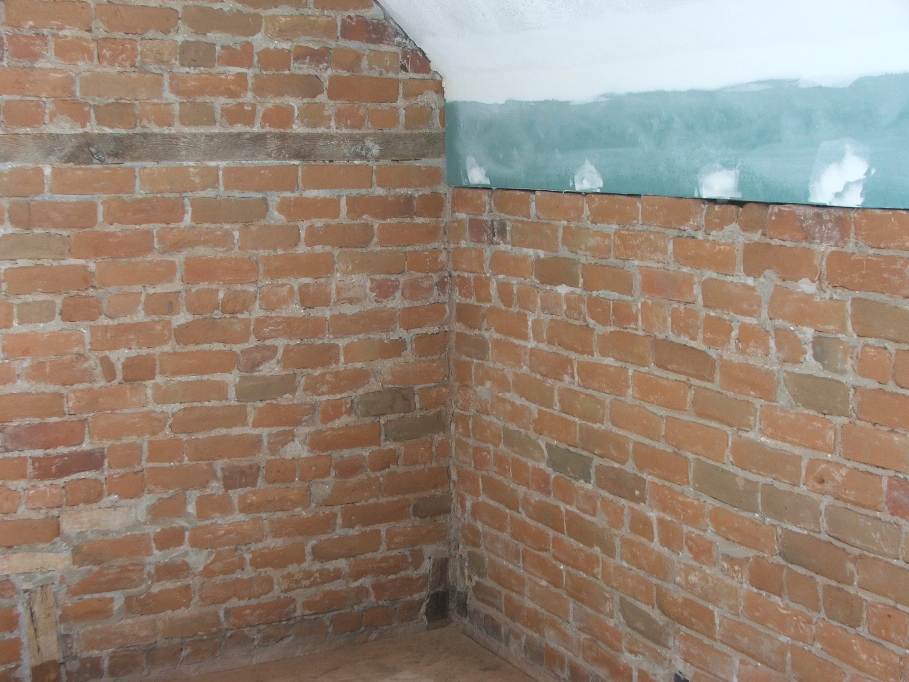

This shows the darkened look to the bricks after sealing. Oh ya! Check out my brick work in the stove pipe, upper left! Pretty handy job, if I do say so myself!
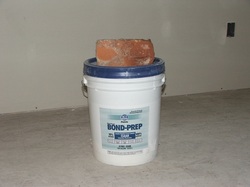
The brick on the bucket has had the right half sealed with one coat on the upper and two on the lower. I plan to take the brick to the store that sold us the bonding material so they can display how well it works.
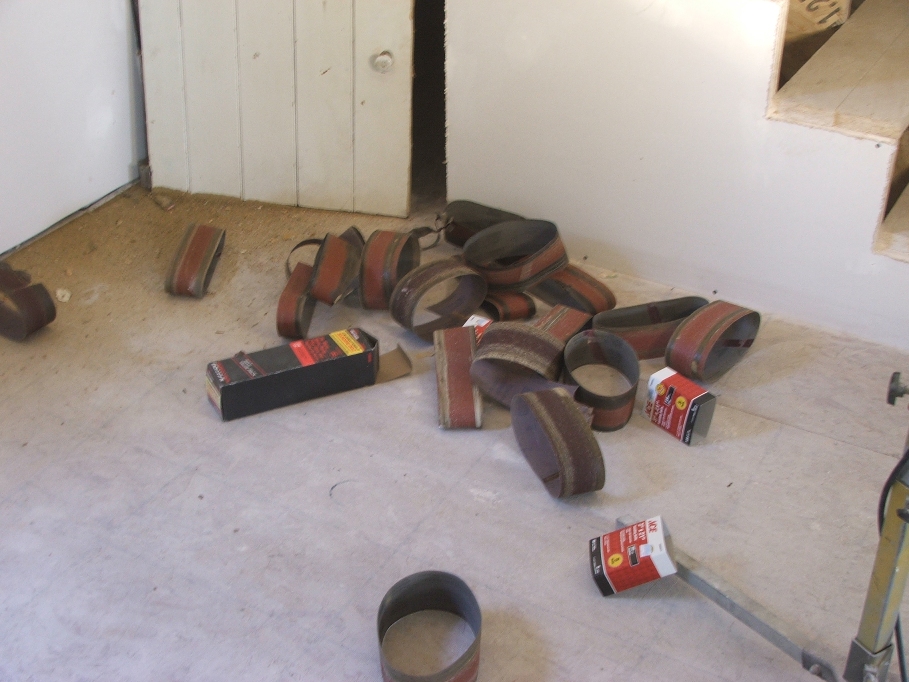
We also started sanding the wood on the wall behind the stairs. Sherry worked very hard on the upper west part with her little “mouse” sander, while I was cutting and fitting MDF around the windows. Sanding that old wood is very time consuming. It is covered with wallpaper layers in several places. Some of those layers are 5 layers thick and stuck very hard against the finish on the wood. Then there is the finish itself! A hard shiney lacquer of some kind was used after a thick and gooey stain or paint was used on the bare wood. Together these materials gum up the sand paper rather quickly and cause you to change the paper very often. As the material heats up, it also causes streaks of the gummy stuff to get on wood you have already sanded. It’s very frustrating to say the least, but it must be taken off, no matter how many pieces of sandpaper it will take.
I came in the next day with the belt sander and thought I would knock that stain off in minutes. After several hours and using 23 belts of sandpaper, I was about half done with the wall, and out of sandpaper. Another trip to town was in order! More sandpaper needed here!
Between the “gumming up” and the belts catching nail heads, it was a frustrating day on the stairs.

The East wall still has to be done, but I’m out of sandpaper for now. We will still have to use the smaller sander to get in close to the corners and where the belt sander can’t get. There is a lot of work yet to be done, but when it is done it will look really nice! A tribute to the ancestors who built it!
Nov. 22…Yesterday was a day to go and pick up more materials. We needed the rest of the trim, some caulking, glue, nails, and the doors we ordered three or so weeks ago. Wheelwright lumber treated us pretty good, they had all of the stuff we needed and the price was much better than Home Depot ($1.00 p/trim piece better)!!!
By the time we got materials and back home, the day was pretty much shot. So today was a day to attack the work left to be done. I went to work on the trim around the doors and windows and Sherry cleaned up the horizontal blinds that will be put back into the big windows up front.
I tried to use the backsaw and miter box, but had very little luck getting the cuts to align, and so I built a make shift jig to get this job done. It doesn’t work perfect, but I did manage to get the trim around the doors upstairs done and the trim around the upstairs bathroom window. Now that bathroom is ready for paint!
I also put some trim downstairs, but as the day progressed I began making stupid mistakes and decided it was time to quit for the day. My thumb is very sore from smacking it with the hammer trying to get those miserable number 6 nails to start. Sherry cut her right index finger while using my knife to try and get old putty off of the stair window frame. So we are both calling “owwie”.

This doesn’t show much of the trim, but it really isn’t much to show. Nothing fancy, just paint grade trim material.
I plan on continuing to trim out the windows and doors downstairs until it’s all done. Then I will break down my jig and set up for base and trim around the brick. The brick trim will offer the greatest challenge because the cuts won’t be 45 degree cuts. I’ll have to use the old fashion angle devise I got from Sherry’s dad after he died.
I plan on continuing to trim out the windows and doors downstairs until it’s all done. Then I will break down my jig and set up for base and trim around the brick. The brick trim will offer the greatest challenge because the cuts won’t be 45 degree cuts. I’ll have to use the old fashion angle devise I got from Sherry’s dad after he died.
Nov. 23…I got a good start and finished the trim around the windows and doors downstairs. No pictures however, but they do look good. About 1 p.m. Mitch came over to help and we started with the brick trim in the master bedroom. We were in quite a dilemma trying to figure out the angles of the cuts we needed to make, and decided that the actual angle was 45 degrees and that we needed to make two cuts each at 22 ½ degrees. I questioned this, but when we put it all together sure enough it worked like a champ. Good going Mitch!!!!
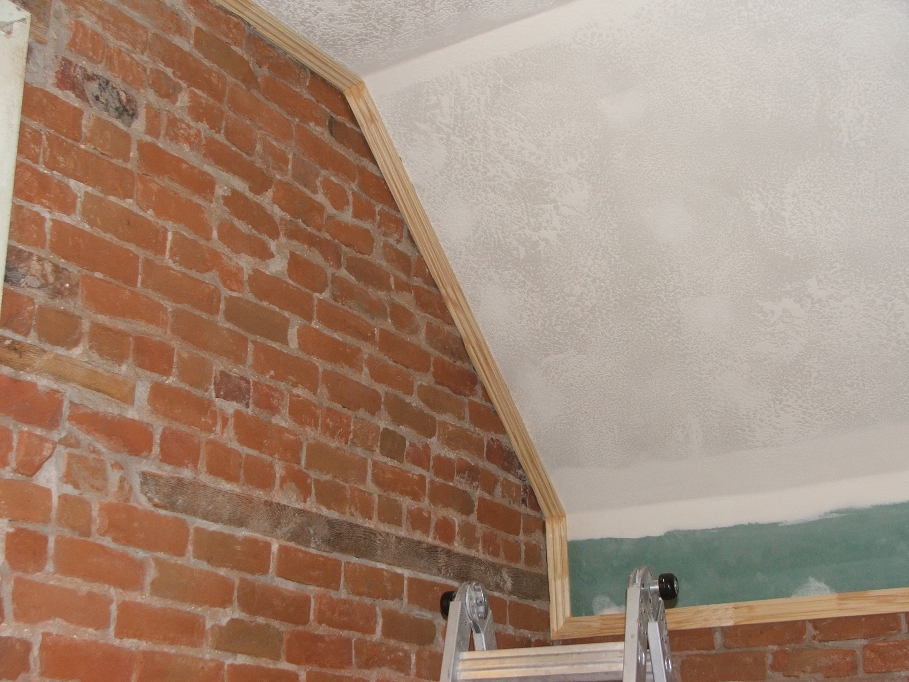
The lower horizontal piece was nailed in place, while the molding going up and around the overhead brick had to be glued into place. Once we have all of the trim where it needs to be, we will caulk the spaces between brick and molding in order to seal if all off.
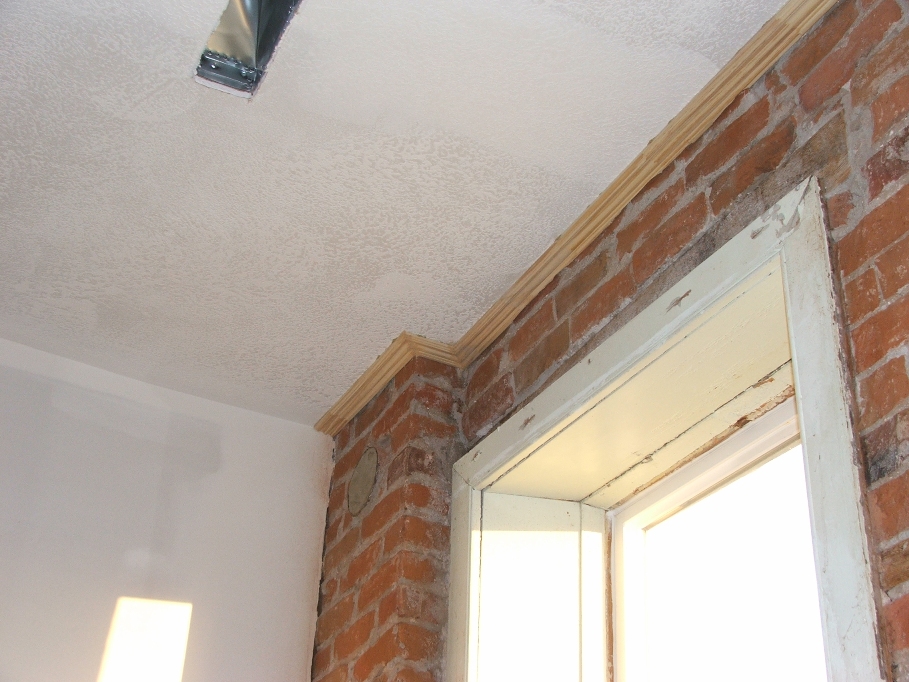
This trim will be painted white like all of the other walls etc. It looks good just like it is, but with some paint it will look even better. Tomorrow is Thanksgiving, so no work on this old house until Friday! Happy “turkey day” everyone!!!
Nov. 25…The Thanksgiving dinner and visit was wonderful. We had both boys and their families over, plus April’s mom and we had a great time. Now back to work! Mitch and I decided it was time to put on the new exterior doors because there is a storm coming.
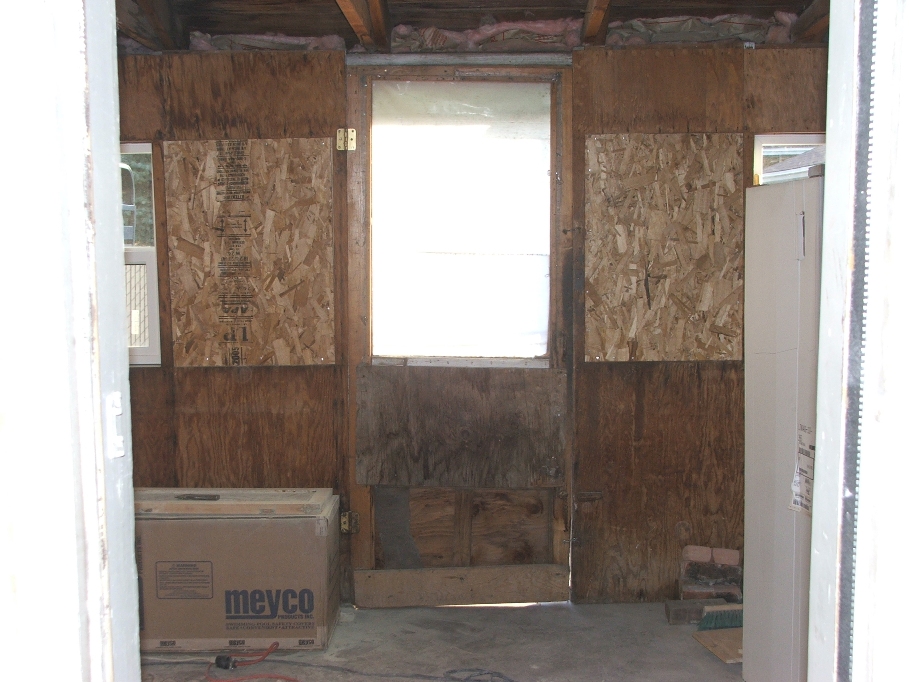
The porch door would be the first to install.
This old door has stood in place for many, many years and definitely has seen better days.
This old door has stood in place for many, many years and definitely has seen better days.

When we ordered the new door I had them put brick molding on the outside frame. Well, because of the way this old house is put together the molding would have to come off and be modified to fit the opening. It didn’t take us too long to remove it without damaging the rest of the frame. From then on, the install went quite well. A few shims, a cut down 1X2 or two and soon we had a very nice looking door. Insulated metal exterior door with holes for a lockable door knob and a dead bolt! Also, insulated sliding window!
This picture was actually taken the day after the installation, notice the snow outside! Good thing we got the door put on! It also has a threshold to help keep out the critters and now the bottom of the door doesn’t hit the cement like the old one has for years and years. We still need to insulate around the frame and put up some trim, but it’s on and done!
Next was to go upstairs and work on the balcony door. That one should just slide in place with the frame they built it in. Simply take out the old door and install the new one. Maybe an hours work!

You have seen this picture before, but I thought you might need a reminder as to how the old door looked.
We took the old door off from the hinge side and removed it. Pulled up the old carpet and did a little repair to the old threshold. Then tried to slid the new door and frame into place! Trouble was noted very quickly. When I measured the door, that was exactly what I had done, “measured the door”. Those were the dimensions I gave Wheelwrights when I ordered and that is what they made the frame to fit! What I didn’t notice was the way the old door frame was built. Remember way back a few months, I said the old door frames were part of the structure of the house? Well this one was no different and they had cut the door stop out of the frame. Therefore my door measurements were ½ inch too wide and thus the new frame was that much too wide. What now????
Well we can’t take the door back as it is a custom made door. So there had to be a way to use it. We pulled off the frame from door latch side, that allowed the hinge side, top and threshold to go into place. Then we cut the latch side of the frame in half lengthwise and that fit nicely into it’s respective place in the old frame work. Then with a little modification on the outside portion of the frame we had ourselves a working door!

We packed insulation around the space between the old frame and the new, and will put up trim very soon. This door is also lockable, insulated metal exterior, with a full length insulated window! It also has a nice raised threshold that will keep out critters and weather!
Nov. 28…Painting! We have a deadline to have the upstairs bathroom painted before Wednesday. This is the scheduled day to have R&K floor covering and cultured marble manufacturing come in and install the marble around the tub area and measure for the vanity top. So it was over there early and put on a sealer coating and try to get at least one coat of finish on the walls. The sealer coat was done in short order and then we had to wait about 4 hours before putting on the first coat of finish.
While we waited, we didn’t waste any time as we still have a lot of trim work etc. that needs installing. I worked on the trim around the stairs, and Mitch worked on fixing a problem with the downstairs sliding door, the small door that allows access under the stairs, and the trim between the stairs and the tv room walls.
Nov. 29…I hit the house early and finished painting the bathroom upstairs. Just after I completed that job, here came Steve Bingham to make a final measurement on the vanity cabinet that will fit in the corner of the bath area. Things are coming together quite well at this point. Steve said he would be over to install the cabinet tomorrow and then the cultured marble folks will be here on Thursday. They can measure the vanity top at that time. Good things are happening.
It’s amazing to us, the difference paint makes the place look. We are loving it!
With no time to waste, I went to filling the gaps between the brick and the molding with fiberglass. Some of the spaces are quite large, while others don’t require any filler. The plan is to make it look better by filling the gaps with painters caulk and when it is painted, it should look more finished than it does with the open spaces. Last night I filled and caulked a bit of the wall in the old gunroom (SE bedroom/infant room/closet) without the aid or anything to guide my caulking gun and the “mess” shows it.

This picture is blurry, but you can see a very “un-straight” edge to the caulk.

Today, under Mitch’s direction, I masked the edge with masking tape and then used the caulking gun. The excess caulk stuck to the tape rather than the brick. The end result is a straight line of caulk rather than a mess like you are seeing above.
I used a full caulking tube on the two brick panels on either side of the hallway door leading to the balcony and that was all the caulk I had. You can see from that, that I will have to buy a “lot” of caulking to finish the task. I figure three tubes for each of the three bedrooms, and a couple more to complete the West end of the hall, and the remainder of the the old gun room.
The masking of the remainder of the brick areas was then completed by myself, while Sherry finished sanding the wood on the stairs and then went to work on the small door frame and window that will be painted and put back on the stairs above the landing.
She finished the sanding of the stairs and when she was done I was able to finish the trim work around that sanded wood. It looks like it’s ready to sand, stain and oil finish! We plan on doing that as one of the last phases in the painting. We will mask it to keep the white paint from ruining the sanding job.
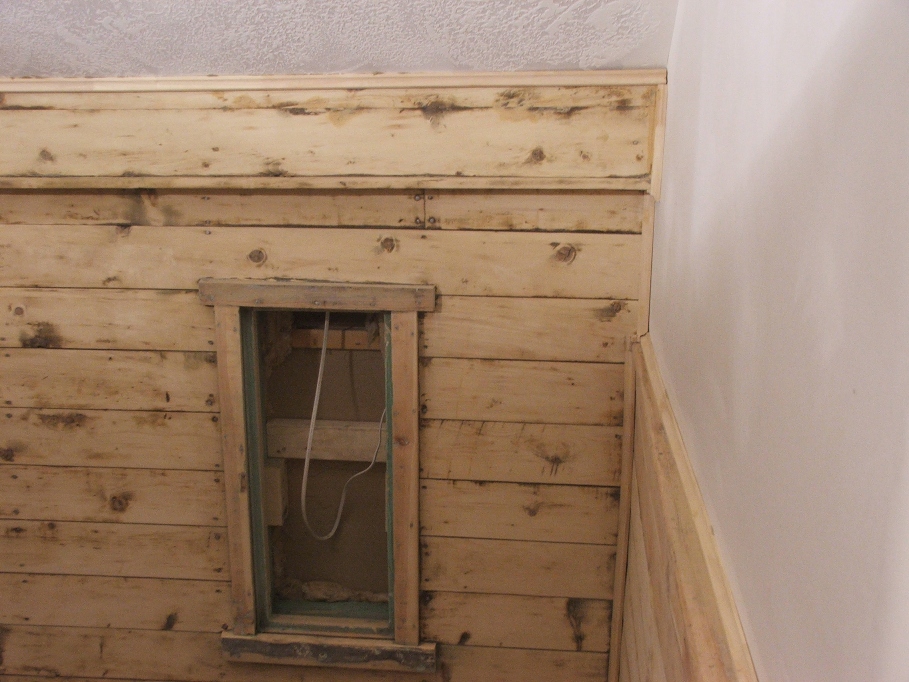
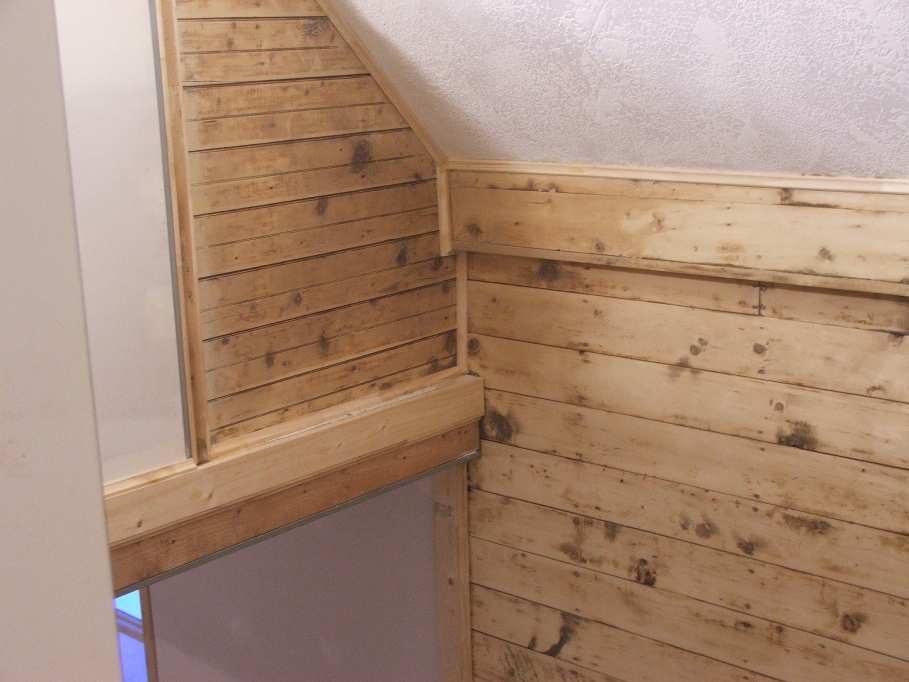
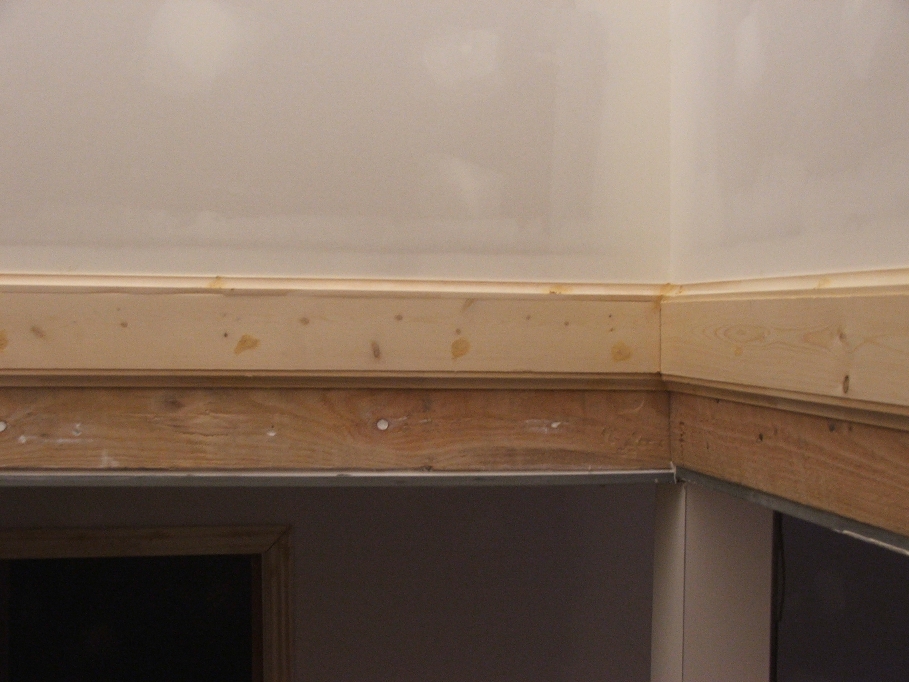
The paint that Sherry has been sanding off is quite thick in places. At the bottom of the door frame you can still see paint, but it’s very smooth and will cover with white very nicely. She has spent a bunch of hours sanding in this area and it’s time she called it done! I think the trim you see in this will be stained along with the other wood. It has turned out to be quite a nice looking job. This was trimmed out to make it look better as well. It’s amazing what a simple 1X4 pine board can do to finish the look of an otherwise “ugly” scene.
Tomorrow is the last day of the month and I have to go up and pay property taxes. I would have mailed them, but they forgot to send us one on the Dutch “A” LLC, far North piece. So, the day will be consumed with “honey do’s” that have gotten way behind…Pick up the hoses, buy and install a new battery in the motor home, winterize the motor home, take care of the weekly chore of checking the chemicals in the hot tub and probably going to town to buy the “last” of the trim wood, stair treads and risers and possibly the by-fold doors for the furnace, and the door that leads from the tv room to the utility room. I would rather paint!
Dec. 1…Yesterday was spelled out pretty well above and no work was done in the old house. But today!!!! YES!!!! More work got done. My goal was to get the door to the utility room installed and trimmed out, and maybe the bi-fold doors installed as well. There is a lot to do, and Mitch has the pressure on to get the painting done soon. I attacked the door to the utility room (tv room to utility room) with earnest. I wanted it to go smoothly and be done quickly. Go slow to go fast! I heard that at work one time.
Anyway, it went in pretty good, but I had to cut the door frame down some, in order that it would fit.
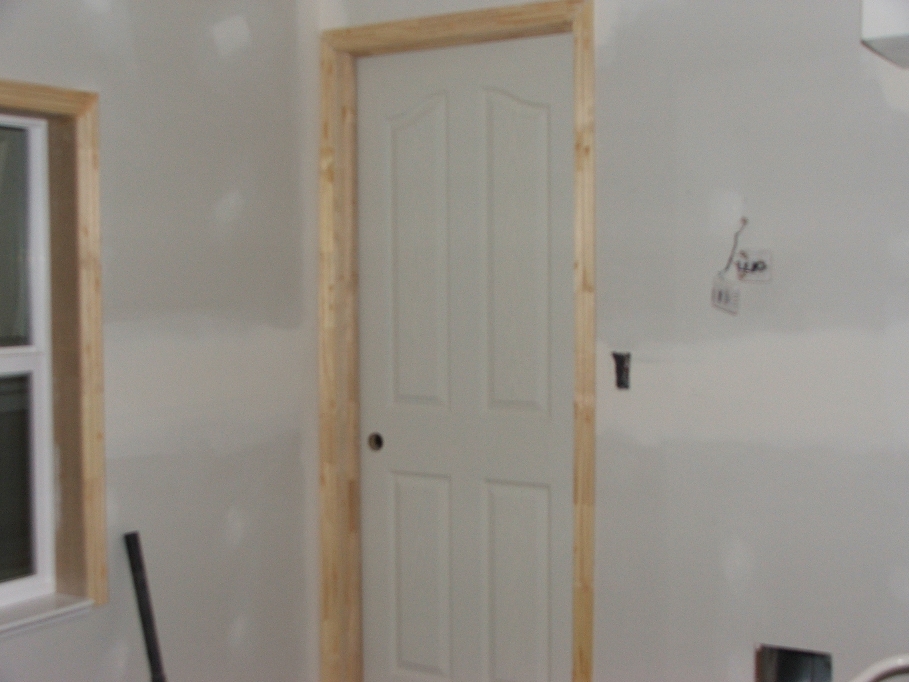
Sorry about the picture being fuzzy, but it was dark and I had the flash on my camera, but it didn’t register quickly enough to make a nice picture of this. It looks quite nice however. This is the view from the tv room toward the utility room.
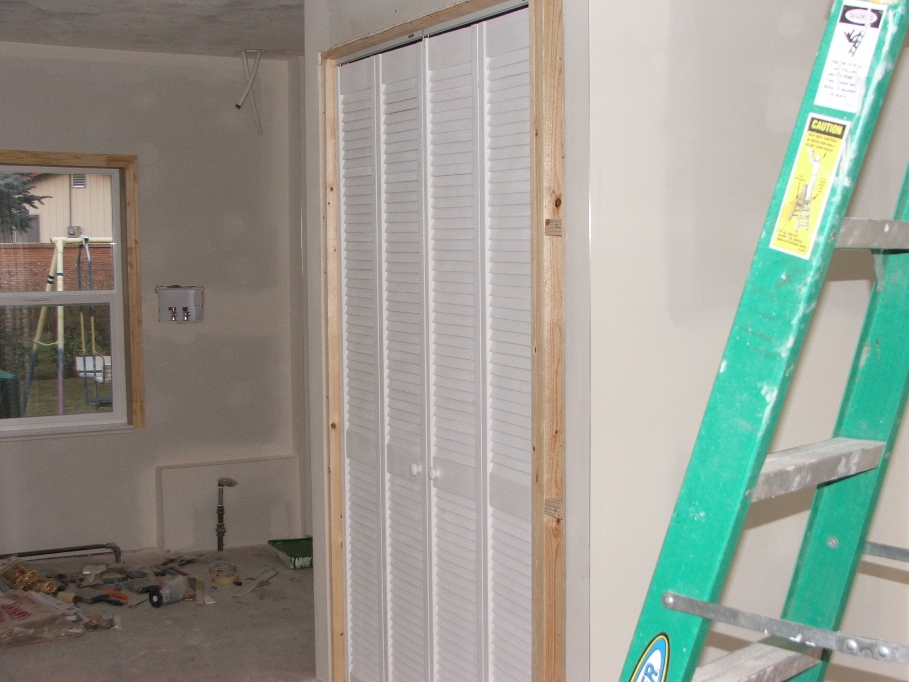
Next was the bi-fold doors around the furnace area. I bought Home Depot specials for about $45 each, and 1X4 wood to frame it in. First, however, I had to build a small “wall” in order to take up extra space in order that the doors will close properly.
You can see the “small wall” on this side of the bi-folds. I’ll have to sheetrock this in order to finish the trim etc. Notice outside, there is no snow!! These doors had to be cut down in their length and width in order for them to fit. Sometimes I wonder how I get anything done, with all of the modifications I have to do. It seems that just as I think I have everything under control another thing comes along and messes me up.
As I have been messing around the guy from R & K has been upstairs installing the cultured marble around the tub and shower area in the upstairs bathroom. Let’s check on the progress so far.
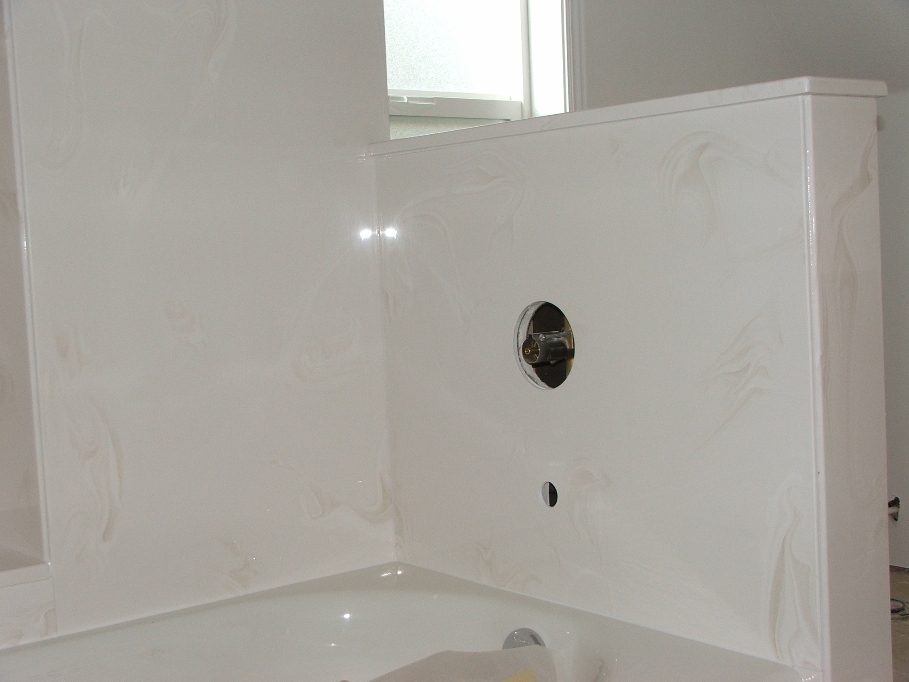

WOW!!!! Does that look good or what???? Nice job! This sure will make for a nice tub/shower very soon.
Actually, this writing is covering from the first of December through the 6th! Fooled you huh? Lots and lots to do, and very little time! Mostly because of Mitch’s time line for painting! He has guys lined up to spray paint on Wednesday Dec. 7th! “D day”! I have a lot to do and little time to do it.
-------------------------------------------
Here comes the guys from “Better Way Insulation”, to blow in the insulation into the attic of the house! Another milestone, as this house has never had insulation! They are going to blow in from 10 to 12 inches of insulation to give us at least an R factor of 38.
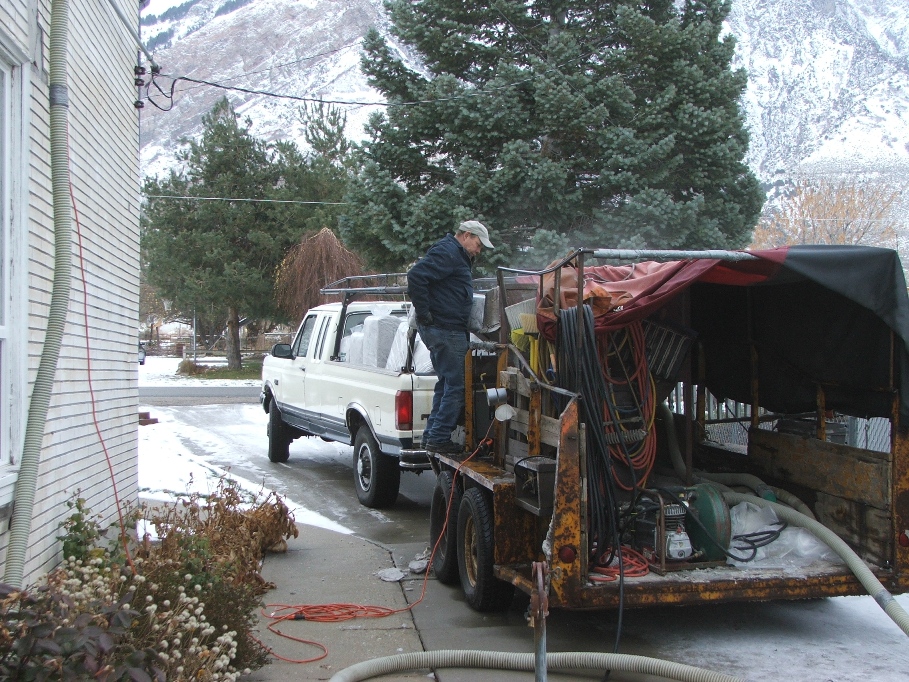

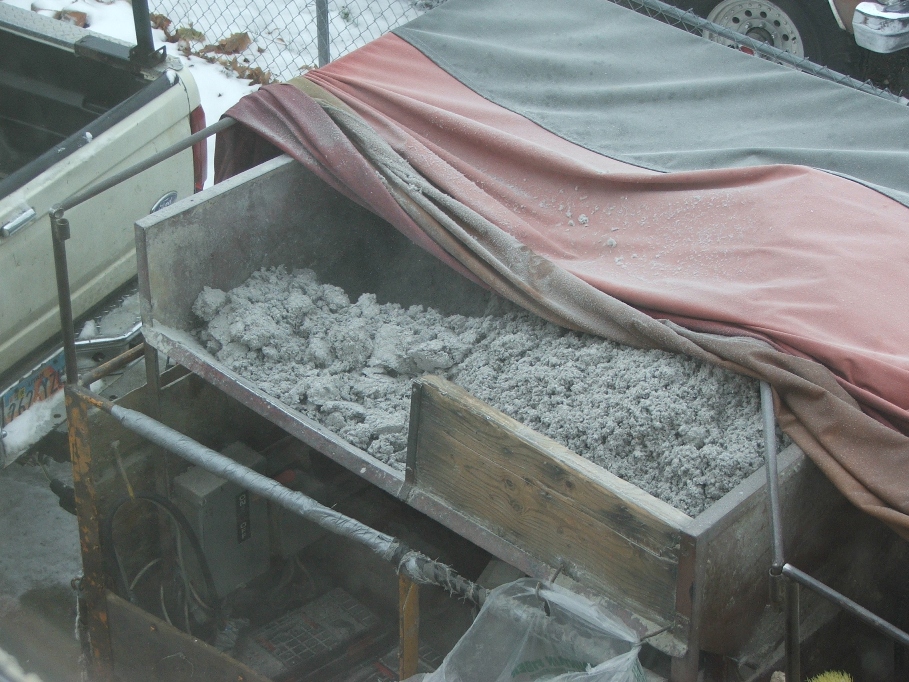
These two work very hard. One operates the “auger” and makes sure it’s full of insulation while the other climbs up into the attic and operates the blow tube. In this case the owner is the blow tube guy. I’ll show a picture of him soon. They chose to go through the upper South window with the blow tube and you can see it going up the wall.
As the chute empties, it need refilling with cellulose material. They are putting 12 inches of insulation up in the attic and that is 384 square feet of space! A lot of insulation will be needed.
As the chute empties, it need refilling with cellulose material. They are putting 12 inches of insulation up in the attic and that is 384 square feet of space! A lot of insulation will be needed.
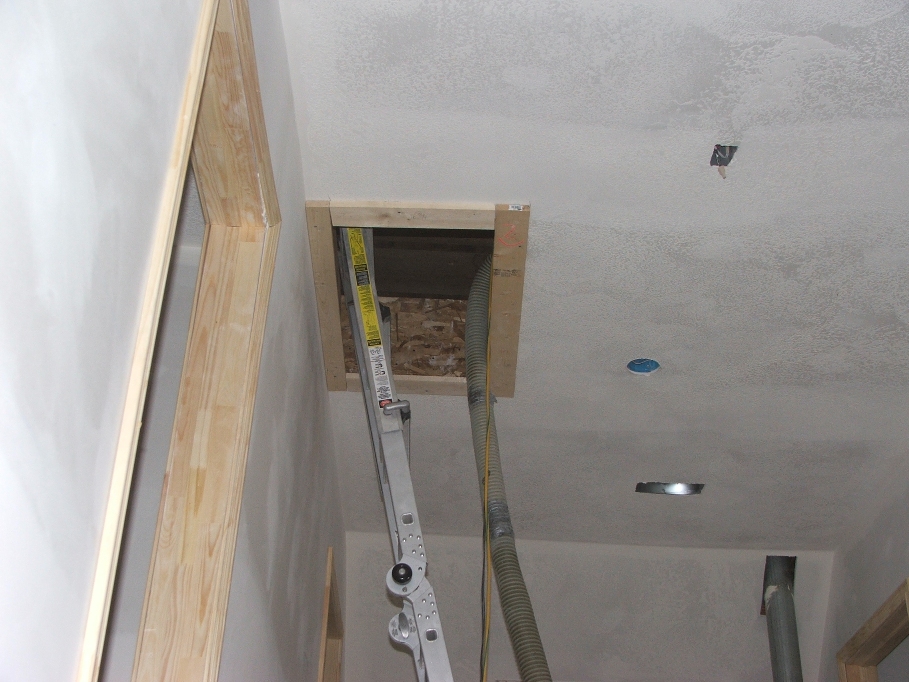
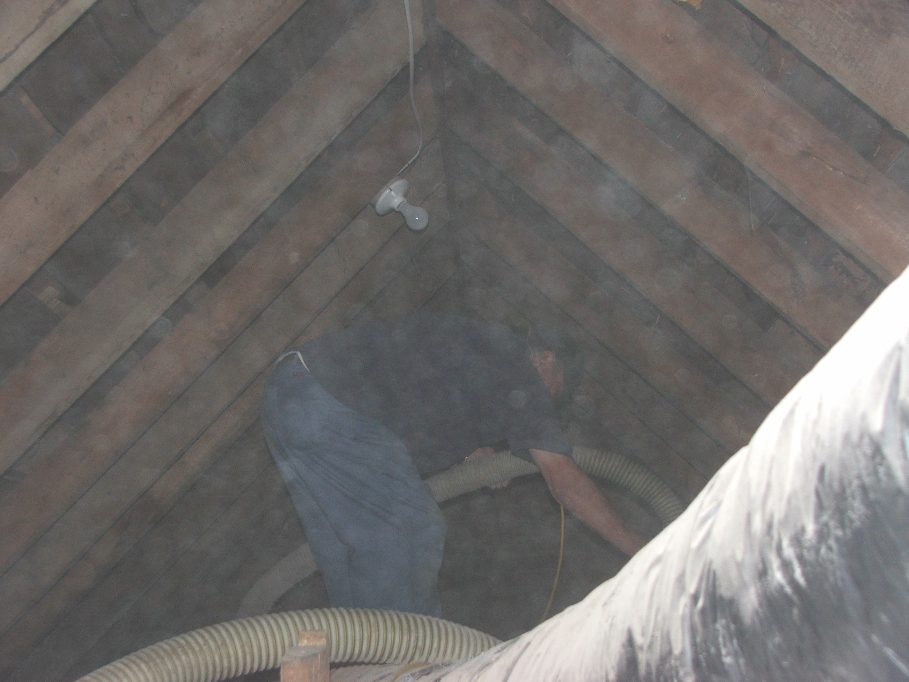
As more days go by, more and more things are happening. No time to waste. I still have to sand, put down base, fix the stairs etc. etc. All before Wednesday! Go Bears Butt, Go!!!
One small thing that needs doing is to trim the entry from the living room to the tv room. Sounds simple but everything takes time. Here is the look of that entry. By taking two pieces of molding and putting them together at the 90 degree corner, things turn out pretty good.
One small thing that needs doing is to trim the entry from the living room to the tv room. Sounds simple but everything takes time. Here is the look of that entry. By taking two pieces of molding and putting them together at the 90 degree corner, things turn out pretty good.
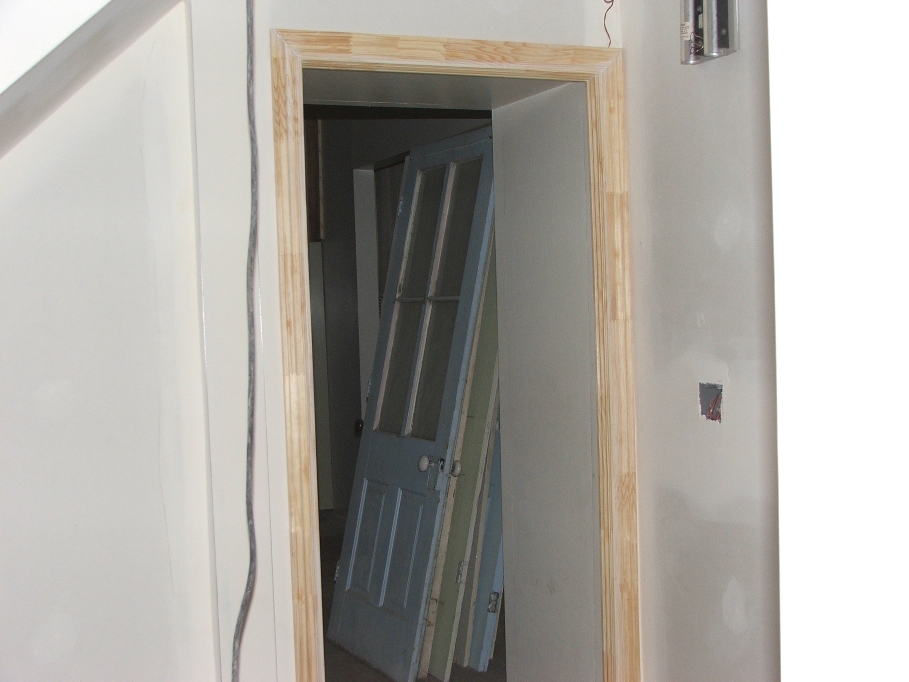
This the view from the tv room looking into the living room. Pretty nice! Another small item out of the way! What’s next?
I guess it will be the trim around the tv room door to the utility room, I have to add wood on the utility room side in order for it to look good and to be able to trim it out.
I guess it will be the trim around the tv room door to the utility room, I have to add wood on the utility room side in order for it to look good and to be able to trim it out.
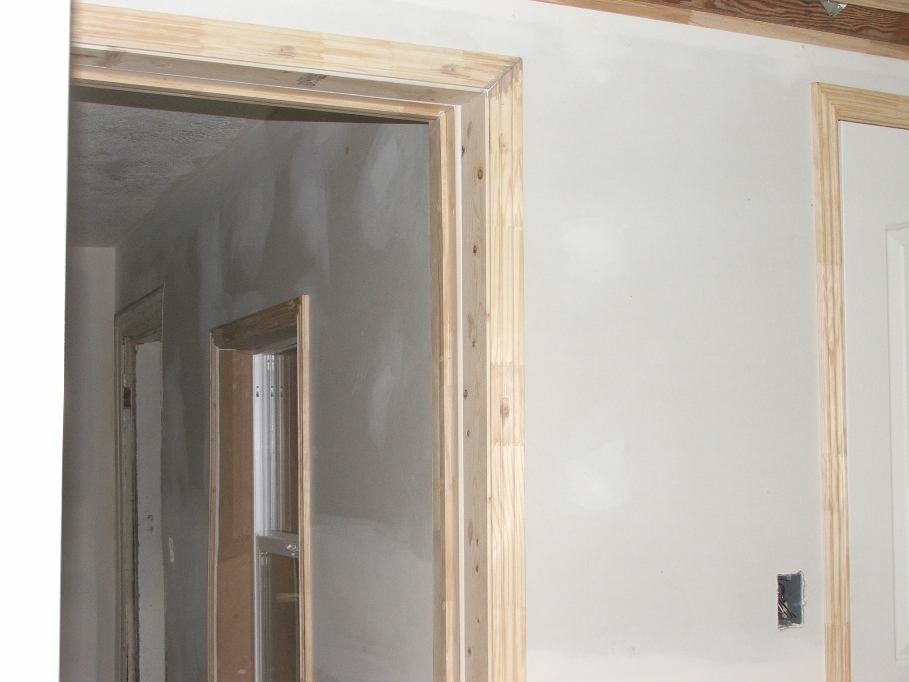

I don’t have a “before and after” picture, just these which are actually the “after pictures”, When I did this frame add on, I had to cut the top of the door off in order for the door to close. With things so “out of square”, small things cause major problems. It’s fixed now and no one will know any different. Still so much to do and so little time! Go! Go! Go!!!
As with every job, especially at this point in this task, everything has to be done “right now” (and not “in a minute”). We bought a cabinet from Steve Bingham and his son, who make cabinets, and they installed it on Friday (Dec. 2). It’s one they built special for someone else, but then that customer cancelled the order, so they have been looking to sell it for a discount price. We are the lucky ones! Take a look at it installed.
As with every job, especially at this point in this task, everything has to be done “right now” (and not “in a minute”). We bought a cabinet from Steve Bingham and his son, who make cabinets, and they installed it on Friday (Dec. 2). It’s one they built special for someone else, but then that customer cancelled the order, so they have been looking to sell it for a discount price. We are the lucky ones! Take a look at it installed.
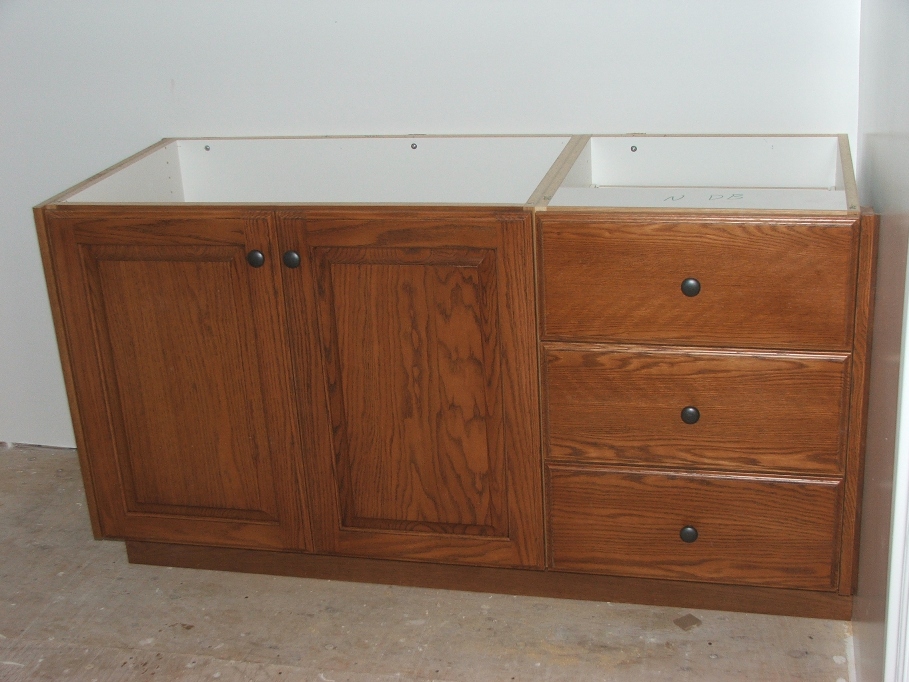
Now that is one nice looking vanity cabinet! Solid hardwood, special stain and sealed with nothing less than “love”. The drawers open sooooo smoothly, they are almost like gliding! A cultured marble top will look excellent on top of this masterpiece!
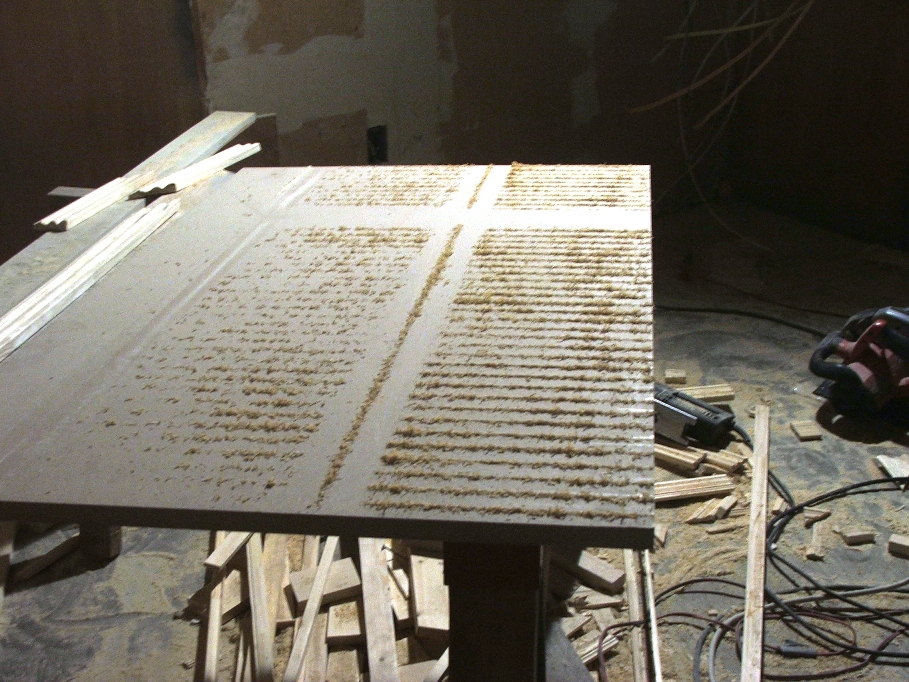
I thought you might like to see this miscellaneous picture I took after cutting down the bi-fold doors that went on the furnace opening. It’s nothing special, but interesting. Check it out.
Sort of a cool picture!
Sort of a cool picture!
Well next is the stairs and finishing some of the other things that need doing. It’s getting close to Wednesday!!! Let’s Go!!!!
The stair treads and risers need to be installed, but we had to make sure no other contractors or people would be using the stairs while we were doing our thing. So Mitch and I attacked the stairs early. It didn’t take too long to rip up the temporary treads and figure out how to attach the treads and risers. We chose to use the glue we have to help attaché the treads down and maybe eliminate the squeaks. The stairs look real good and absolutely do NOT squeak!!!
The stair treads and risers need to be installed, but we had to make sure no other contractors or people would be using the stairs while we were doing our thing. So Mitch and I attacked the stairs early. It didn’t take too long to rip up the temporary treads and figure out how to attach the treads and risers. We chose to use the glue we have to help attaché the treads down and maybe eliminate the squeaks. The stairs look real good and absolutely do NOT squeak!!!

The first four steps are done and Mitch demonstrates their usability!!! Thanks Mitch! Shortly after putting these treads down, we took a breakfast break and when we came back to work, Cody Wright came over and offered his help! Great! He could help Mitch with the rest of the stairs, while I went to work on sanding and finishing some of the other work needing to be done. Wednesday is two days away!!!! Go!
I sanded upstairs, while those two finished the stairs. Then they both had things to do for the afternoon and that would leave me to continue to work on the place.
I sanded upstairs, while those two finished the stairs. Then they both had things to do for the afternoon and that would leave me to continue to work on the place.
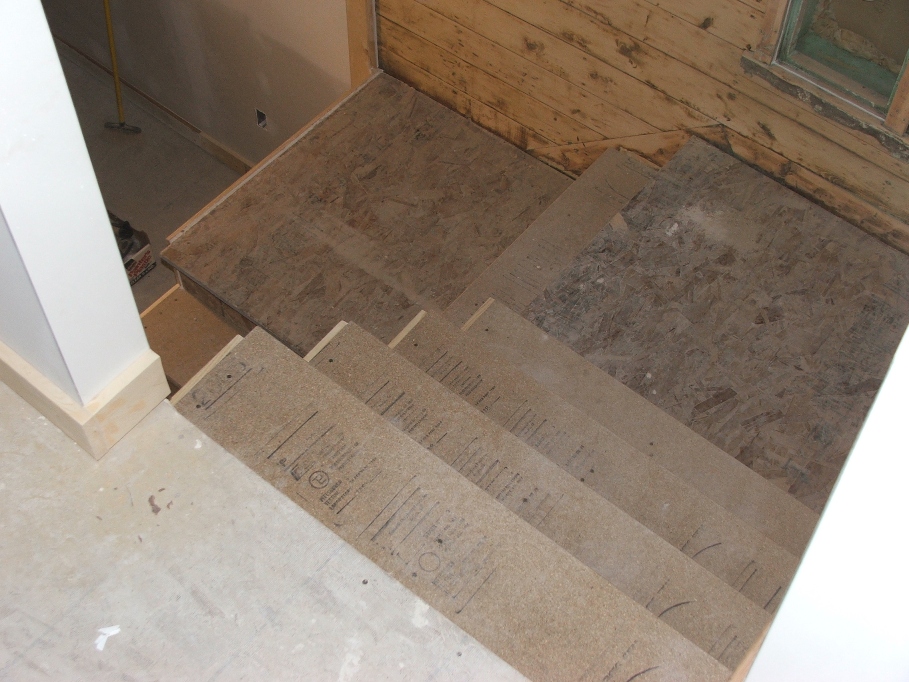
The stairs turned out absolutely wonderful!!! Good job guys, they are nice and very quiet!
Viewed from above! Solid!
Viewed from above! Solid!
Still more to do! I have to frame in the vent pipe from the furnace in the dining room/living room in the front of the house, put up some trim on the stairs, finish the trim around the bi-fold doors in the utility room, finish the base in the utility room and; OH YES, since we decided to put down “floating flooring” in the baths and utility room, I need to cut base for those rooms as well. Go! Go! Go!
Dec. 6…Tomorrow is paint day! And all are lined up. I have to put up the wood, trim etc. plus clean up! Oh my! Can I do it????
Yes! I’ve always said, “You can do anything you want WHEN you want to do it”! I guess that has been the story throughout all of this reconstruction. From a guy who doesn’t know anything about construction to this. It’s amazing it hasn’t fallen down yet.
I got over to the house early (7 a.m.), started by cutting and installing sheetrock in the “small wall” by the furnace and trimming out the door way. It looks quite nice, except for a space that needs “mud”, but I don’t have two days for the mud to dry, so, it will go un-done.
Next, the base in the utility room where the carpet will go and then on to bigger and better things. The upstairs vent pipe!!!

I didn’t have a clue as to how I was going to box this vent in, but as I figured and planned it turned out quite well.
The slant of the roof gave me quite a time, as I don’t know how the “real” contractors figure out angles, and so I started with a squared off top and trying to figure what angle and how much to cut off in order for the bottom of the wood to be on the floor, at the same time the angle would touch the ceiling. I kept trying and trying. Cutting off piece after piece until I finally had it. The funny thing about it all was what I had left when I completed the job. Check this out!
The slant of the roof gave me quite a time, as I don’t know how the “real” contractors figure out angles, and so I started with a squared off top and trying to figure what angle and how much to cut off in order for the bottom of the wood to be on the floor, at the same time the angle would touch the ceiling. I kept trying and trying. Cutting off piece after piece until I finally had it. The funny thing about it all was what I had left when I completed the job. Check this out!
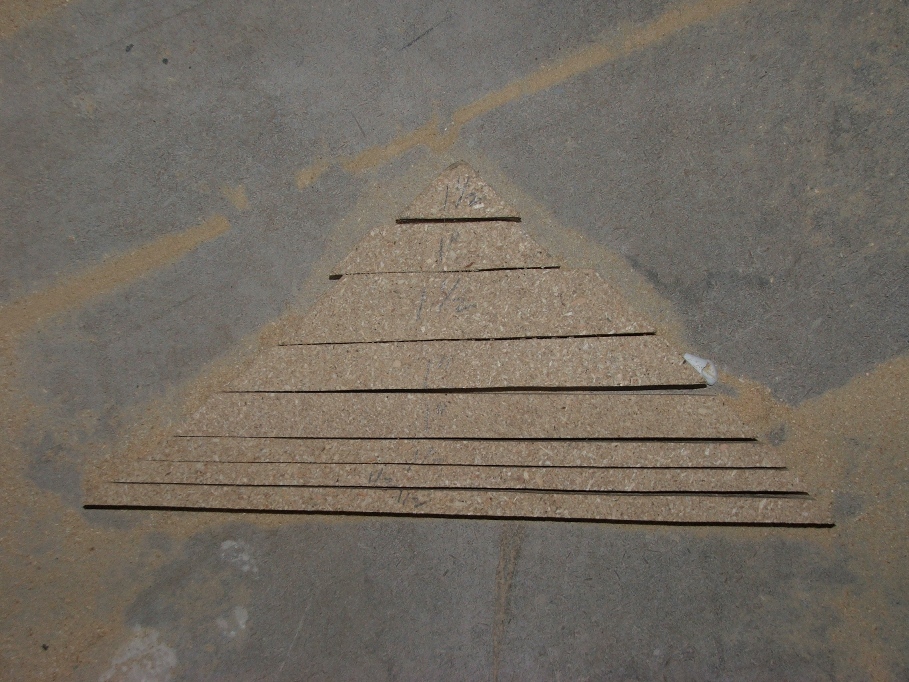
Each piece I cut is marked with the amount I measured and cut off! Later Roy told me how I could have done it with only one cut! Dummy me!
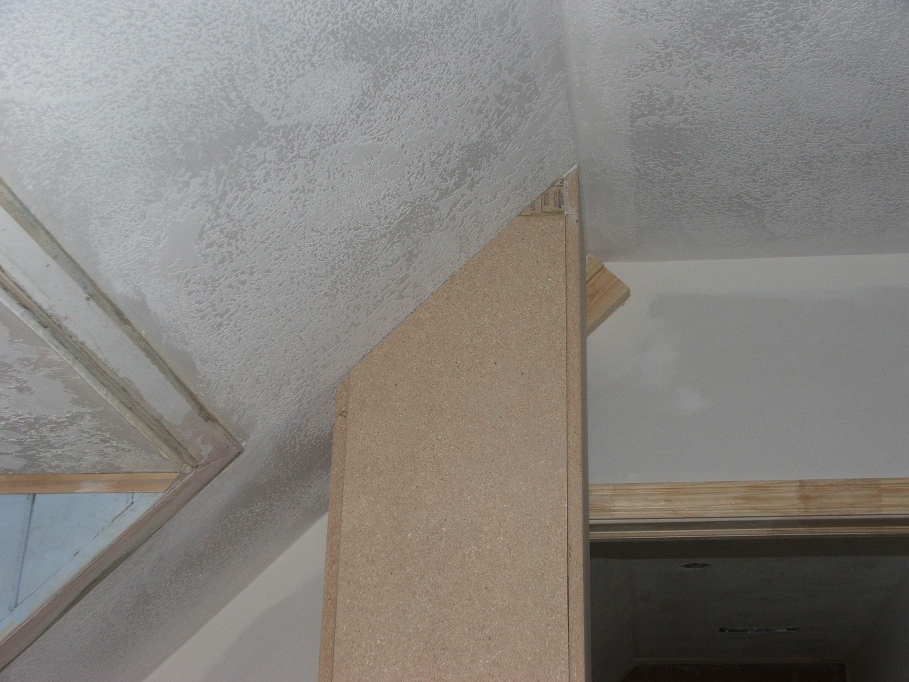
This is the angle that turned out once I had cut all of those pieces. Pretty tight cut if I do say so myself.
Well the vent pipe cover is in place and I hope we will be able to remove the old radiant furnace in the dining room/living room area next year and pipe in heat from the main furnace and use this vent pipe cover to hide the new pipes that force heat into these areas down stairs! Heaven will decide!
Well the vent pipe cover is in place and I hope we will be able to remove the old radiant furnace in the dining room/living room area next year and pipe in heat from the main furnace and use this vent pipe cover to hide the new pipes that force heat into these areas down stairs! Heaven will decide!
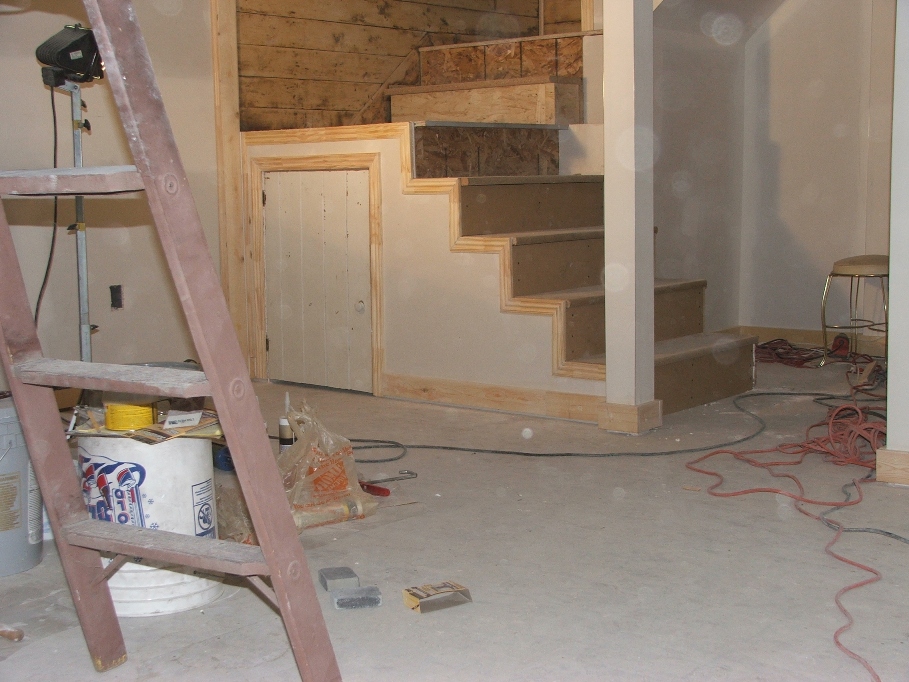
Well now lets look at the stairs with the trim around the sides.
This is sort of cool! Today we had the carpet measured and the guy said that the installers would have to use a “Z” mold above the trim to “tuck” the carpet into. I think it will look wonderful! And Sherry and I are excited to see the finished product!
This is sort of cool! Today we had the carpet measured and the guy said that the installers would have to use a “Z” mold above the trim to “tuck” the carpet into. I think it will look wonderful! And Sherry and I are excited to see the finished product!
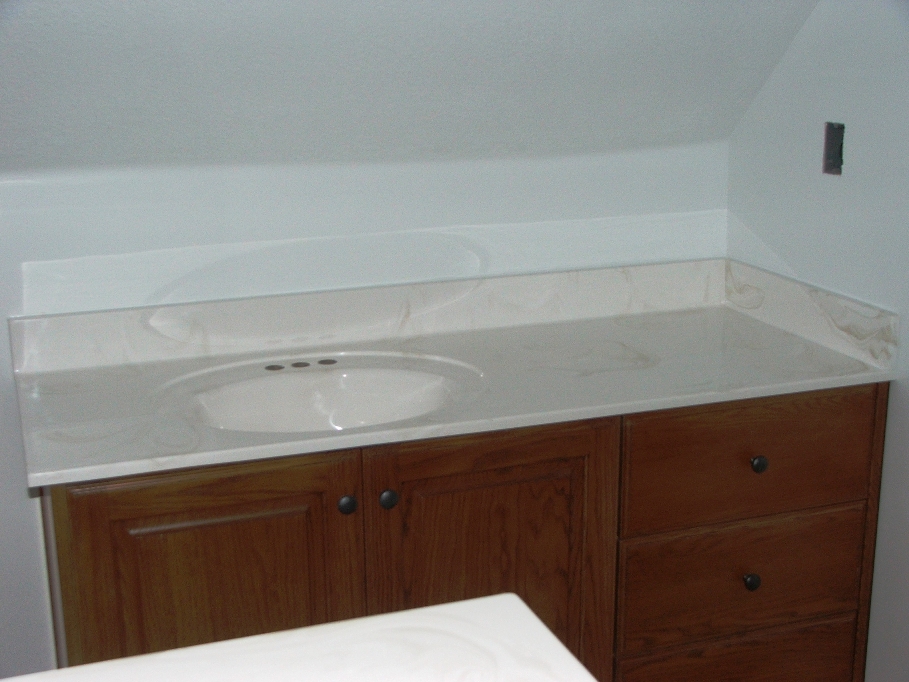
Again, as one thing is happening, another is also going on. R&K sent out the vanity top and he installed it in a matter of minutes! What a wonderful addition to the upstairs bathroom. Magnificent!!!!
Isn’t that nice? Add some hardware and the bathroom will be lovely!
Isn’t that nice? Add some hardware and the bathroom will be lovely!
Dec. 7-9….Wow! What a last three days it’s been. Completing things getting ready for paint, painting and then cleaning up after painting!!! Lots and lots of things have been done.
Cody Wright and Stacy Younger, came over to paint on Wednesday the 7th at about 8 a.m. Cody had borrowed a paint sprayer that worked “air less”. Stacy took a day of vacation with the Willard City to help with the work. Cody is his own boss, and the day was cold (10 degrees) and so he couldn’t lay rock (his profession), so this would work out real well for him. I have never spray painted a house before, but they assured me that we would be done today (7th). OK! Let’s go.
We masked the entire house. We used “red” colored tape similar to duct tape to put around the brick and then used the usual “blue” masking tape to attach painters plastic to the red tape. It went on rather quickly with four of us putting it up. Cody, Stacy, Mitch and me. It took about two hours to mask everything and then the fun started. Cody got the sprayer ready; we stirred up the paint with a drill and paint stirring rod and ran an electrical cord. Time to paint!!!
Cody took charge and even though he isn’t a painter by trade, he did an excellent job of jumping and running from room to room painting the ceiling, the walls the floor, himself and the rest of us. It was quite a show, but when it was done it looked “WONDERFUL”!!!!!
Stacy kept track of the hose and marked unpainted areas for Cody to hit again. Mitch ran the “spatter brush” and I watched with ahhh! Occasionally, I would notice the paint bucket running out and I would mix up another batch and pour it into the bucket.
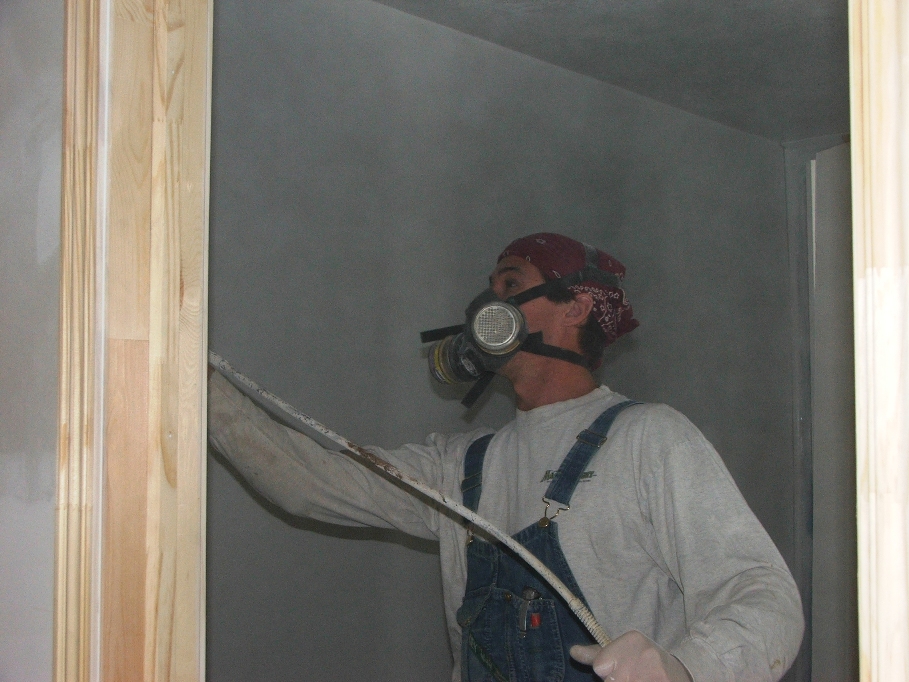
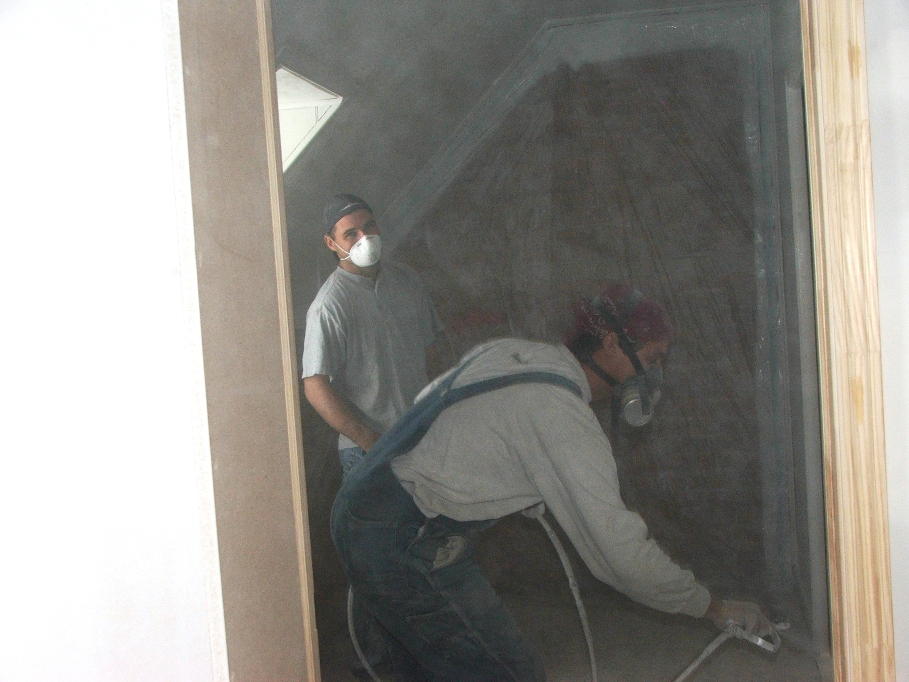

Before it was over, we used 15 gallons of primer and 24 gallons of finish to put one coat of primer on and two coats of finish on the entire house!!!
The first day (Dec. 7th) we got the primer on and one coat of finish. Cody reminded us that the paint that was on the painters plastic would “flake off” the next day, after it dried and would make a mess on the finish coat of paint. We would have to do something to take care of the flaking. But what? We didn’t know. We did know that we were out of paint. We had used 15 gallons of finish and that was only the first coat.
Mitch put a call into Matt Rowley, who works for AIS in West Ogden. He is the one who we have purchased all of the paint from so far and he was on his way home from a swan hunt in West Box Elder County. He would call in the order for 15 more gallons of paint and we could pick it up in the morning at AIS about 7 a.m. It’s been a long day, but we will be at AIS at 7 in the morning.
Mitch and I were there at about 7:10. The sign on the door said they would open at 8 a.m. Not good for us…Cody would be at the old house at 8 to go to work. We drove around the side and found an open door, went in and found a lady who gave us chocolate drinks and said they are always open at 7 a.m. (I think they need to change the sign on the door). We had our paint by 7:30 and was on our way home.
Once home, we assessed the “flaking” and started to put up painters blue tape over the areas on the plastic that were most susceptible to flaking. We used about 6 rolls of tape, many pieces of newspaper and much discussion. But we got it done and Cody approved.
He went to work and soon, it was done! Halleluiah!!!!!!
Cody gave one full day and half another! What a guy! Thanks Cody and Thanks to your wife and family and those that work for you who waited patiently while you helped the Bears Butt do his job!!! I will never be able to repay you for your kindness.
Stacy gave up a whole day of “vacation” to help! Stacy why would you ever do that, when vacation days are supposed to be used for fishing, hunting, camping or sight seeing.
Thanks again Stacy! I will never be able to repay you for your kindness either.
When the job was done, the clean up complete, we were at AHH to see the end result. I could not believe my eyes! And I don’t suppose any of you would find this anything but amazing either. Check out these flicks.
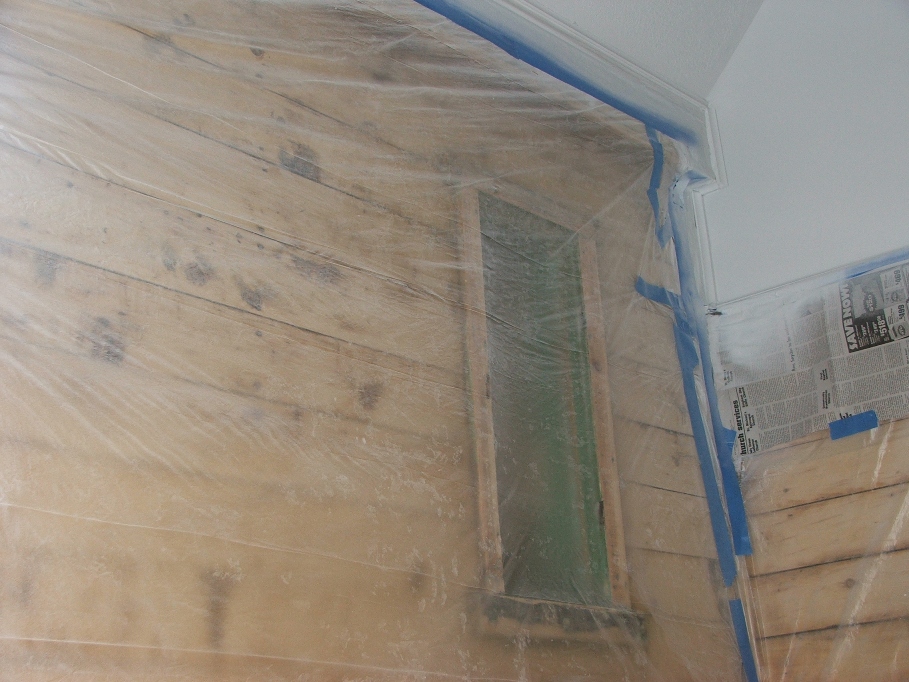

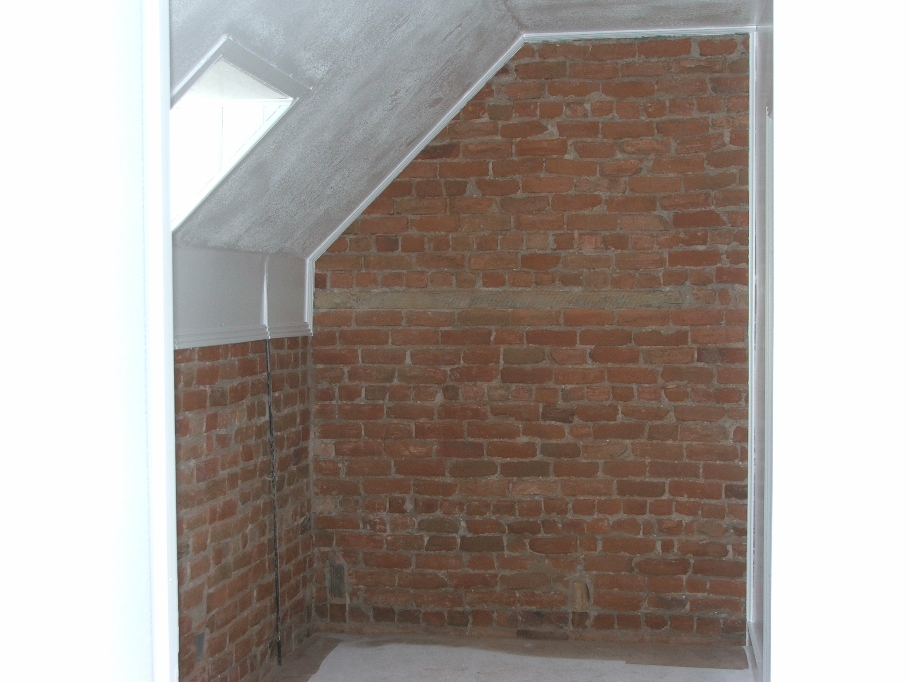
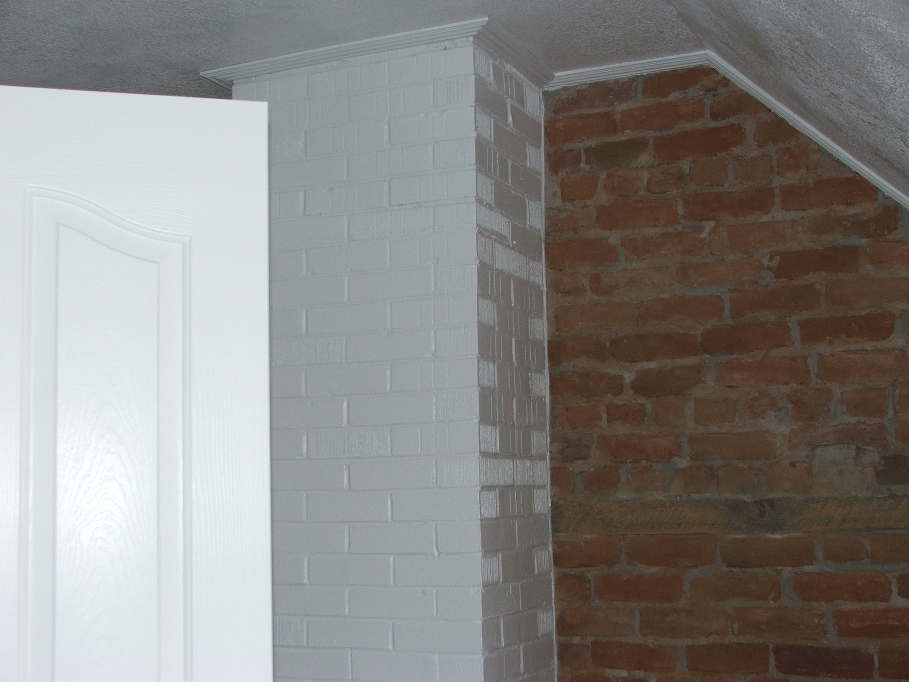

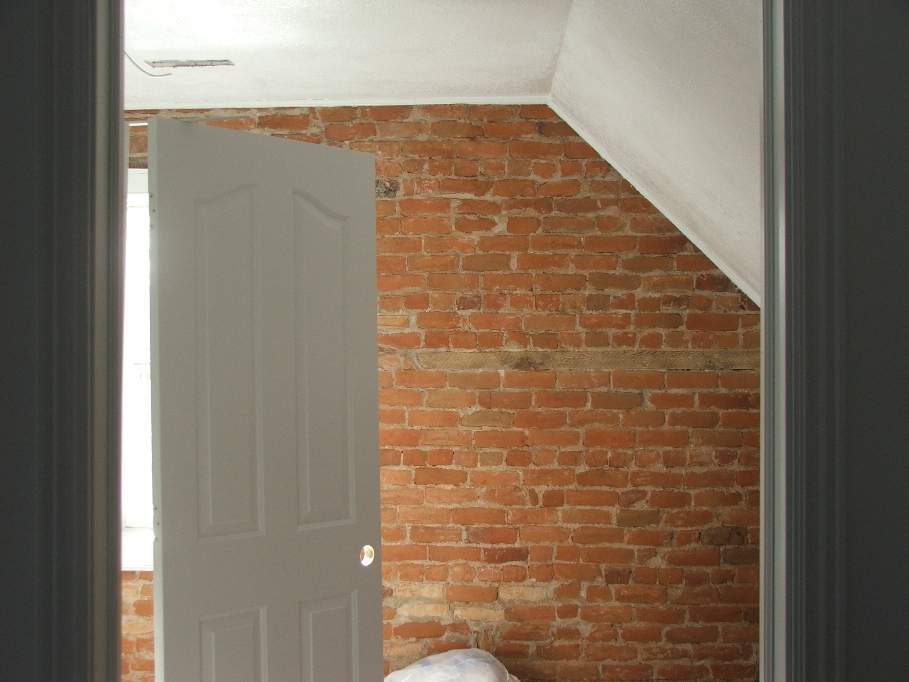
Cody is a brick layer and mostly a rock layer by trade. He told me about the “every six or seven” layers of brick being laid with half bricks (check out the bottom layer of bricks just under the bottom of the window frame and the next one six higher). He said that they would lay five courses of flat bricks, two layers thick, and then turn the sixth layer side ways, and lay it as a “tie in layer” on top of the other layers. These are not “half bricks” like I thought they were, but rather full bricks laid the other way, so that we only see the end of the brick on our side of the wall!!! I never would have thought that. Thanks Cody!
Dec. 9th, in the early afternoon, Sherry and I headed to town to buy light fixtures and some of the other necessary finish items needed. Delbert will be here Wednesday to finish up the electrical and this should include the mounting of the light fixtures. Of course any time we go to town it pretty much destroys any daylight left to do any more work.
Dec. 10…With hardware purchased yesterday for the doors, my task today is to install it and then get ready for a Christmas party with Sherry’s family. I only have until about 2:30 p.m. to work, so I started about 8:30 a.m. on the task. I thought it would not take long, as the doors are pretty standard and the hardware should just mount on and I’ll be done. Not so! None of the doors had been notched for the latches. So I had to try and router out the wood to accept the latch plate. I used my dremel tool to get the job done. Since I don’t have a template, I had to freehand the work. I got it done, but some of the doors don’t look too good.
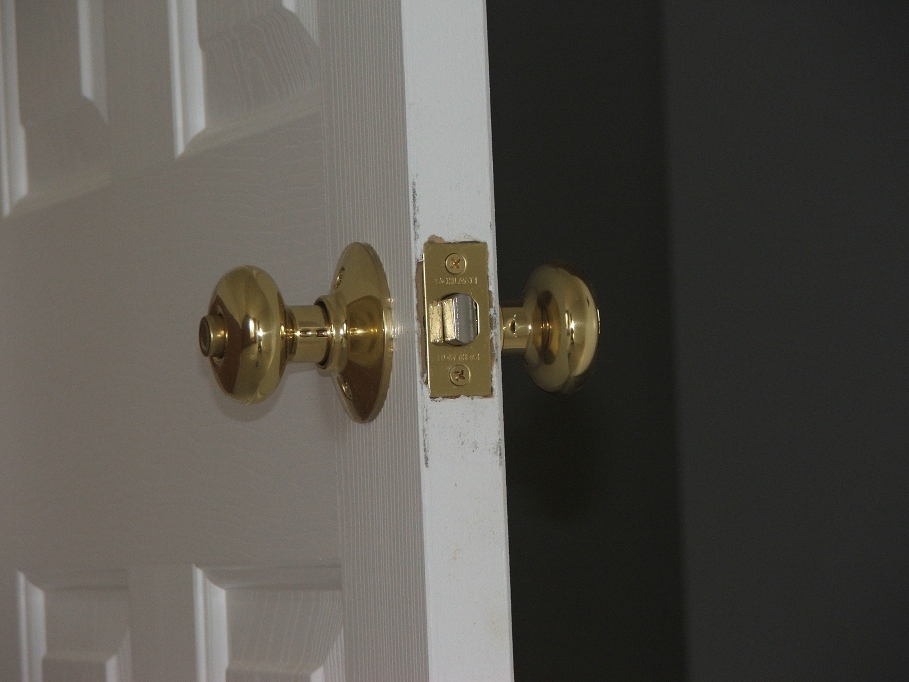
Ugly, but functional.
I was able to get all of the hardware installed except the door from the porch into the utility room. Since we painted, the door has swollen up and now it strikes the frame. I will have to take the door off and cut the face edge down about the width of a saw blade.
Oh well…what’s new?
I was able to get all of the hardware installed except the door from the porch into the utility room. Since we painted, the door has swollen up and now it strikes the frame. I will have to take the door off and cut the face edge down about the width of a saw blade.
Oh well…what’s new?
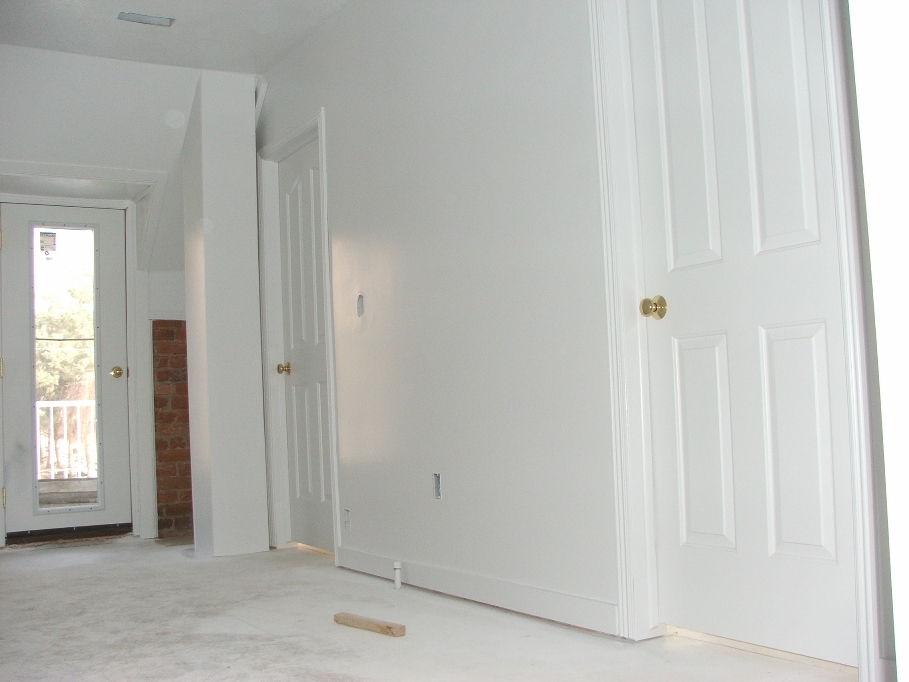
With everything so white, the brick and brass stand out quite well. The carpet will settle the white down a lot, and the addition of the overhead light will also make things look different.
Dec. 12…Today is a day to sort of catch up with some of the little things that need doing. I didn’t get too early of a start, but earlier than some days. First thing was to sand down the face of the door in the utility room that leads onto the porch. The paint has swollen it just enough that it would not close.
Dec. 12…Today is a day to sort of catch up with some of the little things that need doing. I didn’t get too early of a start, but earlier than some days. First thing was to sand down the face of the door in the utility room that leads onto the porch. The paint has swollen it just enough that it would not close.

I took it down and hit it with the belt sander. After just a few runs up and down the door face, I put it back on and it fits just fine. Then on went the door knob and bumper against the wall. It doesn’t look too bad, and it closes real tight.
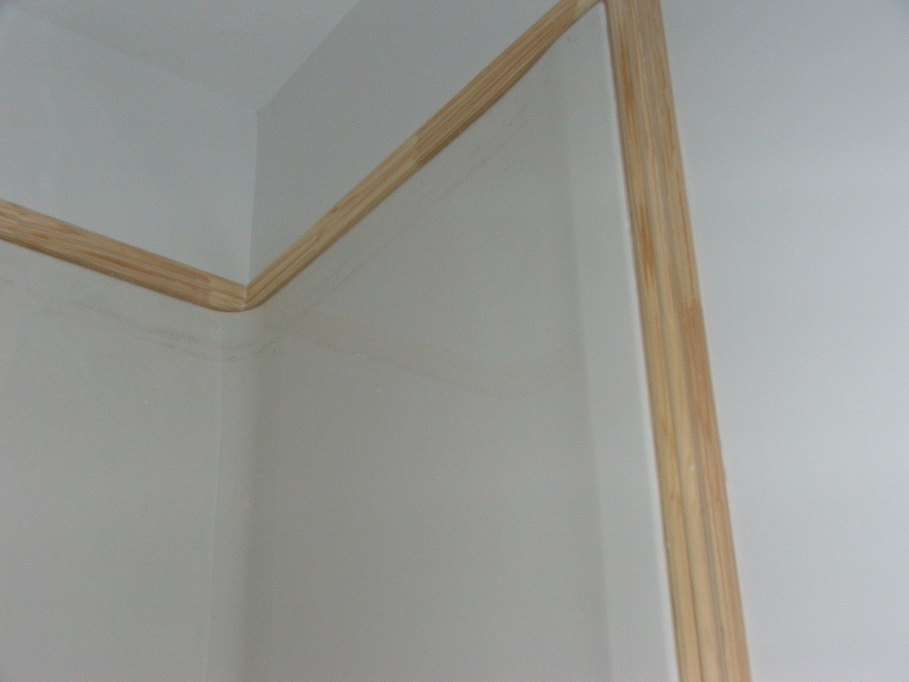
Next was to trim out the shower in the downstairs bathroom. I caulked with a clear silicone between the shower and the sheetrock. Then cut the trim and fit it along the edge. The top rear and the right side upright had to be glued, because there wasn’t anything to nail to. I know I framed it out, but I stopped the frame just inside of the shower stall and didn’t go outside of it. Why? Your guess is as good as mine. Perhaps if I knew what I was doing, I would do it right.
Next was to caulk between the trim and the wall (painters caulk) and again between the trim and the shower (clear silicone). This should prevent water from getting behind the wood trim. Paint will protect the wood trim for many years to come.
Next was to caulk between the trim and the wall (painters caulk) and again between the trim and the shower (clear silicone). This should prevent water from getting behind the wood trim. Paint will protect the wood trim for many years to come.

I would have to take a lot of pictures to let you see the whole shower. I’ll do that when the room is totally finished.
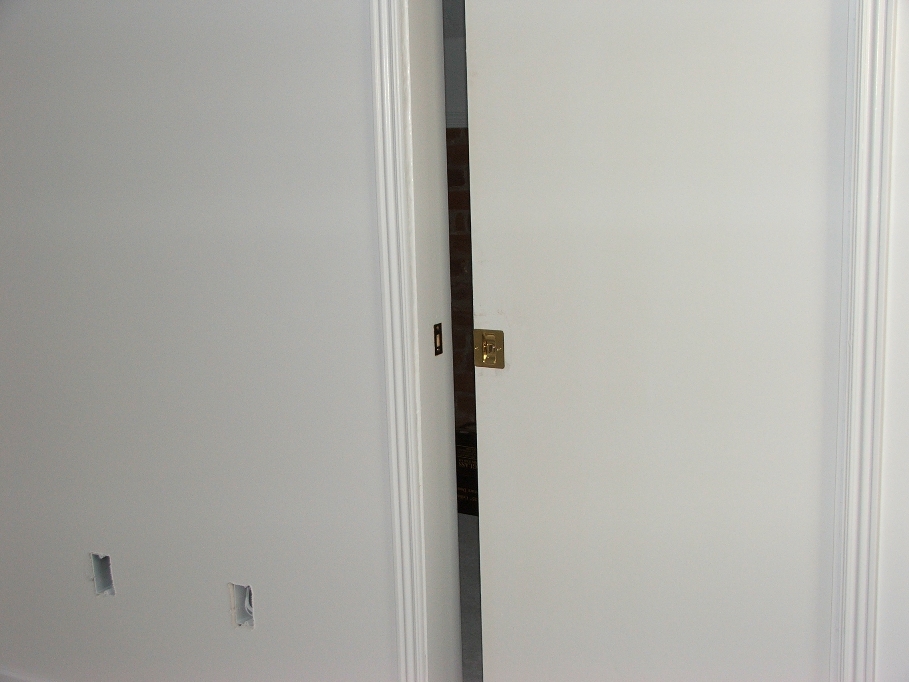
Next was to fit the lock on the pocket door in the master bedroom. Again, I have never done one of those, but it couldn’t be too hard. I found it easier than anticipated. Cut the opening and push the mechanism into the hole. Screw two screws in place and you’re done. Then fit the strike plate on and go to the next project.
I did take a break from things to catch some of Sherry’s great breakfast meals and then came back to put up the vent covers. The upstairs is really warm and I figure if I fit the vent covers on and close them down all the way, the heat will stay downstairs and the furnace won’t run so long. Most of the covers went up easily, but the one in the hall doesn’t have anything to screw into on the South side, so I’ll send Mitch into the attic to remedy that.
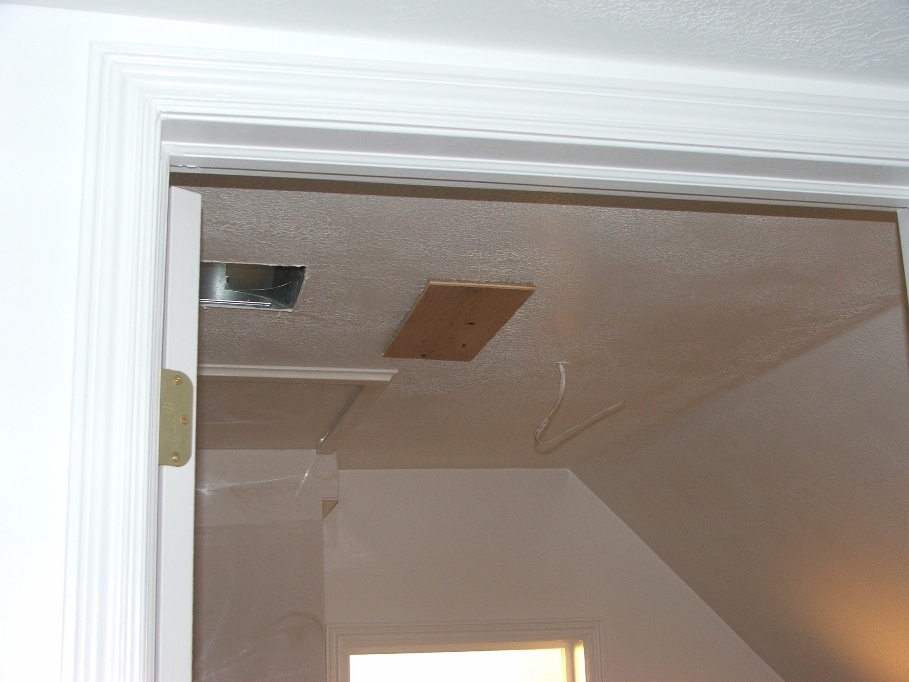
There wasn’t a cover for the one in the bathroom, it is an odd size. But I had to close it off because it gets soooo beastly hot in that small room, so I cut a piece of 3/8ths plywood and closed it off completely.

I’ll get with Scott about a cover for this as well as a missing one for the return air in the tv room.
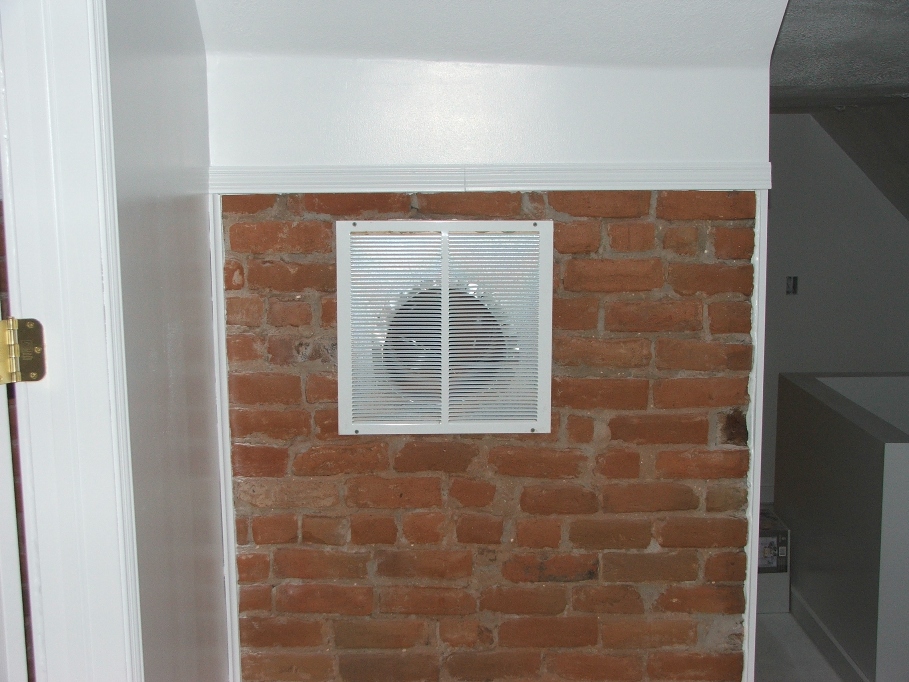
Next was what to do with the return air in the hallway upstairs. I tried just fitting the cover to the brick, but it bent and looked tacky. So I built a frame out of some scrap 1X1 and glued them to the back of the cover. Then drilled through the wood and into the brick. The wood is stiff enough to keep the cover straight and then I masked the brick and caulked around the entire edge of the wood frame. It didn’t take too long and it looks quite good. A bit of paint and it will be finished.
Dec. 13…Today is a day to put some paint on the trim and around the vent as seen above. And to catch the small areas that were missed when the major painting was being done. There are always some touch up places to be done. Sherry is also planning on starting to scrub the walls downstairs in the kitchen, dining and living room areas. When she pulls the refrigerator out and cleans behind it, I will paint that before we push it back into its place. This doesn’t sound like much work, but it all takes time to get done. Since the weather is calling for scattered snow, this will be a good thing to do on a day like this.
I started by masking all of the areas I knew needed touching up and this took quite awhile. Now is not a time to splatter paint on the brick or to paint a window etc. The day went quickly and when it was done all of the painting got done.
I started by masking all of the areas I knew needed touching up and this took quite awhile. Now is not a time to splatter paint on the brick or to paint a window etc. The day went quickly and when it was done all of the painting got done.
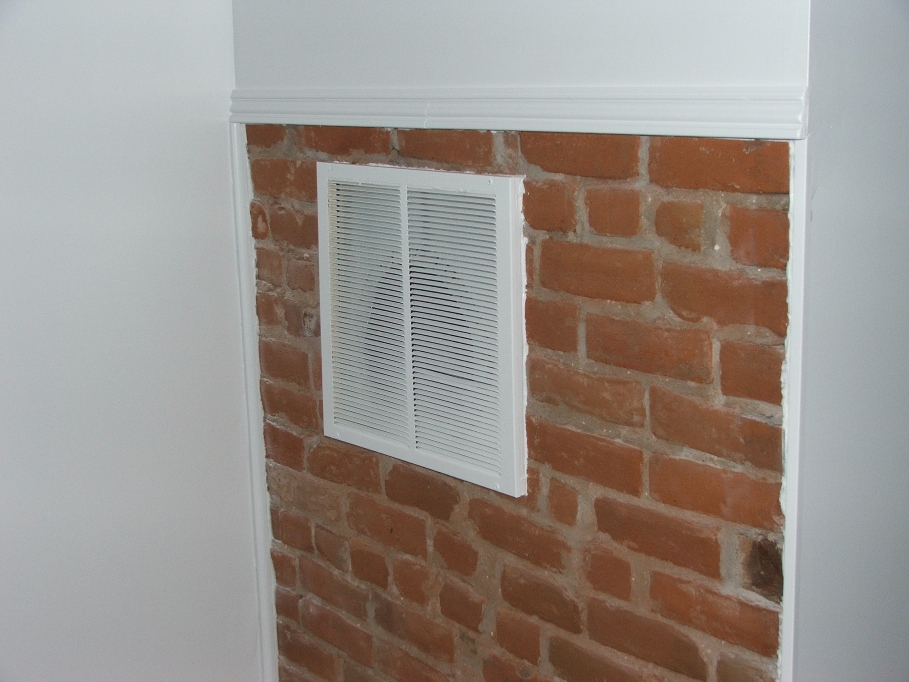
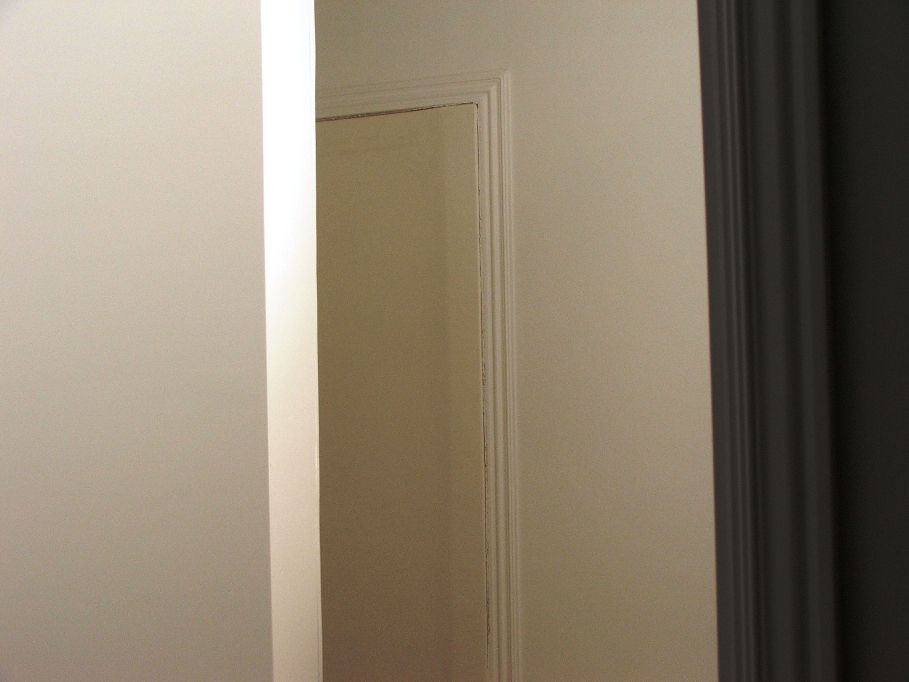
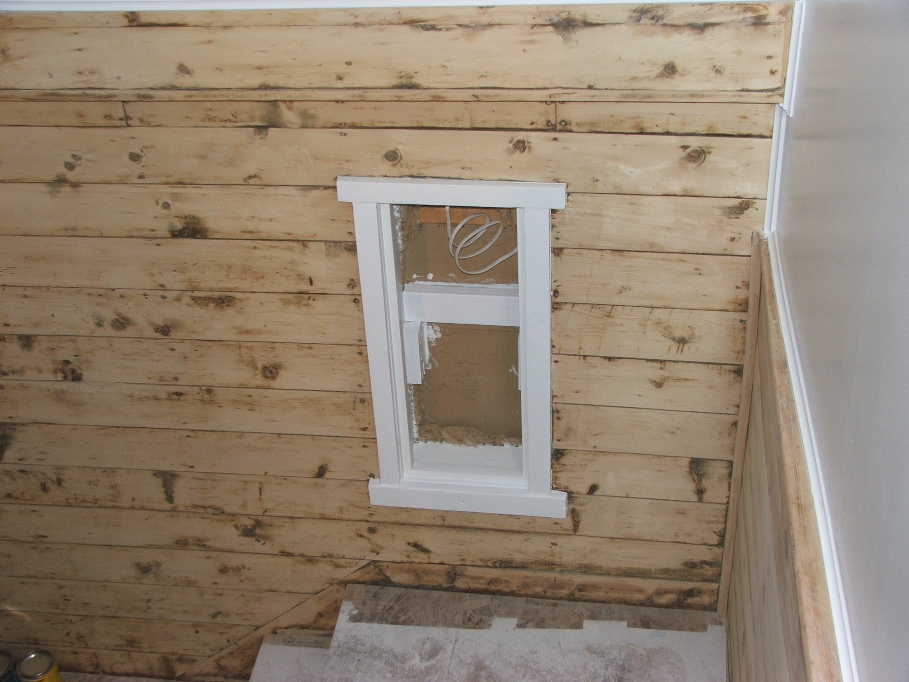
The frame around the small window on the stairs looks good. As does all of the other small areas I painted and touched up. I believe we are now ready for carpet throughout the house. Delbert is scheduled to show up tomorrow to finish the electrical and I sure hope he does.
While he is messing around, I plan on staining the wall going up the stairs and the boards in the brick work in the four bedrooms.
Dec. 14…I got a fairly good start on the day’s activities and began staining the boards in the bedrooms. I was only planning on staining the large pieces of wood the run horizontal to the floor and are about half way up the wall. As I went, however, I went ahead and stained all of the wood in each of the rooms. It really made a difference in the appearance of the rooms. The contrast between white, orange and “chestnut” is very nice. Check out the pictures.
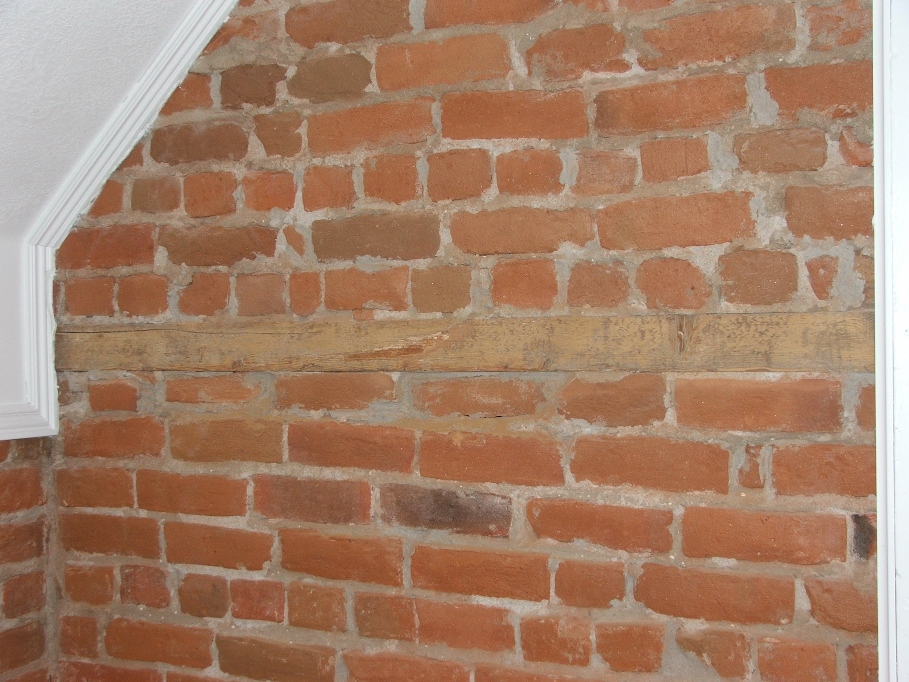

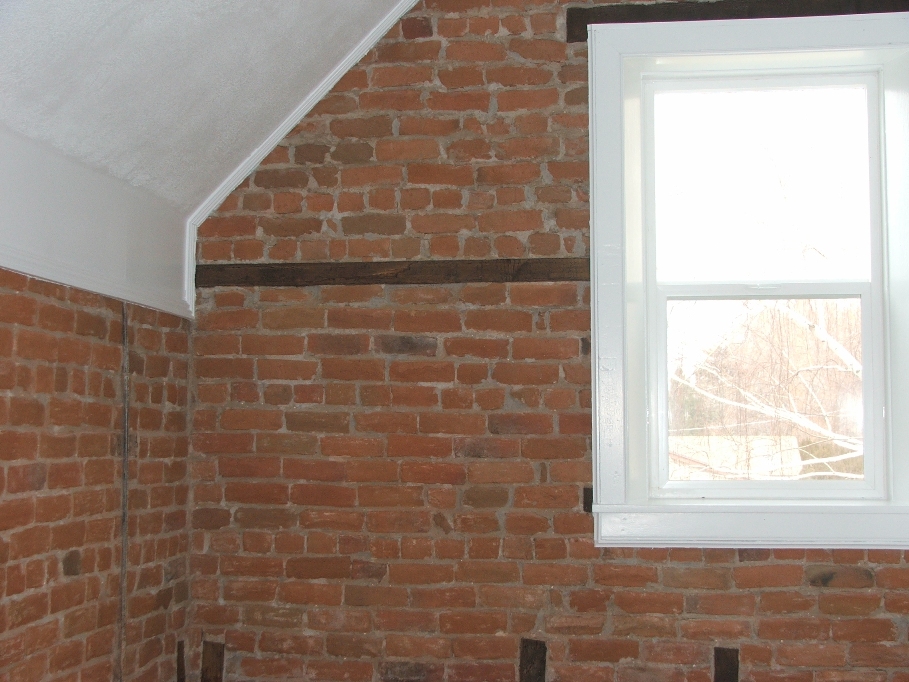
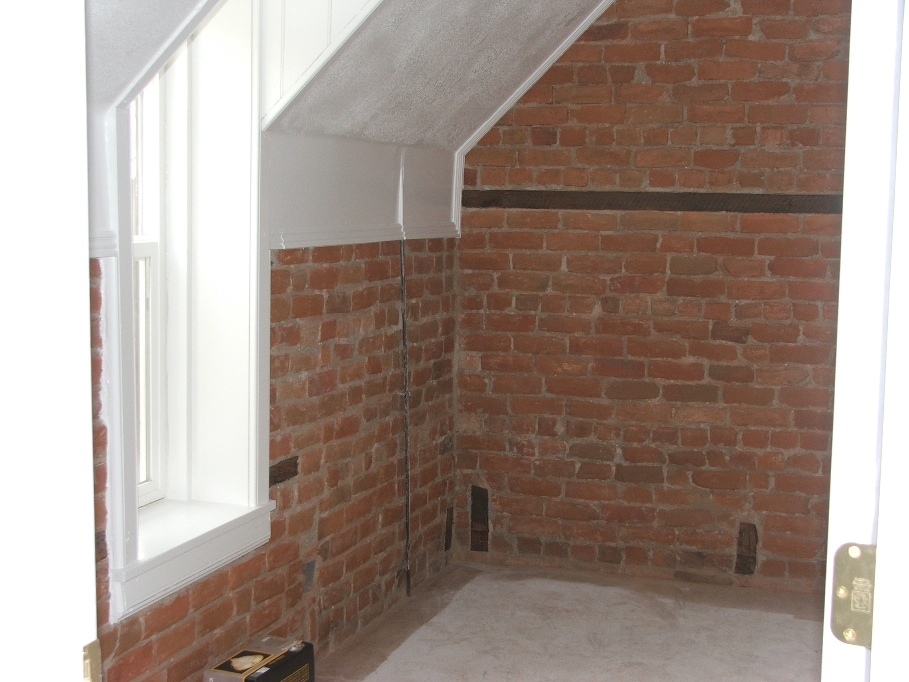
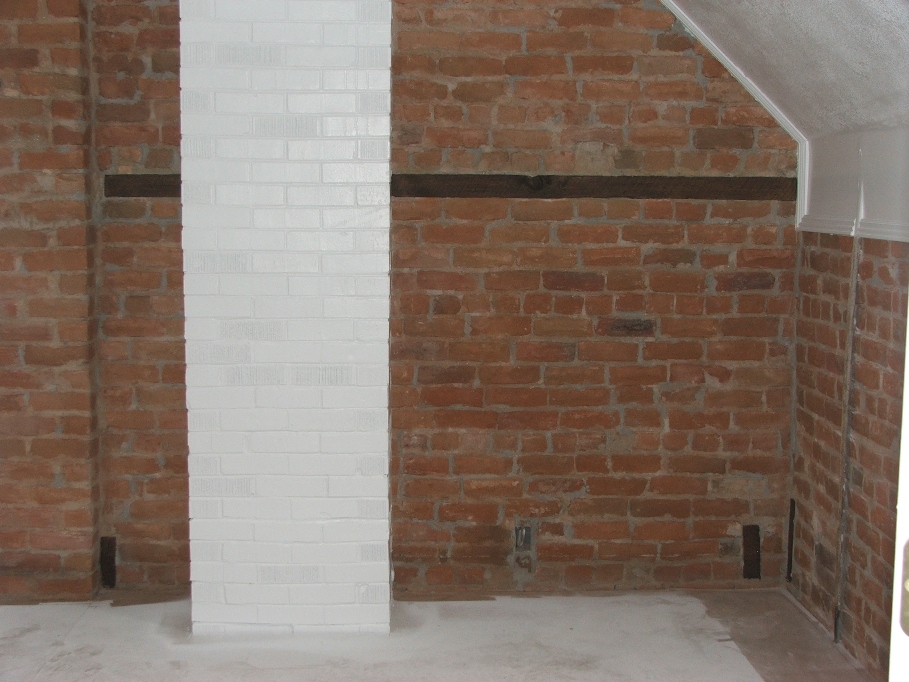

The wood in each of these rooms took longer than I expected, as I tried my best to keep the stain off of the brick. I didn’t mask and so I had to go slowly. Next on my goal for the day was to stain the wall going up the stairs. I masked the edges and where I didn’t want stain to get, and then began staining and rubbing. It’s a slow process, but you want it to turn out looking similar from one application to another. The directions said to wait 3 minutes and then rub it off. In some cases I went longer, in others shorter, but it turned out pretty well.
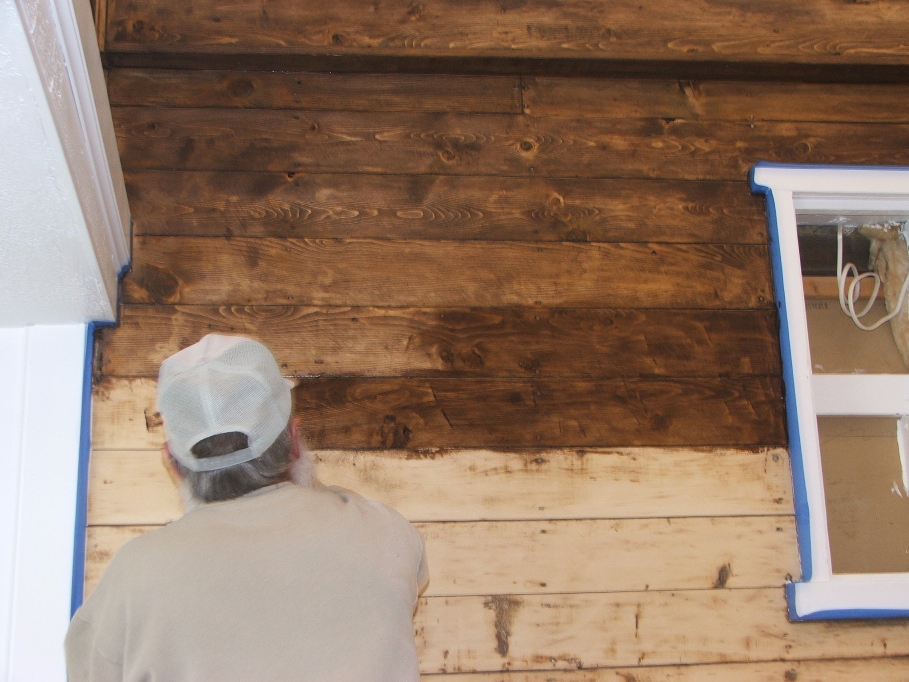

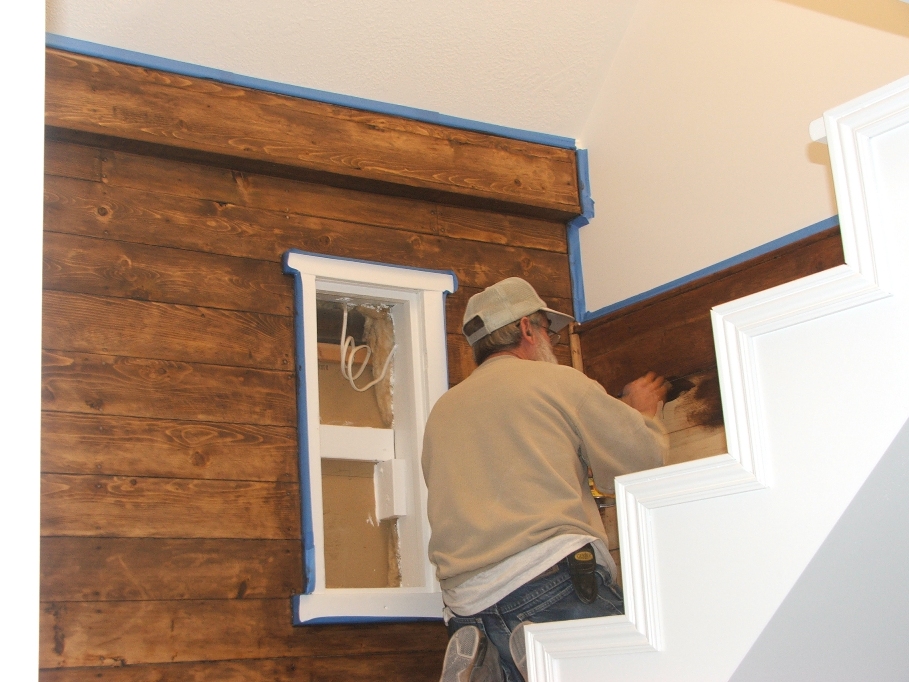
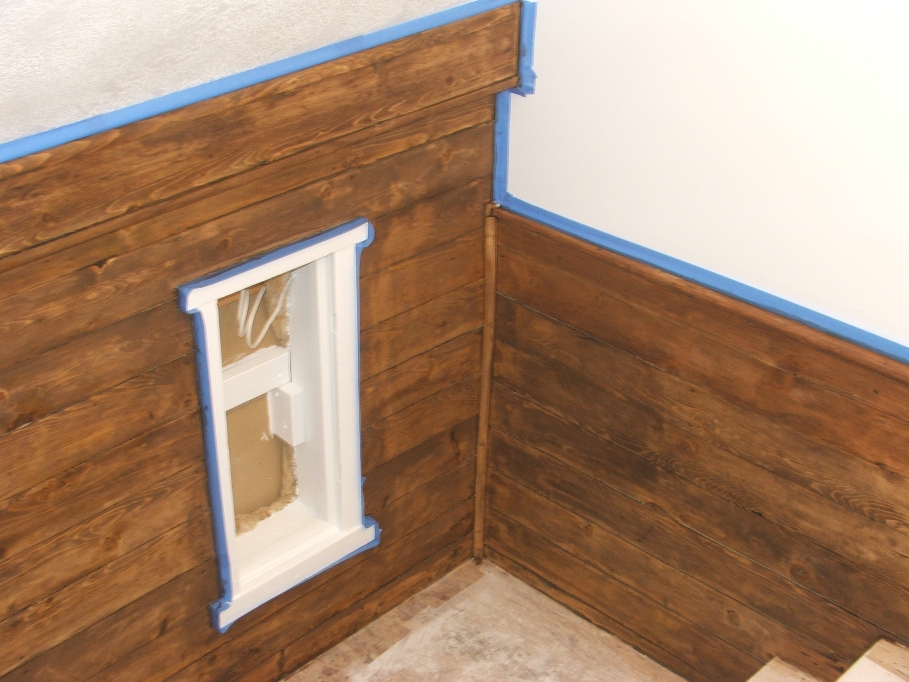
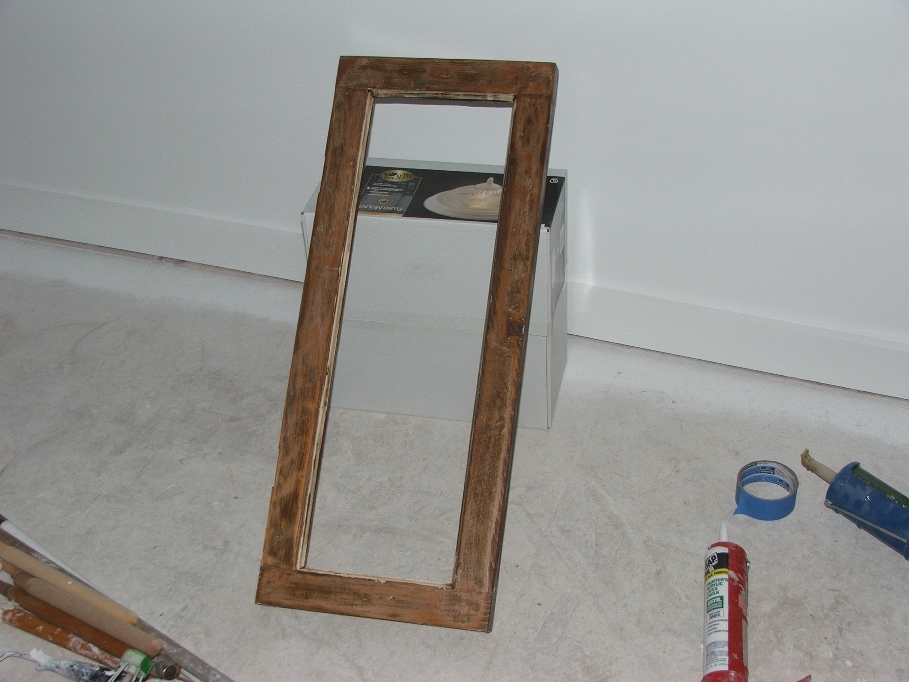
Looks very good. The satin varnish will finish it off. That’s tomorrow’s project! I can hardly wait. I still had some daylight left (Delbert didn’t show up, so I’m on the sun’s time), so I decided to stain the window frame that will fit in the frame in this view. It didn’t take very long to stain it, and it will look good with the contrasting white painted frame, once it’s installed.
We might paint the little inside part of this with white paint. It wasn’t possible for us to sand the paint out of this area, and it looks sort of bad the way it is right now. The added white paint might just give the look of the window and the wall added character.?! We will decide later.
We might paint the little inside part of this with white paint. It wasn’t possible for us to sand the paint out of this area, and it looks sort of bad the way it is right now. The added white paint might just give the look of the window and the wall added character.?! We will decide later.
Well while I was having so much fun staining and rubbing, Mitch was in the kitchen and dining area filling holes with putty and generally getting ready for paint. He came across an ugly situation under the South window…wet wall! Not good. The sheetrock was very wet and crumbly, it would not hold the paint that was on it either. So off it comes! I told him to cut it so that there would be a little of the old sheetrock left we could “mud to” once we got the wet problem fixed (if we can). He went to cutting and cleaning up the mess and the end result was this.
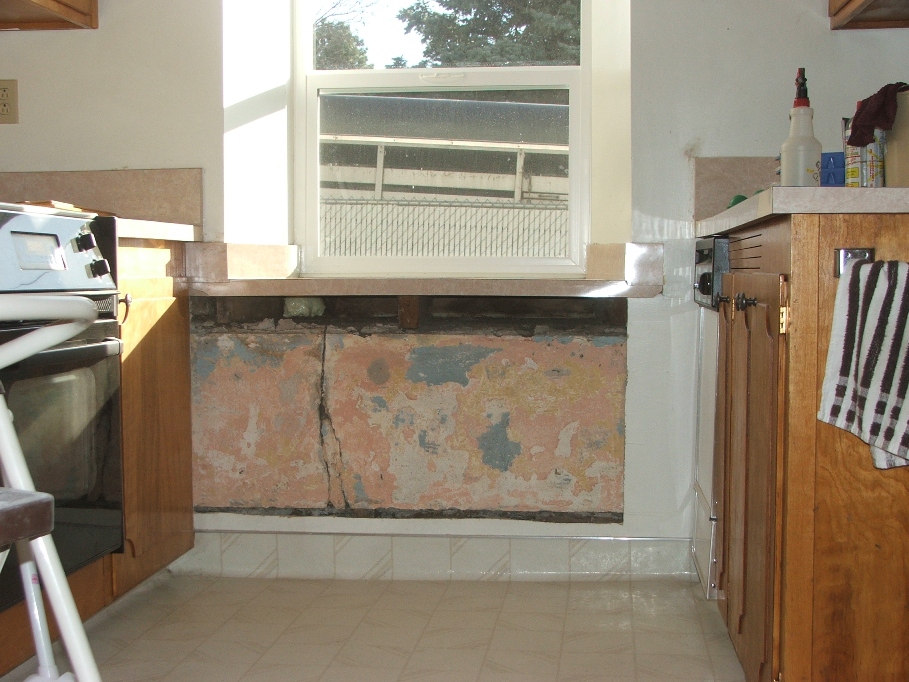
The old plaster is on the inside of the rocks that make up the walls. The space under the window sill is where we have determined the water is coming in. It seems like it comes from rain hitting the outside of the house, following the path of least resistance all around the window frame and ending up dripping onto the sheetrock just under this side of the sill. Most of the wet sheetrock was on the right side of center of the sill.
Mitch cleaned out a mass of spider webs and bugs from inside the space under the sill. Now what? Well it isn’t the worst problem we have encountered in this remodel. Sherry suggests we fill the space under the sill with lots of fiberglass insulation. That will keep the water from coming so deep into the house and then we will put some heavy plastic up between the sheetrock and the old plaster. That will give us a few months of “no worry” until we can get to the outside of the house and fix it properly. Hopefully next summer. For now we have to continue to “jerry rig” where we have to in order to get Mitch and family moved into the house. There shouldn’t be any problem with mold, as this problem appears to have just began.
_
_

As things go, with this small amount of “demolition”, Mitch again “found” something! It still amazes me what we find.
I don’t know what it is for sure, but both ends have been pounded on so I’m guessing it is some sort of “tie” to hold two pieces of wood together while the rest of the supporting structure can be hooked to them. When the support is completed, then this thing is popped off and used again later.
I don’t know what it is for sure, but both ends have been pounded on so I’m guessing it is some sort of “tie” to hold two pieces of wood together while the rest of the supporting structure can be hooked to them. When the support is completed, then this thing is popped off and used again later.
Dec. 15…Well today’s goal is to put the final coating of “varnish” over the stained wood and stain the old door. Maybe even fix up the sheetrock area in the kitchen that Mitch cut away yesterday. We will see with what time we have.
I got a good start and had the first coat of finish on the stairway wall within an hour. Then headed to the bedrooms to do the same. By the time I finished with the bedroom areas, the stairway wall was ready for coat two. It went pretty fast and now looks very good. It isn’t “smooth”, but it sure is protected and looks very nice.
I got a good start and had the first coat of finish on the stairway wall within an hour. Then headed to the bedrooms to do the same. By the time I finished with the bedroom areas, the stairway wall was ready for coat two. It went pretty fast and now looks very good. It isn’t “smooth”, but it sure is protected and looks very nice.
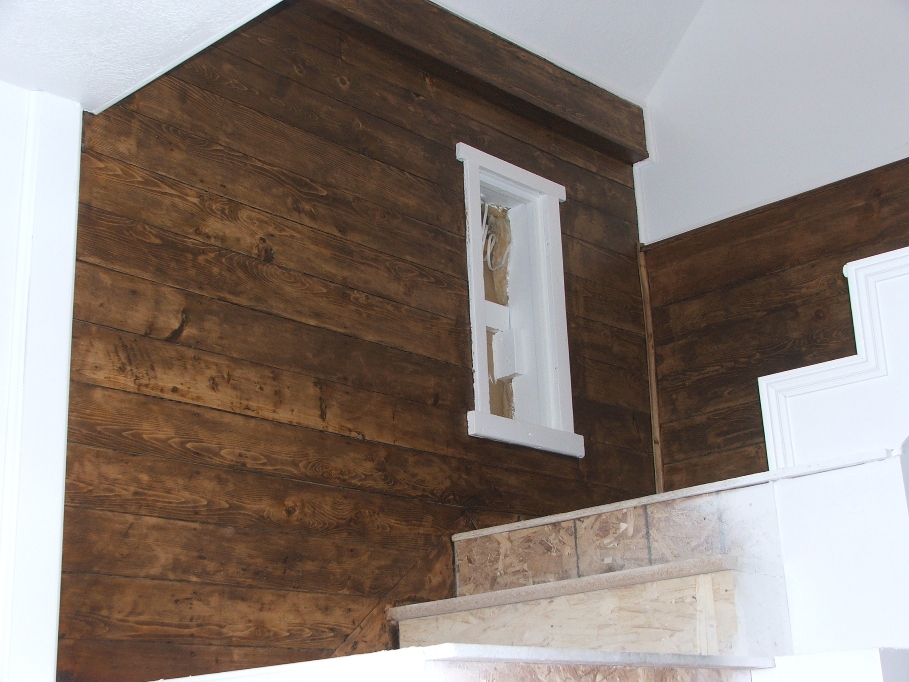
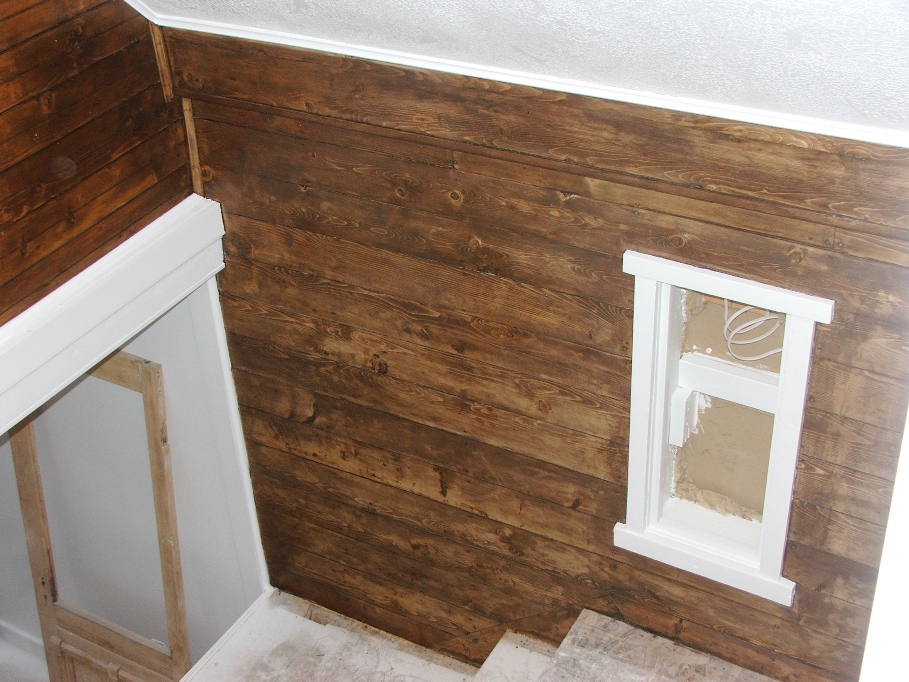
I have mentioned before about the “stress look” in a lot of the wood we have left exposed. These stairs contain rough cut saw lines, nail holes, bangs, hammer marks, scratches, knot holes and various other marks that add to the character of the old house. But upstairs is where the real character wood is located. The hand hewn blocks of wood in the brick wall show real “character”, check this one out.
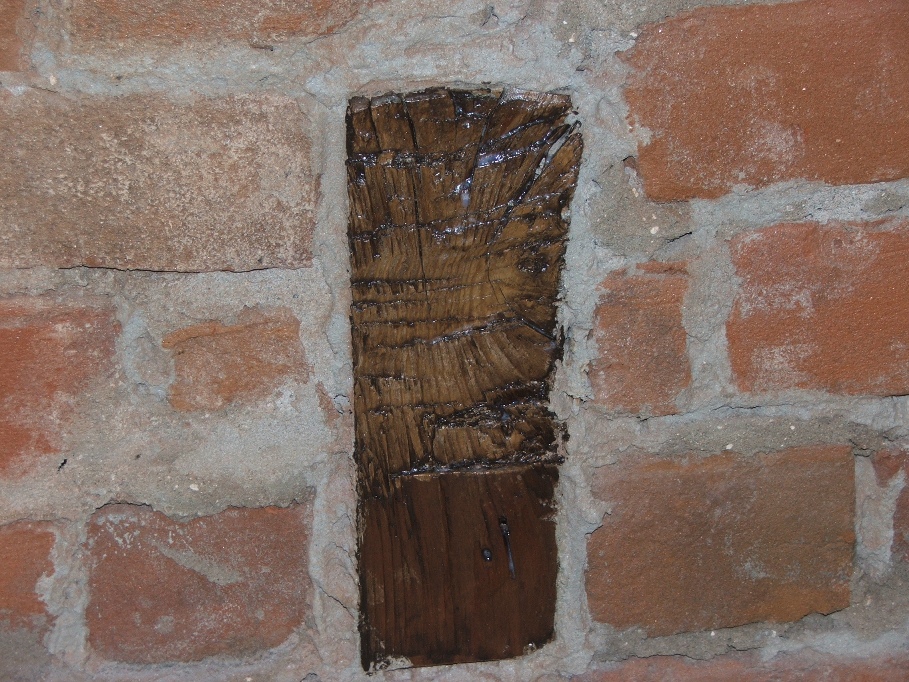
I’m betting the man who cut this and placed it in here, never expected it to be stained and finished as a show piece. This is a very nice block of wood.
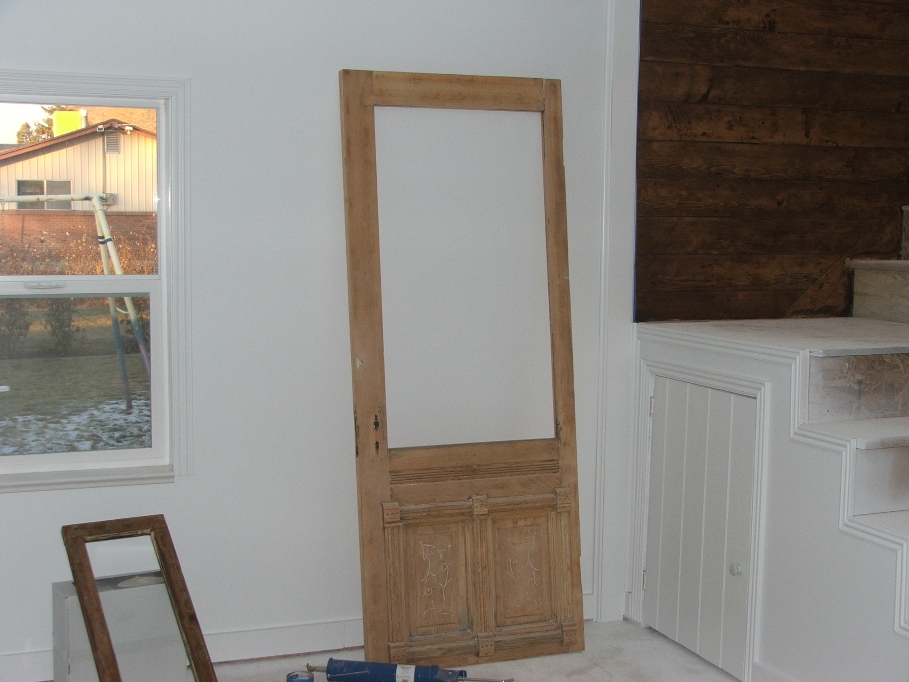
Well with the varnish all up, the next thing was to stain the old door. After Sherry had it sanded it looked like this.
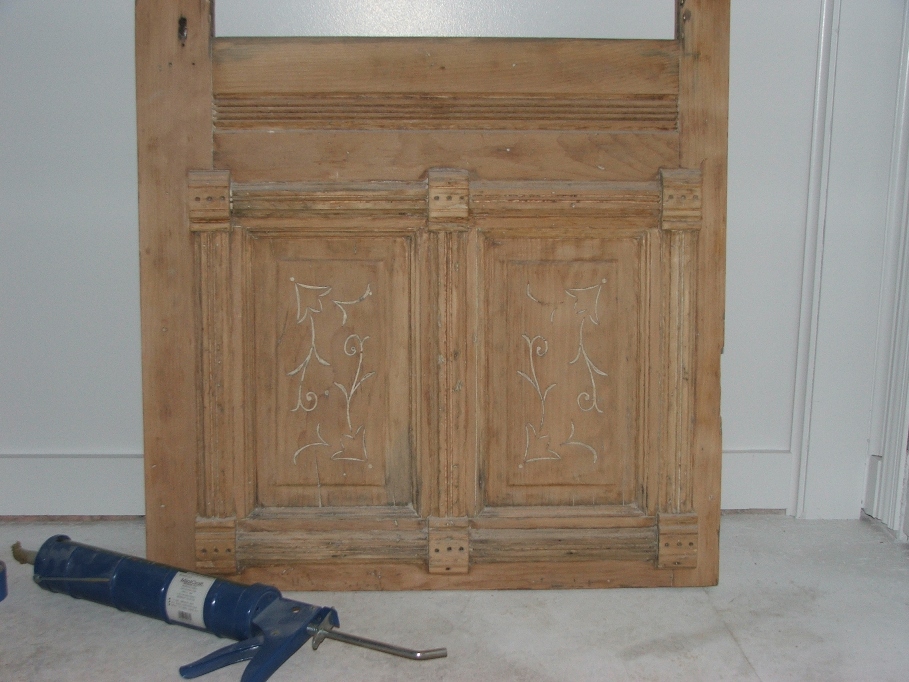
This view is of the side that faces out, away from the tv room. A close up of the two panels at the bottom looks like this.
The white paint in the design was intentionally left in to show the design better once it’s stained and finished. I don’t think this is a bad thing to do. There were several layers of different colors of paint on this door and a lot of it could not be gotten out. We left it and also left a lot of the “stress” marks as well. More character you know.
The white paint in the design was intentionally left in to show the design better once it’s stained and finished. I don’t think this is a bad thing to do. There were several layers of different colors of paint on this door and a lot of it could not be gotten out. We left it and also left a lot of the “stress” marks as well. More character you know.
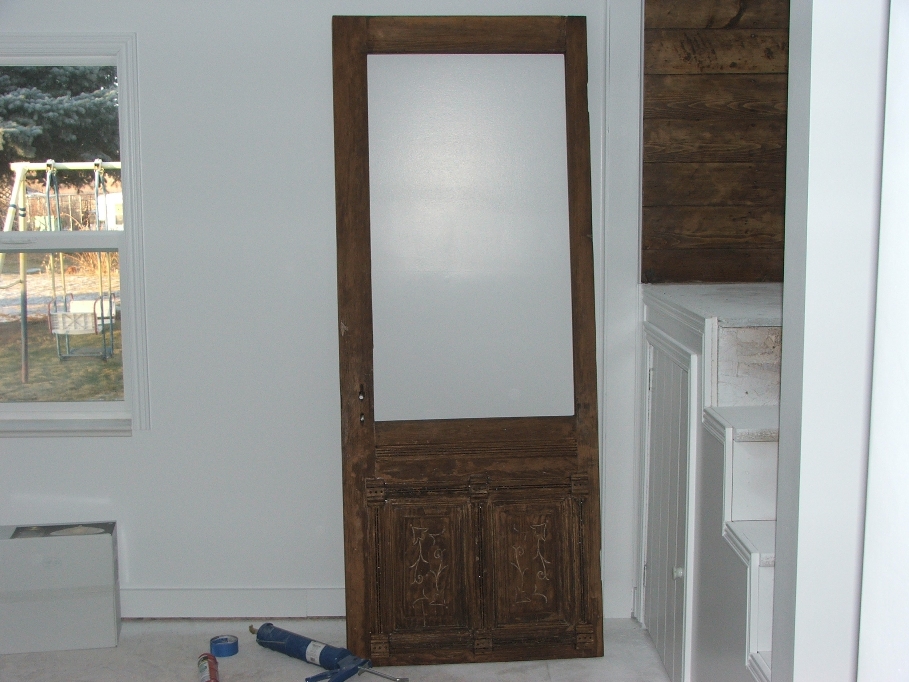
Here it is stained and tomorrow I’ll finish it with the varnish. The new glass we had made for it will fit in nicely, and Sherry has taken the old hardware and cleaned it all up to nearly new condition. It will shine when it’s all put together and the door hung in its place.
There is still daylight left, and I can get the job done under the window in the kitchen. As Sherry suggested, stuff insulation into the spaces under the sill.
I packed “a lot” of insulation into this space.
Next, put up some plastic as a barrier to keep the moisture from getting to the back of the sheetrock. I used a 6 mm thick plastic that I had used on the outside of the house last summer to protect the old wood and to keep critters out of the back of the house.
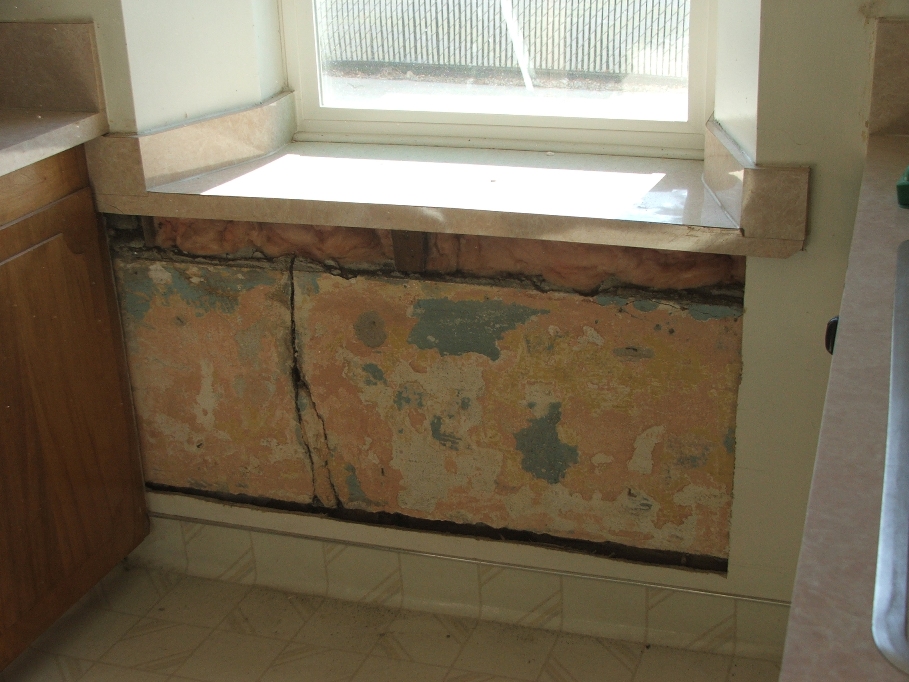

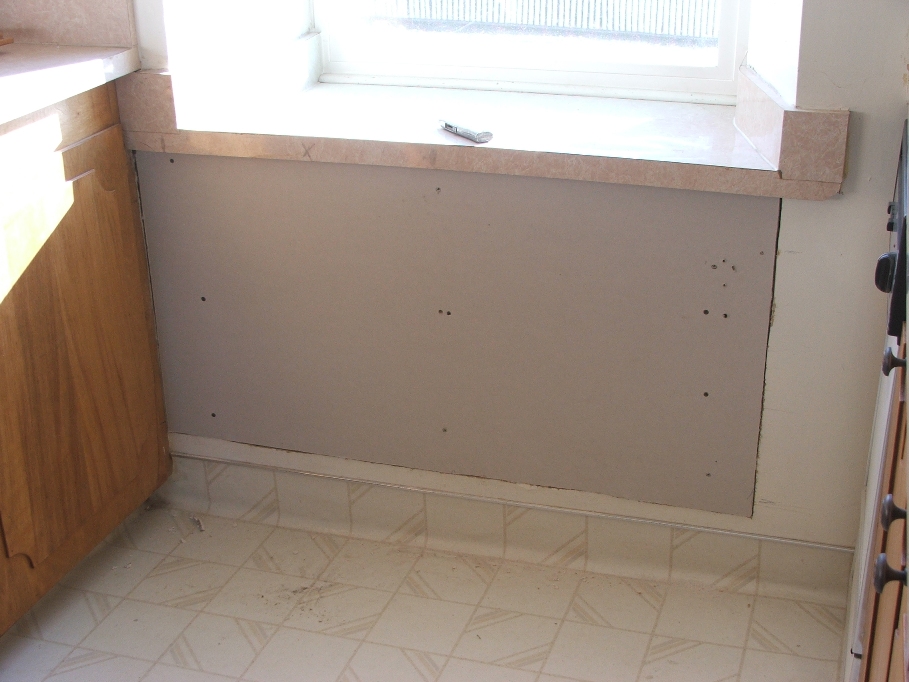
Now to cut a piece of sheetrock and screw it onto the wall.
I called Bryce Wheelright and asked him for about 10 ft. of sheetrock tape to cover the two seams. He said he had one and would drop it off. I’ll try my hand at “mudding” once the tape is on. I feel pretty good about the day’s work and left the house ½ hour earlier than usual.
I called Bryce Wheelright and asked him for about 10 ft. of sheetrock tape to cover the two seams. He said he had one and would drop it off. I’ll try my hand at “mudding” once the tape is on. I feel pretty good about the day’s work and left the house ½ hour earlier than usual.

Dec. 16…Bryce left me about 10 ft. of perfa-tape like he said and I went right to work putting some mud on it and getting the first coat of mud to cover it. Then I went to work on other little things in preparation of the next BIG thing to do…install laminate flooring in the bathrooms, and utility room.
While I was doing this, Mitch patched all of the holes in the kitchen and dining areas and added another coat of mud to the patch under the window. He used so much mud that it took two days to dry, even with the furnace turned on in the dining area.
By all means not professional, but it will do and it really isn’t that bad for novice sheetrockers doing the work.
Dec. 17 through 21…It’s Christmas time and my working time in the old house is being shuffled from one day to the next with shopping or whatever. I have been challenged with laying laminate flooring in the bathrooms and the utility room (laundry side). Having never done it, I’m not sure what I’m getting into, but I figure the challenge is there and I’ve always said “you can do anything you want to do, when you want to do it”! So here goes.
The upstairs bathroom seemed the most likely place to start, mostly because the rest of the upstairs is waiting for carpet to be completed. I read and re-read the instructions, watched the tape on how to do it easily and then began. The first piece was centered on the doorway opening and I figured I’d align all of the “tile spaces” throughout the project area. I was amazed at how easy the task was, each piece snapped into place and the seams are nearly invisible. Keeping a gap around the outer edge of the floor for expansion was sometimes difficult to me, because it just didn’t look right, but I used spacers and got it done. Some of the pieces were quite small and took a bit of pressure to finally get them to snap into place. It turned out pretty good.
The upstairs bathroom seemed the most likely place to start, mostly because the rest of the upstairs is waiting for carpet to be completed. I read and re-read the instructions, watched the tape on how to do it easily and then began. The first piece was centered on the doorway opening and I figured I’d align all of the “tile spaces” throughout the project area. I was amazed at how easy the task was, each piece snapped into place and the seams are nearly invisible. Keeping a gap around the outer edge of the floor for expansion was sometimes difficult to me, because it just didn’t look right, but I used spacers and got it done. Some of the pieces were quite small and took a bit of pressure to finally get them to snap into place. It turned out pretty good.

You can see the base boards are in place in this picture, but that was a trial in itself. While I worked on the downstairs bathroom flooring, Mitch was to put down the base upstairs. He had it all done and asked me to come and see it. When I got upstairs I realized we had not “caulked” the entire space around the perimeter. The silicone caulk will help keep moisture from getting under the laminate and destroying it. He had to pull up all of the base and try not to mar or damage the sheetrock. I felt really bad and so did he. Some of the walls were dented, but a little putty fixed them and life is now good.
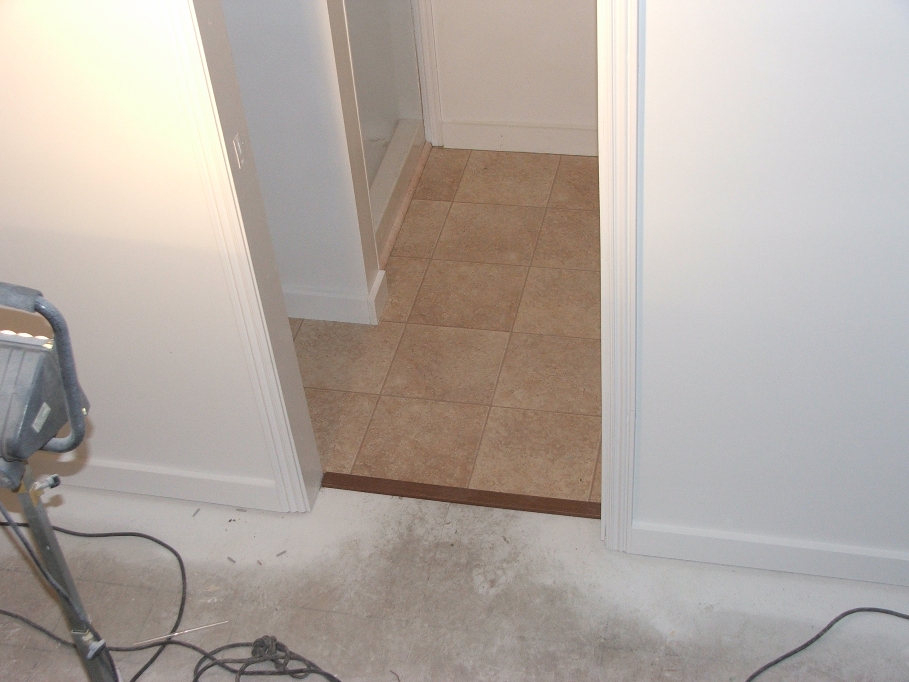
That day I managed to get most of the bathroom downstairs completed, and only had a couple of hours of work left to finish it. I believe the finish took place on Monday the 19th. The Saturday before, we went to Logan and watched as Mitch “walked” to pick up his Masters degree. Congratulations Mitch...Job WELL DONE!
Downstairs bathroom with all of the trim and it’s ready for installation of the toilet and basin. Bring on the carpet!
Downstairs bathroom with all of the trim and it’s ready for installation of the toilet and basin. Bring on the carpet!
Delbert called yesterday morning and apologized for not getting onto my job site. Said he had several big jobs that needed to be wrapped up before he could get paid. I assured him that the other jobs he had were more important than mine and to get those done. The carpet is scheduled to be laid on Jan. 7th and he had until the 3rd or 4th to get mine completed. He was happy about that, but still might show up tomorrow to work on mine.
We changed our minds on installing the laminate in the utility room because the video said the floor could only be 3/16ths out of level and we have a problem with the NE corner of the floor dropping 3 inches in the width of the room. So the lot of laminate we bought for there was returned to Home Depot for a refund and we ordered vinyl to be installed. The measuring person came out yesterday and did a measure and will turn it in for Home Depot to tell us the cost.
Dec. 22…Today is the last day I have to work on the old house until after Christmas. My goal is to mask the kitchen and dining areas, cut in the corners and paint the first coat of finish on. It’s a big task, but I think I can do it. Sherry is working on gifts for the neighbors and other friends. Tomorrow I have scheduled to go to town and do some last minute shopping for Sherry’s gift. I have a great idea (at least I think it’s a good one), and a $60 gift certificate with which to buy it, and Sherry won’t know what I bought.
I got a late start, but was scheduled to be un-interrupted all day. So I started with final sanding in the kitchen and then masked the entire two rooms. Masking takes a long time! I did manage to get it done and in time to cut the corners and get the first coat of finish on before 4:30 p.m. (dark). The final coat will now have to wait until probably Tuesday. I would like to go ice fishing on Monday, the day after Christmas, hopefully up to Strawberry for some of those 20 plus inch Cutthroats.


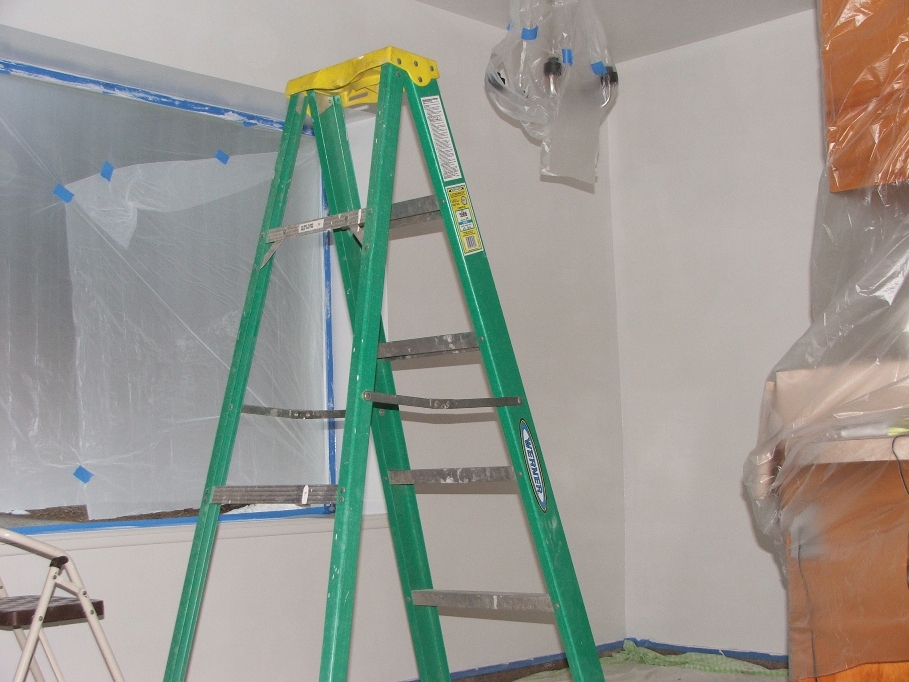
Dec 22 Through 24….Christmas time…Sorry no news……
Dec. 26 through 29…Well, now we have something to hang our hat on! Delbert came and did some of the installation of the electrical, plus Sherry washed the walls in the Living room and moved some of Mitch’s and Angela’s stuff into the newly painted dining area. We are getting quite excited to have them move into the old house and we are also excited to get our own life back in order. Our savings are gone, our borrowing capacities have been met and we are at our wits end. Do I need say more.
We have been blessed with Delbert coming and finishing the electrical part of the house. He is a trooper! He and his crew (kids) finished the lighting and all of the receptacles, switches and getting ready for the outside connection stuff.
Delbert is really trying to do us a great job and is doing a fine job as he goes.
As we progress, it becomes time to paint the front room of the house and the associated parts of that portion of the place. Mitch comes over to help as does Sherry. She washes the walls and ceiling and Mitch removes covers and such, patches holes and basically gets things ready for paint.
We discover “wet sheetrock” again! Nasty thought. What now? Is my thought. Why now? Do I have to rip up the front of the house and rebuild what is there? I am beside myself again! Mitch tore out the portion of sheetrock that was moist and here is what we found.
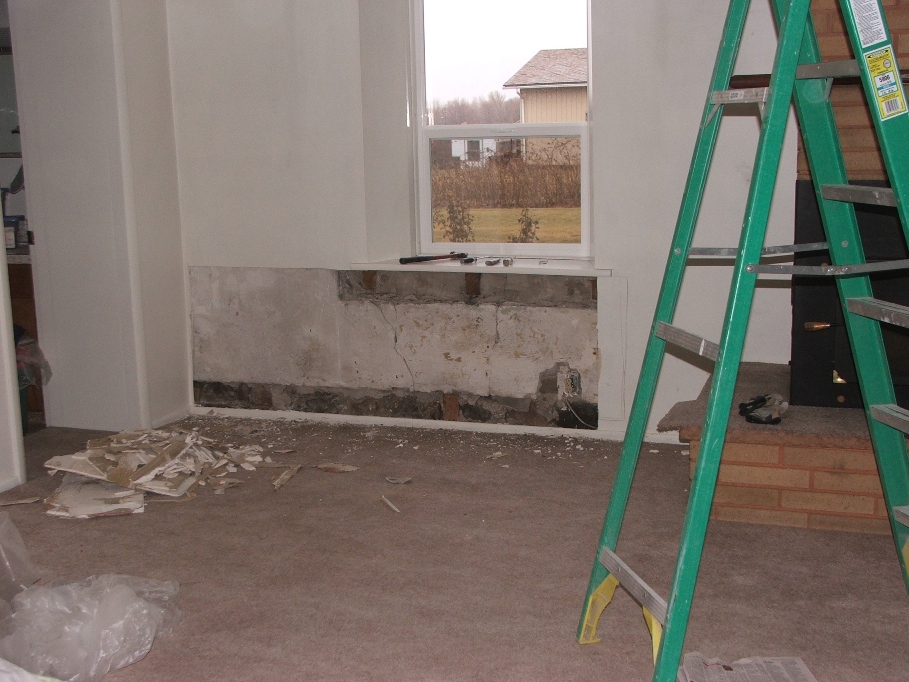
Nasty! Just like on the other end of the house. This shouldn’t be as bad however because I think the water was coming in from where the air conditioner used to be. I’m not completely sure, but I think is was.
I vacuumed the area up after removing the base and I don’t see anywhere water is coming in. The flooring under the base is dry and this leads me to believe the water damage happened some time in the past and the sheetrock just hadn’t had time to dry. It’s best that we replace it anyway and give it a fresh start.
Meanwhile, the carpet is still scheduled to be installed on Thursday the 5th and Roy says I have to have the banister in place before they put down the carpet. He came over and told me what I had to have to do the job and that he will lend me a chop saw and nail gun. He also said that it’s best to set up in the tv room and do the cutting in there rather then on the porch. He says it’s easier to be close to where the installation goes to do the cutting and that it will make a big mess with saw dust. I hope I’m up to this challenge. We can’t pick up materials until Tuesday (unless they just happen to be open tomorrow..New Years holiday).
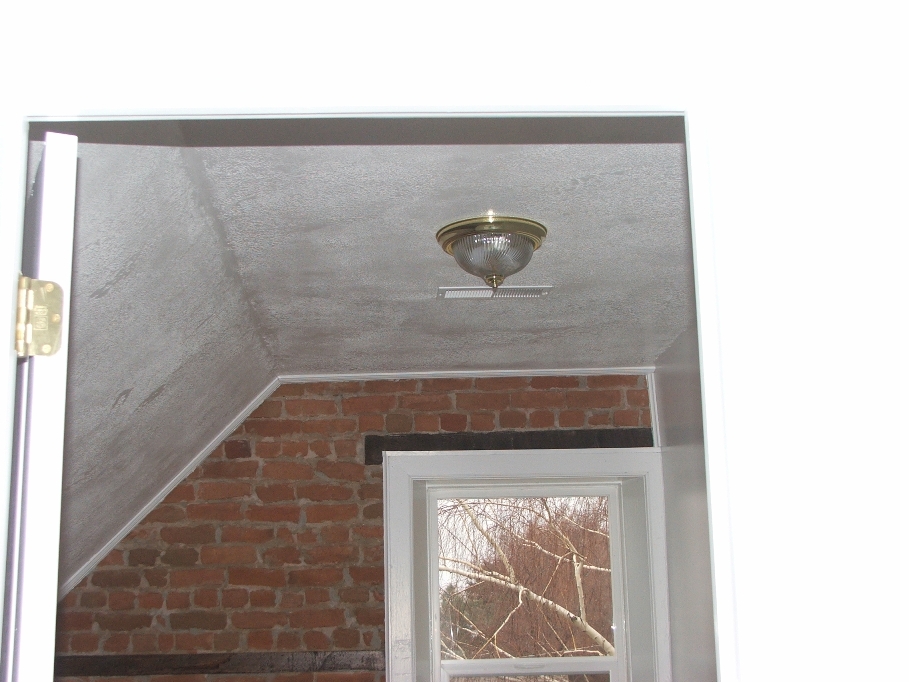
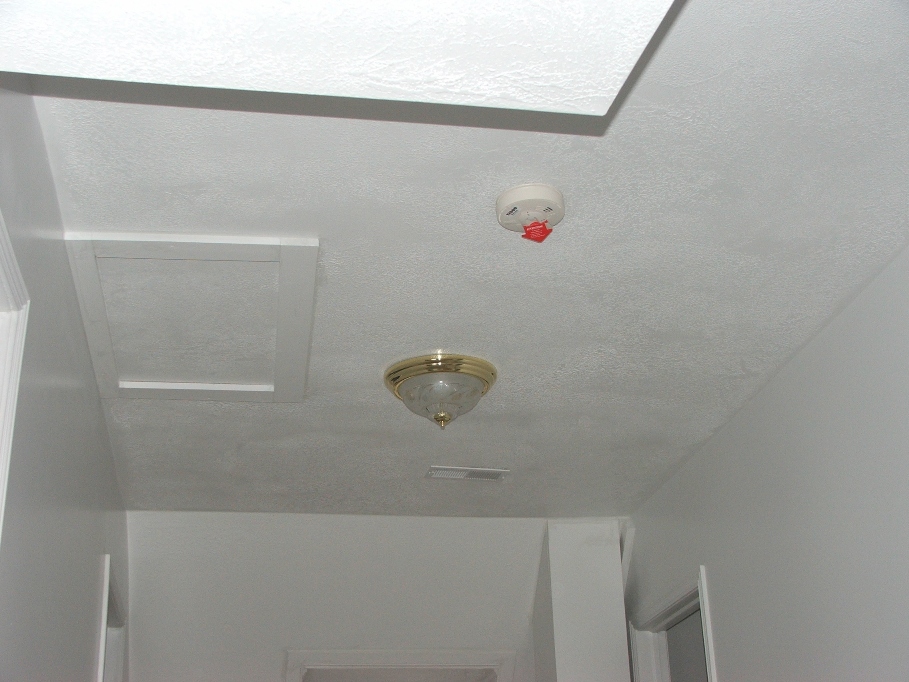

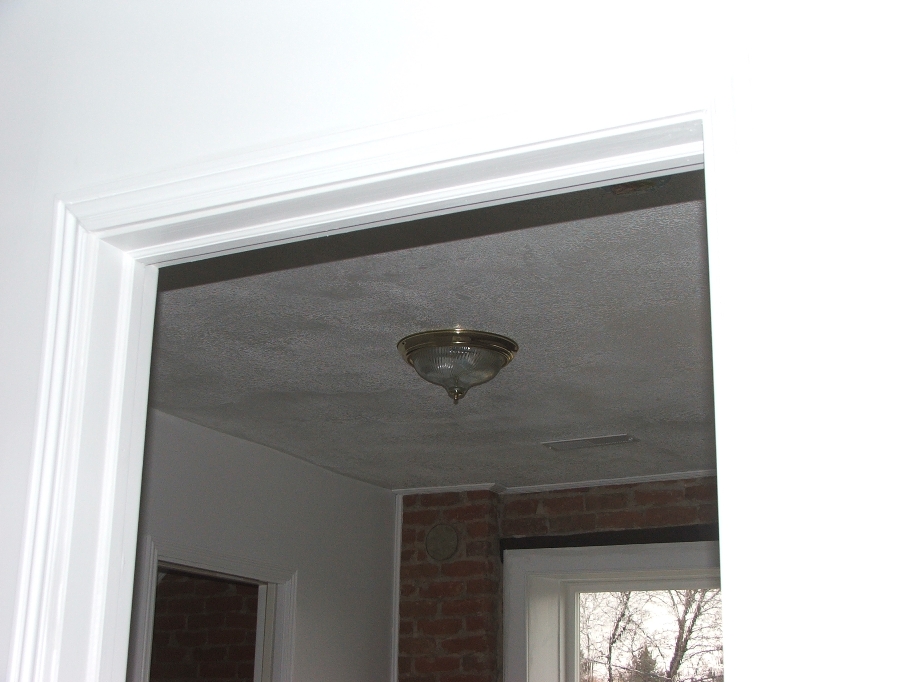
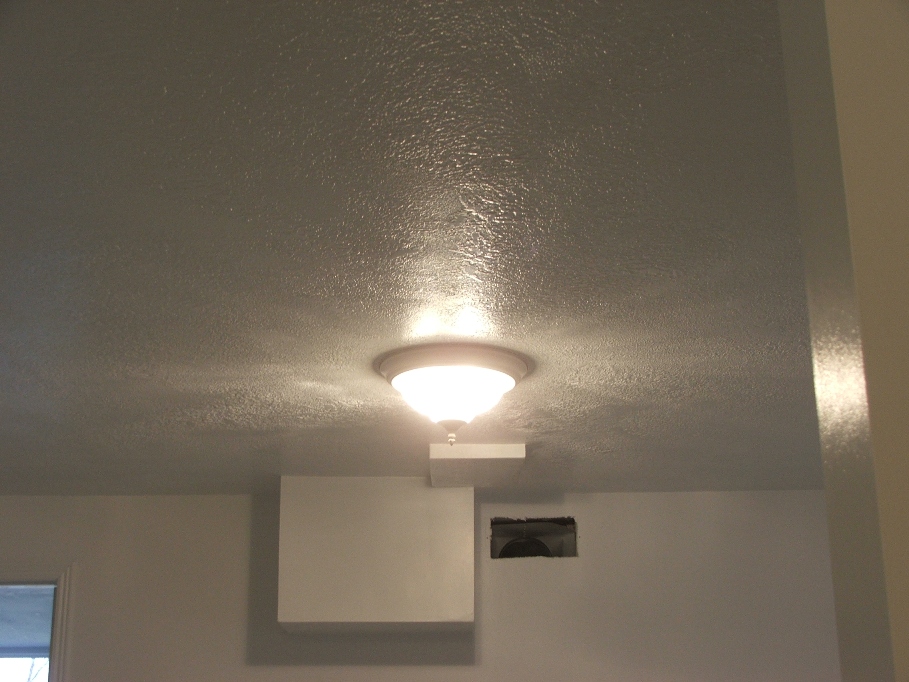
The above pictures are some of the light fixtures that Delbert installed, basic and simple. From top left going to the right..NW bedroom upstairs, Hallway upstairs, Upstairs bathroom, Master bedroom and downstairs TV room.

One of the things I had to do to get ready for a banister is to put a skirting around the steps. This required the purchase of 1X12 lumber and cutting around the risers and treads. The banister “spindles” will mount to the skirting and it sandwiches the sheetrock between two solid boards.
I cut these and installed them in a couple of hours and then painted them with a primer. I hope to get over there today (Sunday) to put on two coats of finish paint. If not, I’ll be over there early tomorrow.
I cut these and installed them in a couple of hours and then painted them with a primer. I hope to get over there today (Sunday) to put on two coats of finish paint. If not, I’ll be over there early tomorrow.
Delbert got ahead of me on installing a light in the stairway small window yesterday and so I had to remove the light to put a backing inside the window to cover the sheetrock backing that is in the “now disconnected” old bathroom downstairs. It took a little doing, as I had to remove the inside frame of the window in order to get the 3/8th thick plywood board in its place. It took more time than expected, and I primed that wood when I did the skirting.
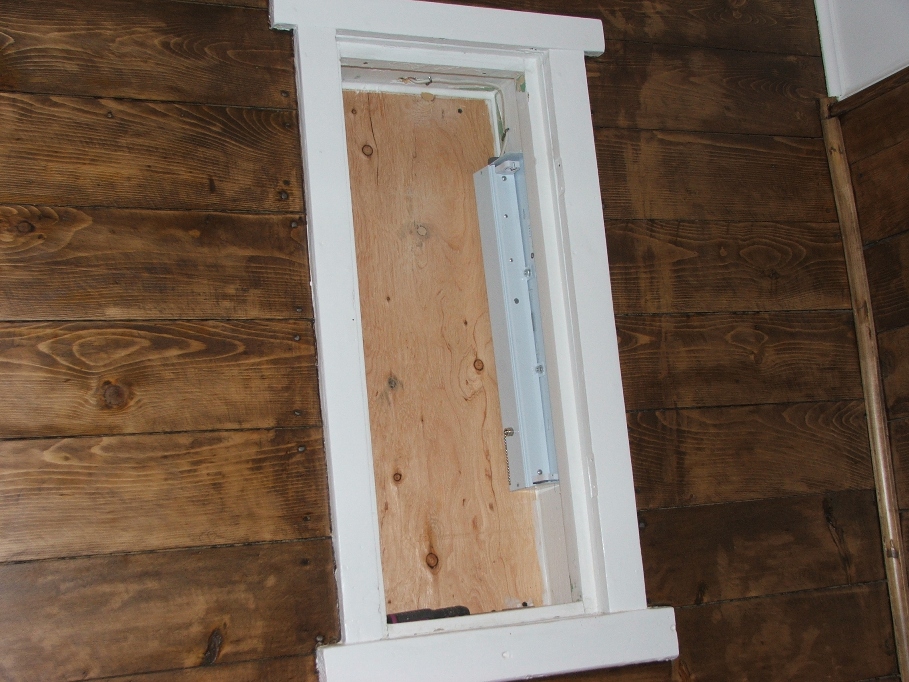
The light is an “under the counter” fluorescent bulb light and Delbert says there won’t be enough heat generated by that kind of light to ever be a problem. I have moved the light out of the window as far as I can without totally disconnecting it from the main power source, so that I don’t get paint on the light fixture. I have the door with the glass and the transparent cover almost ready to install. I hope to have it done soon.
Dec. 30 to Jan 8…WOW…Time flys! Of course we have celebrated the New Year and done all of that stuff. But with this remodel time is flying and we aren’t having too much fun. It’s fun to watch things happen in the positive with this old house however.
I called Witt, and asked him when he could possibly come over and do some of the things he needed to do and he said he could come over right away and do a lot of the finish work. I told him about the carpet and linoleum scheduled time frame for finish of the floors. He again assured me that he would be over this evening. He showed up about 5 p.m. and worked until around 9 p.m. and he got a lot of work done.
I called Witt, and asked him when he could possibly come over and do some of the things he needed to do and he said he could come over right away and do a lot of the finish work. I told him about the carpet and linoleum scheduled time frame for finish of the floors. He again assured me that he would be over this evening. He showed up about 5 p.m. and worked until around 9 p.m. and he got a lot of work done.


None of the fixtures have been hooked up to water yet, but the major install is completed.
Meanwhile, Delbert is doing his thing with the electrical and Witt is doing his thing with the plumbing. Meanwhile we are doing what we can to keep up with all of it. The carpet is do to be installed on the 7th and linoleum on the 9th. Stuff needs to be done before each of those things and time is wasting.
Roy is insistent on the banister being done before the carpet is installed, but I’m not going to delay the carpet because we have waited so long as it is. We are going through with the carpet install even if it means we have to extra “clean up” of sawdust while we install the banister. This writing is getting mixed up at this time, but we are within a couple of days of the actual time frame and I guess over time, no one will care if it’s off a day or two of actual time. We had to install the “newel” posts (I had to learn the stair lingo on this one) before the carpet could go in and I asked Roy to help with the entire banister scene. He came over and we decided what needed to be bought to put in the banister and all of the parts.
With Roy’s help setting up, marking and cutting the posts, and then Mitch’s help in the early morning hours before the carpet came in, we were able to install the Newel posts. Check this out! We are really excited now!!!!
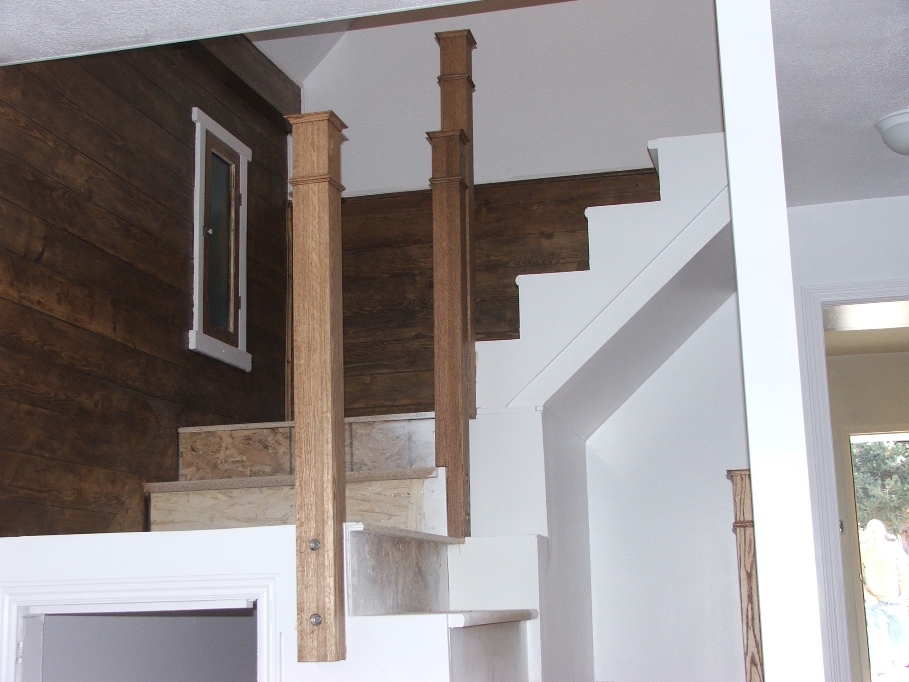
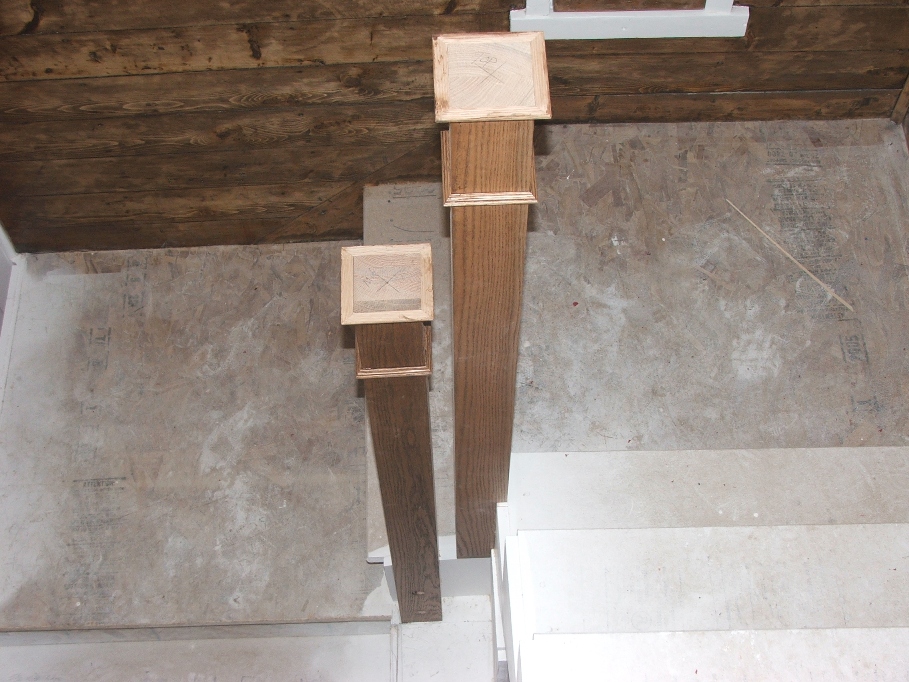
Life is good once again thanks to Roy and Mitch. These things are in place and ready for carpet. Let’s go!!!!!
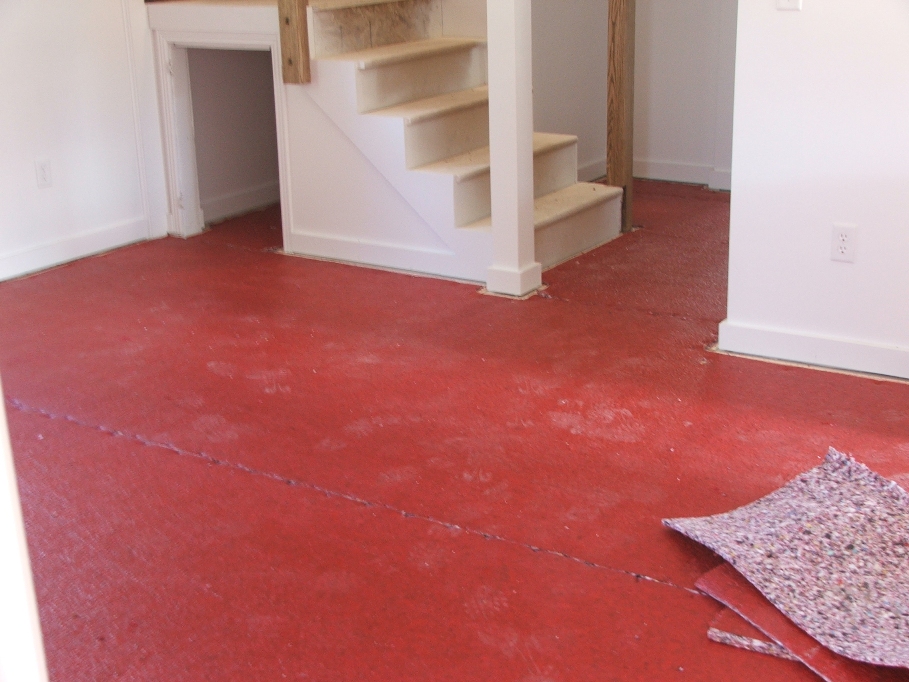
The carpet guys showed up right on time and we had just finished installing these newel posts and cleaned up the rest of the place. They moved in and finished the carpet in record time….about 8 hours! For 144 yards of carpet!!!! Two young guys and it’s done! I’m glad we didn’t pick Red carpet, because the pad was red and it would have been a horrible color!
The following are a series of pictures of some of the rooms that shows the carpet. I'm not a very good picture taker, so you will have to use your imagination on a lot of them, but you get the idea. I love the smell of new carpet!
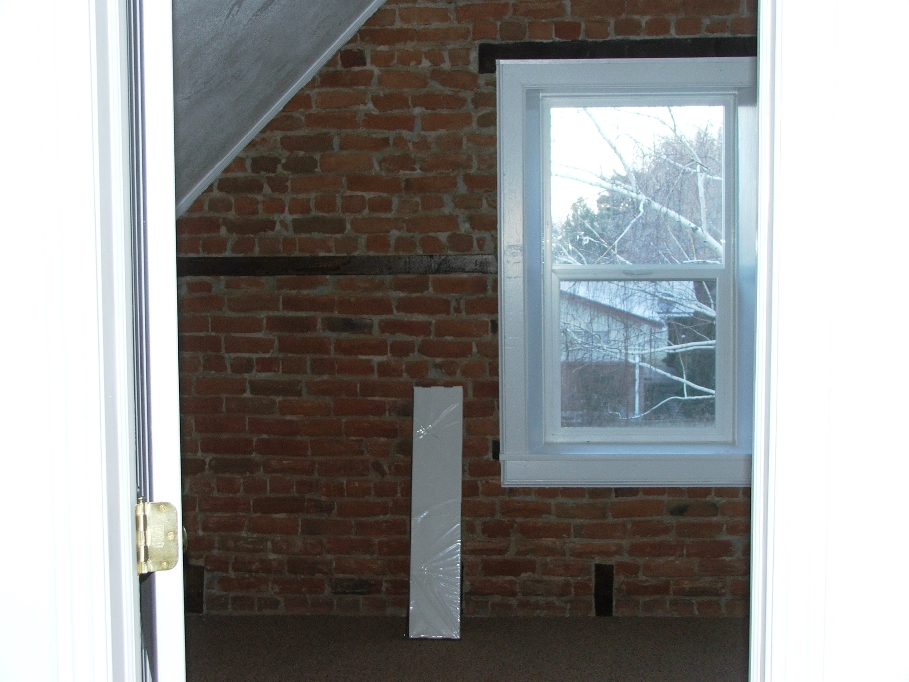
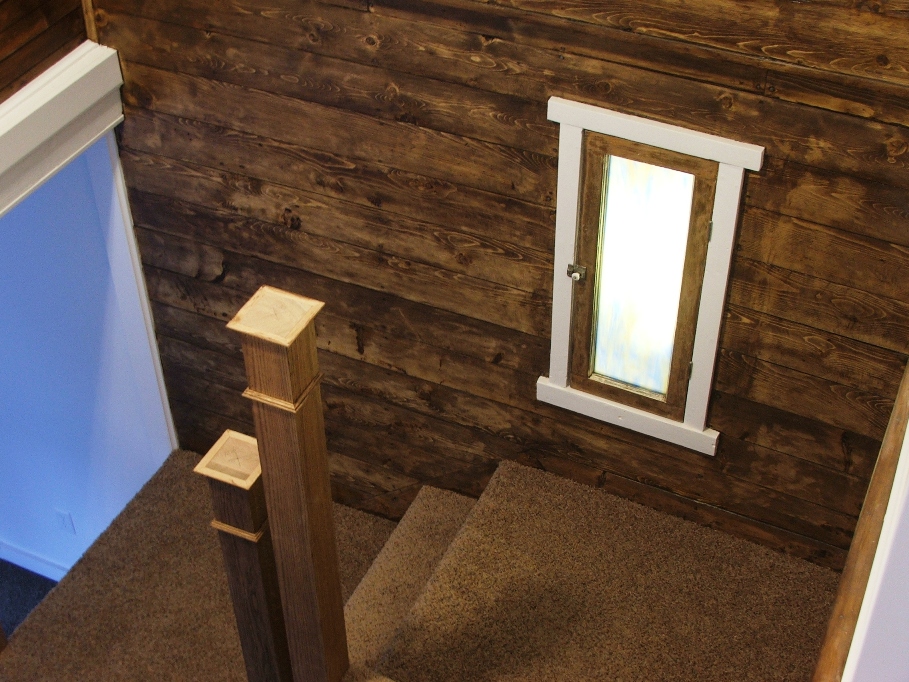
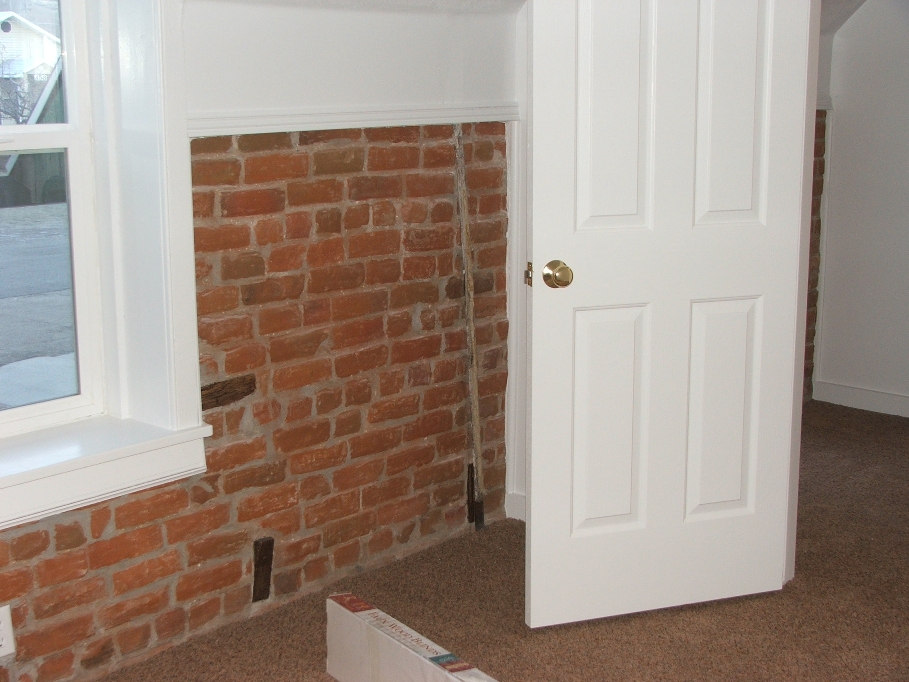
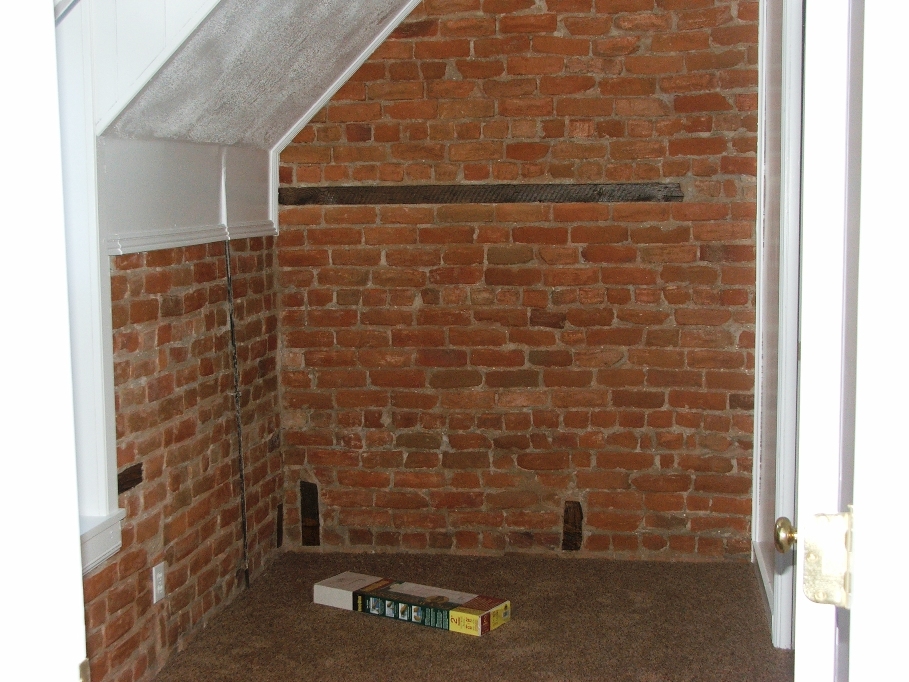
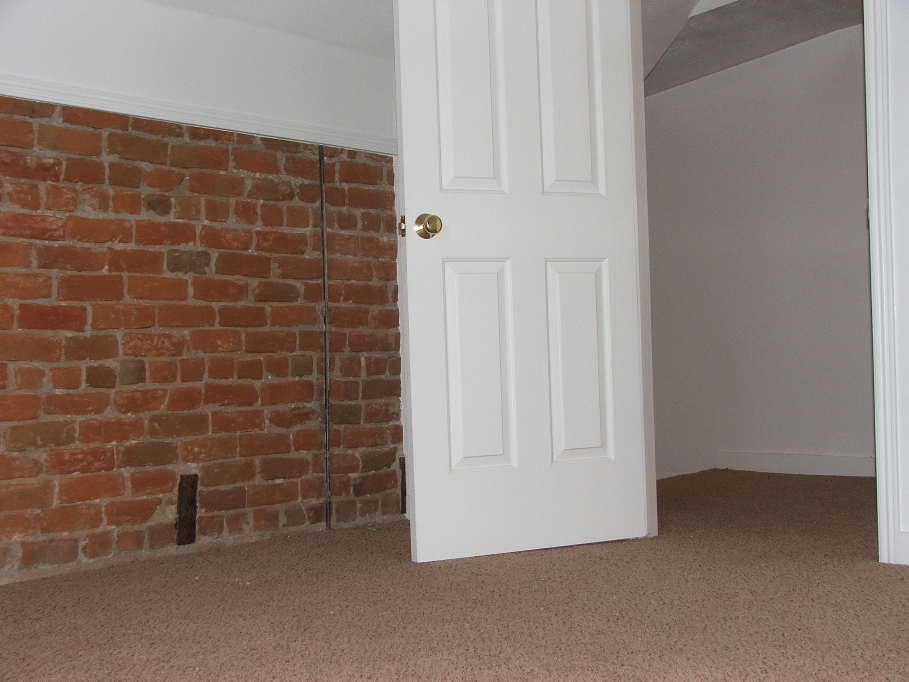
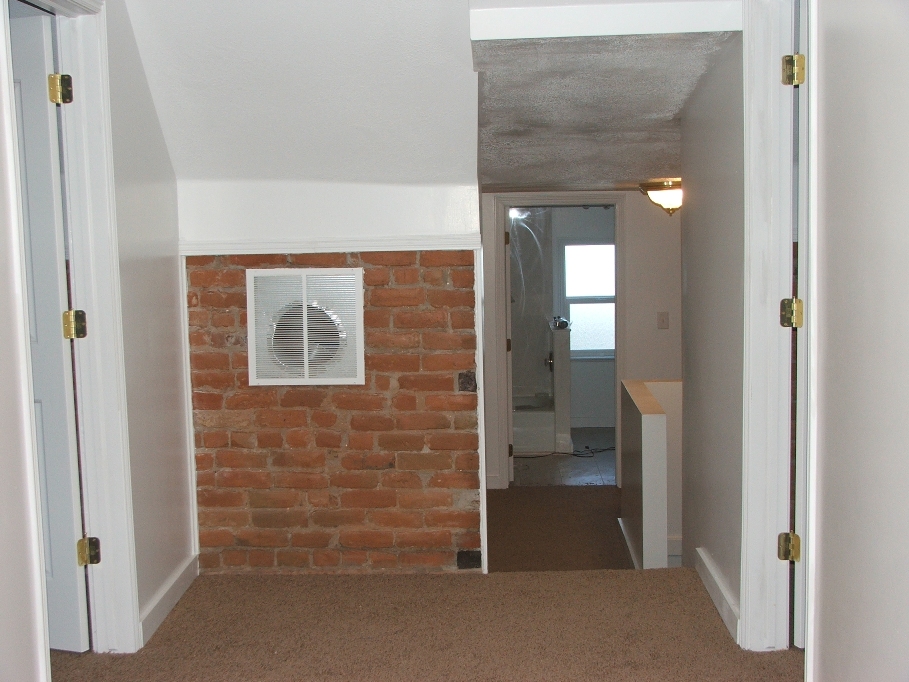
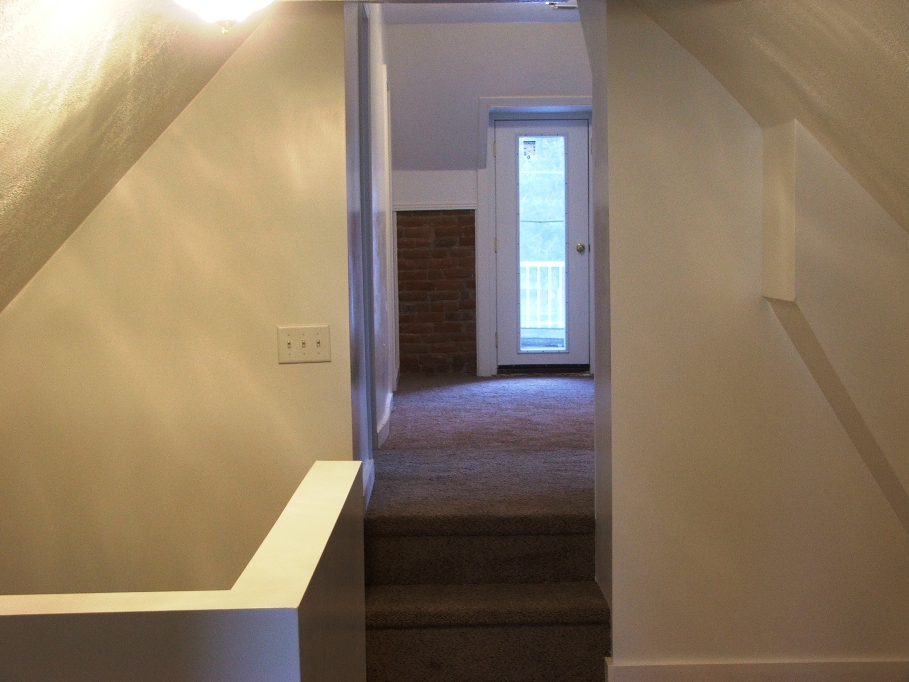
Man what a difference since we started this project. It just isn’t the same (thank God).
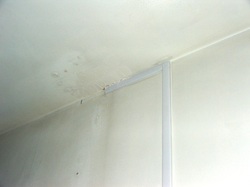
Well, it’s definitely taking shape. Behind all of the carpet excitement scene, Delbert and his son Bryce are busy with some of the last of the electrical. They are working outside and on the porch mostly, but also doing some odds and ends in the front part of the house. We had a chain hooked to the old fan/light that Angela thought should be re-routed up the wall and across the ceiling to eliminate the chain. Delbert said he could “channel” the cord up the wall and cover it, poke a hole in the ceiling and fish the wire over to the light fixture. OK! Get it done.
Another project we put him on was to reconnect the front light back to the switch. Earlier, he had disconnected it from the porch side of the house where Rick had wired it before. It didn’t meet code and was actually dangerous where the receptacles were (too close to the ground in the front of the house). I’m not sure how he did it, but it’s back on when you flip the switch.
He had to build another service connection more toward the front of the house, but still on the South wall. Code calls for the meter to be about 10 ft. from the corner and about 6 ft. above the ground. Then the wires need to be above the roof eve. Once he did that, he moved into the porch and put in a new service panel and wired it up. The temporary power hookup is coming from the old service panel which will be disconnected once Utah Power makes the new connection outside.
The following series shows the outside electrical changes.
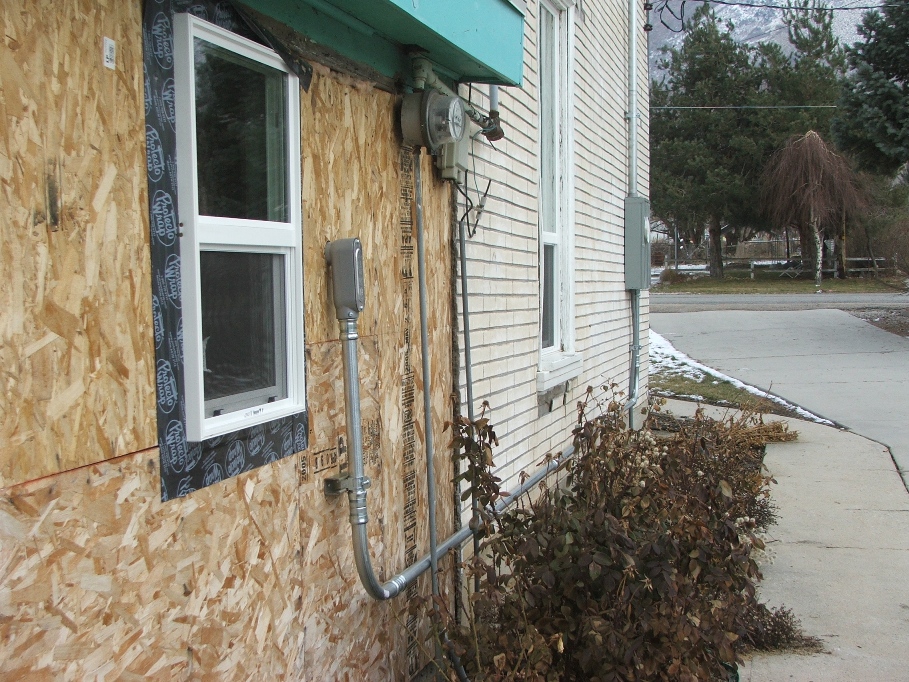
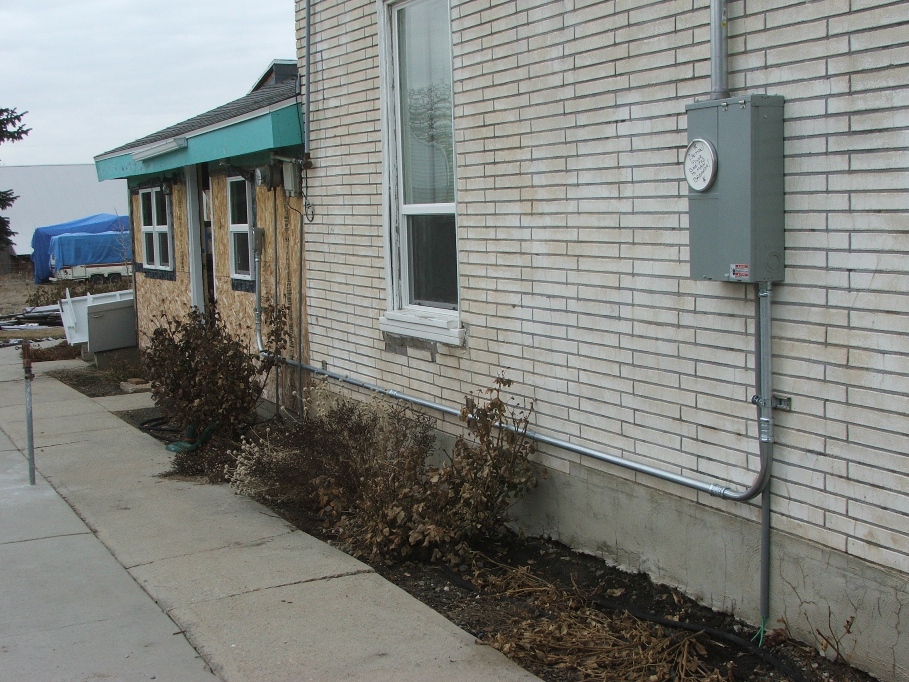
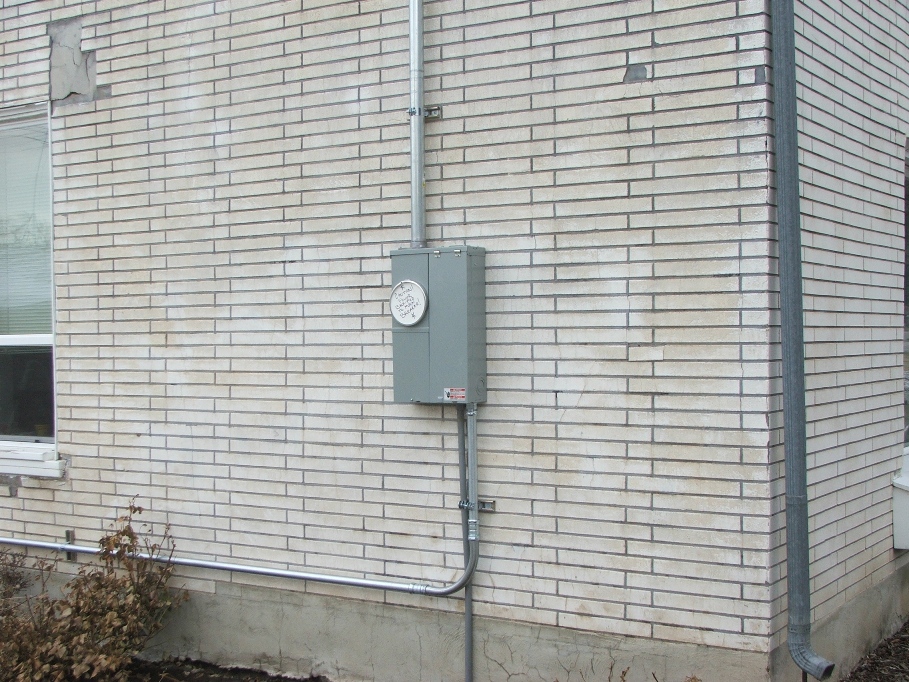

At this point the power is coming in through the two insulators attached to the house. The new line is routed under the window and will enter into the new service panel once the power company comes and hooks up the power to this new pole.
Now let's look at the new service panel.
Now let's look at the new service panel.
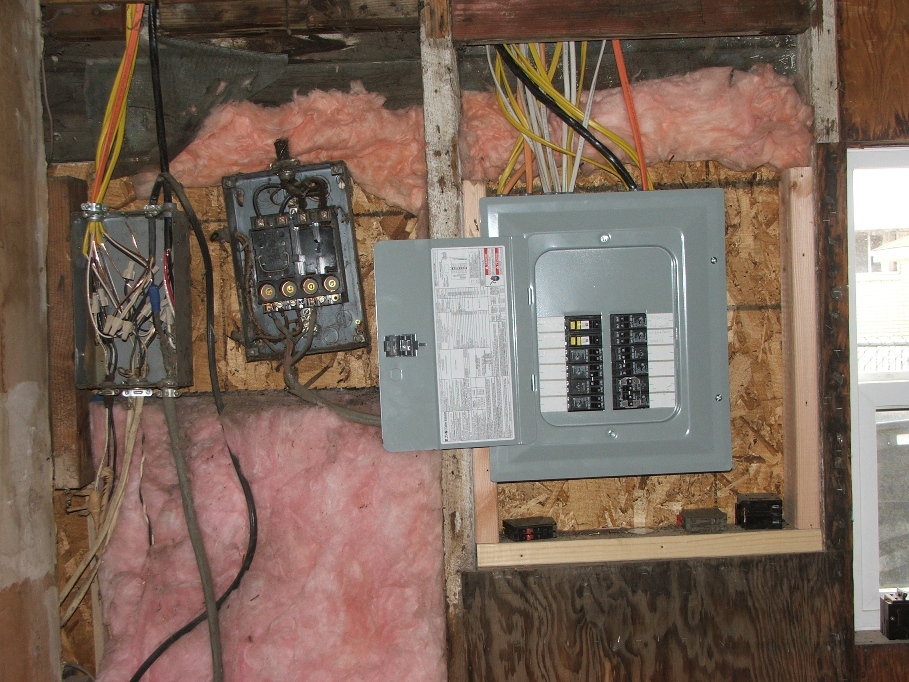
The new service panel box on the right looks much safer than the one in the middle. The left most box houses all of the wiring in the kitchen, living room etc. and will be wired and marked inside the new service panel. All of those circuits will be put on their own breakers and life should be pretty good once this is done. Delbert will switch out the current 30 amp breaker that runs the small electric water heater in the kitchen for a 15 amp breaker in the new box (code). The old box in the middle will be disconnected and tossed in the garbage. Anyone want it????
Of course all of this had to be inspected and I spent all day waiting for the inspector to show up. At 3:30 p.m., I called the county and they said that the inspector had been out to the house early in the day and passed the inspection on the job! This is great, but I never did see the guy. Oh well, I guess since I was painting in the living room, I didn’t hear him come and go. That’s hard to believe since the windows were only covered with painters plastic and you can almost see through it. We found the inspection paper on the ground yesterday, barely readable because it got snowed on and wet.
The county will call in the passing of the inspection and set up Utah Power to come and connect us up. Delbert said they usually take a couple of days to show and once they are done he will be over to finalize the electrical hookups, and give us back our hot water in the front of the house.
I mentioned painting the living room. Since I had to be in the house while the carpet was being installed, I went ahead and prepared the room for painting.
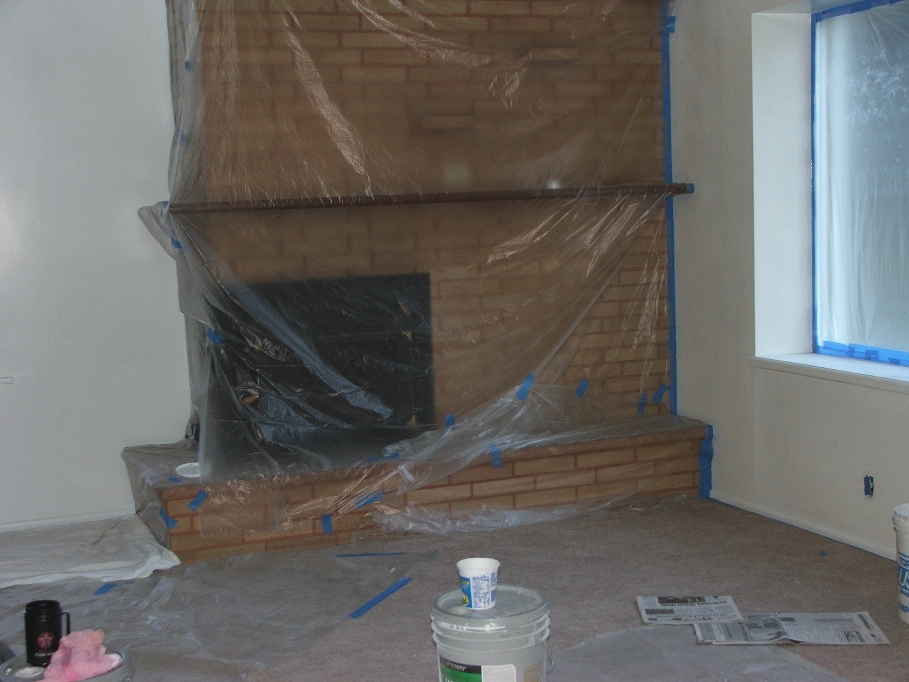
It takes longer to prep the room than is does to do the painting itself. Sometimes we have to question, “where did all of the stuff go that was in this room”? Sherry moved it, that’s where it went!
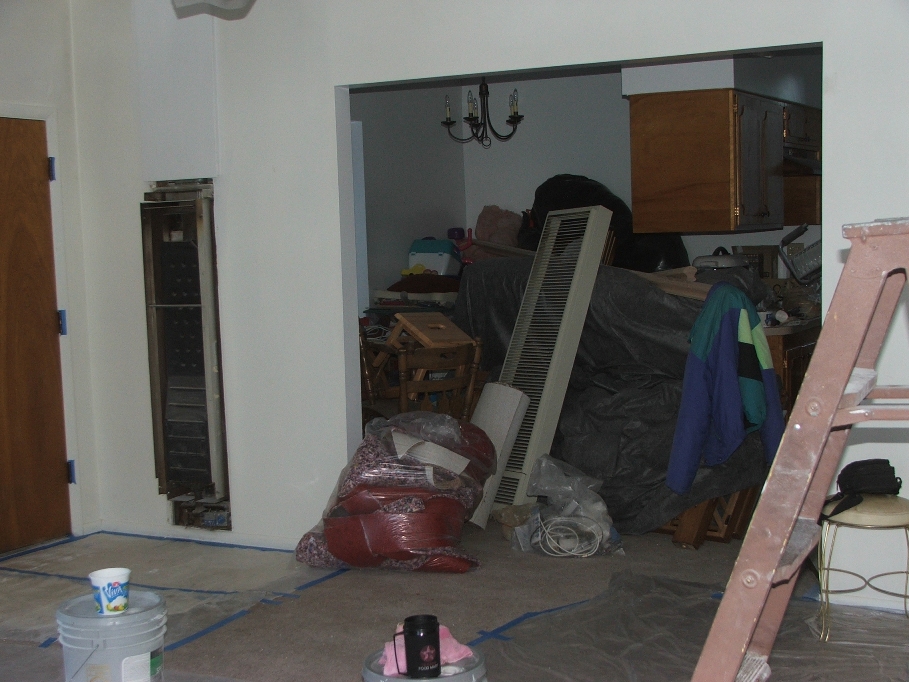

Well, it’s out of the way isn’t it??????
And even though the patch where Delbert had made the hole to thread the wire wasn’t dry, I decided to paint the walls where the sanding dust wouldn’t get on the wet paint. I was able to put two coats of paint on the North and West walls, and one coat on the South wall before the day was done.
And even though the patch where Delbert had made the hole to thread the wire wasn’t dry, I decided to paint the walls where the sanding dust wouldn’t get on the wet paint. I was able to put two coats of paint on the North and West walls, and one coat on the South wall before the day was done.
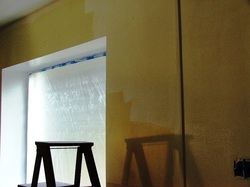
This is a picture of the East wall, but do you really think it needed painting? I believe it’s been close to 10 years since it was painted last. Mother has been gone nearly 4 years, and I know it wasn’t painted after she bought the carpet and new furniture.
The next day, Saturday, Mitch was over and finished the sanding on the patch and we were able to finish the painting in the entire room.
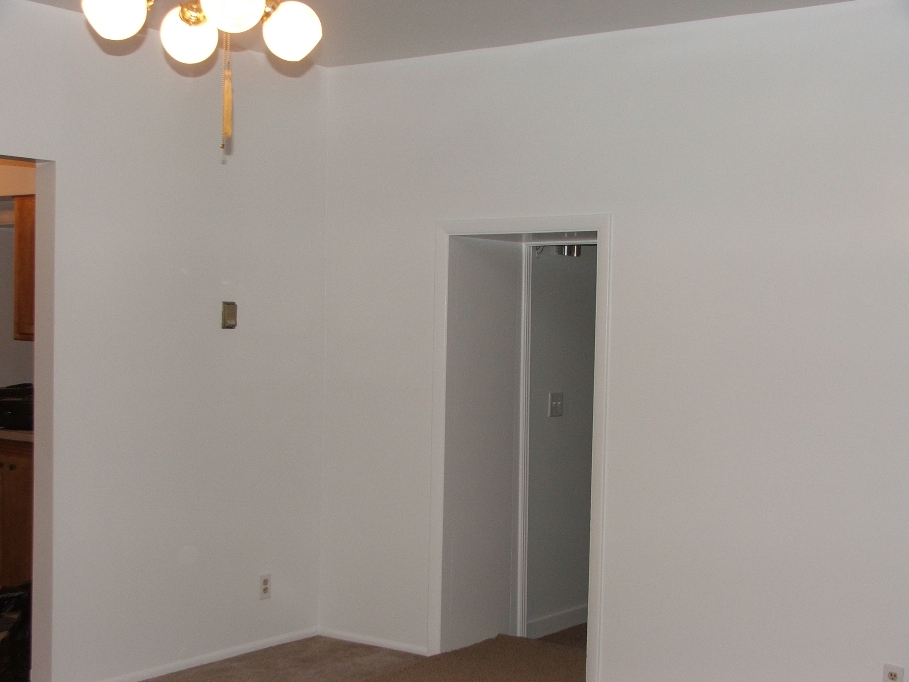


Keep working! There is lots more to do!
Again, things have been so very crazy this week, I’m not sure what day is what, and this journal has gotten way behind. The next series may have taken place earlier in the week, but you still need to see the end results. We had purchased some faux wood blinds to put in the windows upstairs and in the TV and utility rooms. They went in quite easily and look very nice. If you ever need blinds, I suggest these. They are cheap, easy to install and they say they are easy to clean.
Again, things have been so very crazy this week, I’m not sure what day is what, and this journal has gotten way behind. The next series may have taken place earlier in the week, but you still need to see the end results. We had purchased some faux wood blinds to put in the windows upstairs and in the TV and utility rooms. They went in quite easily and look very nice. If you ever need blinds, I suggest these. They are cheap, easy to install and they say they are easy to clean.
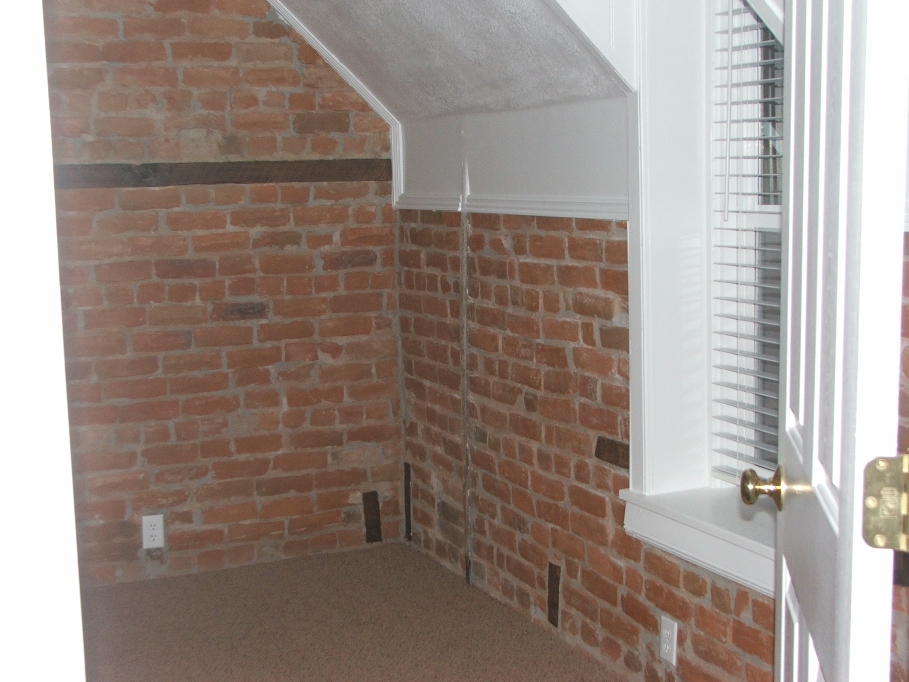
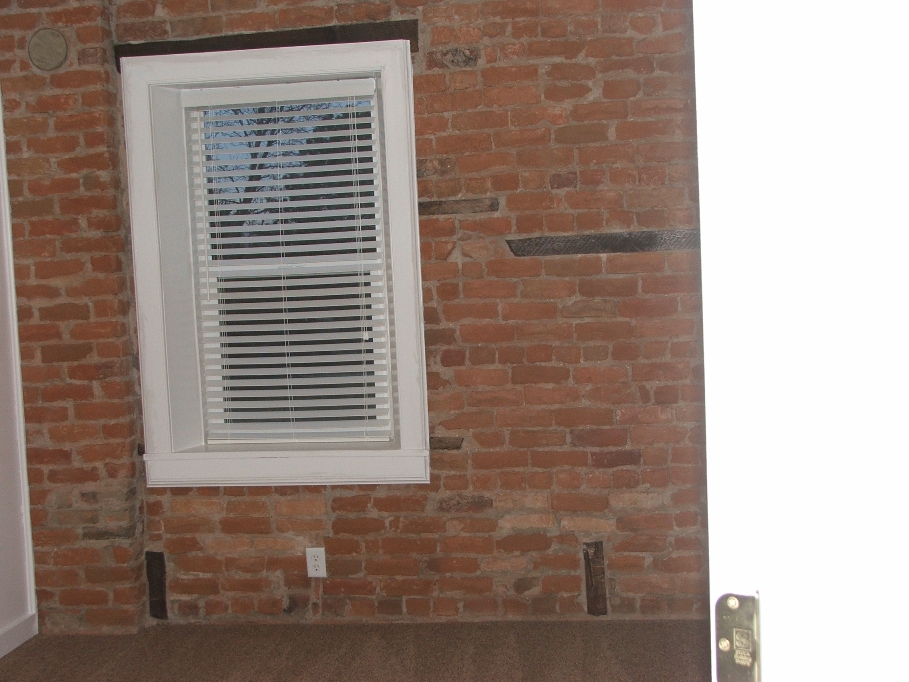
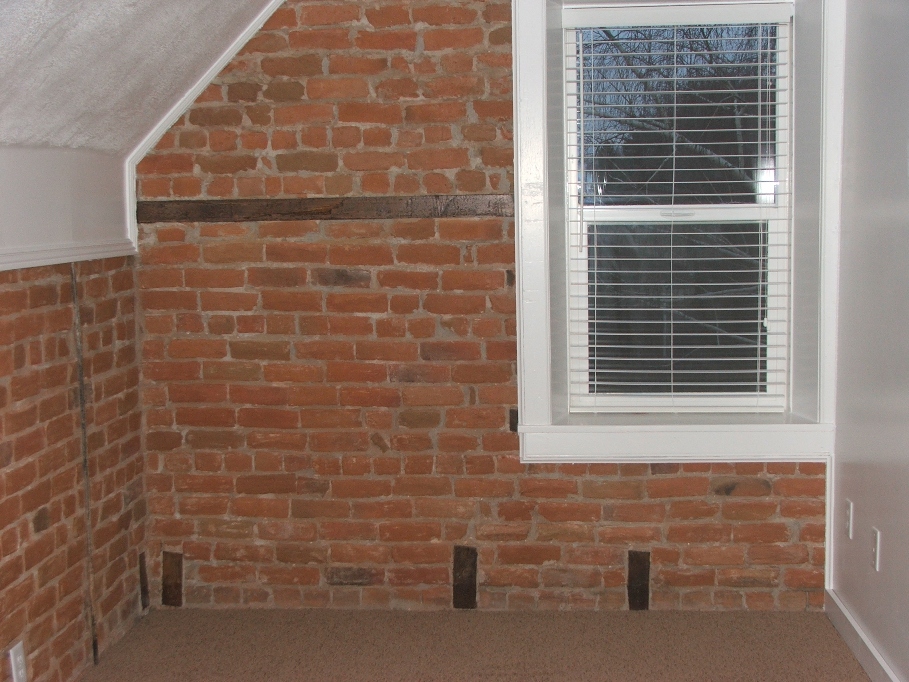
The blinds are also installed in the windows downstairs, but I didn’t take any flicks of them. You will see some of the blinds in pictures that will follow, but for now you have to see the old door with the new glass installed! It turned out better than I ever dreamed it would! Sherry came over and held the glass while I put up the last of the quarter round to hold it in place. Once that was done I used my Dremel tool router to “chew off” some of the wood that was sticking out too far from the door. Because of how I had to use the Dremel tool, I had to free hand the work. As I proceeded, the nasty-ness of the cutting actually turned out better than if it had cut smoothly. It looks like I was able to salvage the old trim and recondition it. It is beautiful!
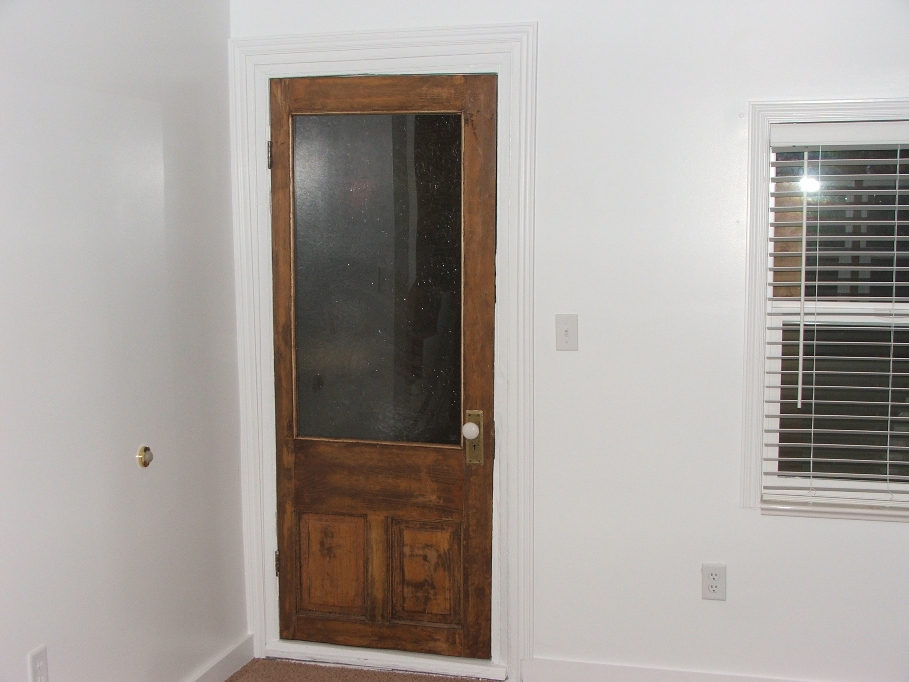

View from the porch side! Do you think I’ll get the porch cleaned up anytime soon???
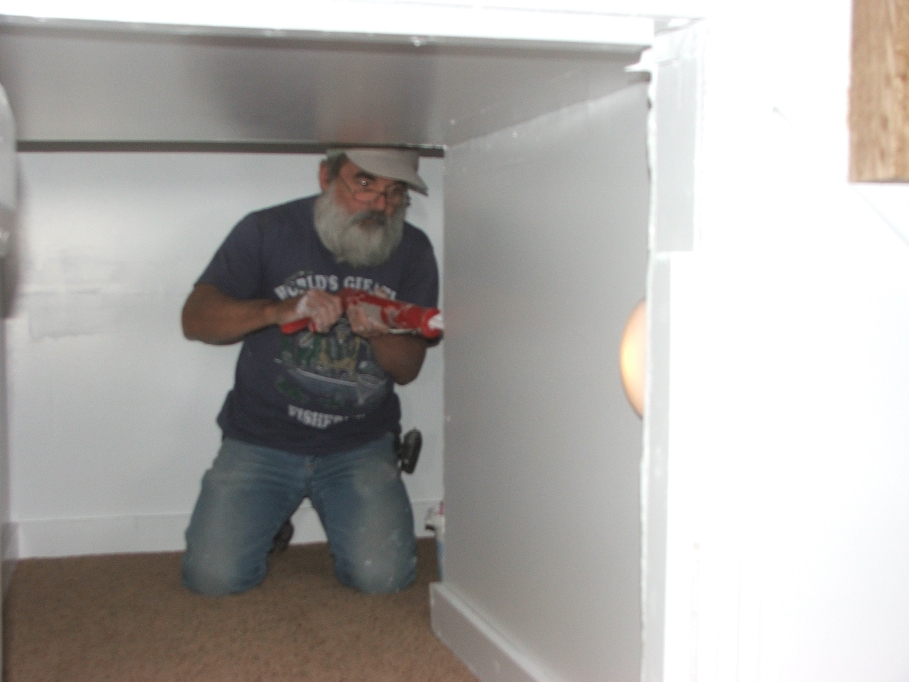
The day isn’t over yet, but it’s getting close and I have one last thing to do to reach my goals for the day. Install lights in the “play area under the steps” and caulk the edges in that same place. The caulking took the most time, but all of the holes and gaps are filled, no spiders and bugs can get in now (as if they could before). And Sherry had bought two touch lights that are now installed in the space to give the kids some battery operated lights by which to see.
I can nearly stand up in there! Sometimes it pays to be short! Notice too the touch light on the right side!
I can nearly stand up in there! Sometimes it pays to be short! Notice too the touch light on the right side!

Jan. 9 and 10…These days were spent catching up on some of the small things needing to be done. Quinn (one of Mitch’s friend) came over with his wife and cleaned the carpet in the living room and dining areas up front. When they were done the carpet looked and smelled very nice.
View into the living room area. We were afraid “spunkie” might have made some messes on this carpet, but we had Quinn put a disinfectant in the cleaning solution and we did not smell anything that was like cat urine. We were very thankful for that. Most of the old spots of soil came up and the carpet looks really good. The carpet is over 10 years old and still in great shape. We are fortunate.
View into the living room area. We were afraid “spunkie” might have made some messes on this carpet, but we had Quinn put a disinfectant in the cleaning solution and we did not smell anything that was like cat urine. We were very thankful for that. Most of the old spots of soil came up and the carpet looks really good. The carpet is over 10 years old and still in great shape. We are fortunate.
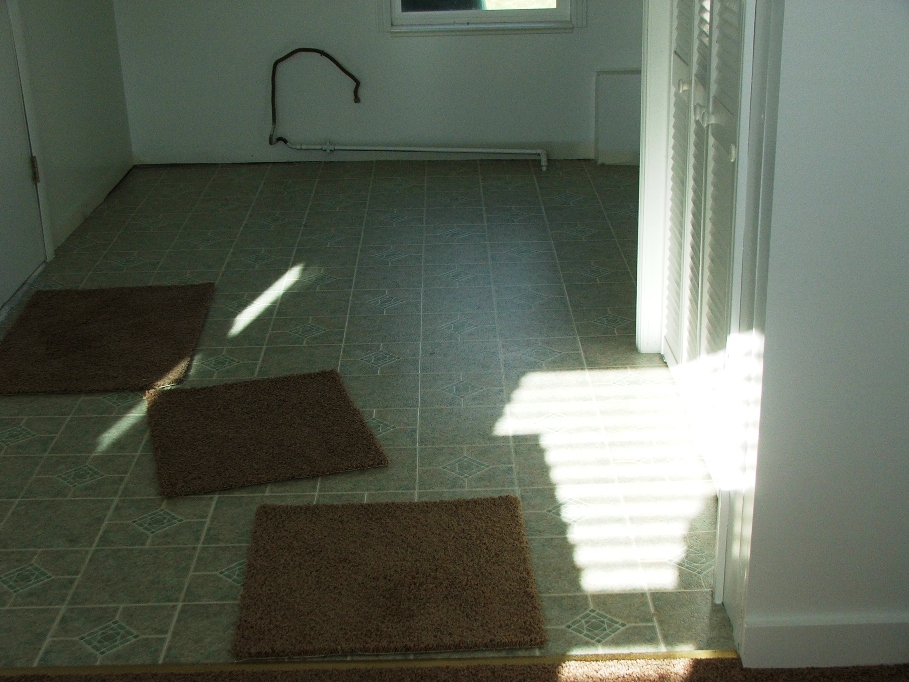
Meanwhile, back in the utility room, a family team of three were busy putting in the linoleum in there. First they had to lay down a ½ inch thick underlayment and cement the seams. They used small staples to secure it down and all of this prep work is to make sure the linoleum stays smooth and doesn’t show any dimples and dips. Once they were done I took the following picture.
The sun is shining in a bad way for you to see this flooring very good, but believe me it’s nice and of course Sherry and Angela picked a perfect color to match the carpet, and still be neutral enough for any changes to the décor in the future.
The sun is shining in a bad way for you to see this flooring very good, but believe me it’s nice and of course Sherry and Angela picked a perfect color to match the carpet, and still be neutral enough for any changes to the décor in the future.

Once they had cleaned up and gone, my next chore was to caulk around the edges and put in the base. This took three tubes of clear kitchen and bath caulk (25 year stuff) and about an hour and a half to do.
This is the view with tape still down, because I went right to caulking the nail holes and painting. The floor is 4 inches lower in the far right corner than it is by the door, and the base shows the slope. I’m not sure if we will caulk between the linoleum and the base or not. I’ll let Mitch decide. In the meantime, I’m going to move the washer and dryer into place, and Witt will install the water heater and hook up the old sink.
This is the view with tape still down, because I went right to caulking the nail holes and painting. The floor is 4 inches lower in the far right corner than it is by the door, and the base shows the slope. I’m not sure if we will caulk between the linoleum and the base or not. I’ll let Mitch decide. In the meantime, I’m going to move the washer and dryer into place, and Witt will install the water heater and hook up the old sink.
Most of the 10th, which by the way, is the ONE YEAR ANNIVERSARY DATE OF MY FIRST ENTRY INTO THIS JOURNAL, I spent cleaning up and doing small things to get ready for banister work with Roy tomorrow.
I moved the back rain gutter, installed the North window (living room) blinds, hooked up the front door weather door, painted the base in the utility room and moved a LOT of stuff from the porch into the cellar. I also put up some weather tape on the seams outside the porch to help keep water from coming into the porch. Things are almost completely done. Sherry and I are very glad to be nearly completed with this project, Mitch and Angela are ready to move into the place and the bank would like to know when they might expect a payment on the debt we are in to them. Come on lottery!!!!!!
Jan. 11 through 14…Roy was over about 10 a.m. to get started on the stair rail and we started off real slow. He says that first step in building a rail is very important, especially the angled rails. Because of that, we started with the easiest rail first….the flat one.
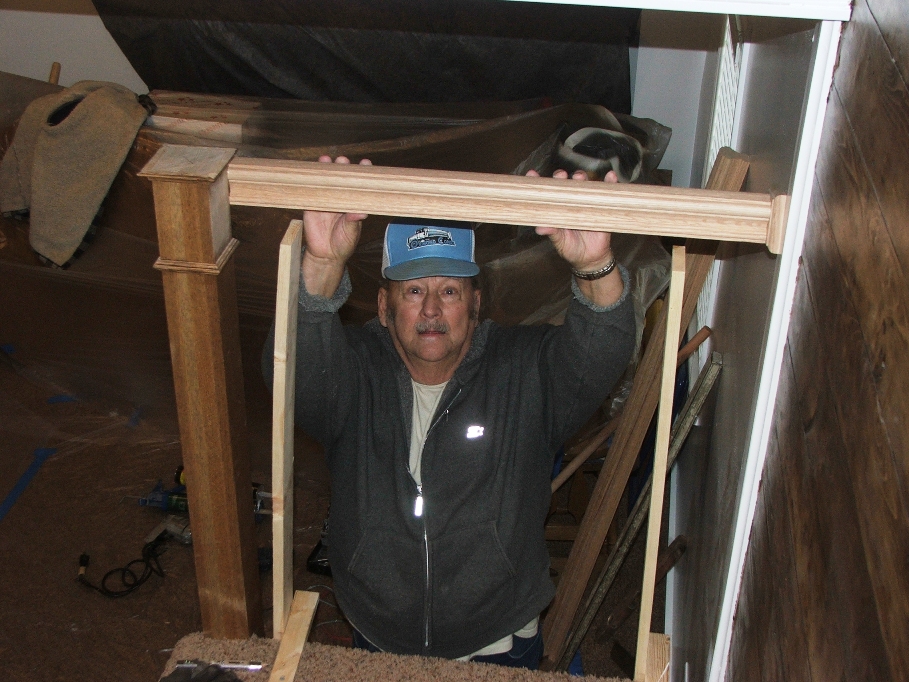
He measured up the wall and marked 36 inches with will be the top of the rail. Then measured and marked the newel post. Attached the rosette to the North end of the rail and cut it to length. We added glue to the rosette and the other end of the rail and put it into place, nailing with his nail gun to help hold it until the glue dried.
The wood under the rail is to help hold it into place, like a “third hand”. This helped in getting accurate measurements.
Next we installed the spindles under this piece of railing. Roy started in the center and then planned out the placement either side of that. He used a 1X4 to make his plan and then we went to the real work under the rail. I’ve found that Roy is a perfectionist in building this rail. He says he isn’t, but when I see him make small cut after small cut and use shims under the rail and against the saw wall I see the other side. All of the rails fit as close to perfectly as anyone could possibly make them fit. Very nice indeed!
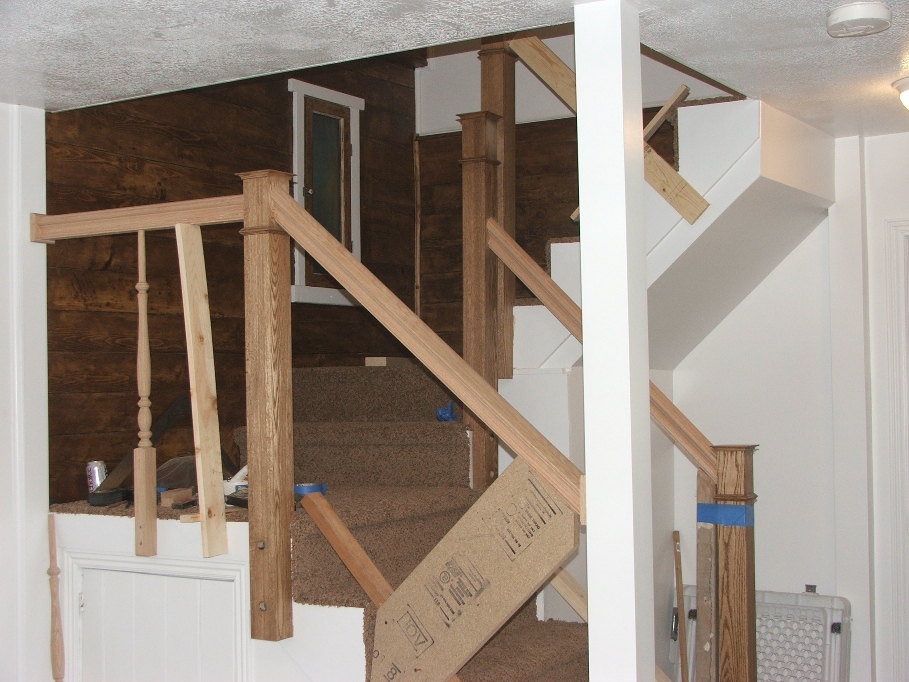
The first spindle is in place in this view and you can also see the “jigs” he created to hold the other rails in place. Some are taped while others are screwed to the treads. This makes for a little patchwork, but what the heck. Those holes are easily fixed.
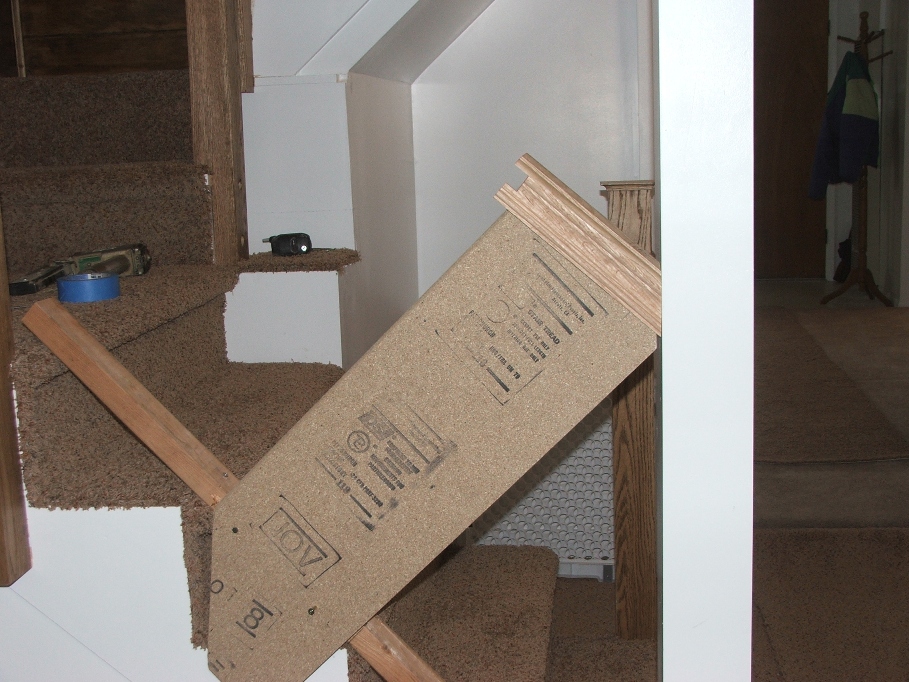
Jig with “test rail” in place. The short test rail was used to check the angles and make the small adjustments before “attacking” the full length rails.
Roy is well into his 70’s and so can’t get around like he did when he was younger. Plus he has to take water pills which makes his working days rather short. He can work about 4 hours before he has to go home. This is fine with me, as I can get some work done before he gets here and then work a bit longer after he is gone. Mind you, however, I don’t do much on the rail while he is not here.
The picture above shows the far side downstairs rail pretty good. Roy wanted to have the rail the same as the closer one and then take it straight into the newel post, but I talked him into just putting it into the newel and cutting down the time it would take to make it “better”. There is no doubt his way would have given the stairs more character, but I think it has enough this way. By the way, the upper end of the far rail is about 1 inch higher than the same end of the closer rail.

This is the view from the top of the stairs. One spindle in place and a bunch to go.
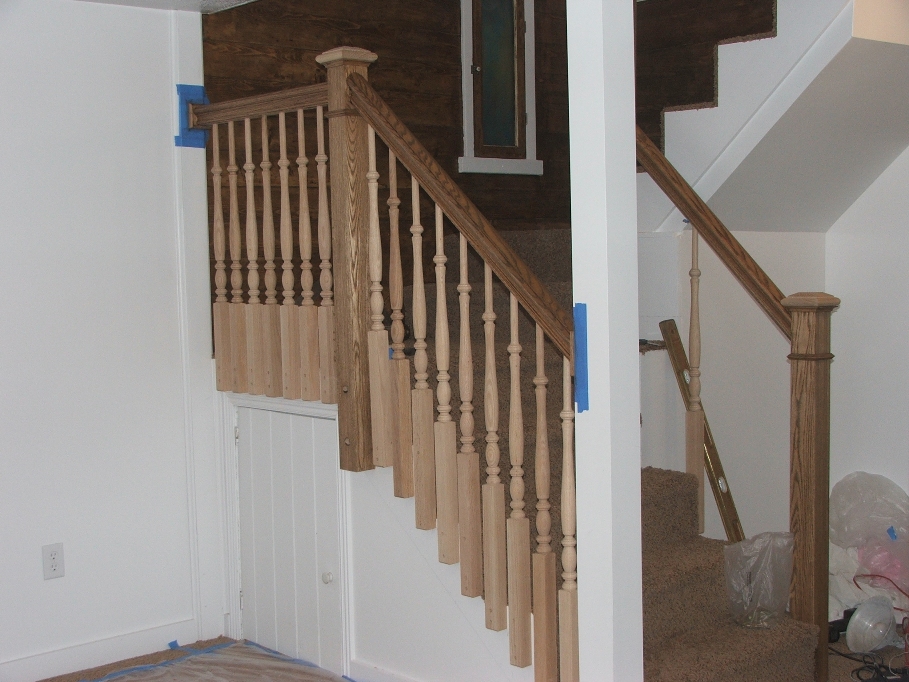
We quit working on the stairs about 2 p.m. and this is what it looked like after the second day.
Roy suggested I get a coat of stain on the hand rail, because of people coming in to see the daily accomplishments and putting their “greasy” hands on the rails. The stain would be better served on a rail that didn’t have hand oils impregnated into the wood. I stained it after he had gone home on day one.
As for the spindles, I will have to stain and varnish the first set we put up while they are in place on the landing. The others I will take down, mark them as to where they go, and finish them on the porch. I can also repaint the skirt where we have pencil marks and holes from the jigs. I’ll wait until all of the spindles are in place before I start that process.
Notice the tops of the newel posts. I glued them on the night I stained the rails. But couldn’t stain them because the glue hadn’t dried yet.
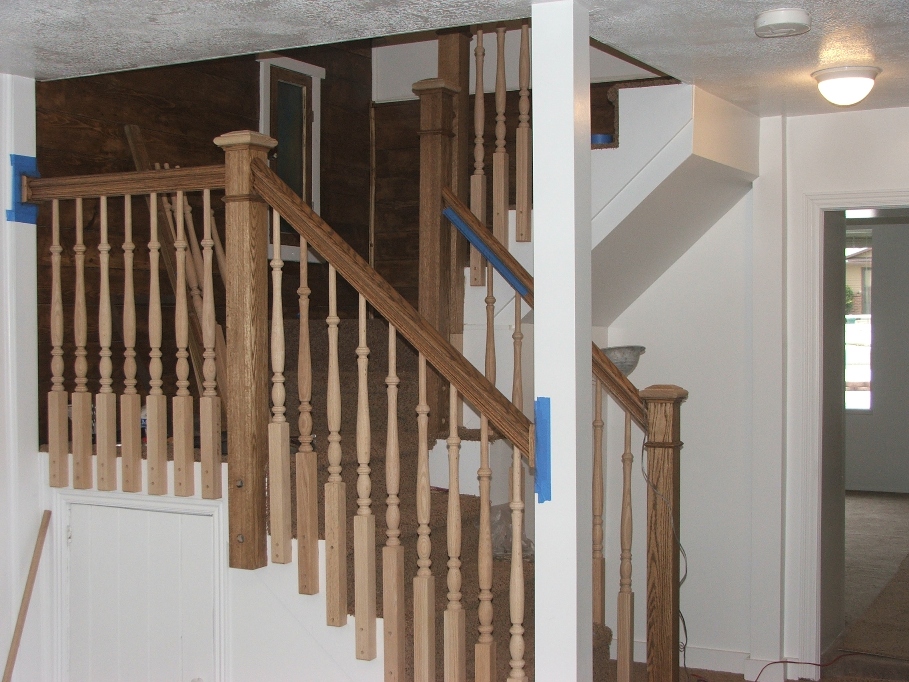
Well by noon on Saturday (14th) this is what it looked like.
I think we have 4 more spindles to put in place. But, before we can do the last one on the far side of the bottom set, I have to insert a piece of wood under the higher middle newel post to make it look like it’s a full length post plus I have to plug the lag screw holes on both of the middle newels. The picture above actually shows the piece of wood I inserted under the one newel, but the following picture shows it better.

The block is glued in place both on the east and the north sides. It shouldn’t need any nailing. I should be able to put the plugs in early on Monday morning, before Roy gets here. I sort of think the last of the spindles will go into place rather quickly, and then we can dismantle the chop saw and get all of Roy’s tools back over to his place. After that I will disassemble the spindles and stain them. While they are off, I will stain the underside of the hand rails and will probably varnish them as well.
While this work has been being done by Roy and myself, Mitch has been busy touching up the caulking and building the closets in the two small bedrooms upstairs. Mr. Witt has also been around trying to finish up with the plumbing. I think he has about one day left and he will be done.
I have called in to Utah Power for the service panel to be connected and their technician made a quick trip out to make sure it was ready. He said that I will be getting a call early next week, probably Tuesday the 17th, and they will tell me when they plan on being here to run the new power line from the street pole to the new meter. He also said I need to clear a path through the pine tree branches to give them a “clear shot” from the pole to the house. This means I will probably have to “top” the tree.
Jan. 16…Martin Luther King Holiday, but work needs to be done. I passed on an ice fishing trip to Causey in order to get the banister completed and I’m glad I did. First order of business this morning was to plug the 1 inch holes in the newel posts. That didn’t take too long, and Roy showed up just as I finished with that.
We are only 5 spindles from completion!!! Roy went right to work calling out orders for cutting the last spindle on the East side lower portion and I cut what he said. That spindle went in without any problems. We predrilled a couple of holes and nailed it down with some number 6 penny finish nails.
Then we measured and marked the last four hole placements up top. Roy had to head for home and my job was to complete the drilling. That was done again in short order and I picked up a few things while I was waiting for him. Oh ya, I took a picture of the last 4 holes.
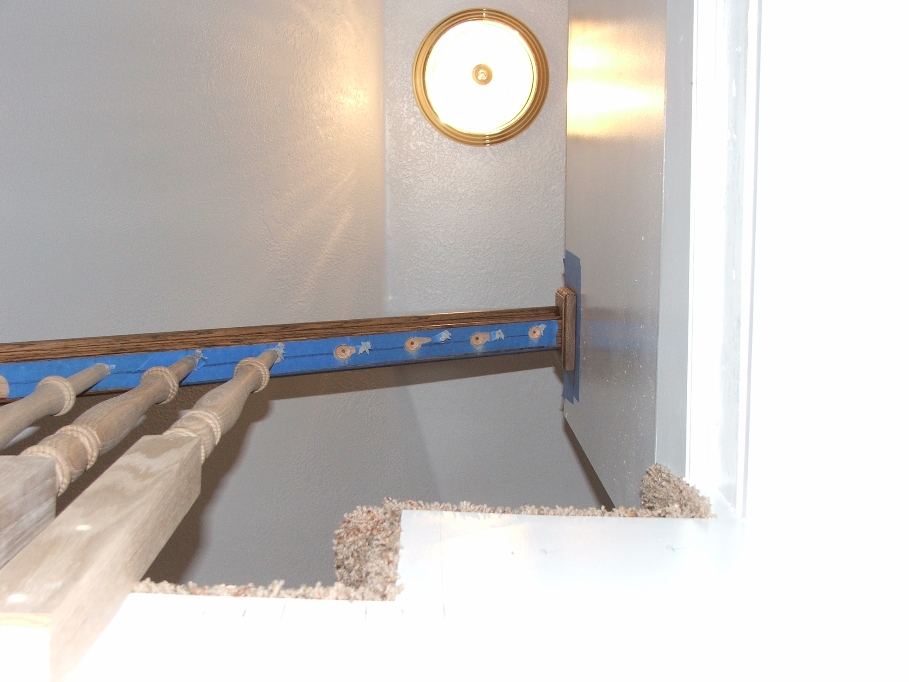
Roy finished the installation of the last four spindles in less than 15 minutes and then we took a few more to admire the job. Roy did an OUTSTANDING job on this rail and told me he figured it was the last one he would ever do in his life. If it is, I’m glad he waited until this rail to be finished with building banisters.
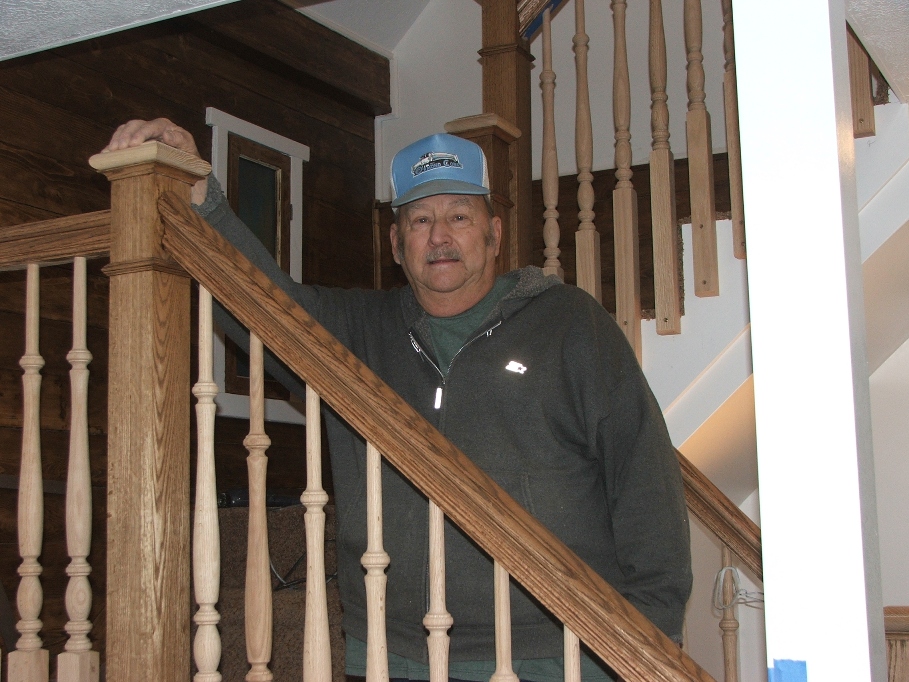
A VERY GOOD job Roy!!! THANK YOU A MILLION!!!
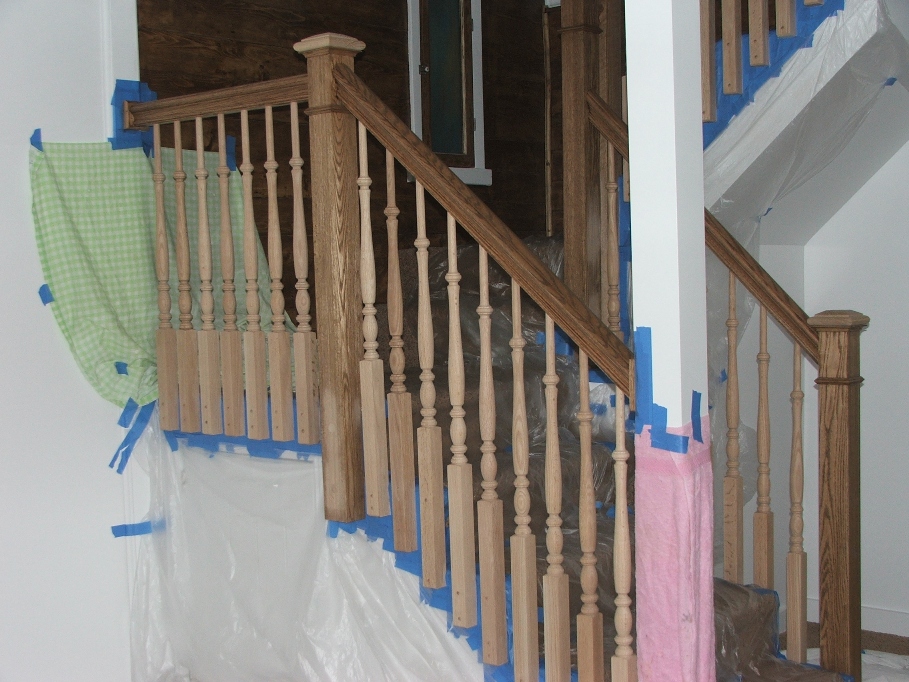
Well, he had things to do and so he packed a few of his tools and headed for home. I spent the rest of the day dismantling the chop saw, gathering the rest of Roy’s tools and cleaning up a bit. Then I put in the 3/8ths screw hole plugs and the rest of the 1 inch hole plugs. A bit of putty was in order here and there as well, in preparation for the staining and the varnishing.
After a lunch break, Sherry and I went back to the old house to prep for the staining. It took a lot of masking tape and painters plastic to get it ready. But now it’s ready and tomorrow I’ll hit it hard!
After a lunch break, Sherry and I went back to the old house to prep for the staining. It took a lot of masking tape and painters plastic to get it ready. But now it’s ready and tomorrow I’ll hit it hard!
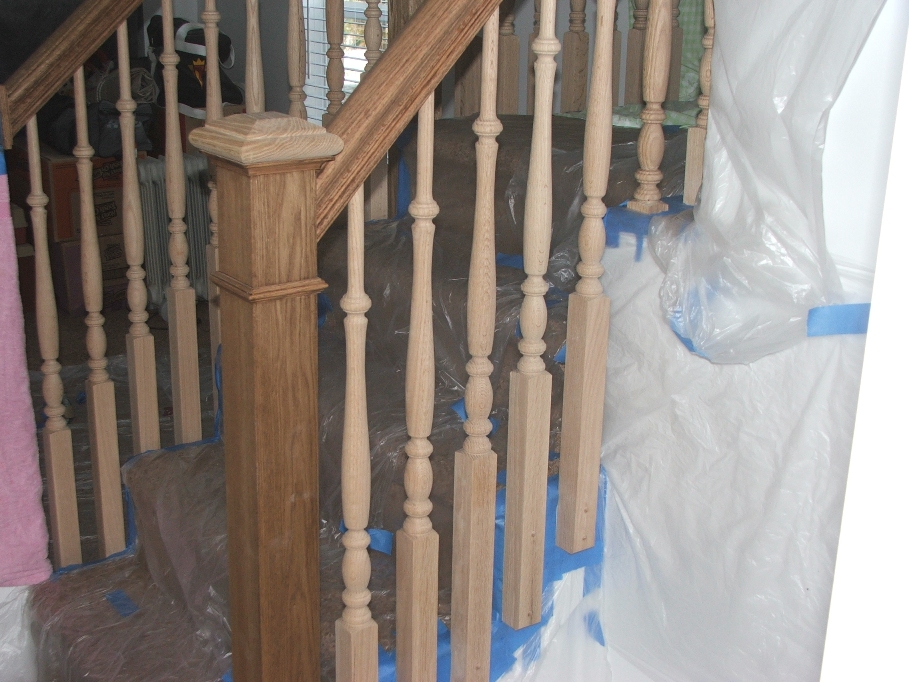
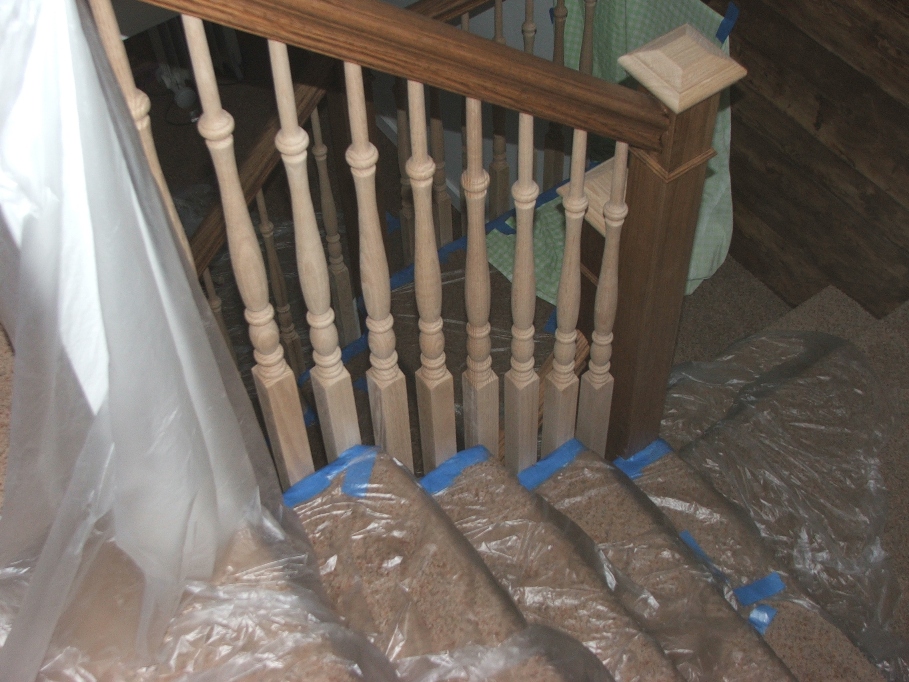
It took as long to prepare for the work as it will take to do the job!
The rest of the day was spent taking Roy’s equipment back over to his shop and reassembling it like it was the day we took it apart. Thanks again to Roy for the use of his equipment and his knowledge in building stair banisters!
Jan 17…I was on top of the work by 9:45, but not feeling very well. It seems I have the beginning stages of the flu that is taking it’s toll on the families. I figure if I can get the staining done and a coat of varnish on the banisters then a few days of rest could be “enjoyed” while throwing up and having the chills etc.
There is a bad storm coming in starting tonight and lasting through Thursday, so I figured I had best climb up in the pine tree out front and remove some of the branches that are blocking Utah and Power from connecting us up. It was quit cold, but I figured with gloves and a “quick about the work” attitude I would be able to get the job done and not get too cold. WRONG!!!! My hands got colder than I can ever remember and I almost cried when thawing them out. Man did they hurt. The job got done, at least to my satisfaction. We will see what Utah Powers’ attitude is whenever they get here.
Meanwhile, I have staining to do. Trying not to make too big a mess, it took longer than it would have to stain the spindles than if the carpet wasn’t down, but what the heck it’s done now.
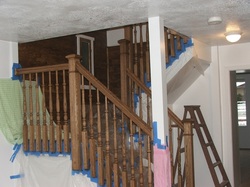
Tomorrow I’ll put on some varnish hopefully and then it’s all done. While I was on the last few spindles in came Keith Witt to finish the plumbing. Last night he worked rather late and called me about 8:30 p.m. to tell me he locked up but had left a light on. I went over to turn it off and low and behold the toilets FLUSHED!!!!!!!! We are happy now and from here on out Delbert can’t say he has to have a can of pee in his trailer when working on the Zundel mansion.

Keith finished with what he had to do and tested it all. Everything seems to be in proper working order.
This is Keith calking around the floor drain. He is pleased with the job and happy to have it behind him. I told him I would hook up the water lines to the sink I have yet to put on the wall, and he reminded me that he would have to come over and attach the drain. Call him when I’m ready. I forgot about the drain! Dummy me.
This is Keith calking around the floor drain. He is pleased with the job and happy to have it behind him. I told him I would hook up the water lines to the sink I have yet to put on the wall, and he reminded me that he would have to come over and attach the drain. Call him when I’m ready. I forgot about the drain! Dummy me.

Before I left for the day, I took a picture of the “drencher” shower head in the upstairs bathroom. It flows straight down just the same size as the head itself. No overspray at all. Of course once you introduce a “head” under it the splashing will go everywhere.
The blue tape is holding the trim in place while the caulking dries.
The blue tape is holding the trim in place while the caulking dries.
Jan. 18…Utah Power called today and set up the time of 10 a.m. tomorrow for the electrical line to be installed. I called Delbert and he came over all excited and said he would be here at 10 as well to finish the job. This is great news! Delbert also climbed up the long ladder he has and looked at the tree trim job I had done and said there might be one small branch in the way, but he thinks they will break that off rather than reschedule. And, he says, the line will “swoop down” anyway and might miss the branch all together.
At any rate, I will be prepared to climb up the tree and cut branches if they say they need to come down.
Today we are getting a real pounding of snow and by days end we have about 2 inches on the ground. I had to climb on the 4 wheeler and plow the neighborhood. It’s better to clear it than to have it freeze in place.
While the snow was coming down, I varnished the banister. It is now finished and only cleanup and touchup on the white paint needed for absolute completion.
With the electrical the main “last thing”, I still have to install the sink in the utility room, cut off the sliding door in the master bedroom (even though Mitch thinks it’s ok as it is) and install the microwave in the kitchen. Without having my “list” in front of me, I believe this will finish the job and I can go fishing!
Jan. 19…Utah Power actually showed up a half hour early this morning. I ran for the old house! He was a nice guy and wanted to make sure the electrician was there before he cut and spliced any wires. So I called Sherry and asked her to get hold of Delbert and let him know. In the meantime I toured the man through the house. He was impressed.
When Delbert arrived the UP guy jumped in the bucket and quickly had the incoming line cut and in his hand. Then he jump-roped it over a tree branch and hoisted himself and the line up to the new mast on top of the roof. He had plenty of cable and line to reach and had it spliced in very short order.