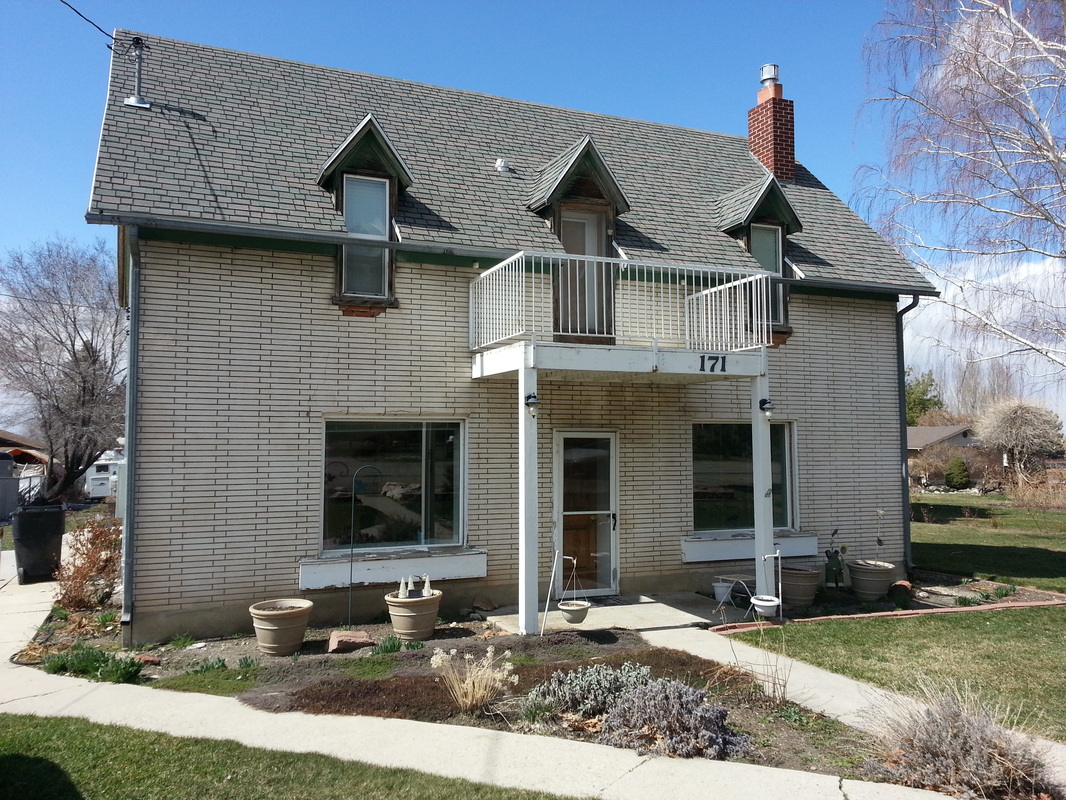
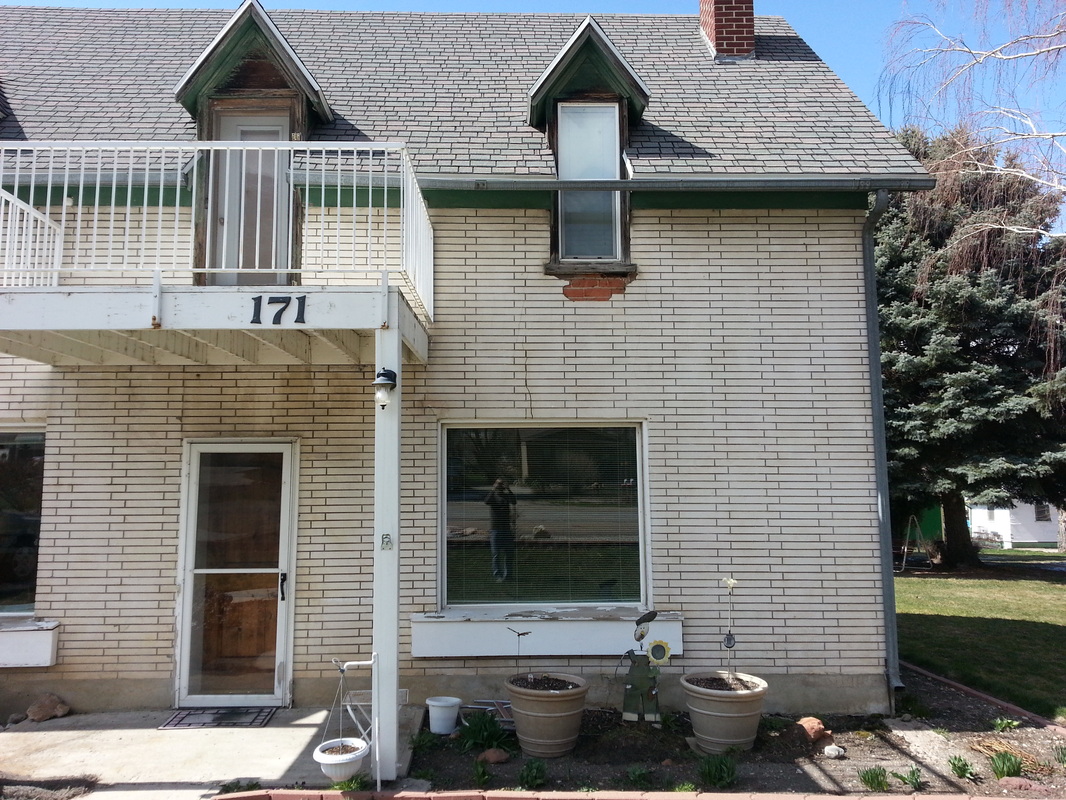
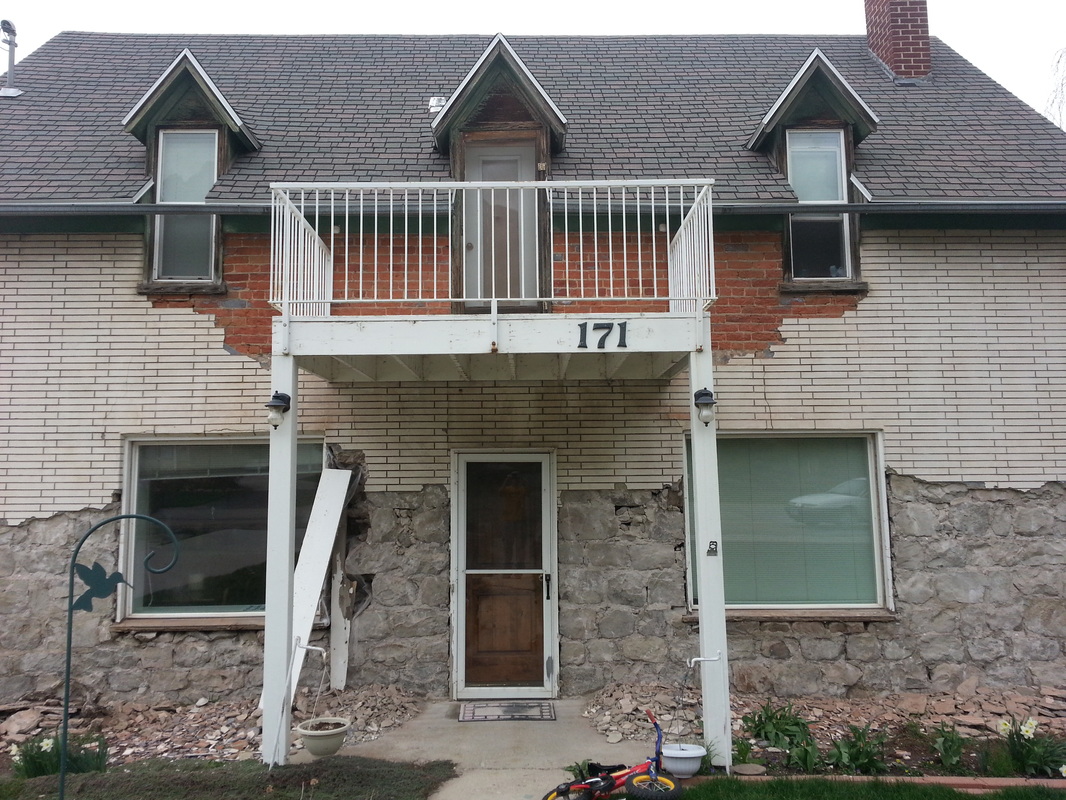
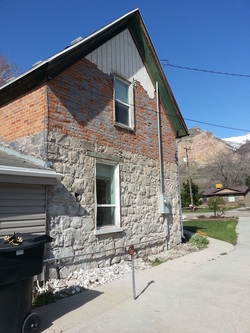
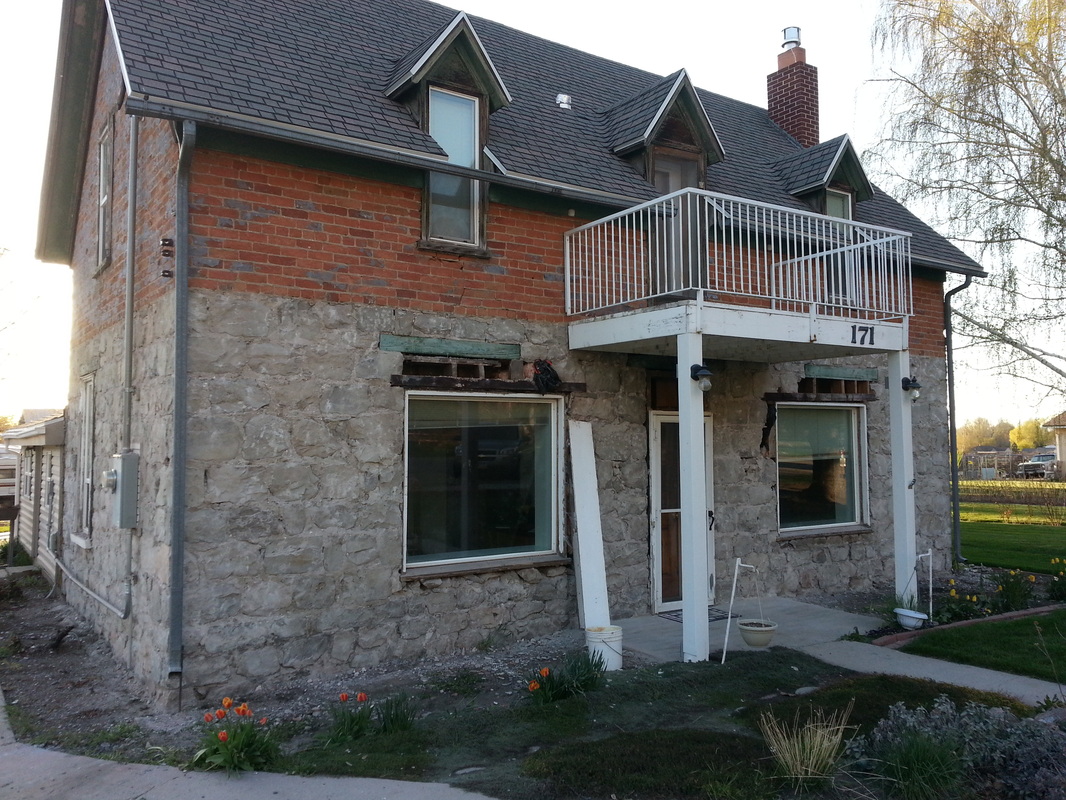
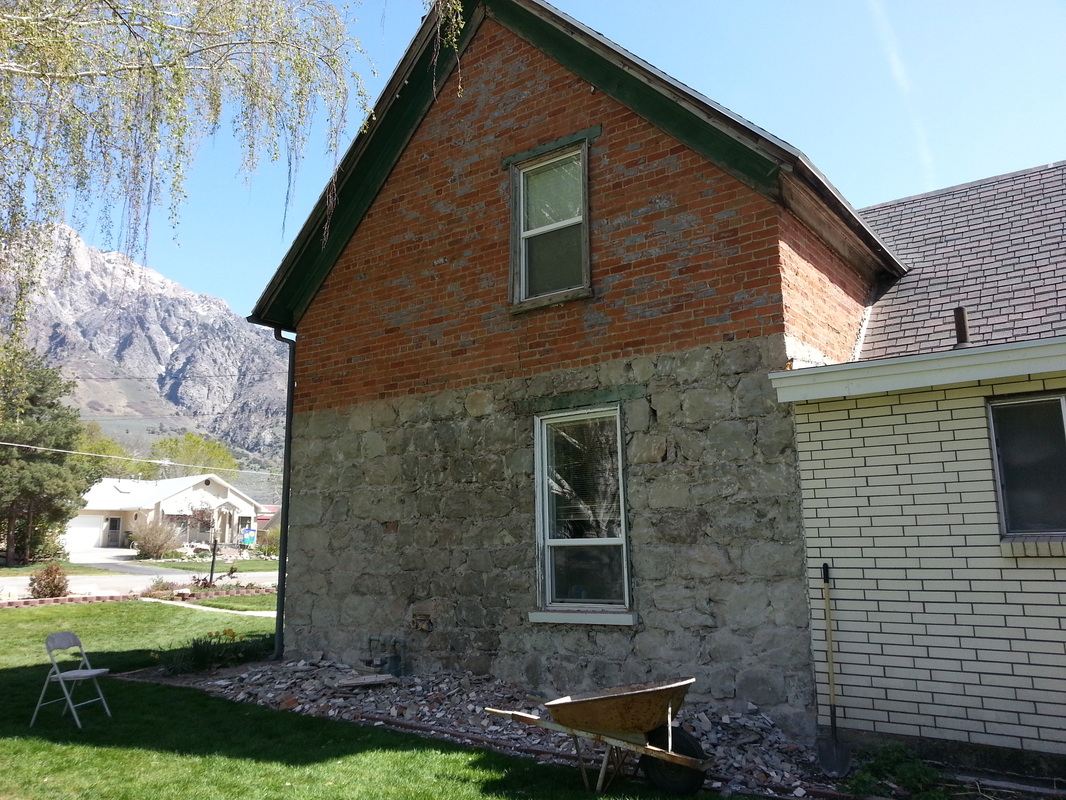
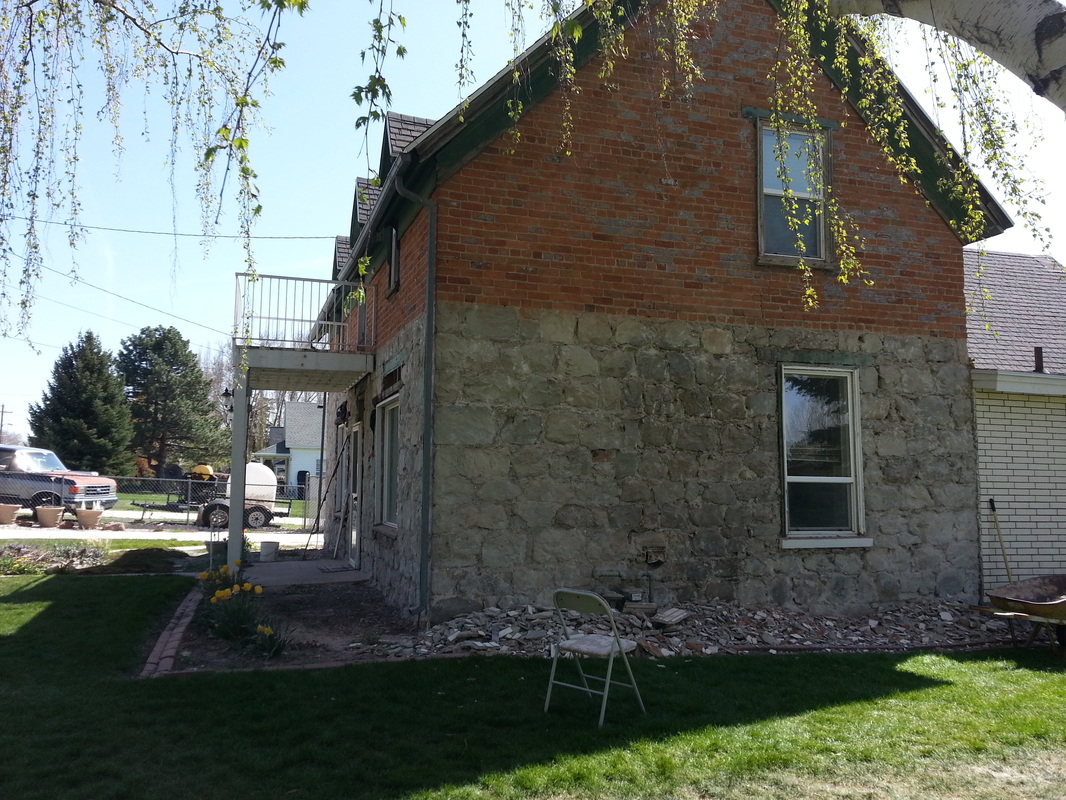
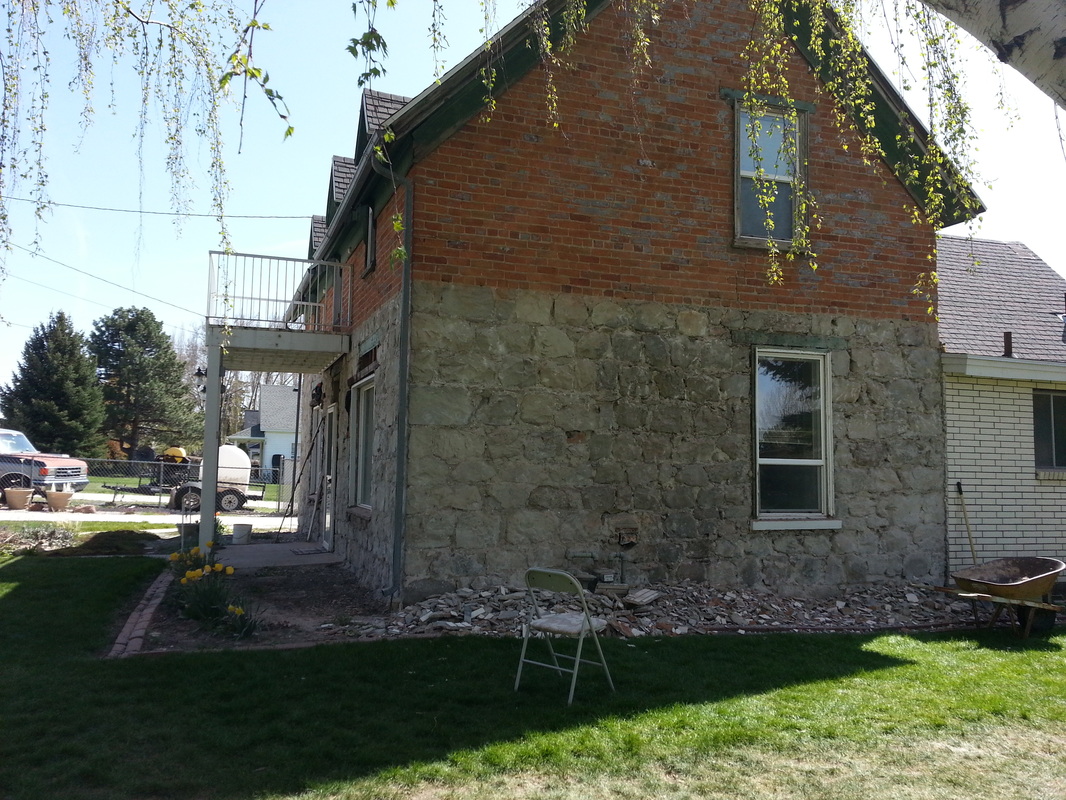
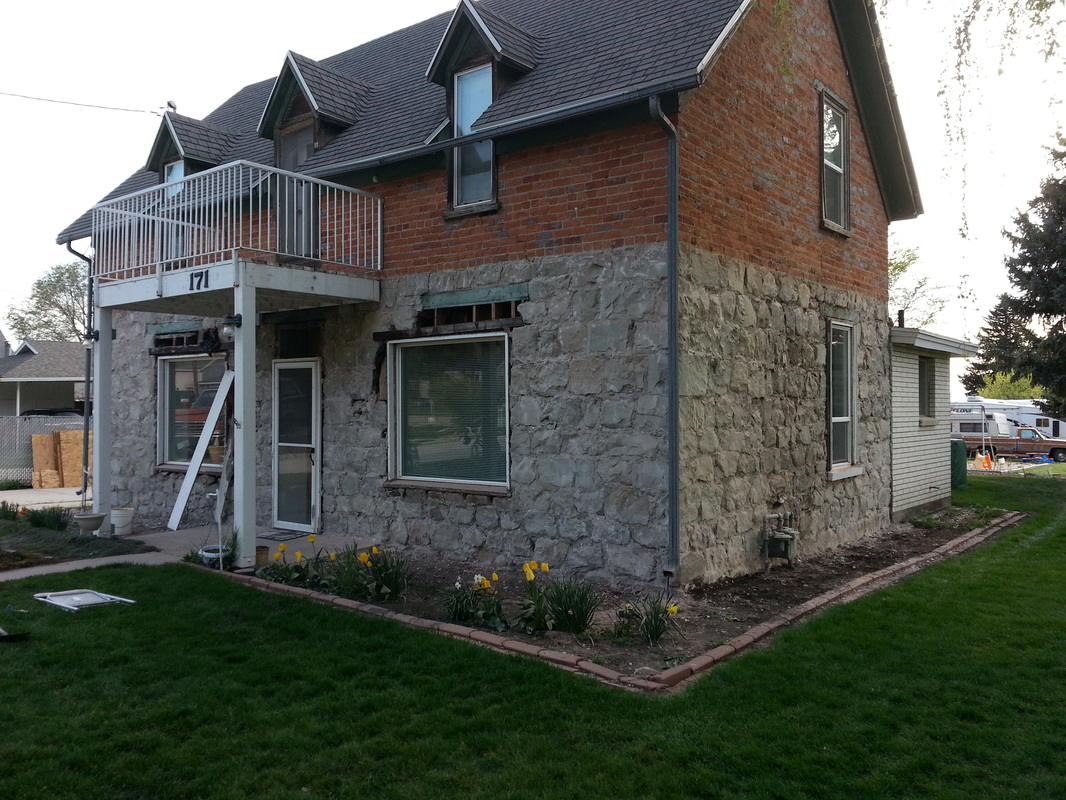
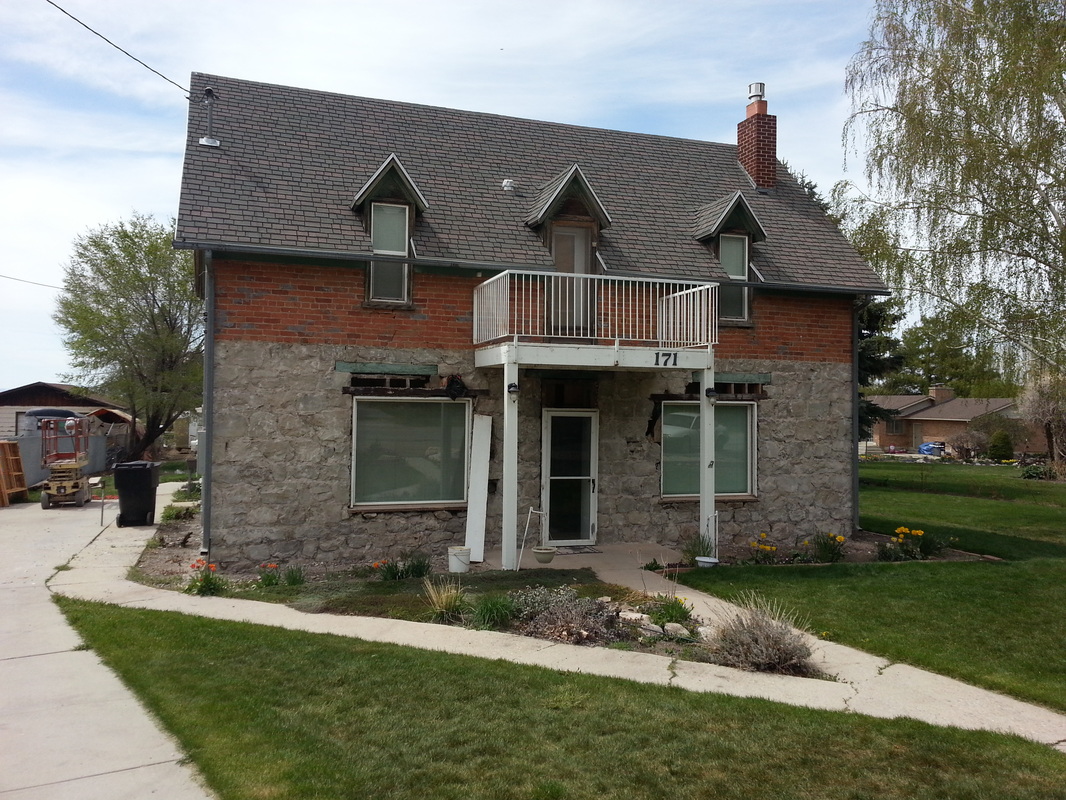
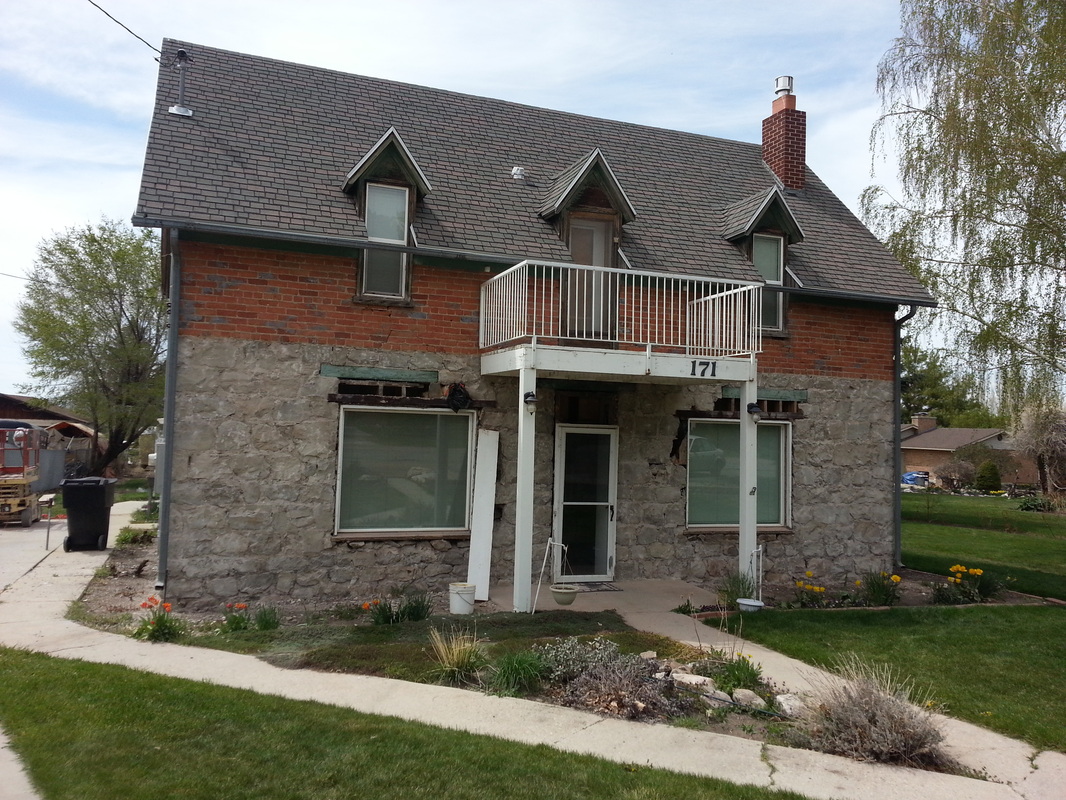
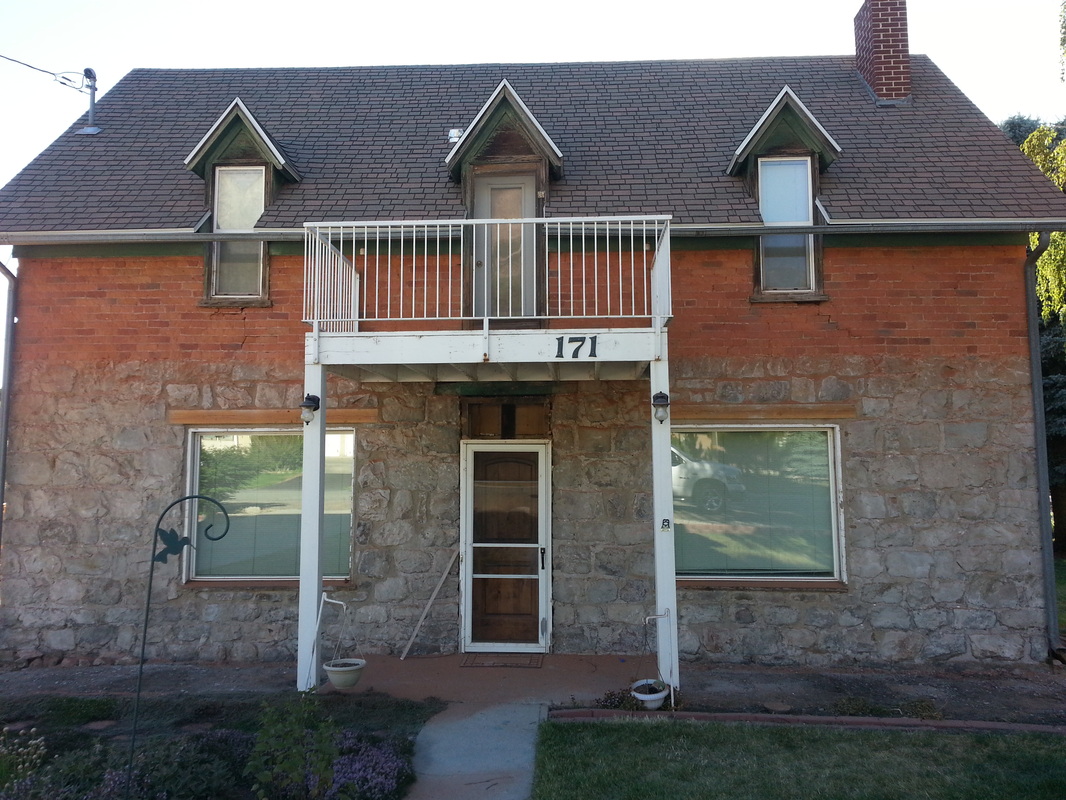
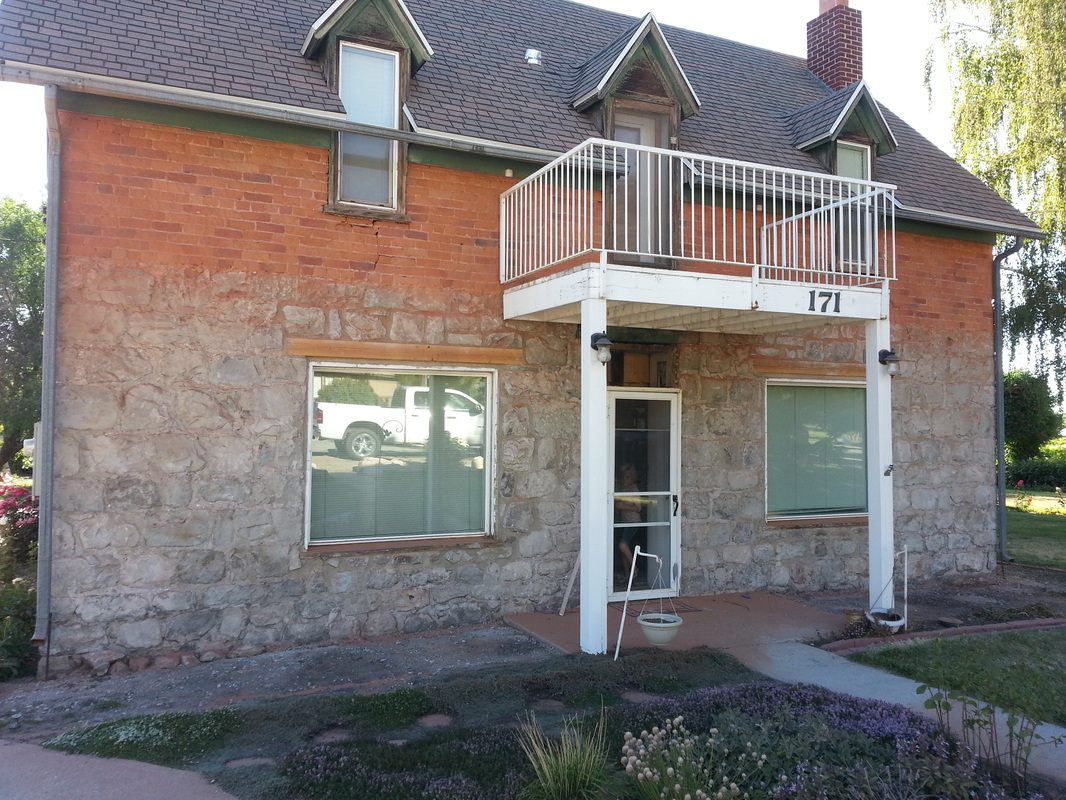
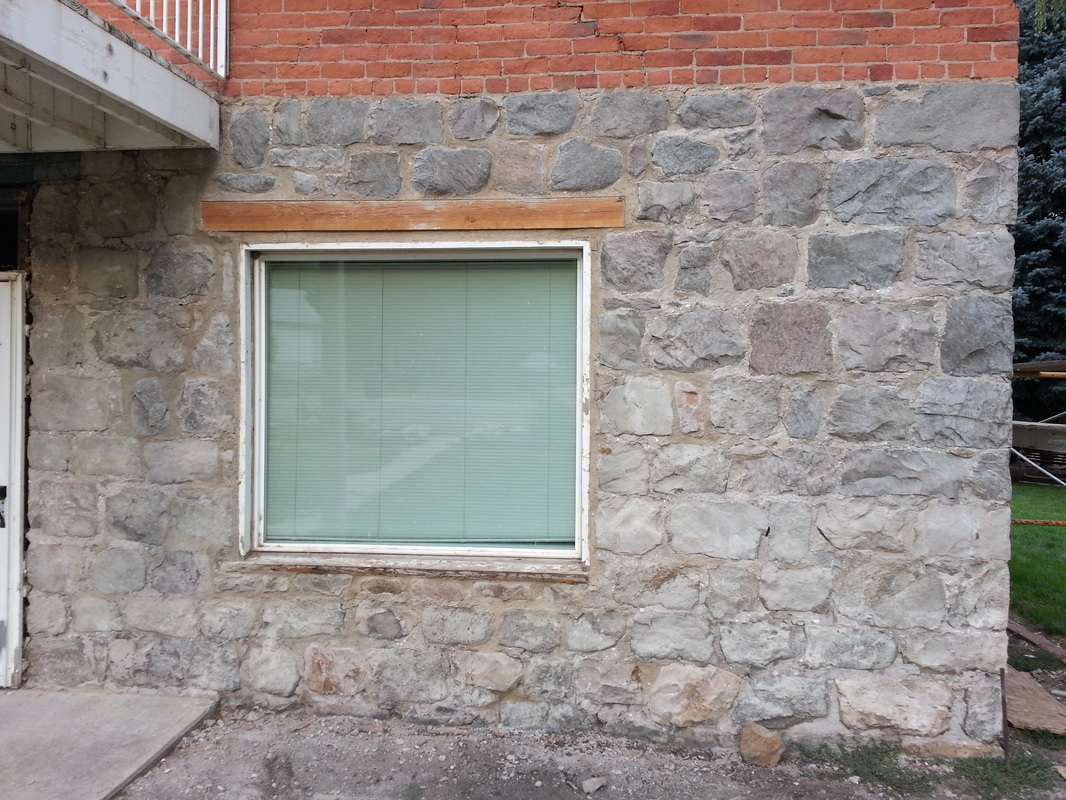
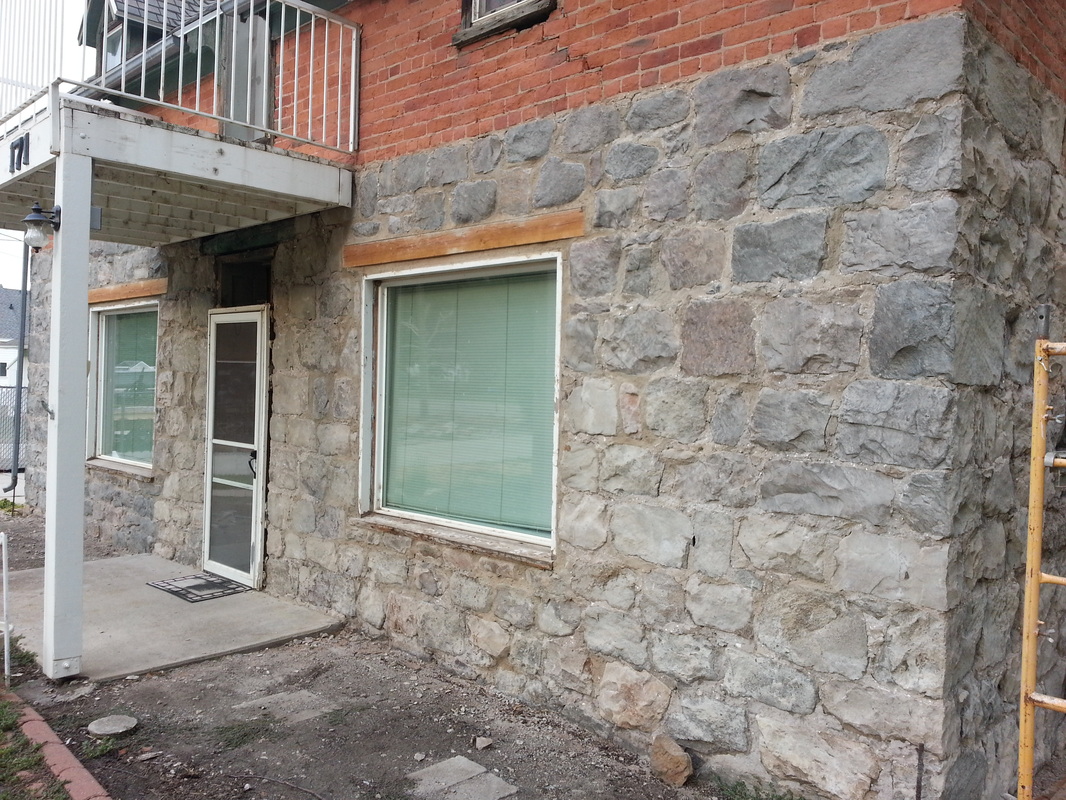
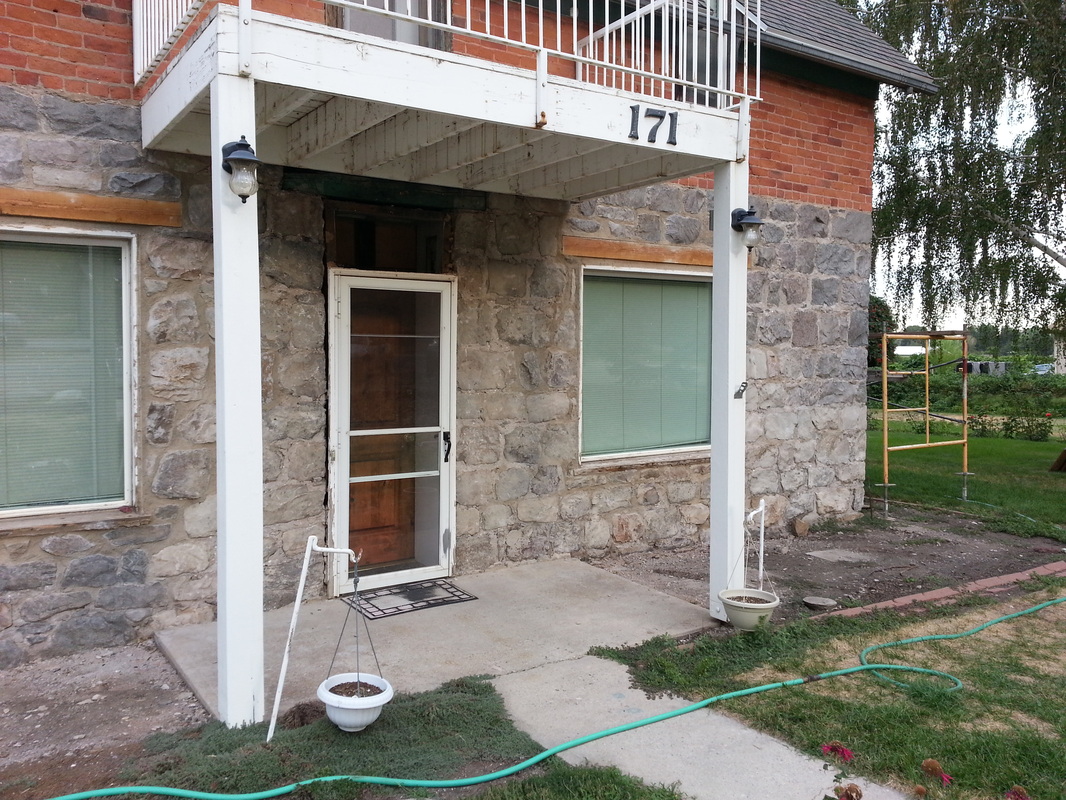
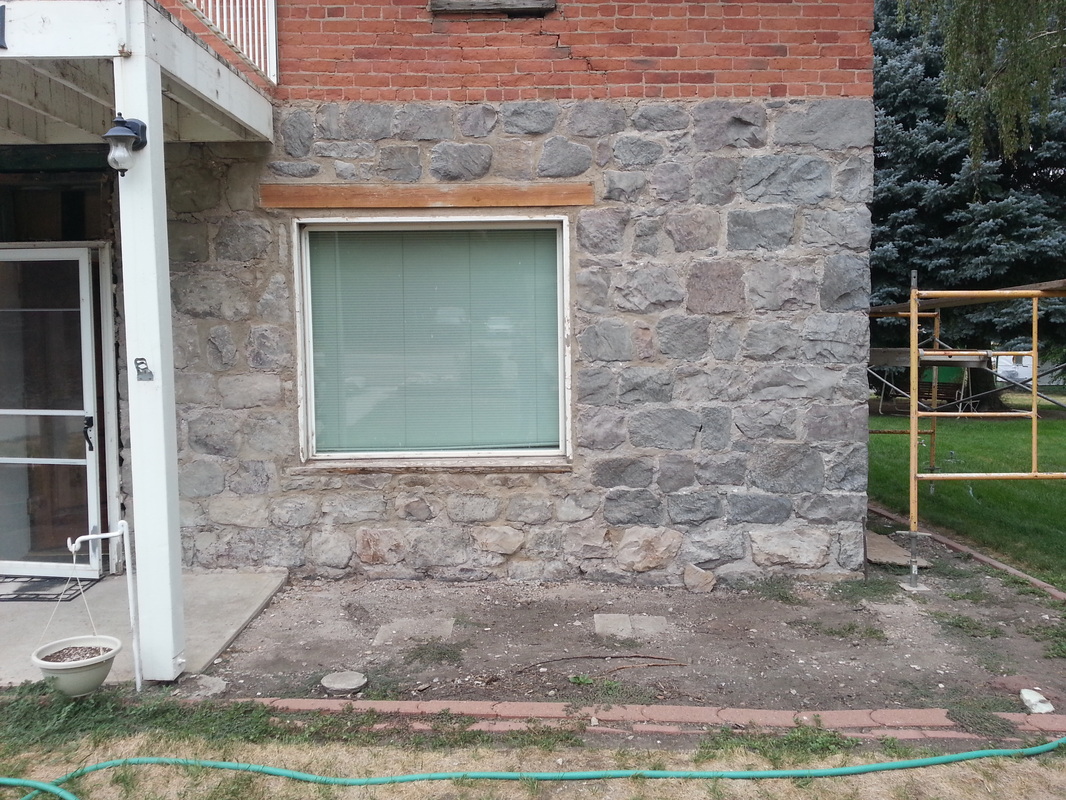
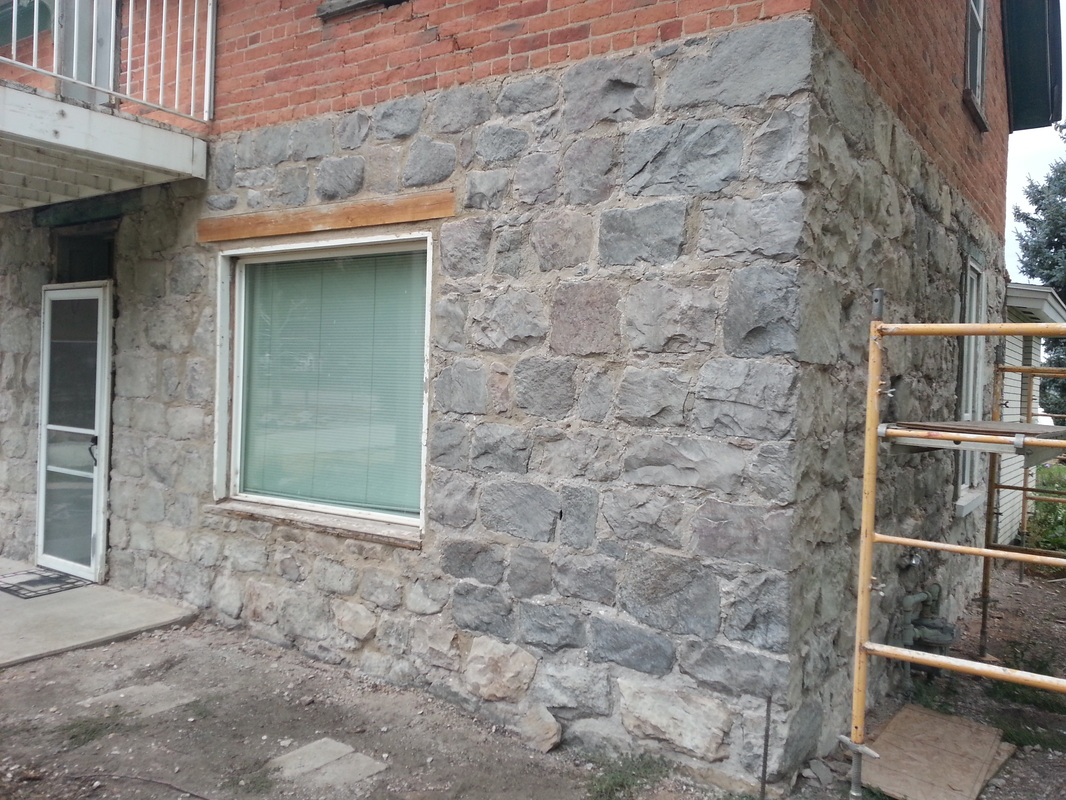
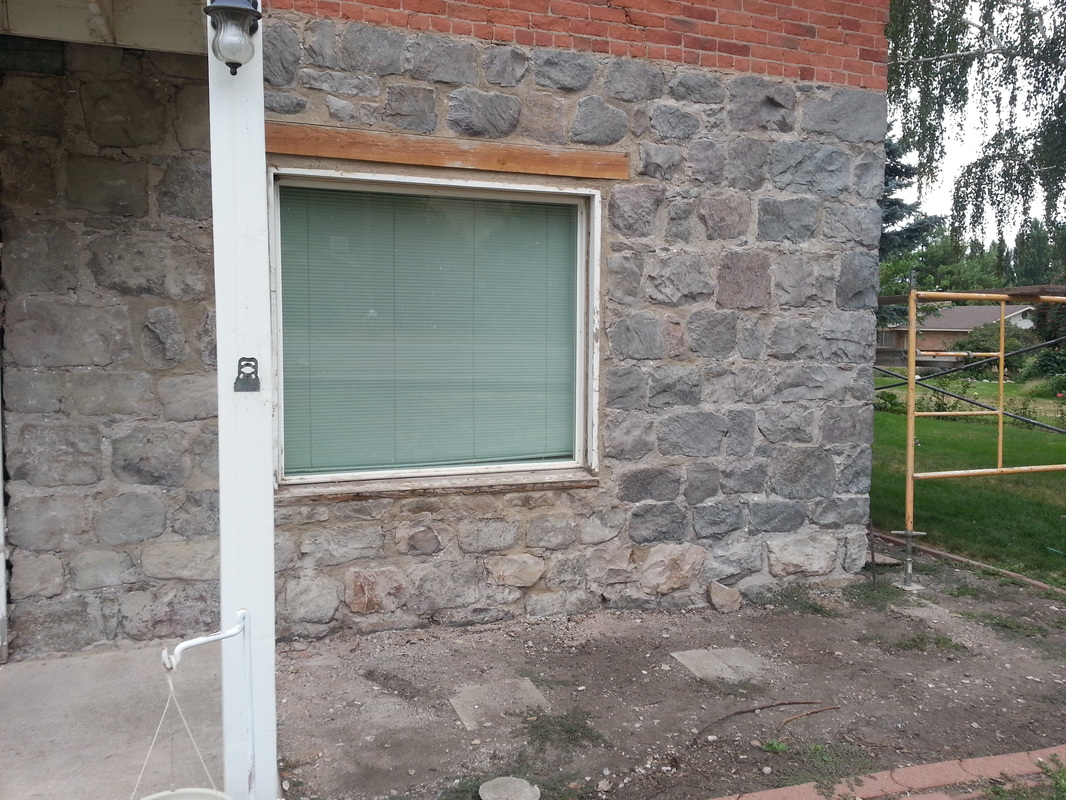
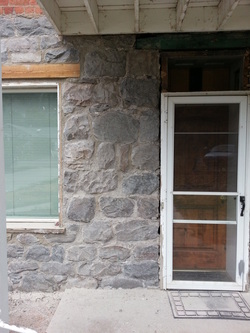
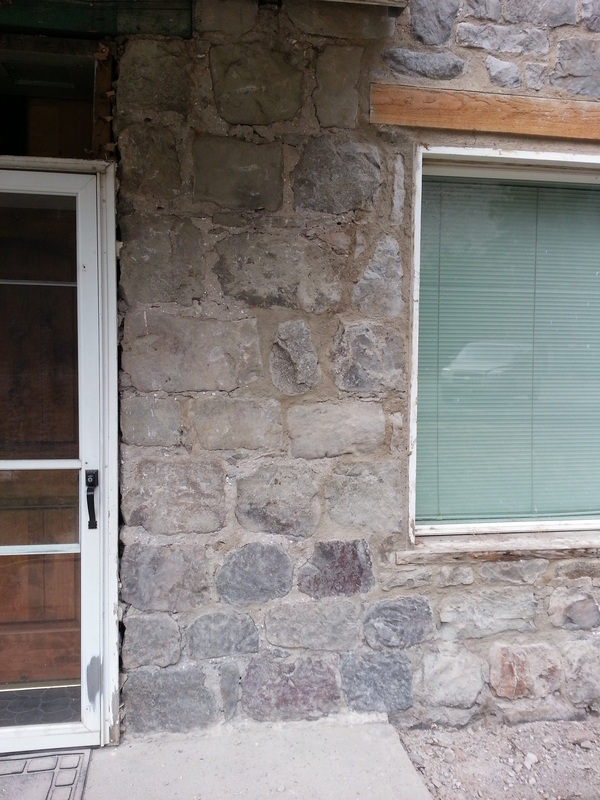
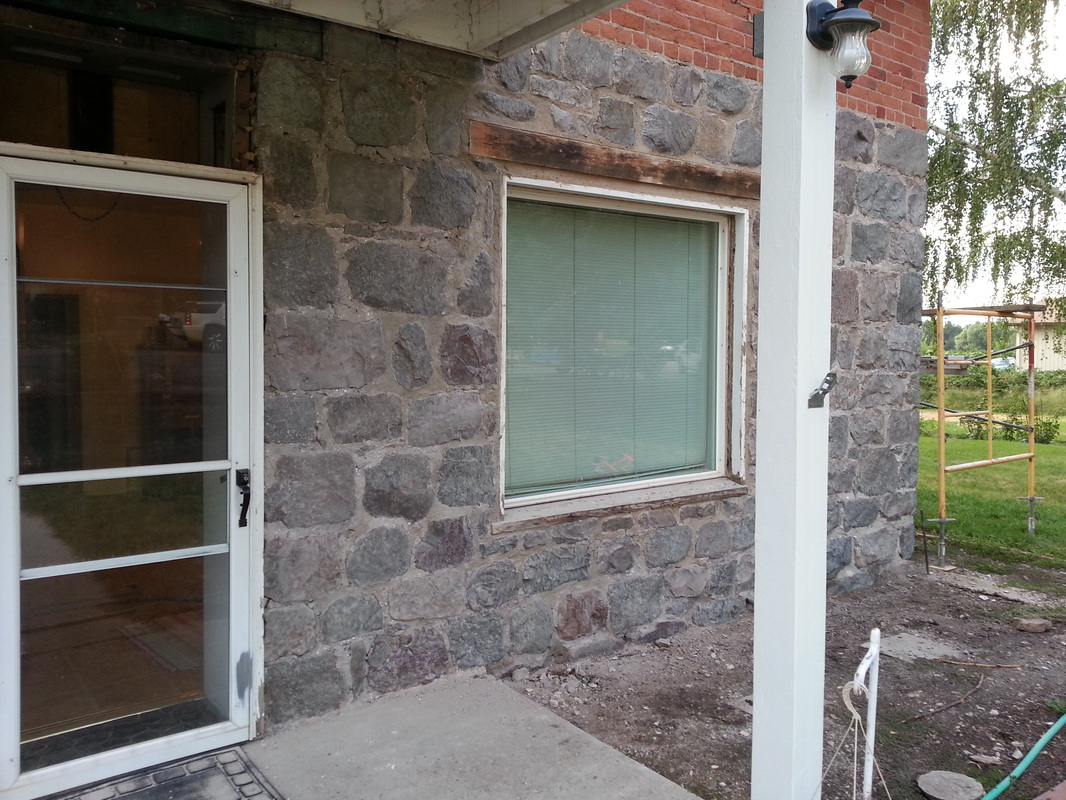
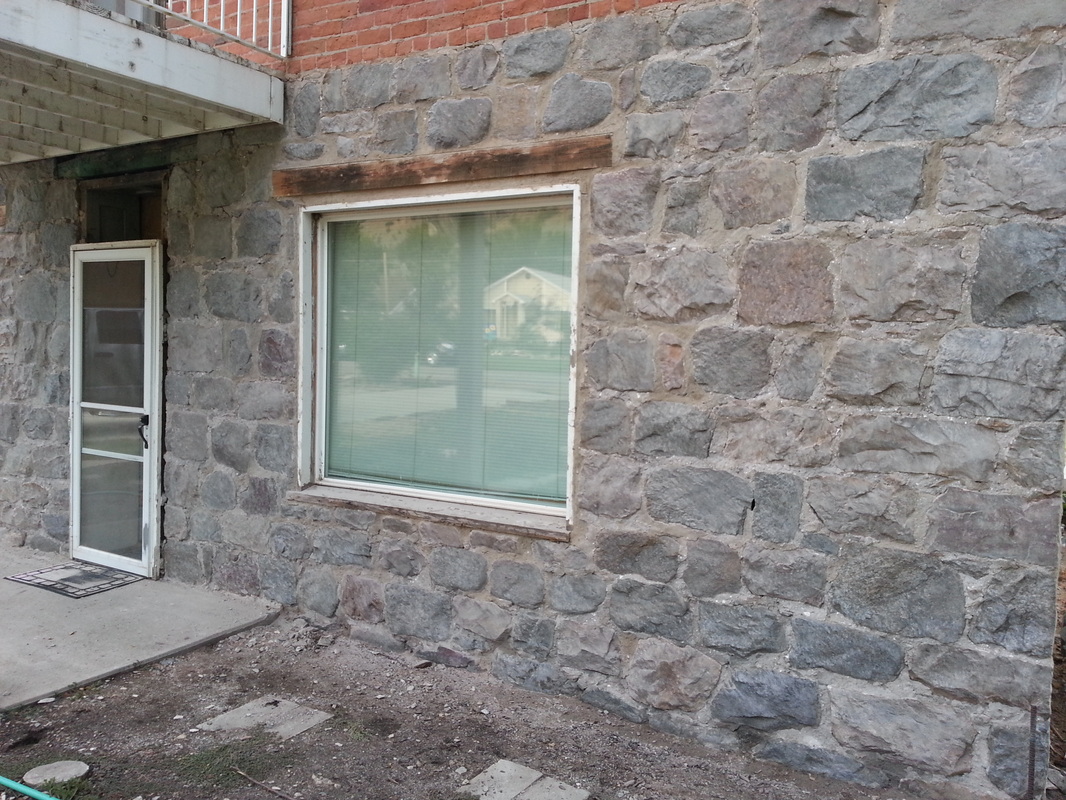
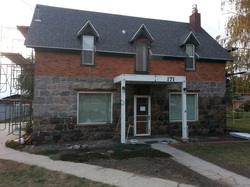
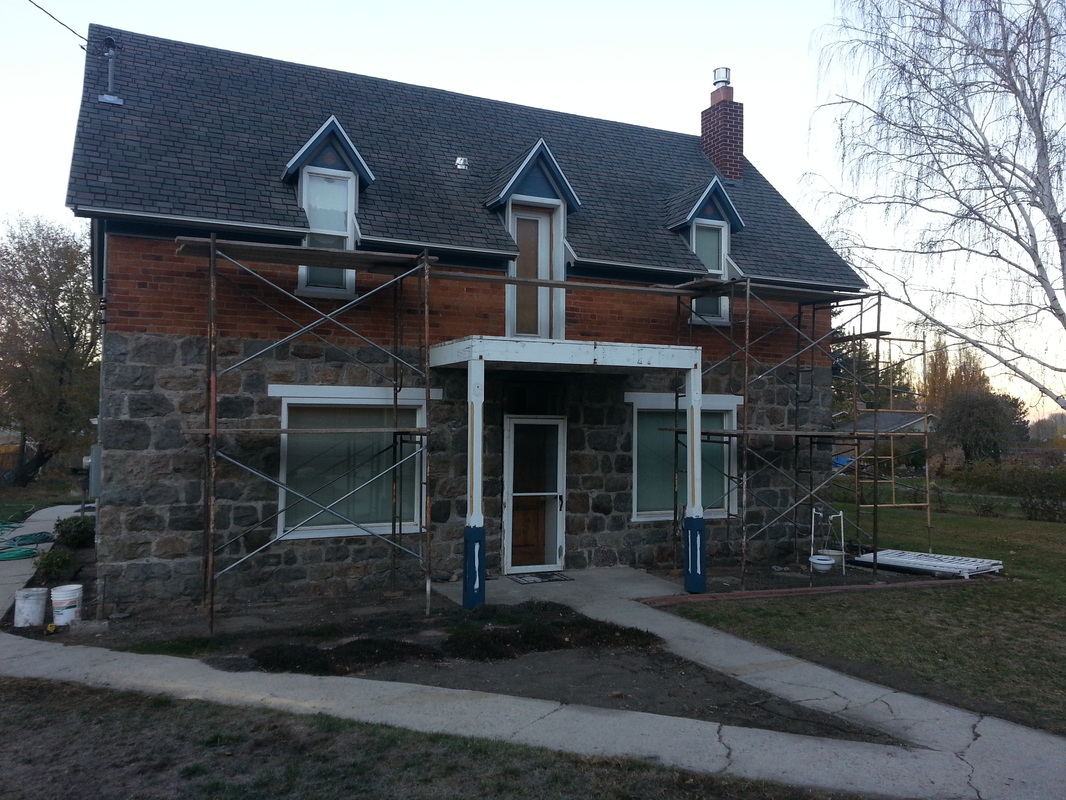
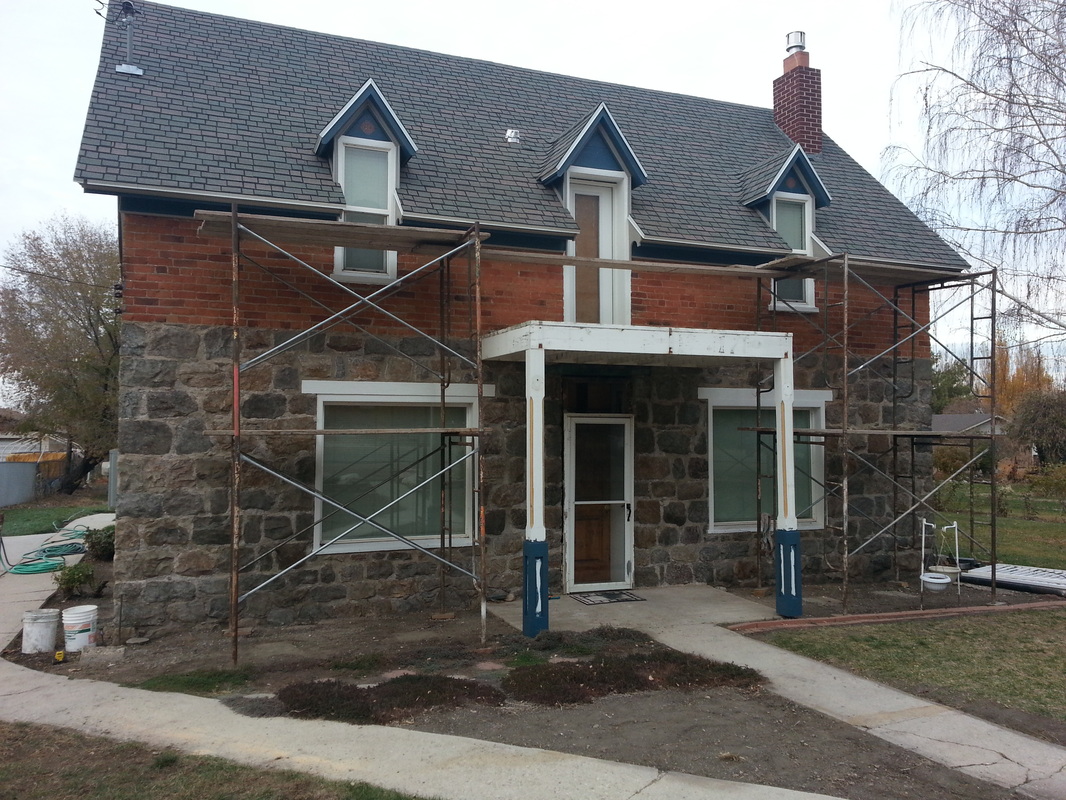
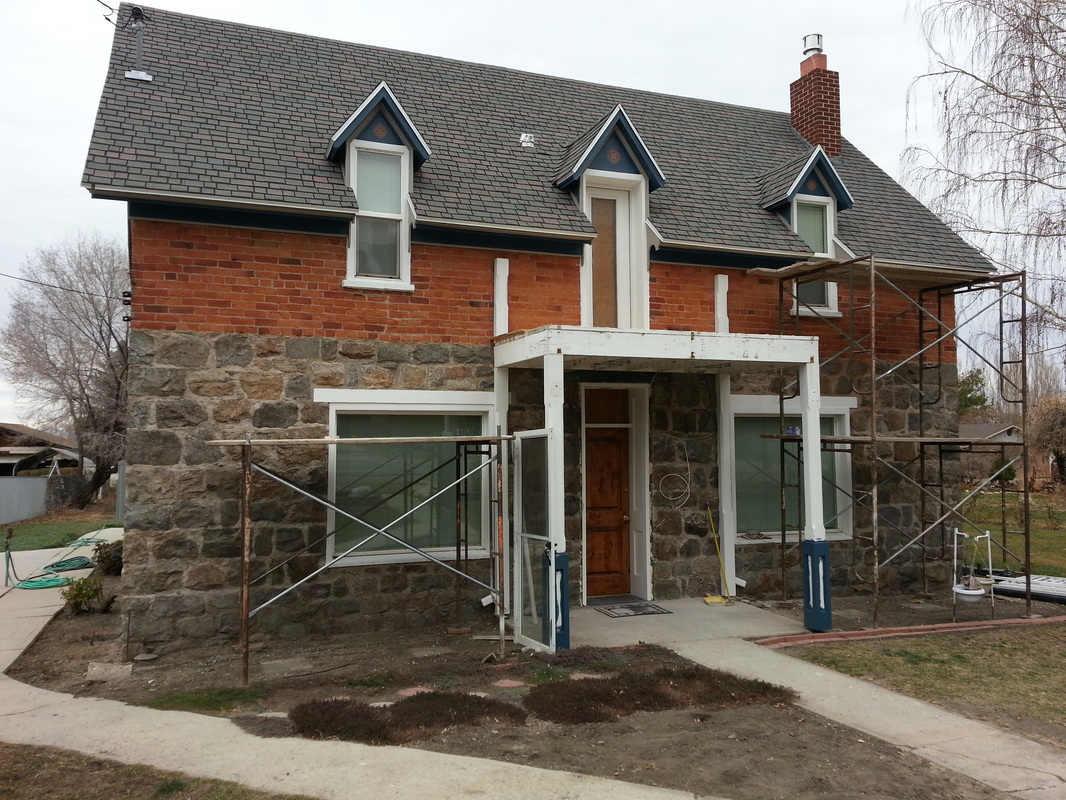
Before:
|
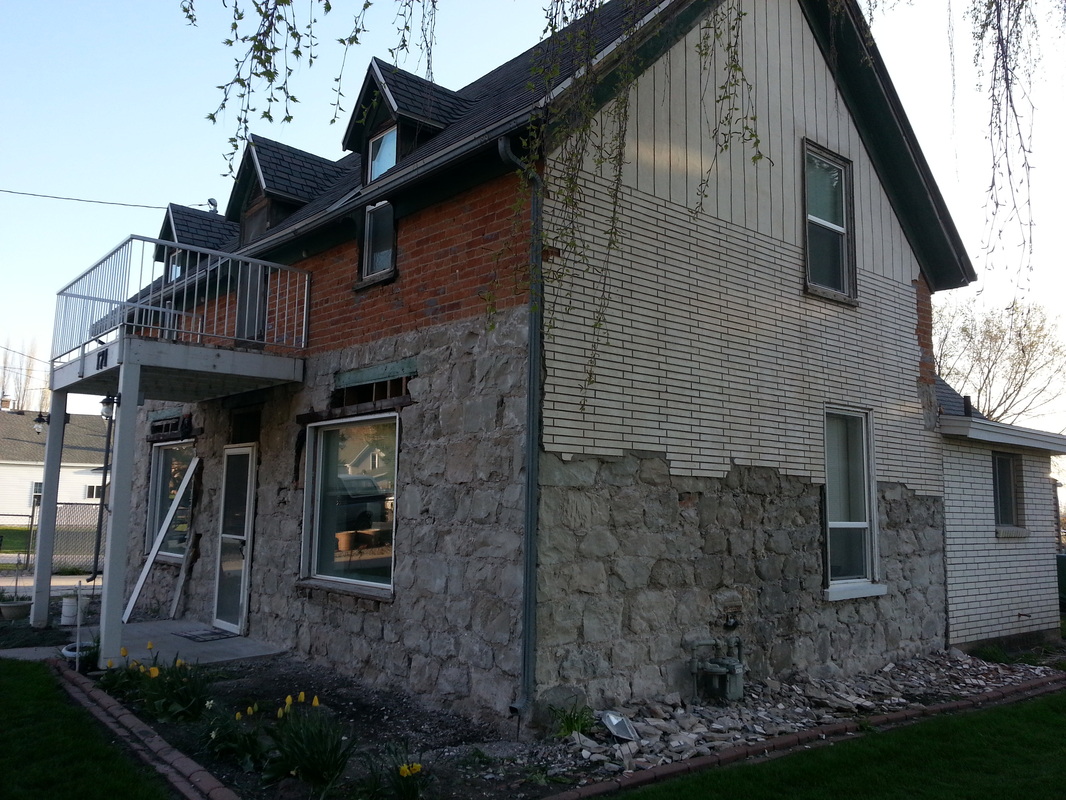
After: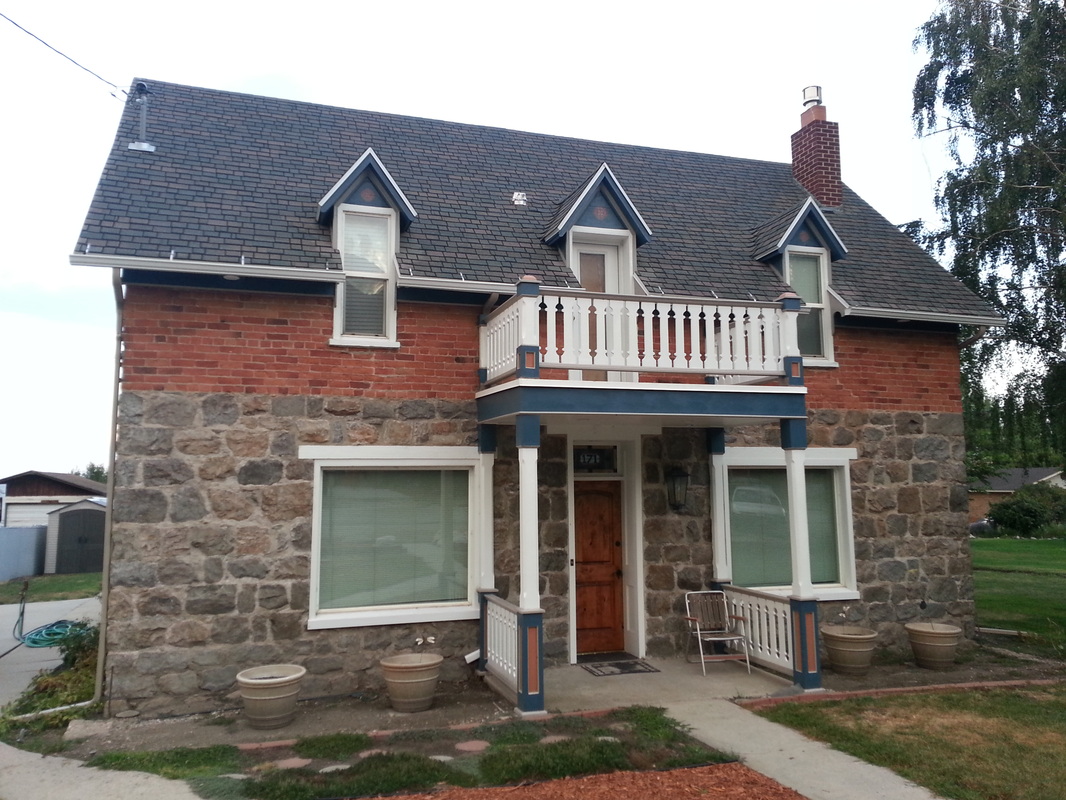
|
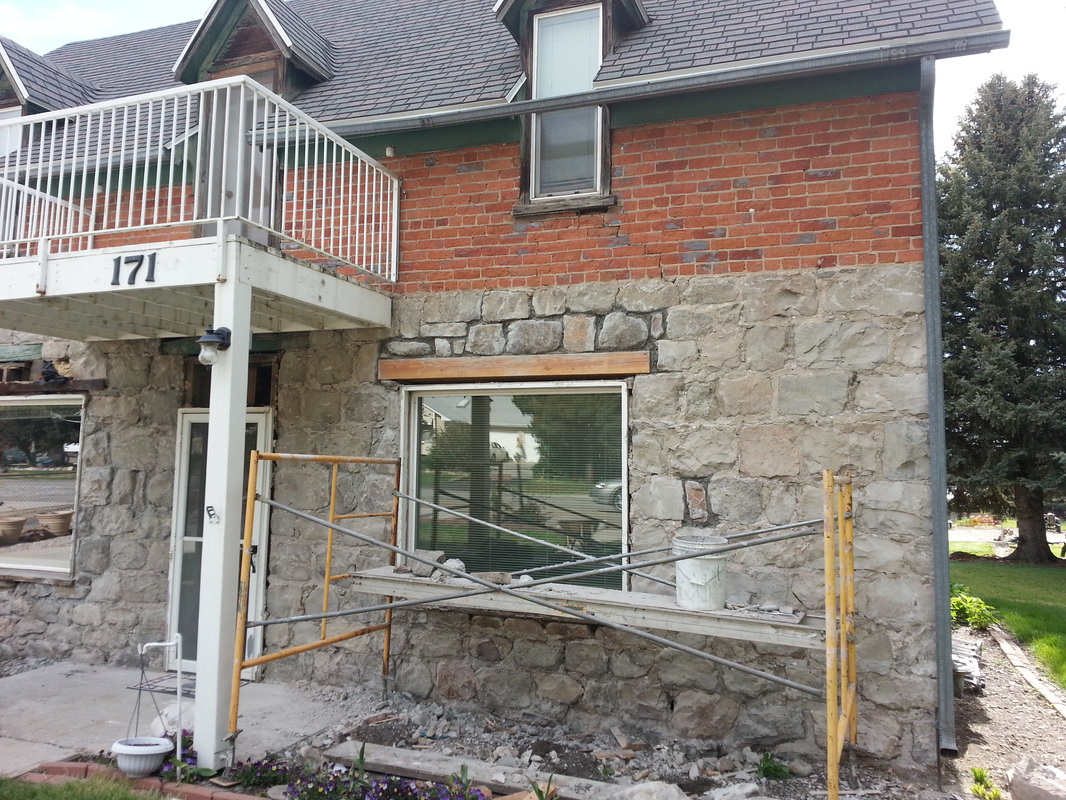
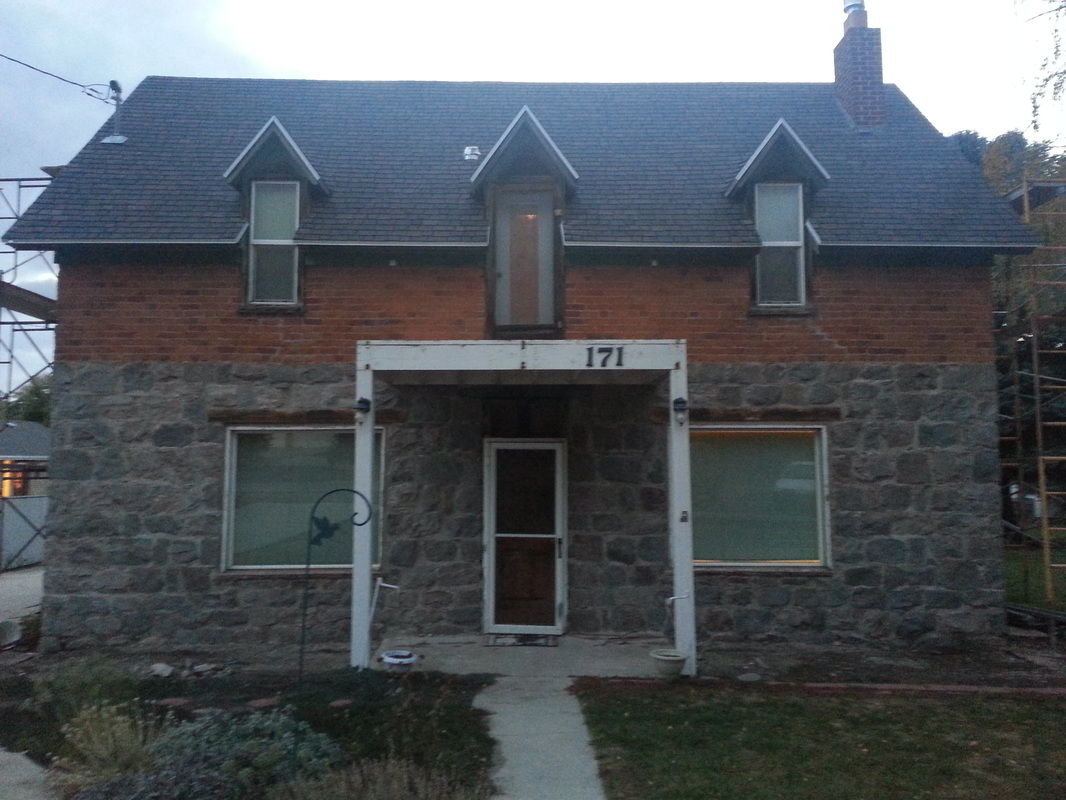
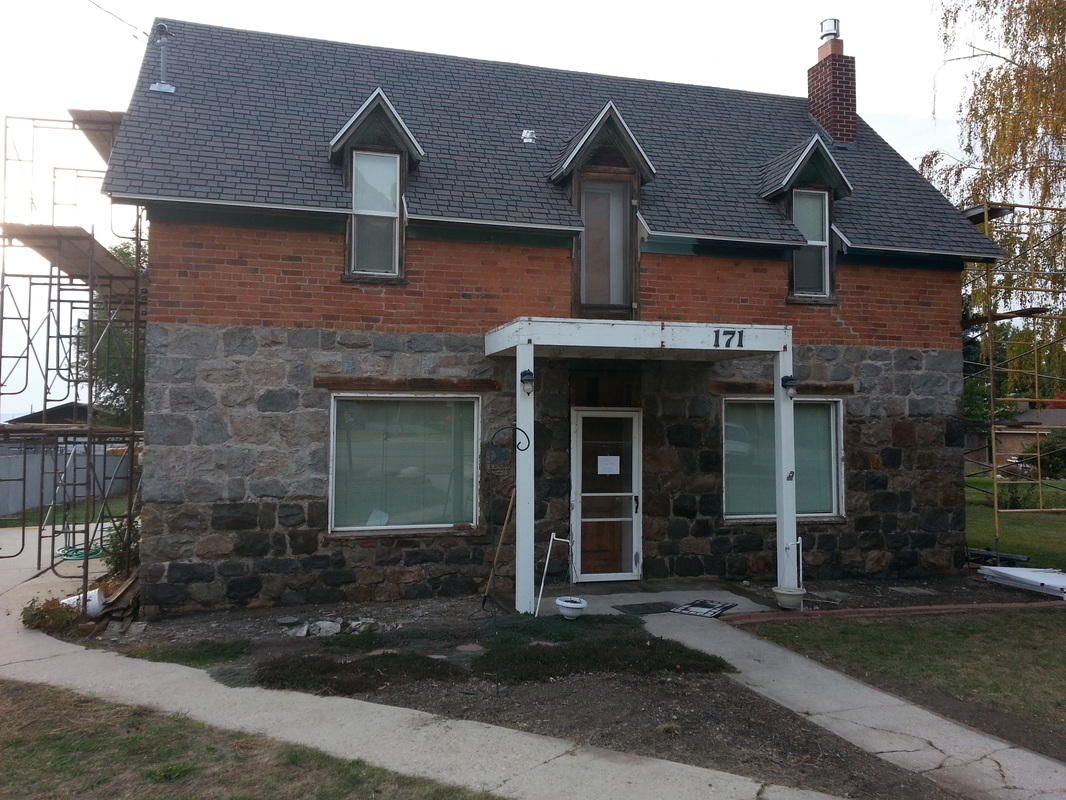
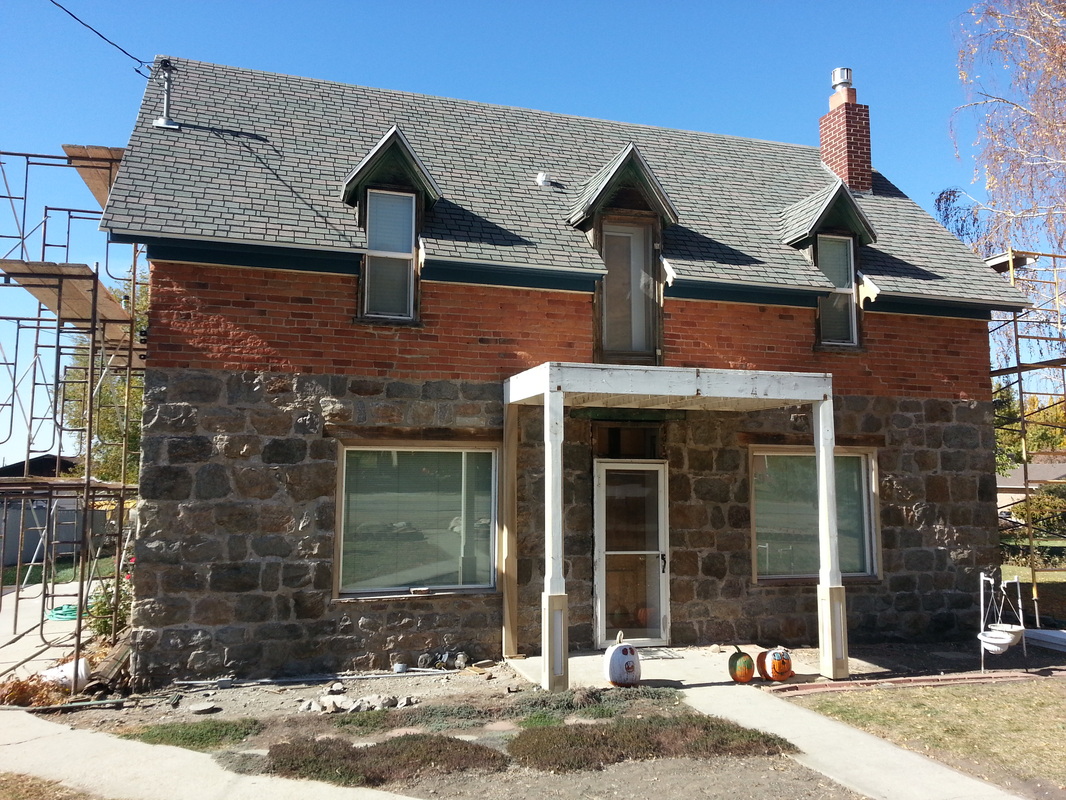
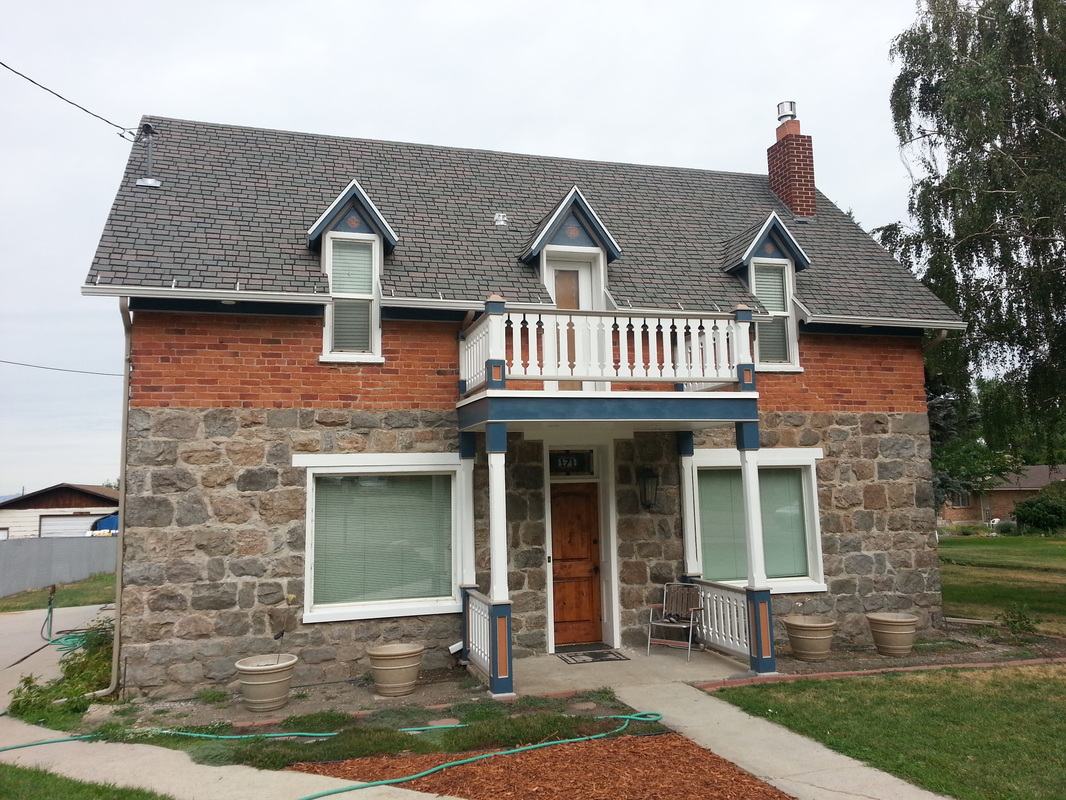
Zundel House Remodel...Part 2...by Mitch Zundel
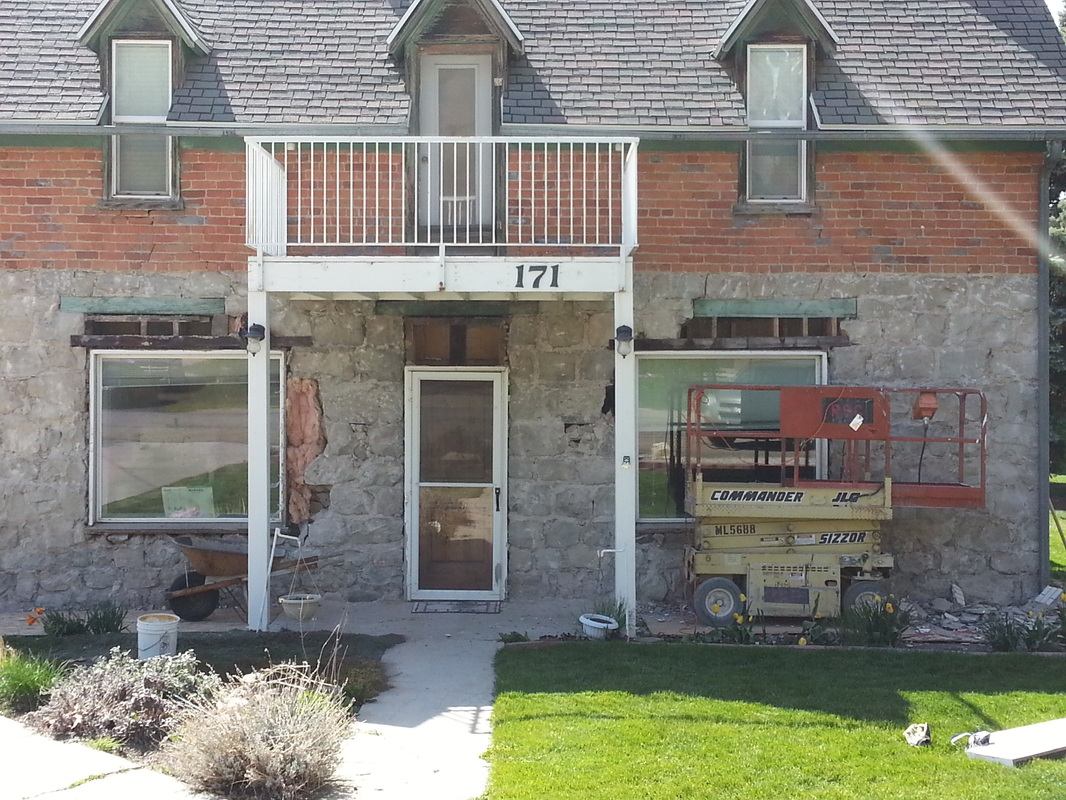
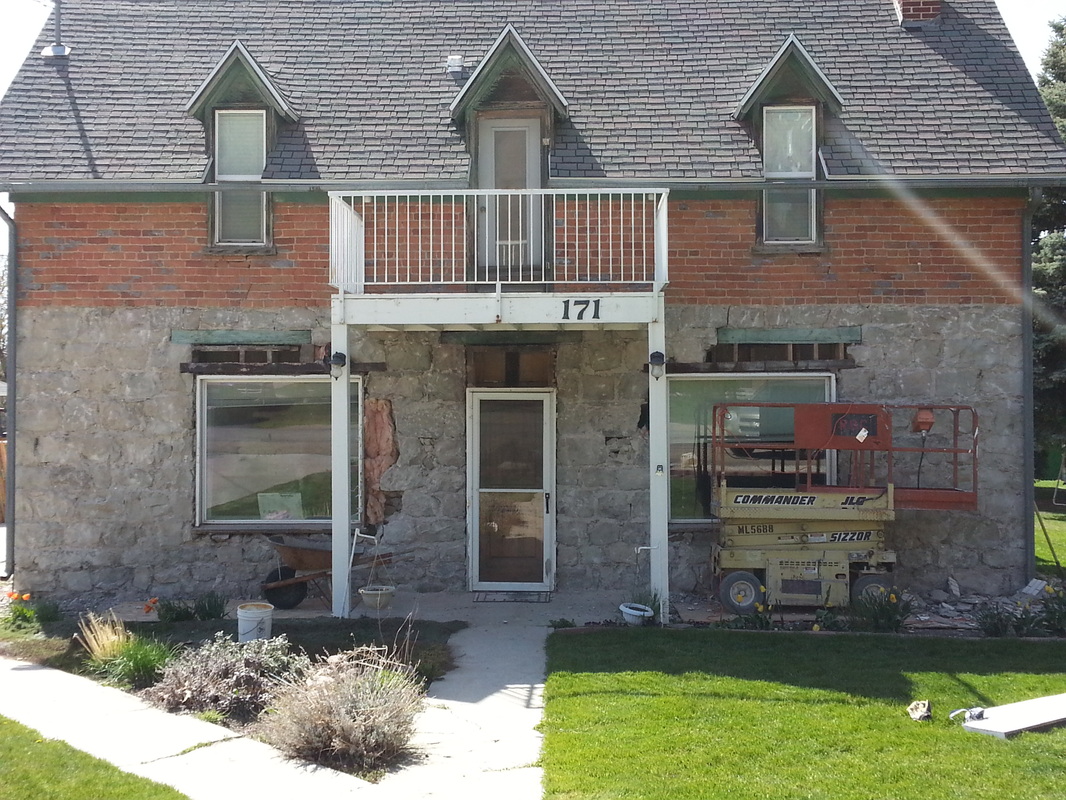
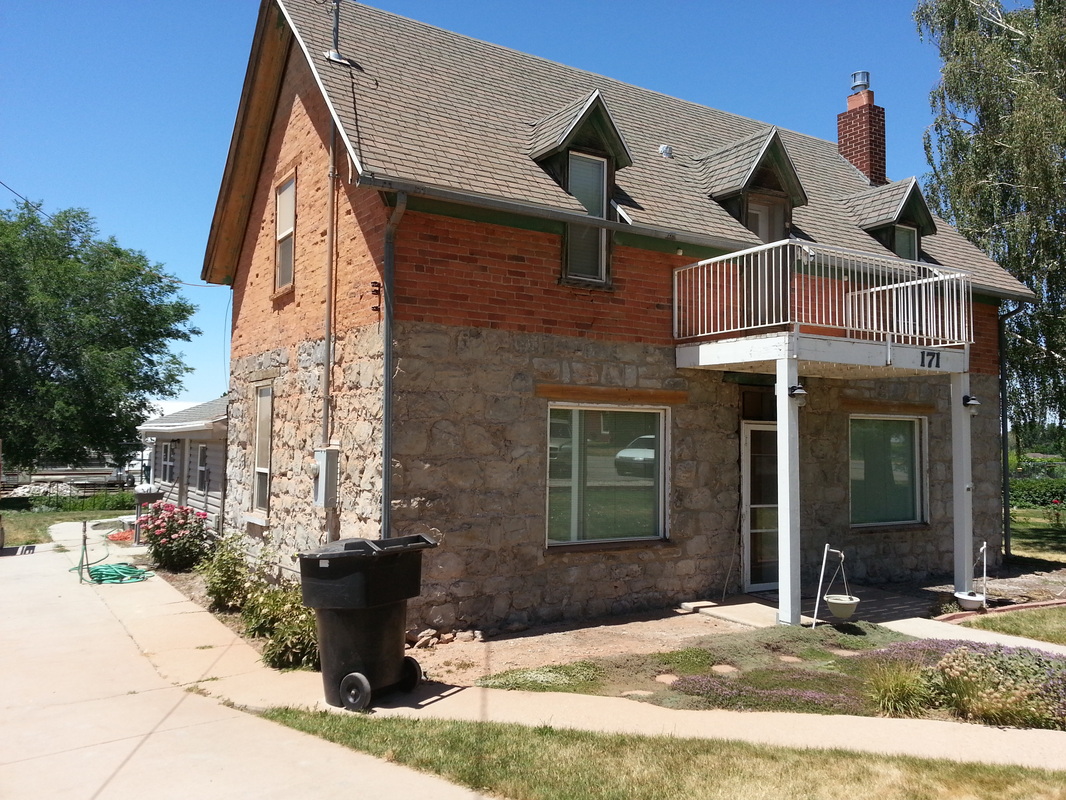
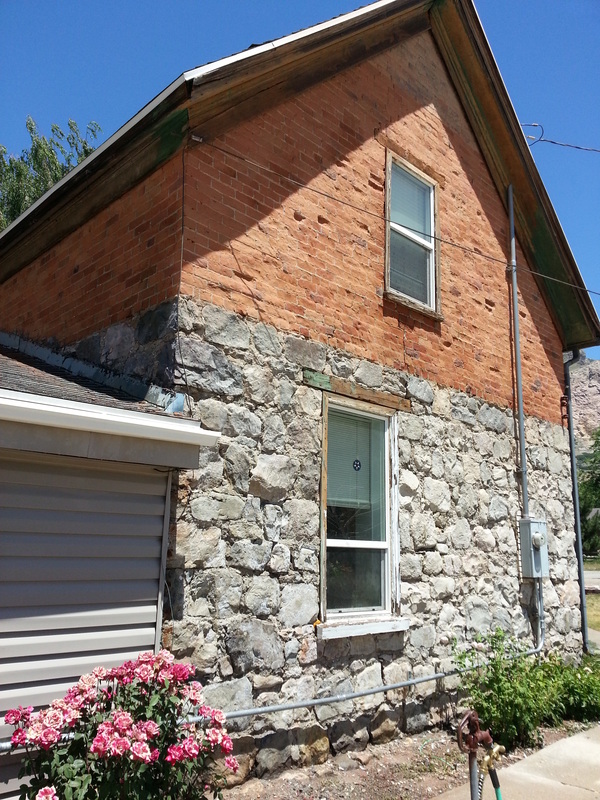
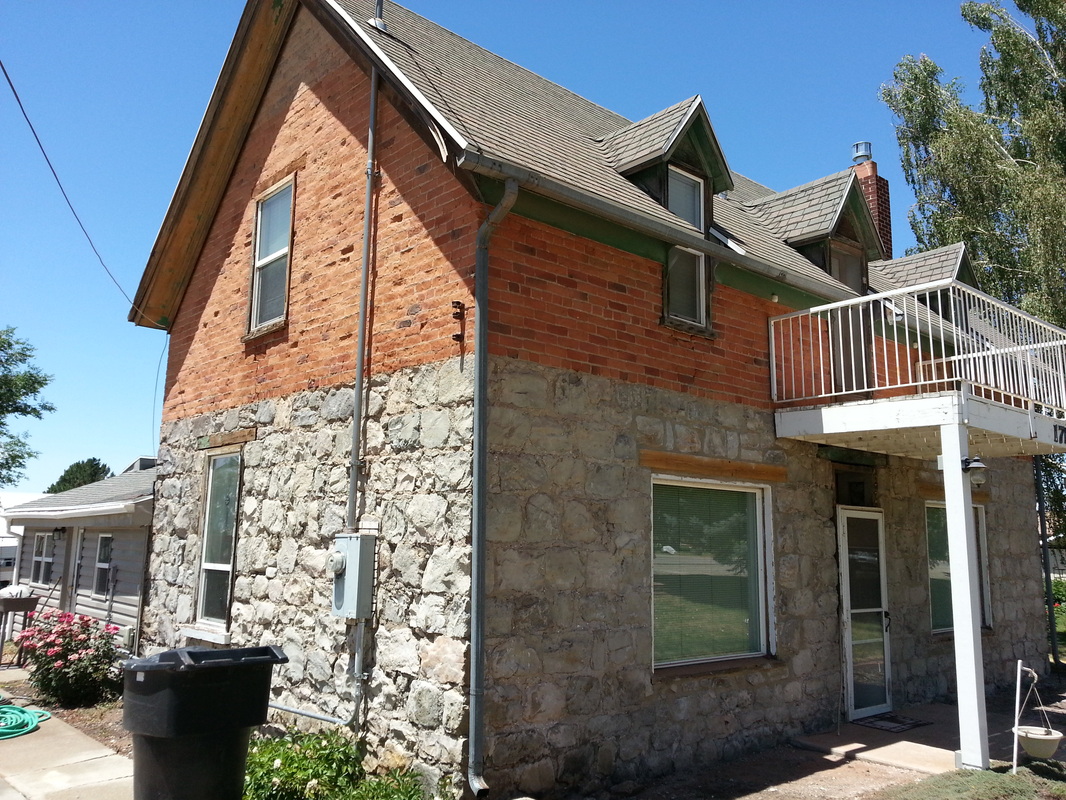
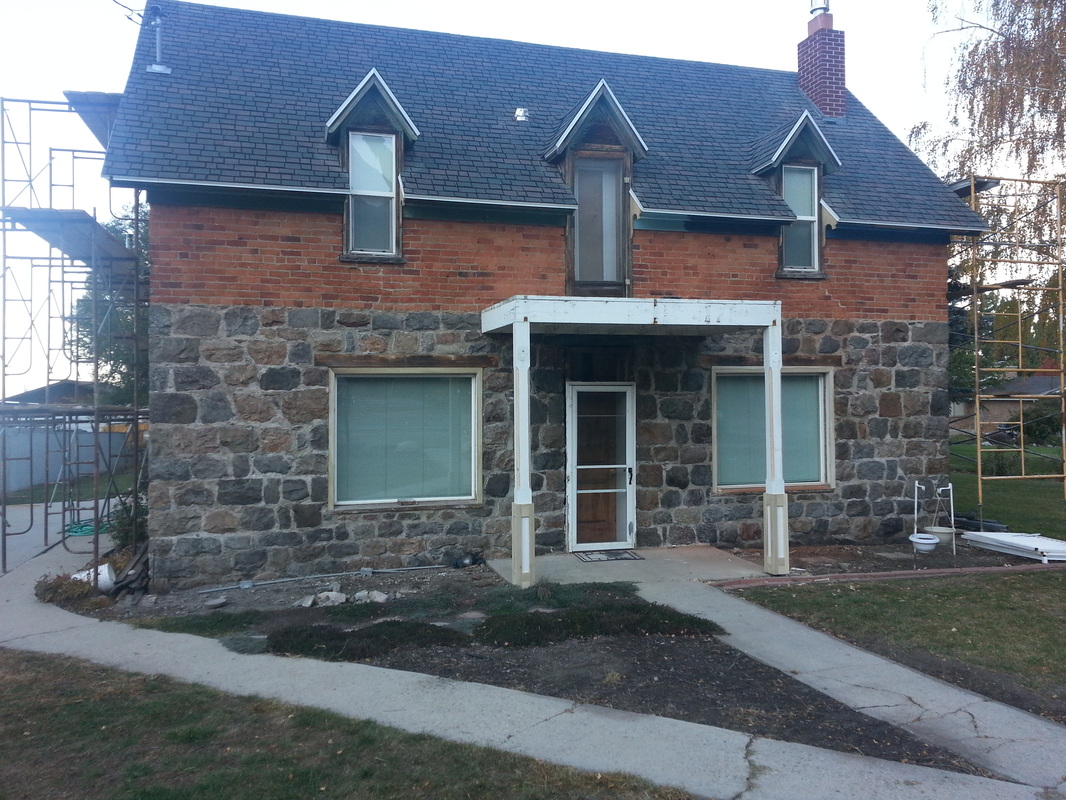
In November 2012, Mitch and Angela Zundel purchased the Zundel home...me, Mitch...and I guess since my dad and mom wrote so much about the home and the remodeling, I should follow up with what we are doing with the home. We have lived in the home with our three children (Sydnie, Addilyn, and Chase) since 2006 (when dad finished the "first" (most recent remodel...see the "Part 1" on the other page) and we rented the home from them). We added a new gas fireplace insert and put in a humidifier on the furnace, but for the most part, we haven't done too much...until now.
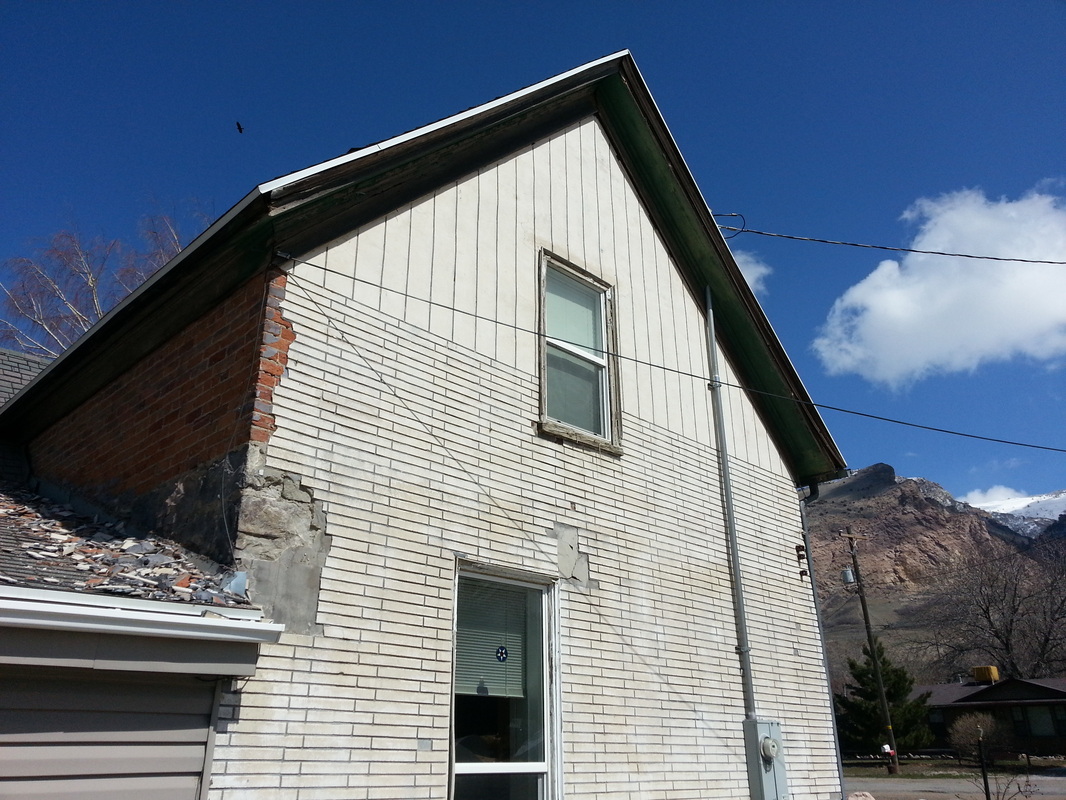
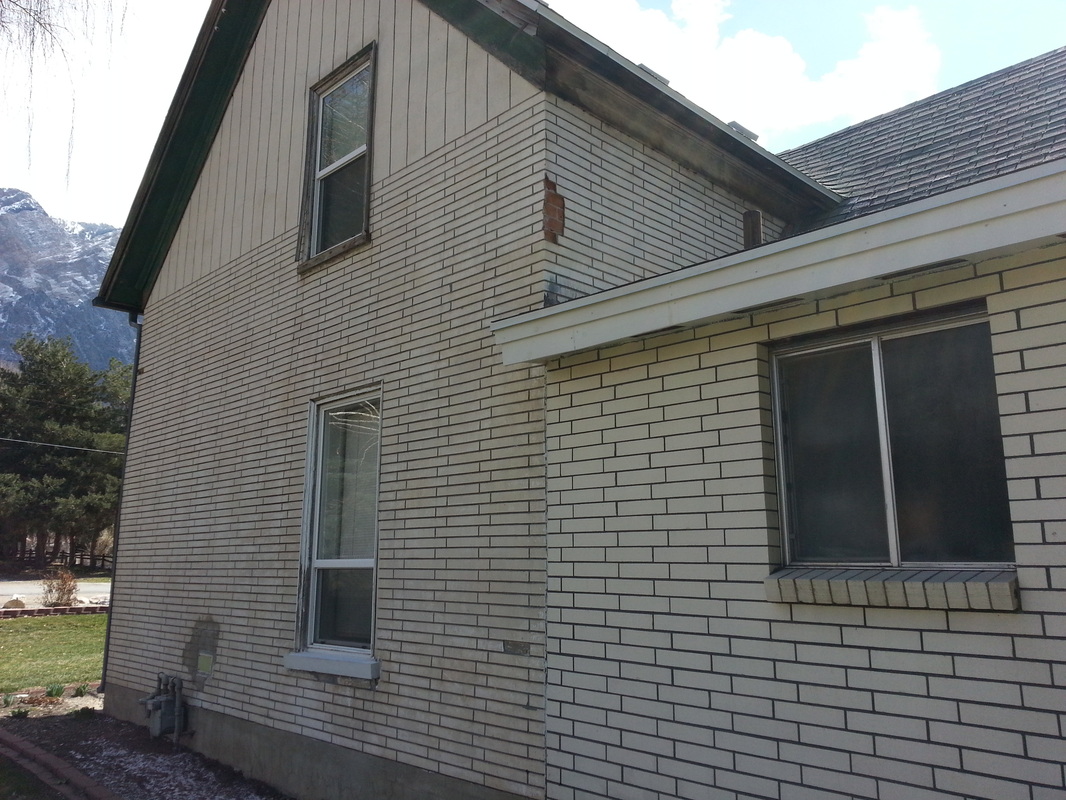
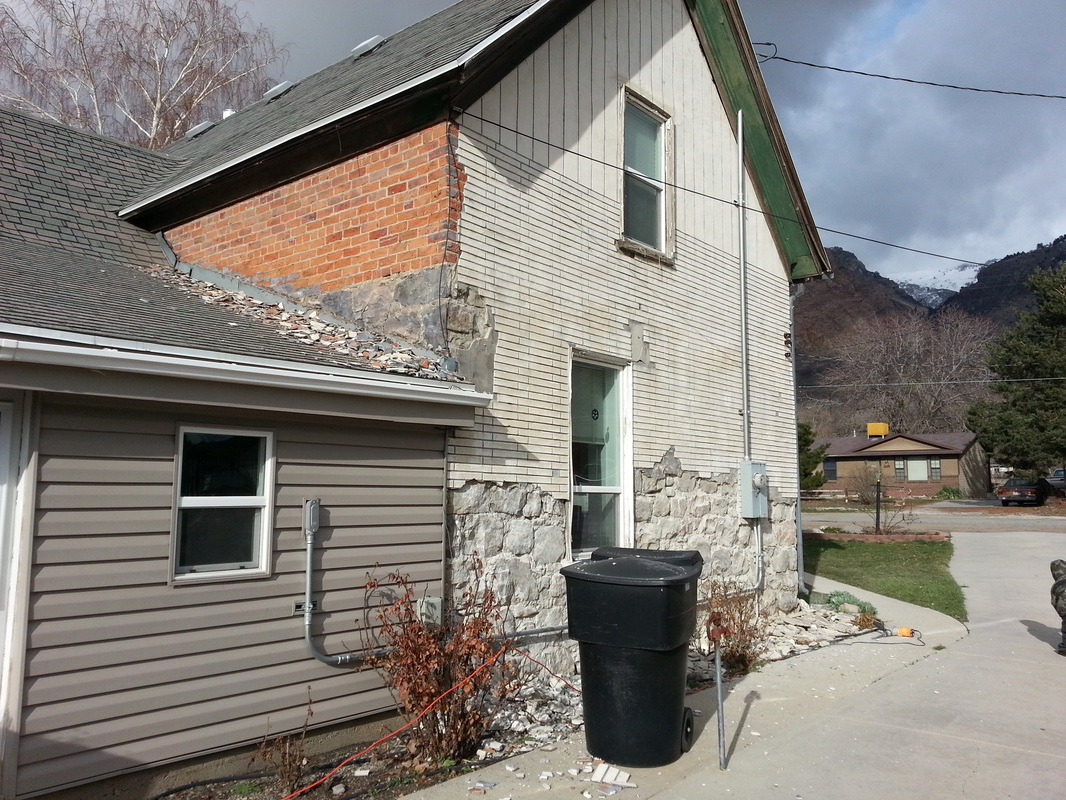
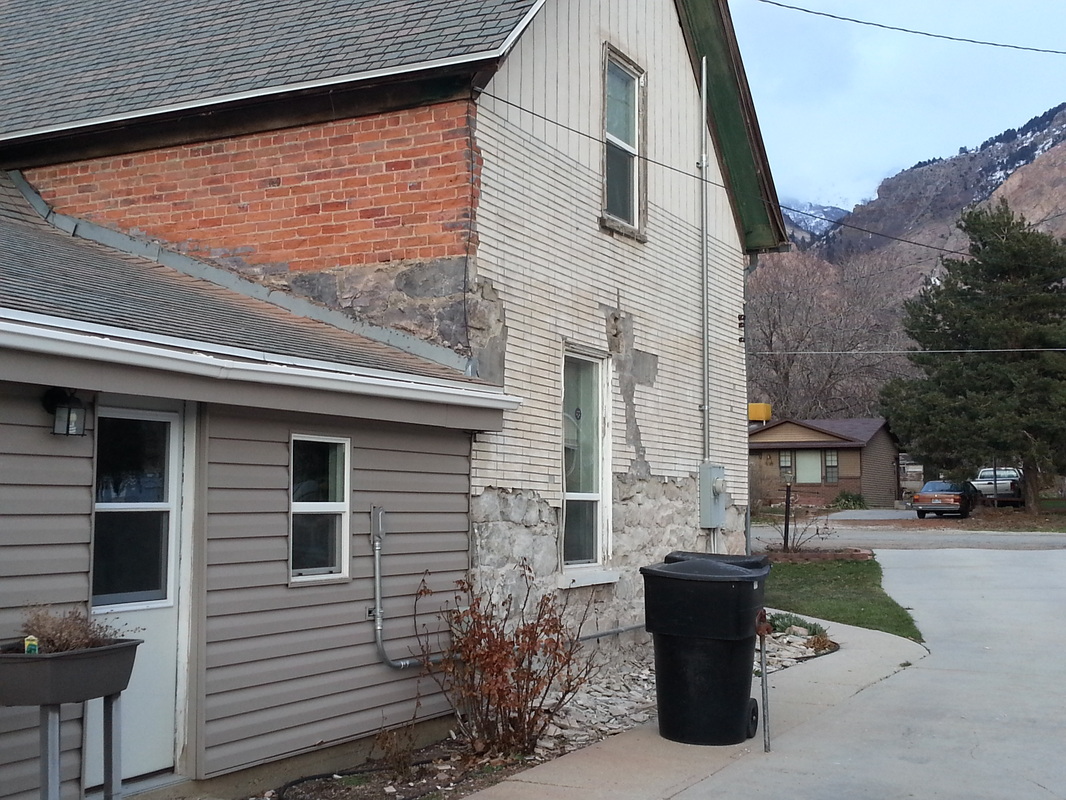
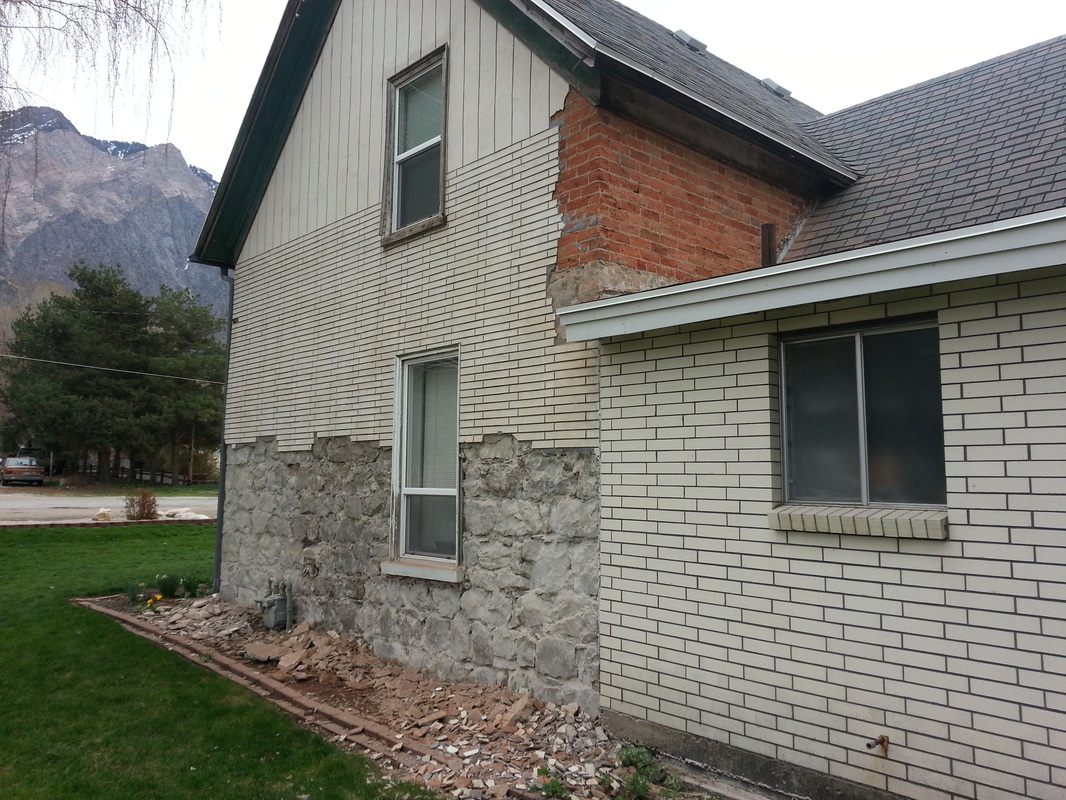
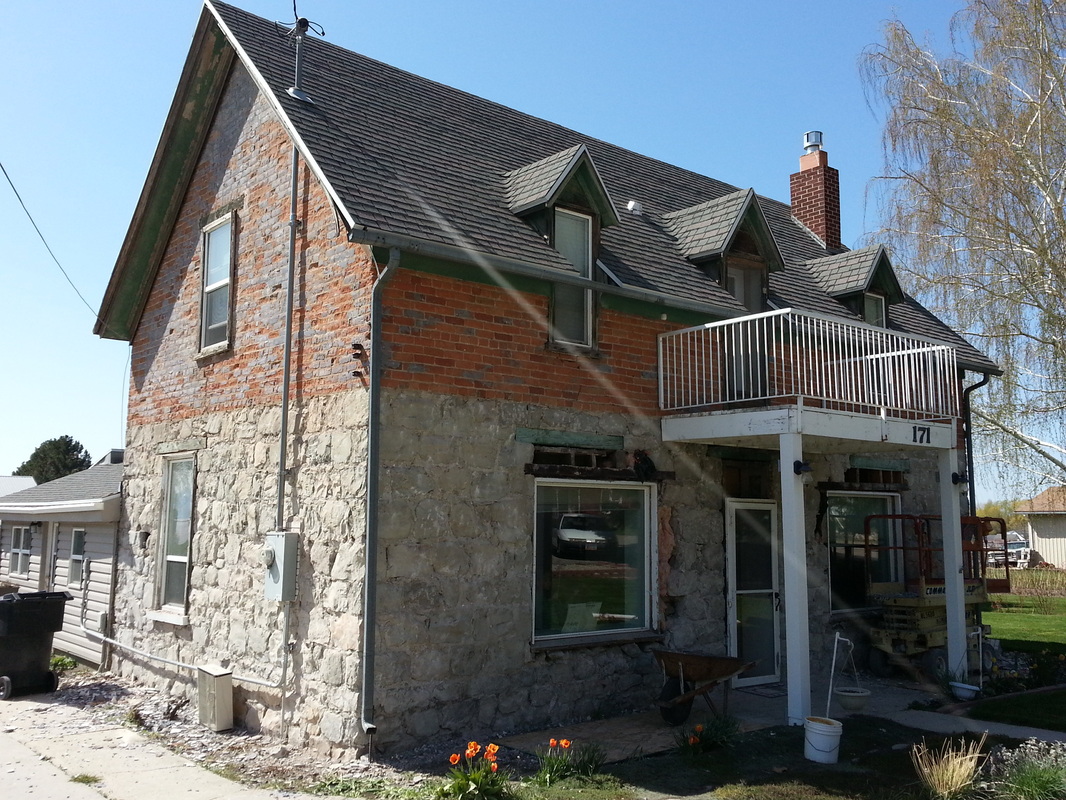
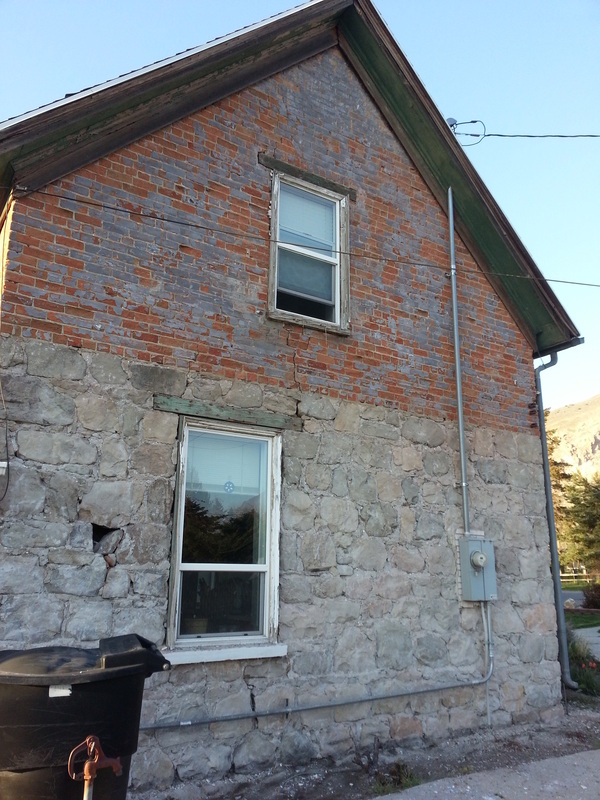
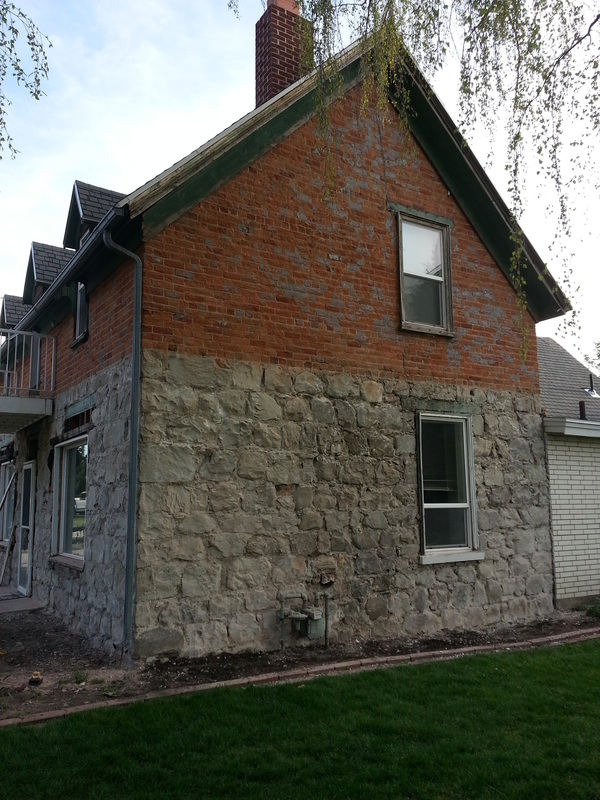
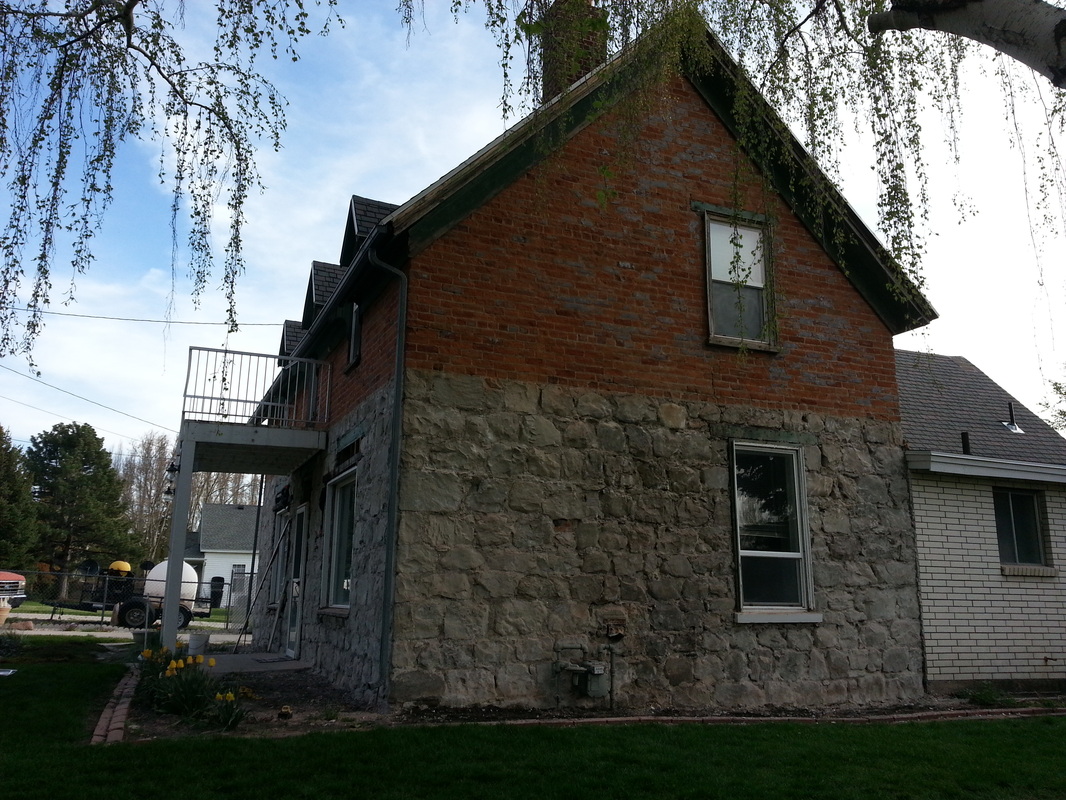
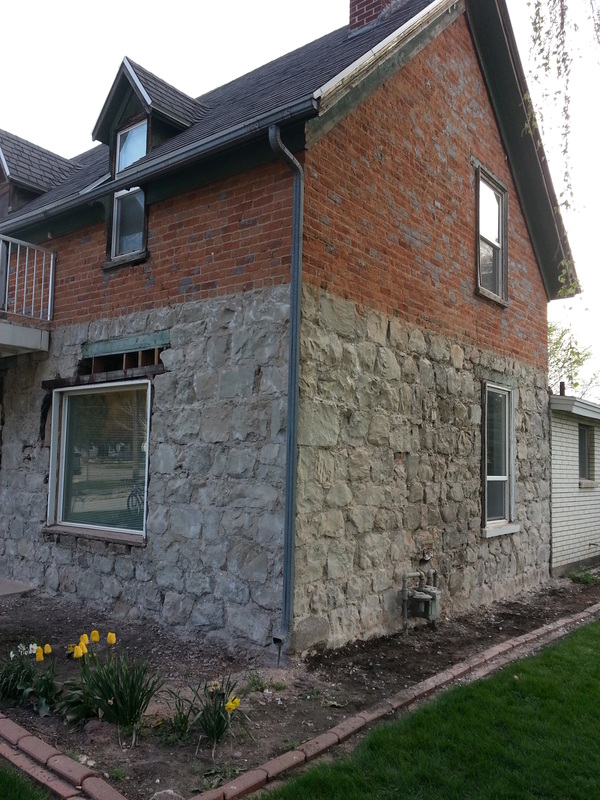
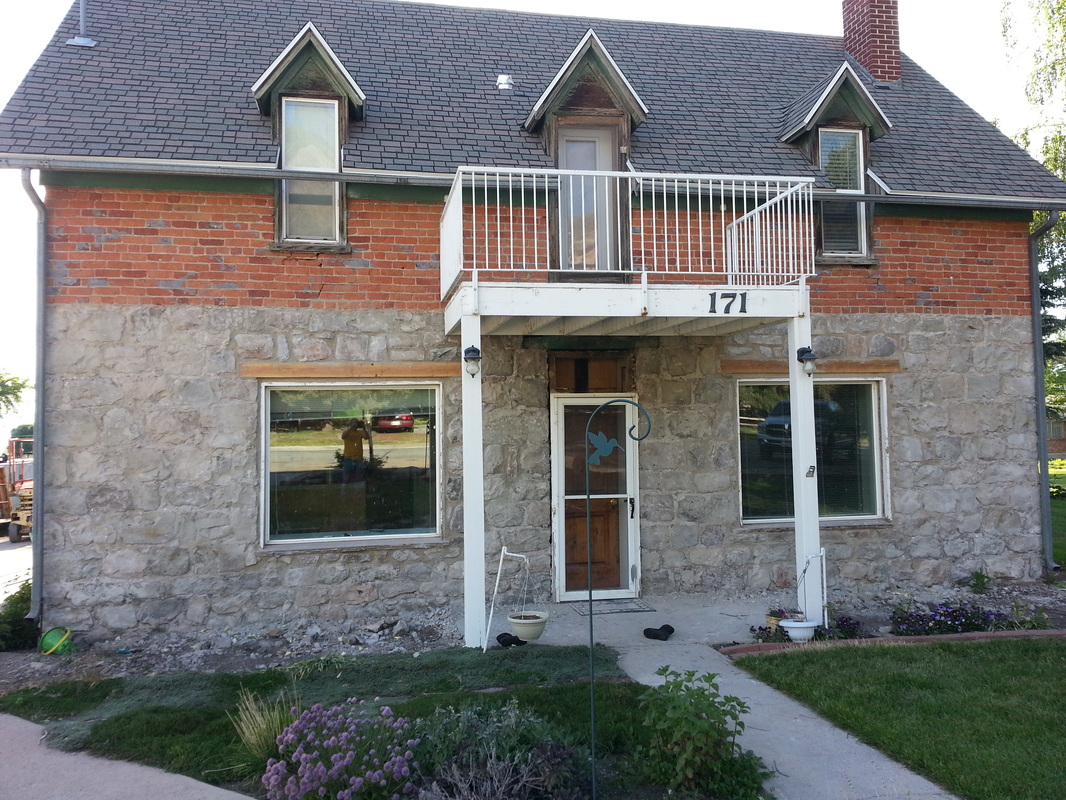
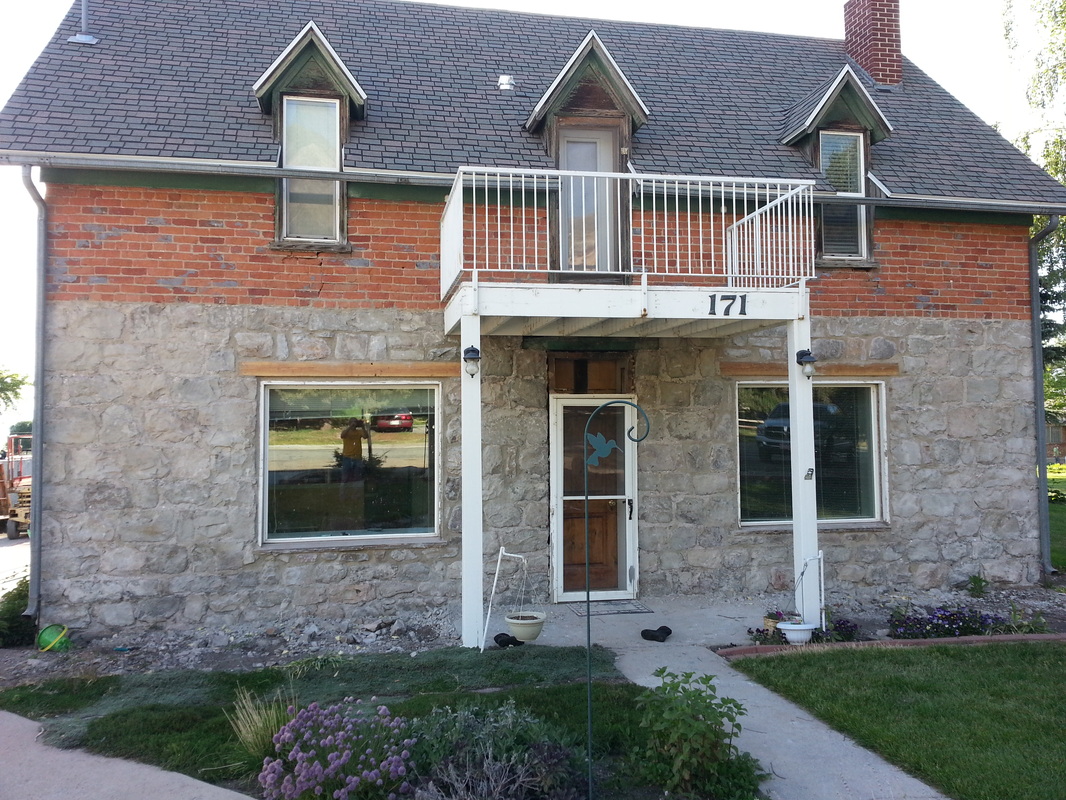
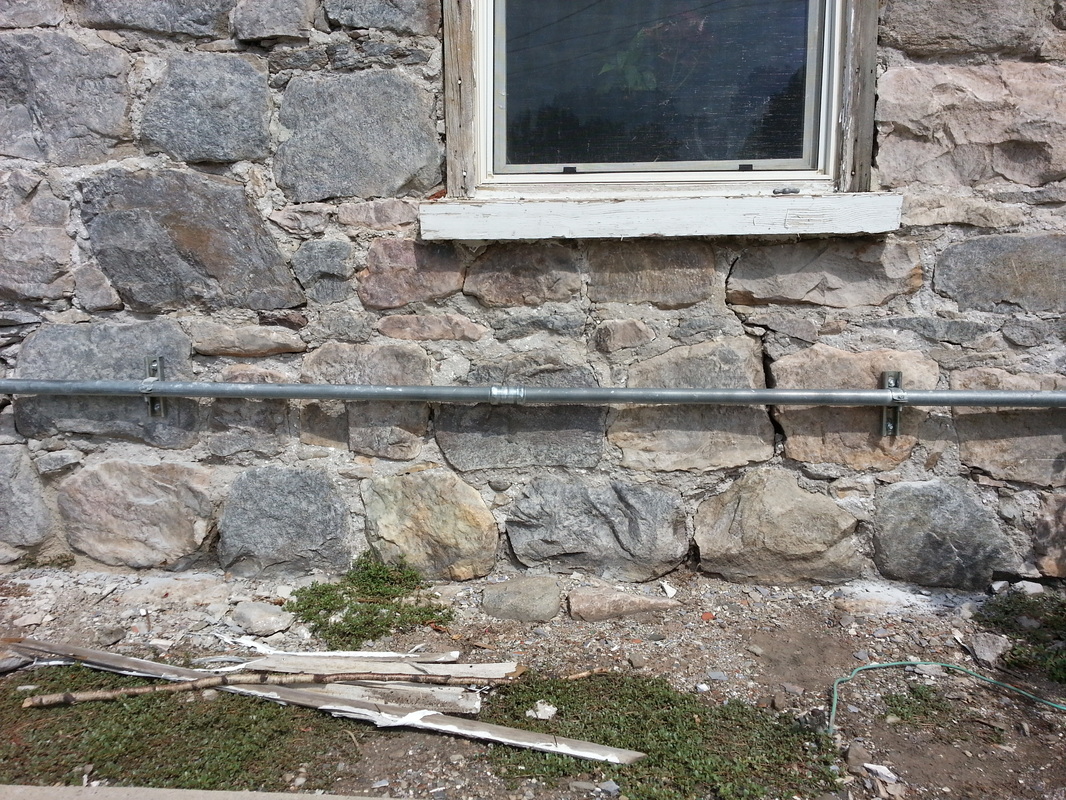
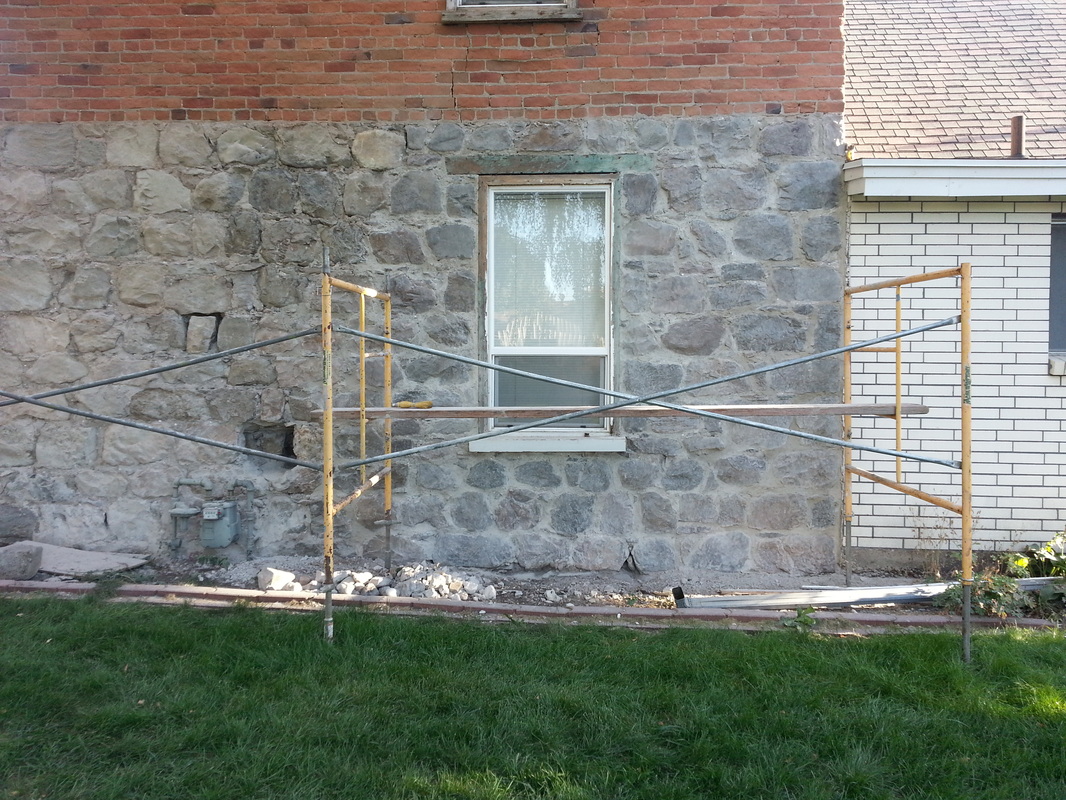
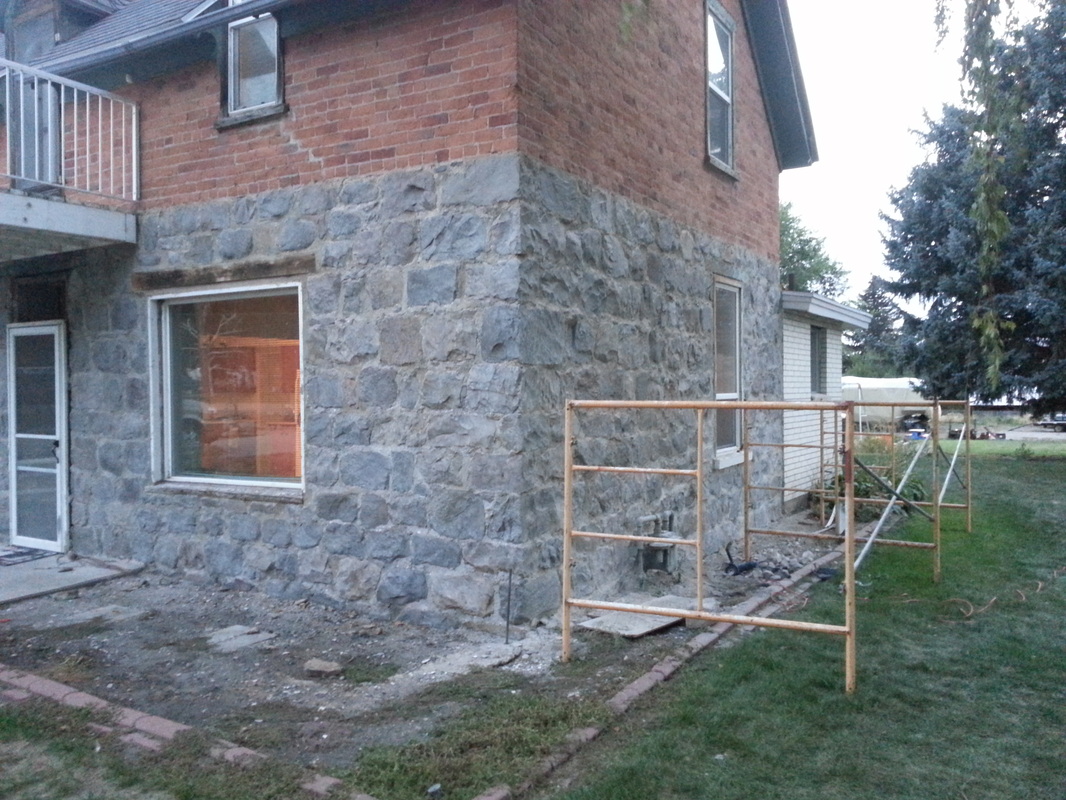
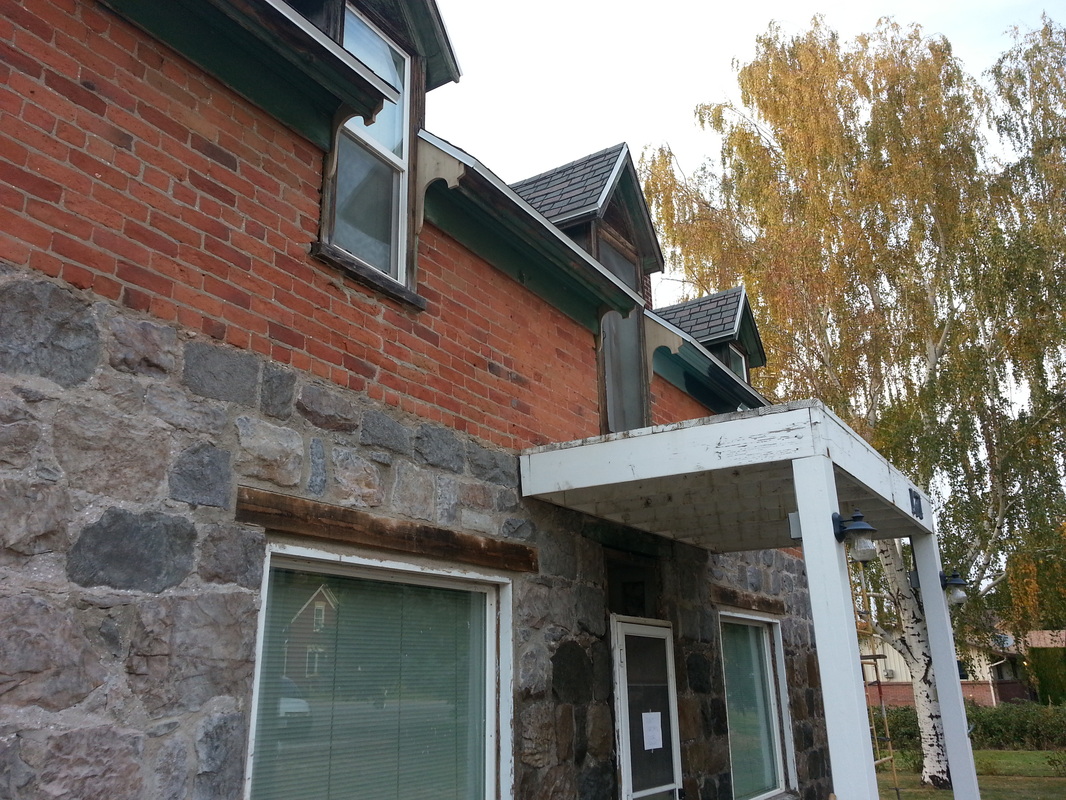
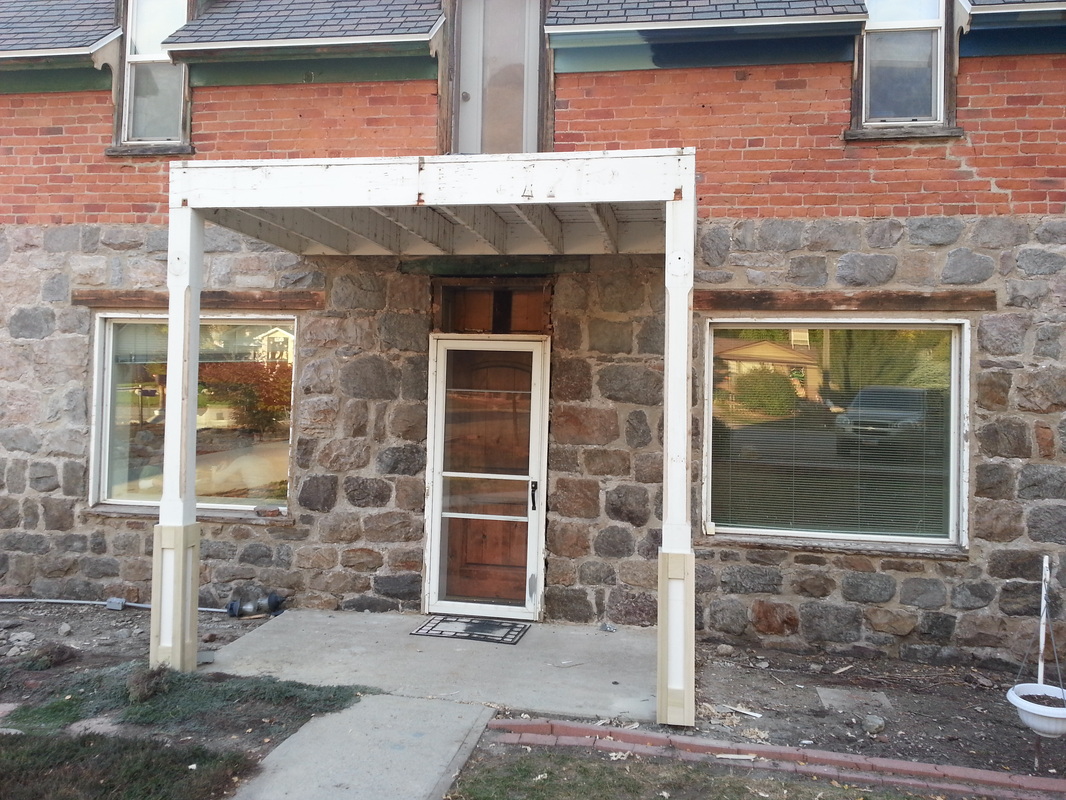
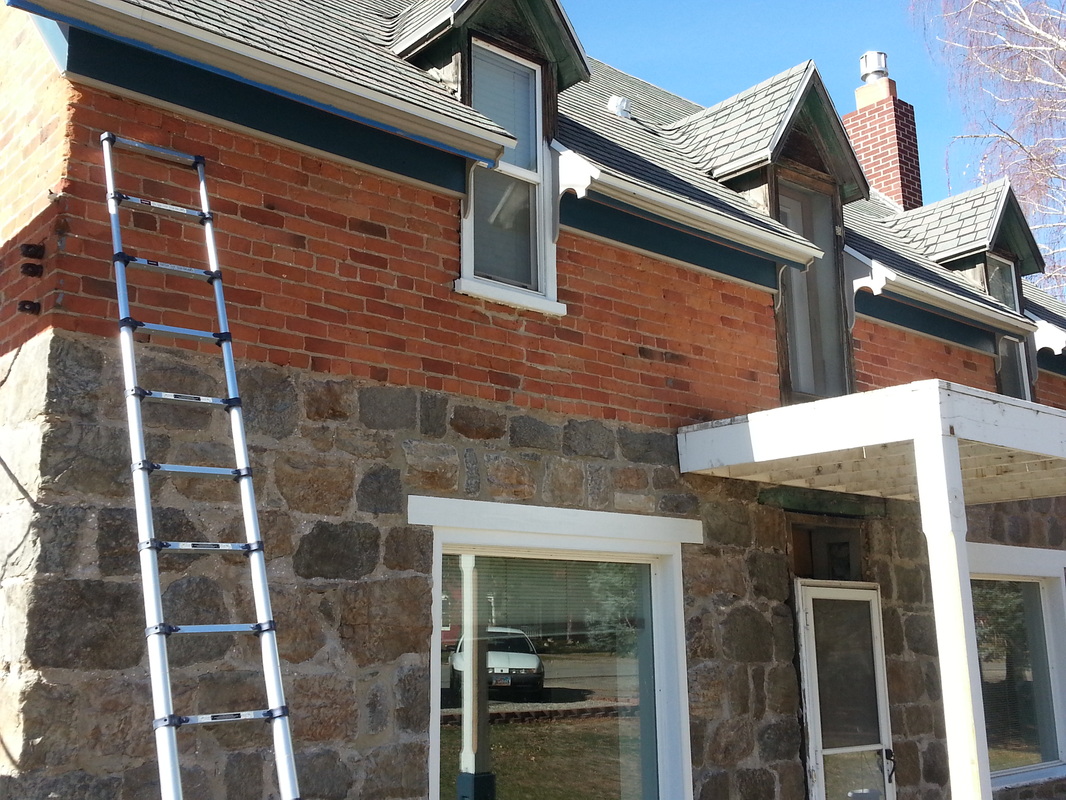
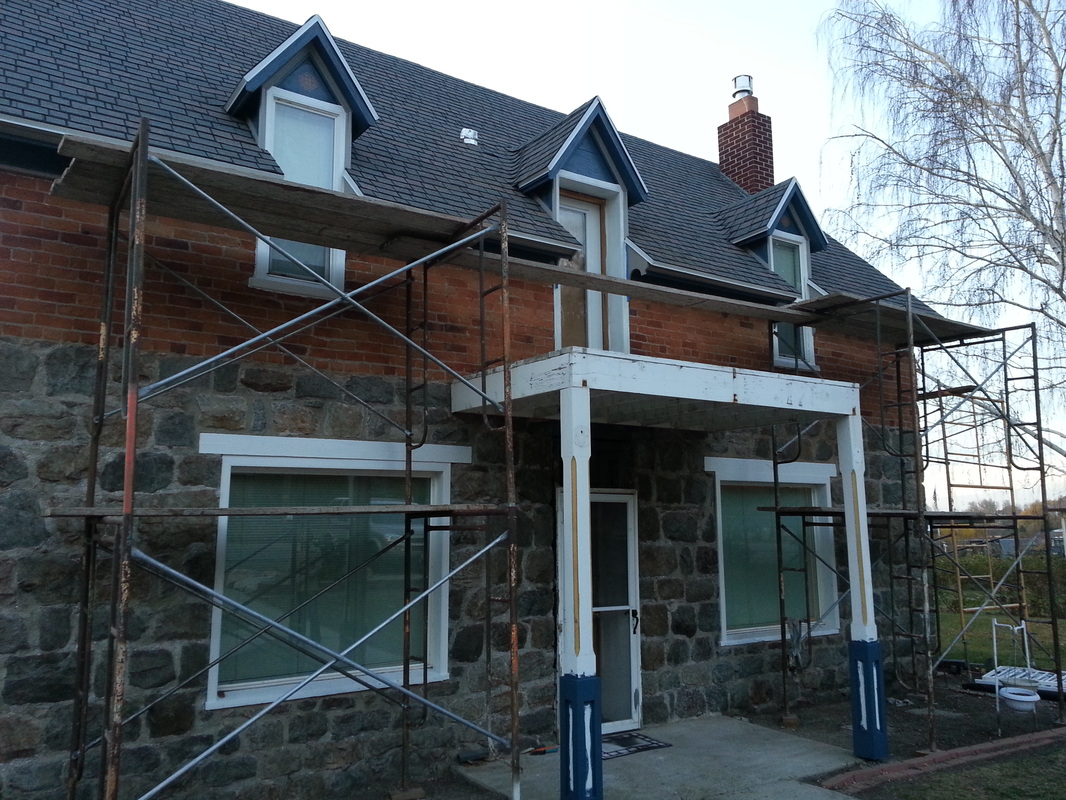
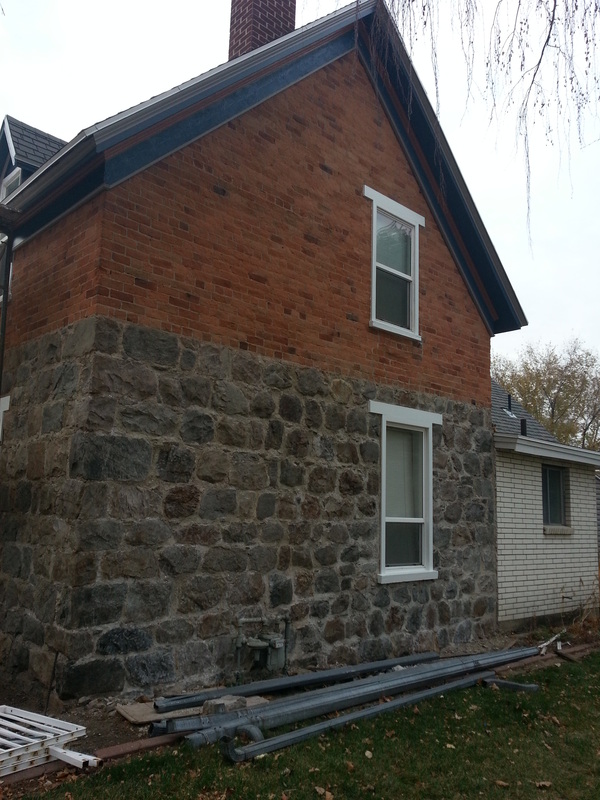
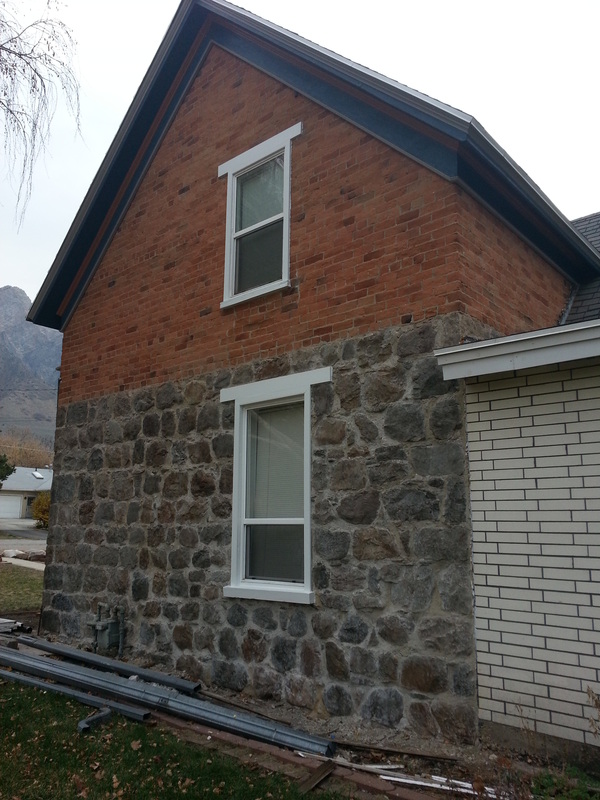
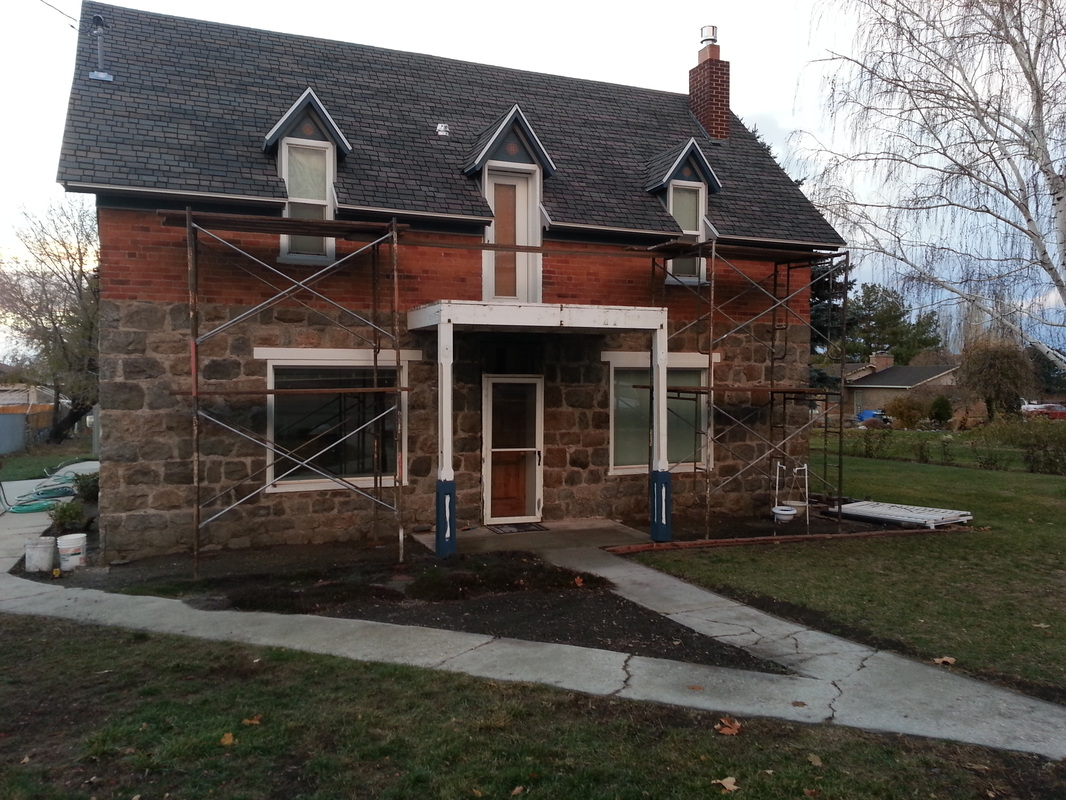
Since we have lived here we have wanted to "fix up" certain parts of the home...specifically the outside...by taking off the fake brick and bringing the home back to the original look. This is where I will pick up and be adding to this page as we go forward...I will first put the "somewhat" pre-construction (I already started above the porch) photos out there.
Since we have lived here we have wanted to "fix up" certain parts of the home...specifically the outside...by taking off the fake brick and bringing the home back to the original look. This is where I will pick up and be adding to this page as we go forward...I will first put the "somewhat" pre-construction (I already started above the porch) photos out there.


March 23, 2013

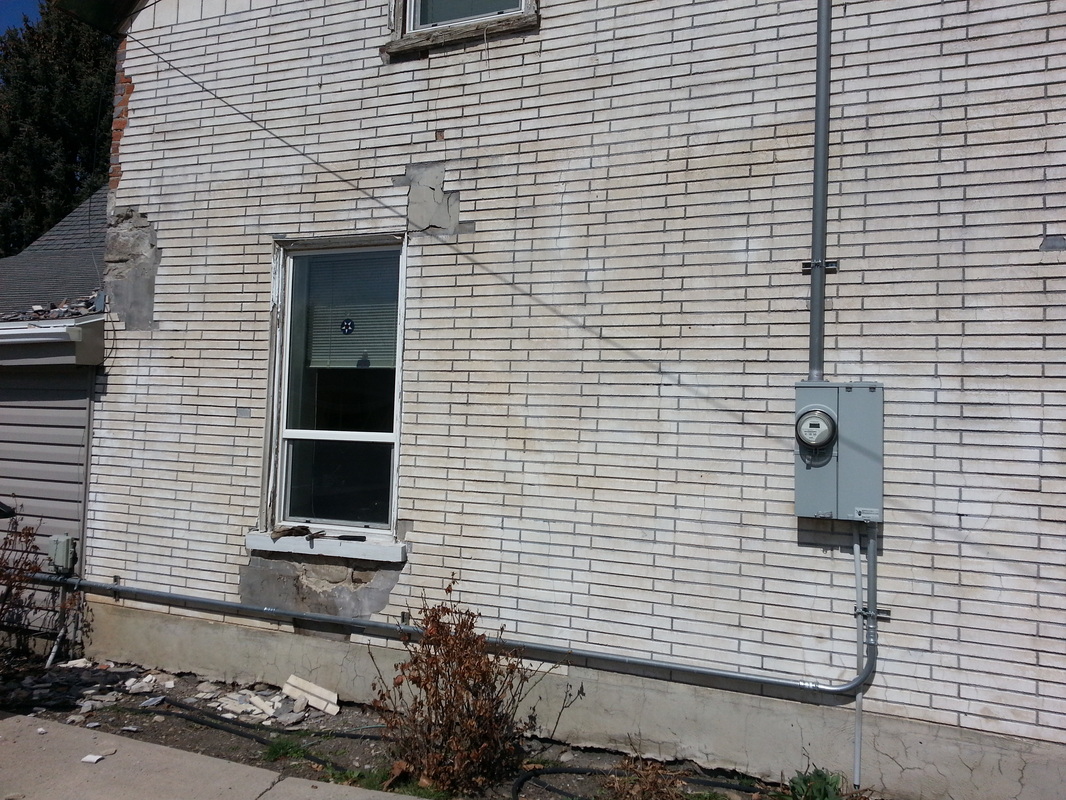
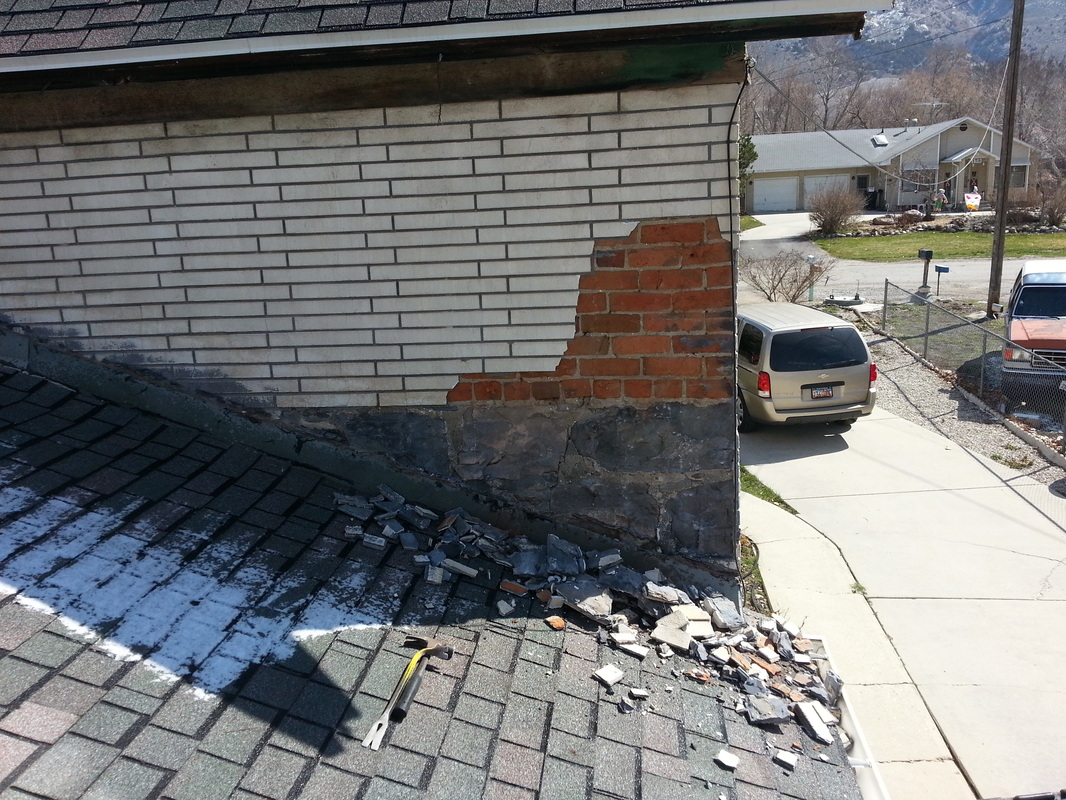
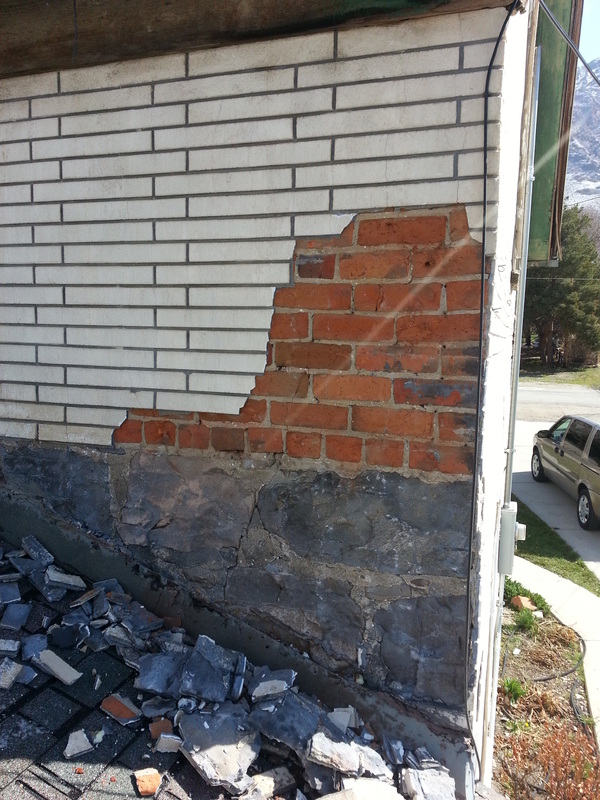
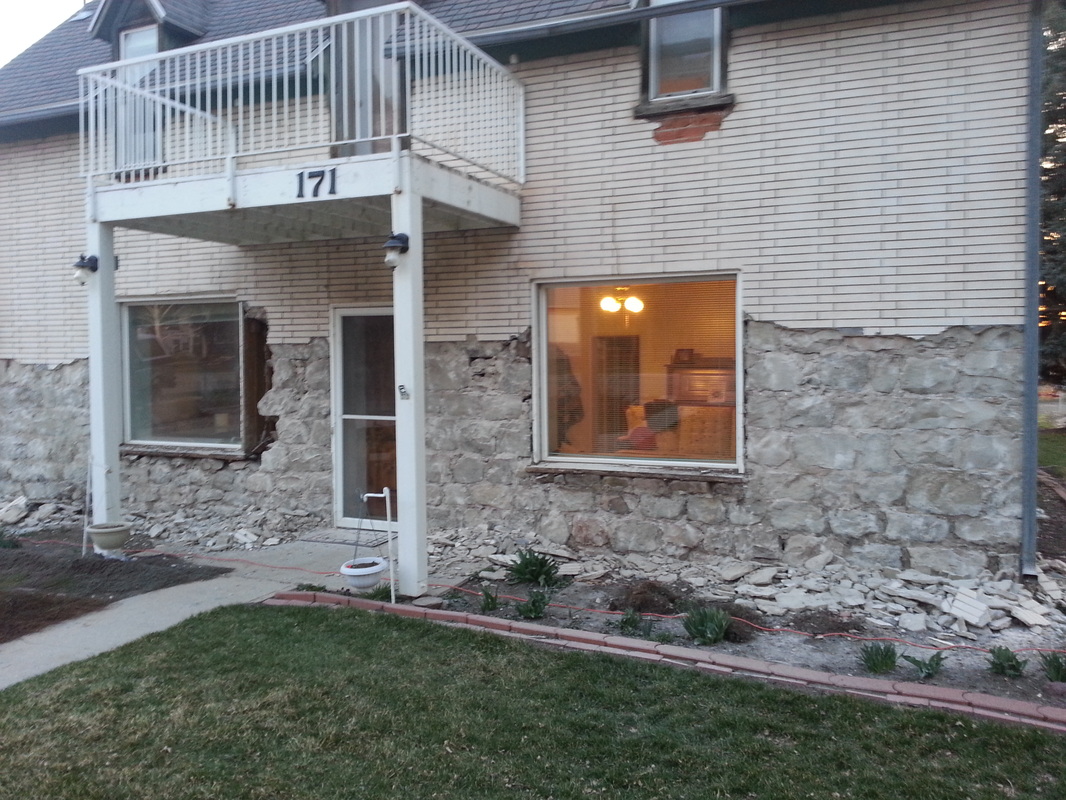
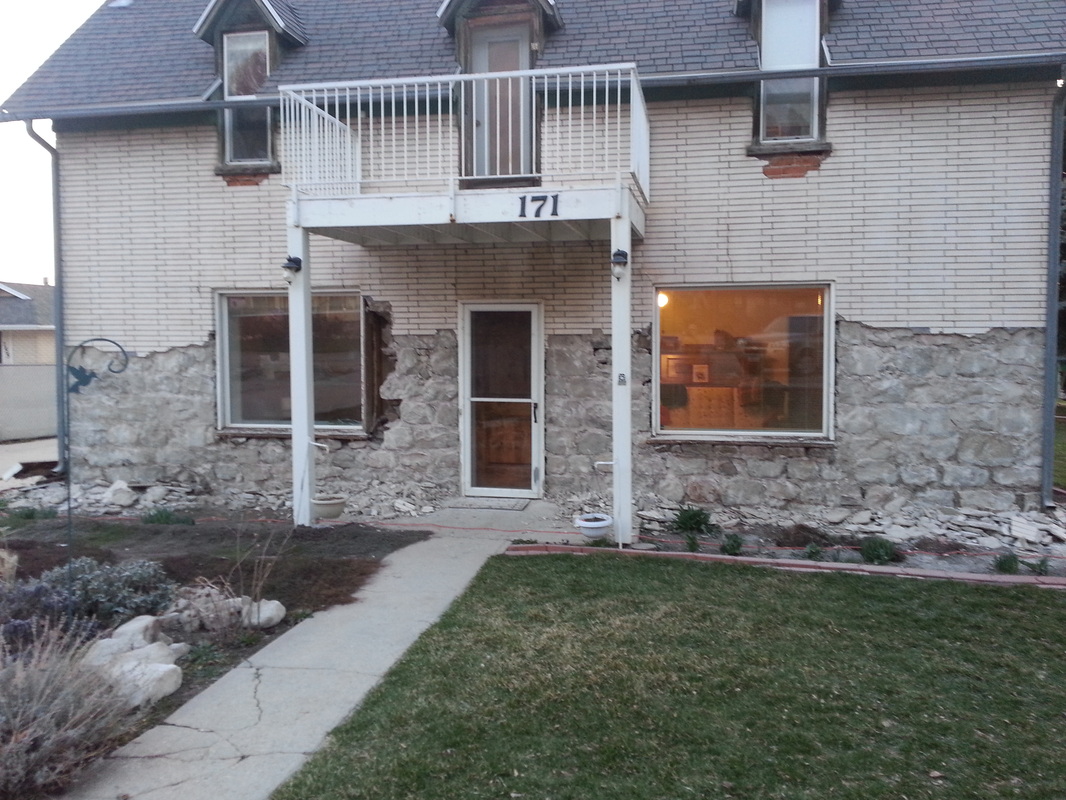
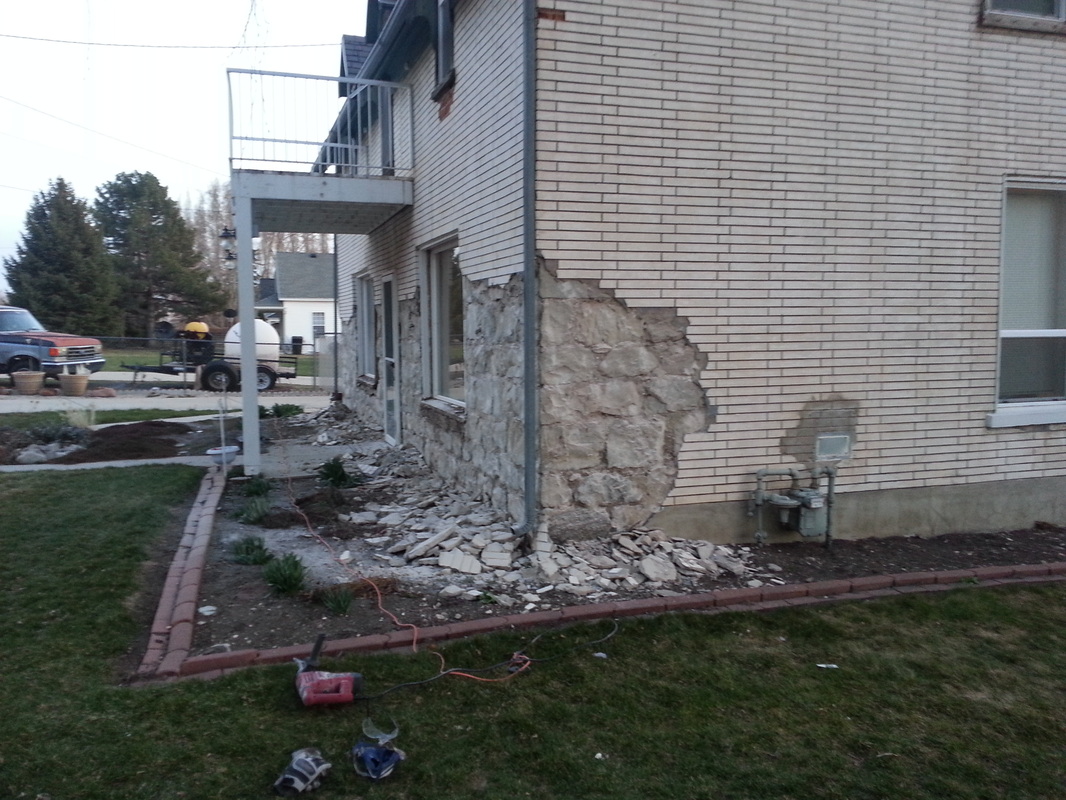
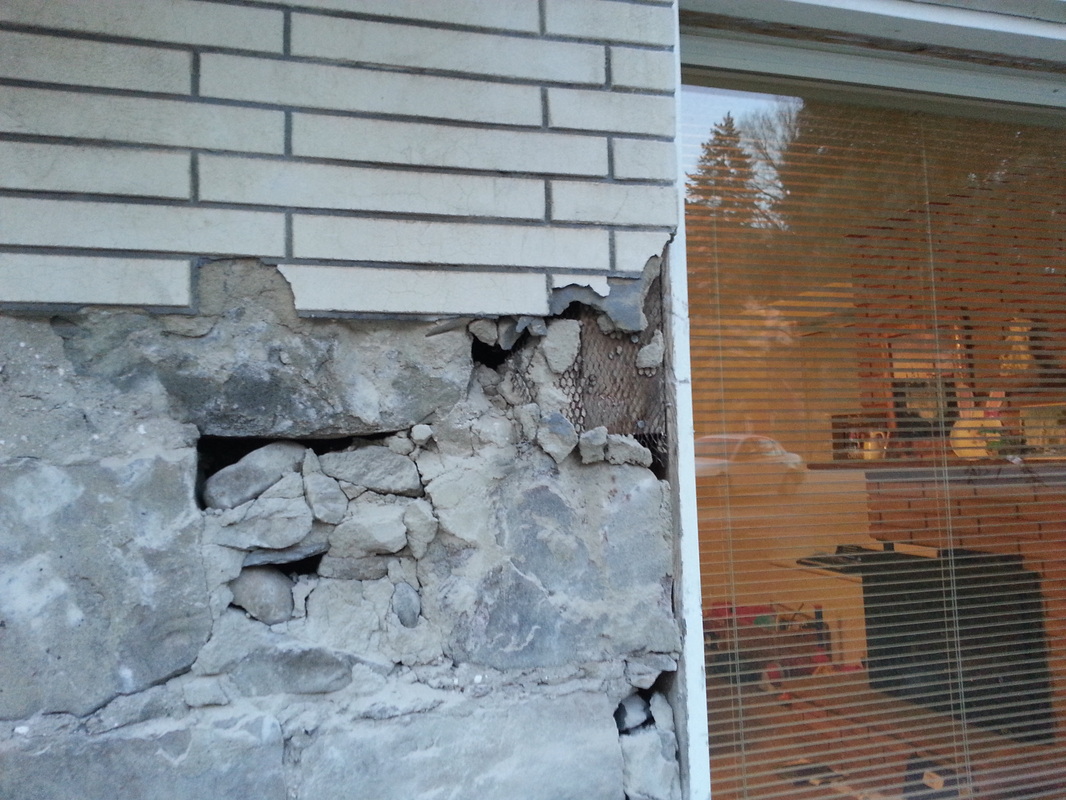
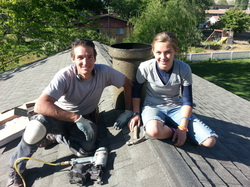
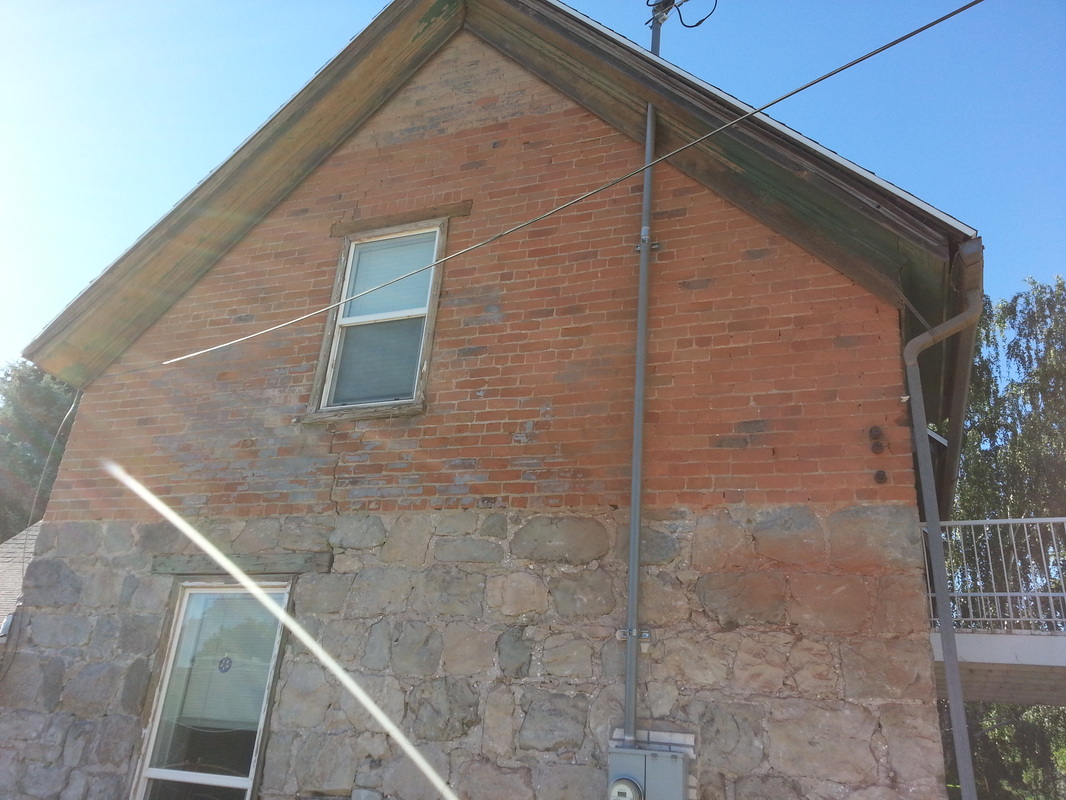
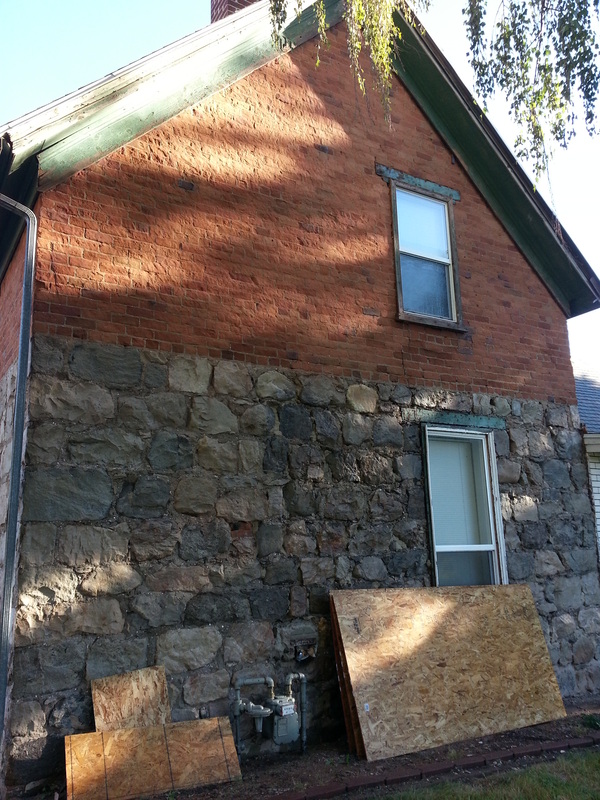
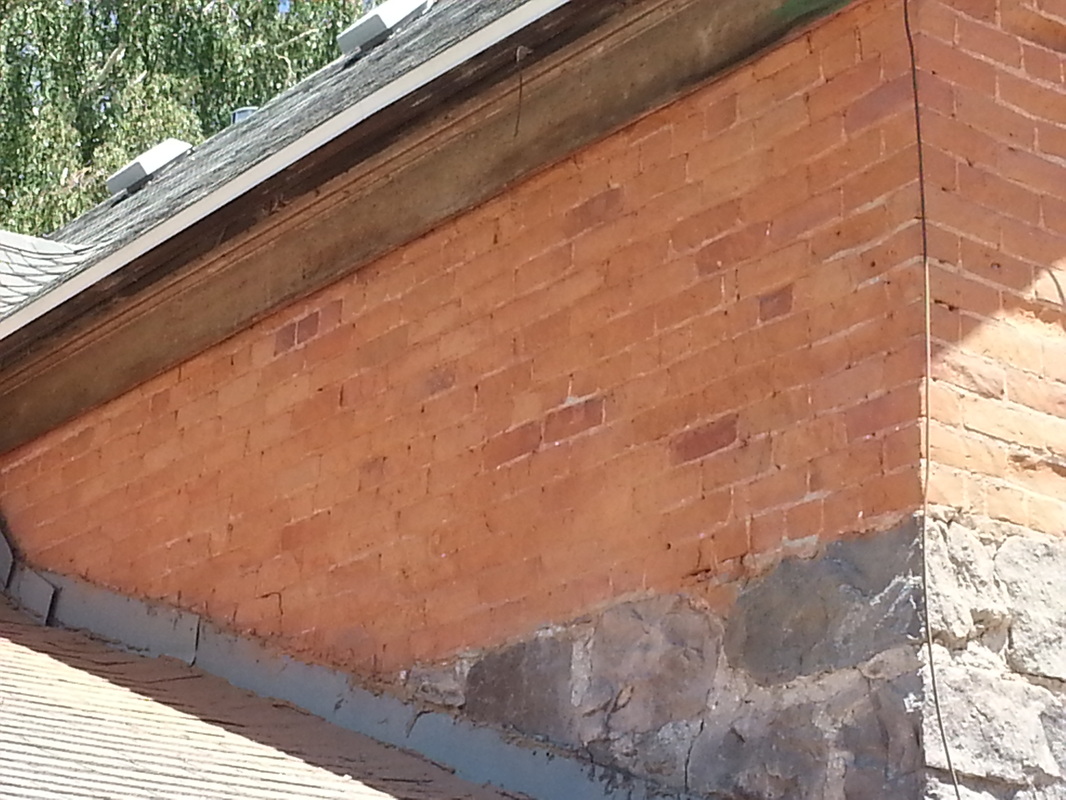
After setting some funds aside to ensure we have the ability to complete the outside of the home I decided to go up on the roof above the porch and see what it was like to take off the fake brick...maybe I'm a bit excited to get this off and see what we're up against or maybe I'm opening up "Pandora's box" and will regret this later?? Whichever is the case it has begun. What started out as a simple test to see what it will be like turned into much more!
I got up on the roof (there was a bit of snow from the night before and it was dripping on me as I started, but with the sun out it stopped quickly and so I proceeded to take my dad's crowbar and a hammer and start. I was nervous that the bricks would just crumble but I was pleasantly surprised when they didn't. As I knocked off the fake brick it did take a layer of brick off with it. It was cemented right to the brick which surprised me because I expected some chicken wire or something to help keep it to the home. I'm glad they didn't use the wire because they would have put a bunch of nails into the brick causing more damage...score 1 for me! :)
As I was finishing up with that small triangle of an area, my dad called and asked me if I knew where the crowbar was...I smiled and said I was using it (they were gone when I went over there to get it). My dad was also doing some remodeling on their home and needed to take off some baseboards. So since he needed it, I decided it was a good time to break and go for lunch.
After lunch I decided I needed a crowbar so we went to Smith and Edwards, purchased one along with some gloves (and candy of course...the kids went with) and went home to get going on the south side of the home. When we got home, my neighbor, seeing what I was about to do and figuring I could use something "magical"...much better than a crowbar, introduced me to a rotary hammer! He let me borrow his and after getting a feel for the thing, found that this powertool would be most helpful in this project! :) ha ha
After a couple of hours I decided to call it good for the day. I finished off the south side and was excited about the progress that was made and what we saw. For the most part the home is in pretty good shape! So far so good! Here's a few pictures from day 1...

March 27, 2013
On Monday, March 25, 2013...mom's birthday, we went to Harbor Freight and purchased our own rotary hammer. I didn't want to burn up my neighbors and felt it would be well worth the investment. I purchased an extended warranty so I have 1 year and 90 days to finish this project with the unconditional warranty. I purchased the Chicago Electric 10 amp model...only downside...it's heavy...on the positive side...I might have Popeye arms when finished. :)
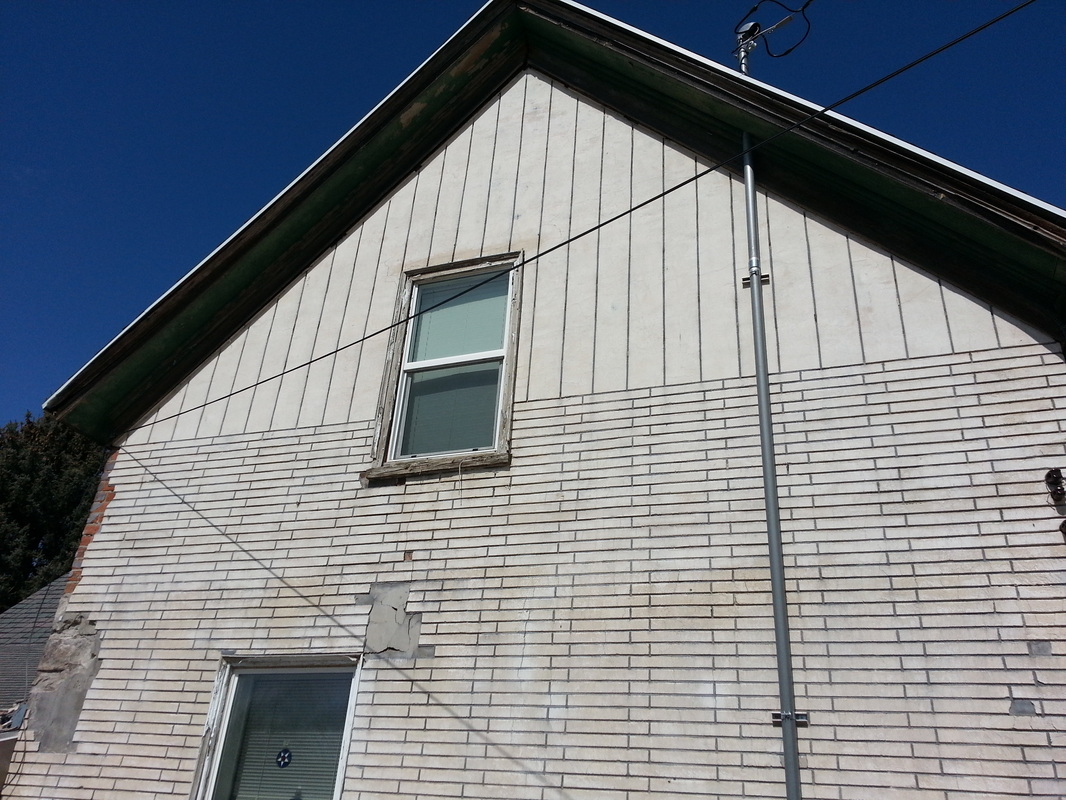
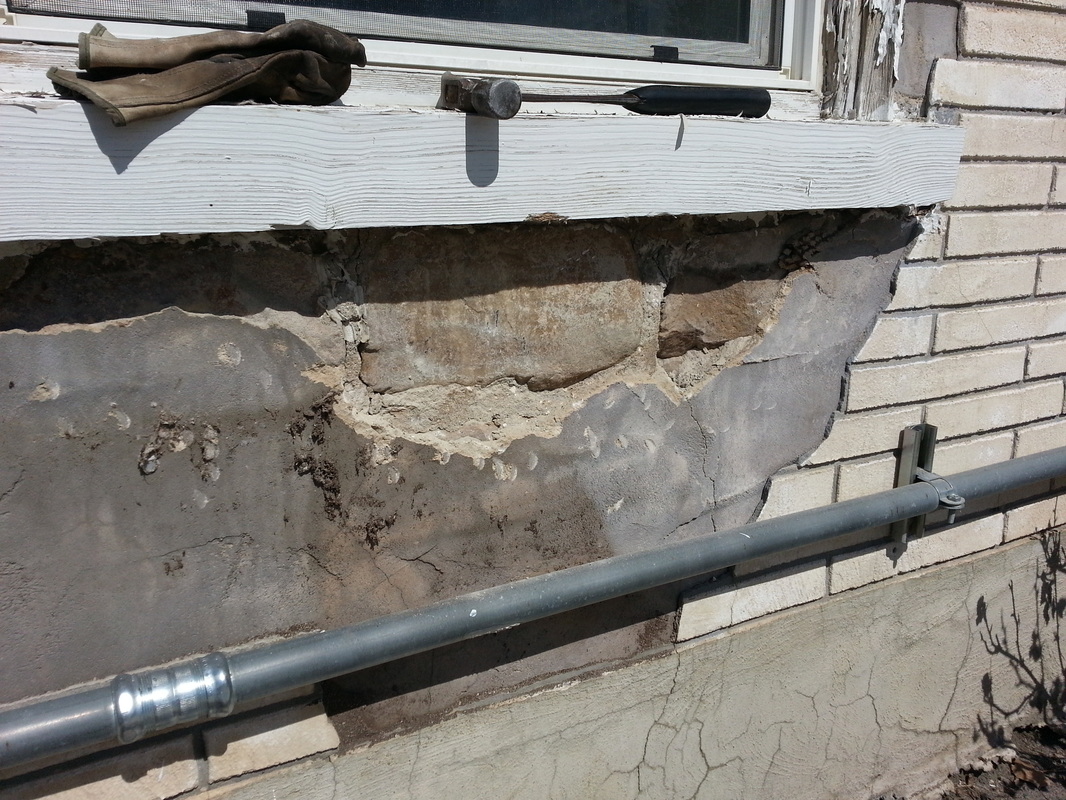
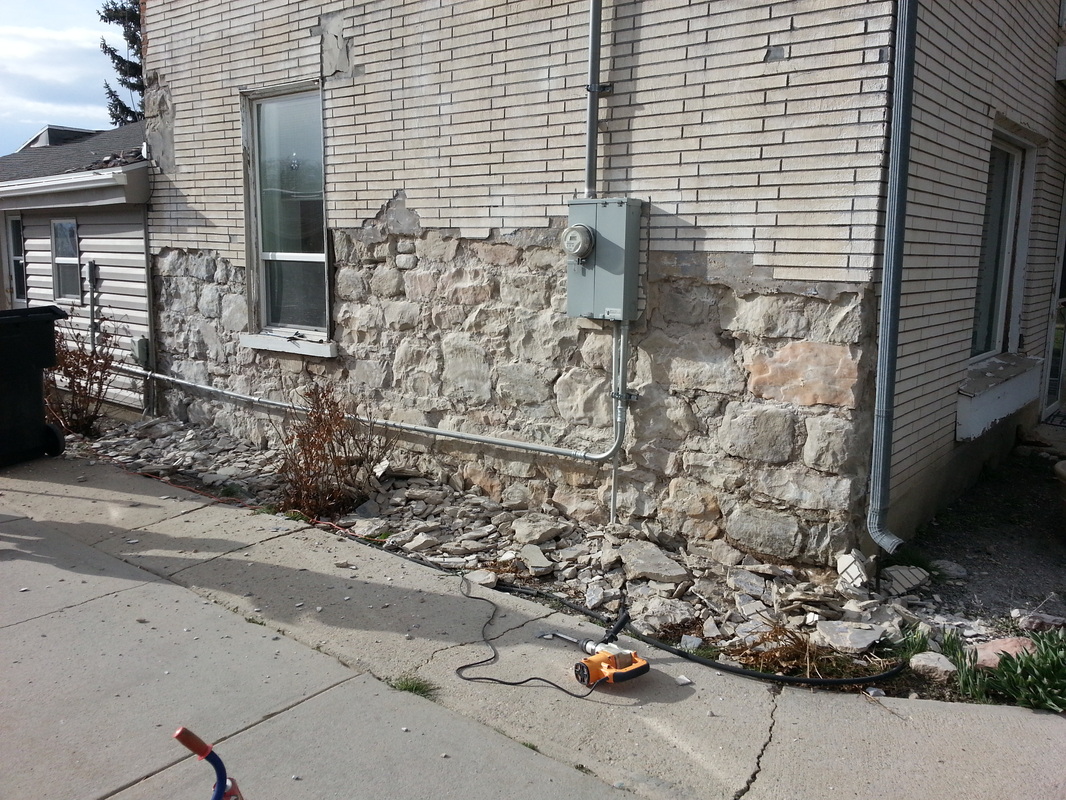
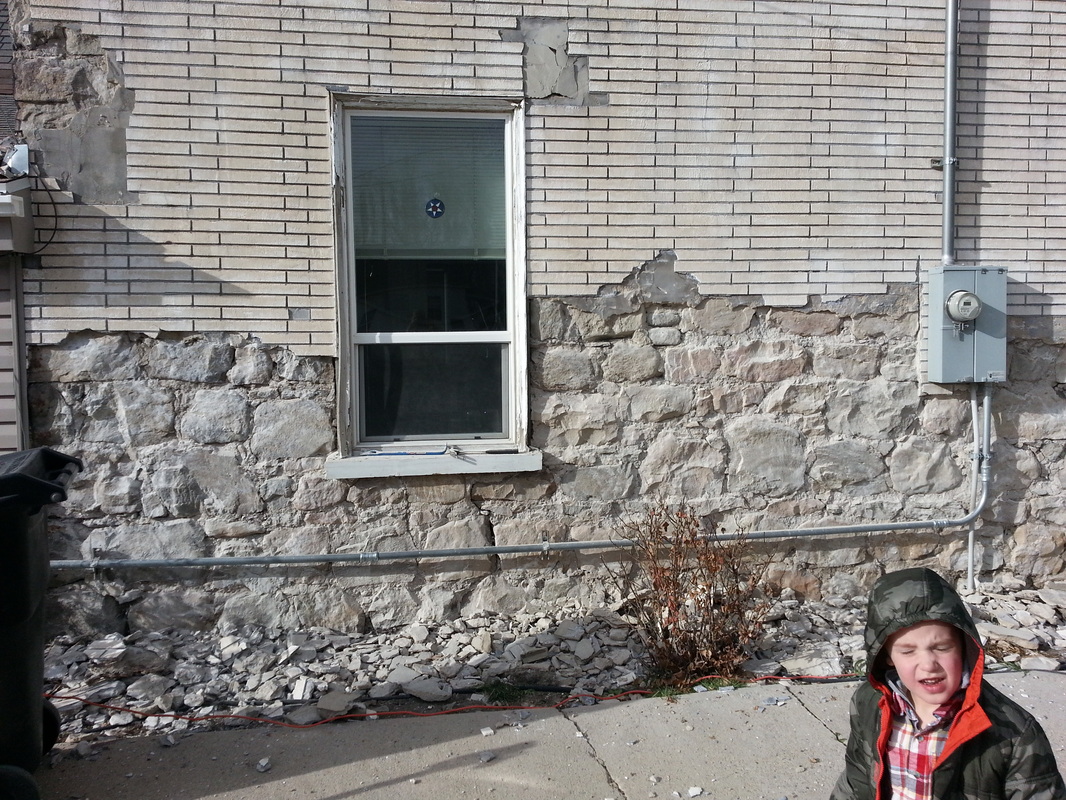
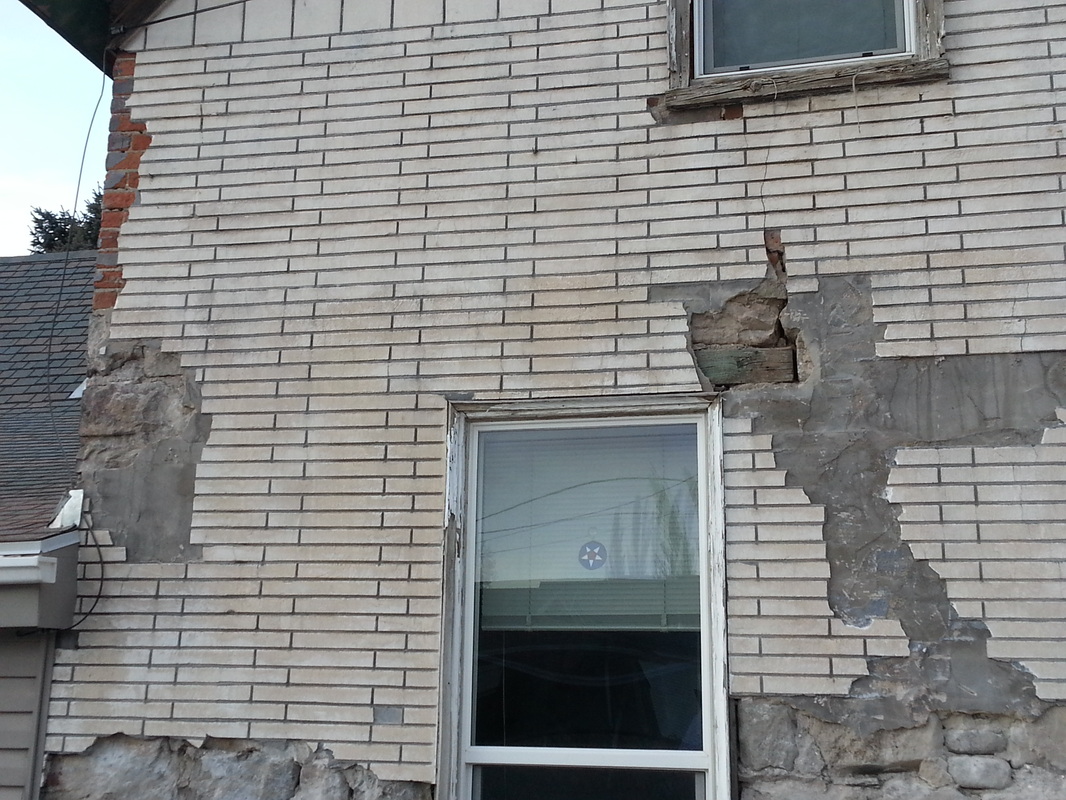
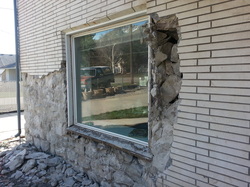
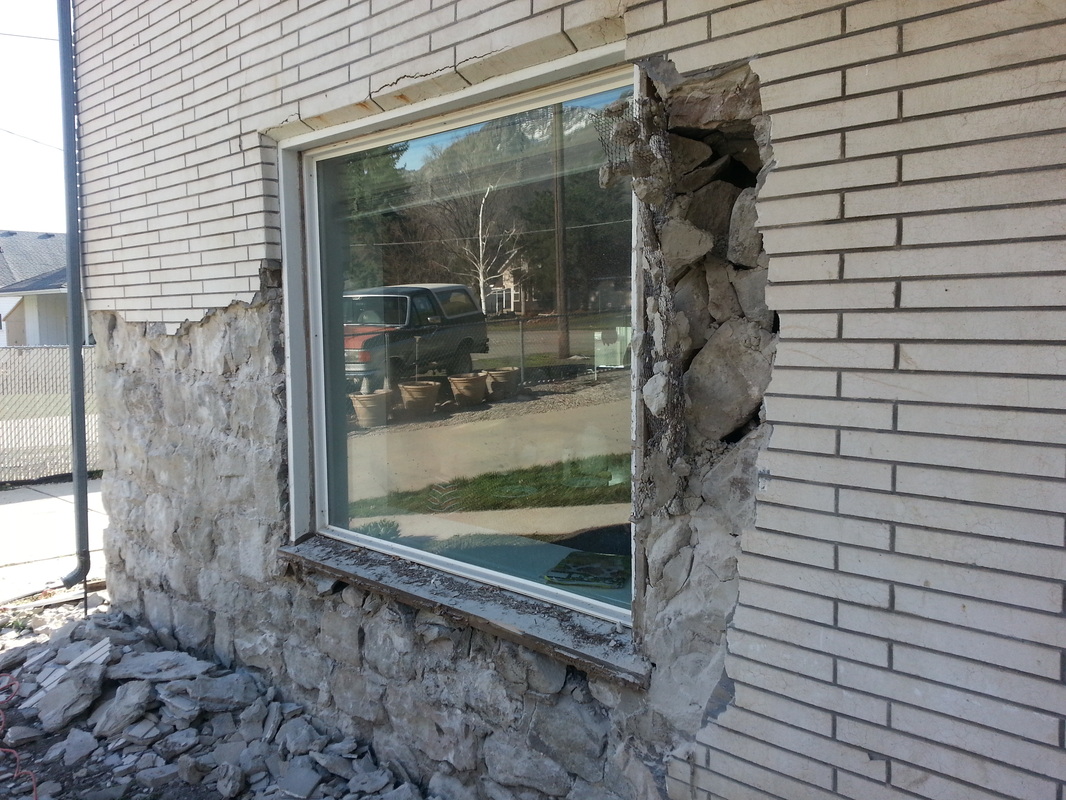
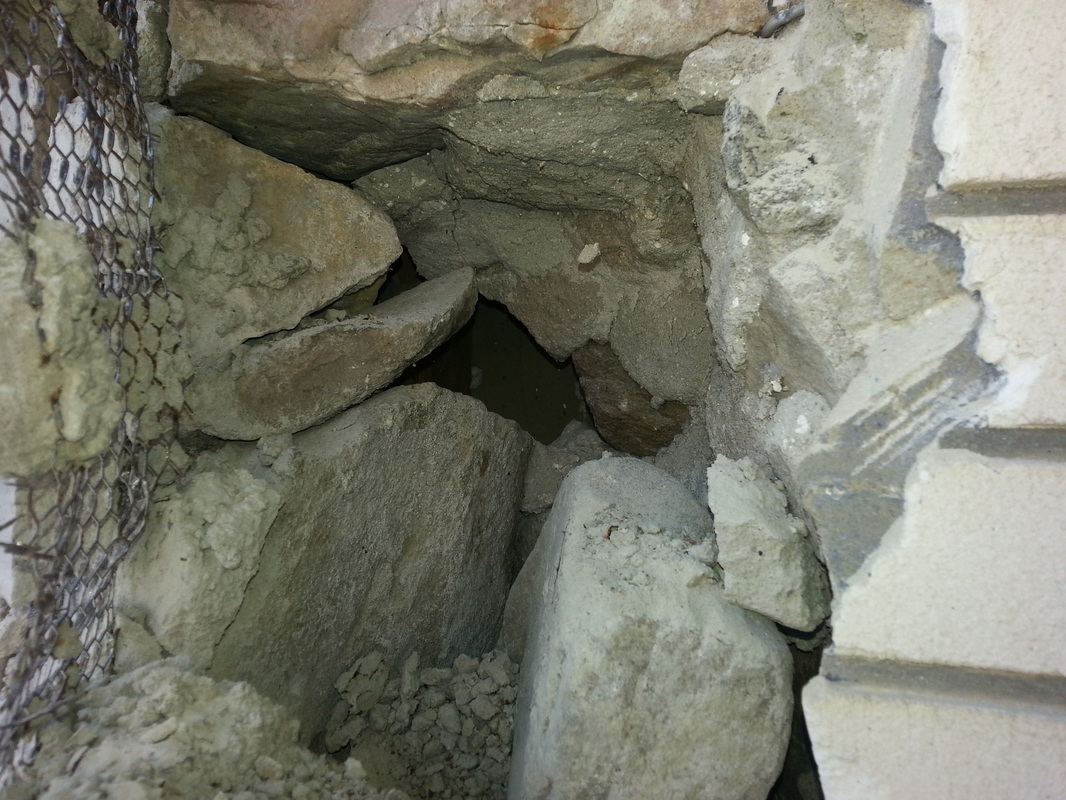
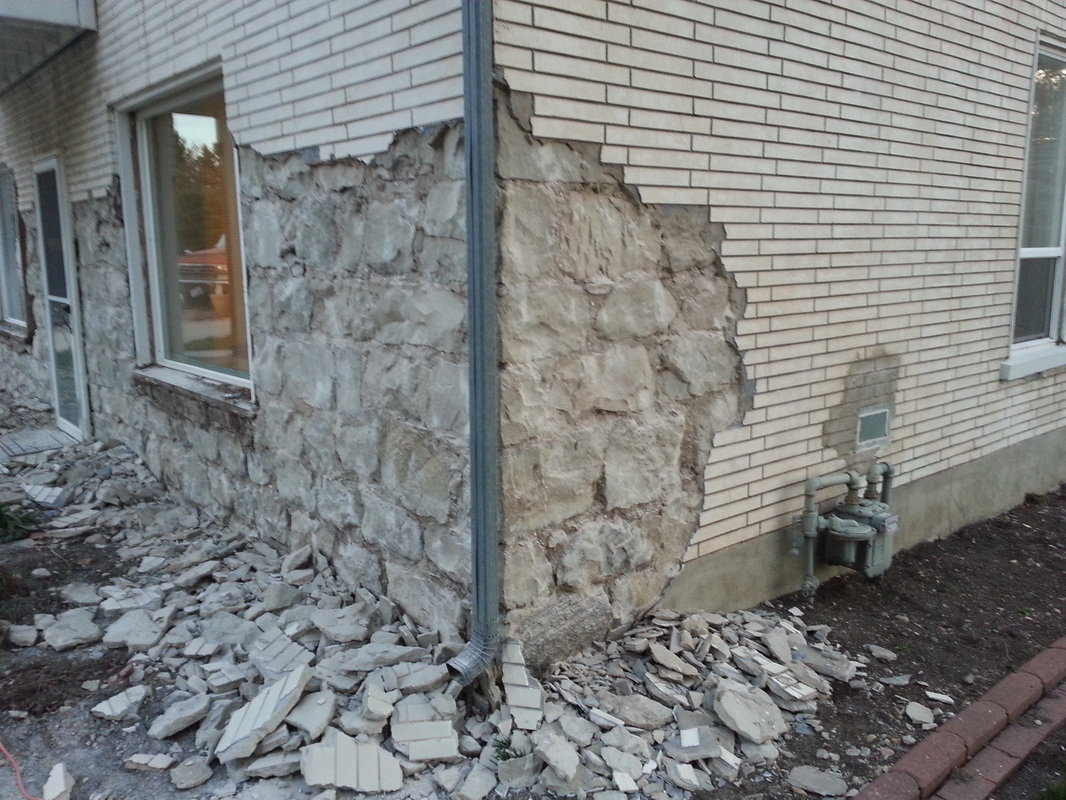
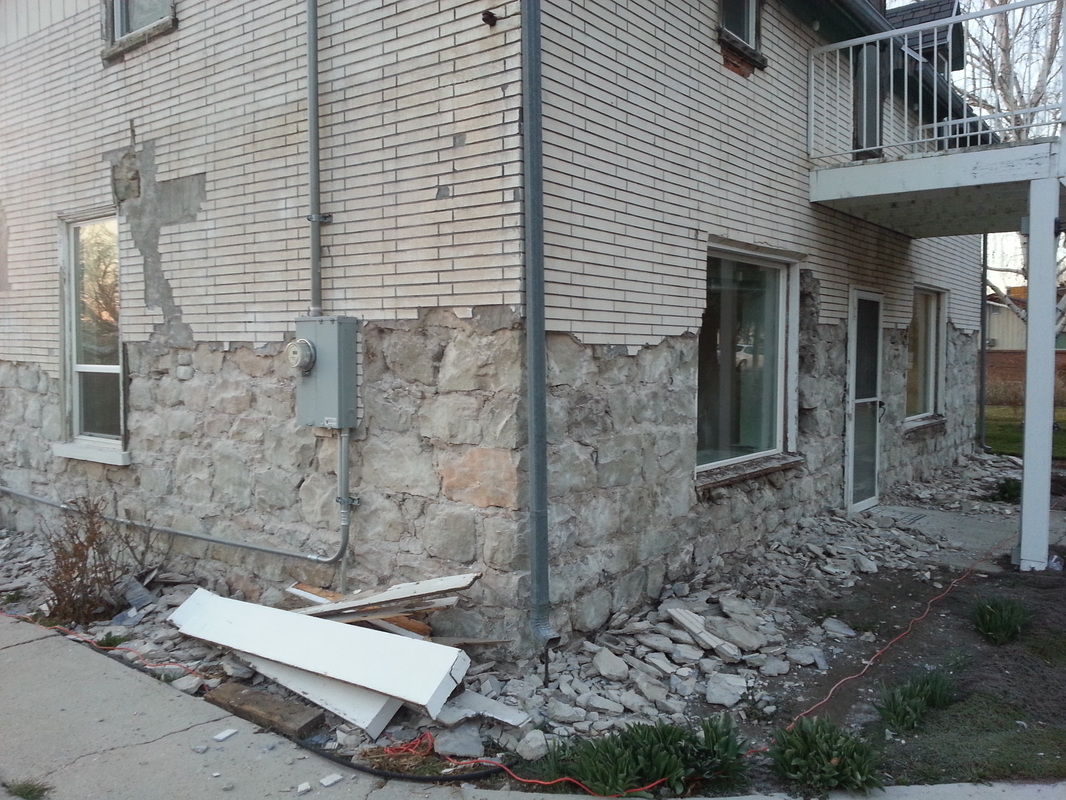
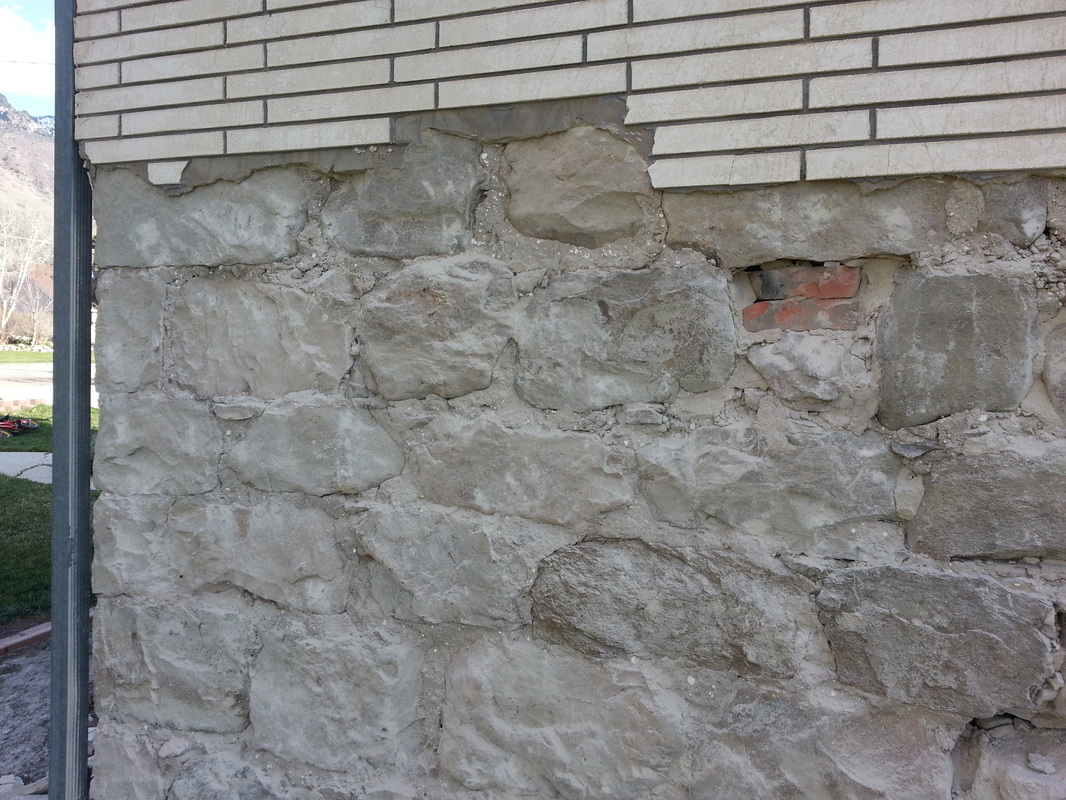
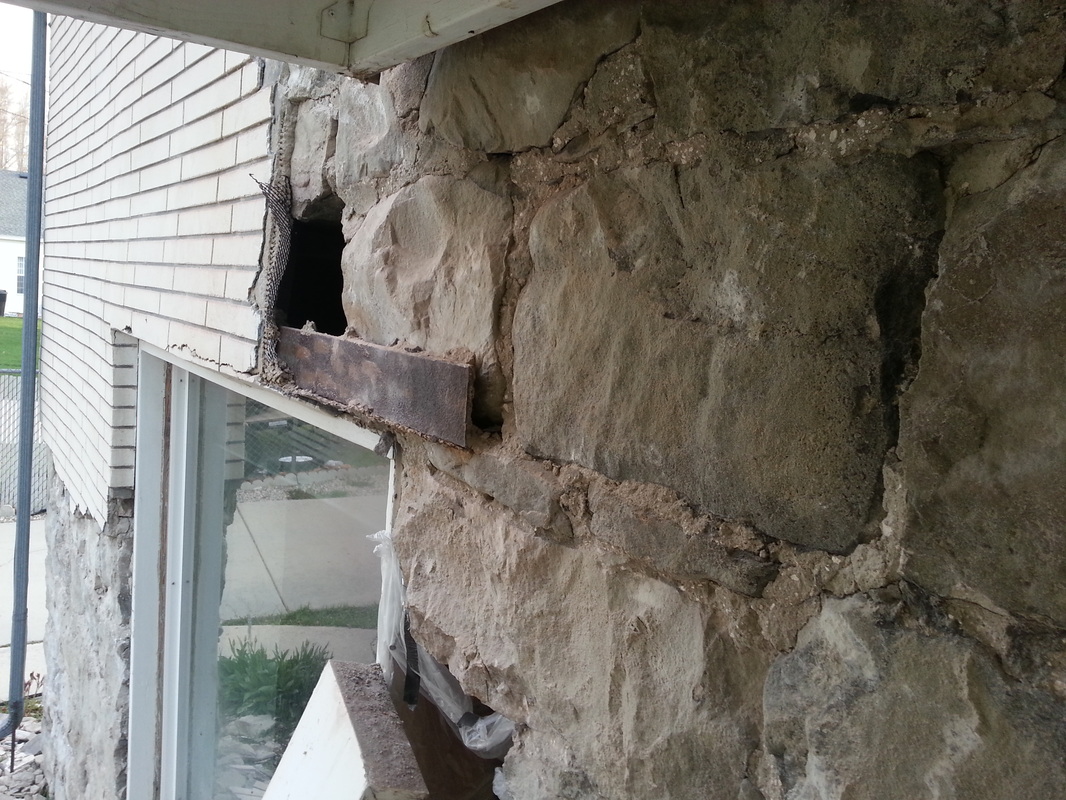
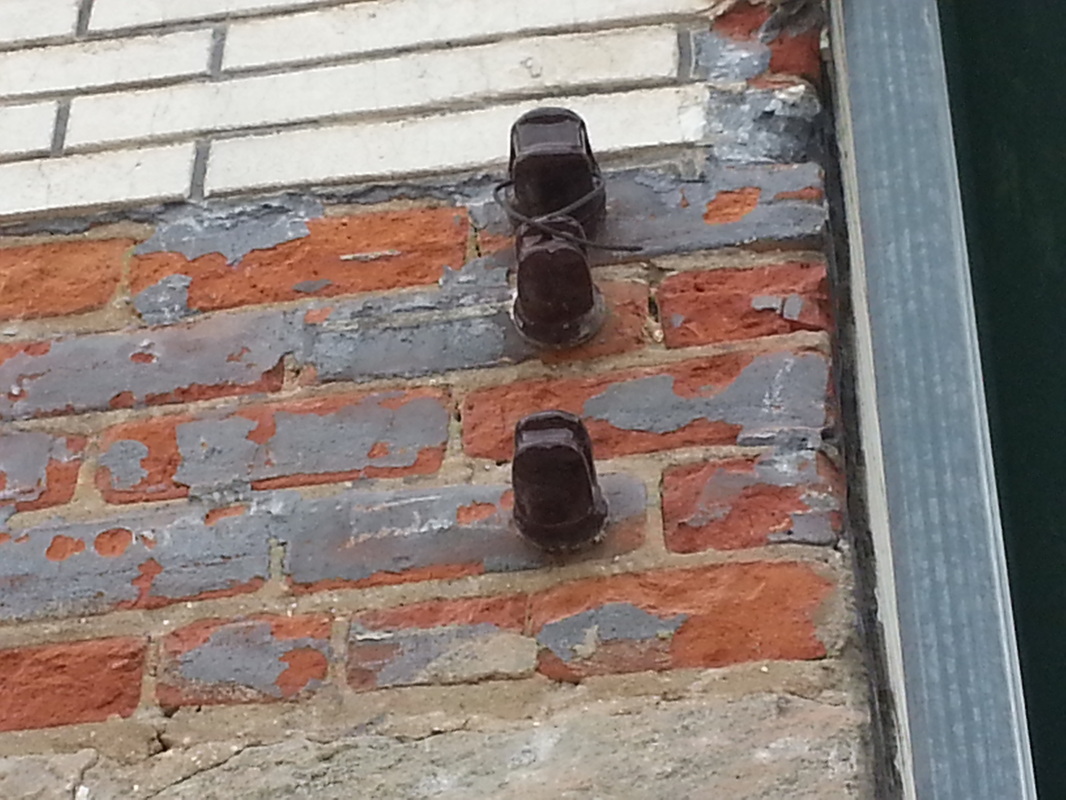
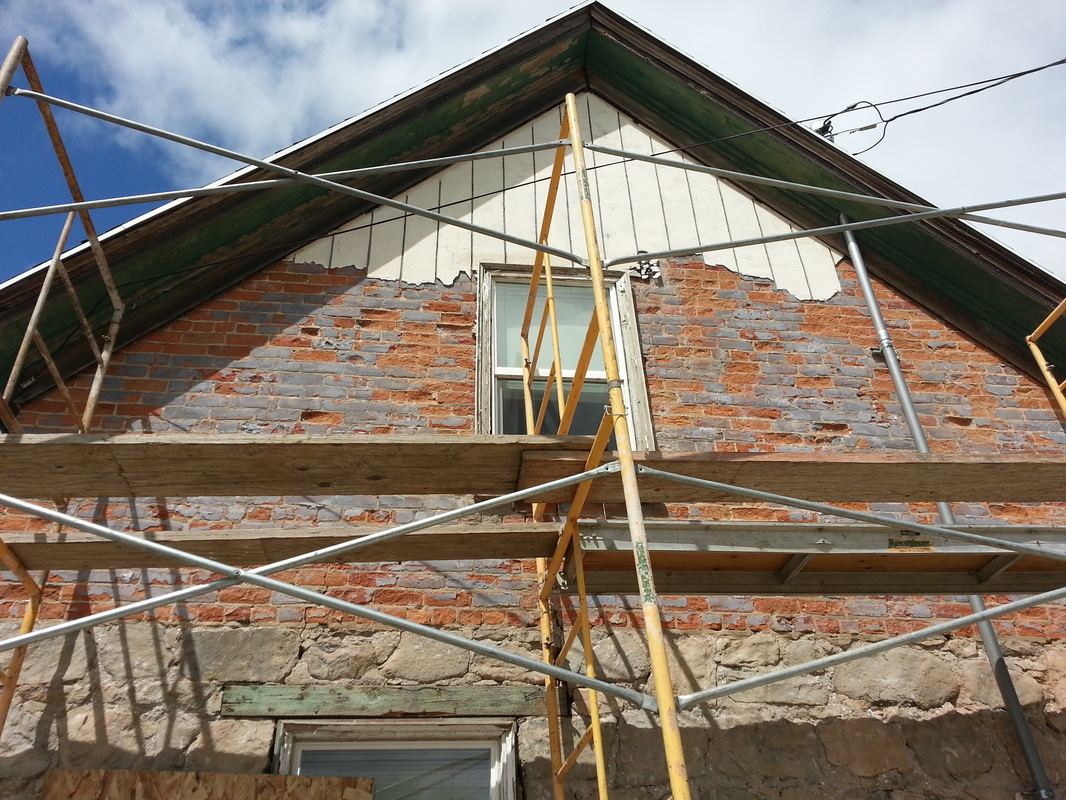
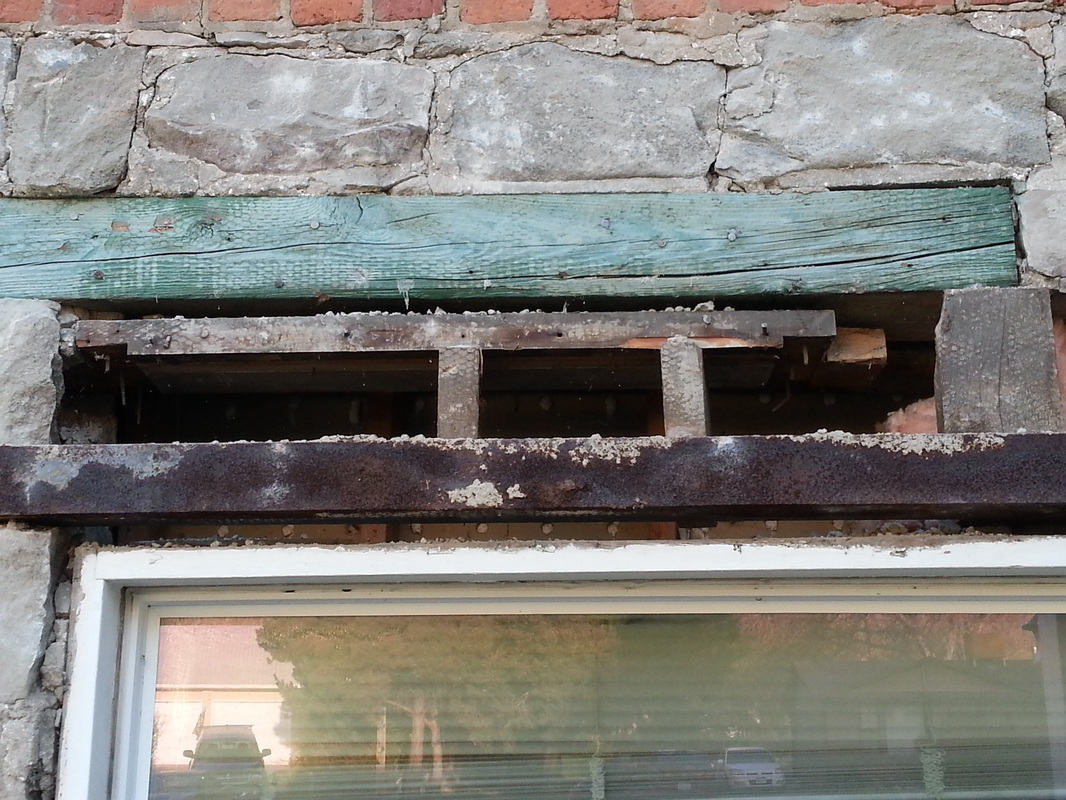
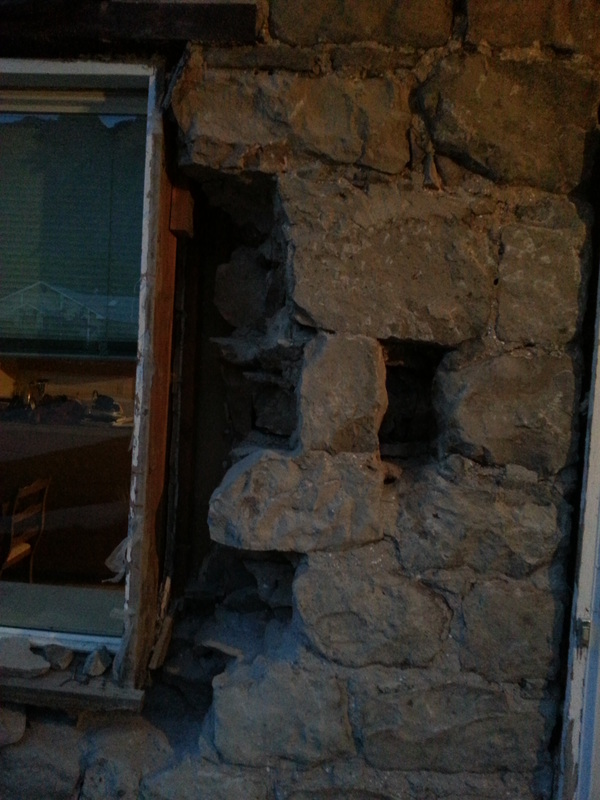
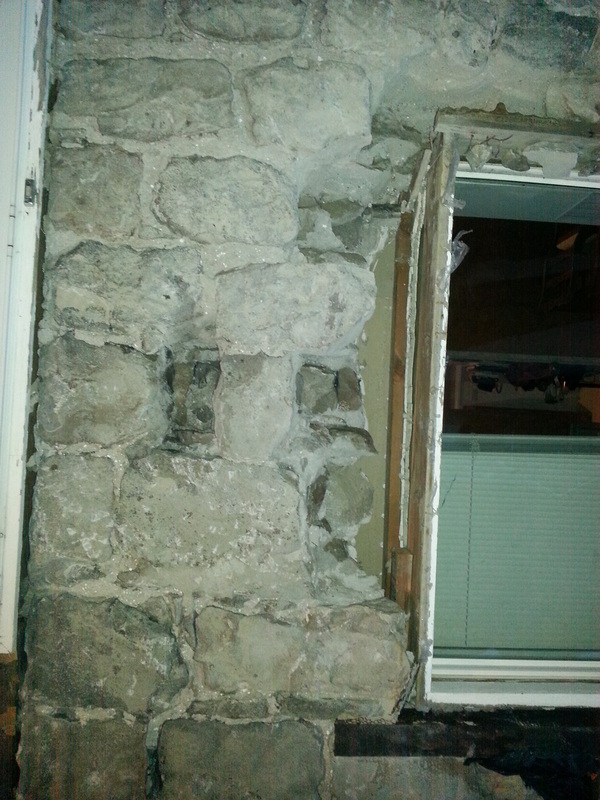
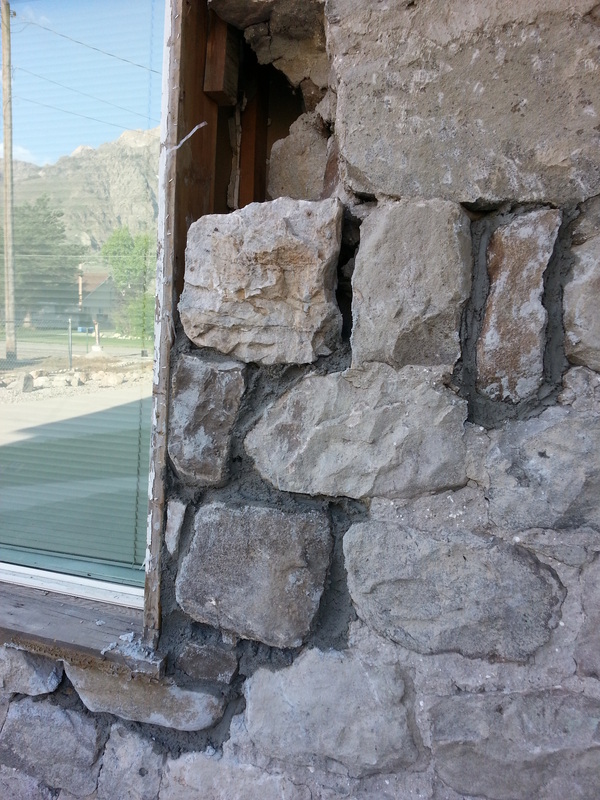
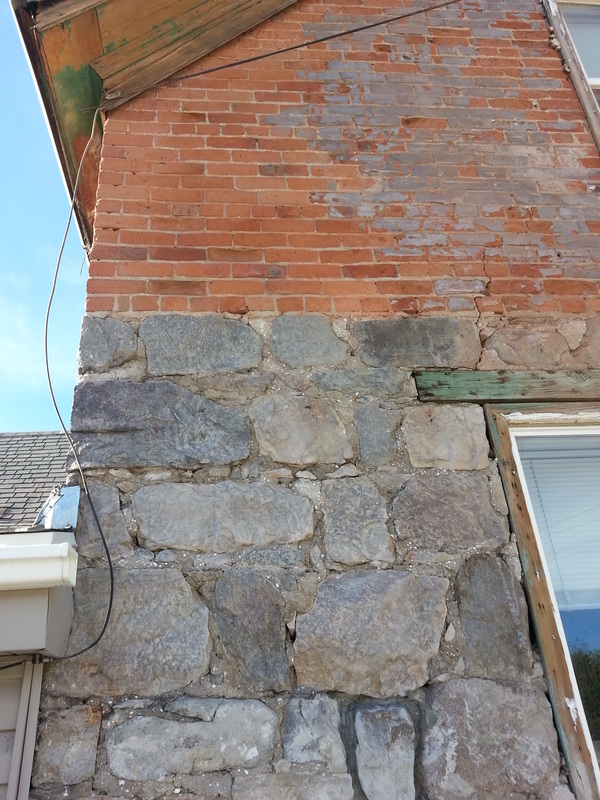
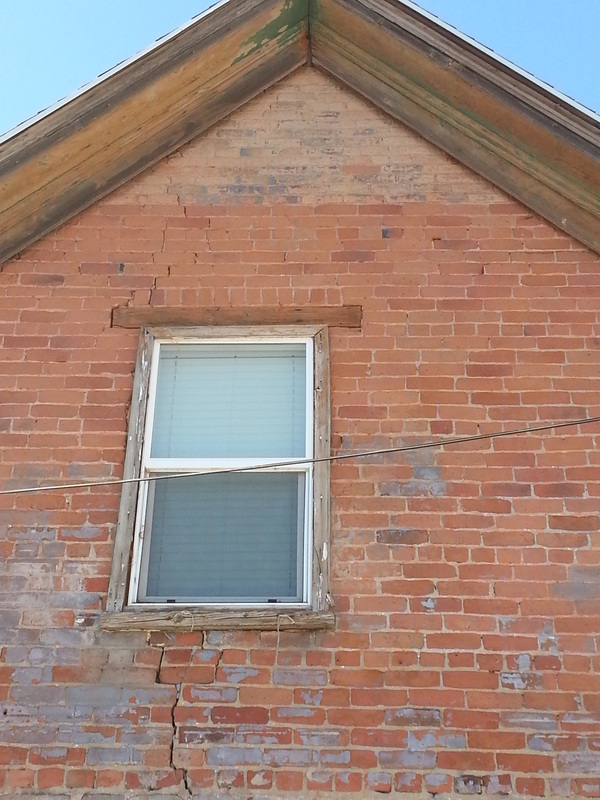
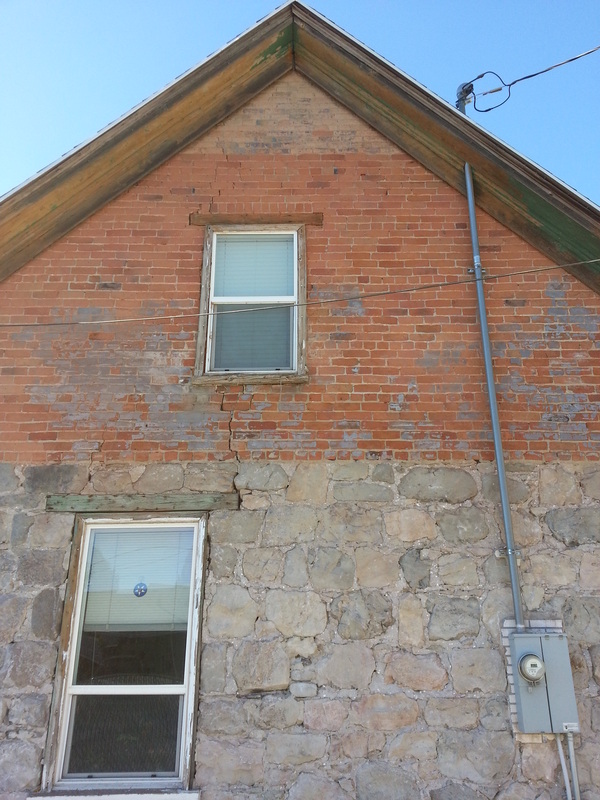
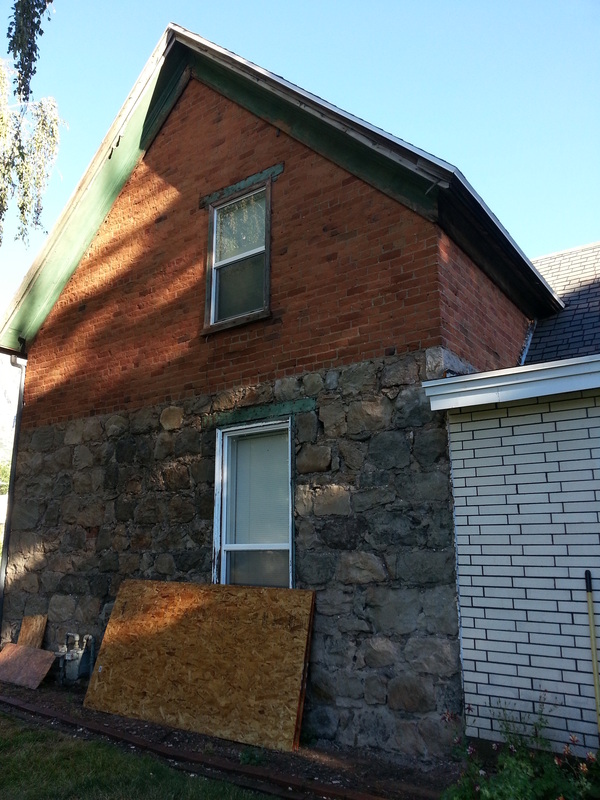
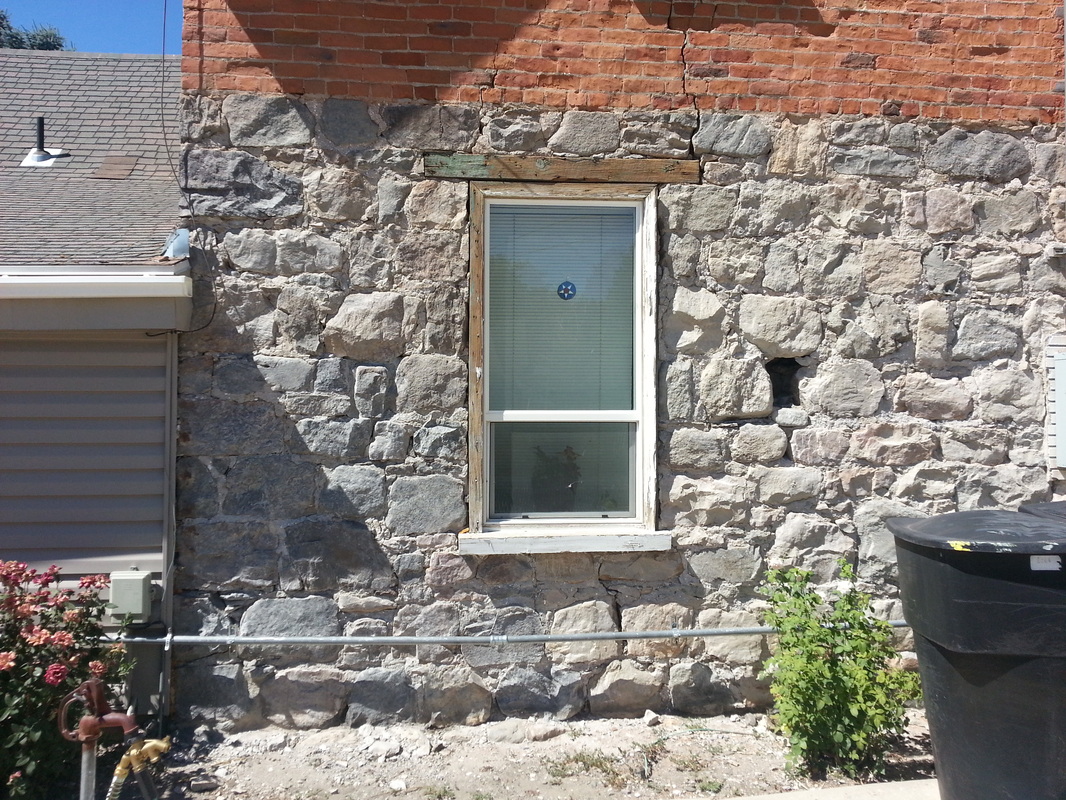
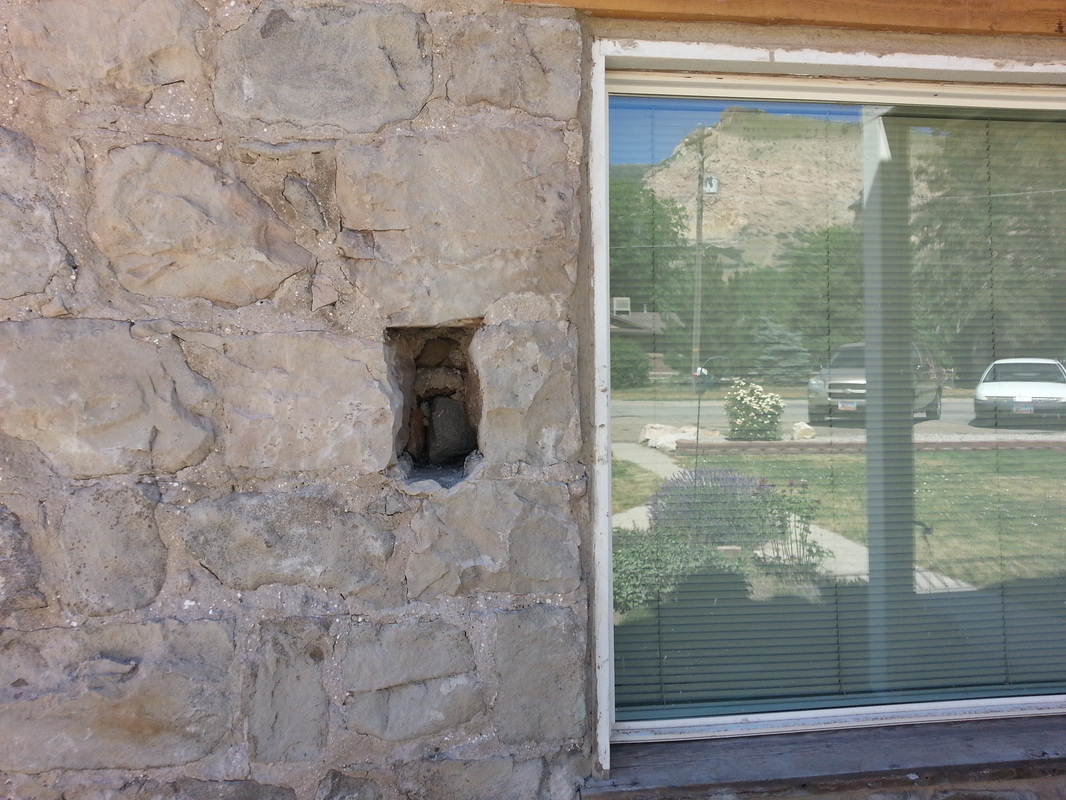
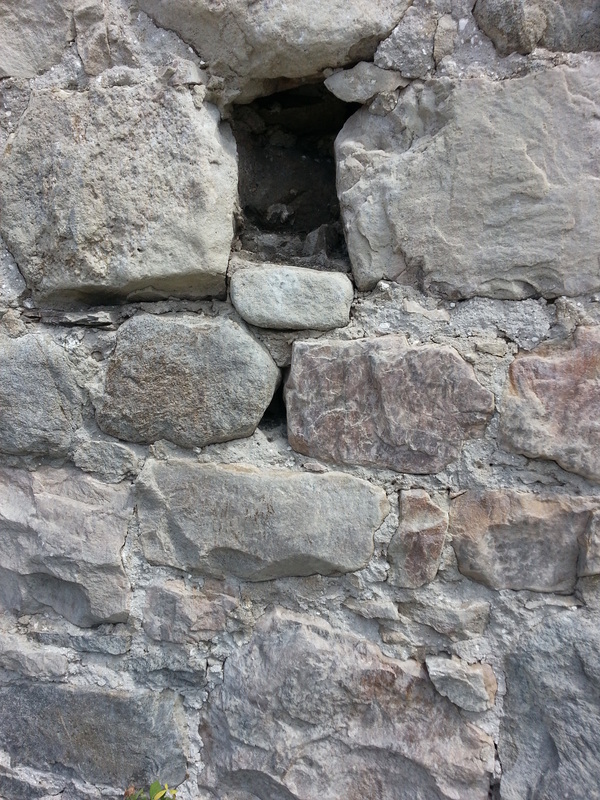
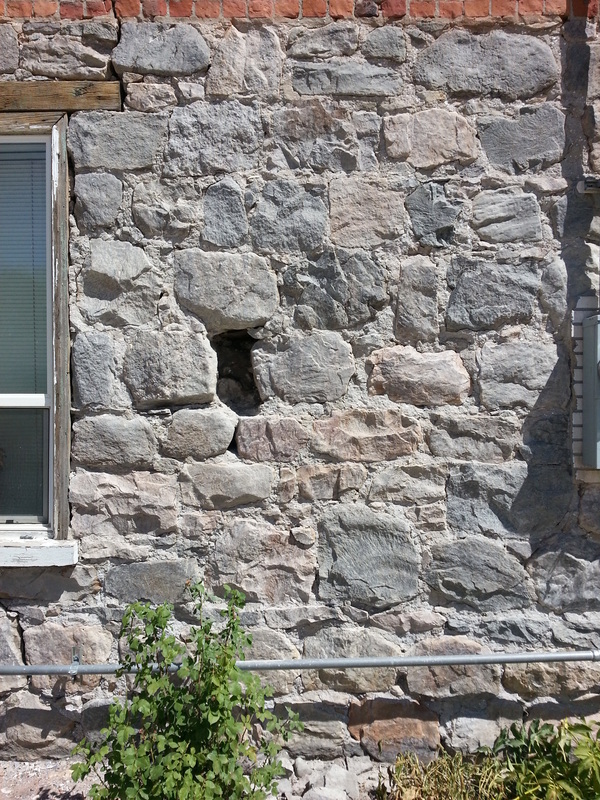
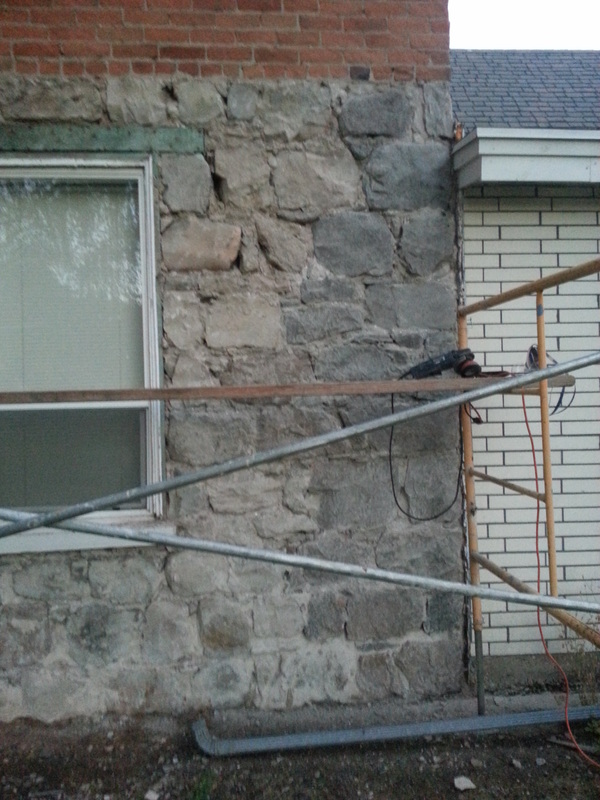
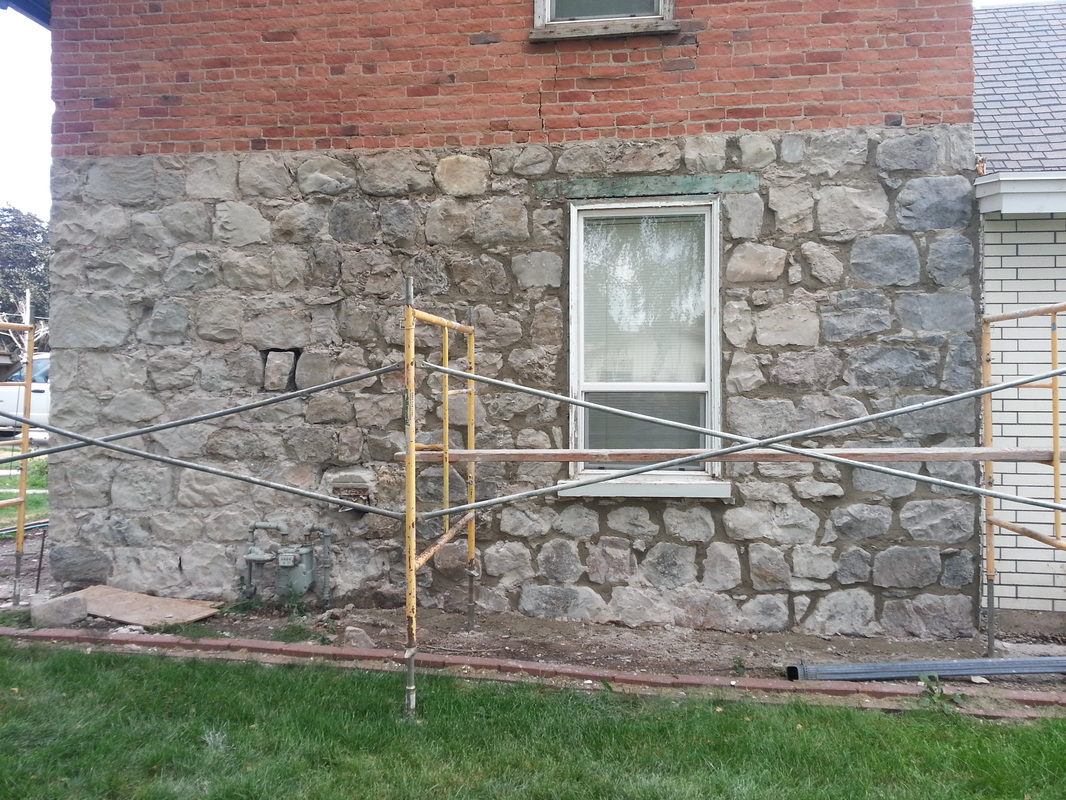
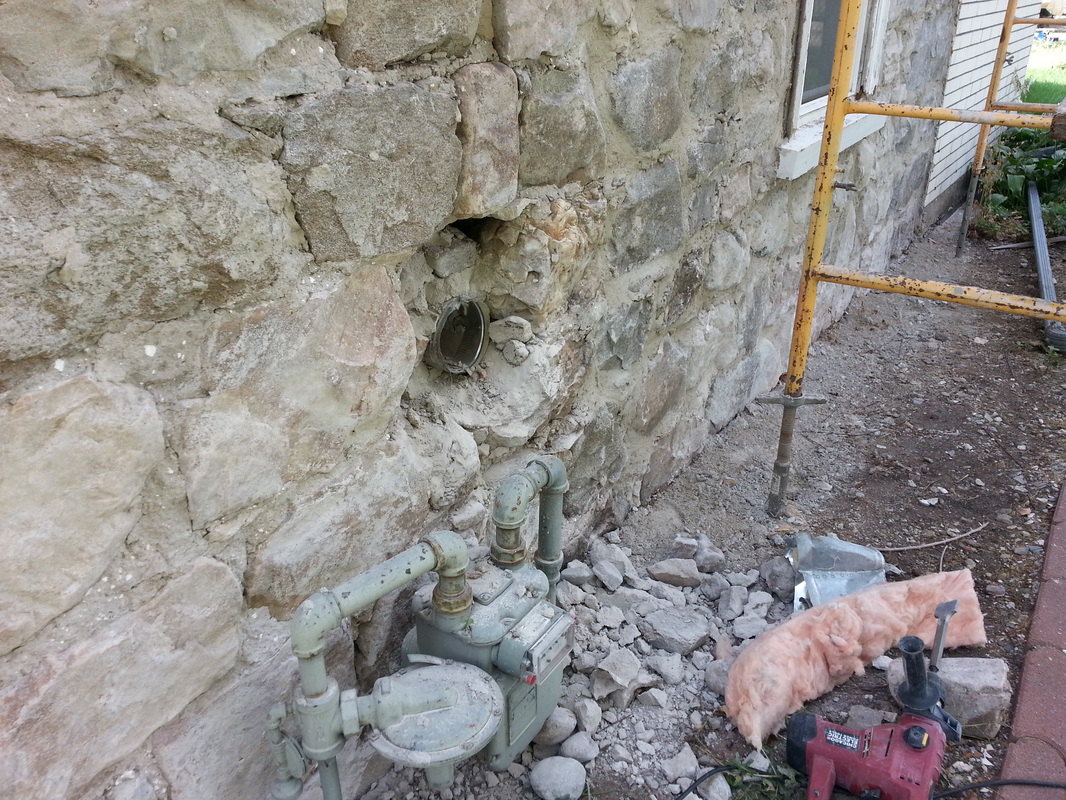
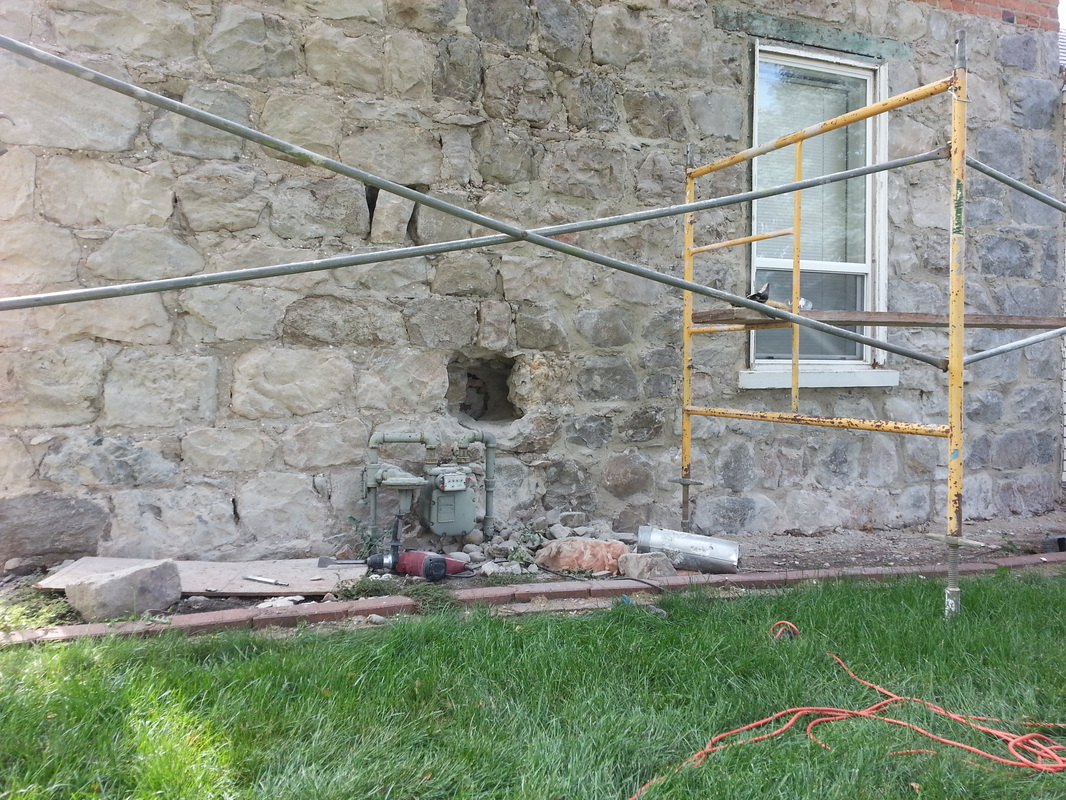
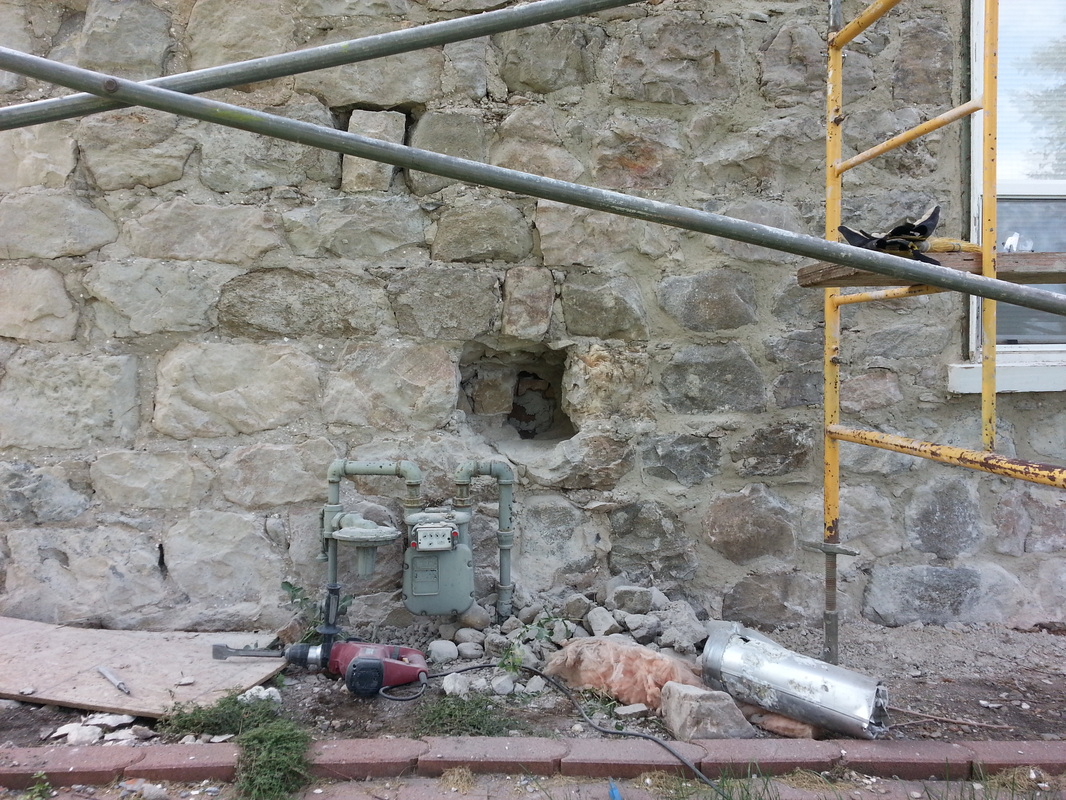
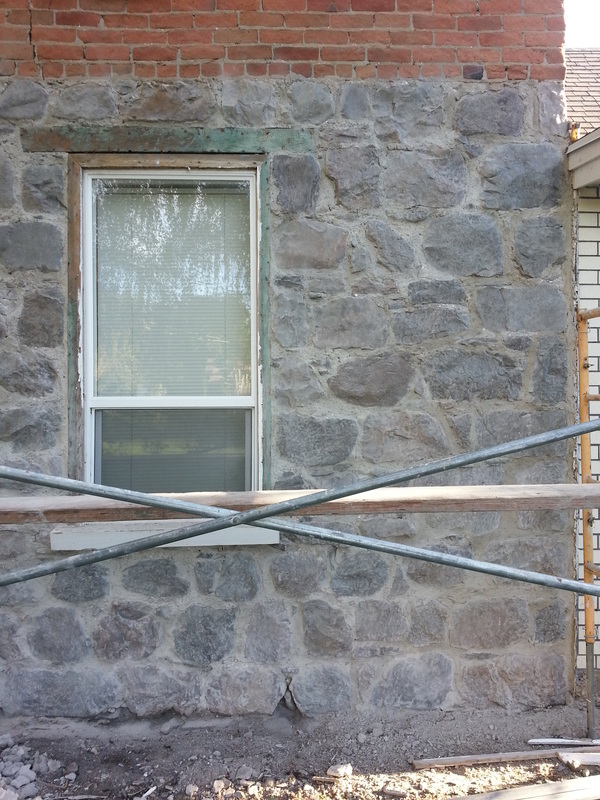
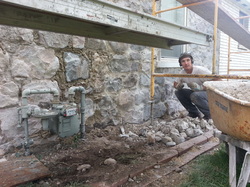
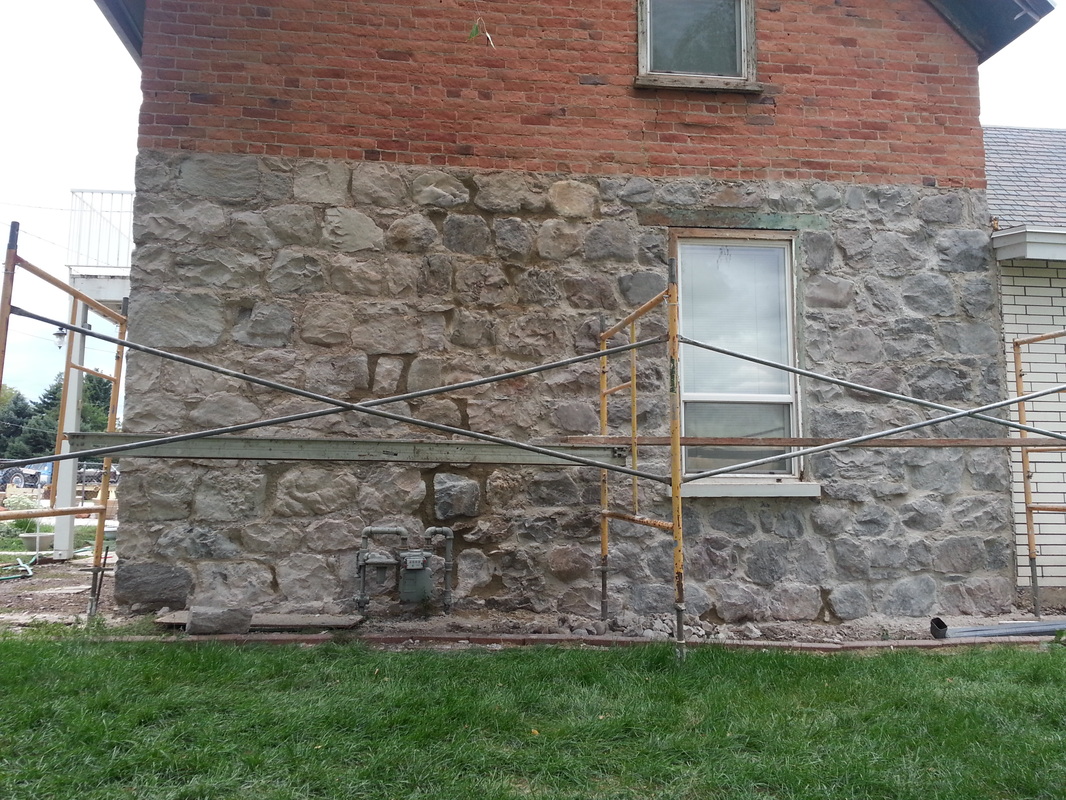
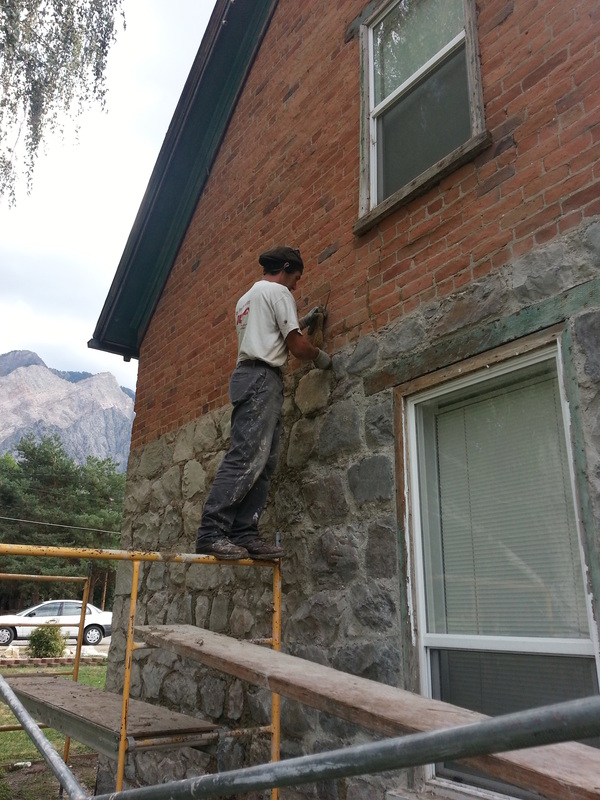
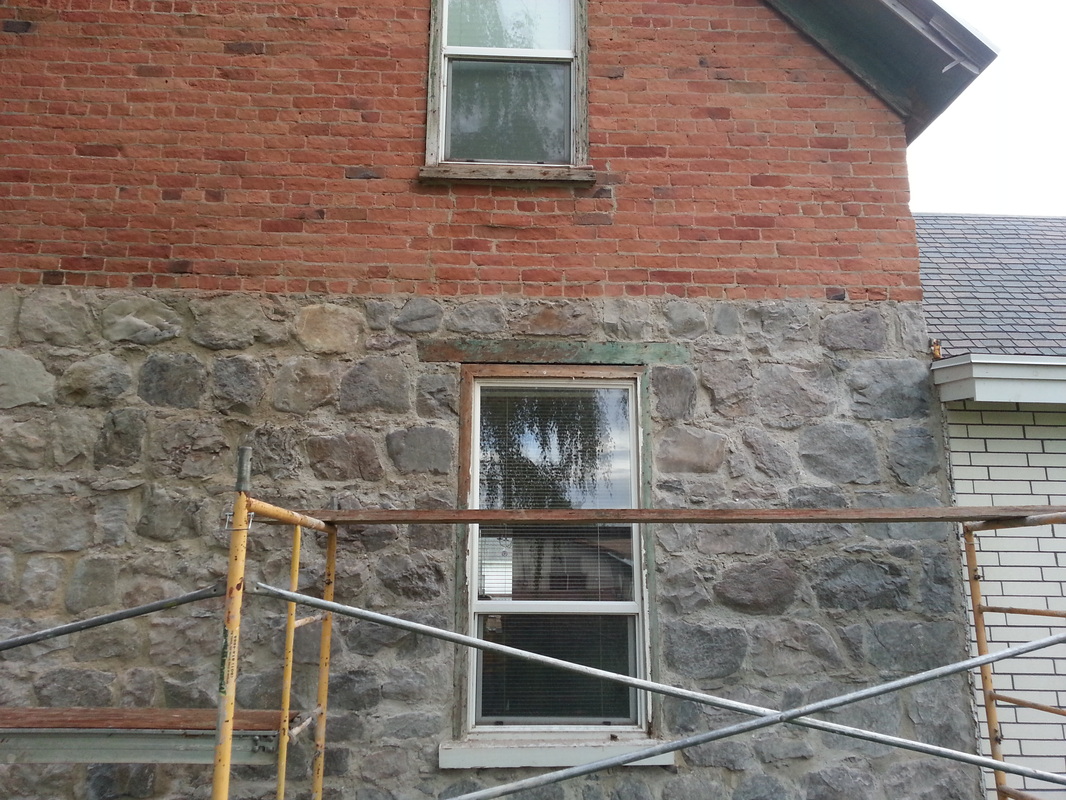
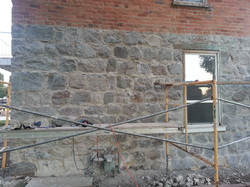
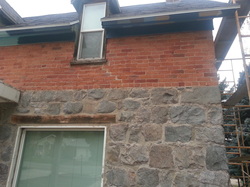
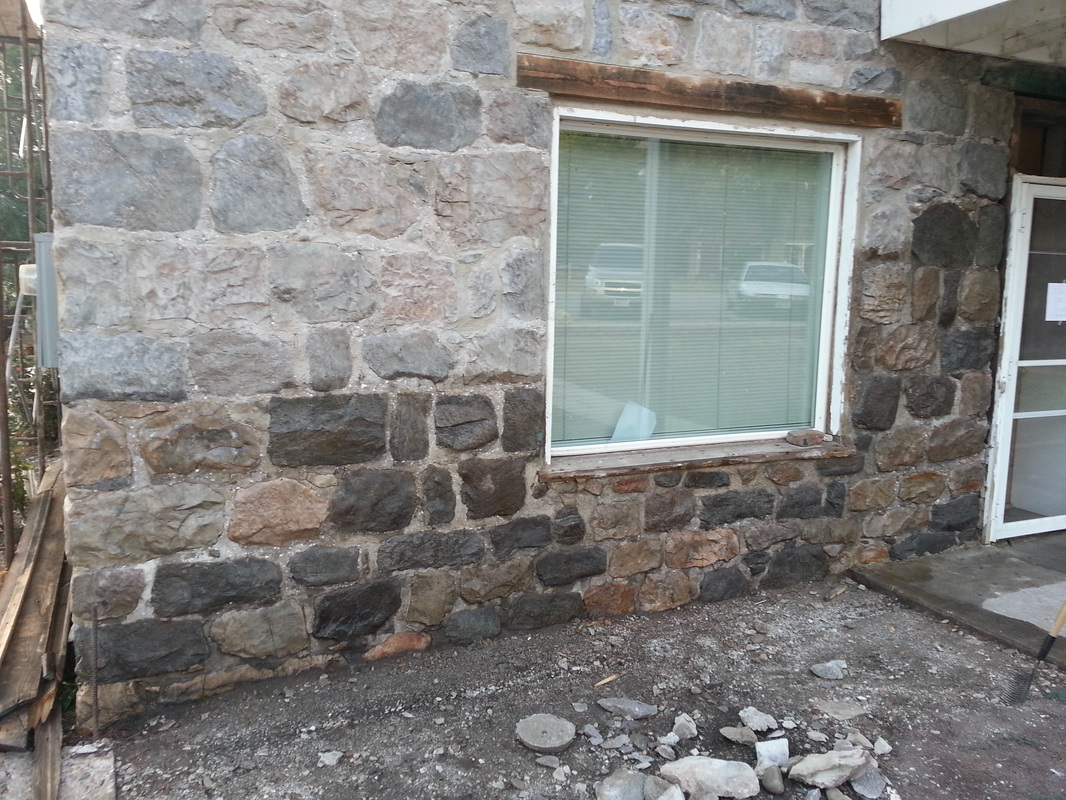
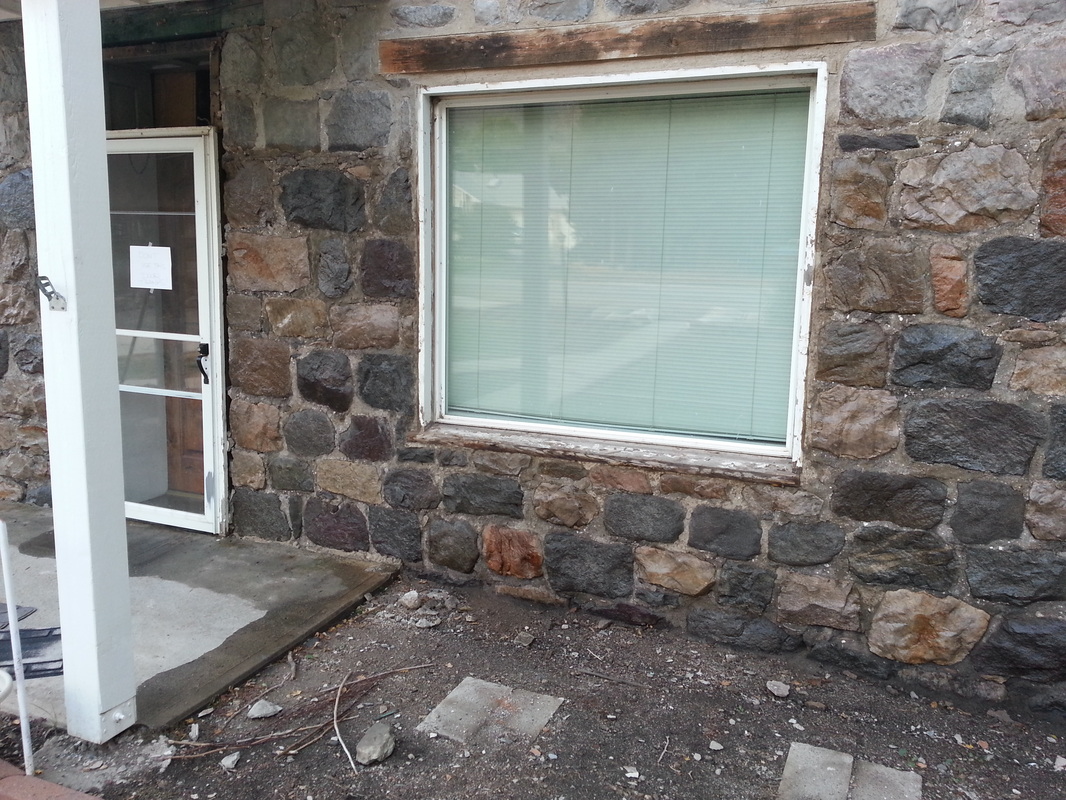
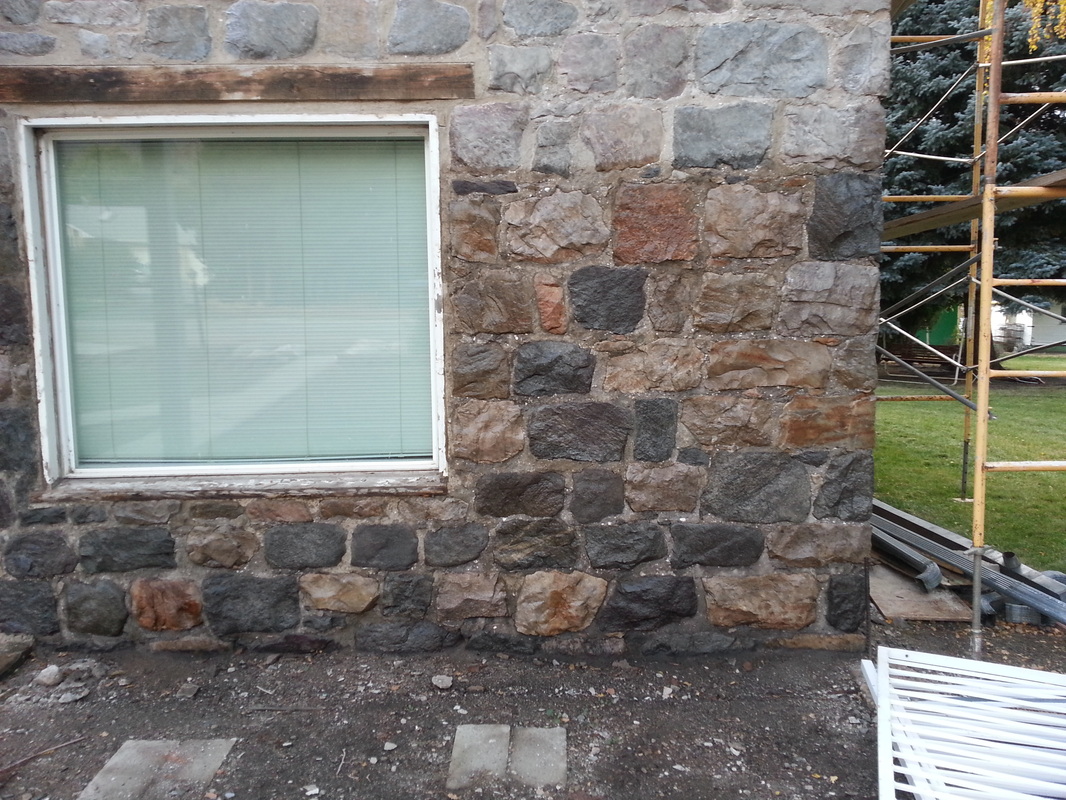
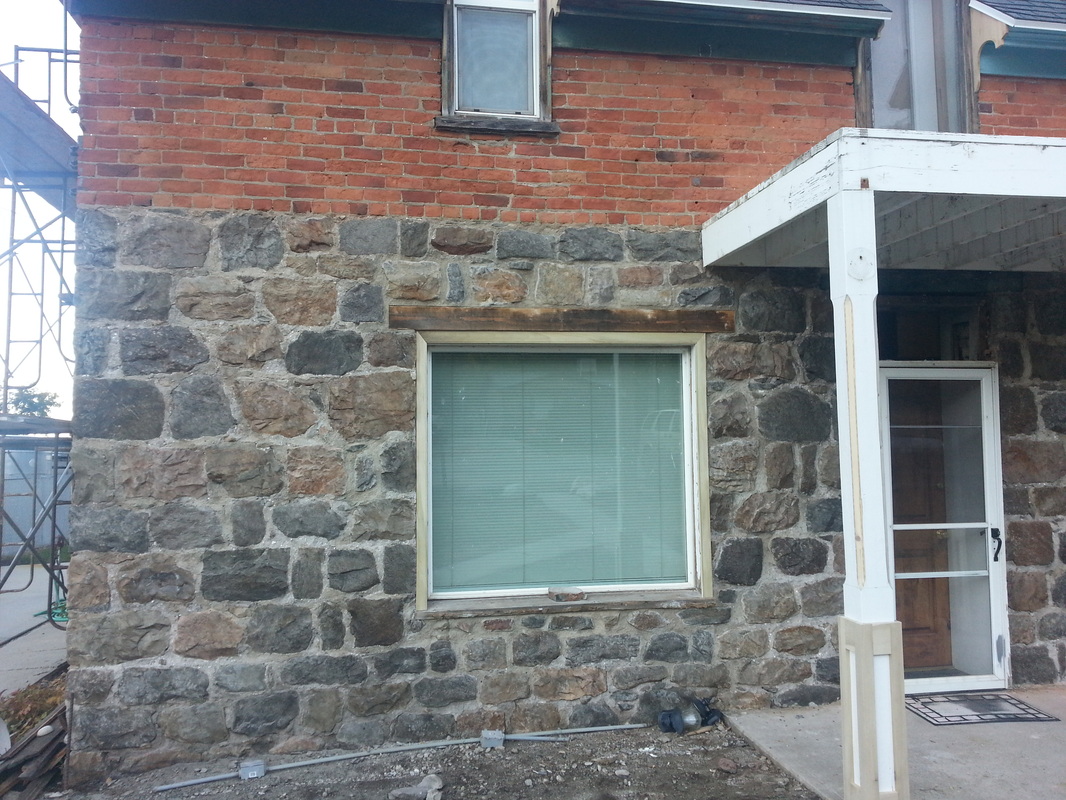
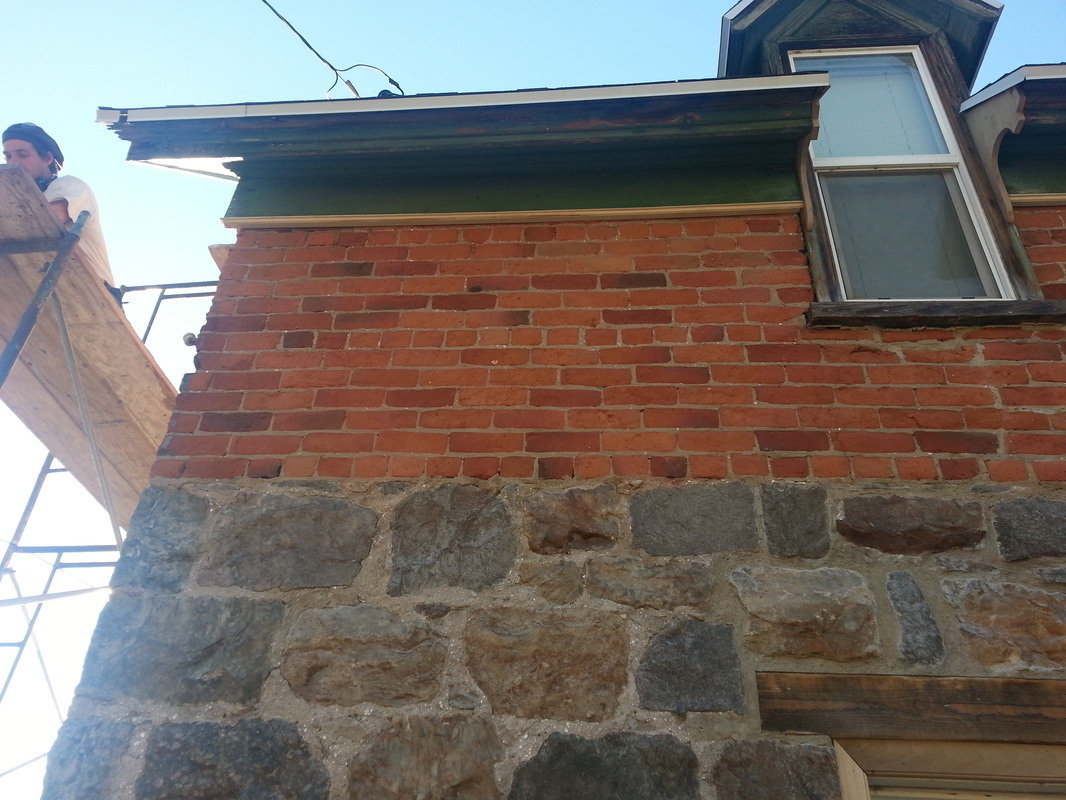
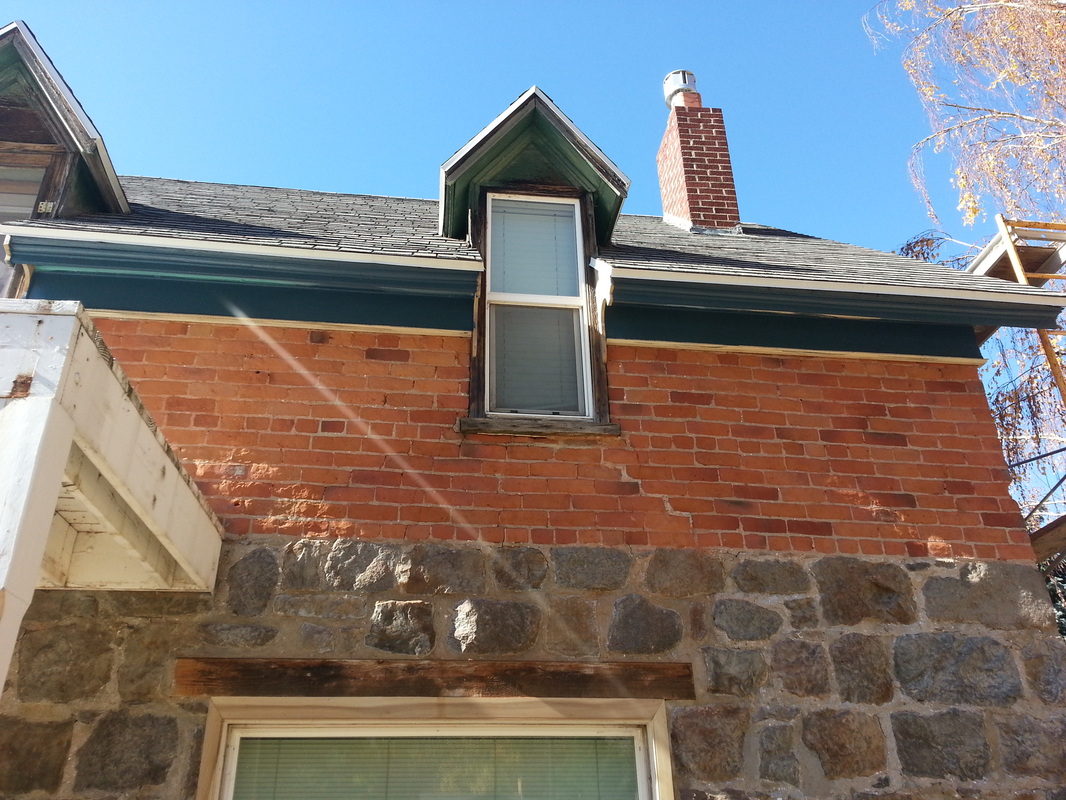
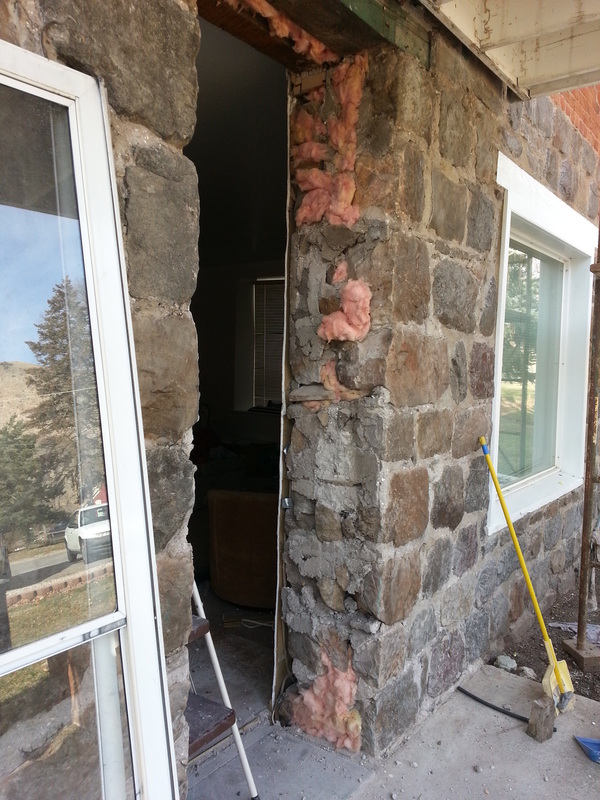
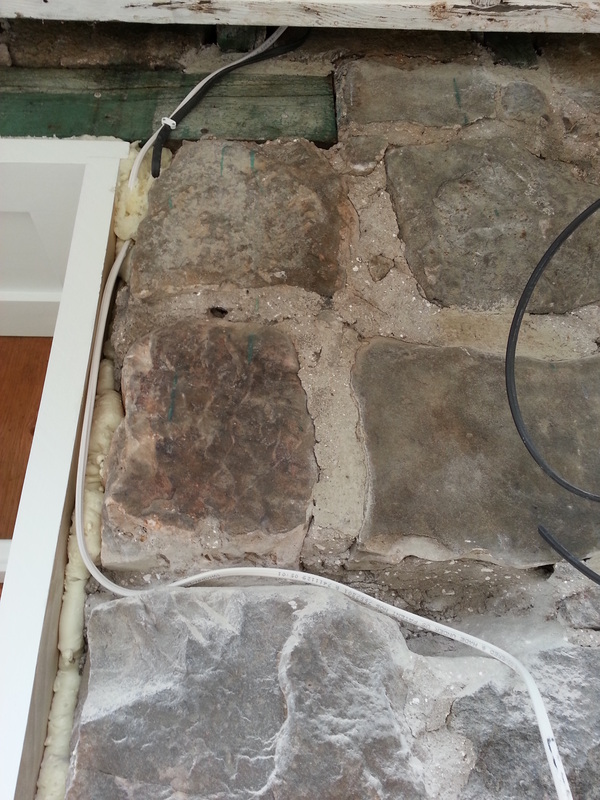
Today, I left work a couple hours early and went home to work on the house. I started around 4:30 and got done around 8. I was able to get through (head high) all the east side of the home and a small part of the north side. You can tell they didn't put a lot of effort into "fixing" the stone work around the two big windows because they were just going to cover them up...I probably would have done the same (who knows)?? You can see the inside sheet rock after I took out the loose rocks. Cody Wright (the guy I would like have come and re point the rock and brick work) sent me a text (he happened to drive by) and said, "Don't worry. The big hole of missing rock looks much worse than it really is. Stay the course." I laughed and left him a voice mail asking him what I should do with the hole in the meantime. :)
My mom came over and took a look while she was on a walk...she mentioned she's excited to be able to see the progress on the north side (since that is the side she can see from their home). I was glad to have made it around to that side, even though I didn't get to far today. :) Here's day 2's photos...


March 30, 2013
Today I was going to finish up the north side. I wasn't going to take me long, but it sure was a harder for some reason to get this side done?? Maybe it's Murphy's law where I was expecting this to be quick and because of my expectations, it took longer?? Maybe it's because the sun doesn't hit this side?? Either way, I was almost complete when the machine stopped working. I was getting ready to take it back when I did some cleaning on it and found that it was just jammed, so I'm good to go, but I called it good for the day anyway. :)
Another thing...I was talking with Uncle Bob about the trees around the yard and he brought up that when he was digging a hole to plant the tree (east of his raspberry bushes near the property line) that he hit the old fort wall. I later asked my dad about this and he mentioned to me that he remembers seeing an old wall that went real close to the property line going from the road and running west. I guess that's where the old fort wall went?? Probably the north wall??
Another thing...I was talking with Uncle Bob about the trees around the yard and he brought up that when he was digging a hole to plant the tree (east of his raspberry bushes near the property line) that he hit the old fort wall. I later asked my dad about this and he mentioned to me that he remembers seeing an old wall that went real close to the property line going from the road and running west. I guess that's where the old fort wall went?? Probably the north wall??
April 6, 2013

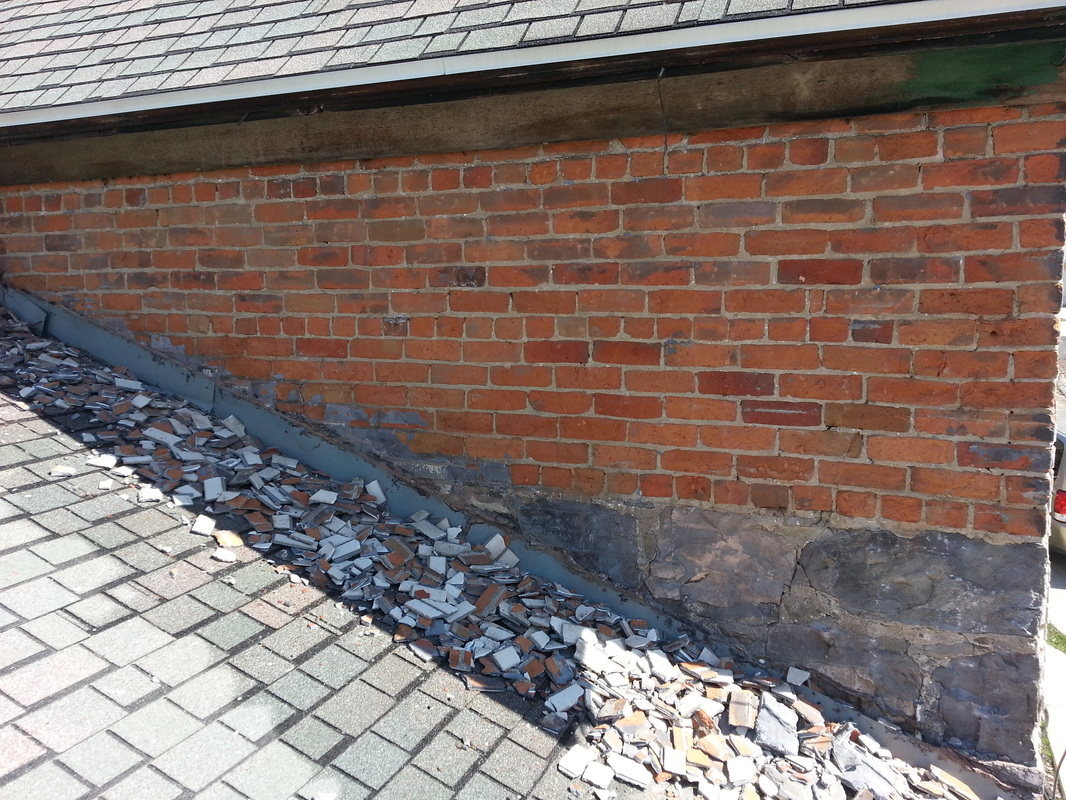
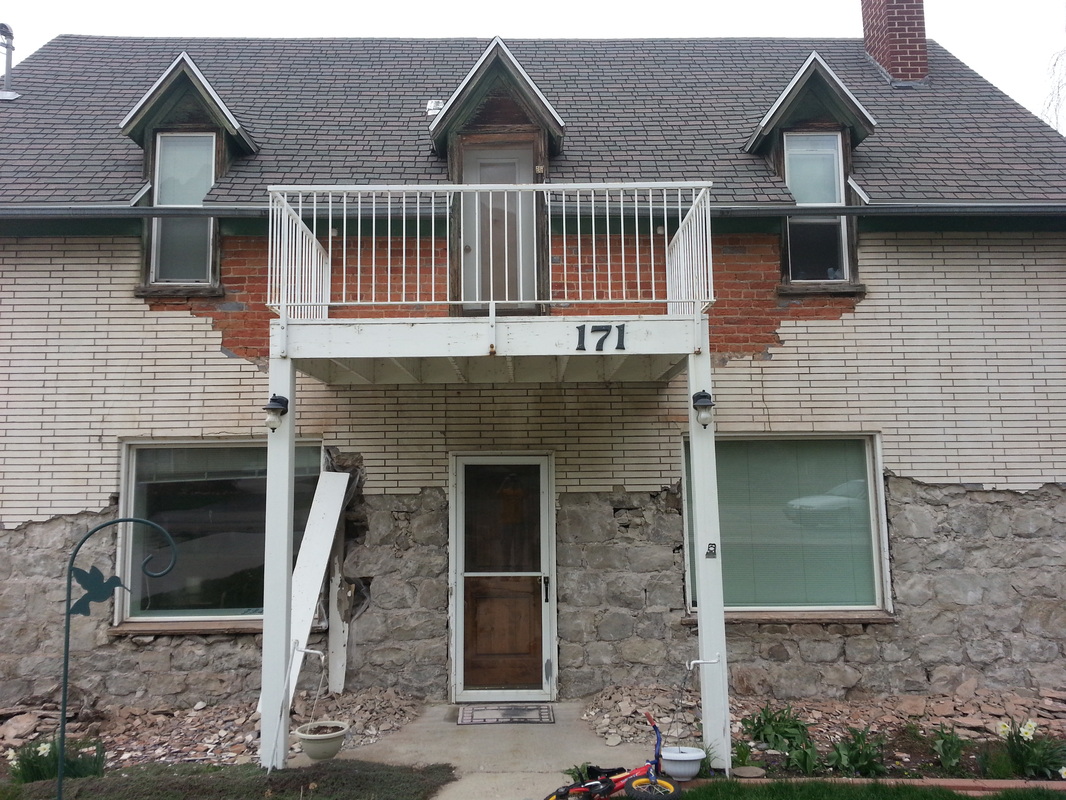
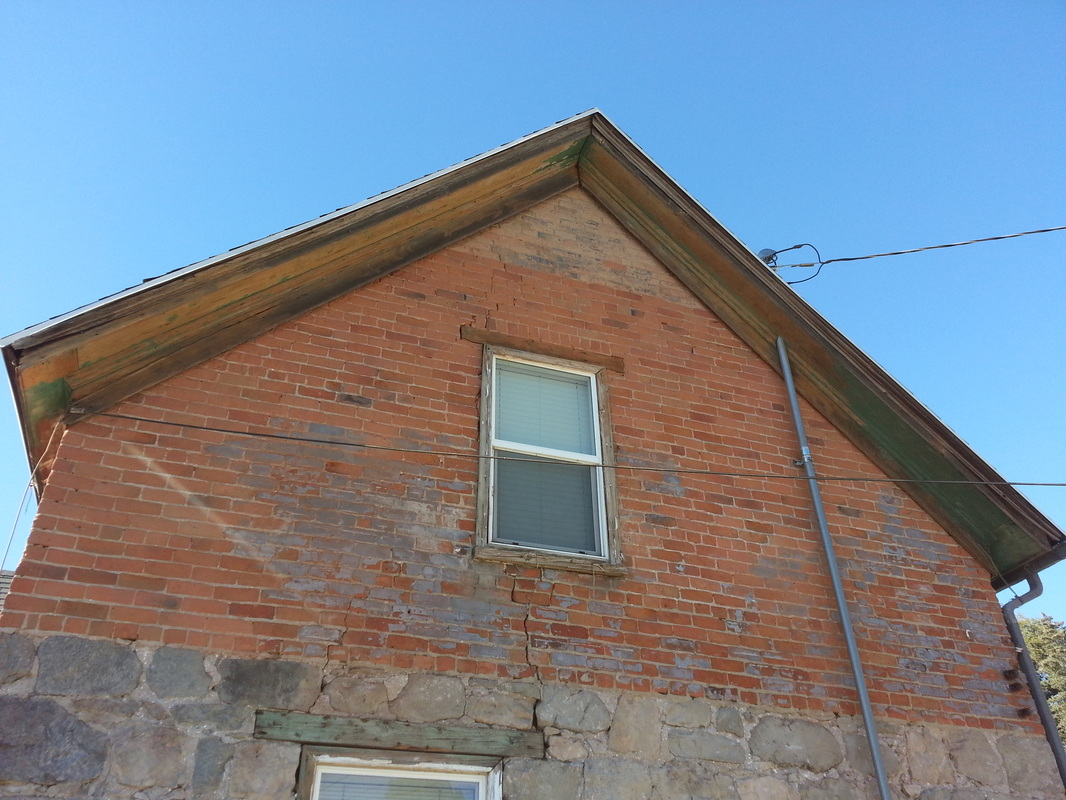
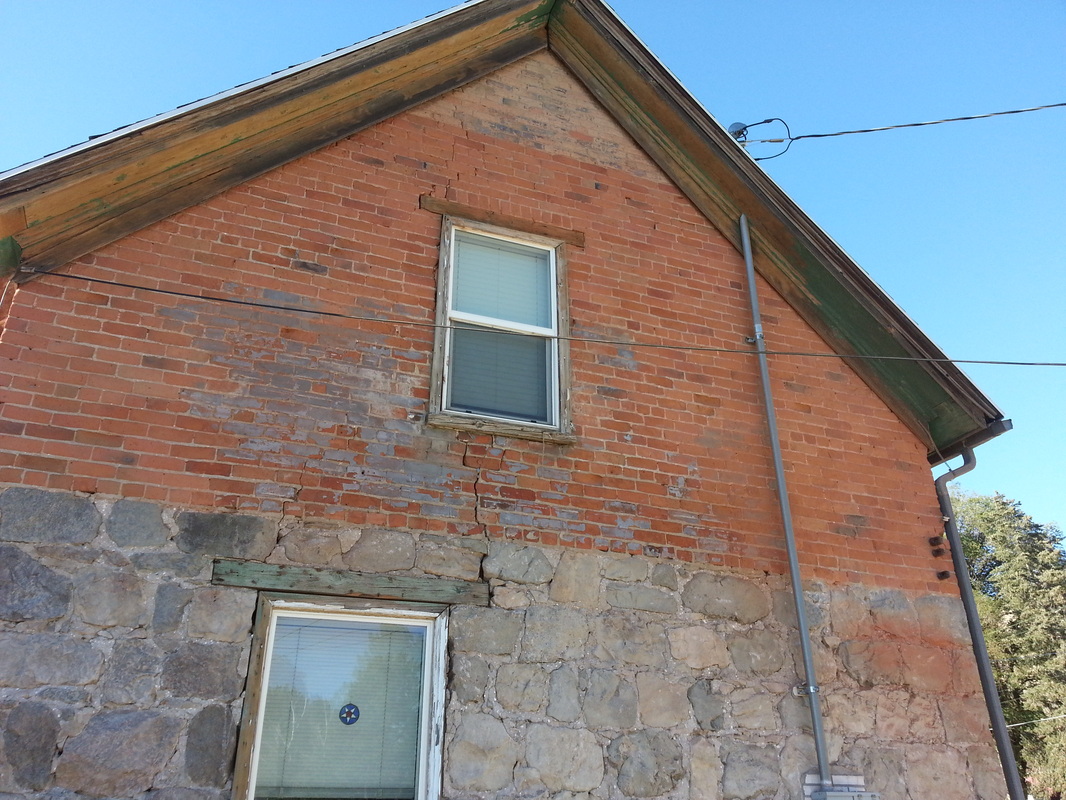
Today, Chase and I, finished up the north side, got on the roof (north west corner) and knocked that off, and then went above the porch on the east side. I'm pretty much ready for the scaffolding to go up to finish up the sides. Knocking off the fake brick, over the bricks, is much easier, so I'm looking forward to having the scaffolding up and really knocking out the rest of this stuff! :) The hardest part about today was holding that heavy machine at arms length trying to reach out to the windows in the front...my arms are just not used to holding something that heavy out that far (maybe I'm just a wimp)!
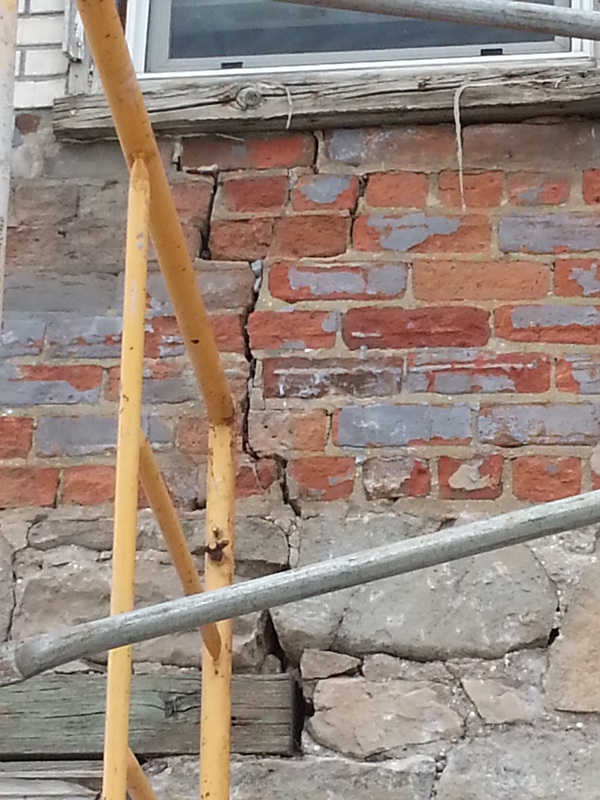
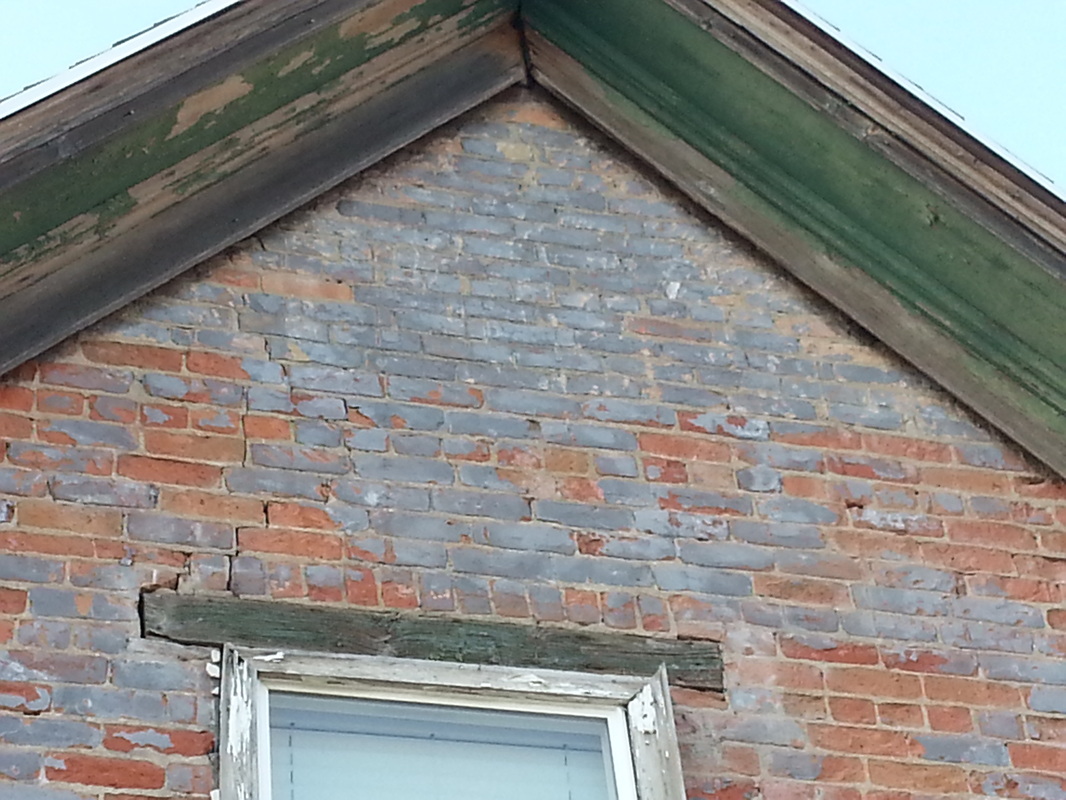
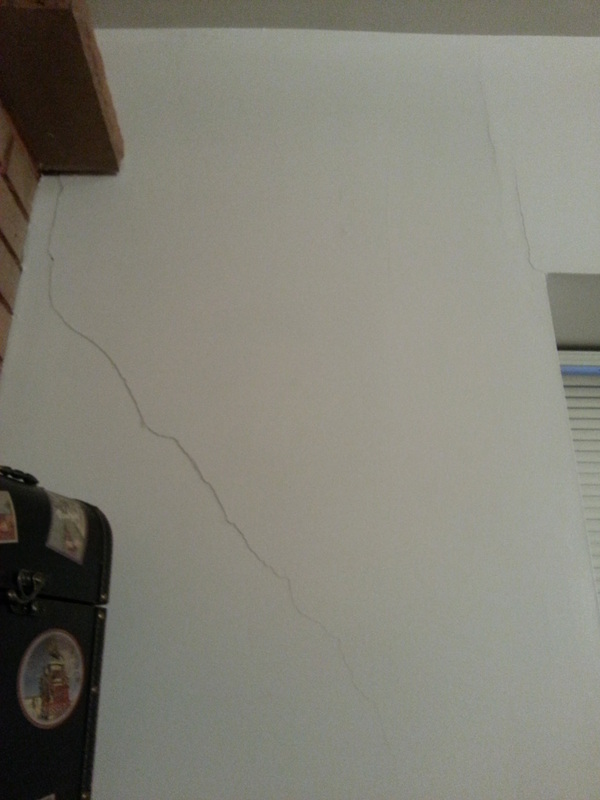
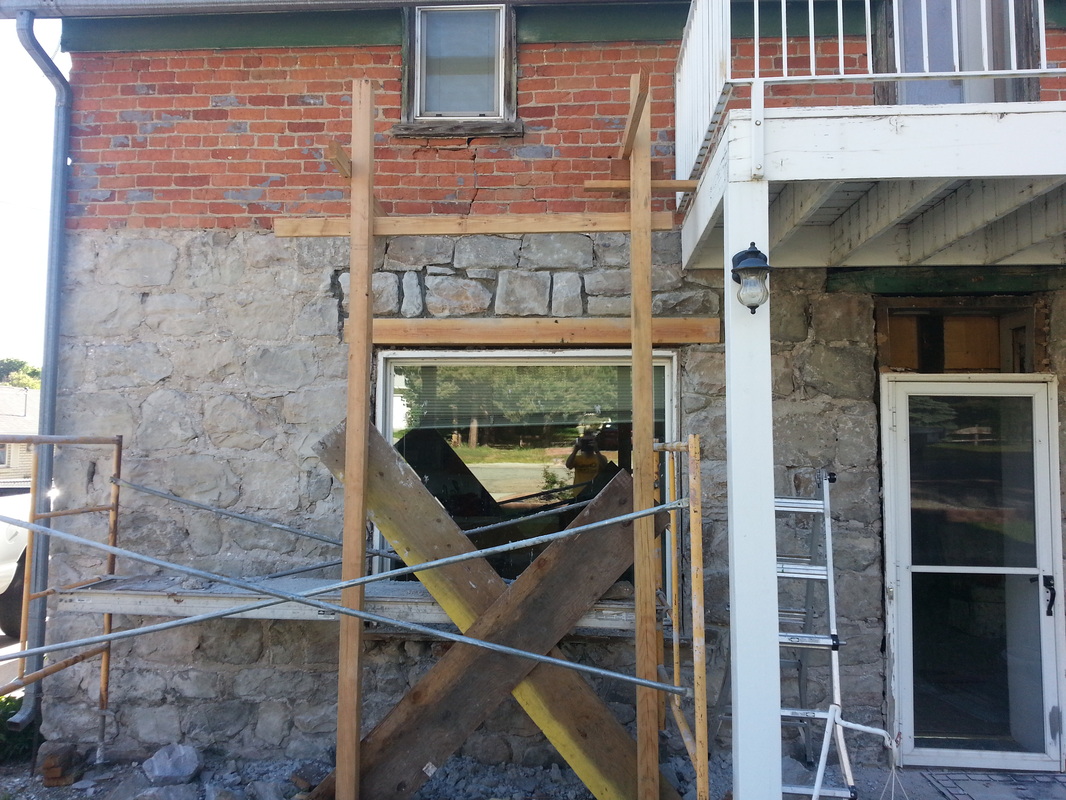
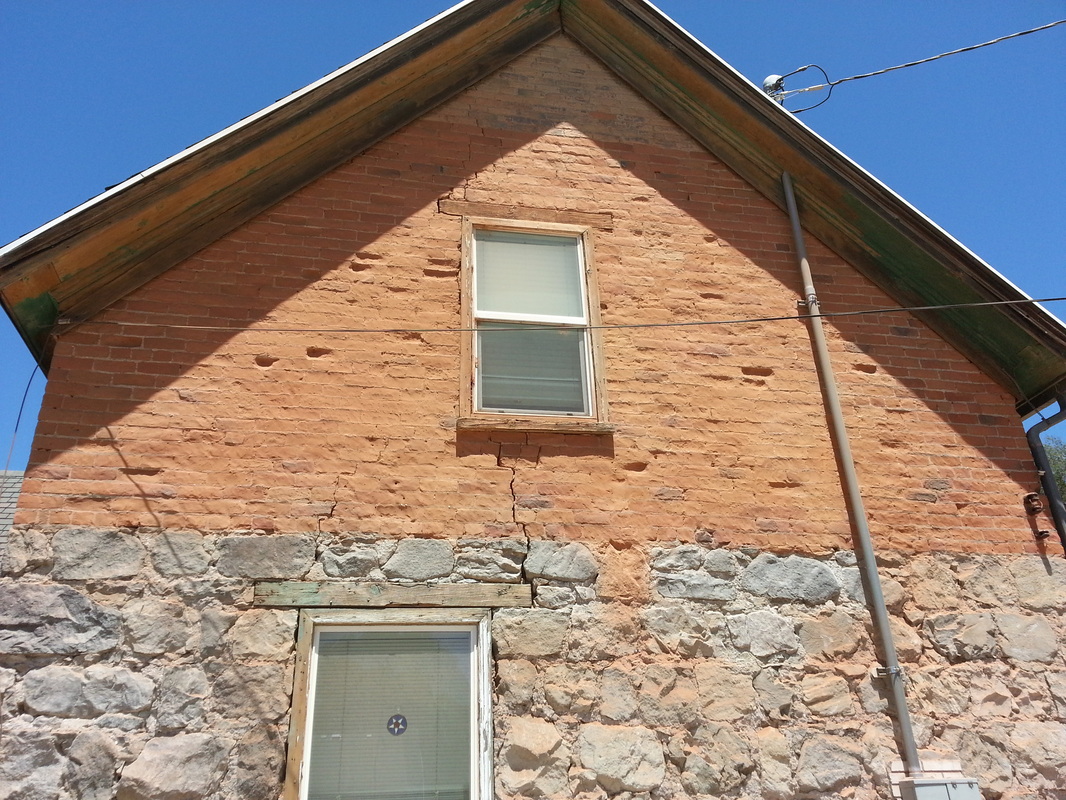
So far, I'm pretty excited about the shape of the whole house. There are definitely some large cracks and a few of the bricks are either really loose or missing a portion and some of them are really flaky...but all in all, I'm excited. They will definitely need to be sealed.
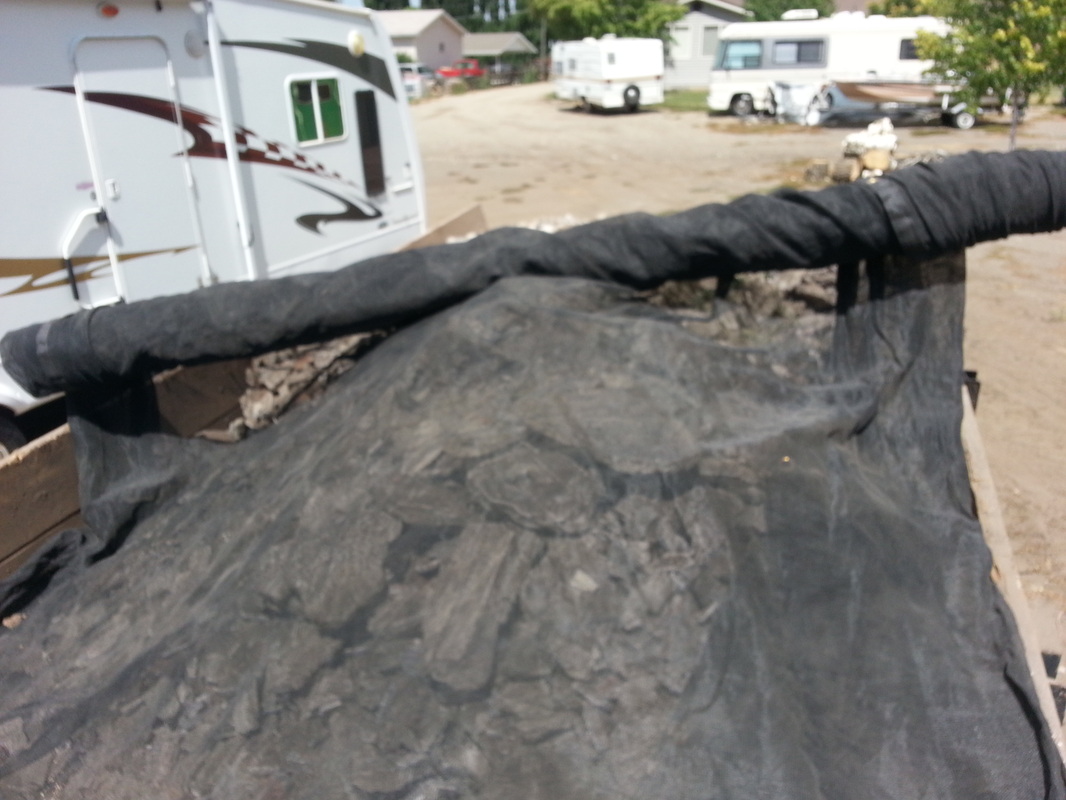
By the way, It's been really rainy lately...off and on...so I've had to cover up the big hole in the front and hope that rain doesn't get in anywhere else. I'm not too worried, but still a small worry.
So far, I'm pretty excited about the shape of the whole house. There are definitely some large cracks and a few of the bricks are either really loose or missing a portion and some of them are really flaky...but all in all, I'm excited. They will definitely need to be sealed.
By the way, It's been really rainy lately...off and on...so I've had to cover up the big hole in the front and hope that rain doesn't get in anywhere else. I'm not too worried, but still a small worry.


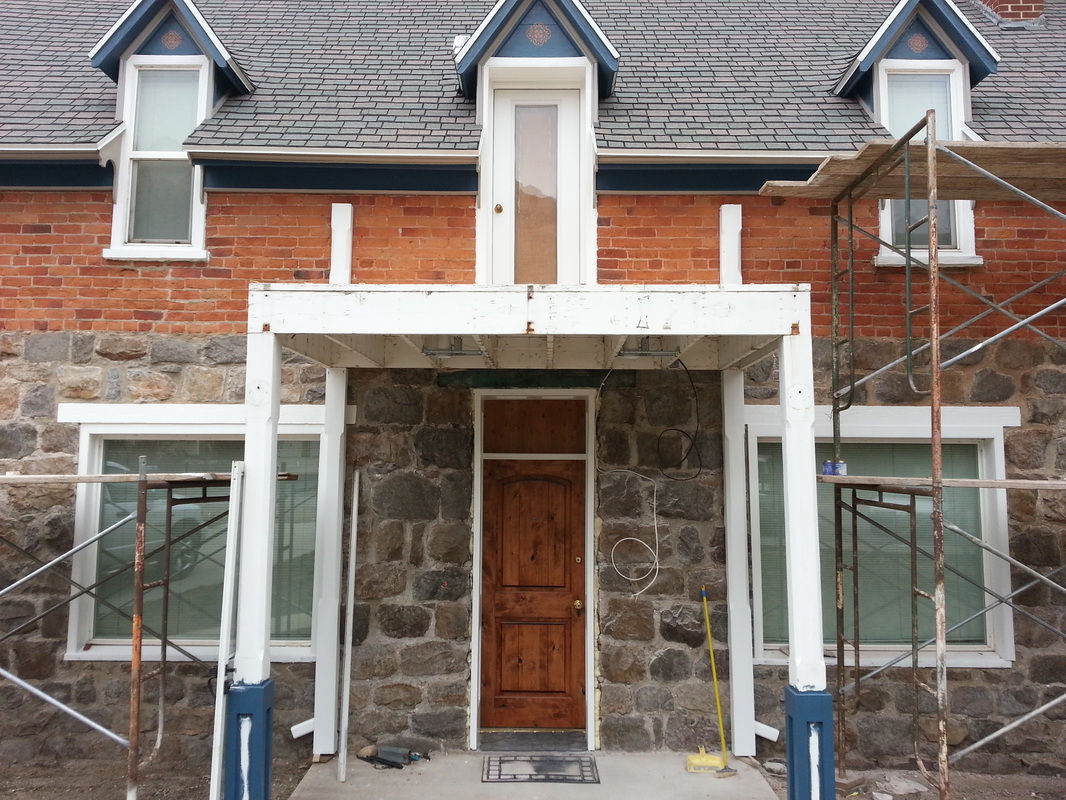
April 10, 2013
Holes, holes, and more holes...
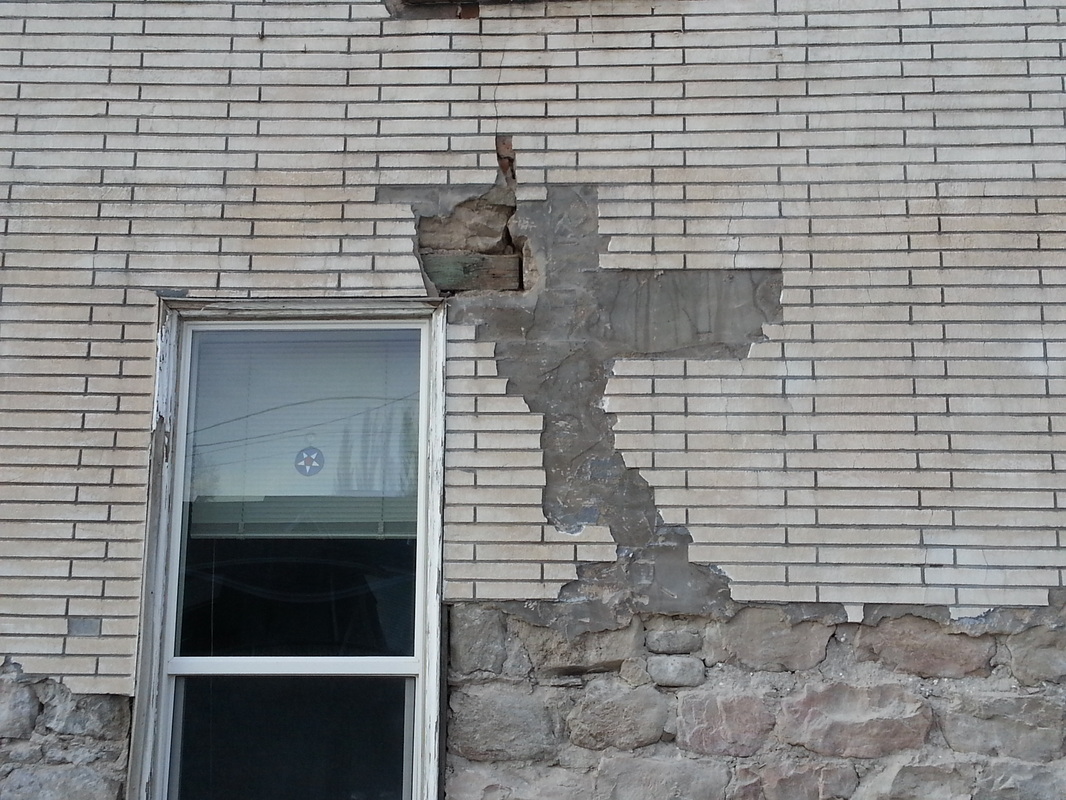
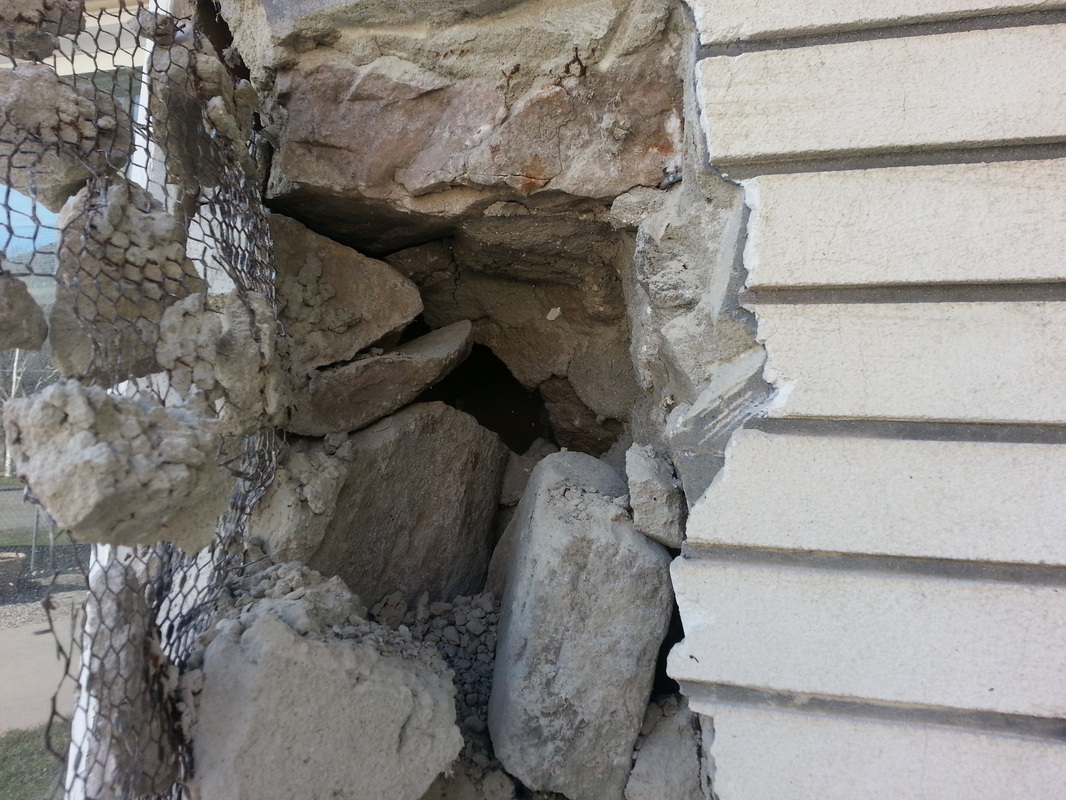
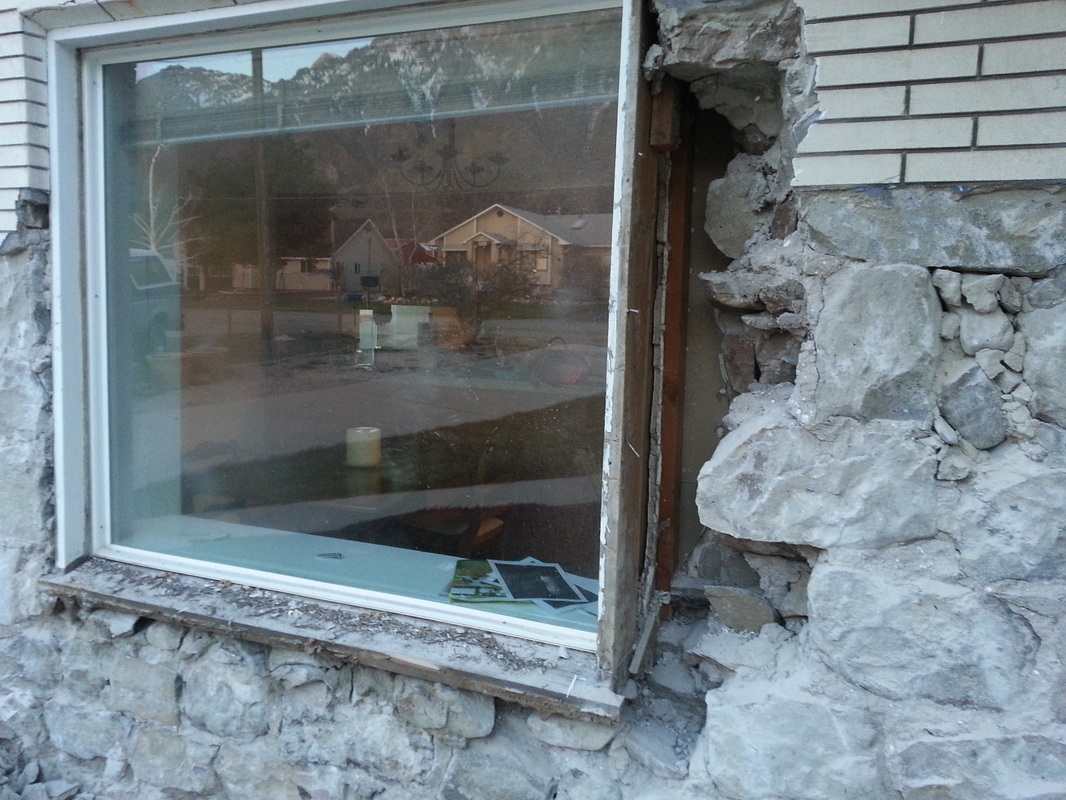
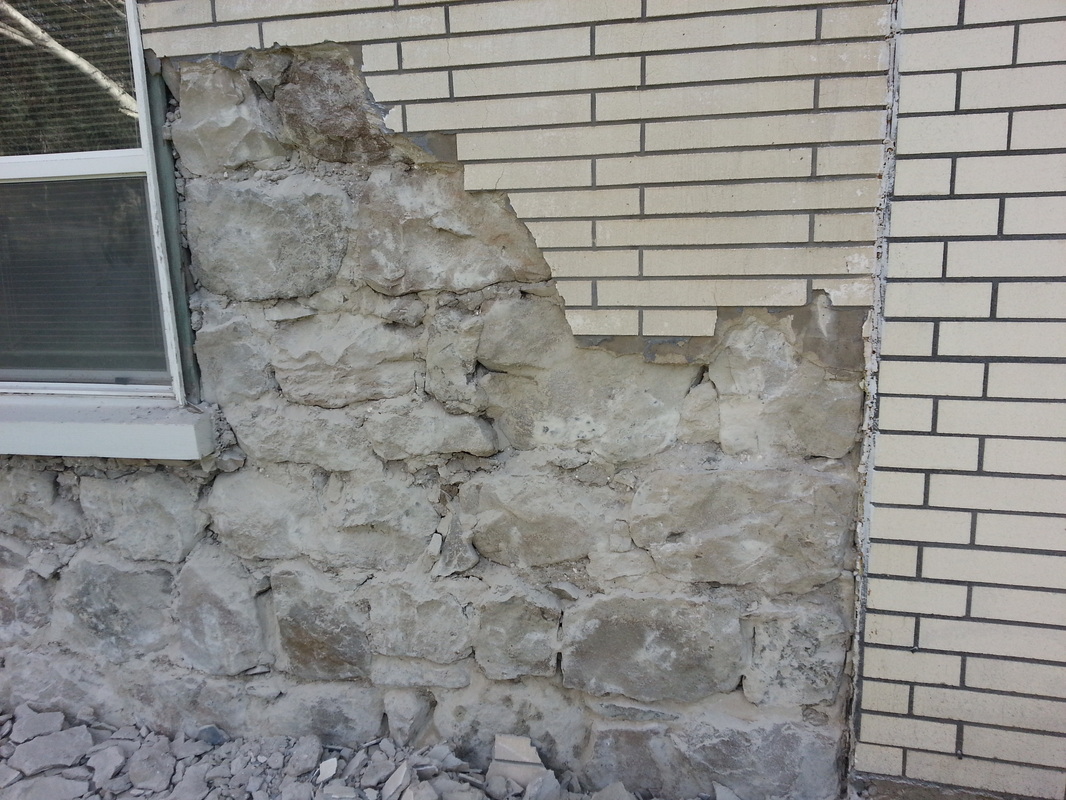
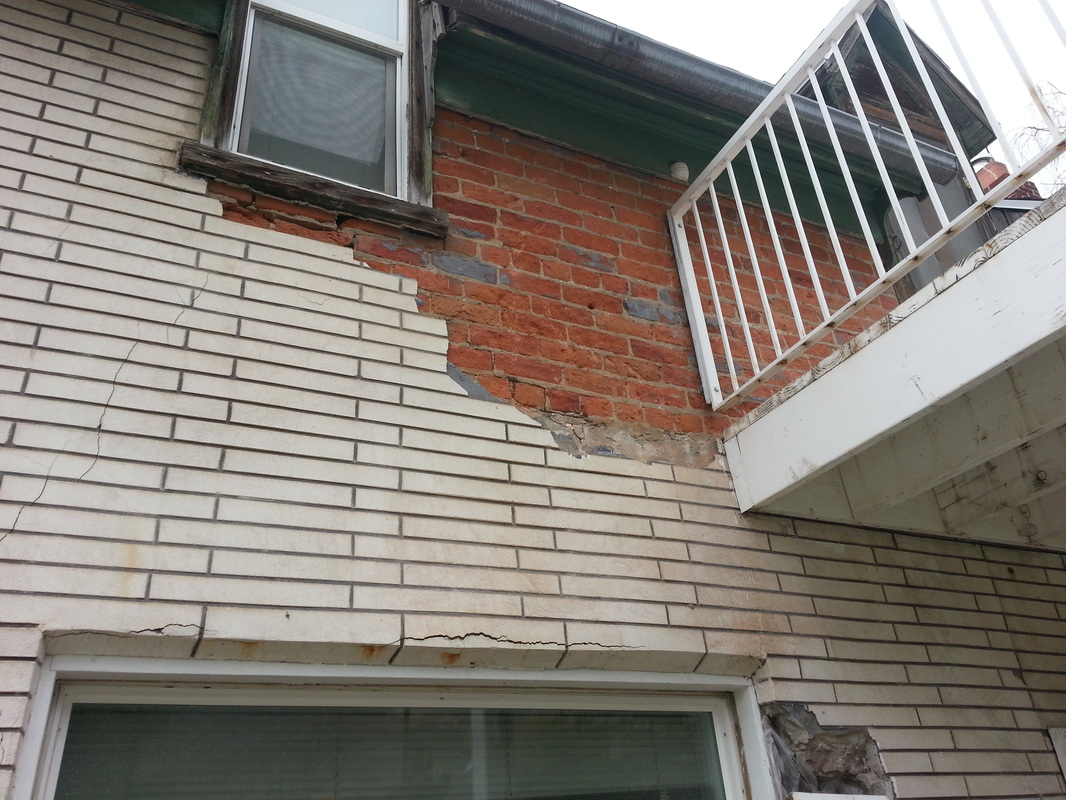
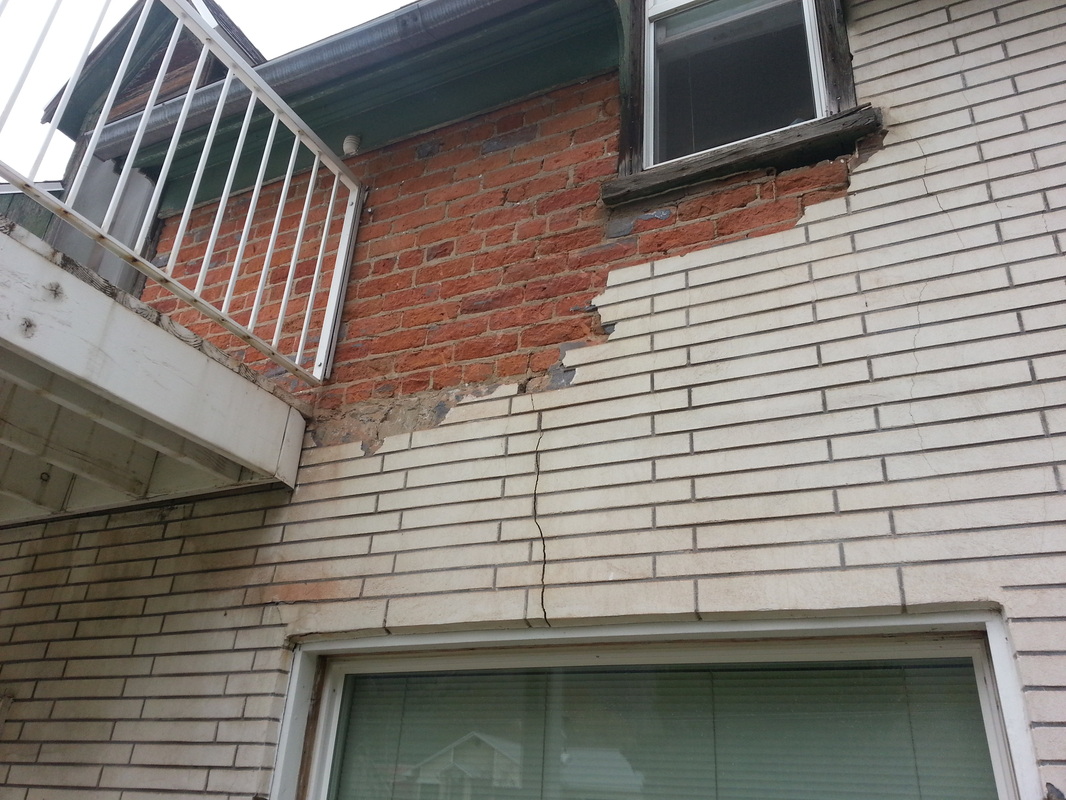
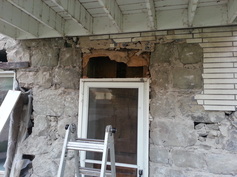
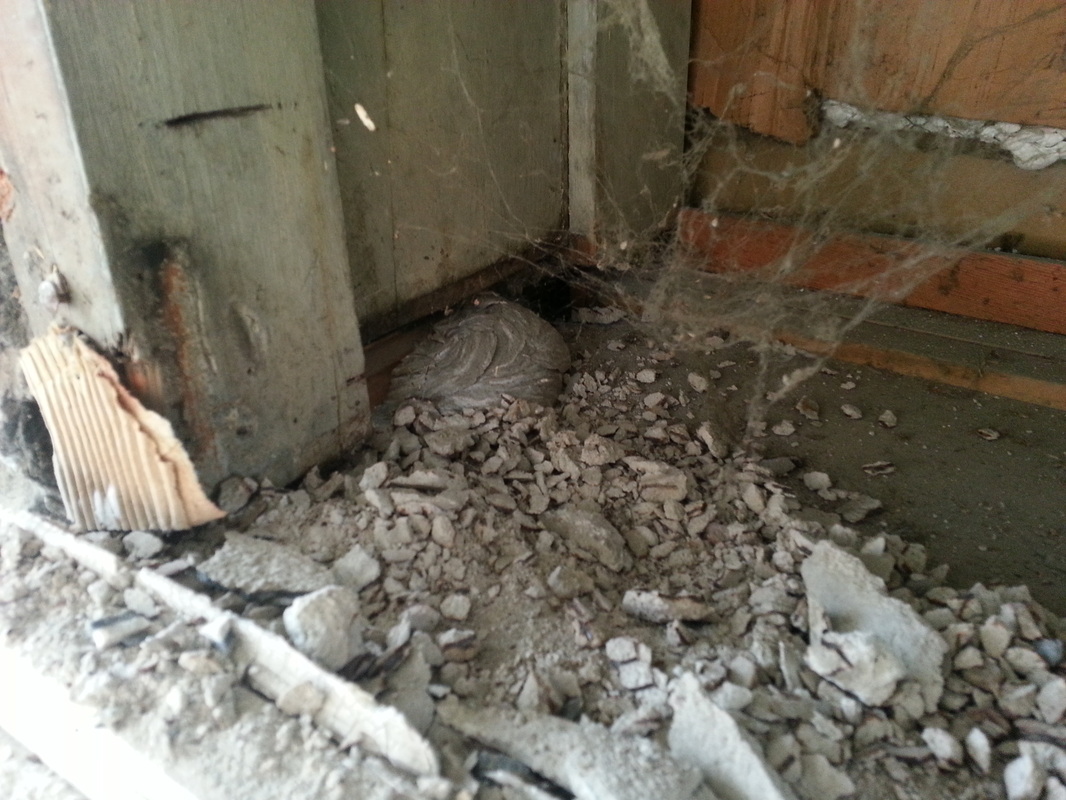
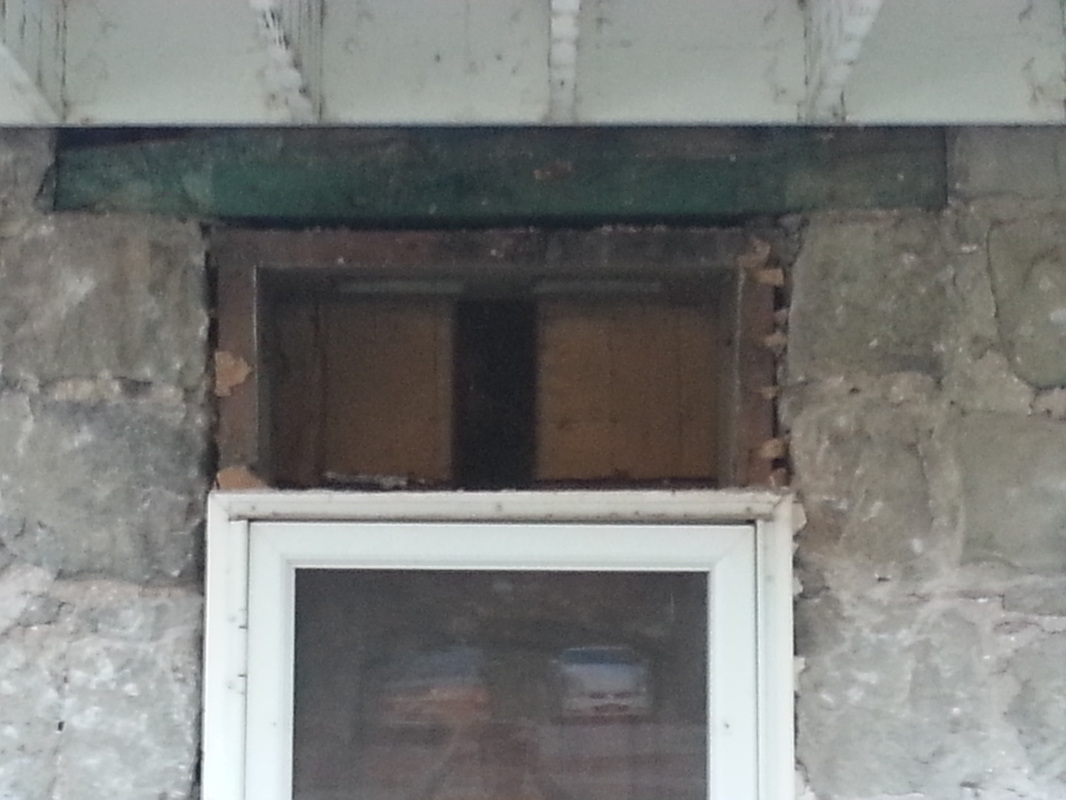
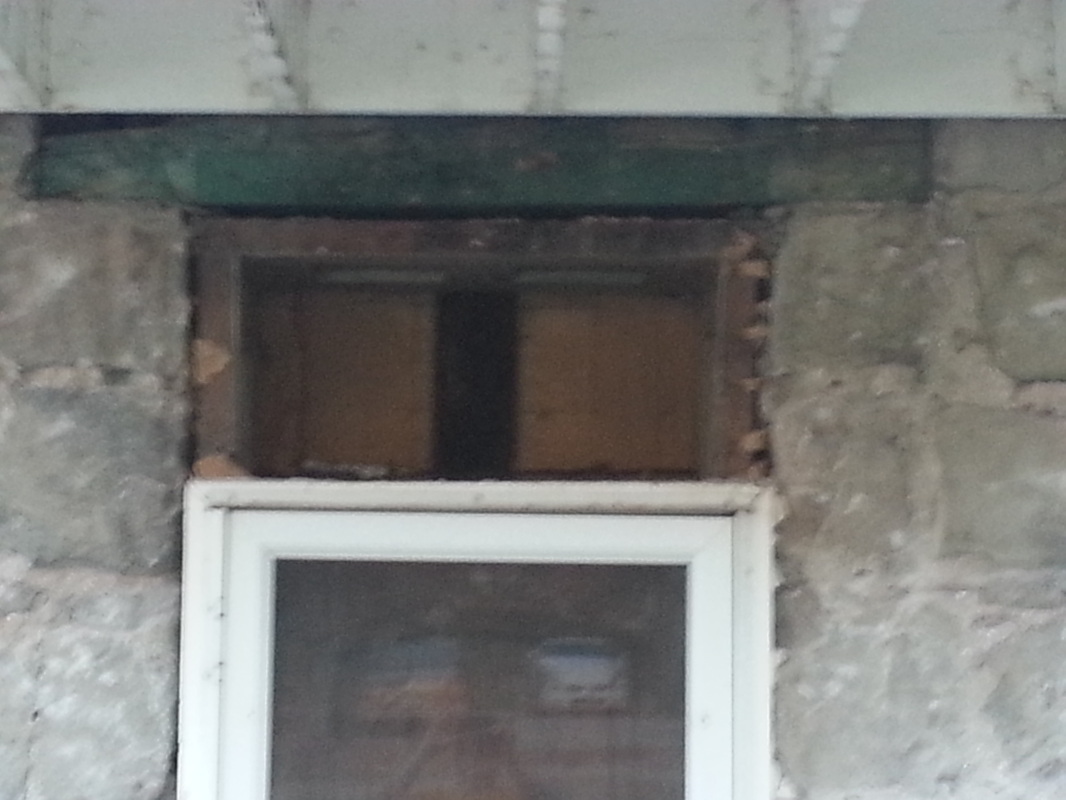
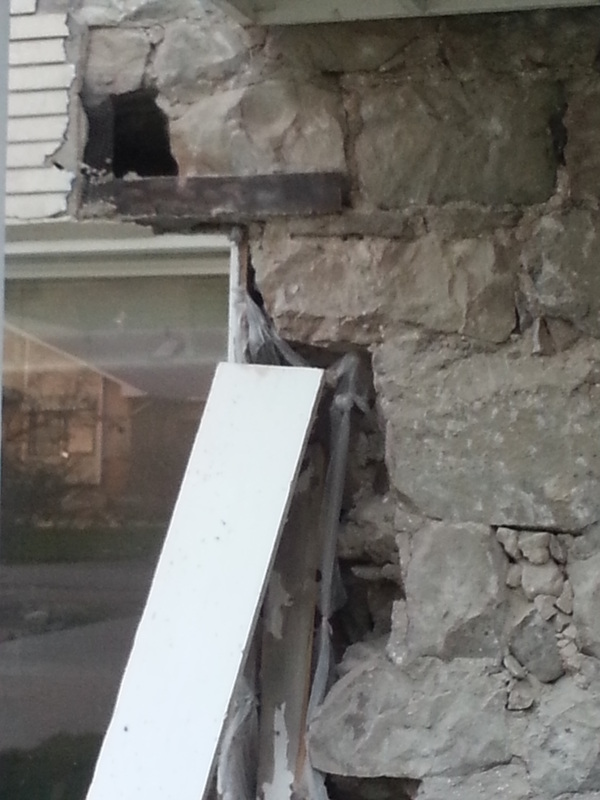
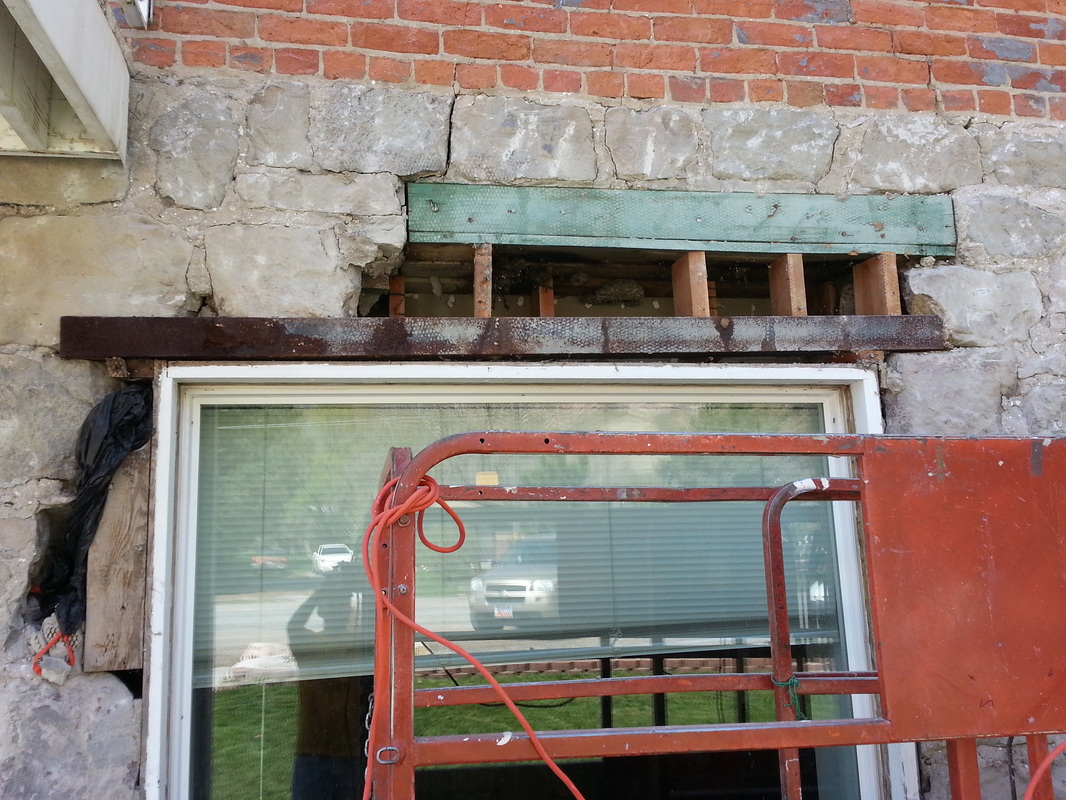
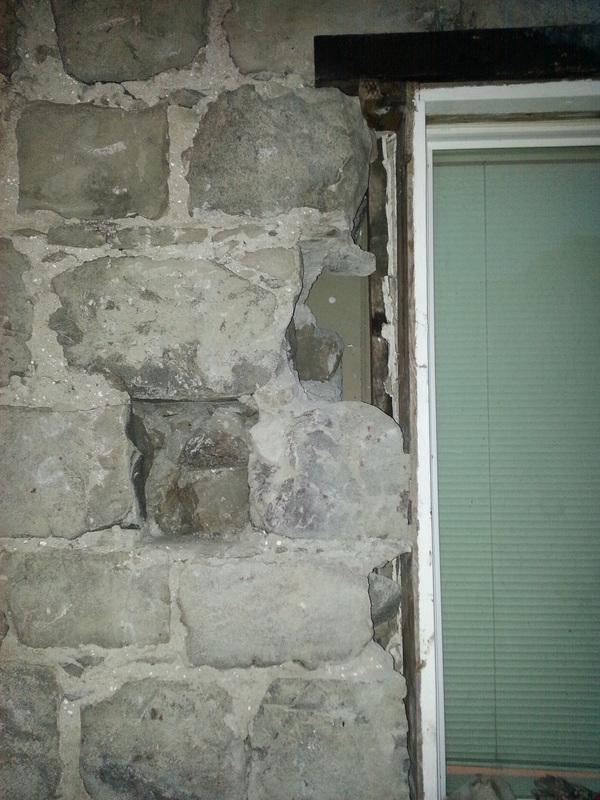
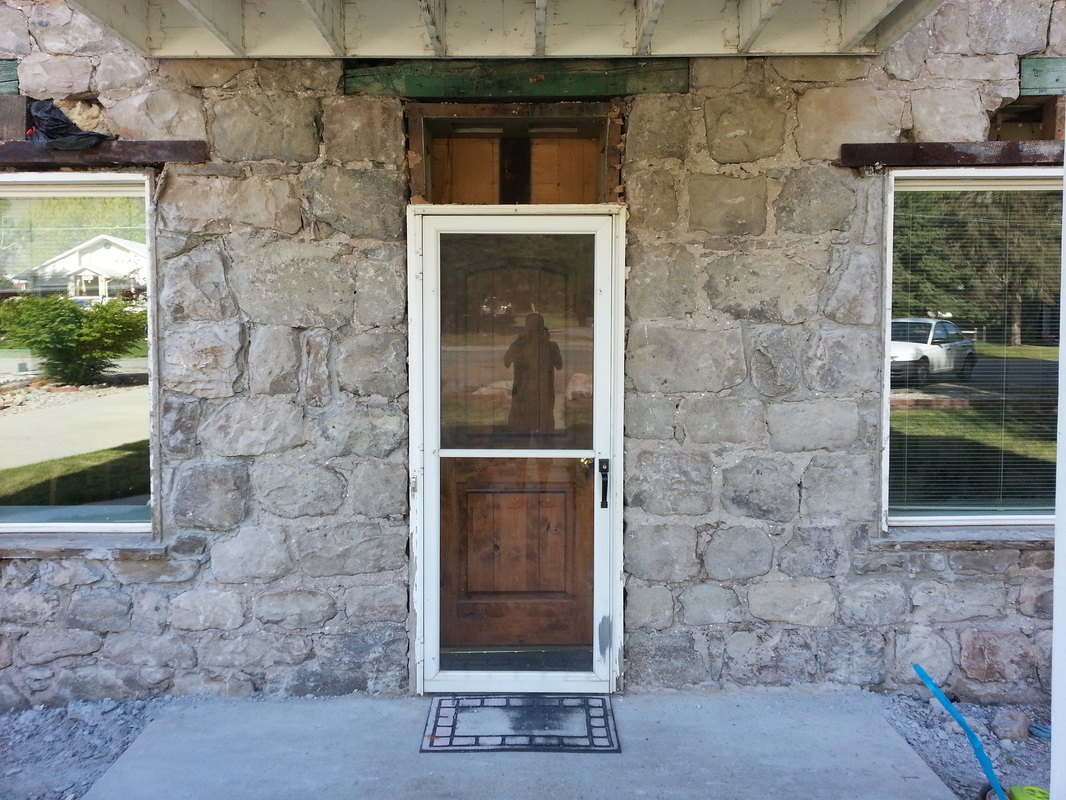
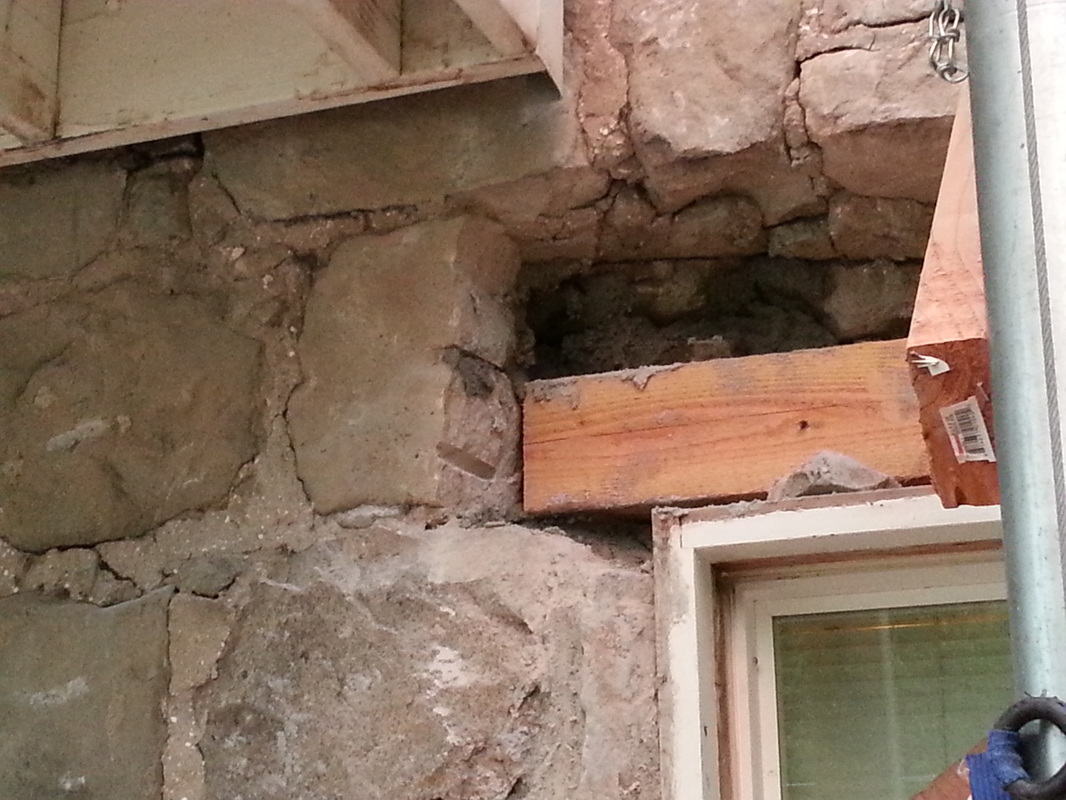
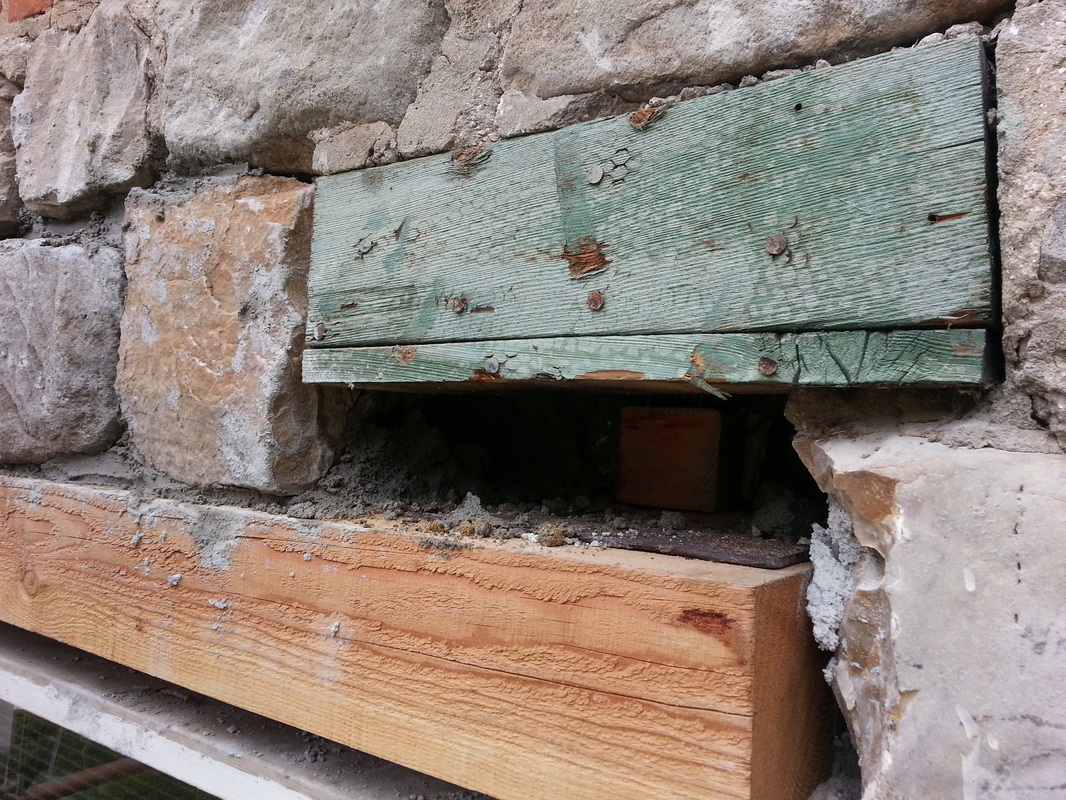
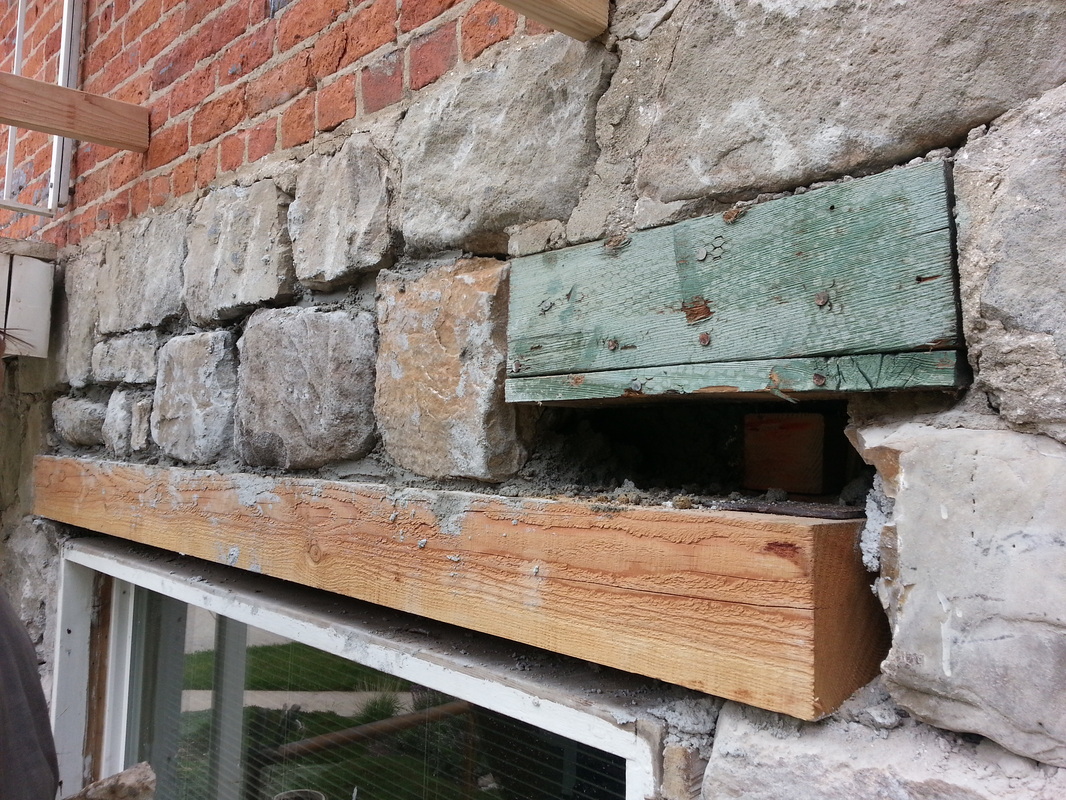
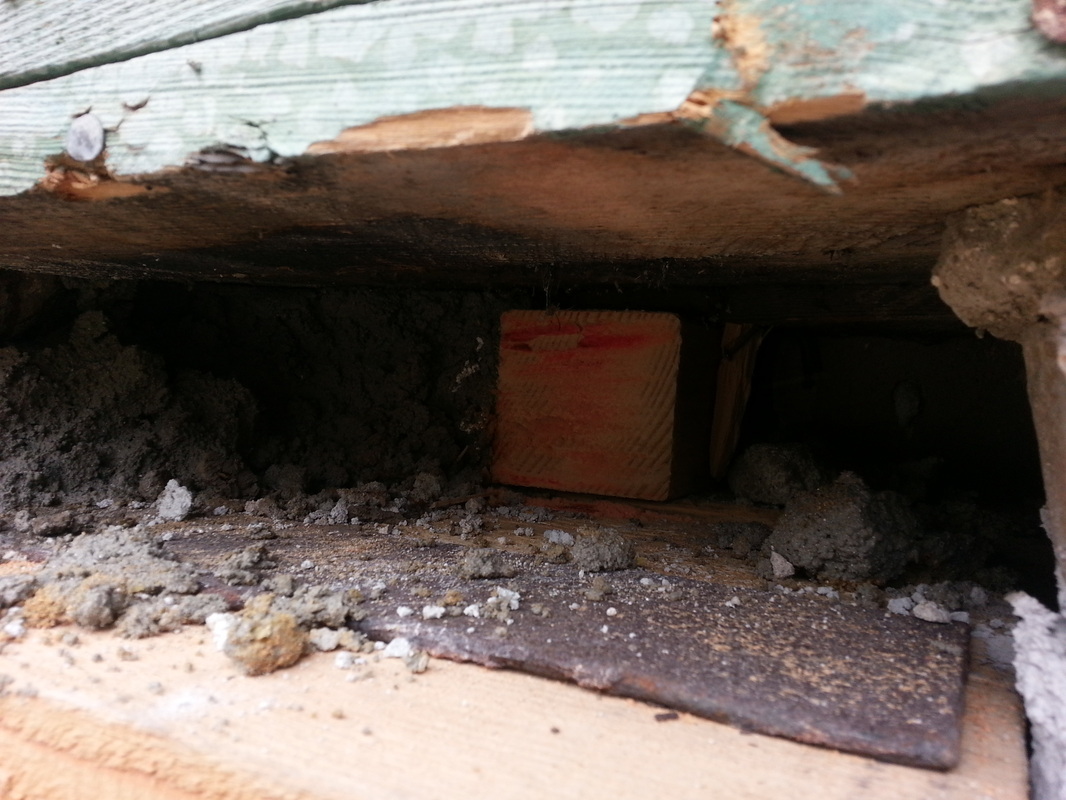
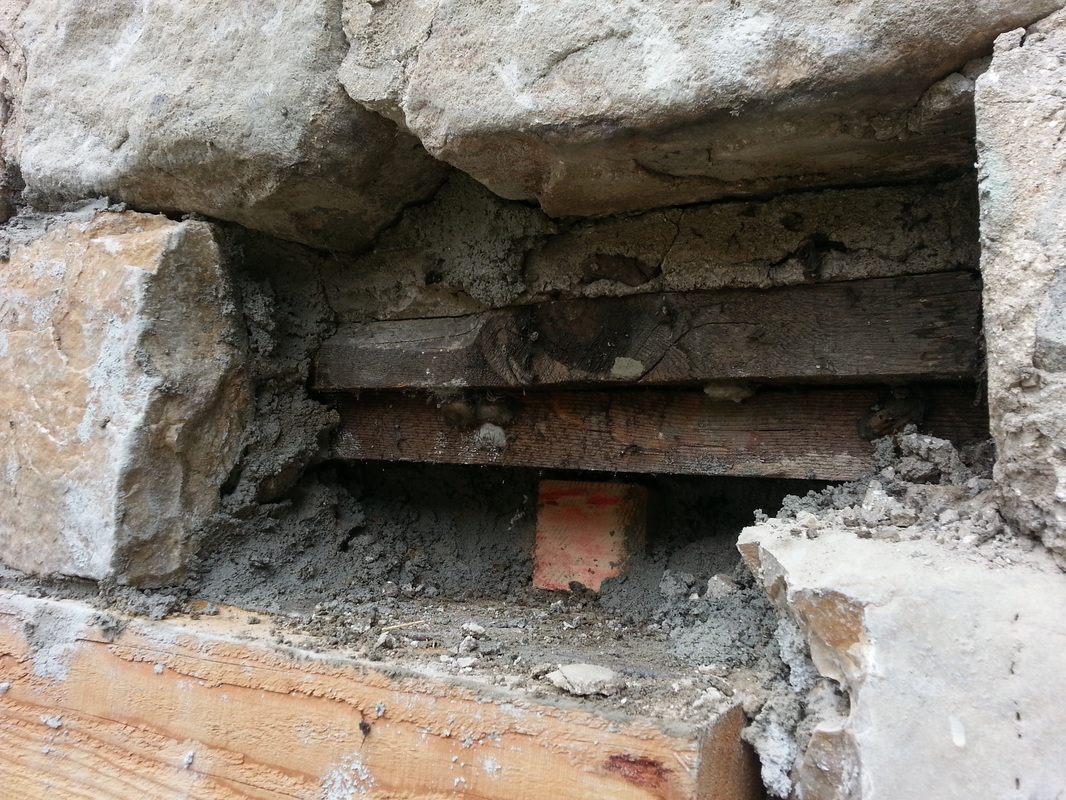
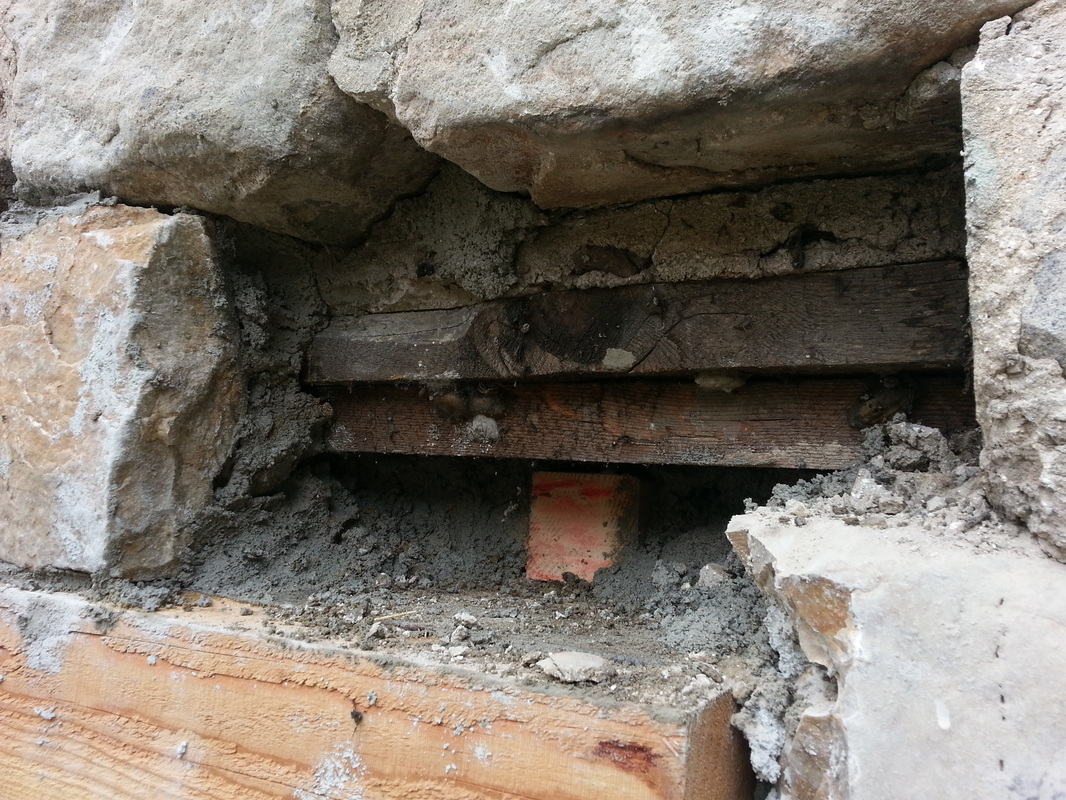
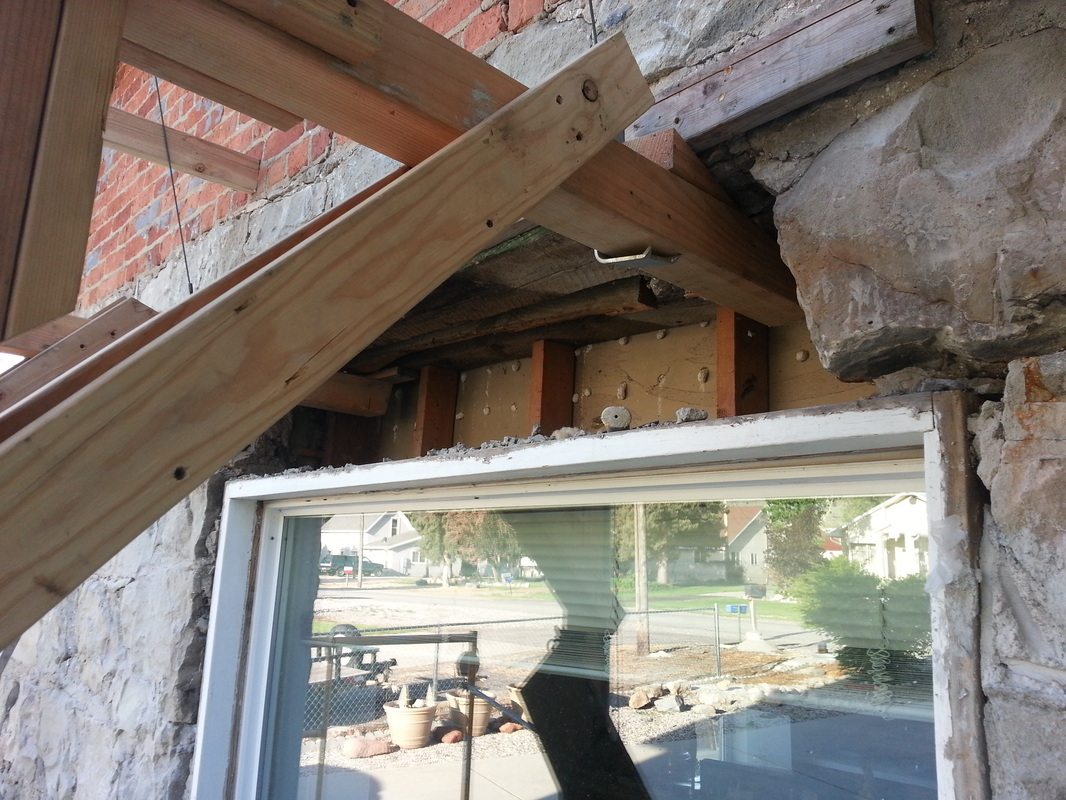
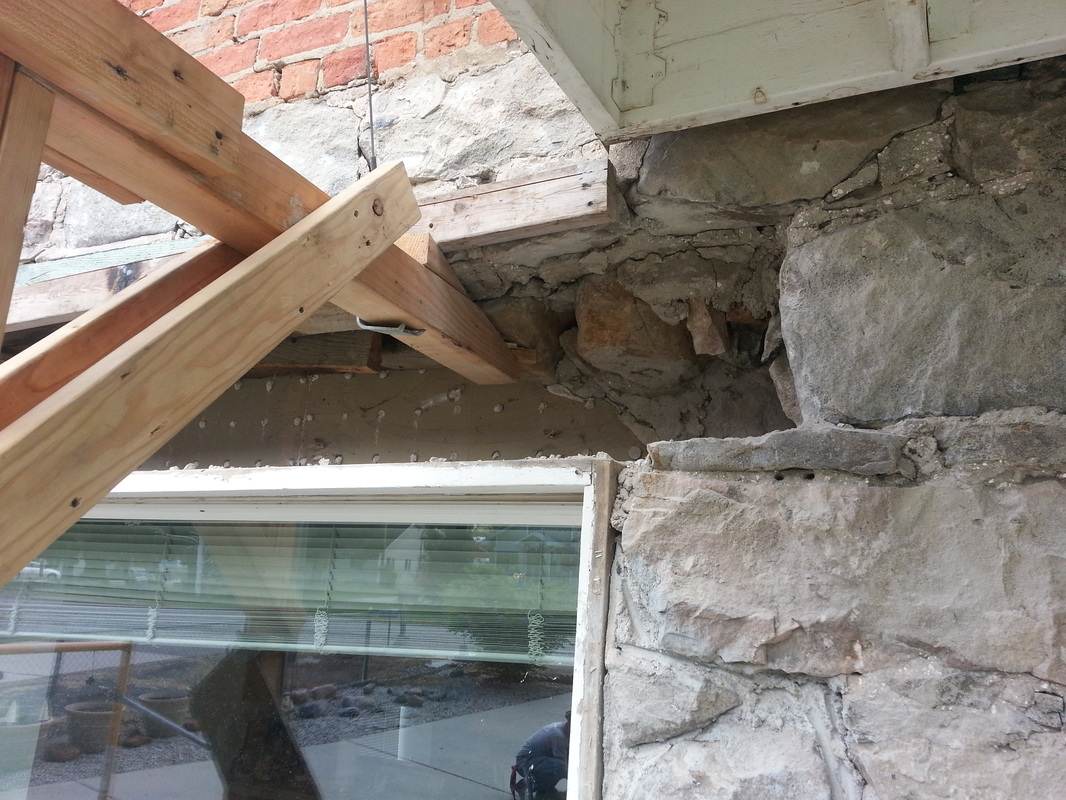
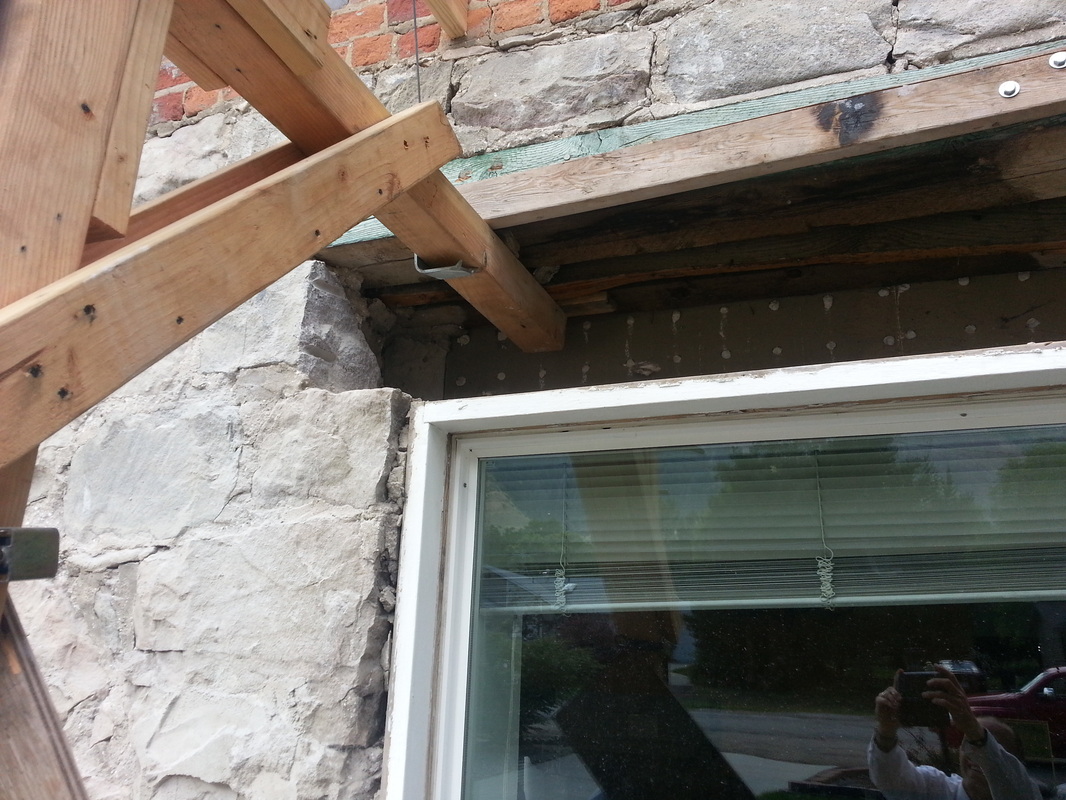
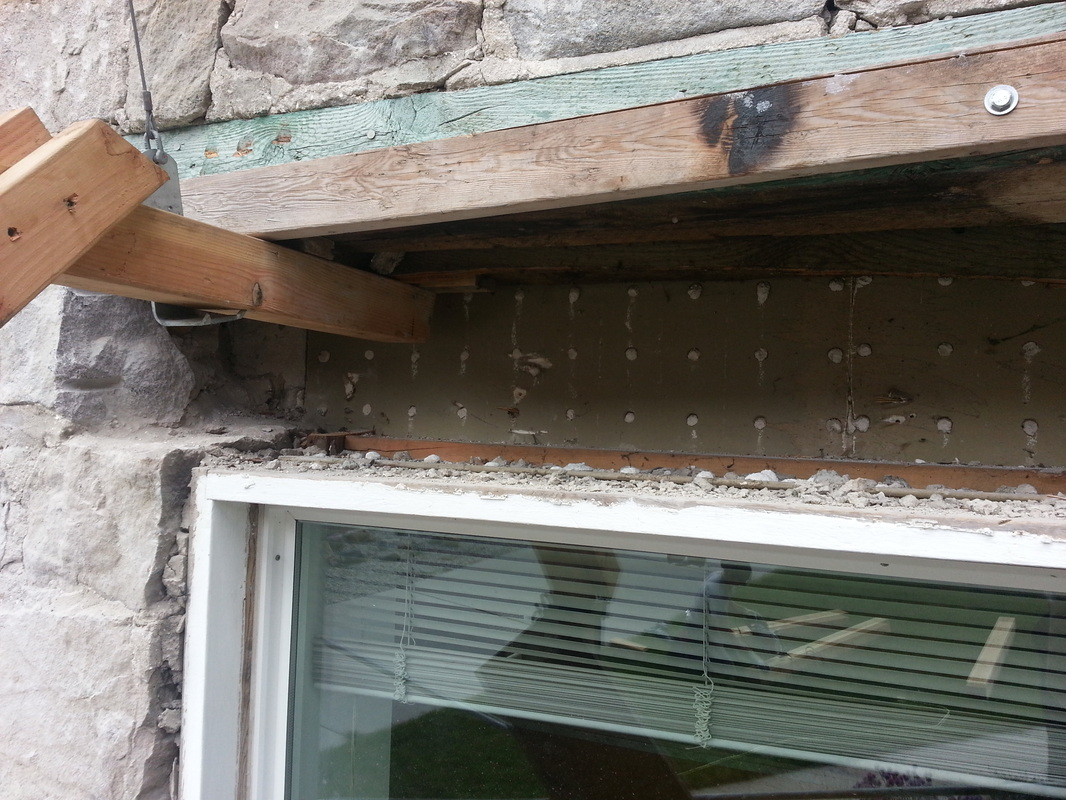
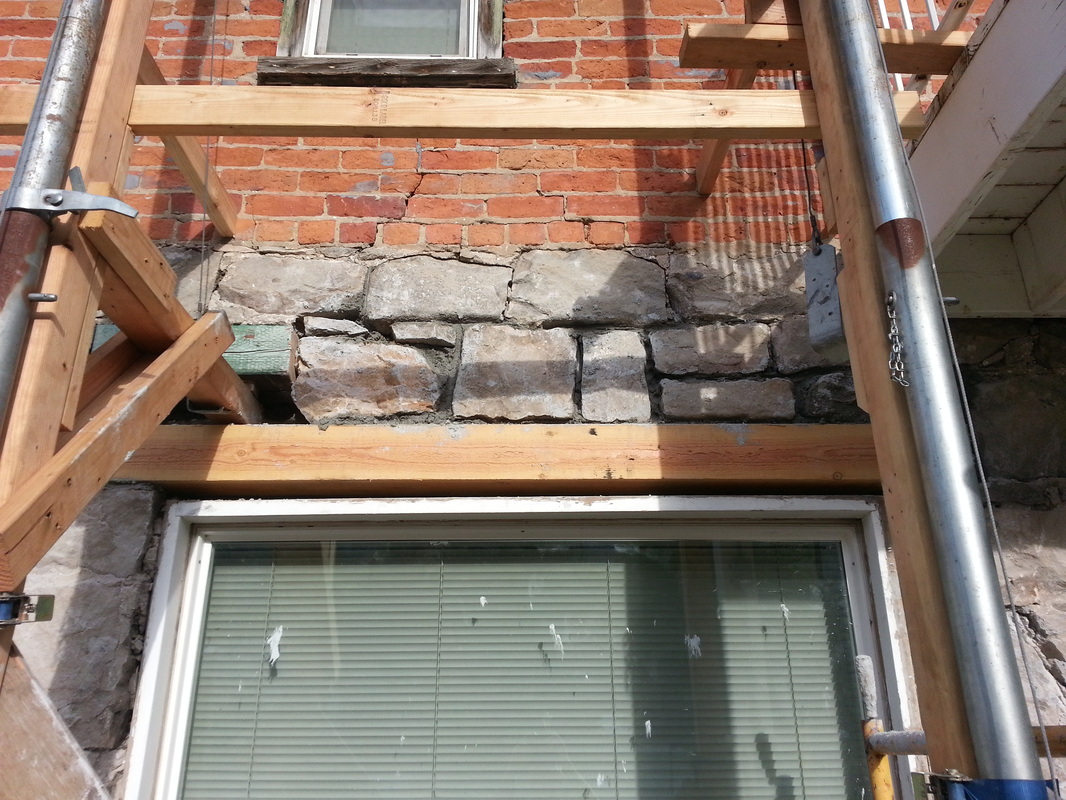
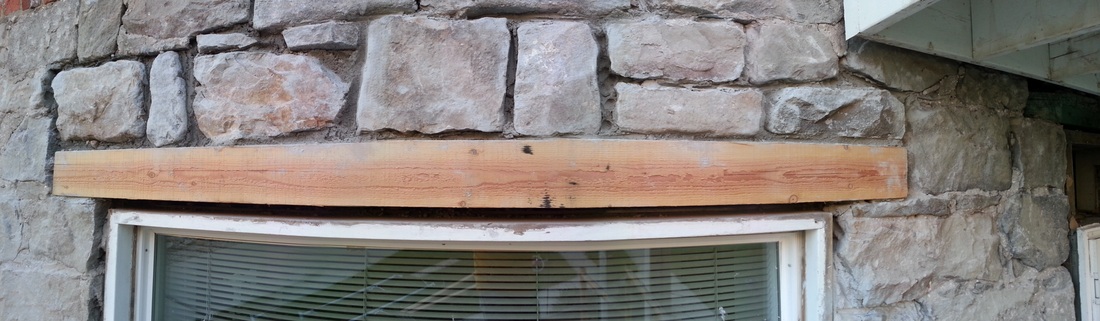
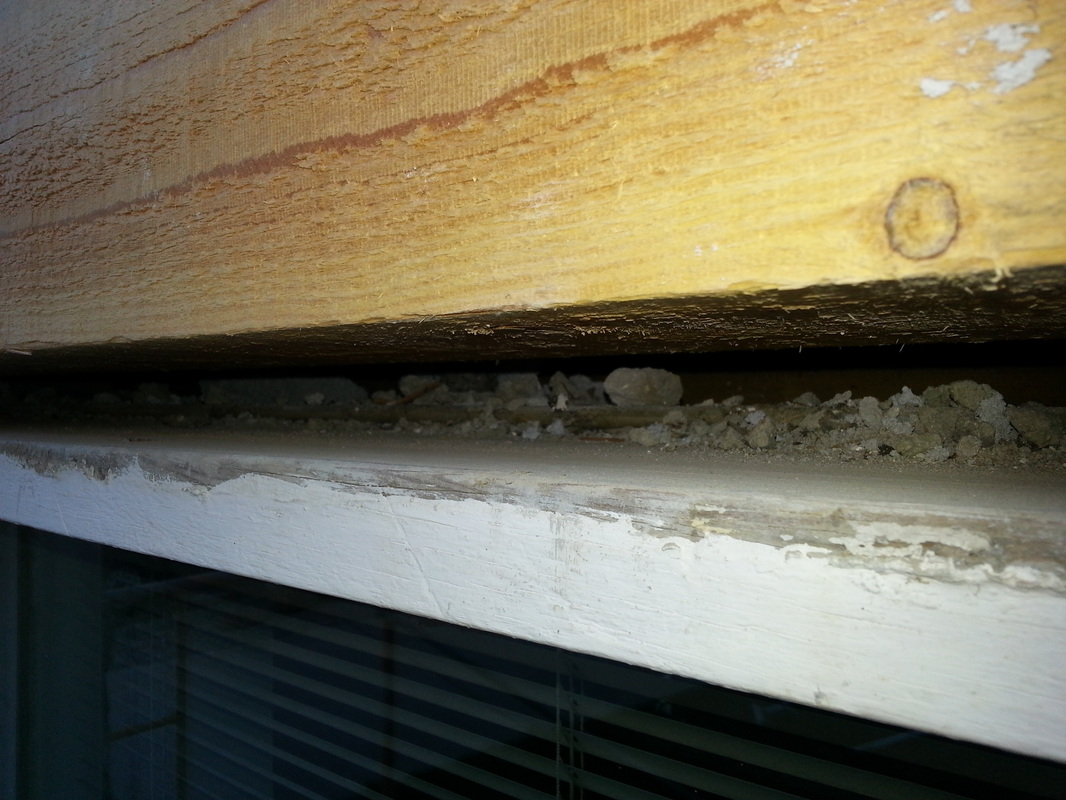
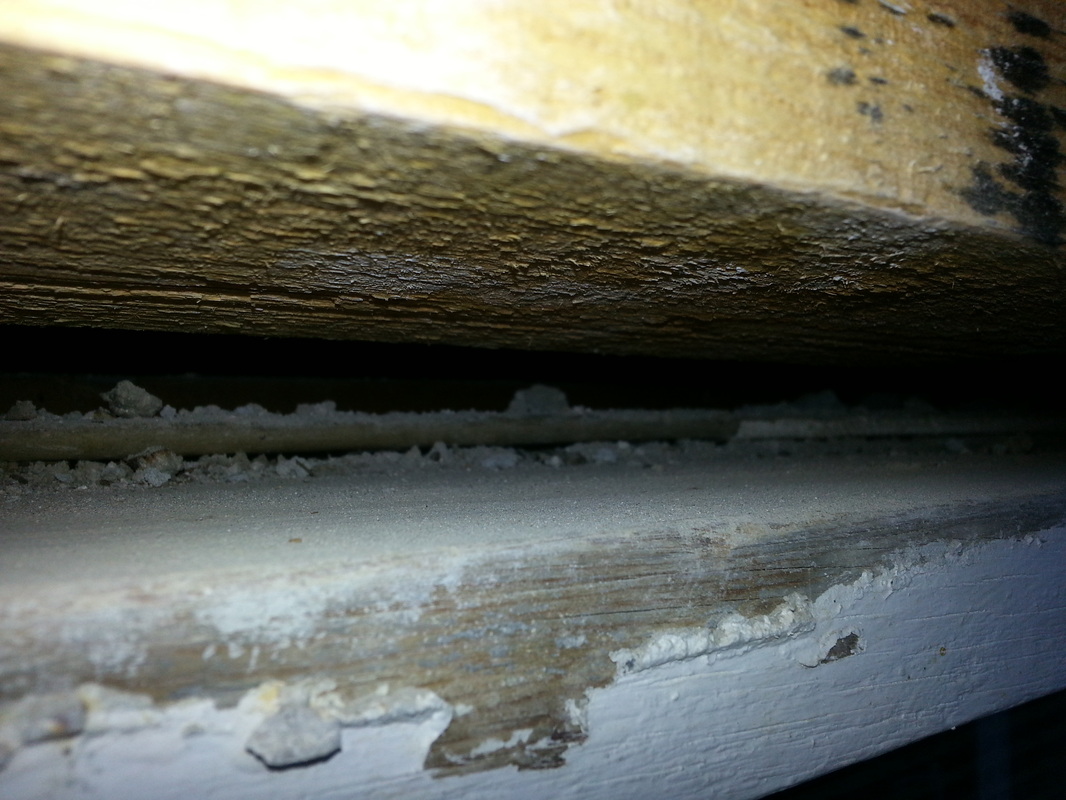
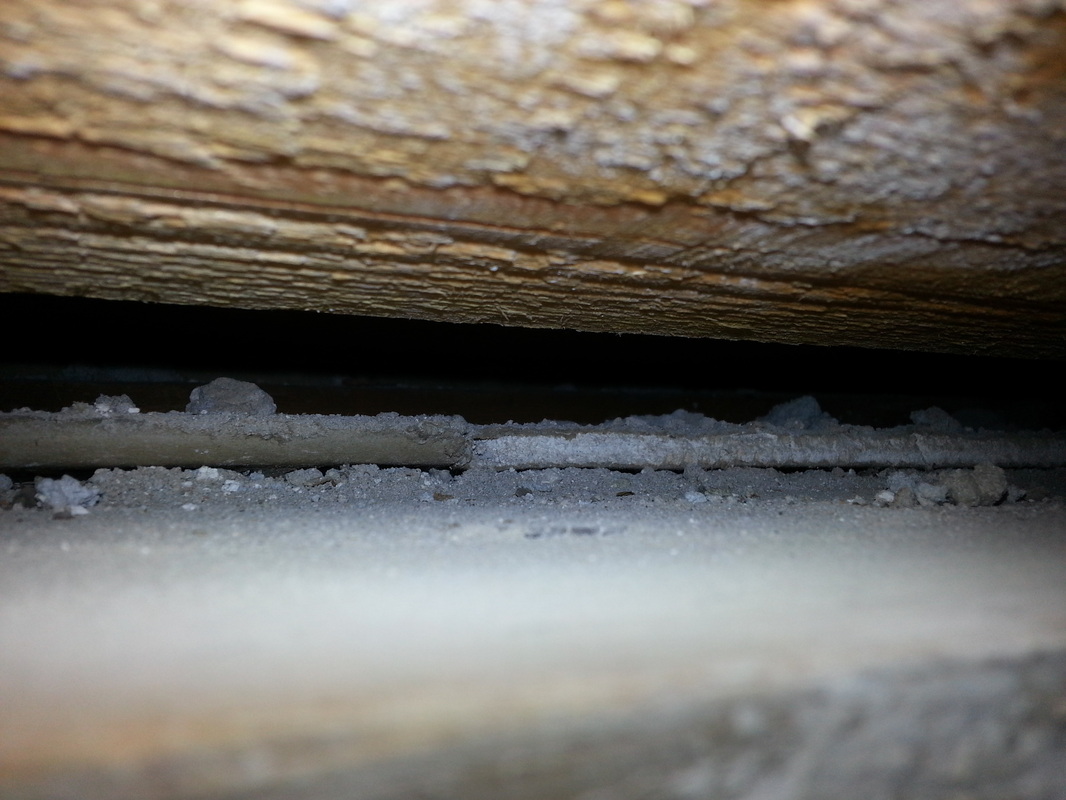
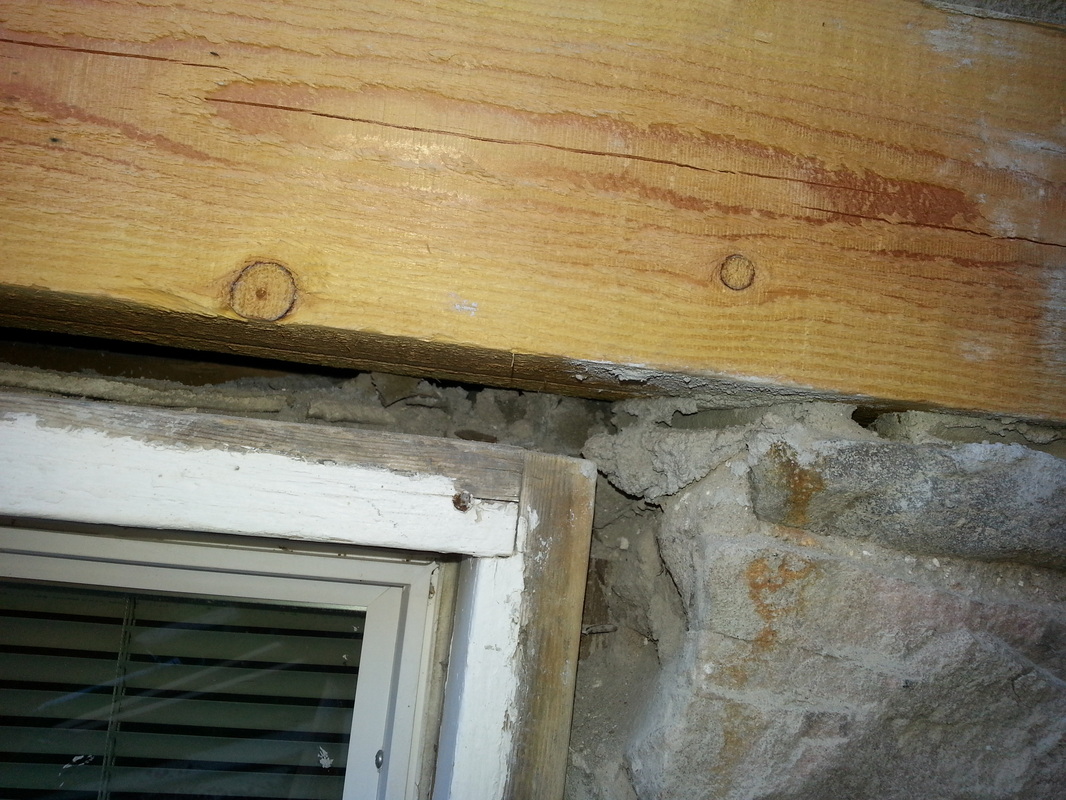
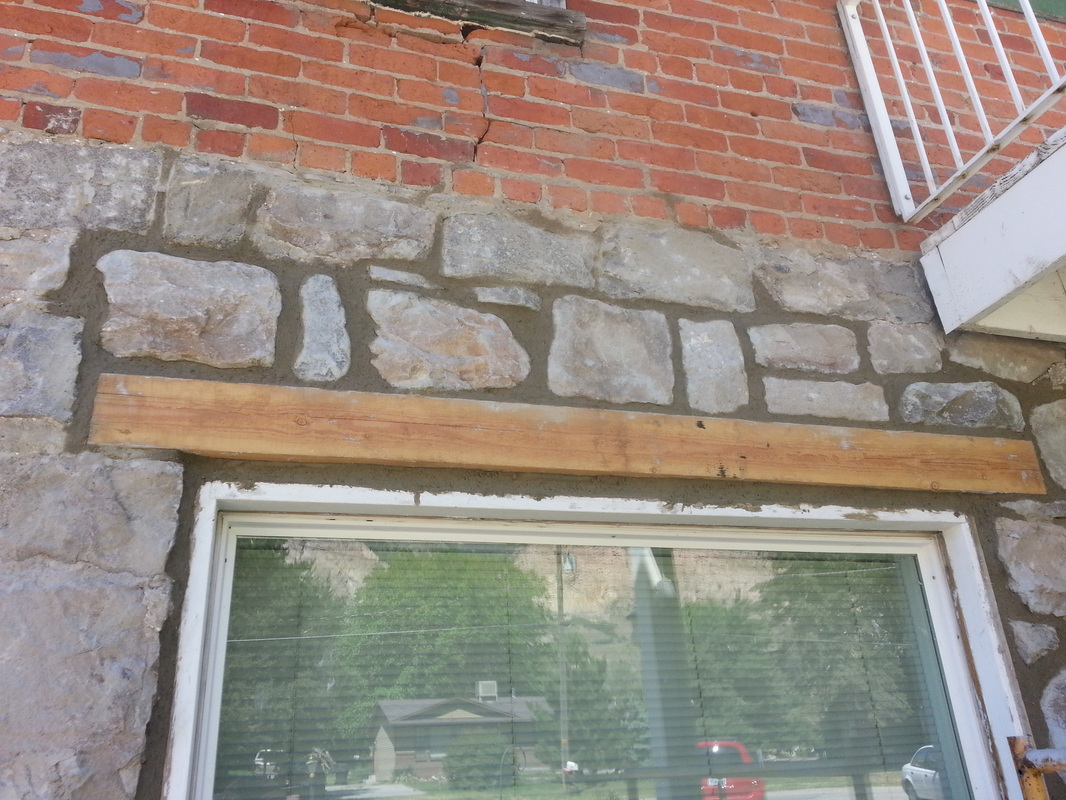
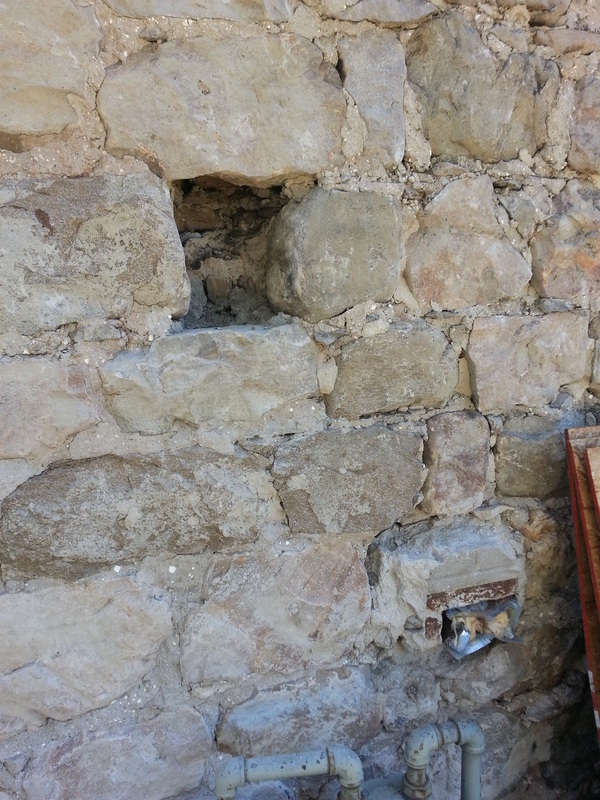
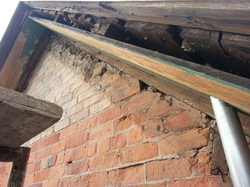
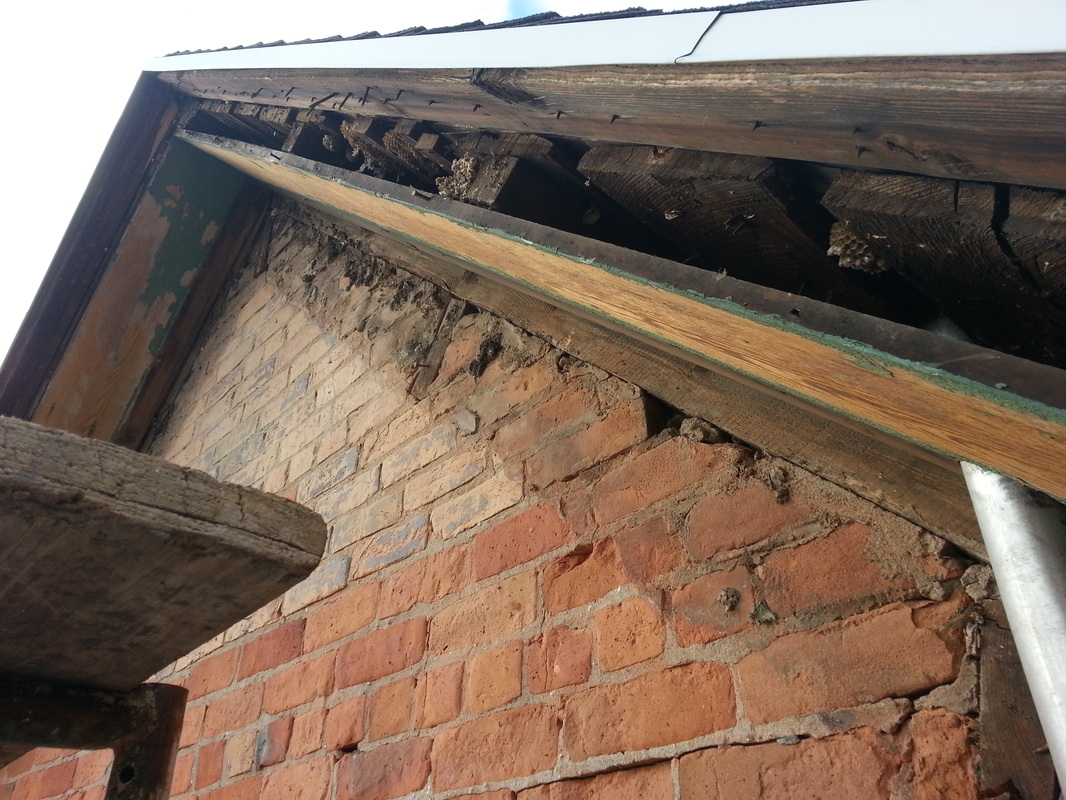
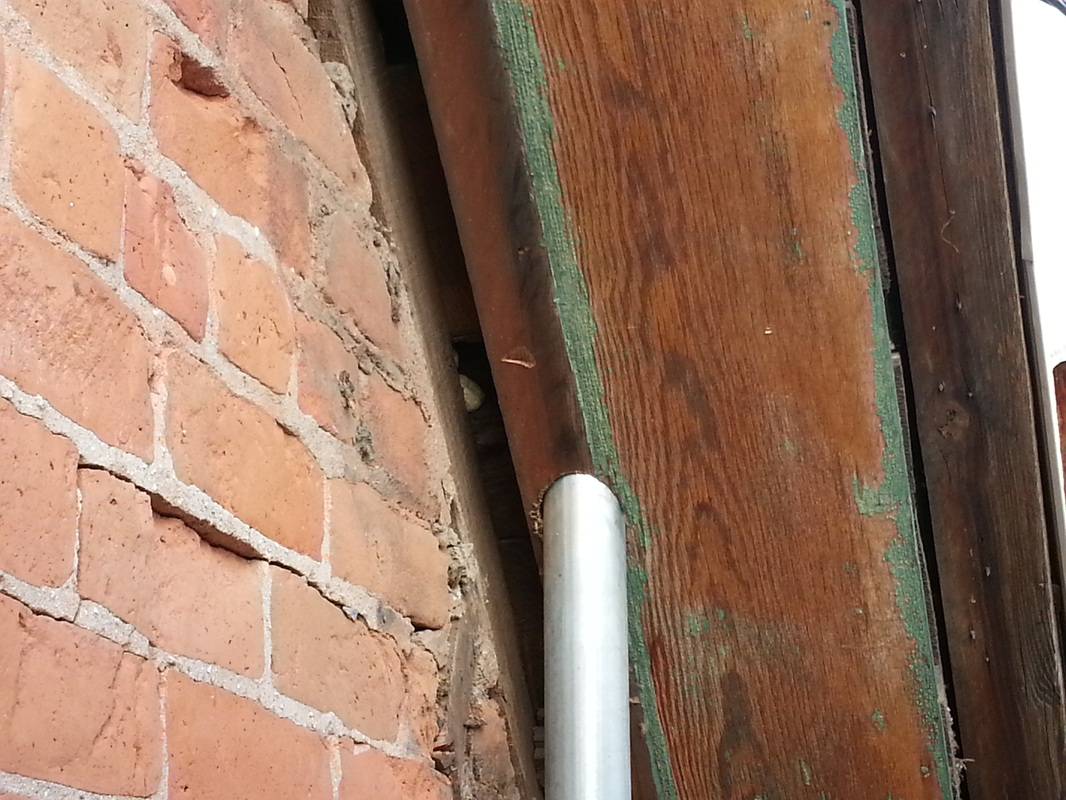
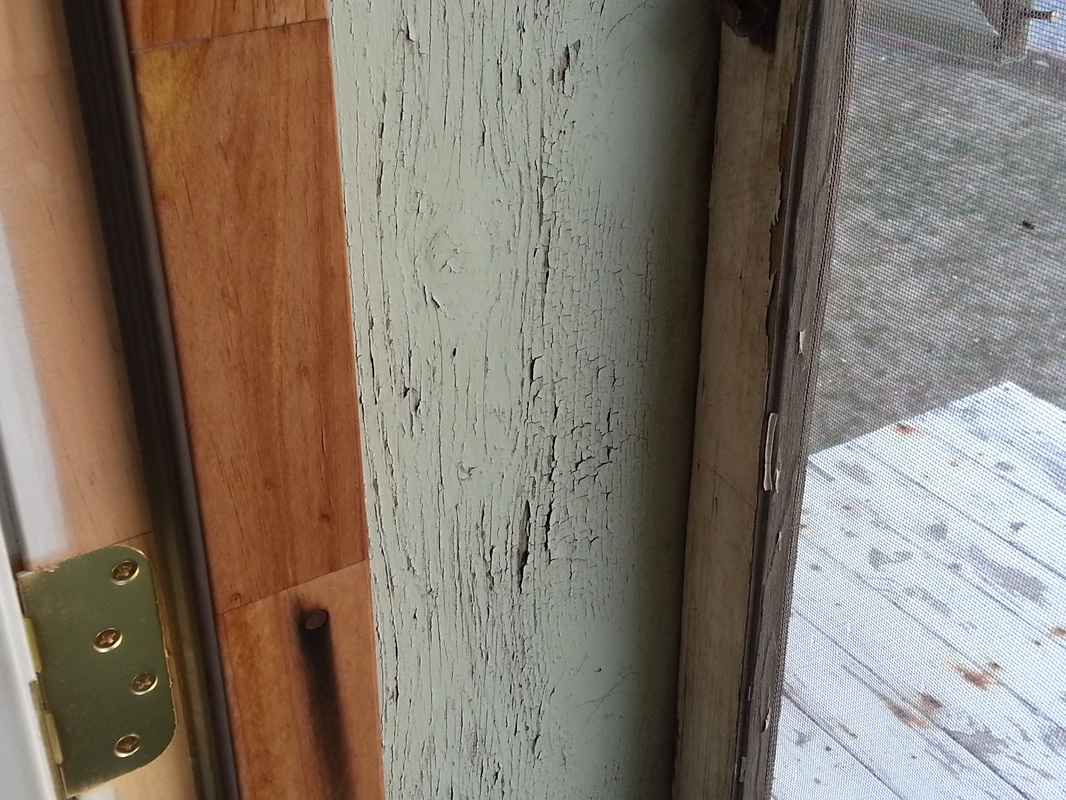
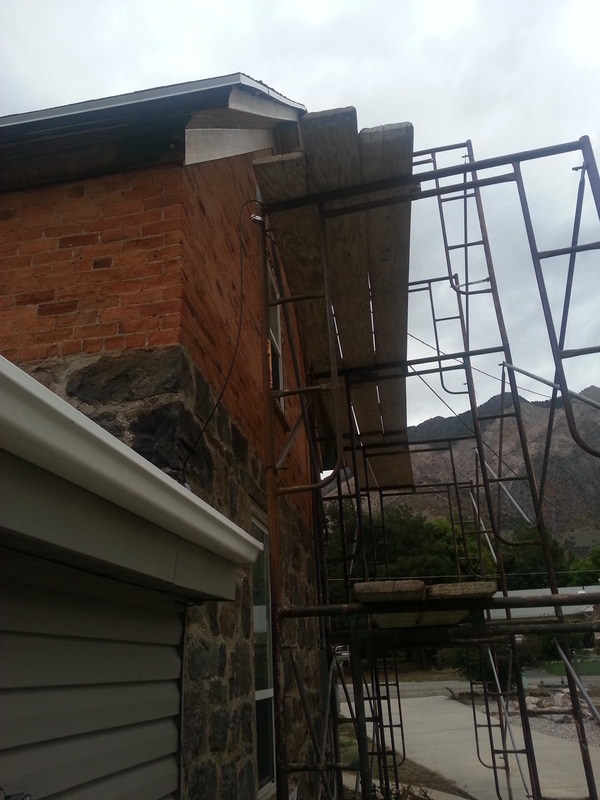
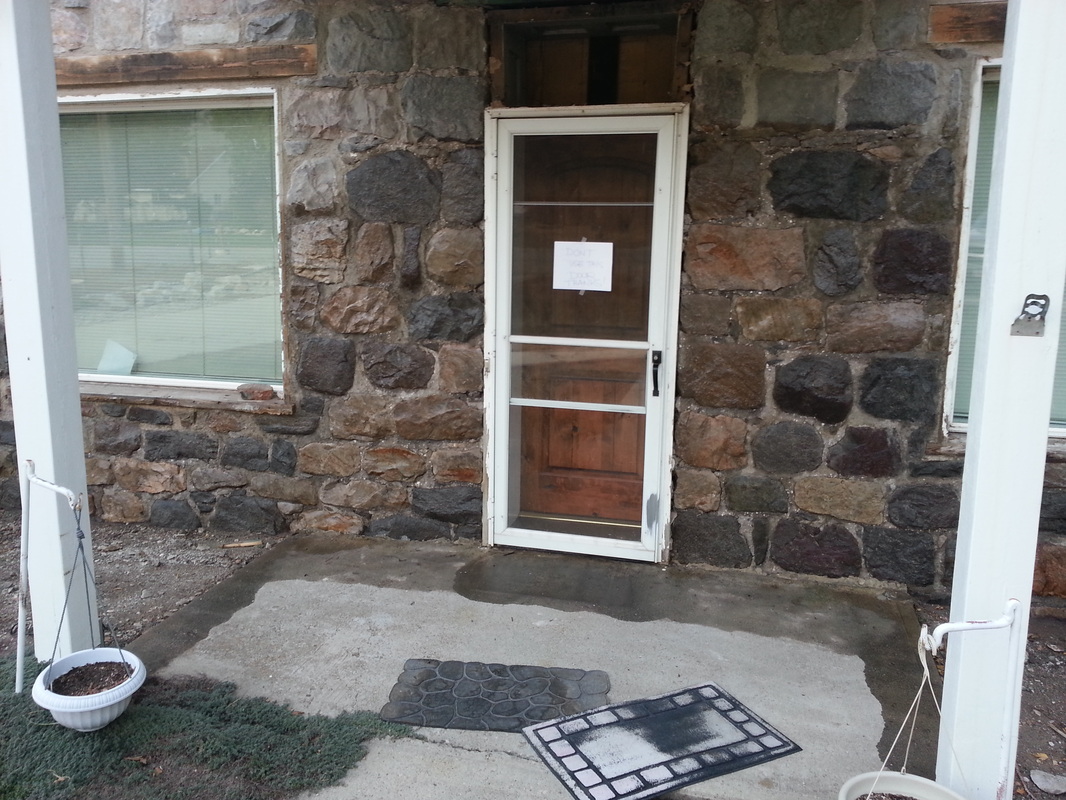
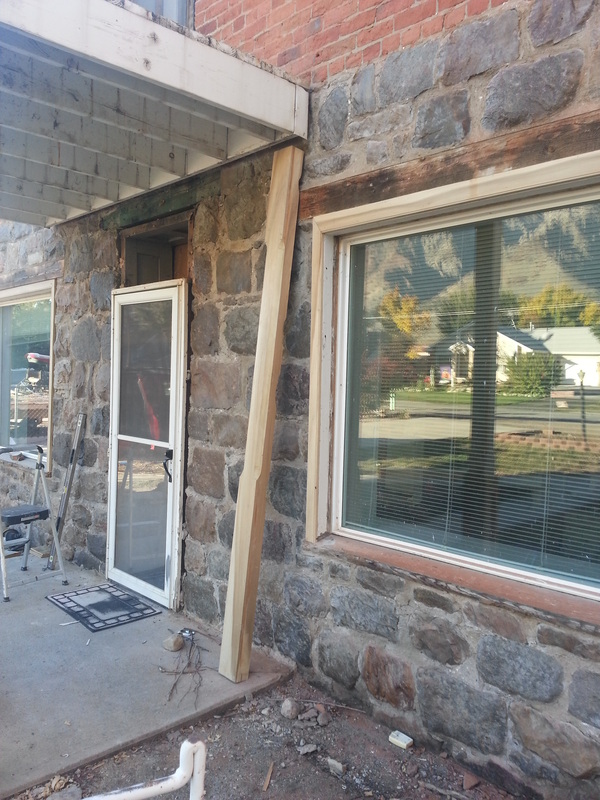
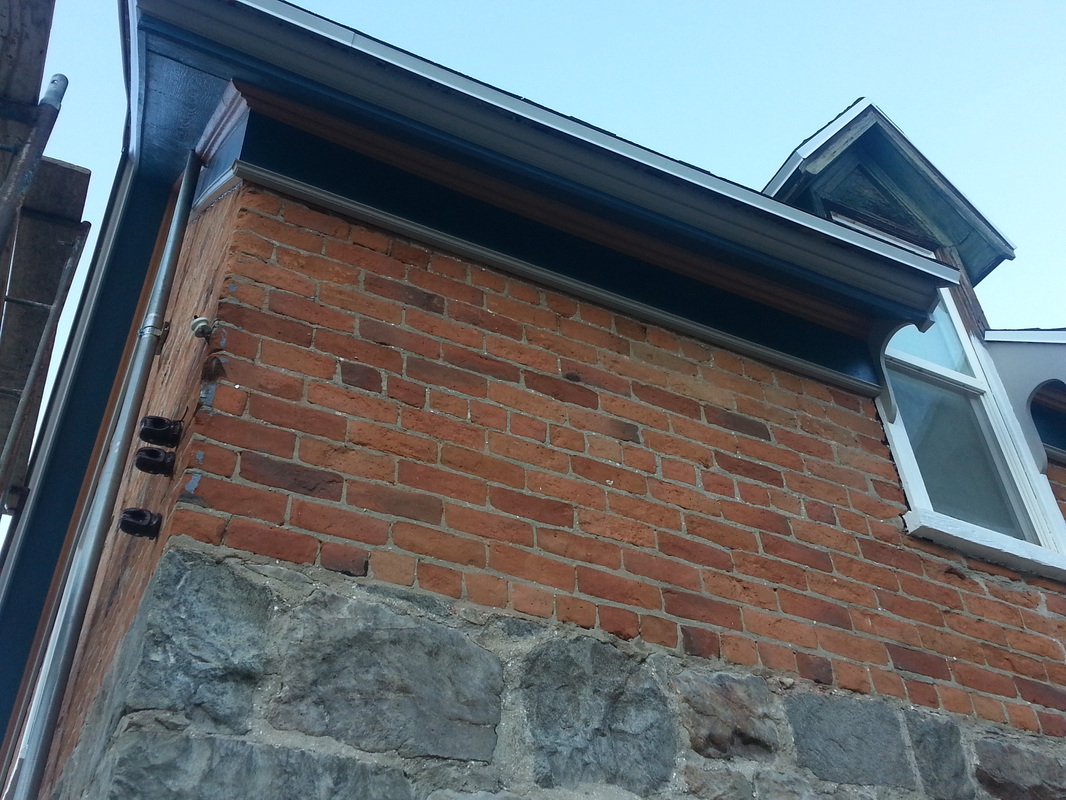
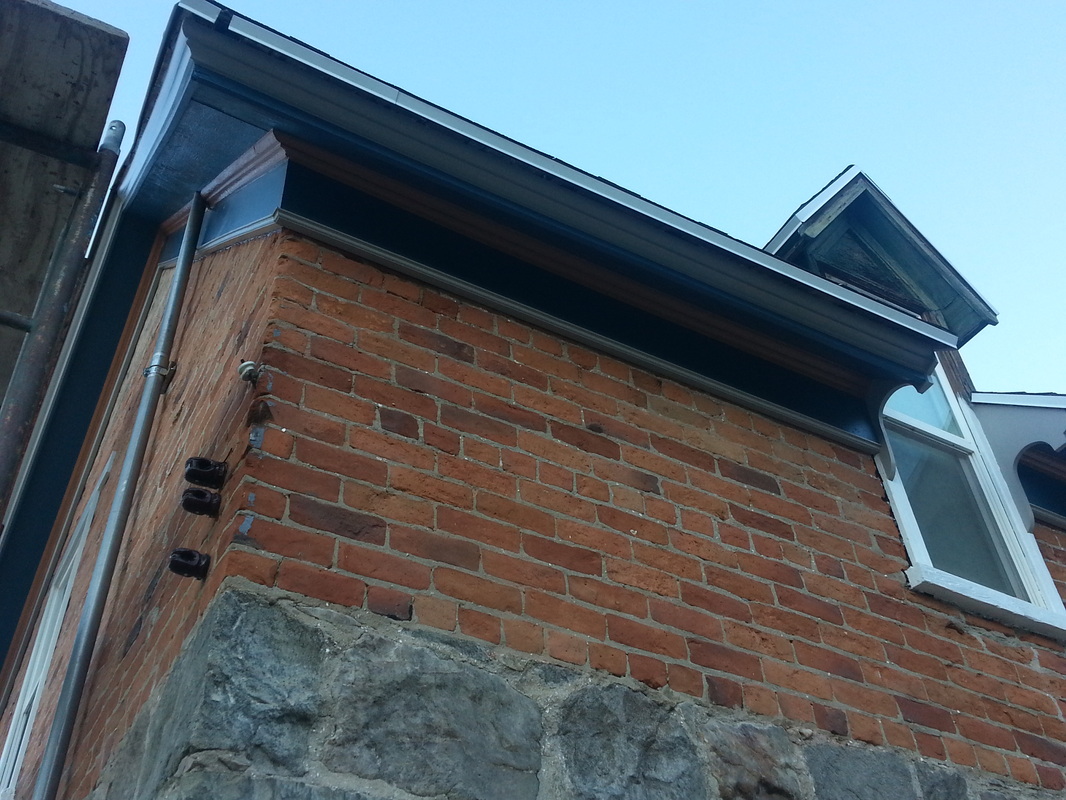
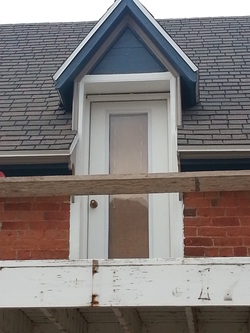
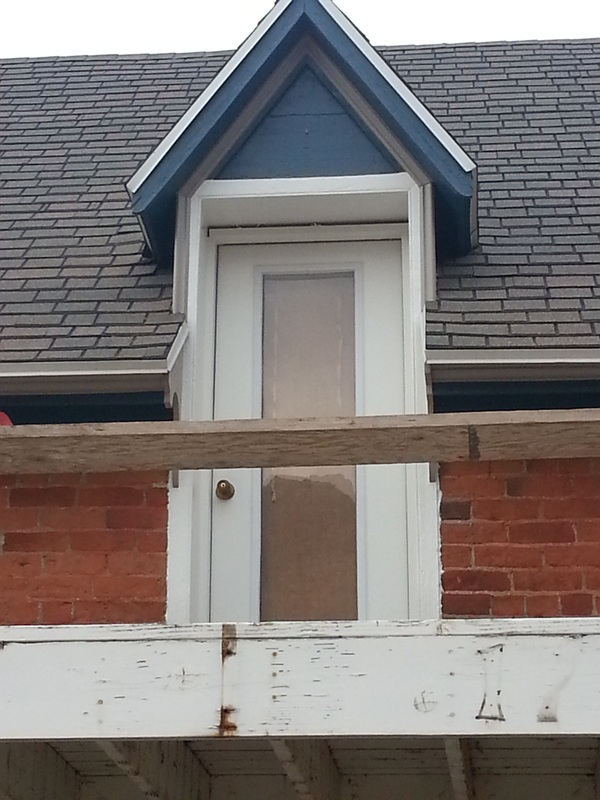
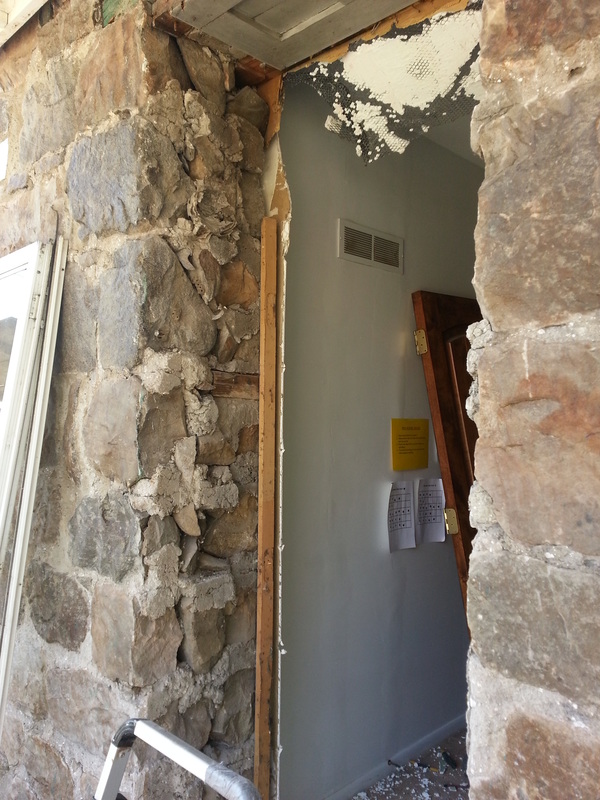
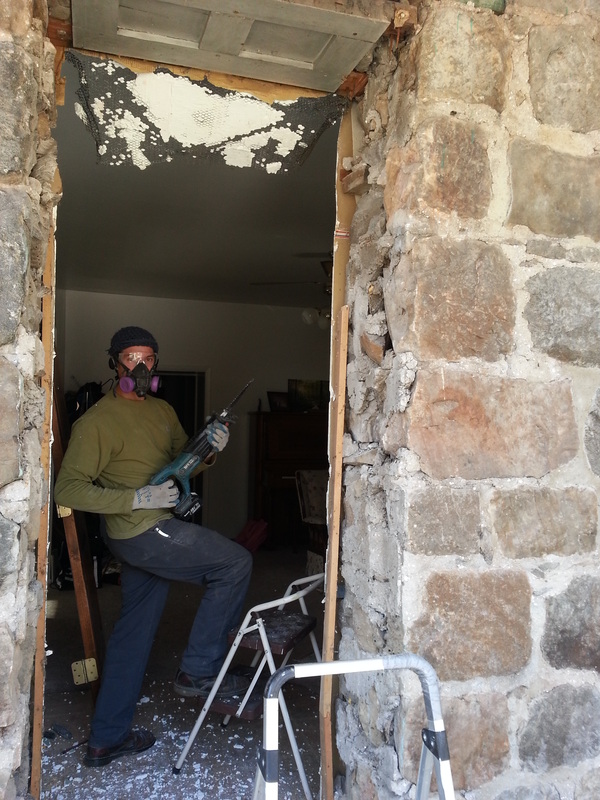
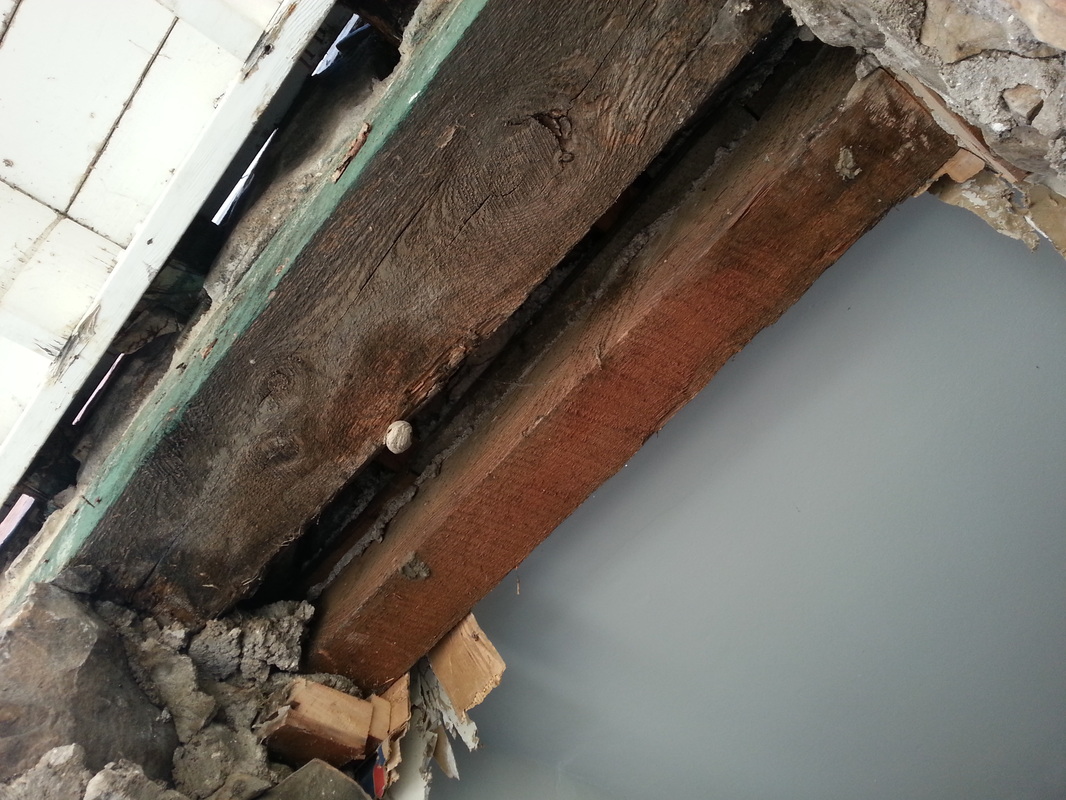
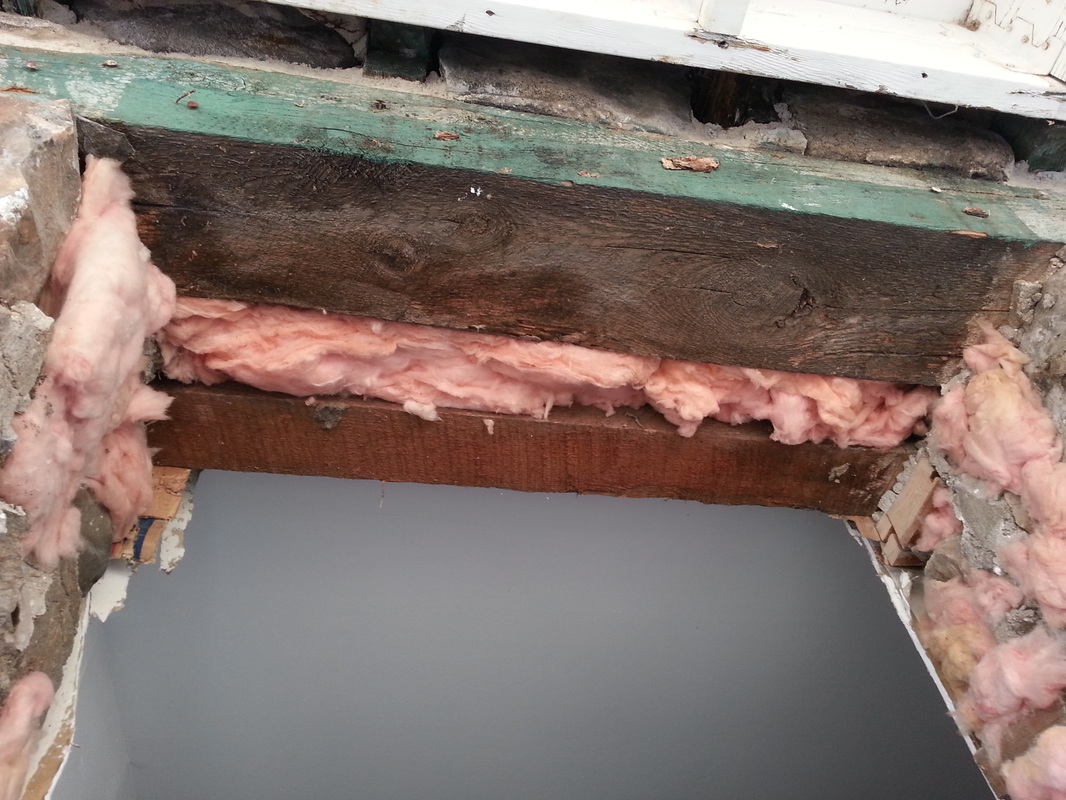
I started working above and around the door on a ladder because I didn't think it would be worth putting up the scaffolding with the overhead porch. When I was getting the fake brick off above the south window, I hit another hole. I guess what they did was put up a piece of angle iron to support above the window after they knocked out the rocks (because they were expanding the window size from the original) and then framed in the window without the rocks being placed back in. In doing so, they didn't put in any insulation. Then I was removing the brick above the door and hit another hole...the old door would have had a window above it. They took some old cardboard, placed it up there to hold the wire mesh and then put the brick stuff over the top...again, no insulation (other than the wasp nest...ha ha).
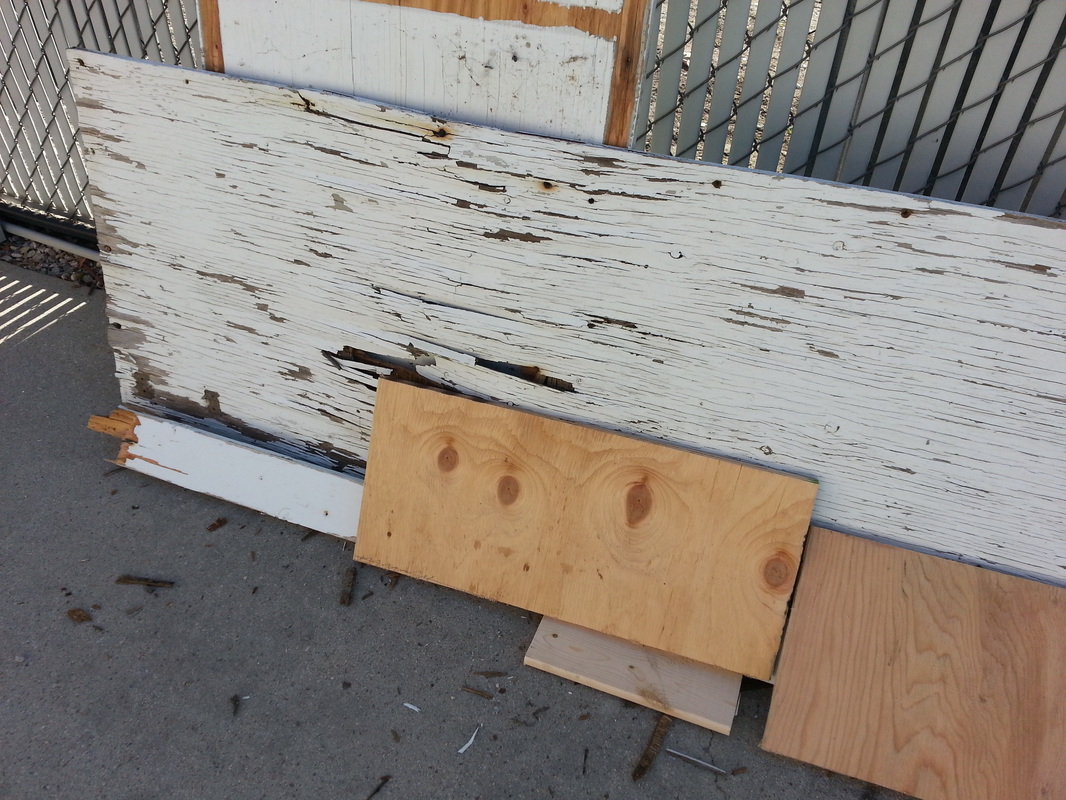
For years, Ang and I have asked why there is a draft around the door and why the south side of the kitchen/living room is always cold...even with the furnace on...now we know! :) Cody Wright just tells me to not worry about it...we'll get it fixed up right. In the meantime, I'll be looking for an old looking large board to put in above the window to make it look more authentic and possibly be knocking out one more rock to replace it with the board...won't be doing that until I'm ready! ha ha
Cody and I went and picked up the scaffolding so I can go up the sides now. So the next steps are to get a dumpster and start picking up the rubble, put up the scaffolding, and do the rest one side at a time....it's coming along! One fear I have is removing around the window...we're still very much in a rainy season and I don't want to create more of a problem...
I started working above and around the door on a ladder because I didn't think it would be worth putting up the scaffolding with the overhead porch. When I was getting the fake brick off above the south window, I hit another hole. I guess what they did was put up a piece of angle iron to support above the window after they knocked out the rocks (because they were expanding the window size from the original) and then framed in the window without the rocks being placed back in. In doing so, they didn't put in any insulation. Then I was removing the brick above the door and hit another hole...the old door would have had a window above it. They took some old cardboard, placed it up there to hold the wire mesh and then put the brick stuff over the top...again, no insulation (other than the wasp nest...ha ha).
For years, Ang and I have asked why there is a draft around the door and why the south side of the kitchen/living room is always cold...even with the furnace on...now we know! :) Cody Wright just tells me to not worry about it...we'll get it fixed up right. In the meantime, I'll be looking for an old looking large board to put in above the window to make it look more authentic and possibly be knocking out one more rock to replace it with the board...won't be doing that until I'm ready! ha ha
Cody and I went and picked up the scaffolding so I can go up the sides now. So the next steps are to get a dumpster and start picking up the rubble, put up the scaffolding, and do the rest one side at a time....it's coming along! One fear I have is removing around the window...we're still very much in a rainy season and I don't want to create more of a problem...


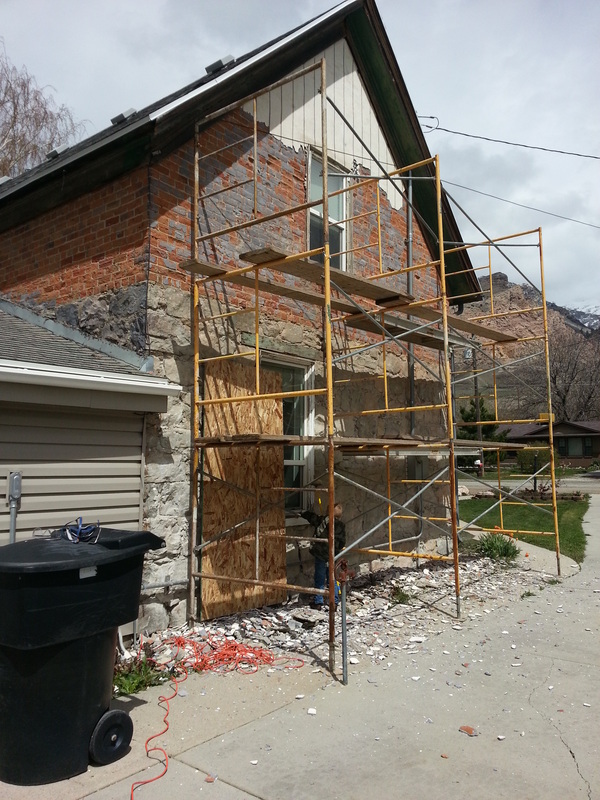
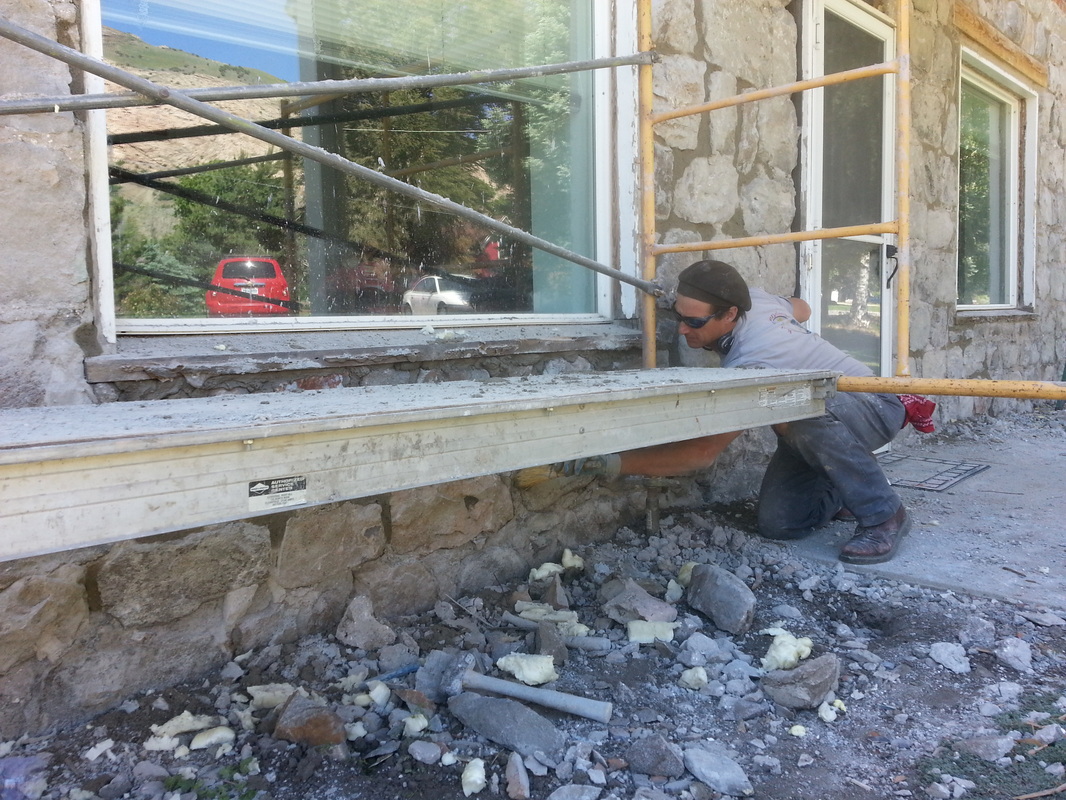
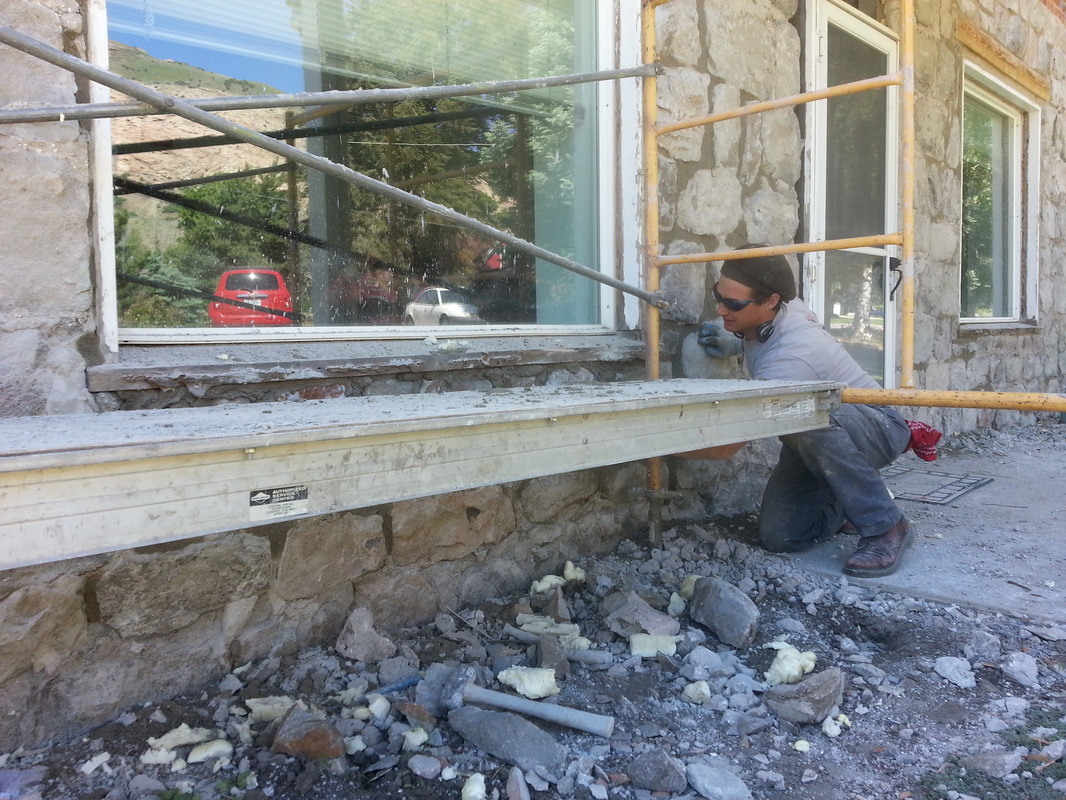
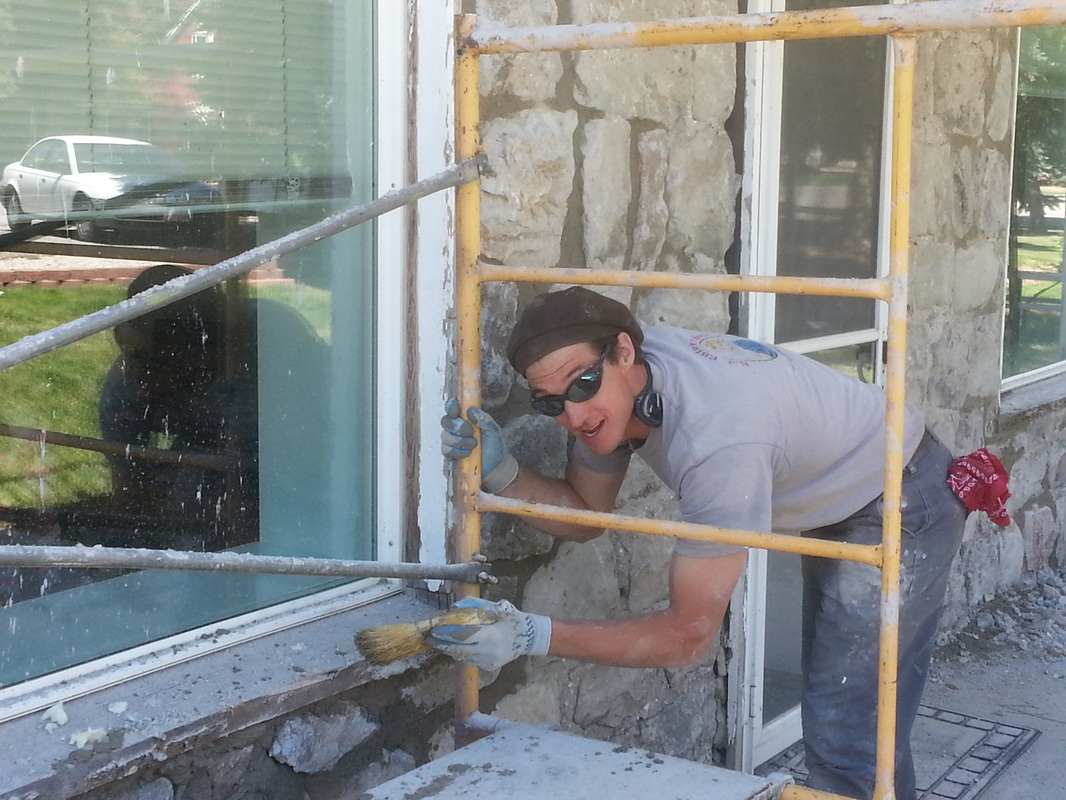
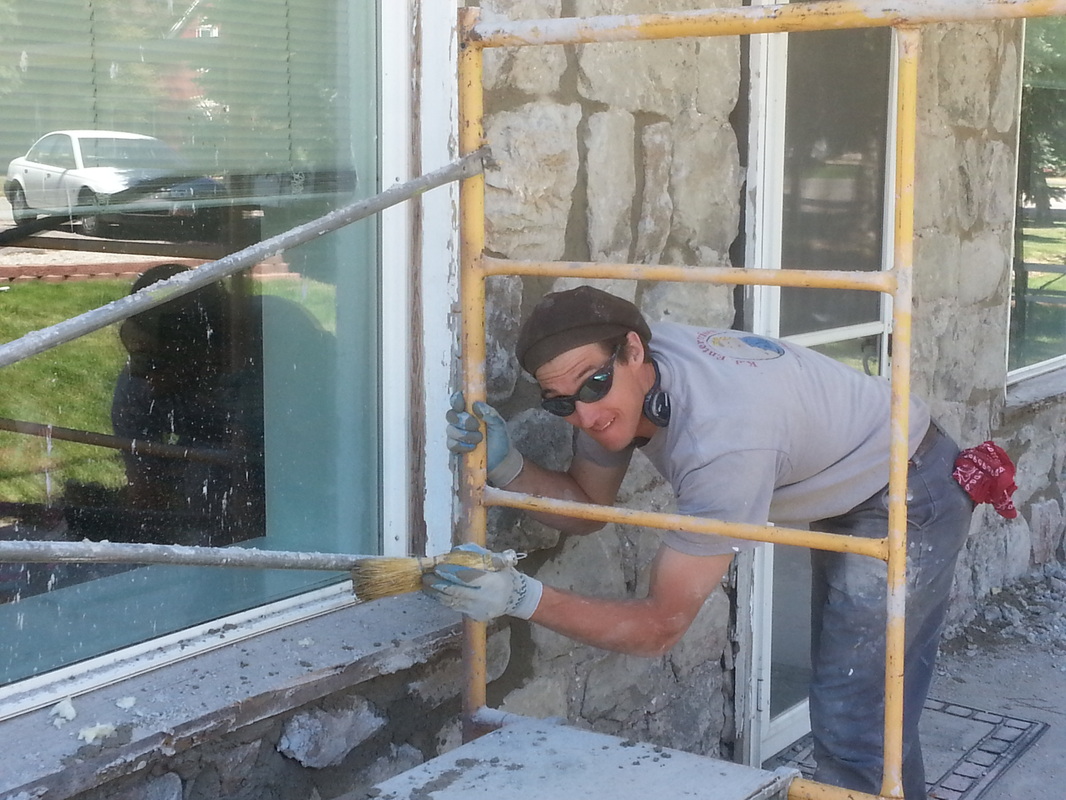
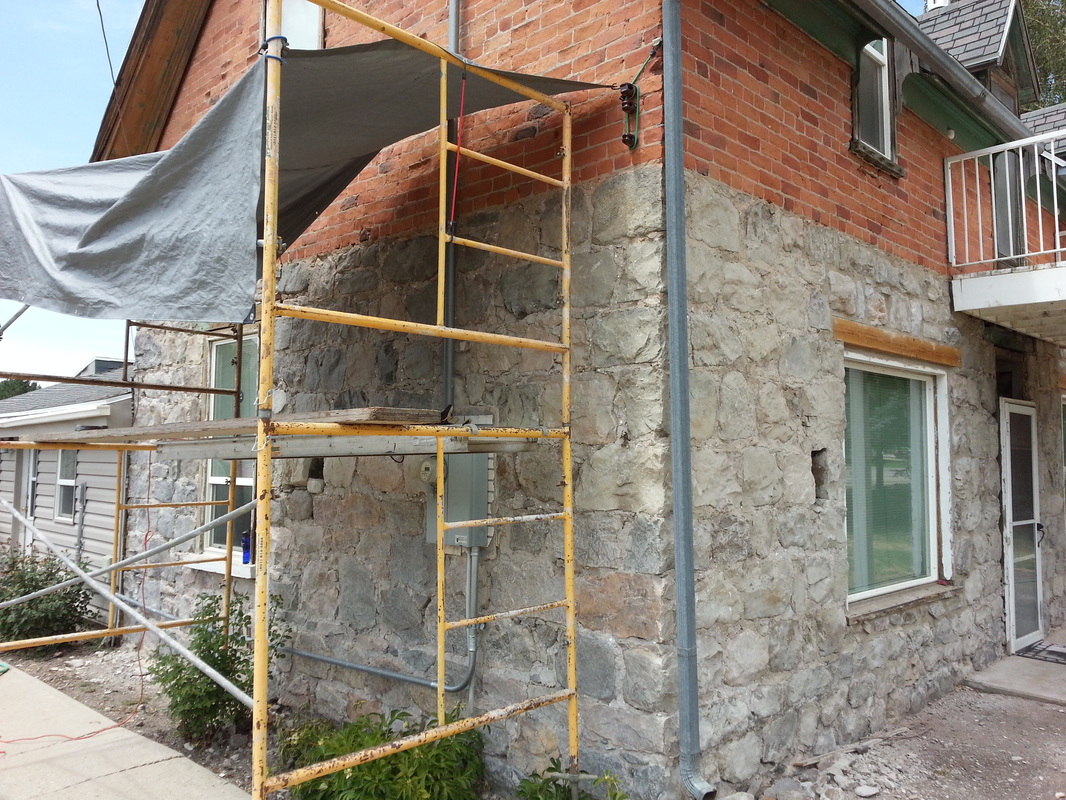
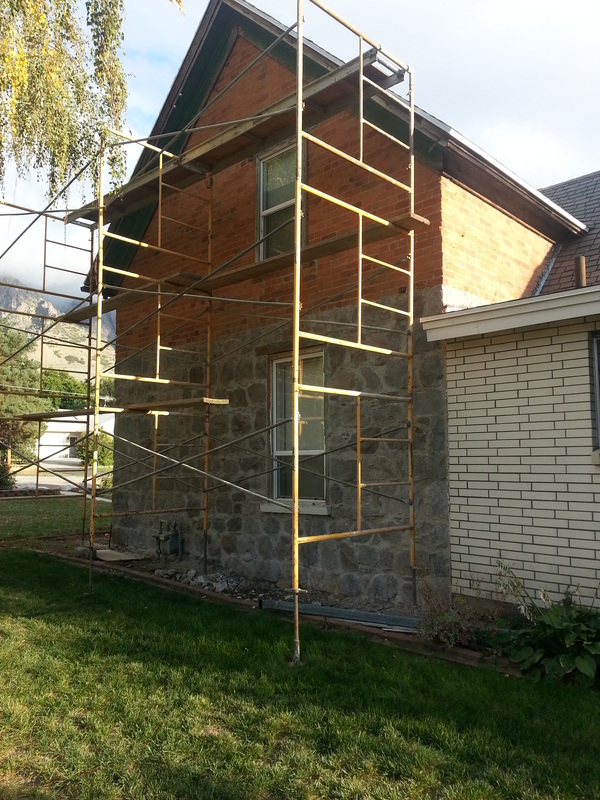
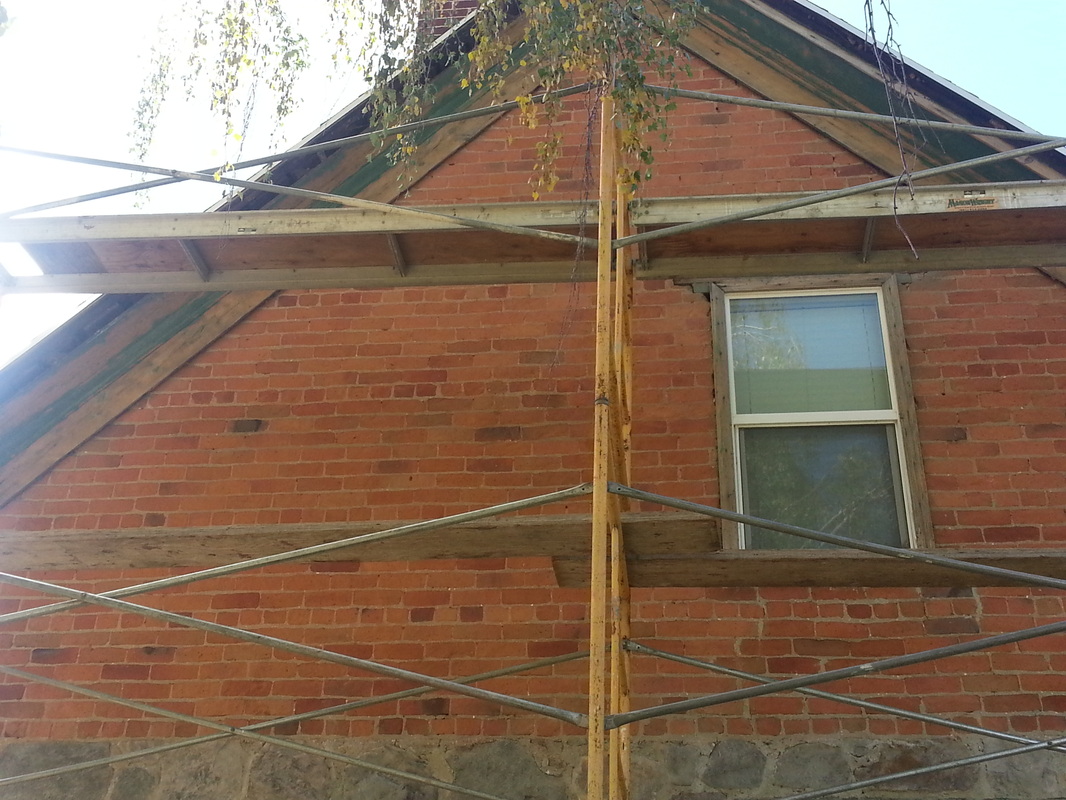
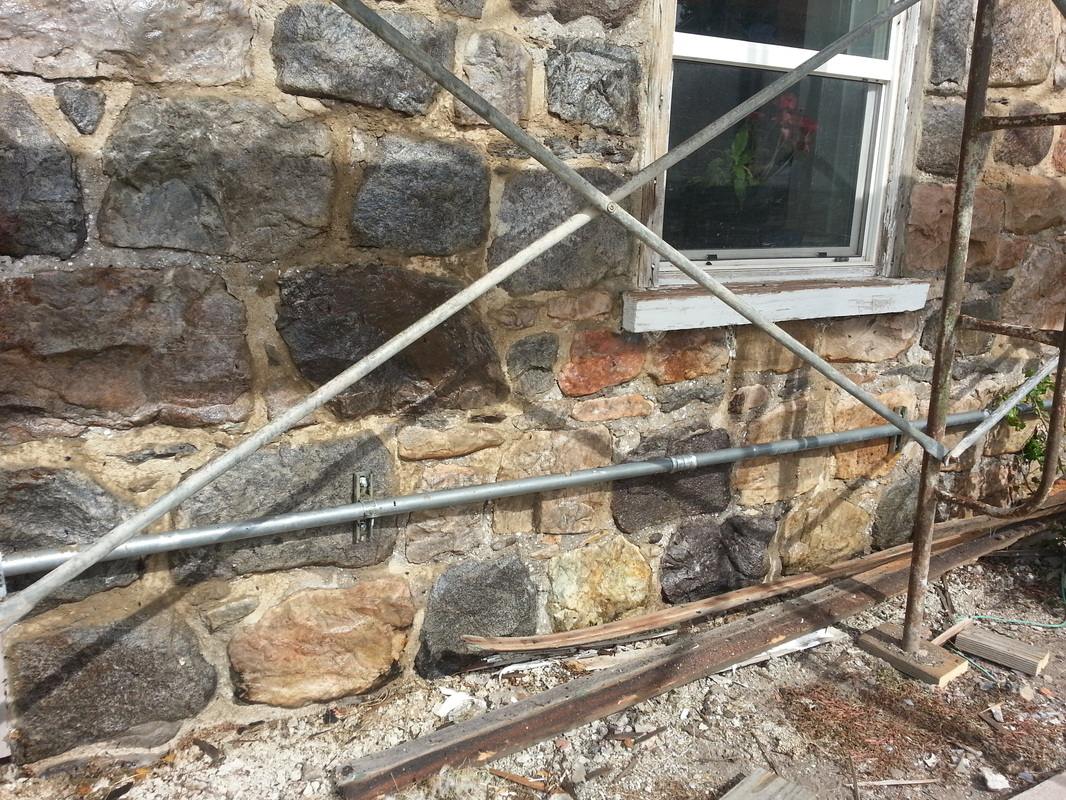
April 11, 2013
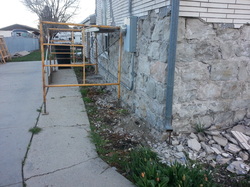
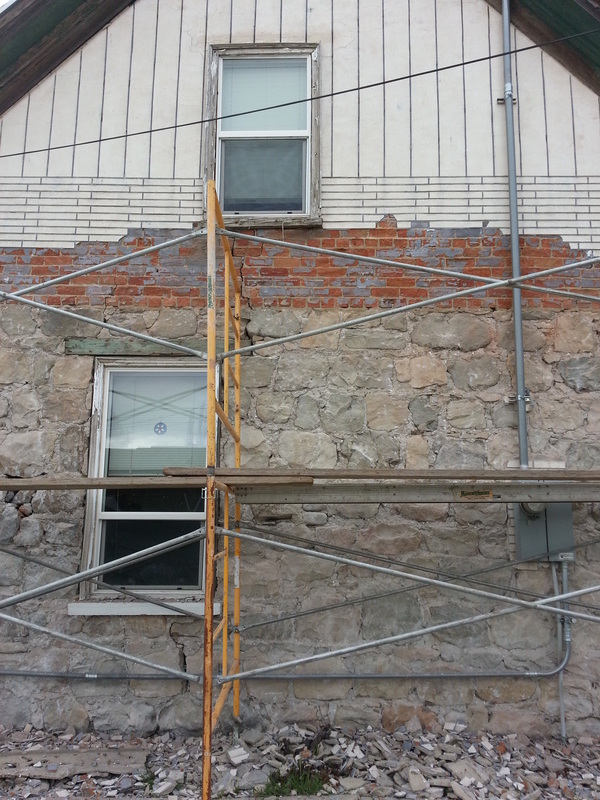
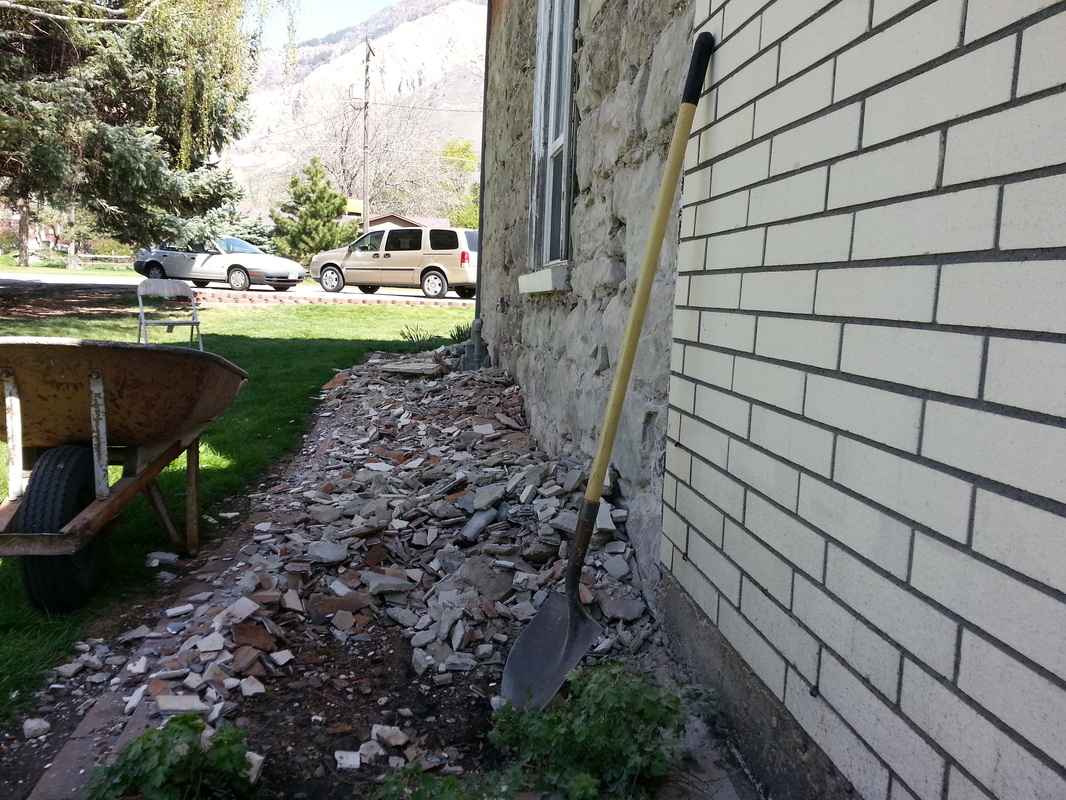
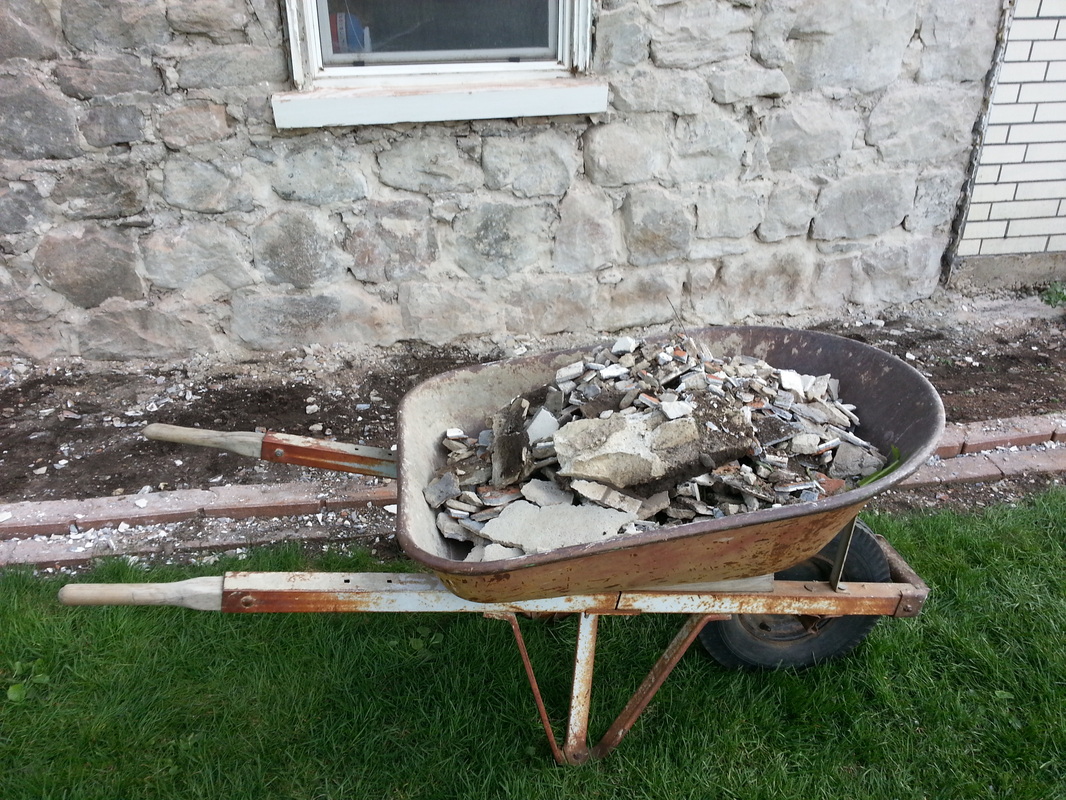
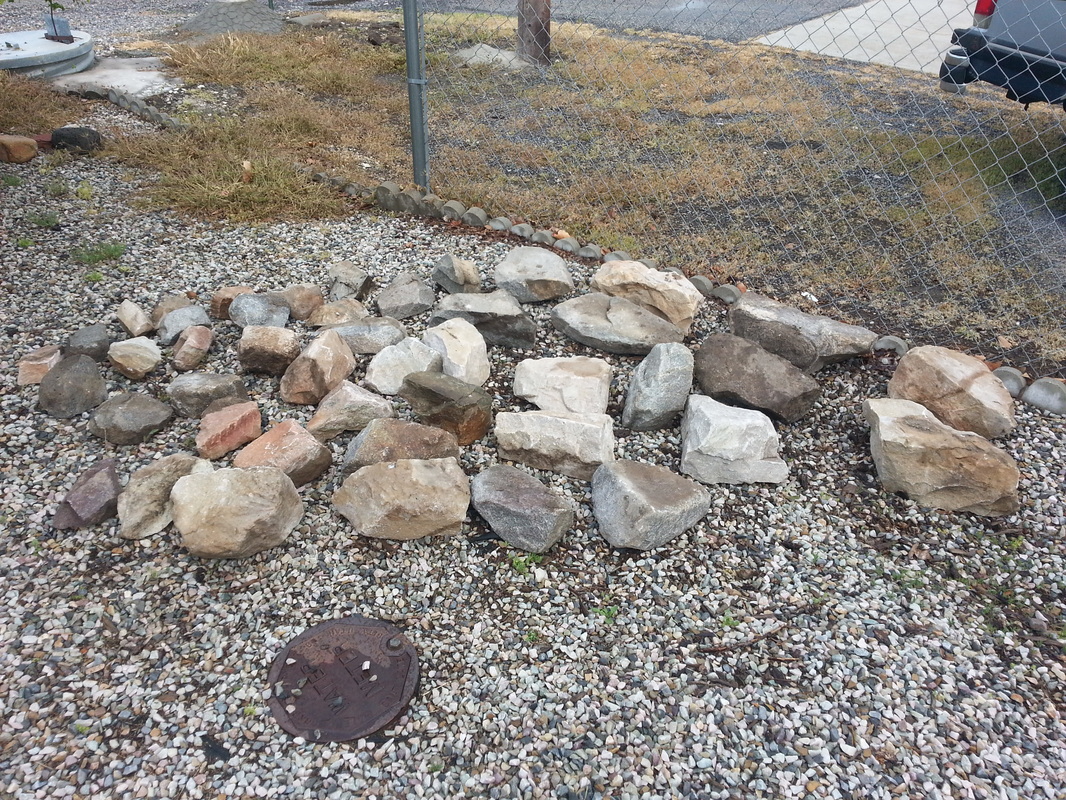
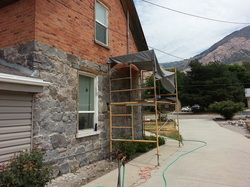
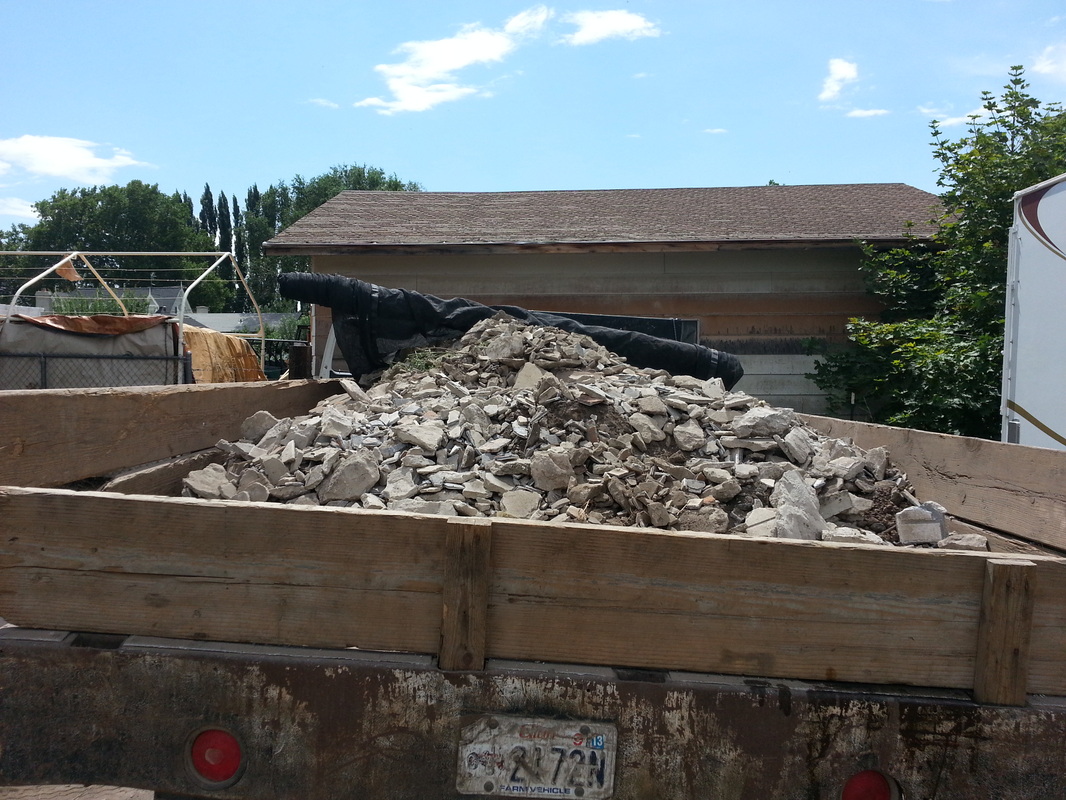
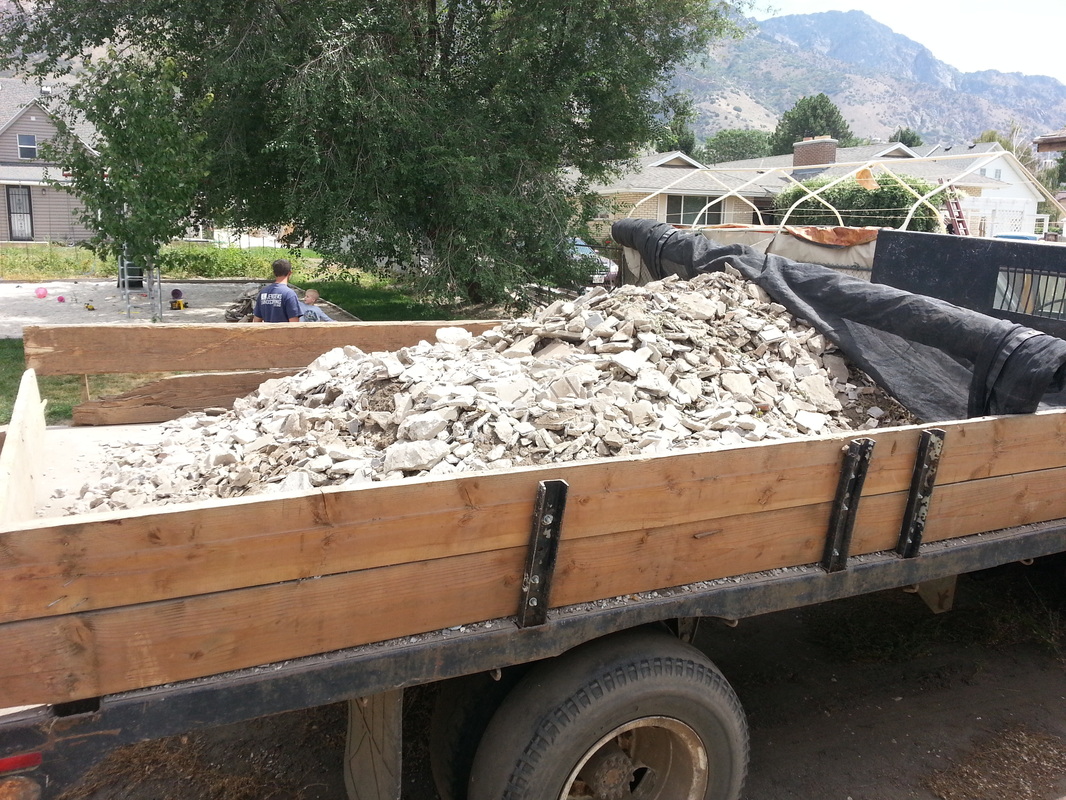
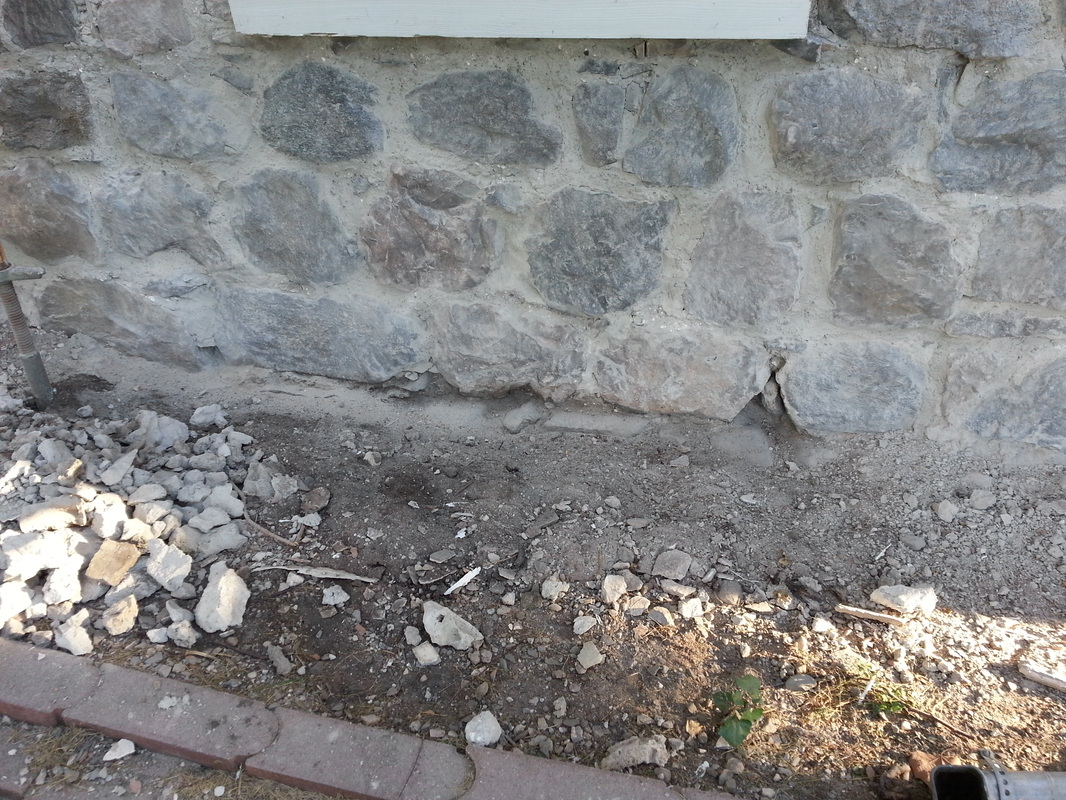
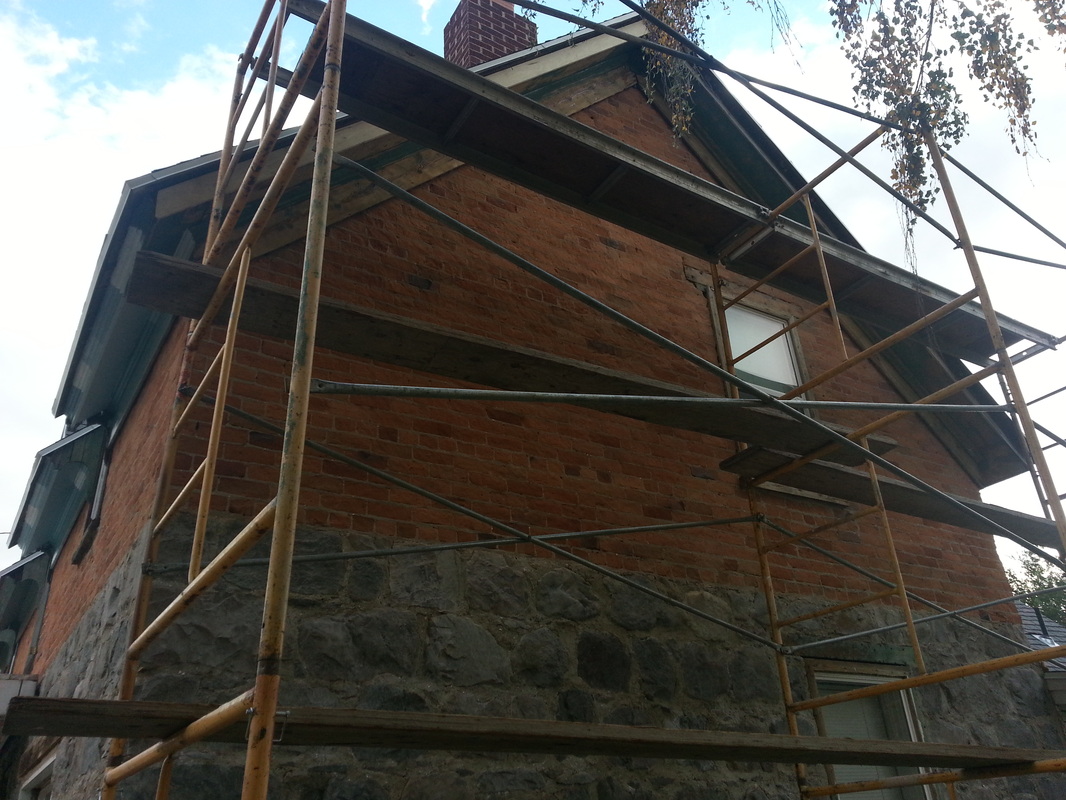
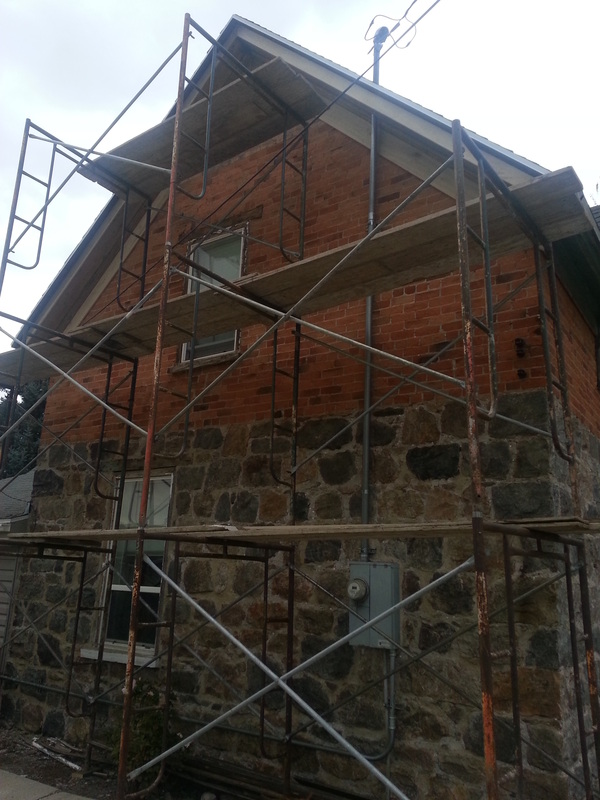
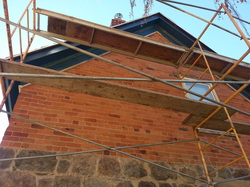
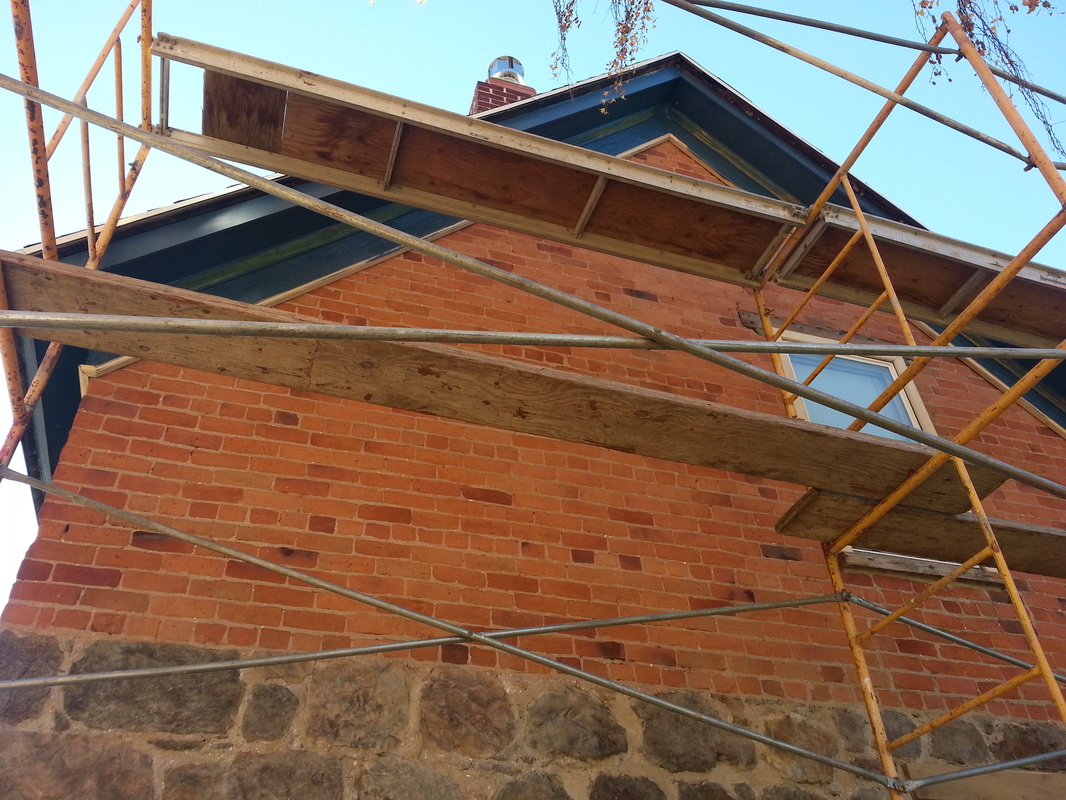
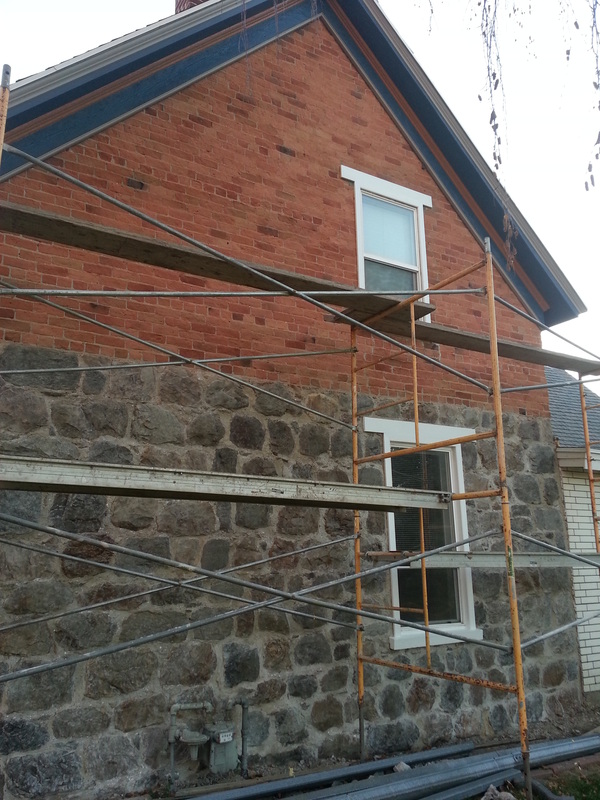
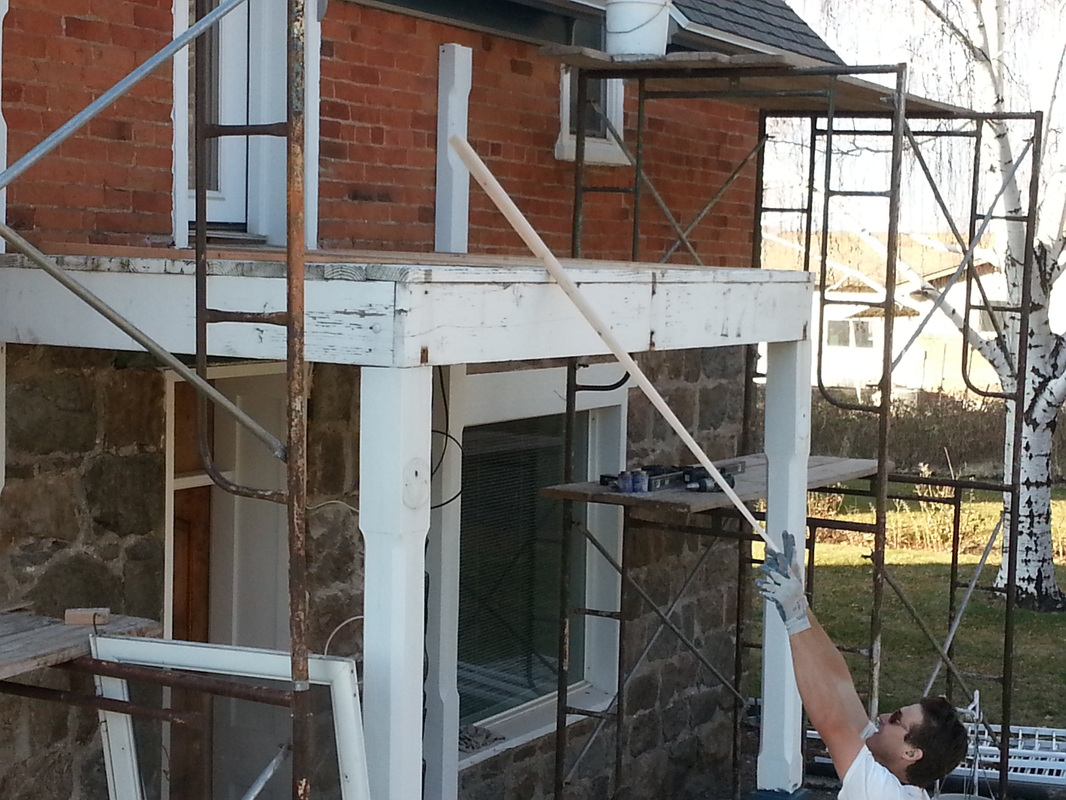
Today I set up some scaffolding...I first had to pick up all the debris on the south side so I could put the legs down...I then also cut down all the growing plants/bushes (mostly the rose bushes). I'm not hoping they die, but neither am I holding my breath because they are going to get buried under all the fake brick. The pile of debris is 7 wheelbarrow loads.


April 13, 2013
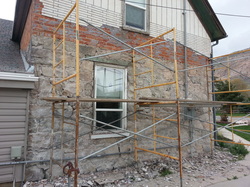
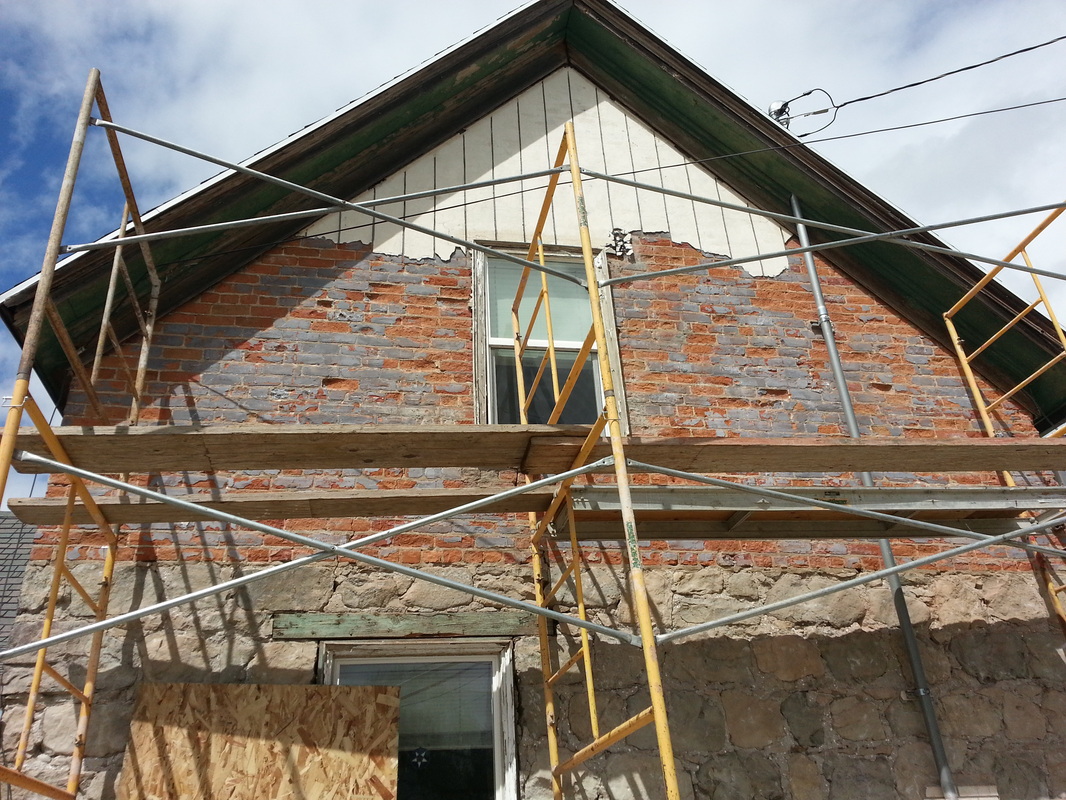
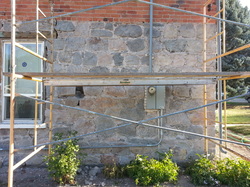
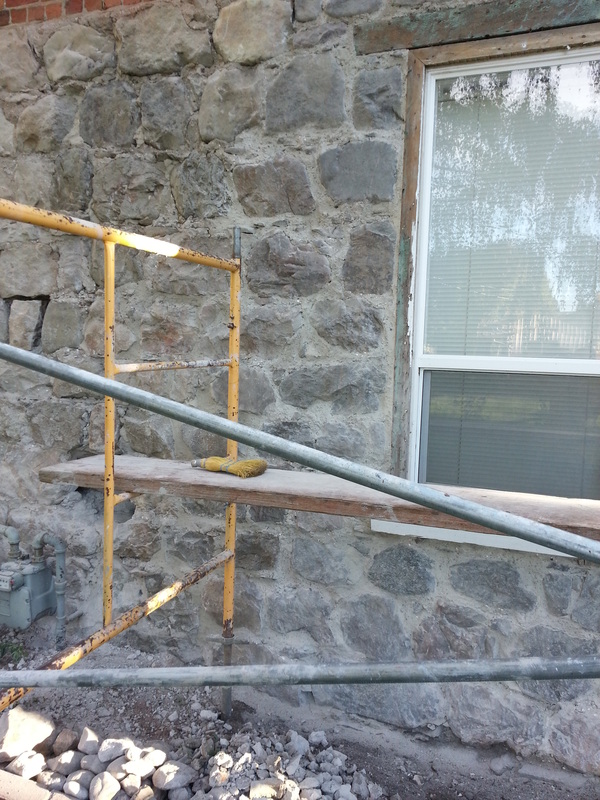
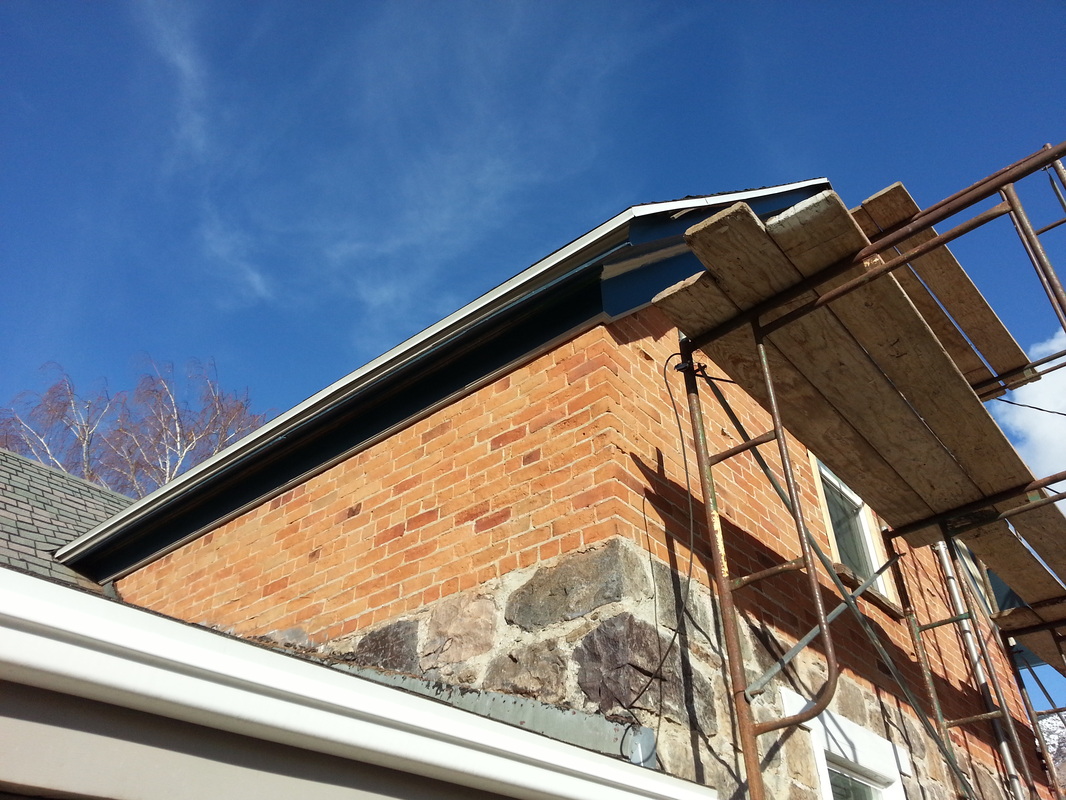
Today, I reached the next "head high" level on the scaffolding. First, I put up another level of scaffolding and the boards to go along with it. Then I made sure the scaffolding was as level as I could make it...I think it looks good for a first-timer and by myself. :)
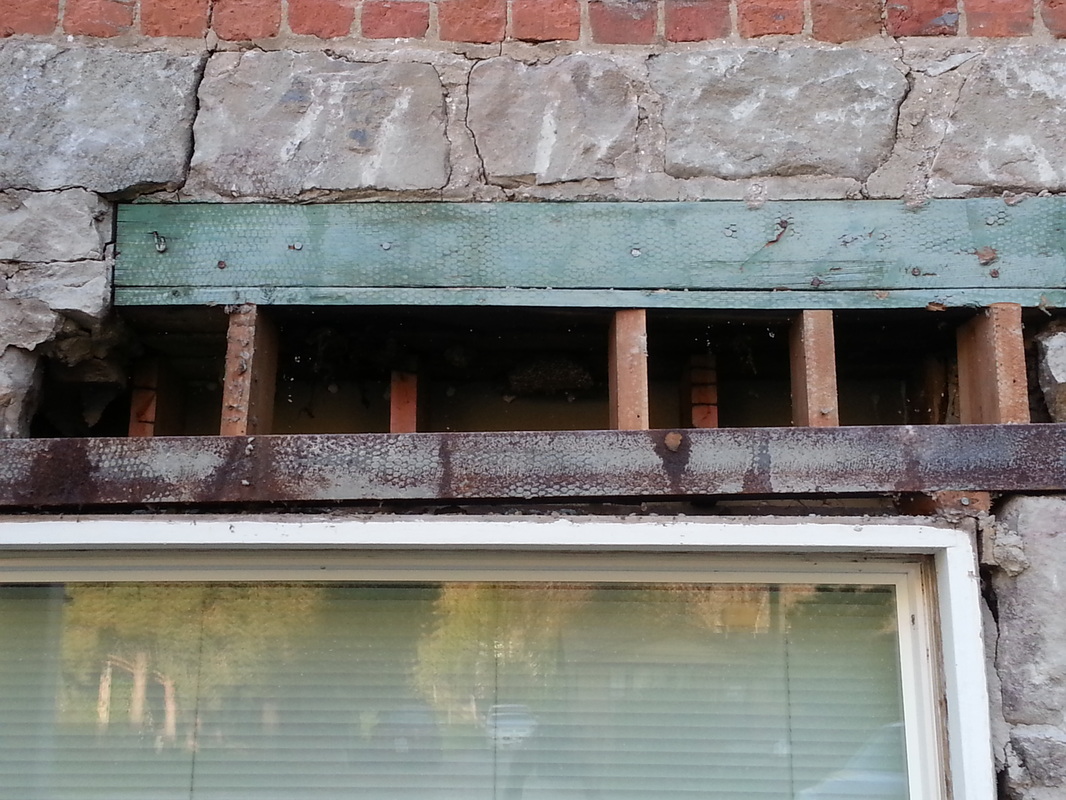
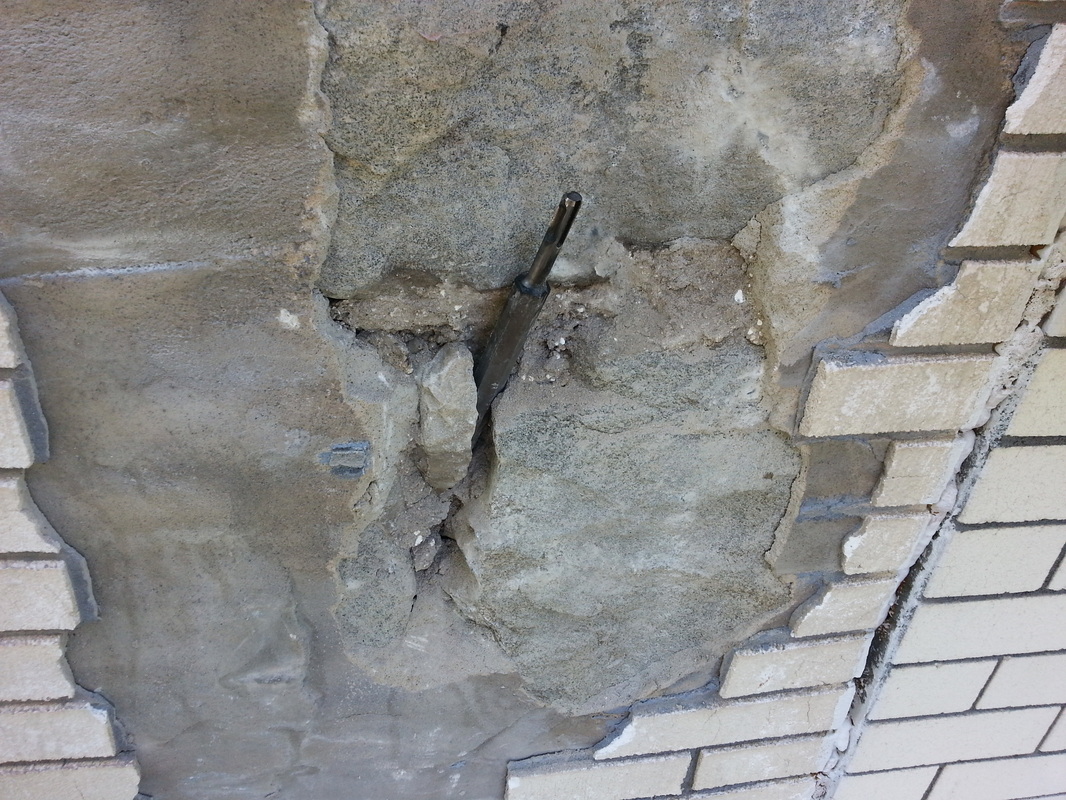
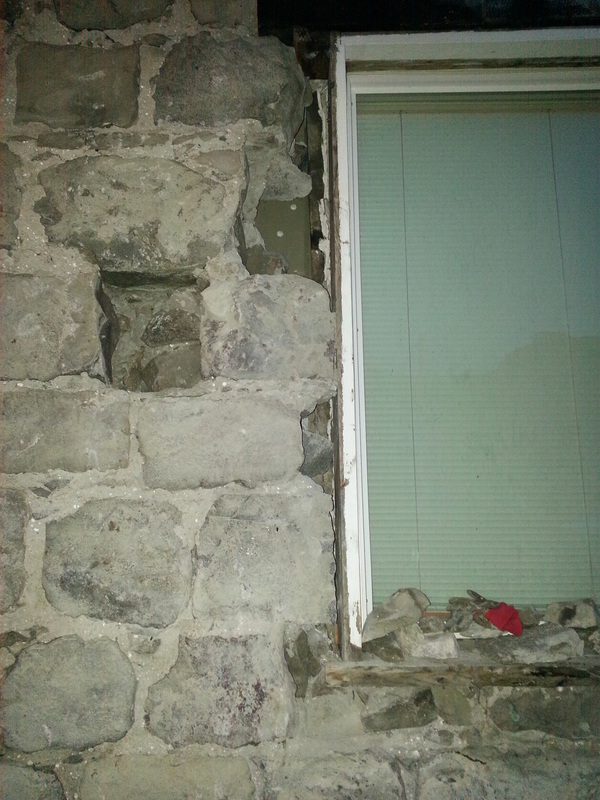
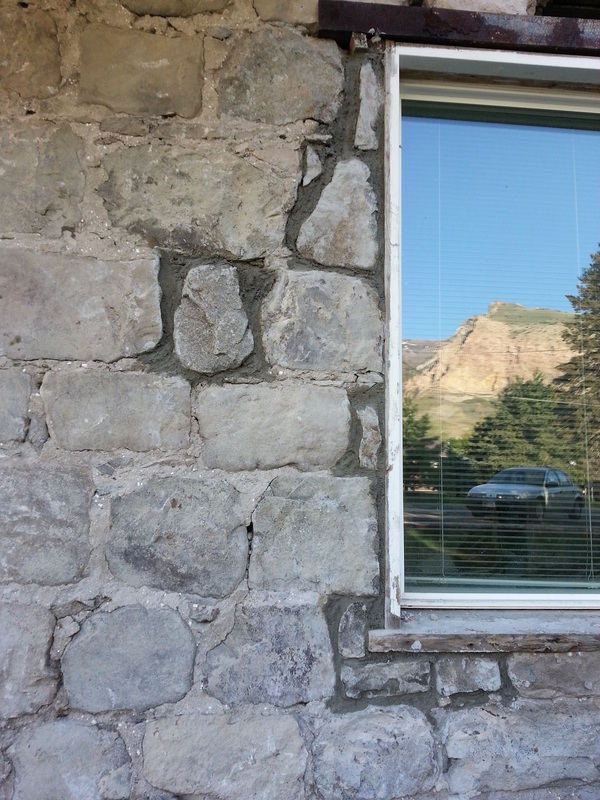
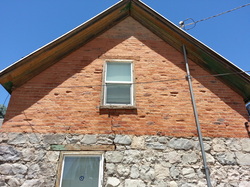
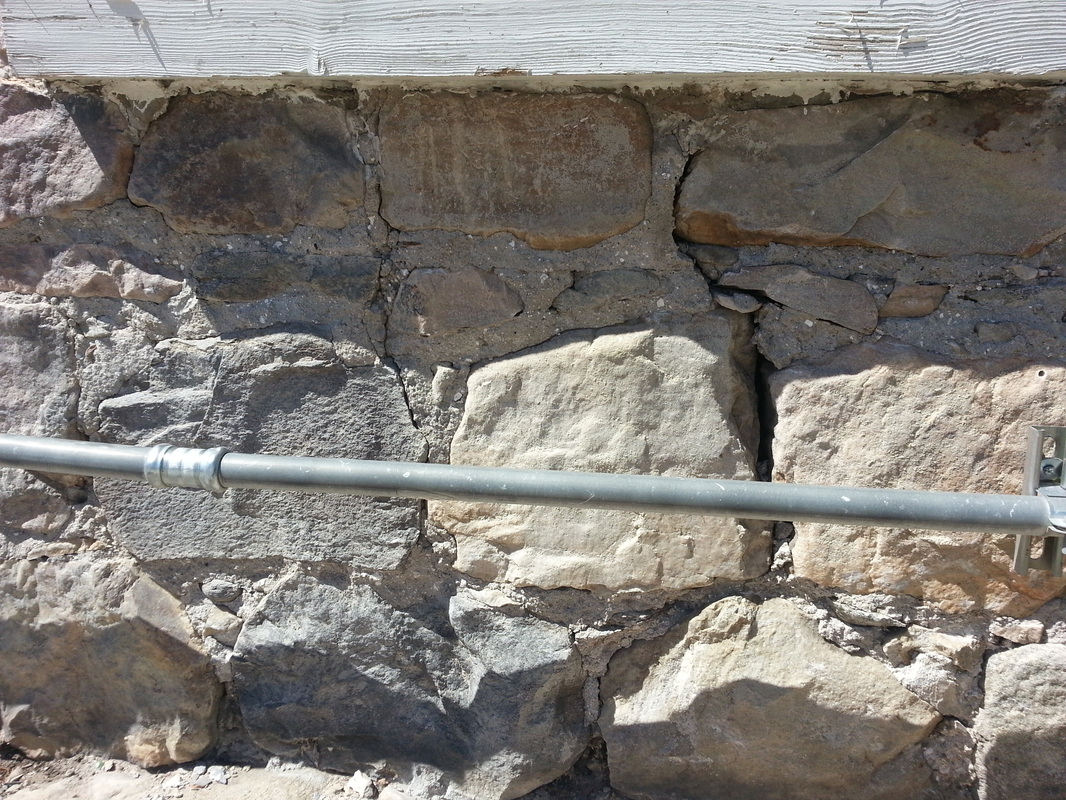
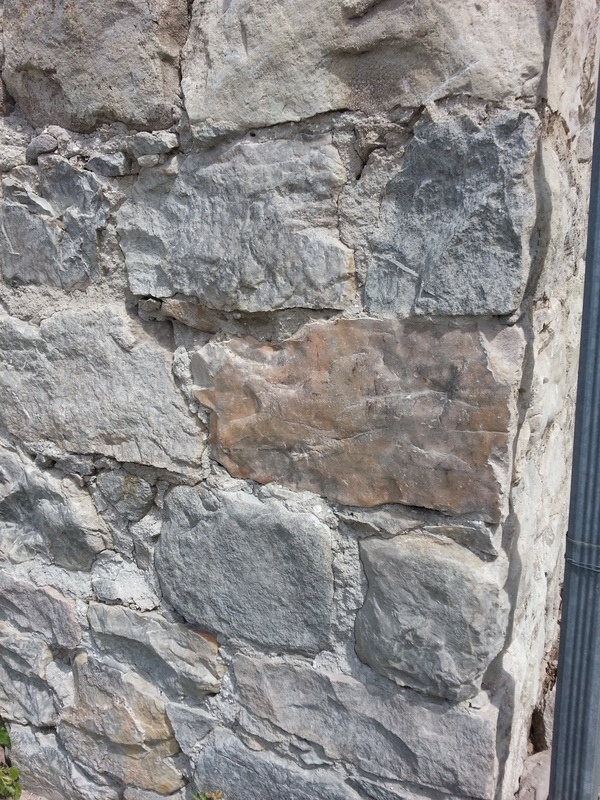
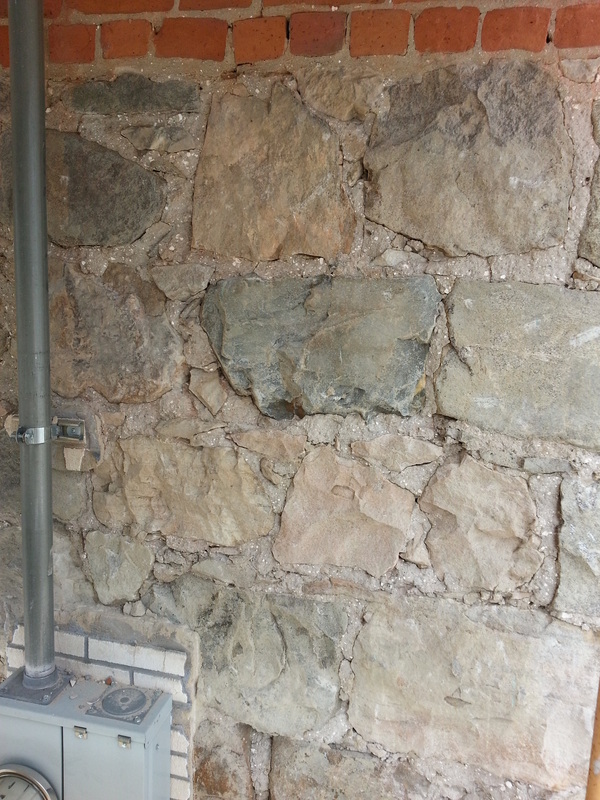
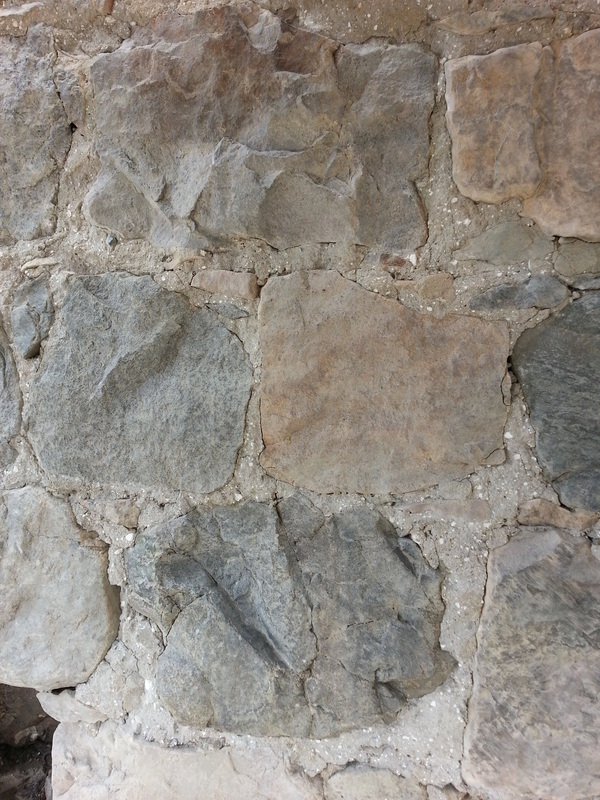
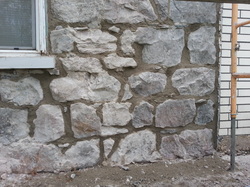
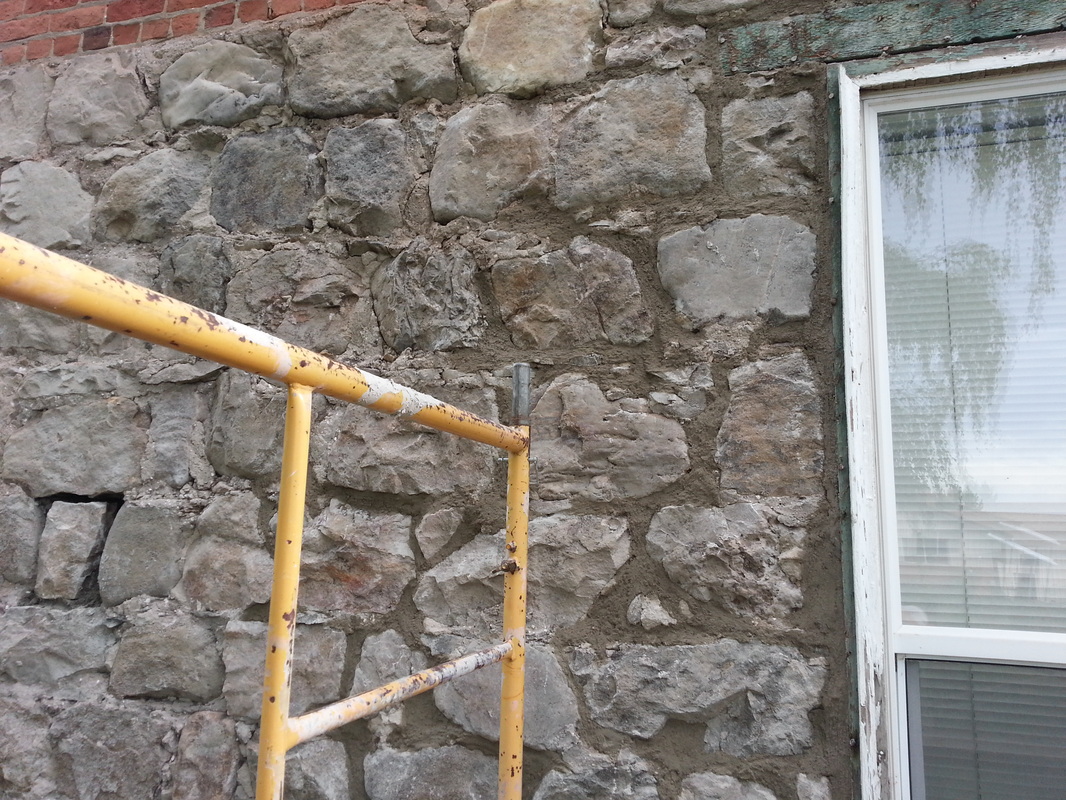
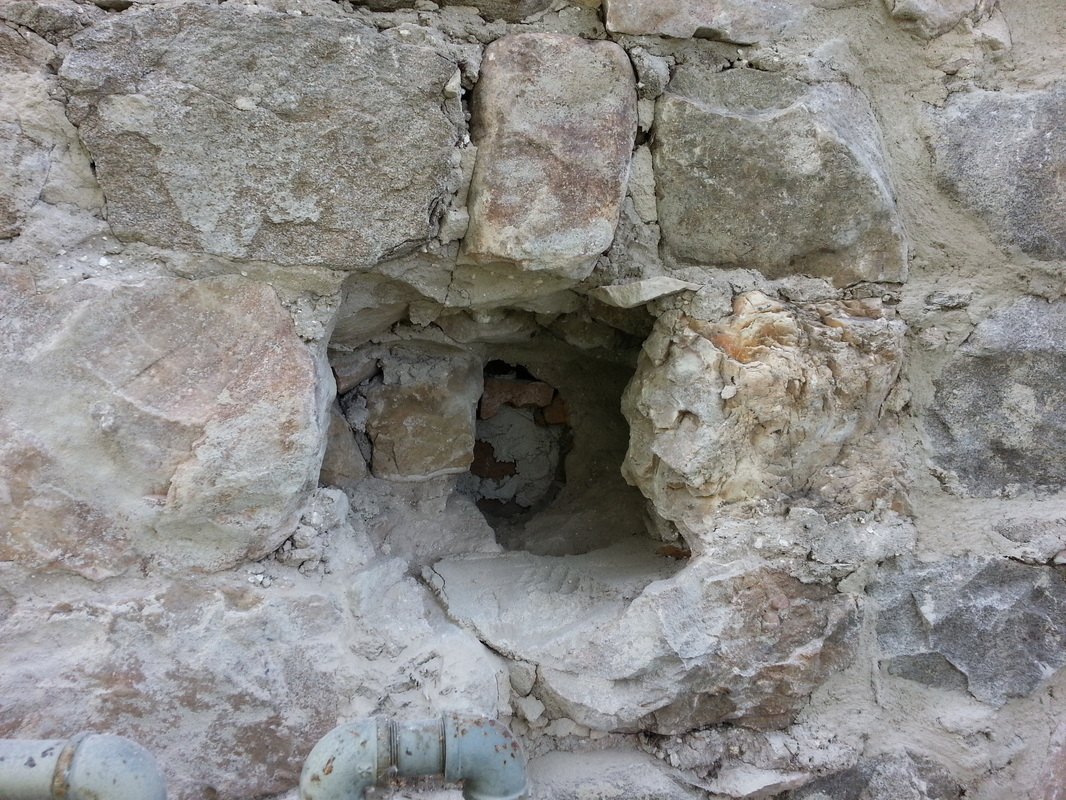
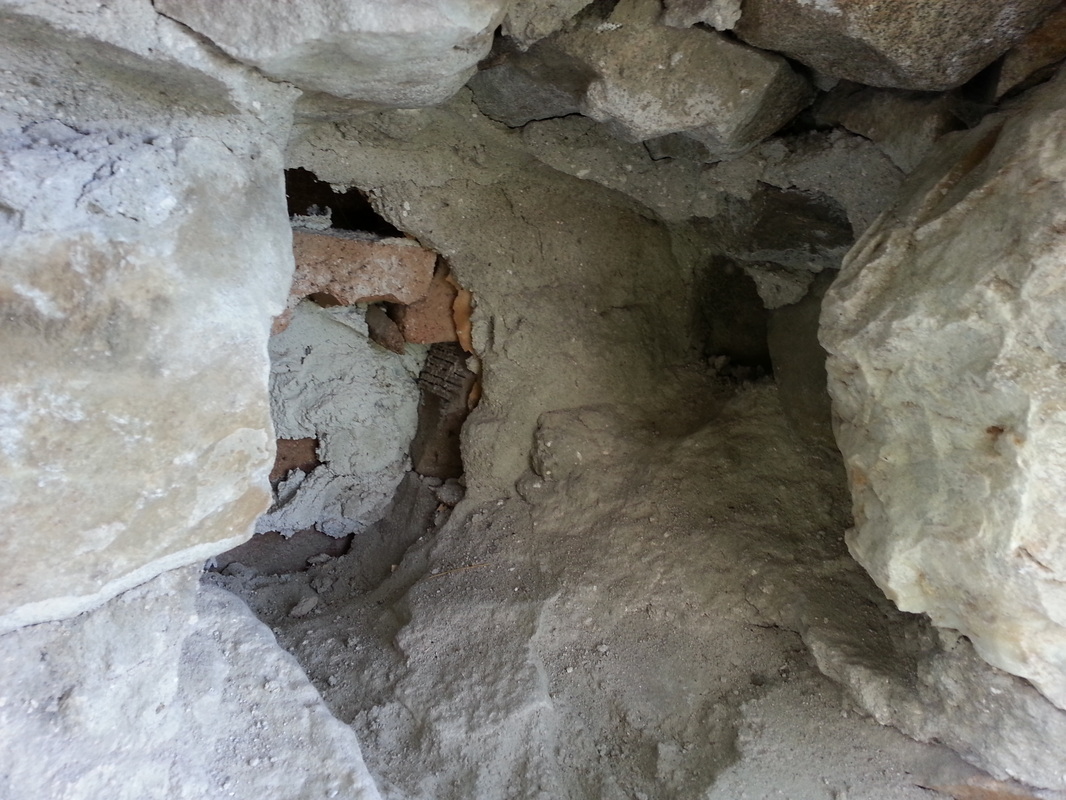
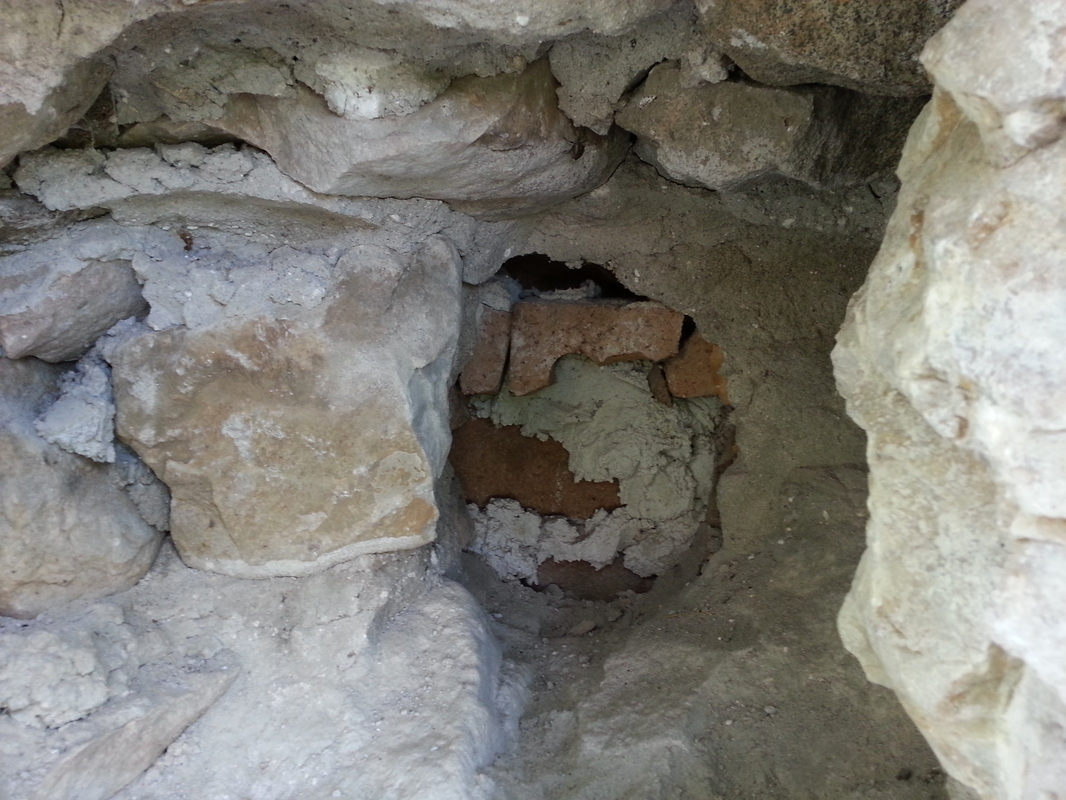
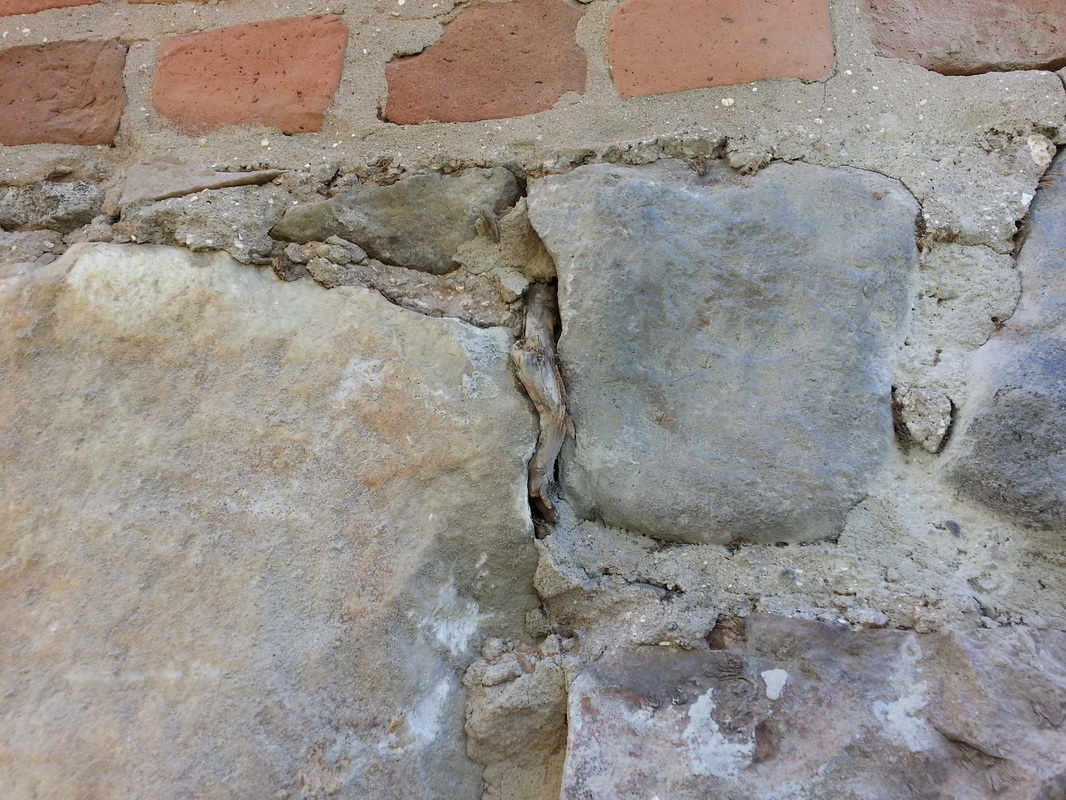
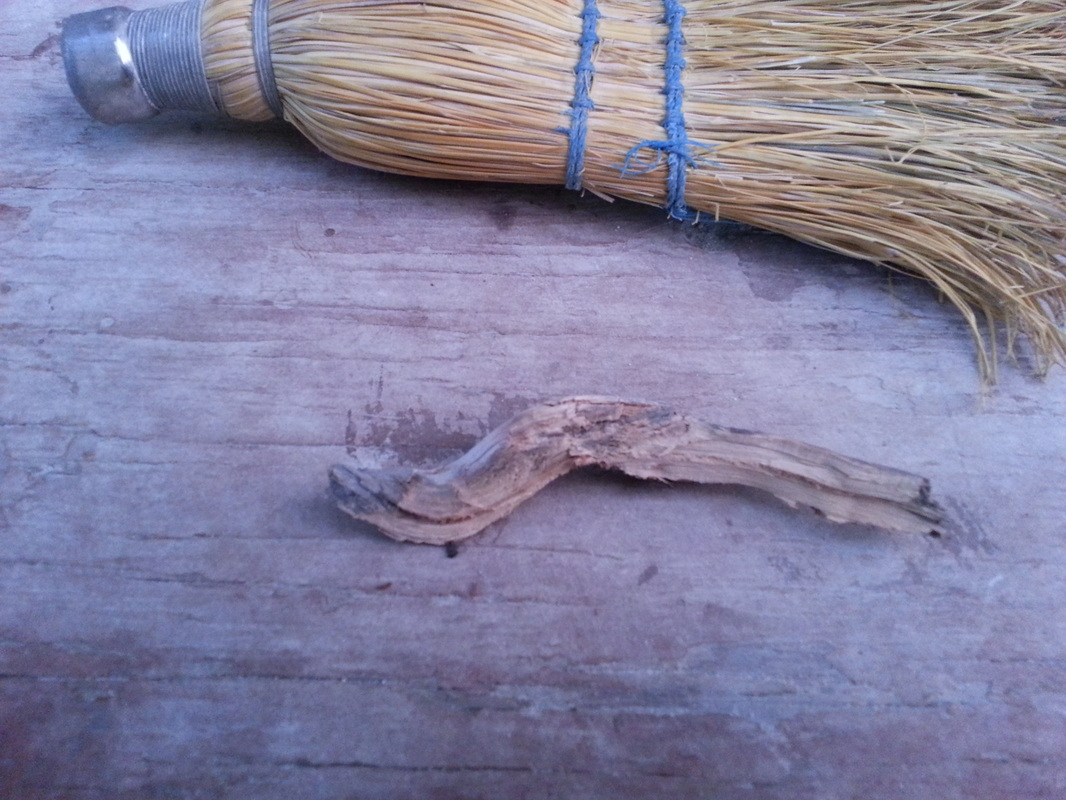
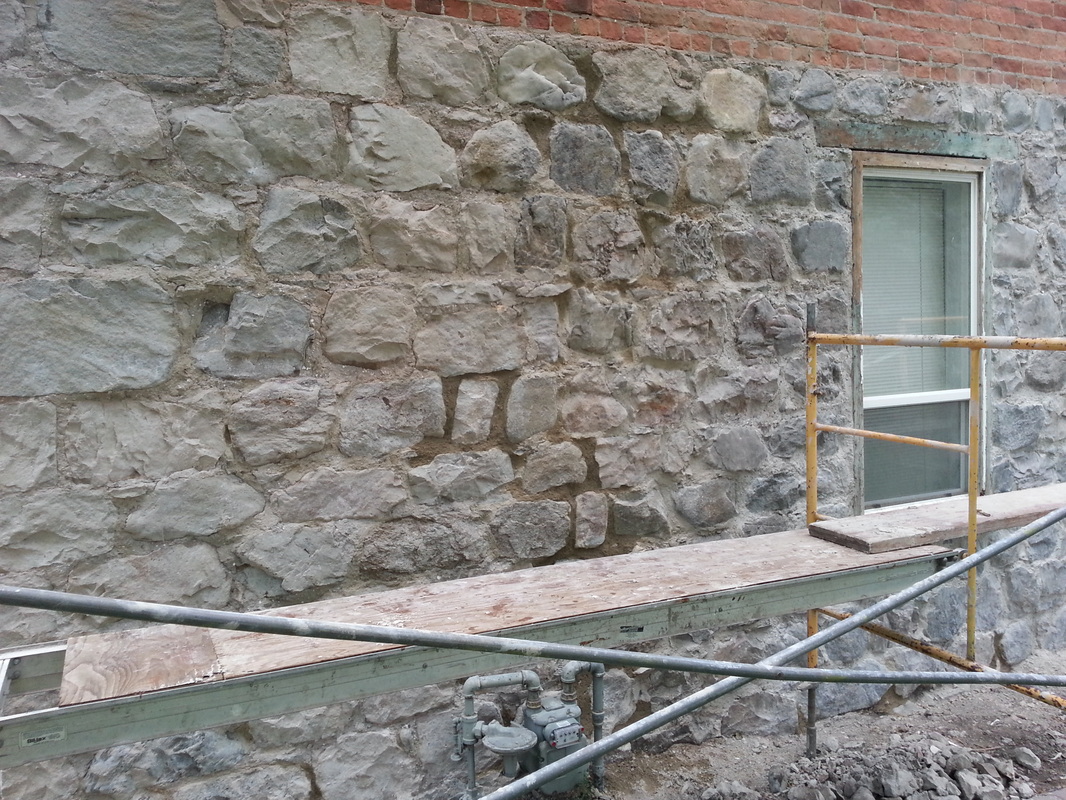
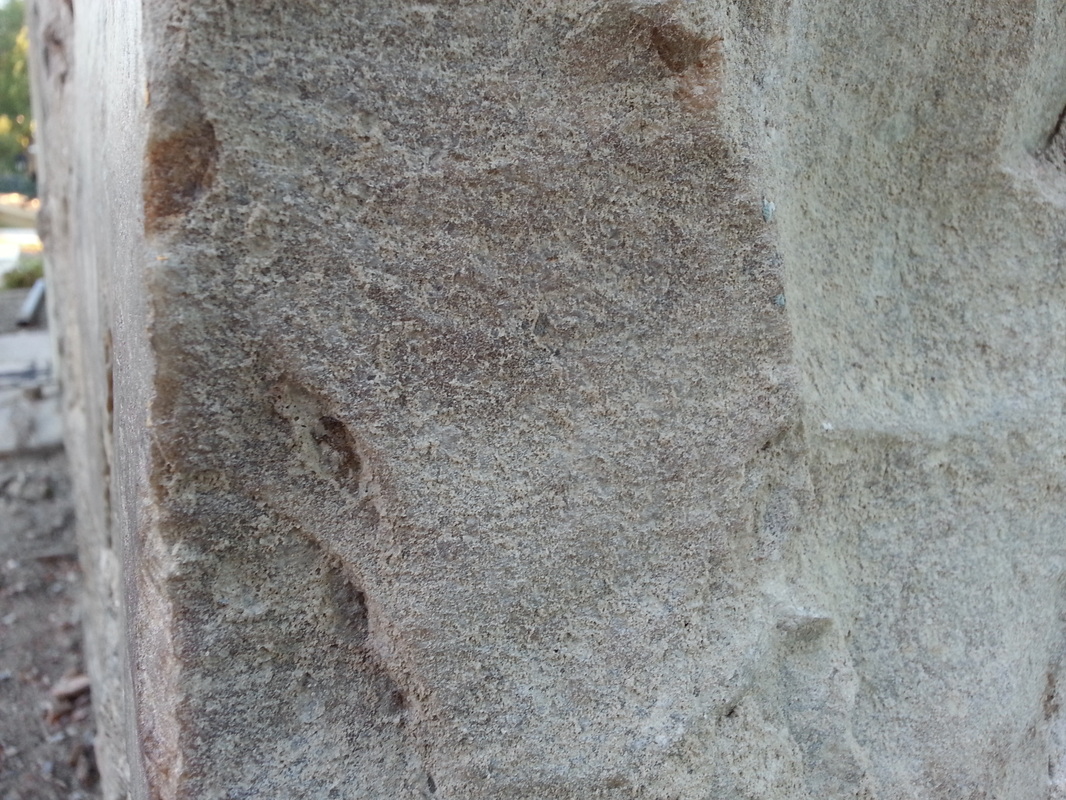
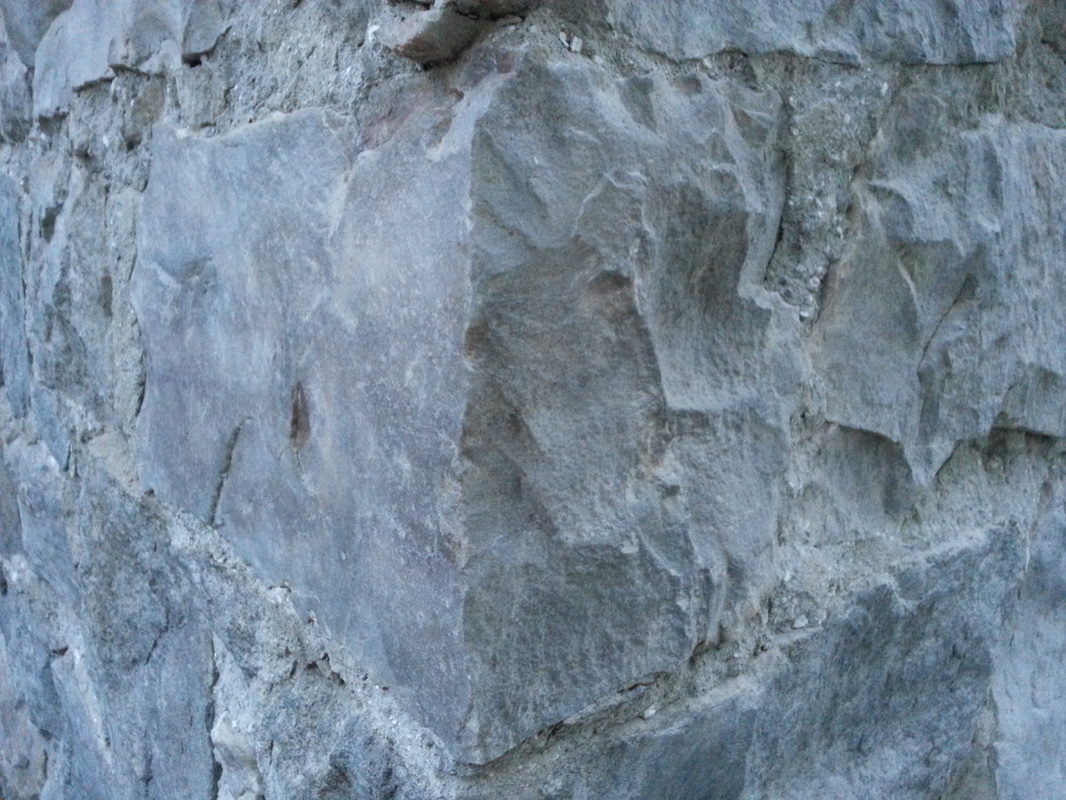
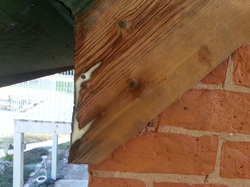
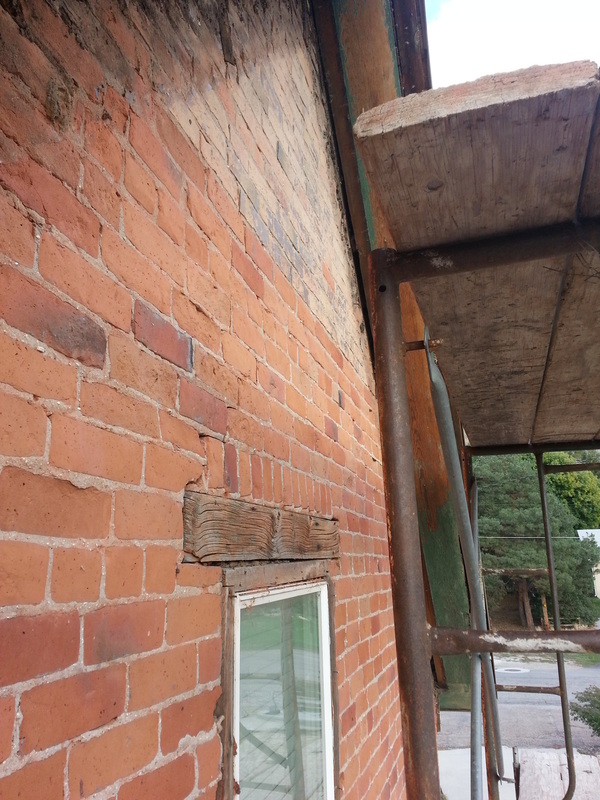
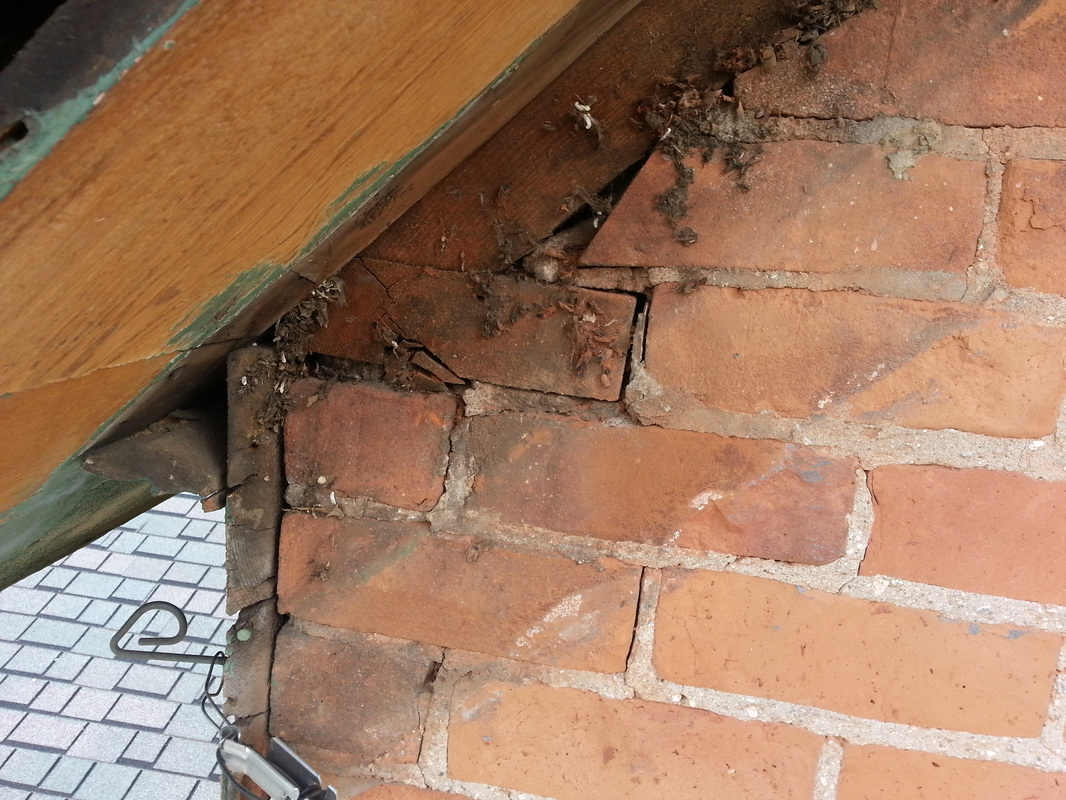
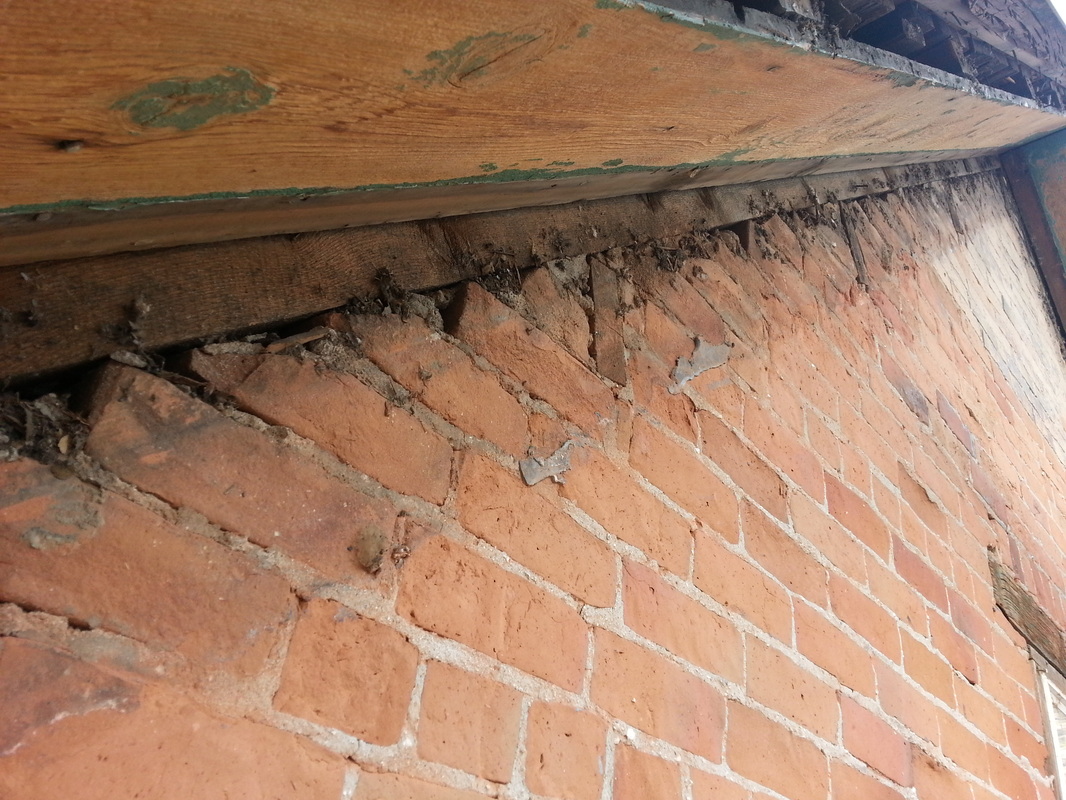
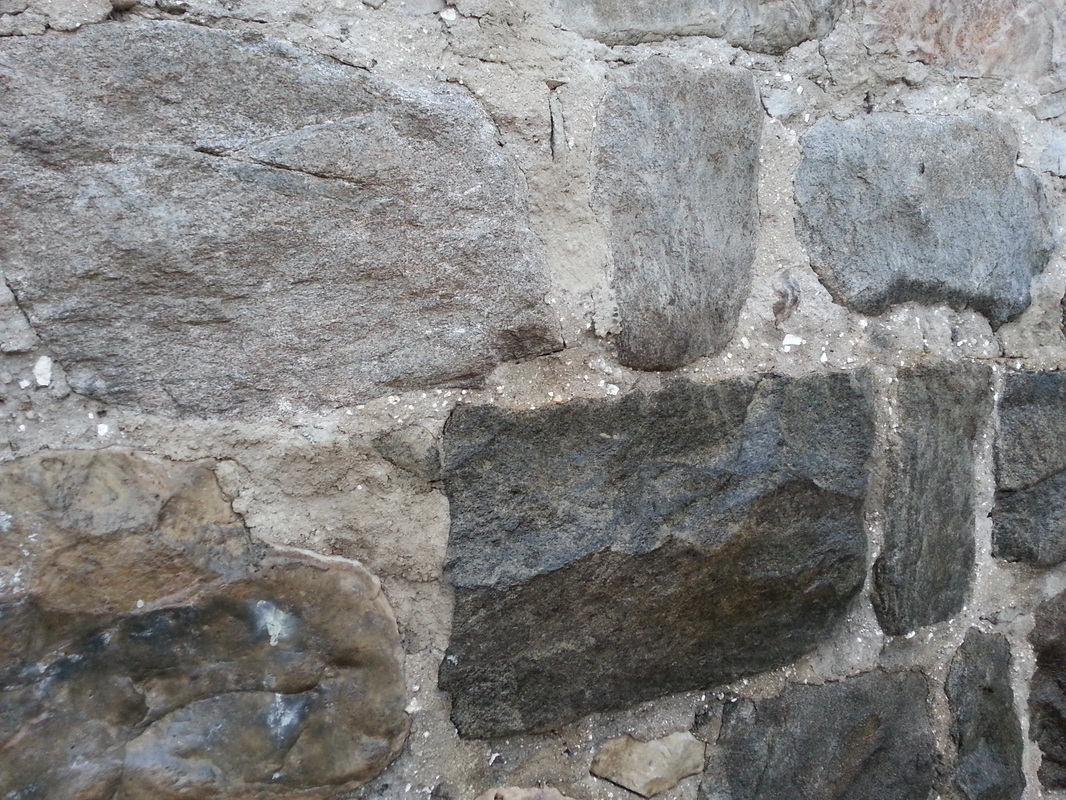
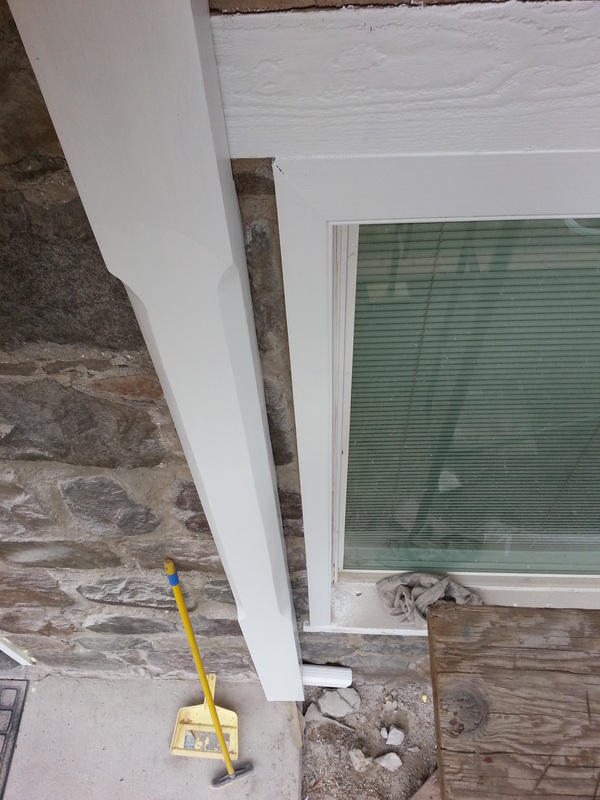
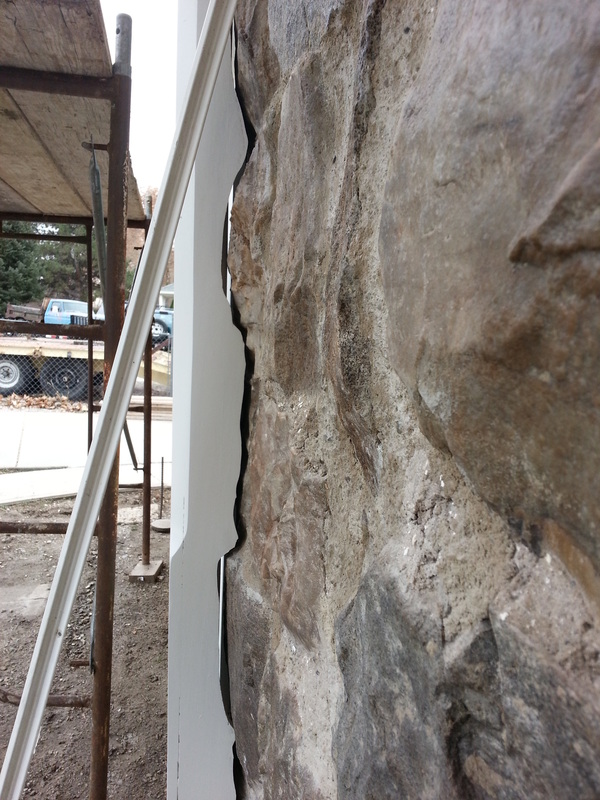
I found another hole in knocking the fake brick off...west of the south-side window (see pictures) and a couple of large cracks in the brick/rock. The other issue that I'm running into is the cement isn't coming off the brick as easy as I was hoping it would. I'm contemplating how I will take this off...grinder, sand paper, wire brush, old brick?? The last thing I want to do is destroy a brick, but I would like to bring out the color of the brick (not a gray cement layer). :) We'll see...
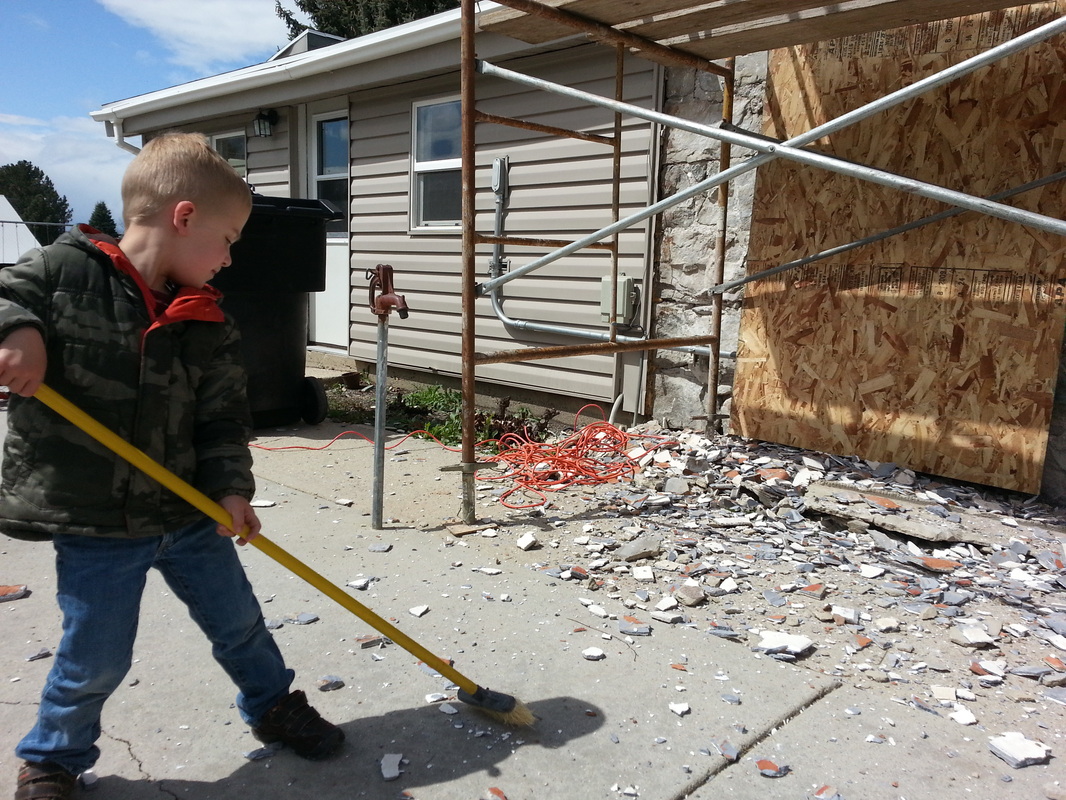
Also, Addi was given a consequence today for some bad action (don't want to make it an issue in this type of setting), so let's just say she wasn't a perfect angel today (normally she is... :))...anyway, her "punishment" was to go out and help me. She cleaned up the debris by the front door. Good job, Addi...now to get them to WANT to help me!!! :) ha ha
I found another hole in knocking the fake brick off...west of the south-side window (see pictures) and a couple of large cracks in the brick/rock. The other issue that I'm running into is the cement isn't coming off the brick as easy as I was hoping it would. I'm contemplating how I will take this off...grinder, sand paper, wire brush, old brick?? The last thing I want to do is destroy a brick, but I would like to bring out the color of the brick (not a gray cement layer). :) We'll see...
Also, Addi was given a consequence today for some bad action (don't want to make it an issue in this type of setting), so let's just say she wasn't a perfect angel today (normally she is... :))...anyway, her "punishment" was to go out and help me. She cleaned up the debris by the front door. Good job, Addi...now to get them to WANT to help me!!! :) ha ha
April 20, 2013
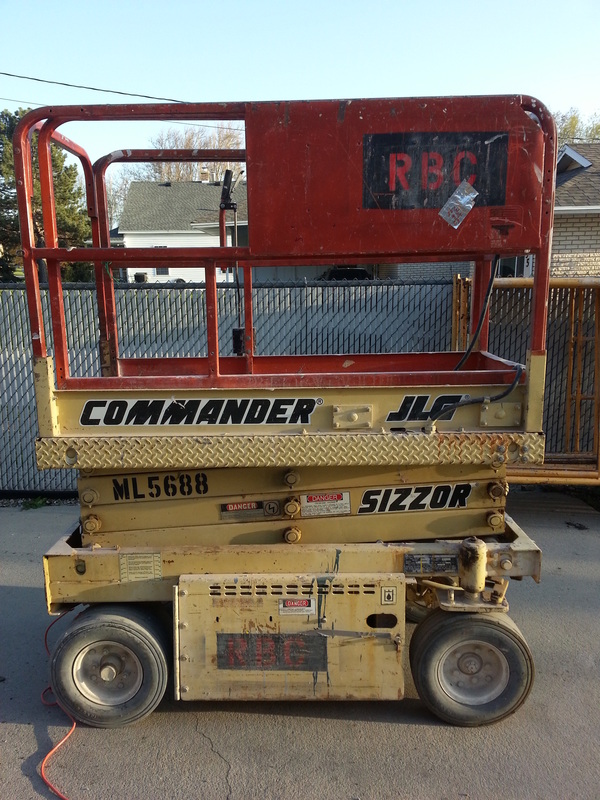
It was raining off and on today so the scaffolding was a bit slippery, but I was able to put on an additional layer of scaffolding and when the sun came out in the late morning/early afternoon I was on it! I was able to get the next layer off (as high as I could reach). Chase came out and "helped" clean up. :) Also, I was speaking with Robert Beebe (also on the city council with me) and he told me to come pick up his lift to do the job. I think I will. :)
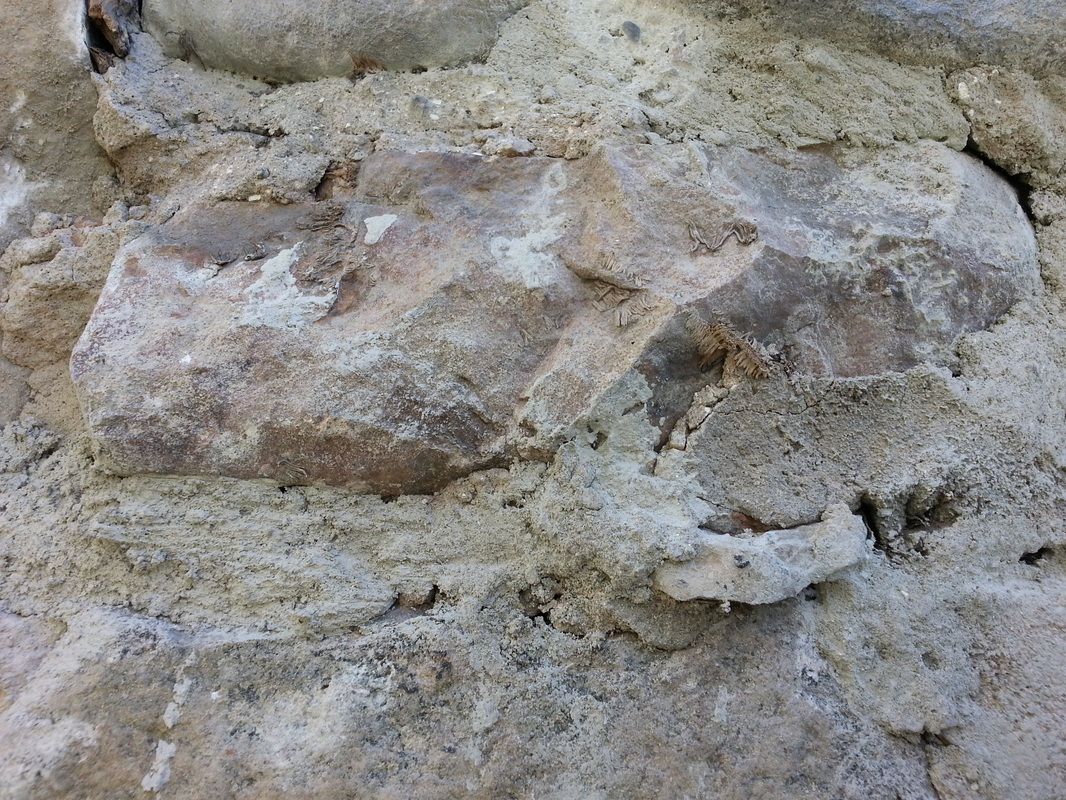
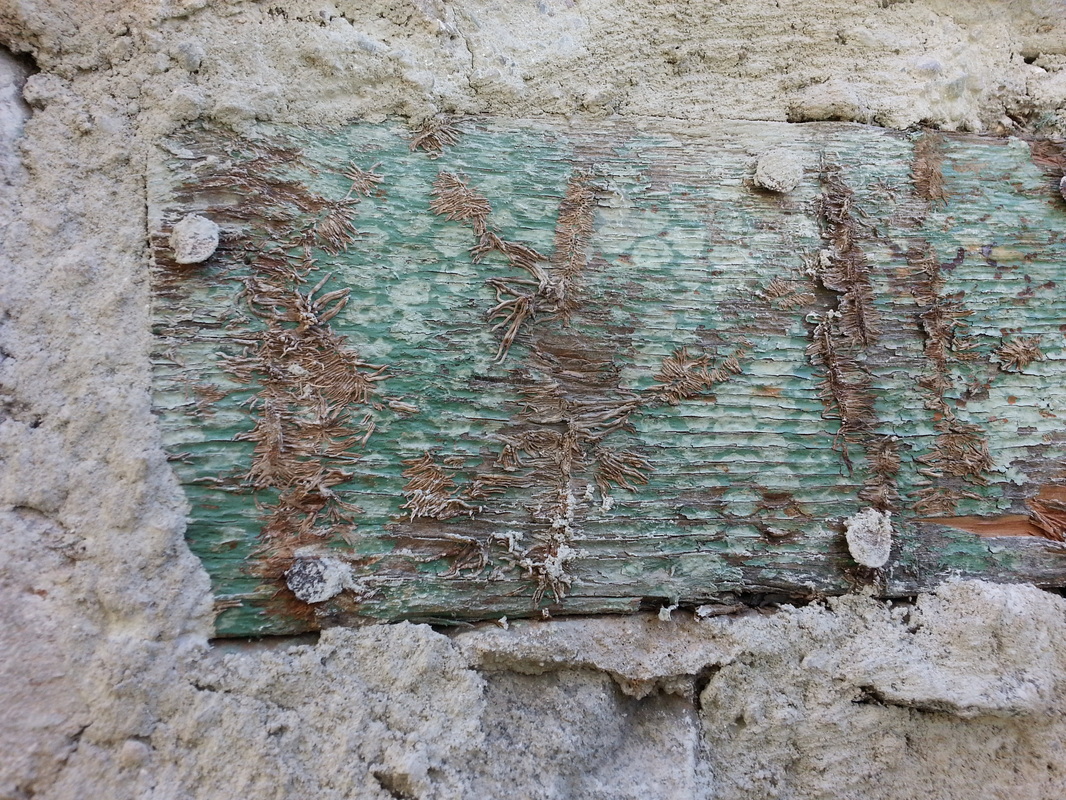
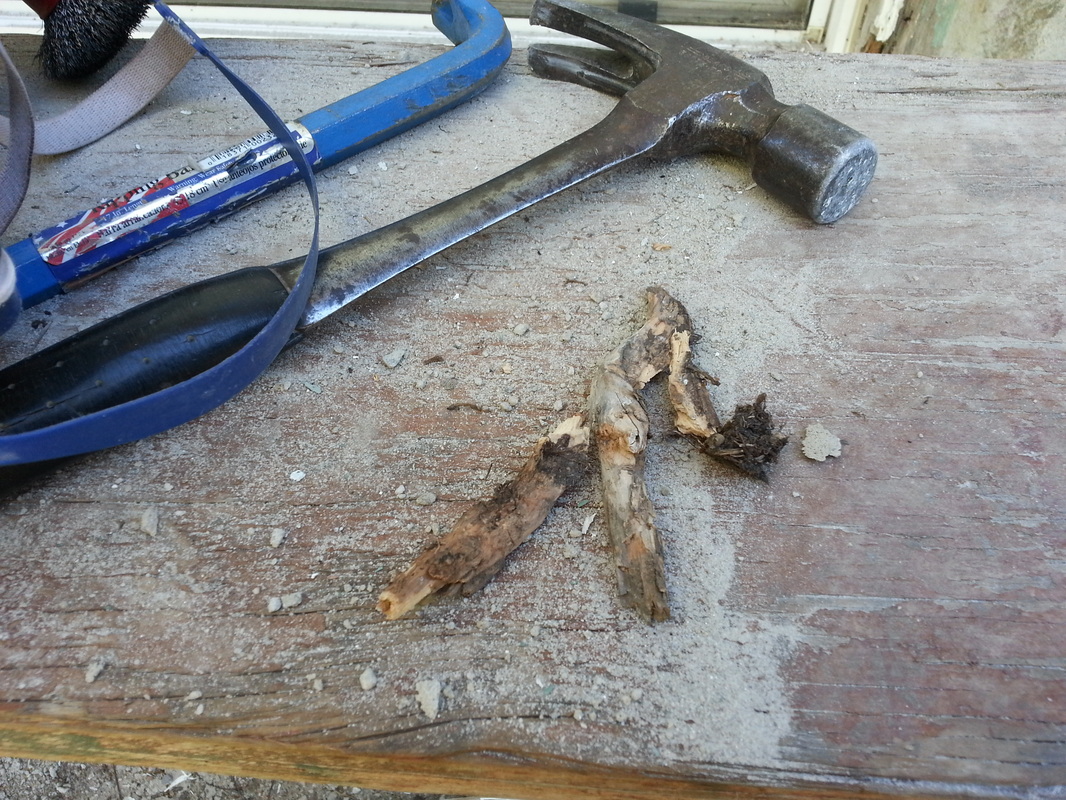
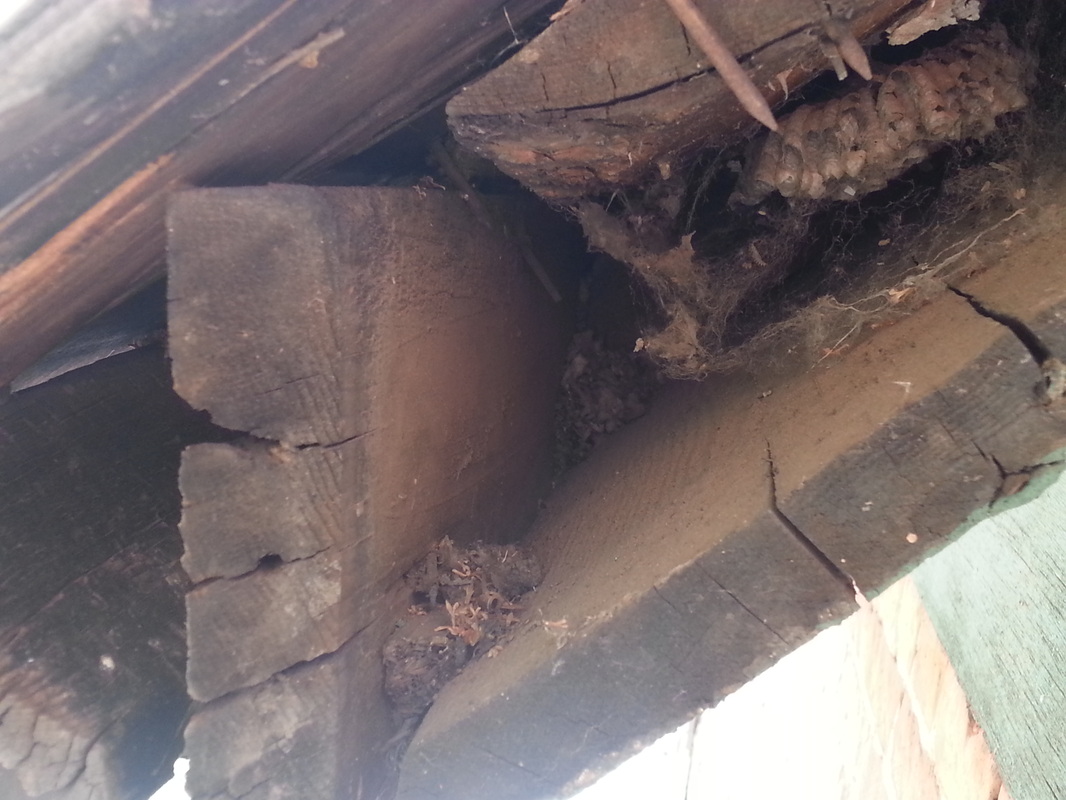
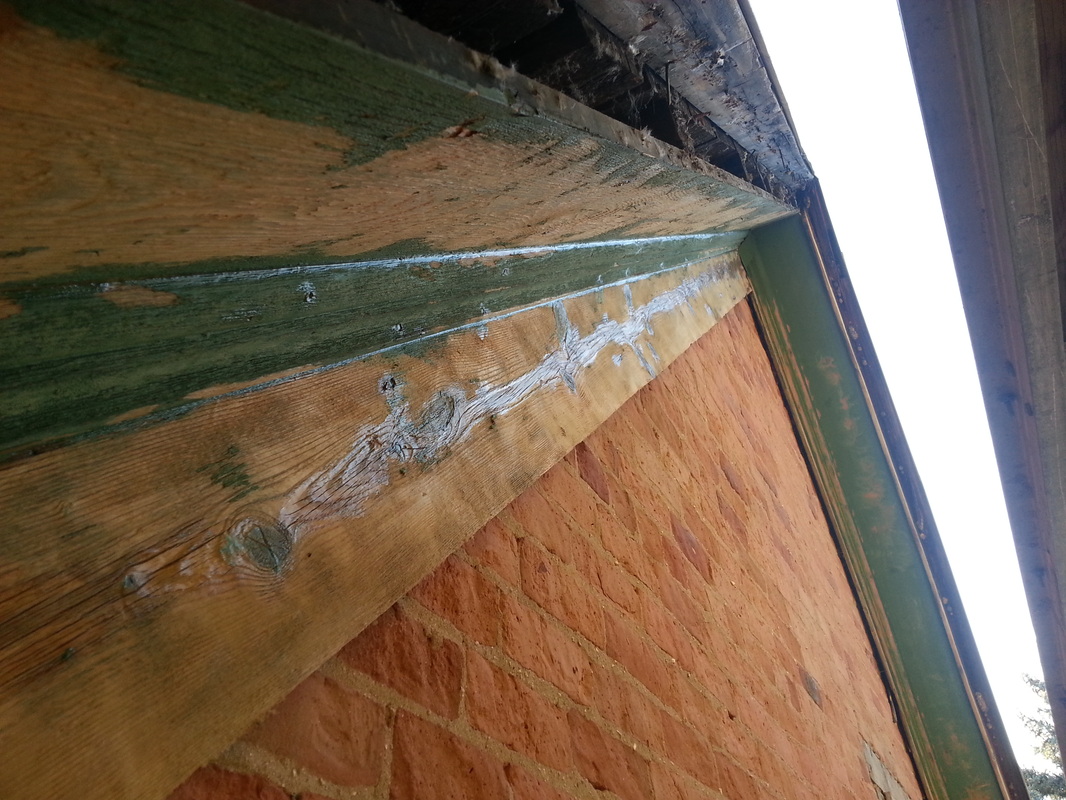
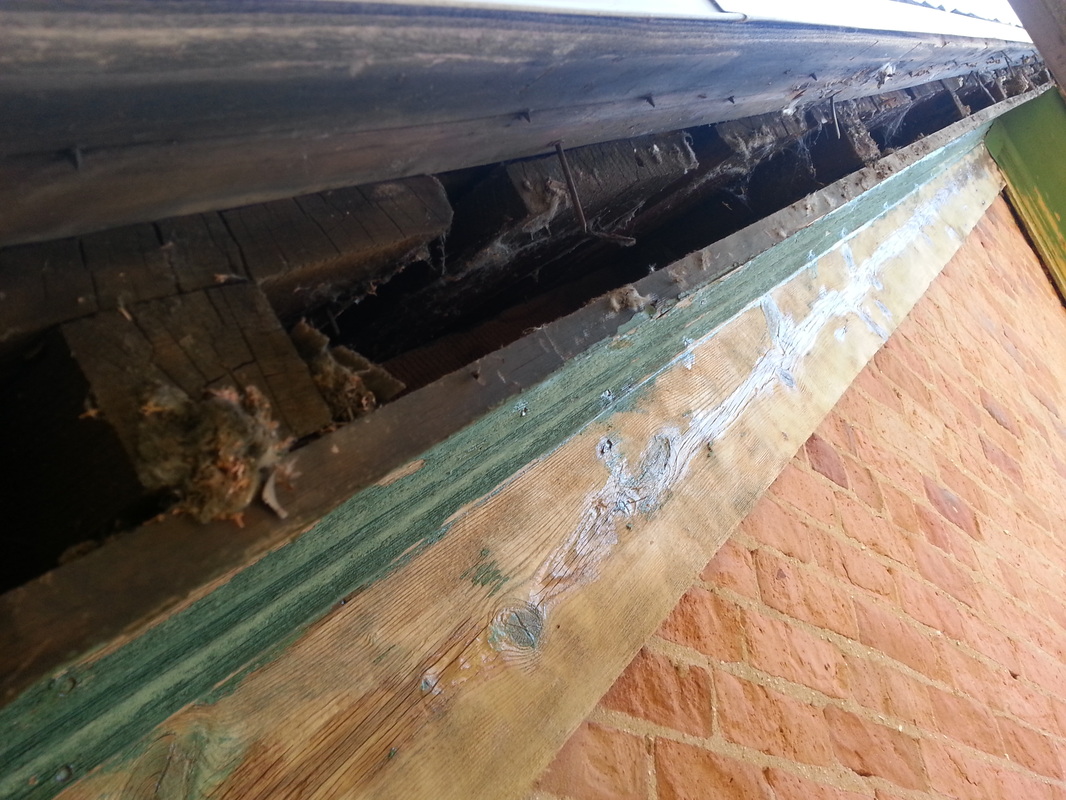
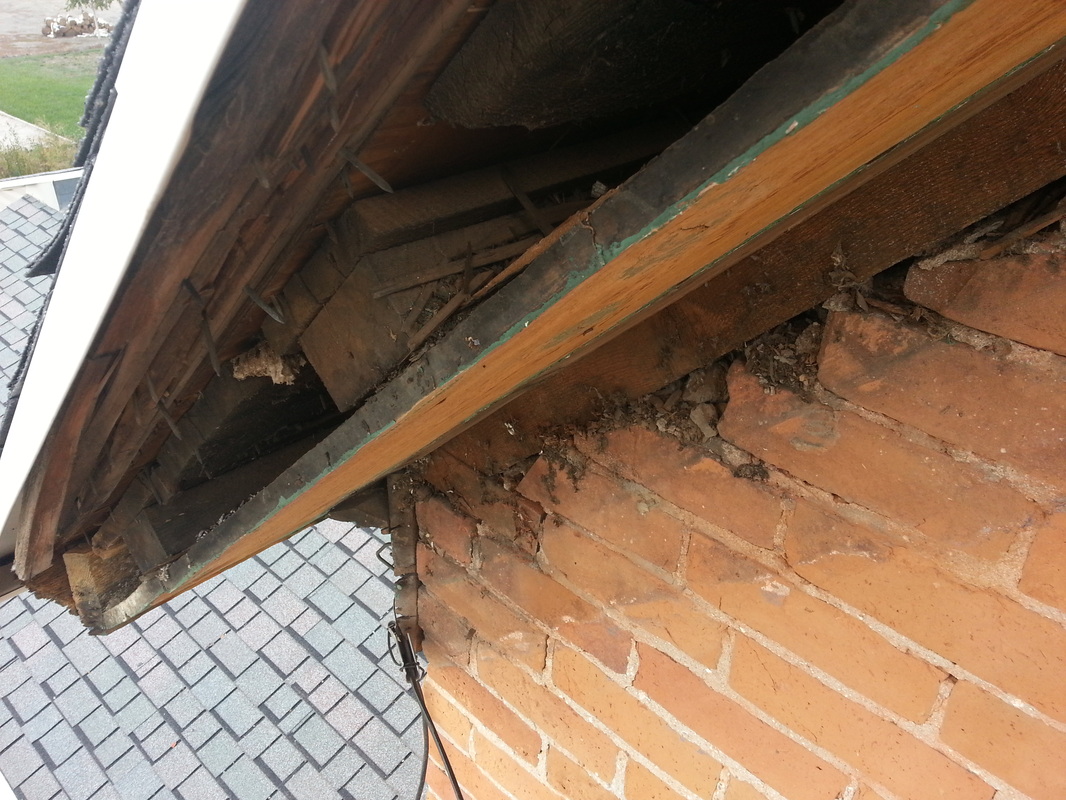
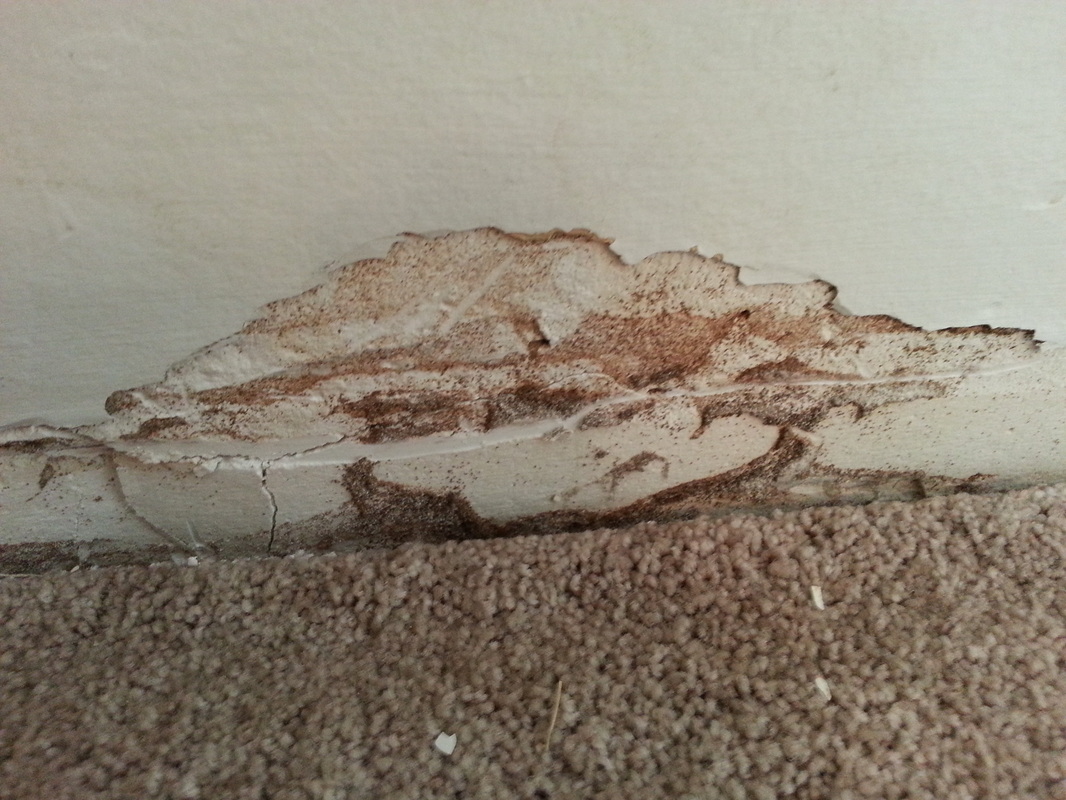
Also, today, I found where the mice would come in...I'm sure there are other spots around, but this was was a definite...there was all sorts of mice nesting material...see the picture below...
Also, today, I found where the mice would come in...I'm sure there are other spots around, but this was was a definite...there was all sorts of mice nesting material...see the picture below...


April 24, 2013
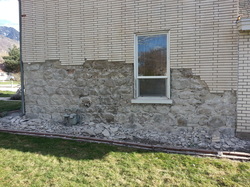
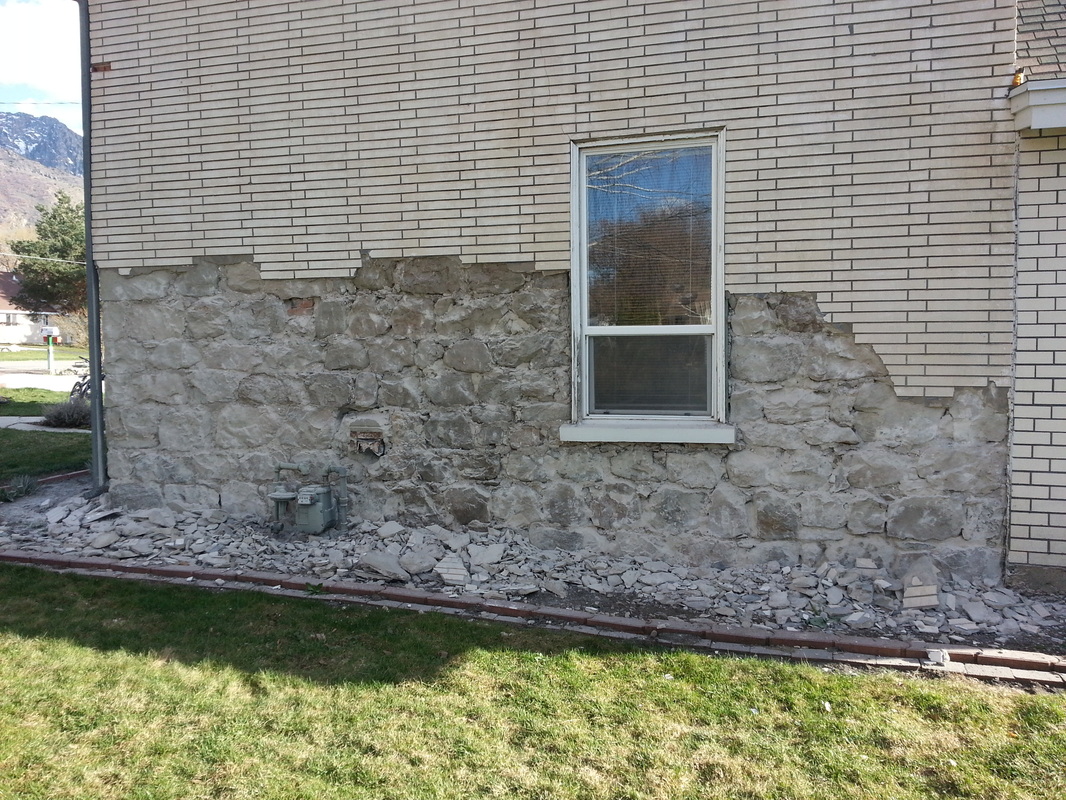
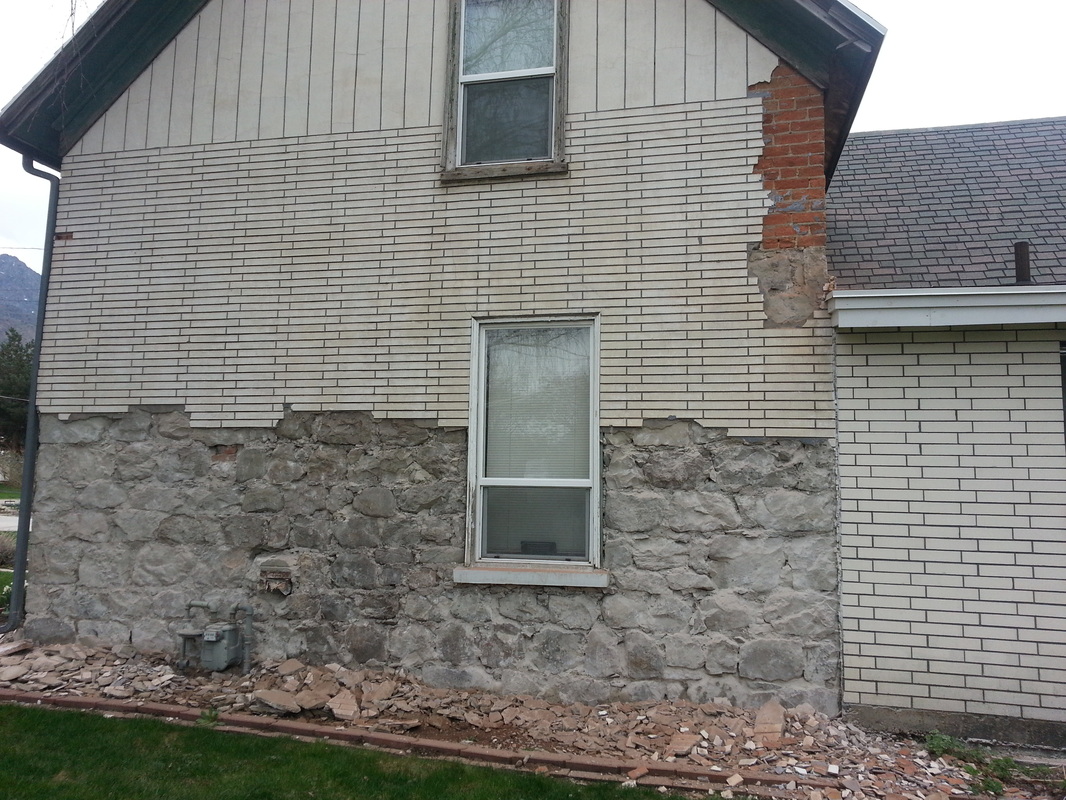
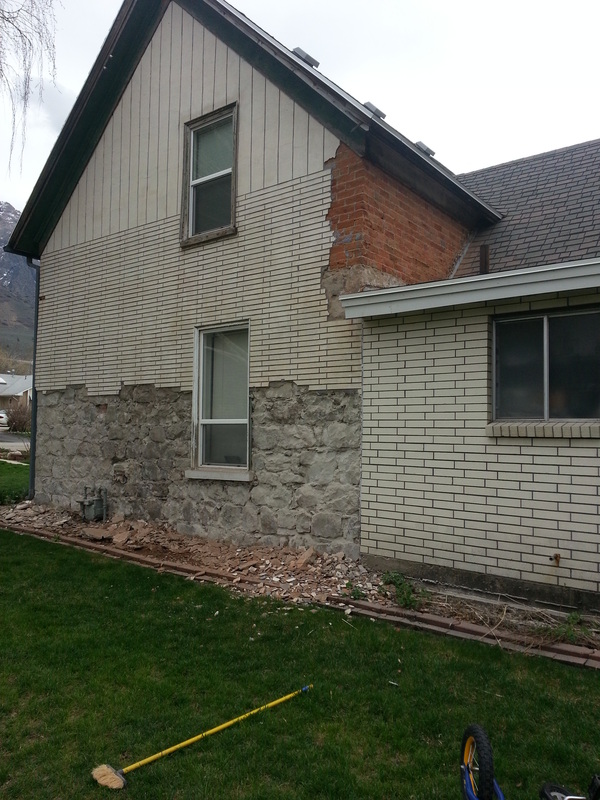
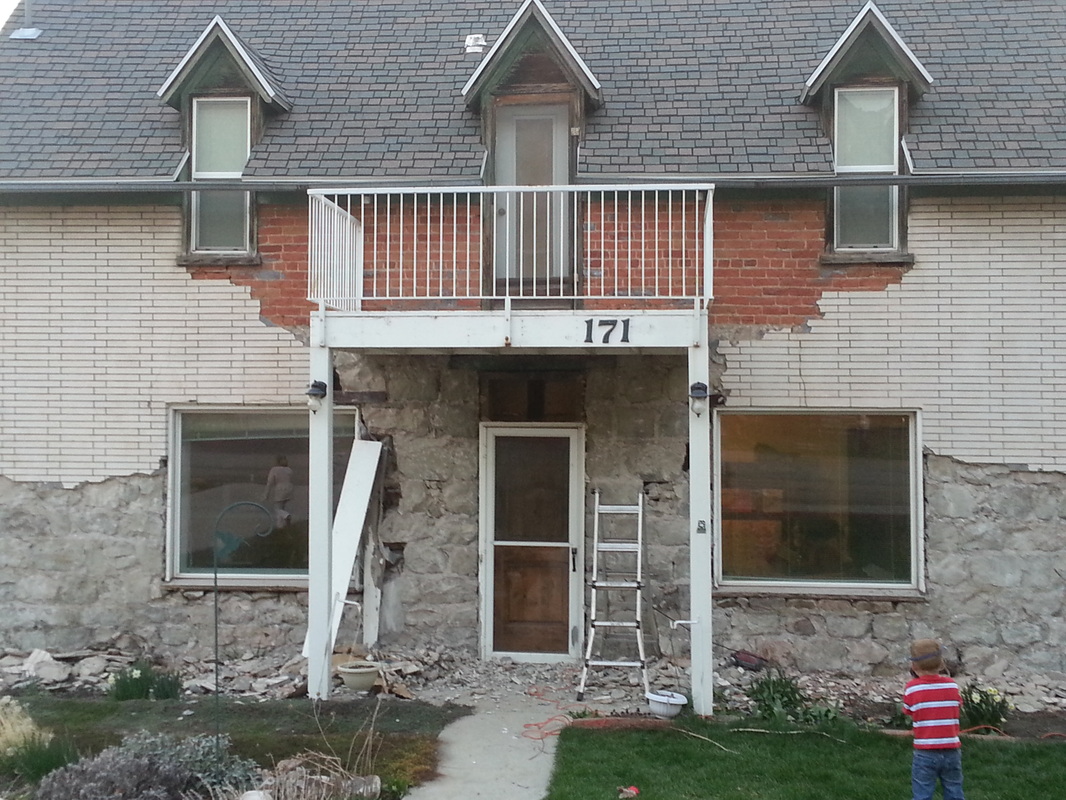
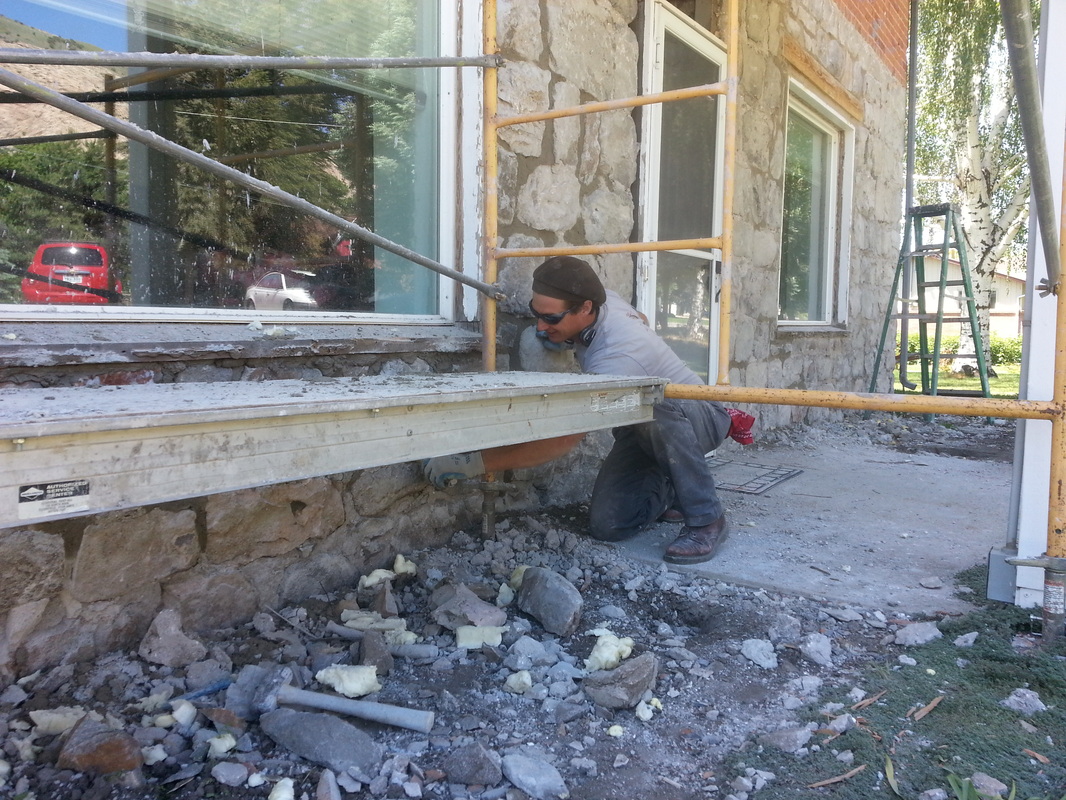
I took the day off from work today to get the house done...first of all, Robert Beebe let me use his 17' lift and he helped me by putting it on his trailer and hauling it to me this morning. I was able to test drive it a bit and then I started in on the work. I had to work around the cable line that strings across my driveway to the southeast. I was just about done when my Chicago Electric 10 amp rotary hammer stopped working. Luckily I purchased a warranty from Harbor Freight. I returned it (had to drive to Ogden...about 1 hour delay on the day) and got a new one. When I got back I put new grease in it and went back to work, finishing the south side. I then thought I would drive the lift to the front of the house. As I looked down, I thought, "I'll just drive this thing right over the 'hard' dirt..." Yeah right! I dropped off the sidewalk and landed on a flower...all it did was sink into the plant and started spinning. The tires are super slick and the thing weighs WAY too much to not drive on something hard! Ang tried to push, while I pushed the buttons...we had it rocking back and forth but all I was doing was digging into the dirt. Then we put some wood under the wheels and then tried...again...it wasn't budging! Then our new neighbor (Walt) came over and we put some extra wood under the tires...he pushed while I ran the controls...we did it but when the machine got back on the sidewalk, he slipped and went down! Not good. He said all that was hurt was his pride, but either way I was very grateful for his help! I learned that lesson the hard way...from then on the rest of the day I spent putting particle board and plywood on the ground under the machine! I was able to completely remove the fake brick from the front of the house and then haul the debris to the pile in the back from the south side and the east side. Now all I have is the north side of the house...and to figure out what I'm going to do with the windows in the front!!! Still plenty to do.
My mom sent me a text today saying how proud she was of me and what we're doing. It made me feel good to know I have support from my family. Also, uncle Bob came over and he's excited to see the progress on the home. He told me a story that when he was young his dad (grandpa) would try to convince him to get up on the ladder and paint the eves...he told me that he wouldn't do it...after being up that high (even though I was on a lift) I don't blame him at all! By the way, the lift sways back and forth and it is a bit spooky. I took the kids up a couple of times, they didn't seem to be bothered by the heights at 17'.
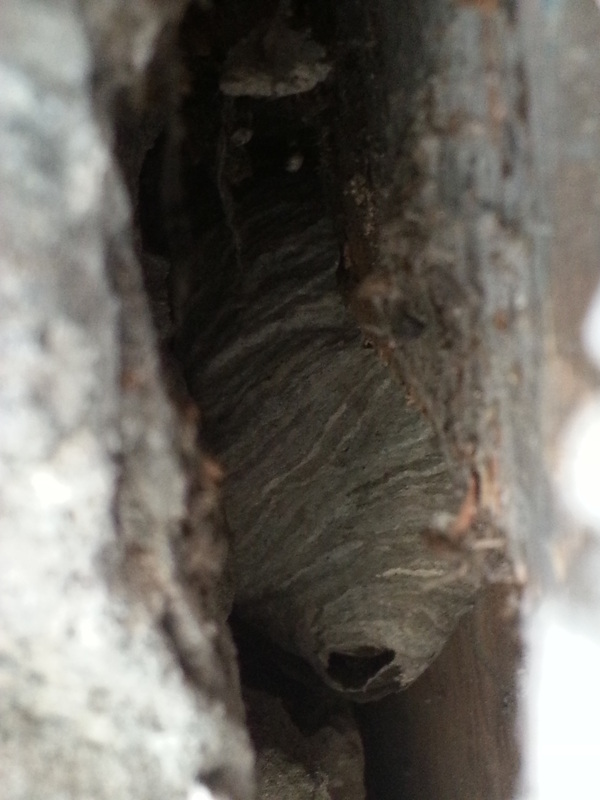
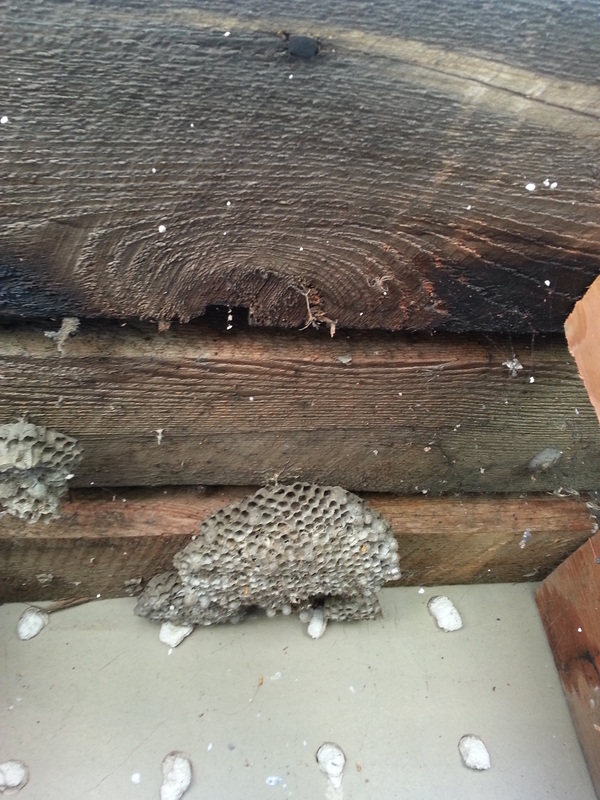
Also, there were some huge wasp nests above the north window...they must have climbed in a crack that went right down the white brick in the middle of the window area.
My mom sent me a text today saying how proud she was of me and what we're doing. It made me feel good to know I have support from my family. Also, uncle Bob came over and he's excited to see the progress on the home. He told me a story that when he was young his dad (grandpa) would try to convince him to get up on the ladder and paint the eves...he told me that he wouldn't do it...after being up that high (even though I was on a lift) I don't blame him at all! By the way, the lift sways back and forth and it is a bit spooky. I took the kids up a couple of times, they didn't seem to be bothered by the heights at 17'.
Also, there were some huge wasp nests above the north window...they must have climbed in a crack that went right down the white brick in the middle of the window area.


April 27, 2013

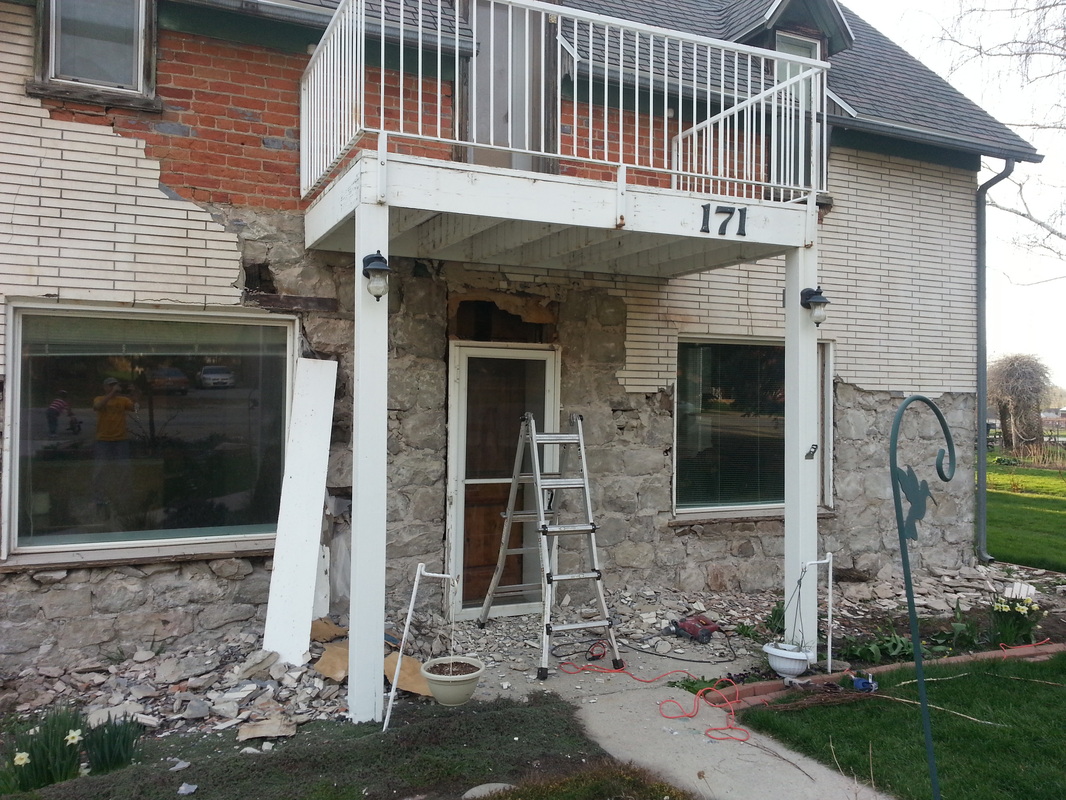
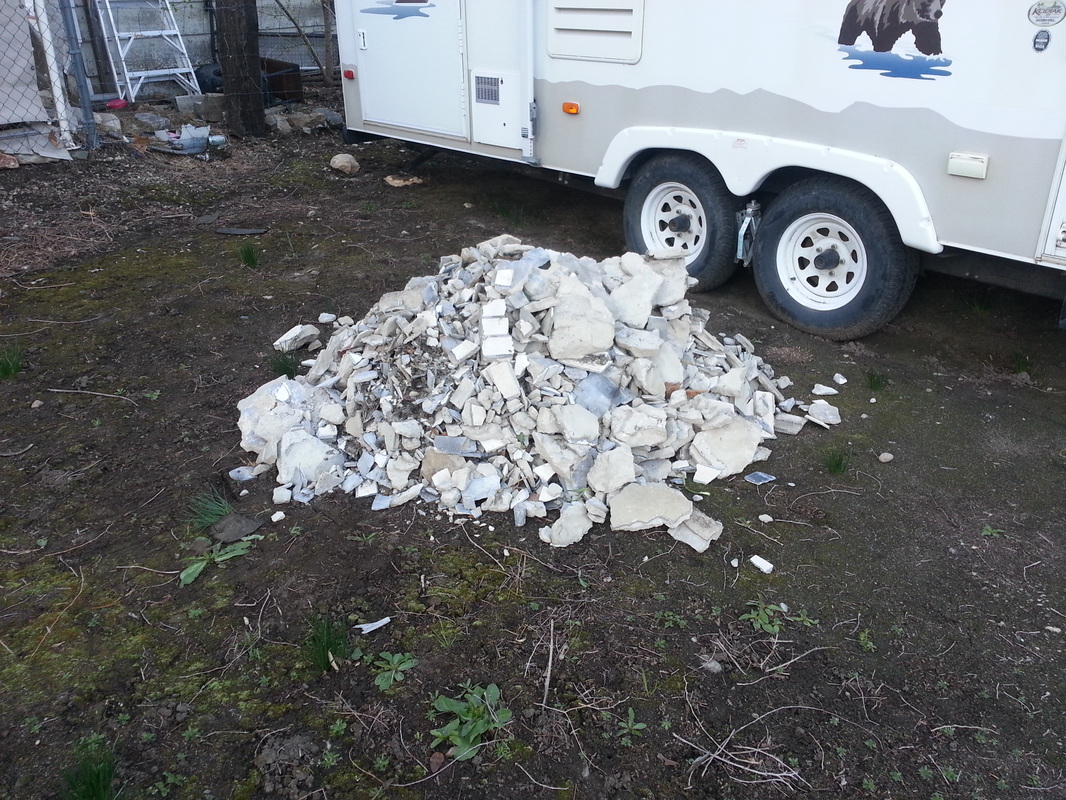
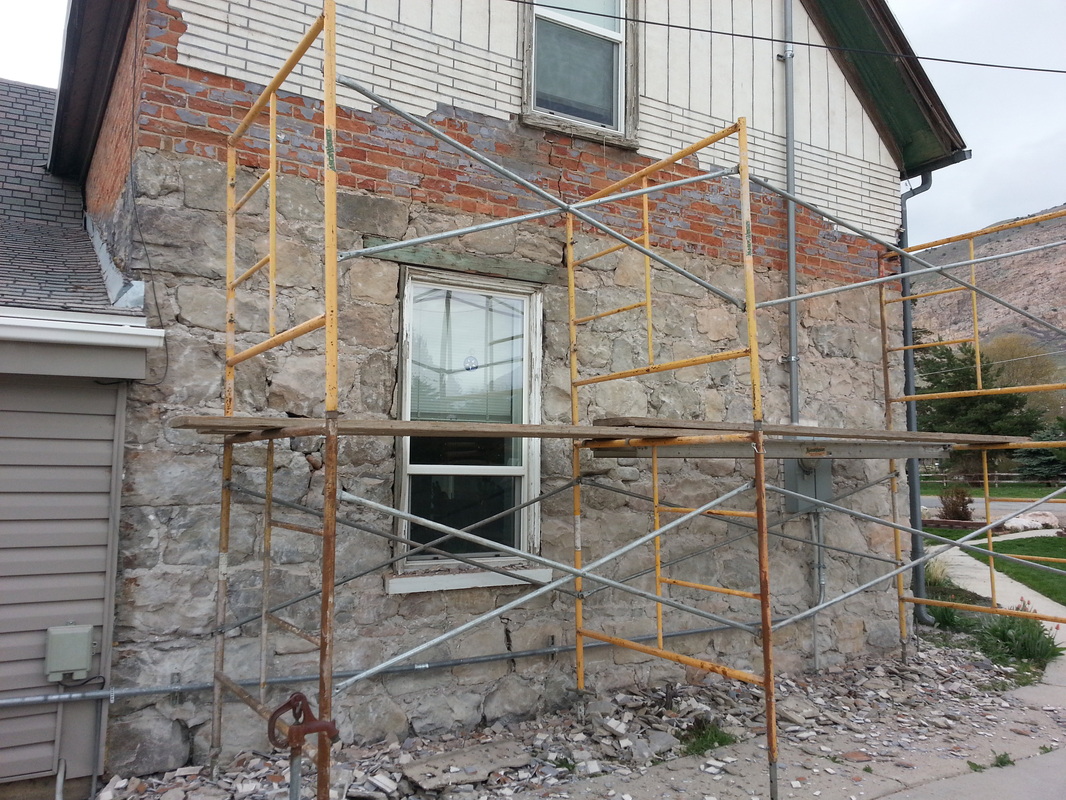
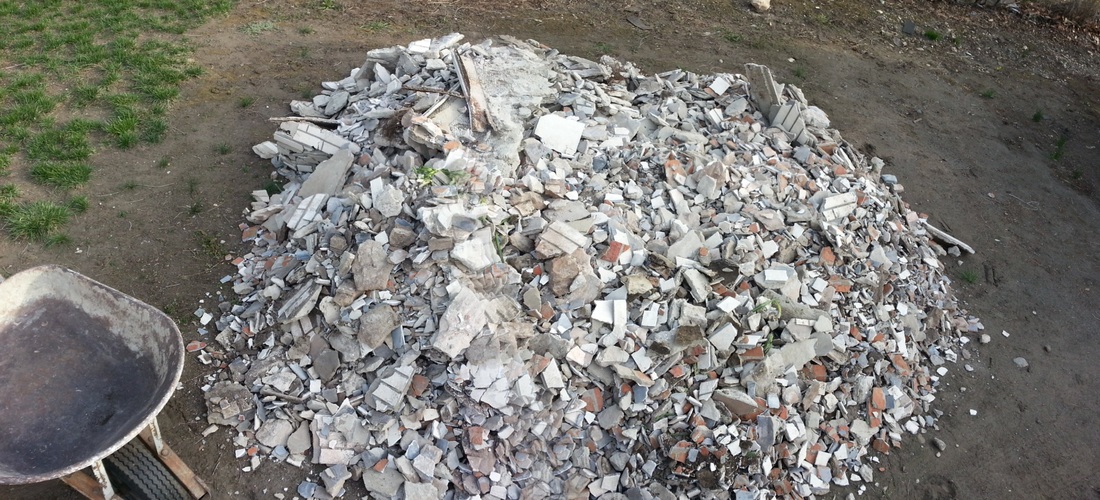
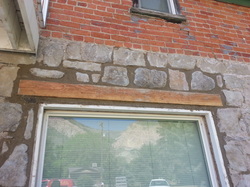
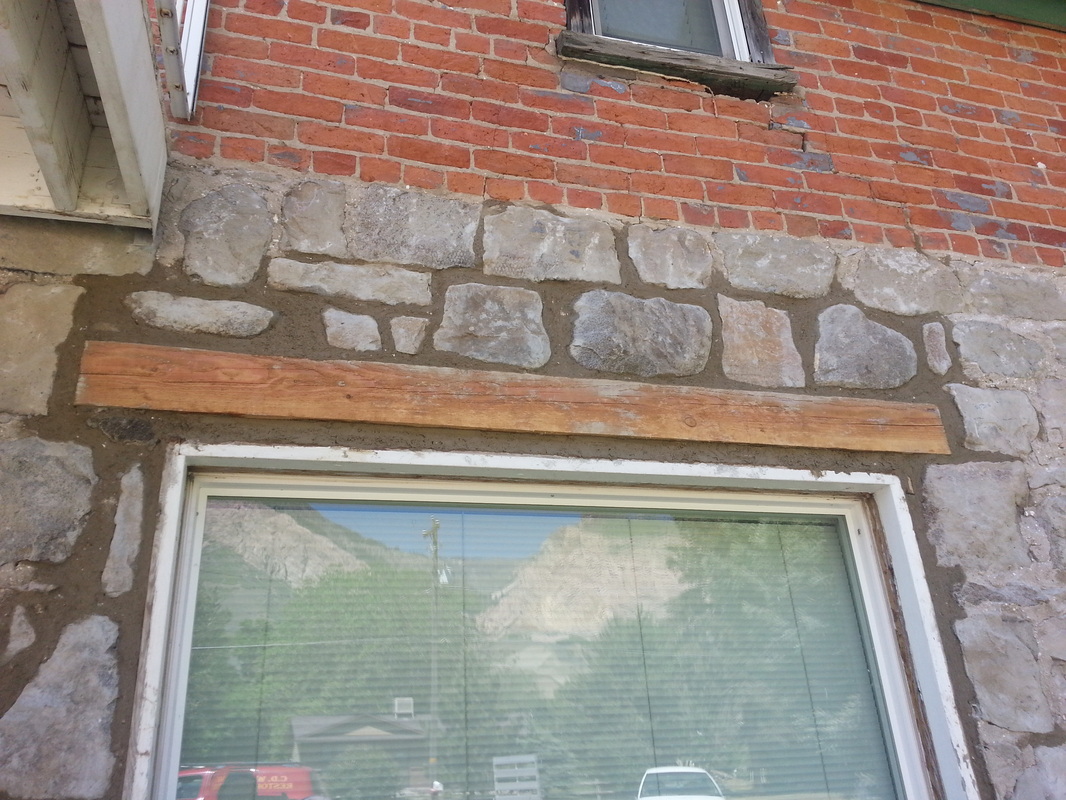
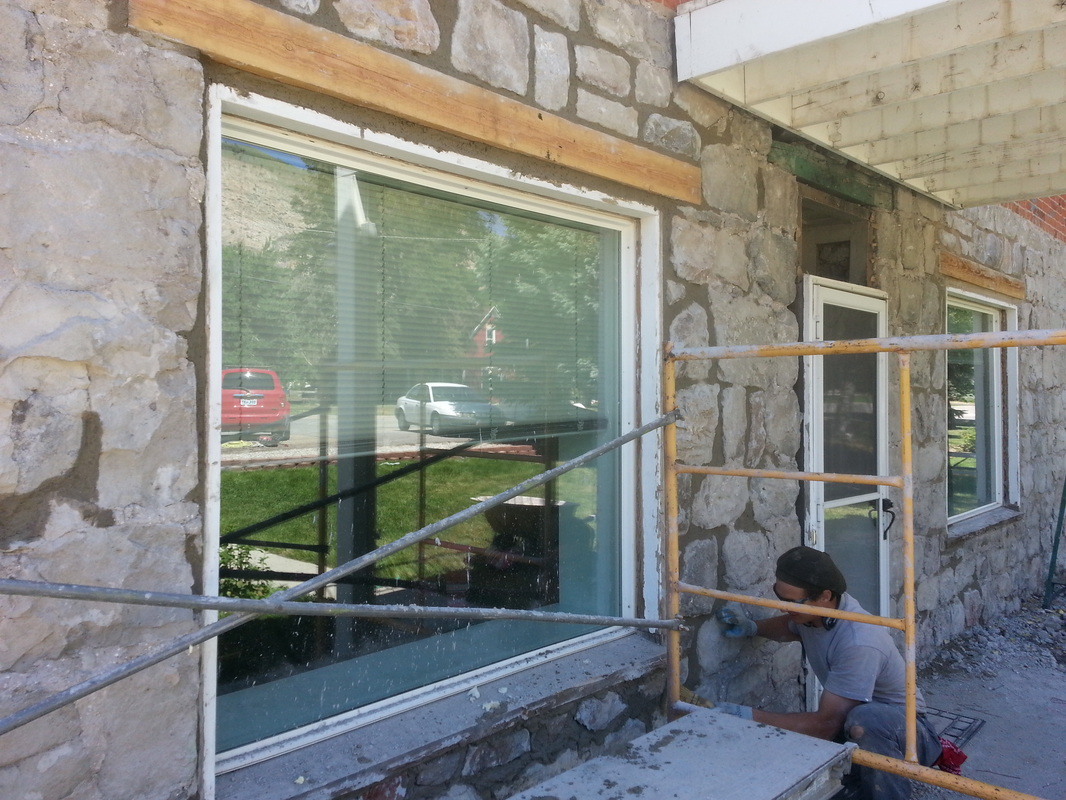
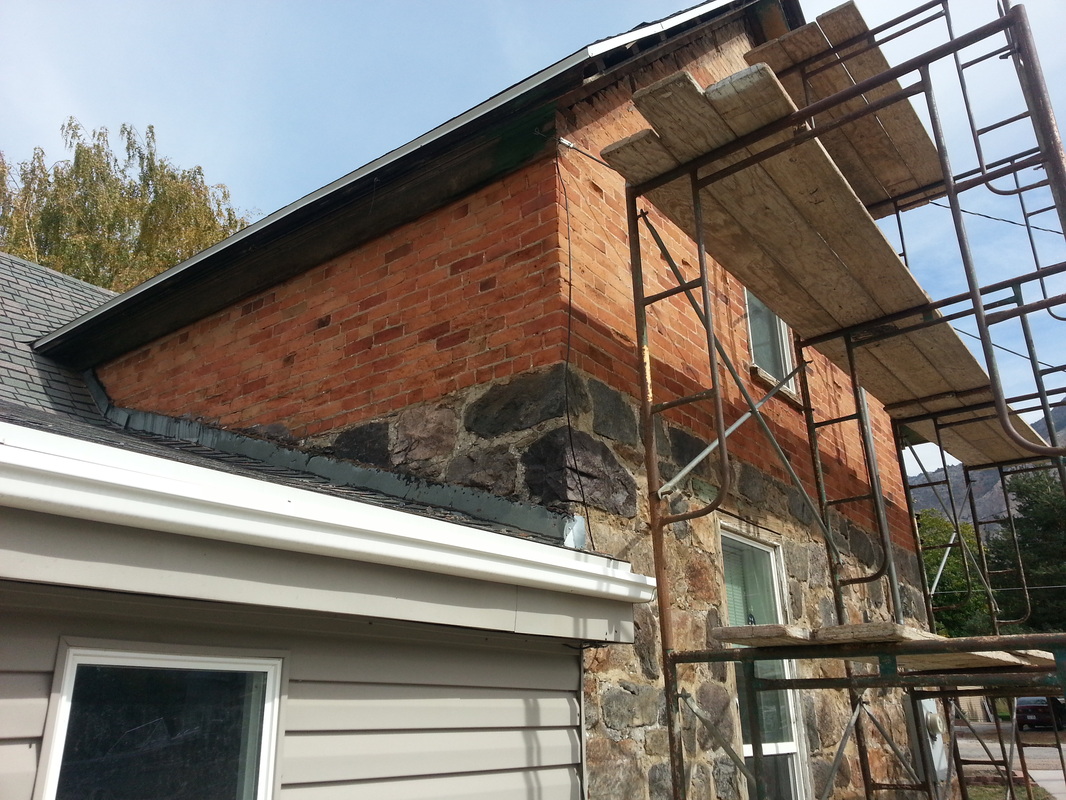
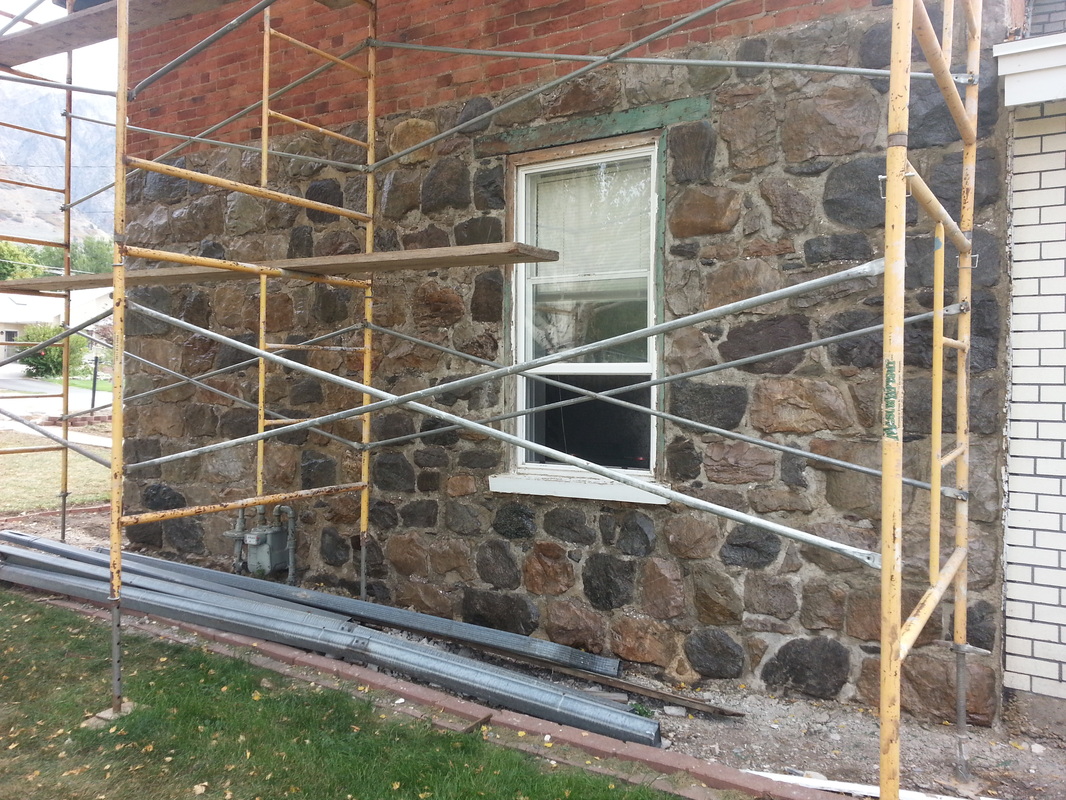
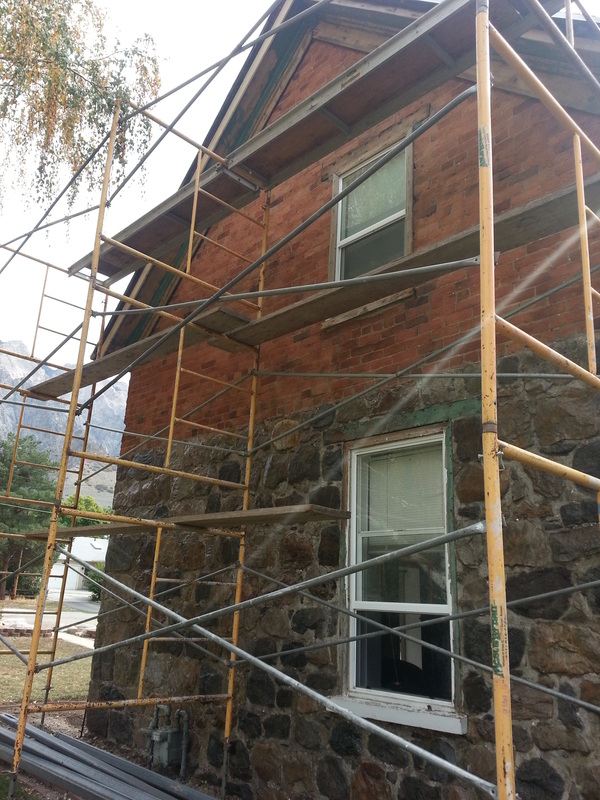
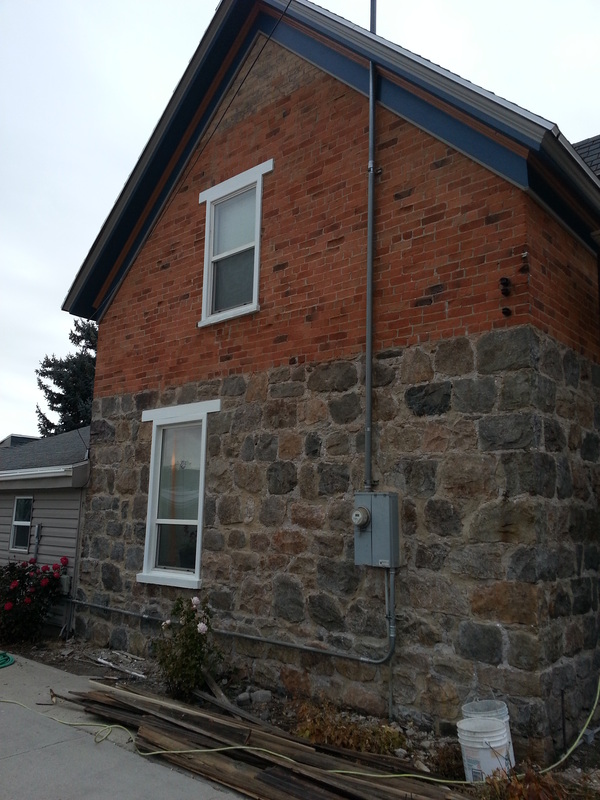
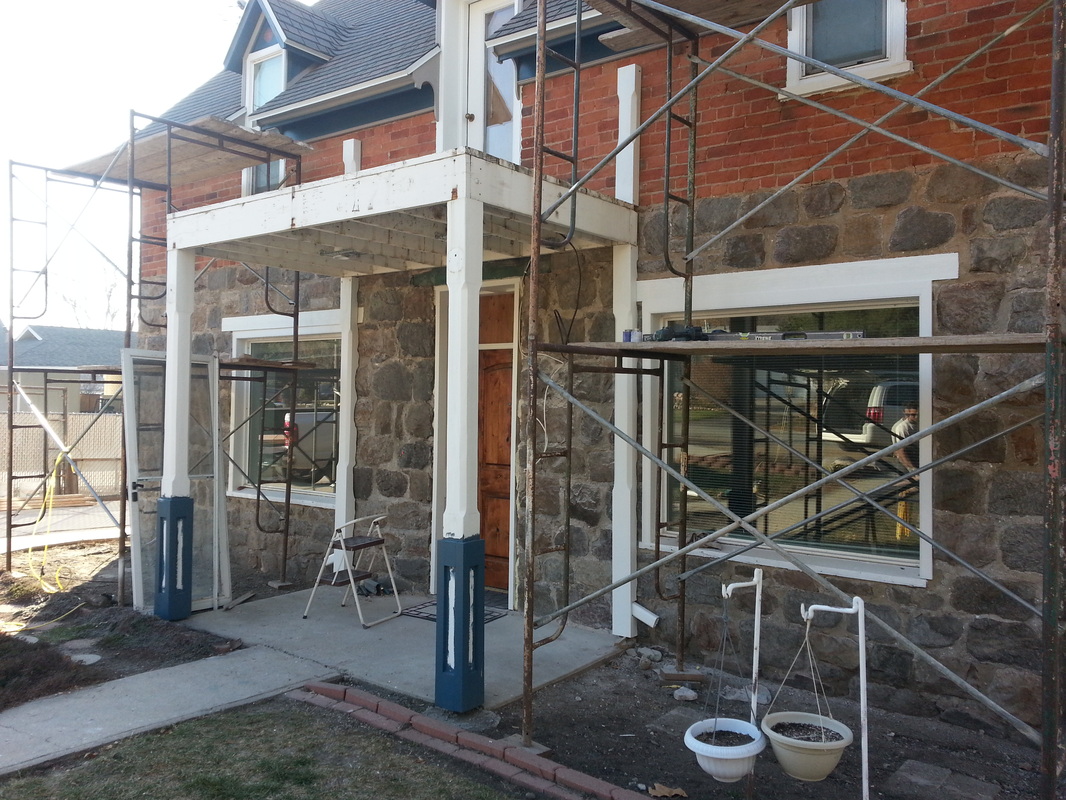
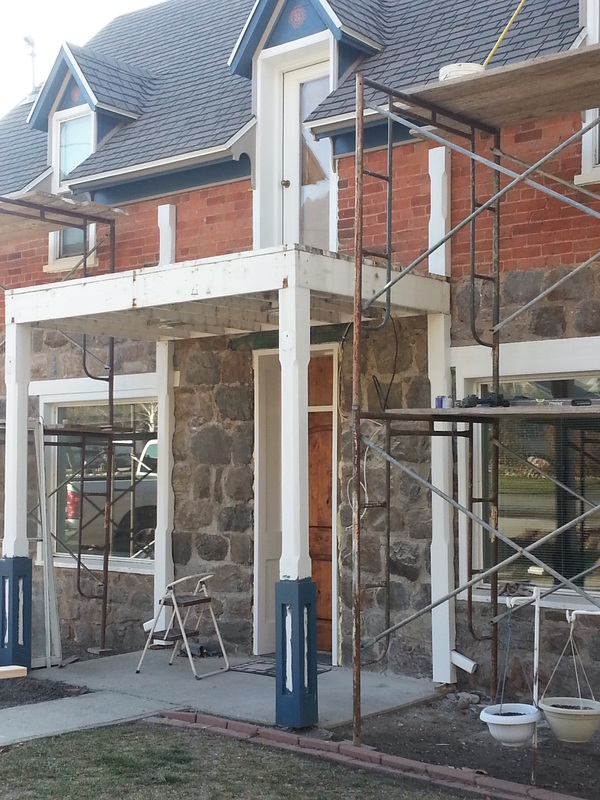
The fake brick is OFF!!! I was able to get all the remainder brick off and clean up today. I look back and I have to say the Lord has given me a lot of strength and patience to have been able to get it all off just over one month (and really only a few days) without much help. I'm very grateful!
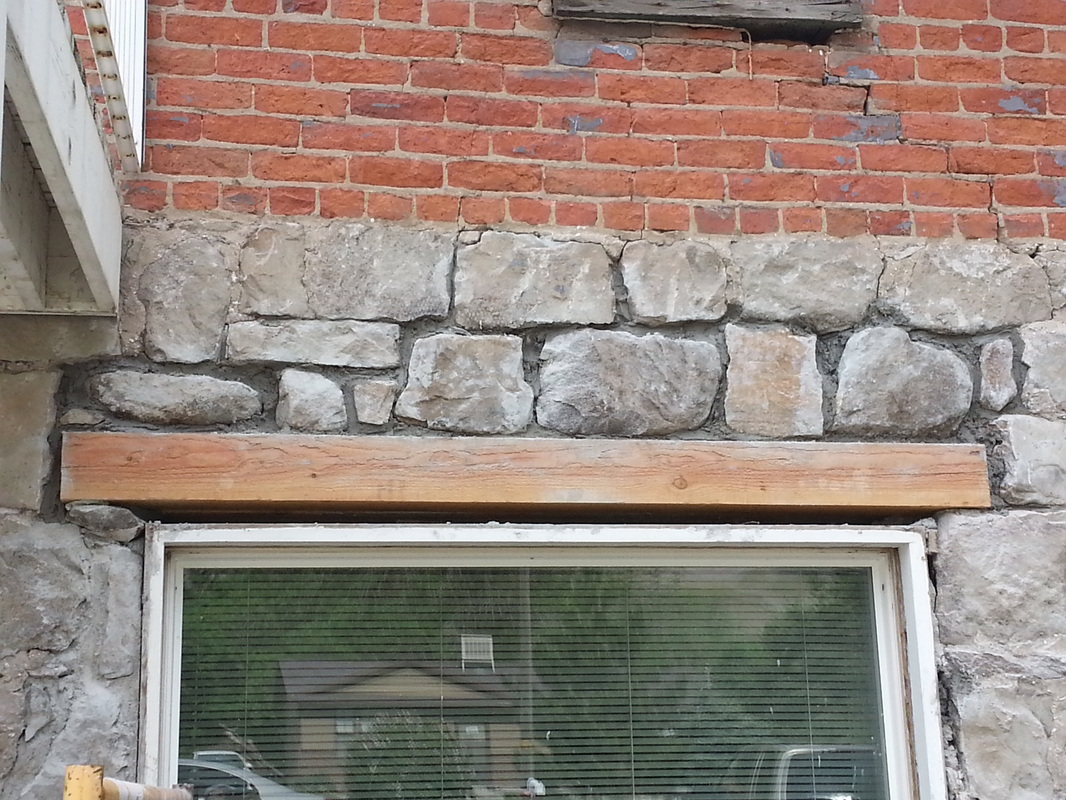
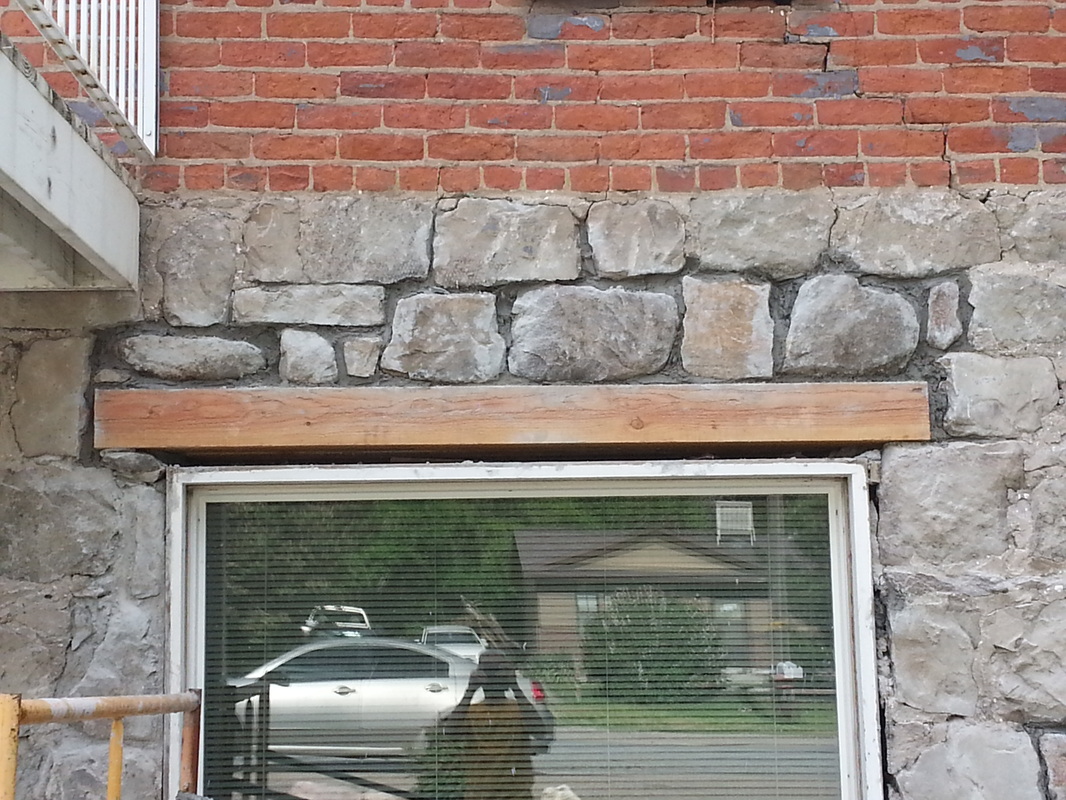
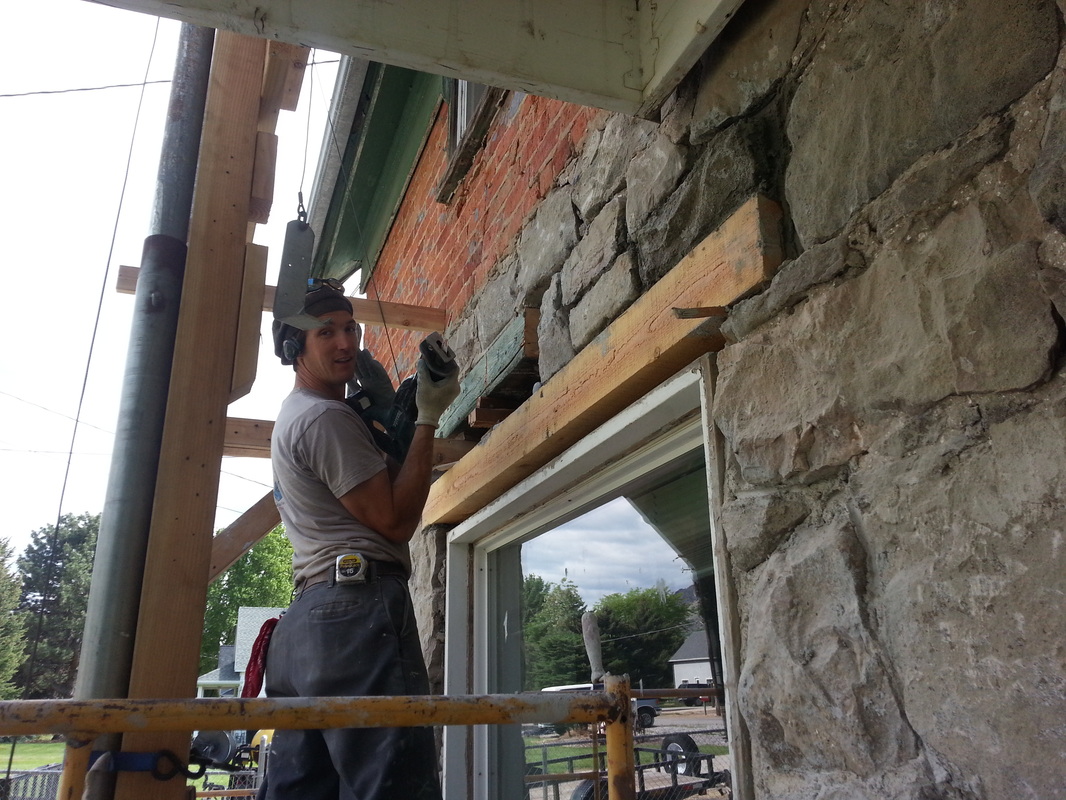
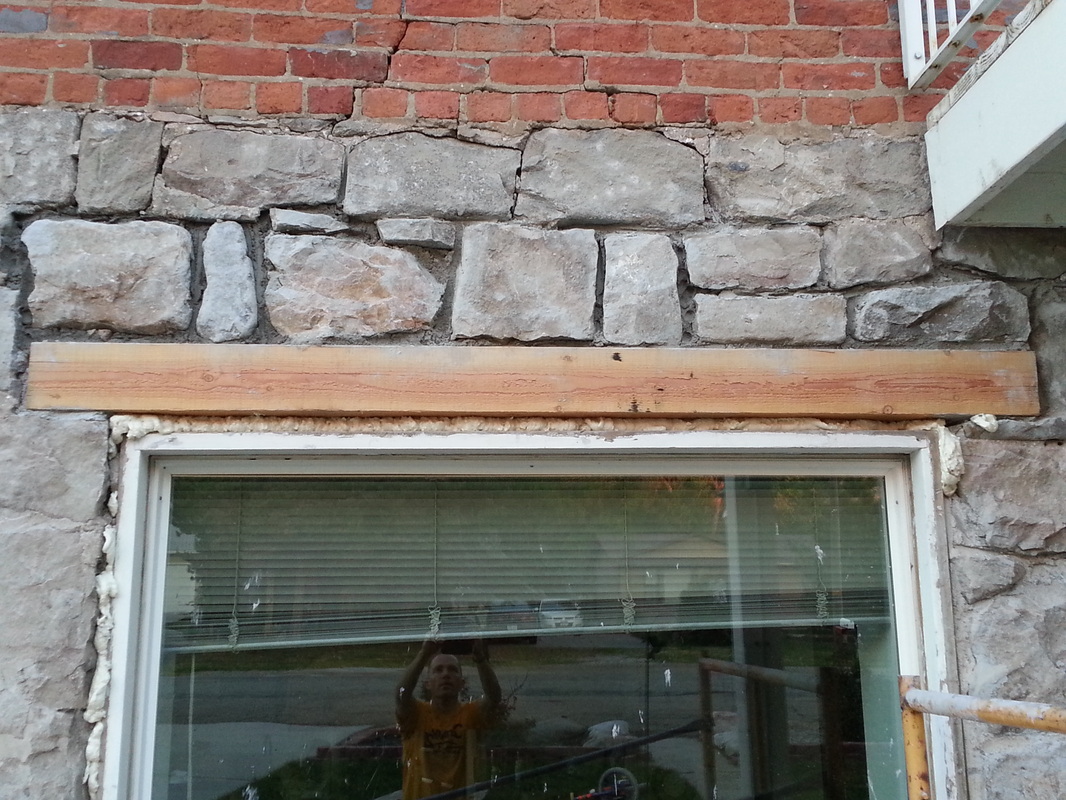
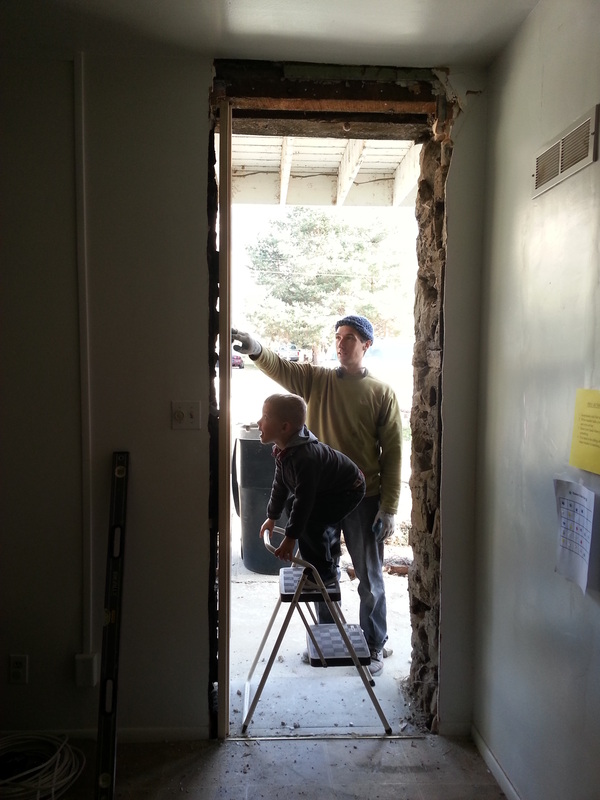
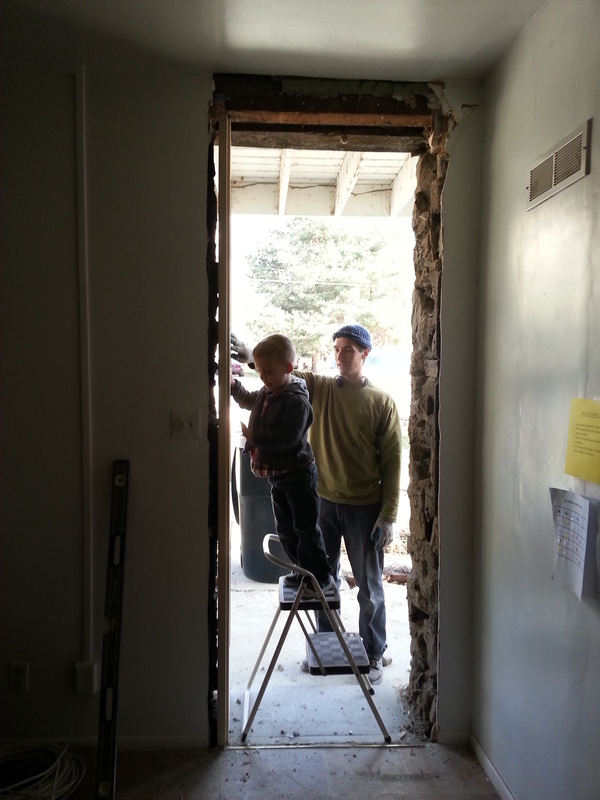
Now the real work begins...refinishing stuff. My first priority is fixing the east windows. I would like to put in a new header above the windows. This will take fixing the sides, letting them cure, and then taking out the rocks on the top sides of the windows and inserting the new headers...all this while holding the rest of the walls up so they don't fall down! Guaranteed, this won't be easy, but I think it would be way cool when it's complete.
I've taken a couple of pictures...the last bit of fake brick, the last wheelbarrow load going to the pile, the pile of all the rubble, and when I got the hammer drill bit lodged into the rock. :)
We're excited to have this complete and we're excited to move forward. We are planning some things with the railing on the deck to give it some new "look," planning the paint colors for the trim and other outside woodwork, and now we're looking into the inside living room and the kitchen...it's all about time and money...what to do and when to do it. :)
Oh...yeah...a couple of other things...Uncle Bob came over again today and he told me a couple of things about the yards...first, where the current woodshed sits was a chicken coop and west of that was the pig pen. Where my parent's house sits was a huge barn (he said that it was bigger than Phil Barlow's barn to the west of us) and the place of the cows. They would milk the cows and there was a road or path going from the west to the east just about where the raspberry's are today where the milk guy would drive through to get the milk and then drive off. He also said they had a few apple trees where his house is today (north of the old house). He didn't remember or know of the initial house where Abraham would have stayed in, but he said there was a log cabin near the chicken coop?? He may have said a few other things about the yard, but I can't remember anything else at the moment...
Now the real work begins...refinishing stuff. My first priority is fixing the east windows. I would like to put in a new header above the windows. This will take fixing the sides, letting them cure, and then taking out the rocks on the top sides of the windows and inserting the new headers...all this while holding the rest of the walls up so they don't fall down! Guaranteed, this won't be easy, but I think it would be way cool when it's complete.
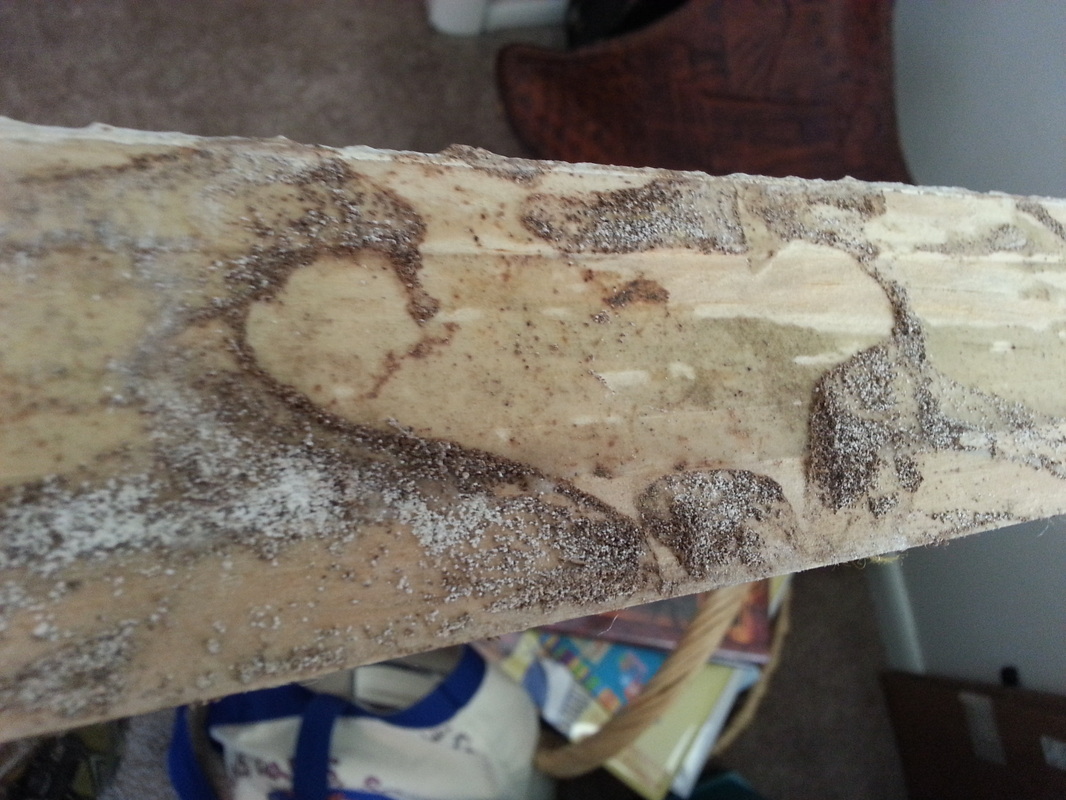
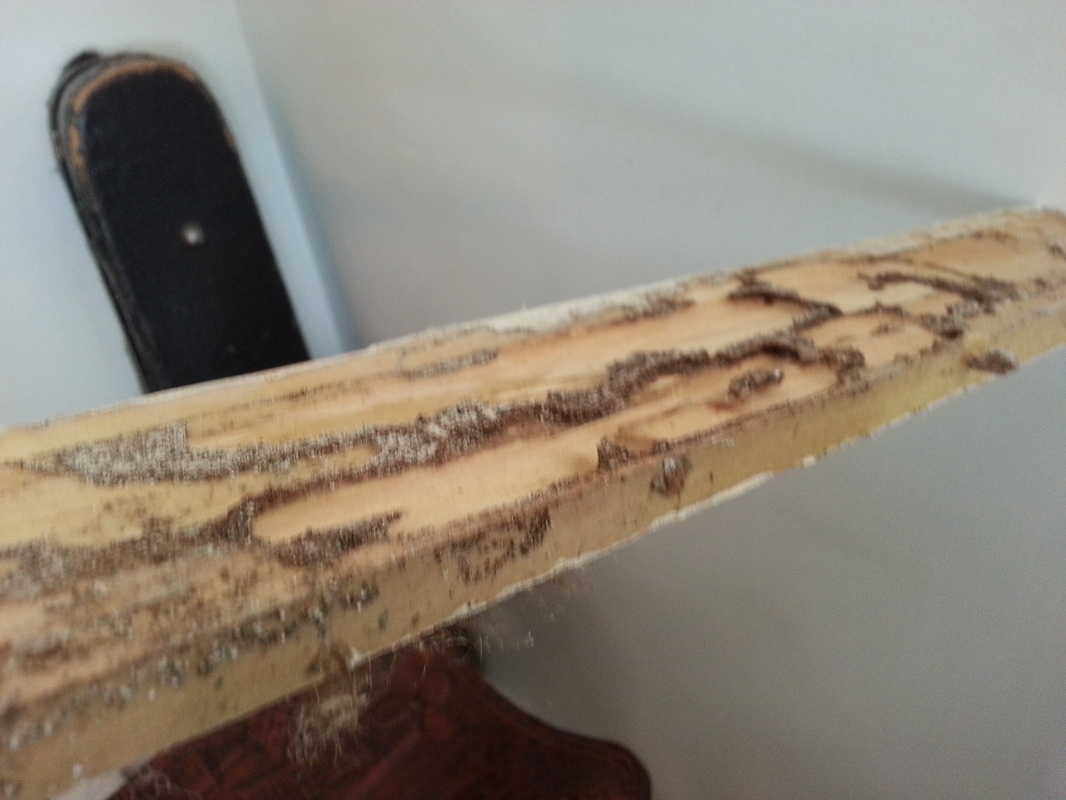
I've taken a couple of pictures...the last bit of fake brick, the last wheelbarrow load going to the pile, the pile of all the rubble, and when I got the hammer drill bit lodged into the rock. :)
We're excited to have this complete and we're excited to move forward. We are planning some things with the railing on the deck to give it some new "look," planning the paint colors for the trim and other outside woodwork, and now we're looking into the inside living room and the kitchen...it's all about time and money...what to do and when to do it. :)
Oh...yeah...a couple of other things...Uncle Bob came over again today and he told me a couple of things about the yards...first, where the current woodshed sits was a chicken coop and west of that was the pig pen. Where my parent's house sits was a huge barn (he said that it was bigger than Phil Barlow's barn to the west of us) and the place of the cows. They would milk the cows and there was a road or path going from the west to the east just about where the raspberry's are today where the milk guy would drive through to get the milk and then drive off. He also said they had a few apple trees where his house is today (north of the old house). He didn't remember or know of the initial house where Abraham would have stayed in, but he said there was a log cabin near the chicken coop?? He may have said a few other things about the yard, but I can't remember anything else at the moment...


May 8, 2013
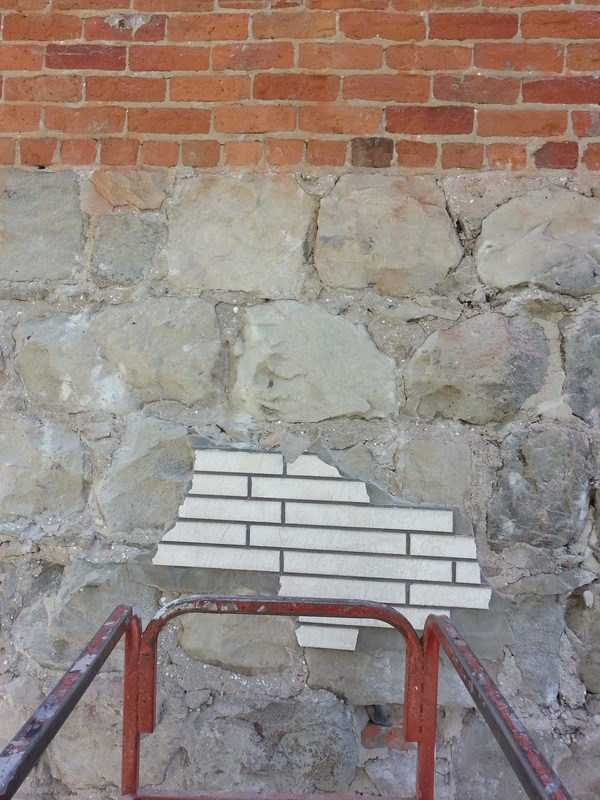
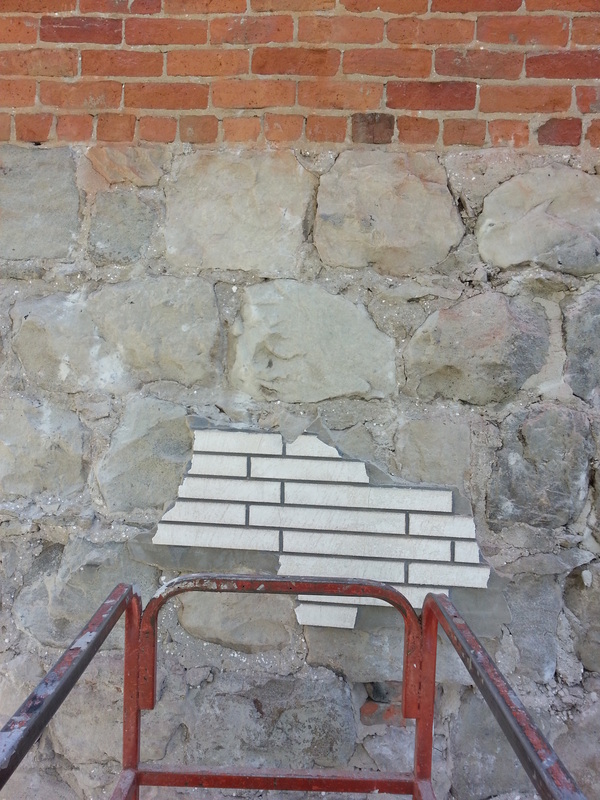
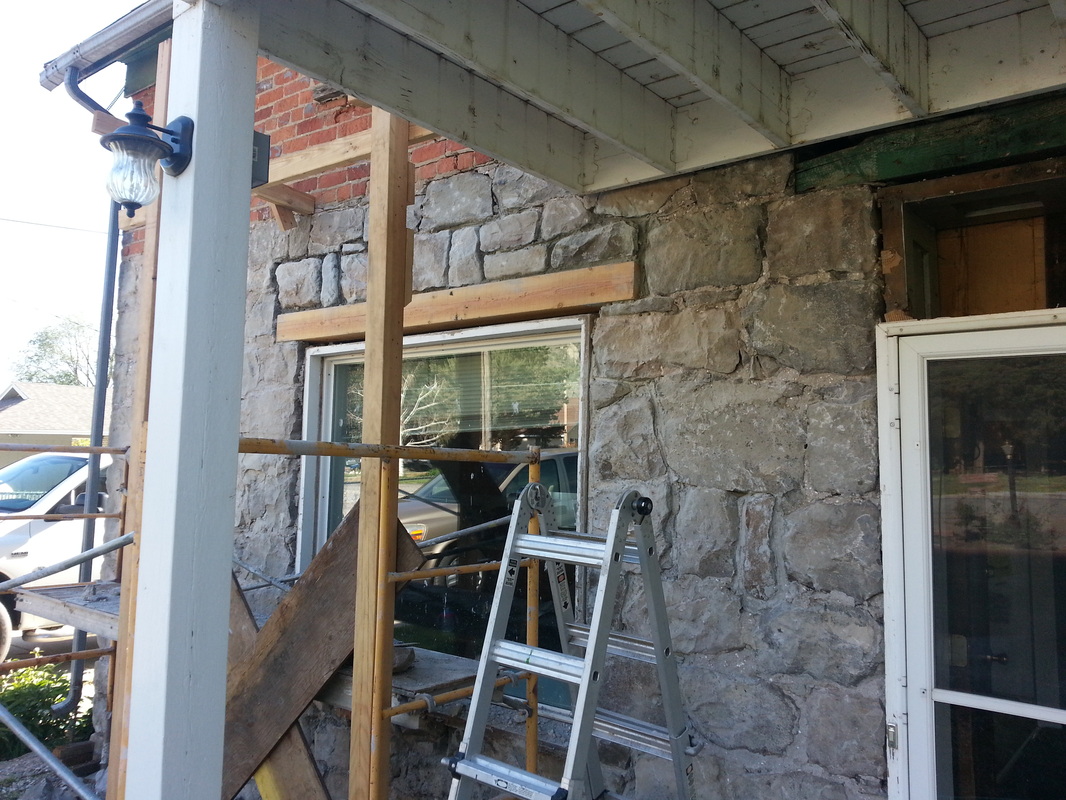
Today I cleaned up the area around the windows. Cody is planning on coming tomorrow so I want to have everything ready for him. I took out some of the debris that is loose and I think we should be good to go...I also went over to Dave and Darcey's to get a few rocks to use.


May 10, 2013
Cody and I worked today on filling in the sides of the windows so they can set before we do anything with the headers. We did finish the north window but we didn't finish the south one. Cody is coming tomorrow first thing to get it done. Then we can start on the headers. We have a plan but we're unsure as to how this will work.


May 11, 2013

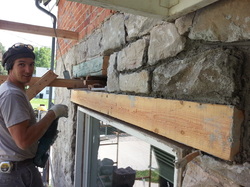
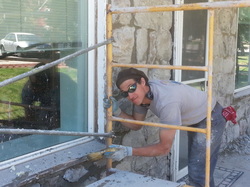
Cody came and finished the south window this morning. All I can say is Cody ROCKS! He was very good at matching the right size of rock in the right spot. I am amazed at his work! We even had to knock off a bit of the rock that sticks out so it would be flush with the rest of the outside wall! Amazing job, Cody!


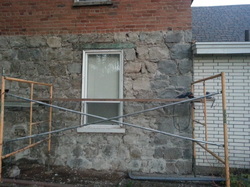
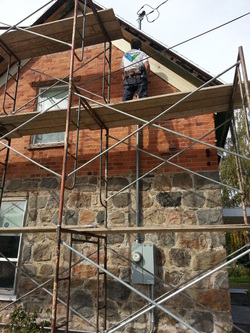
May 17 and 20, 2013

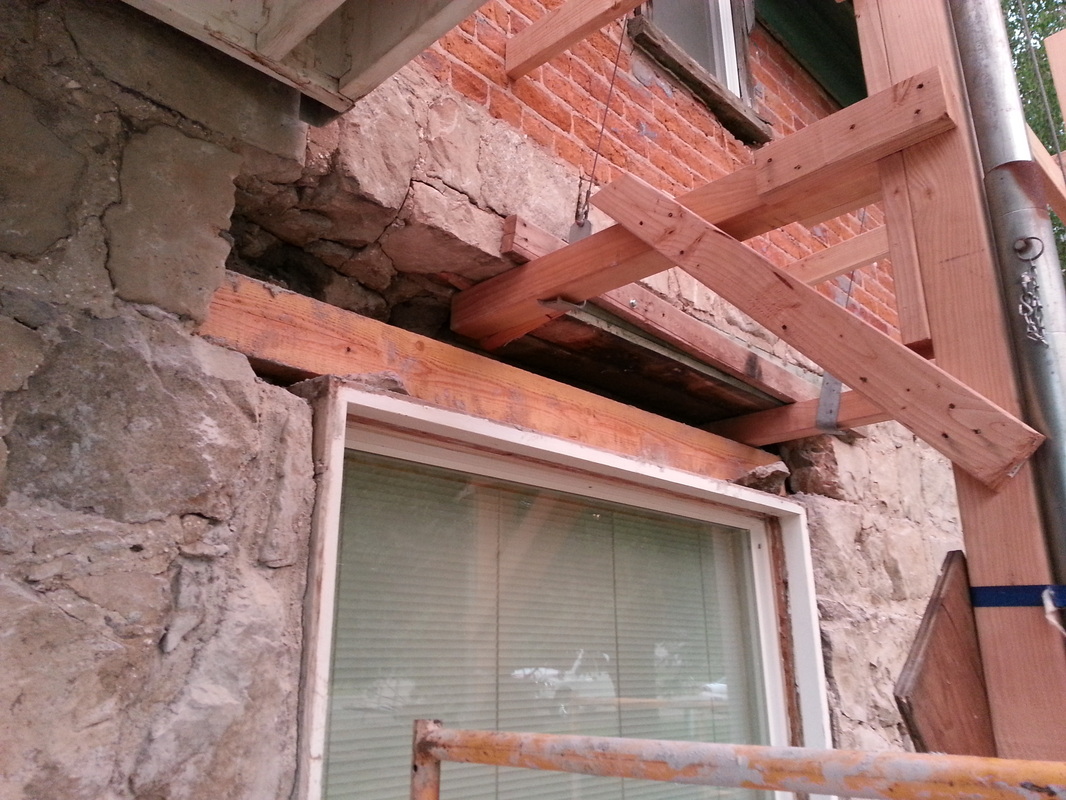
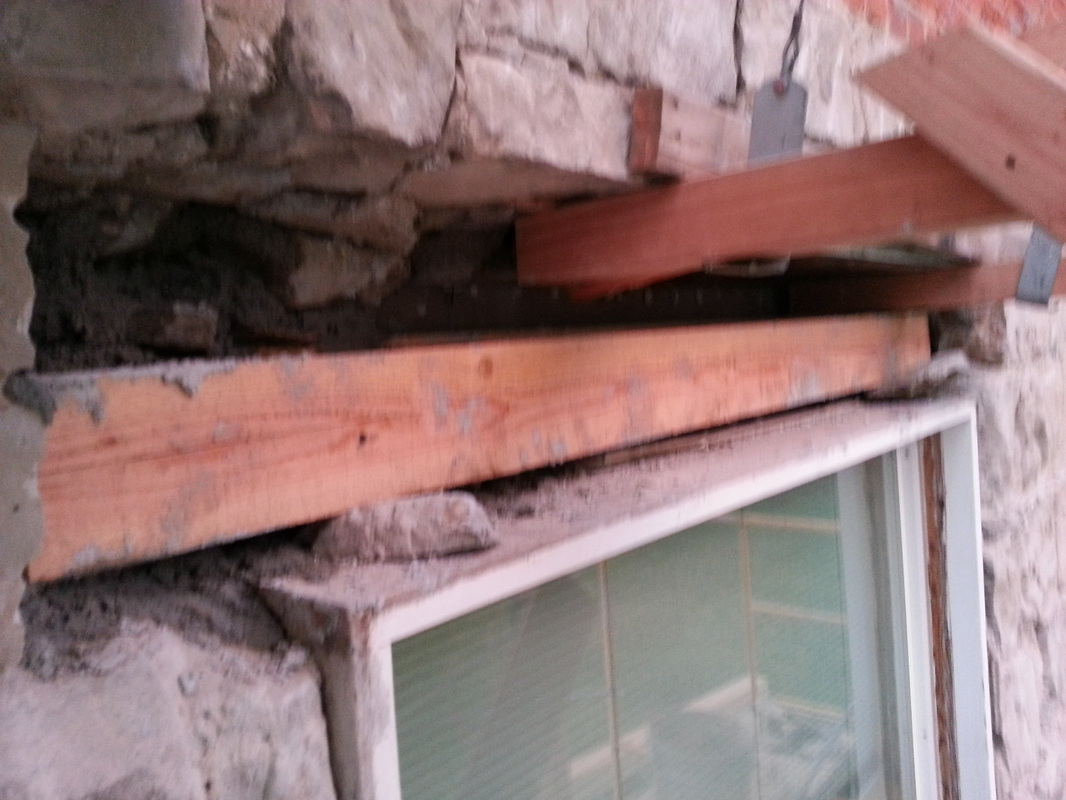
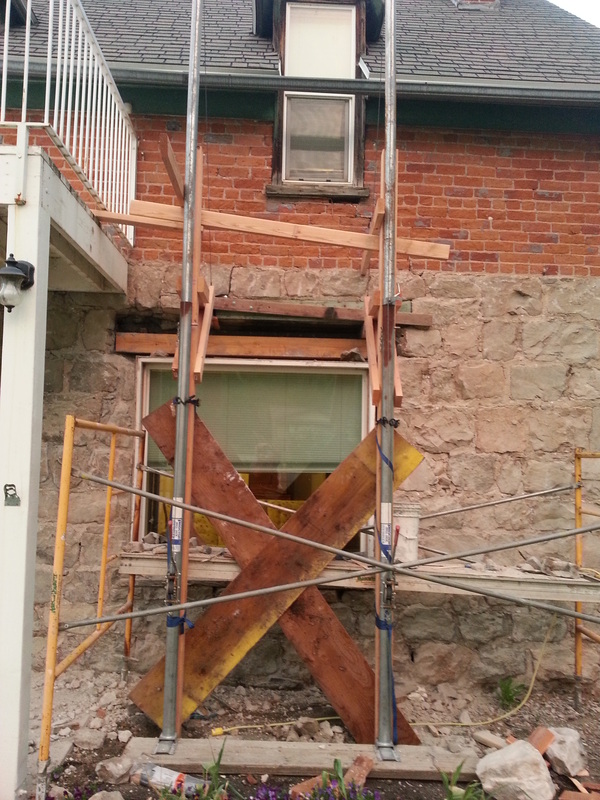
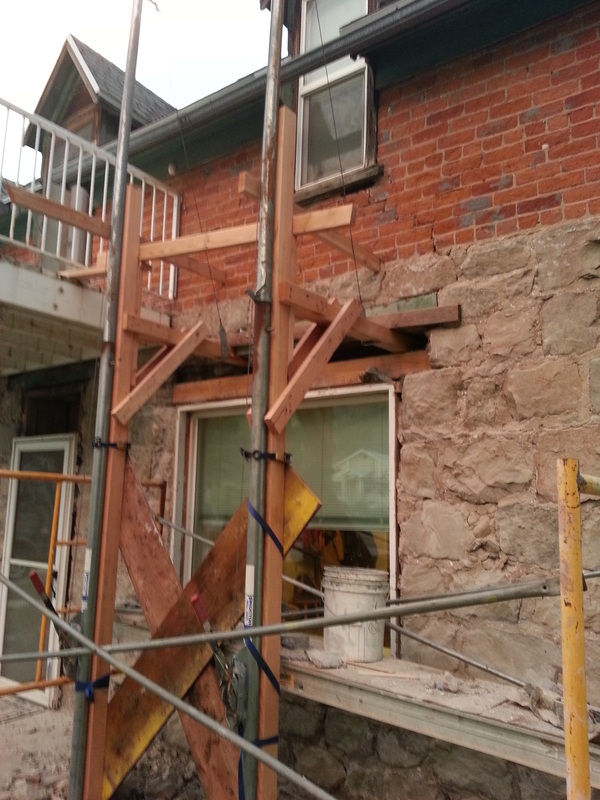
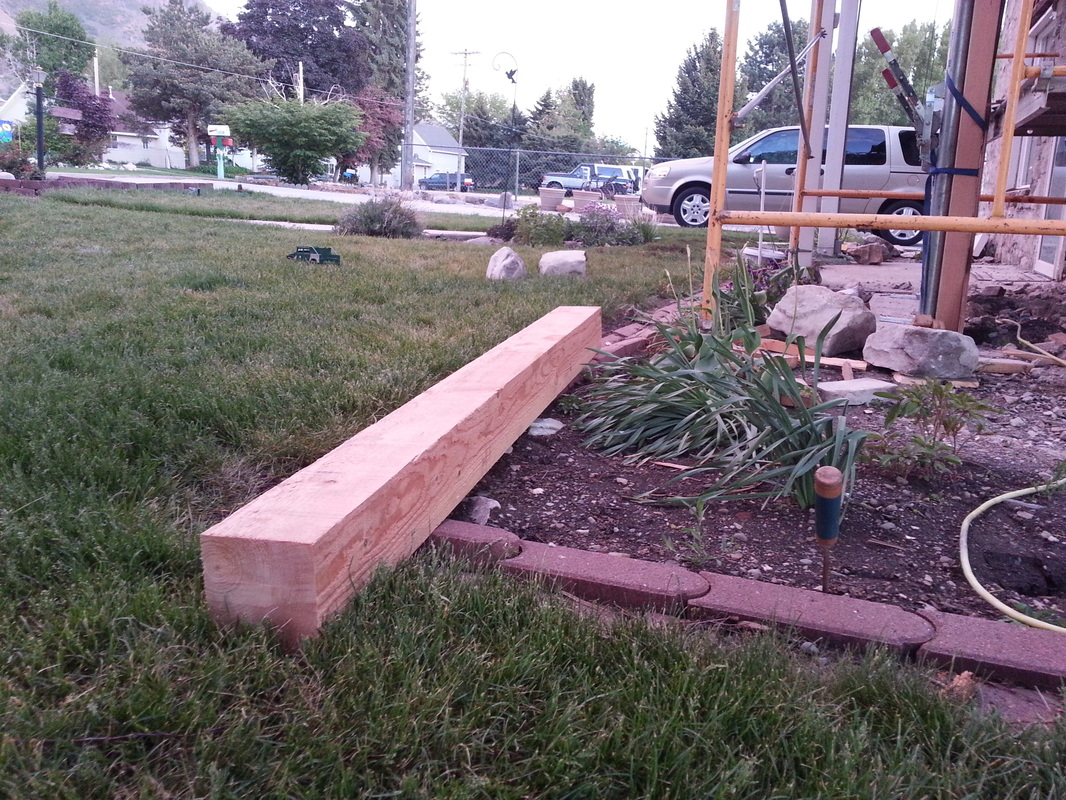
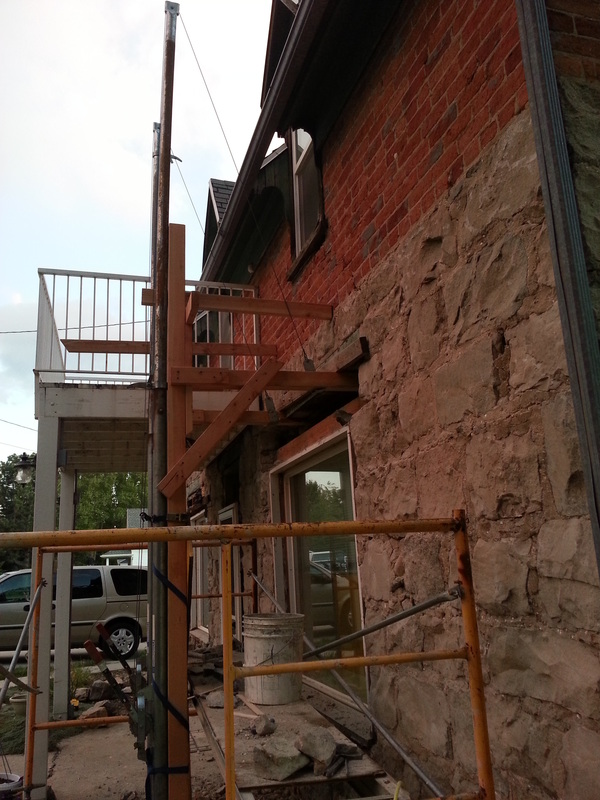
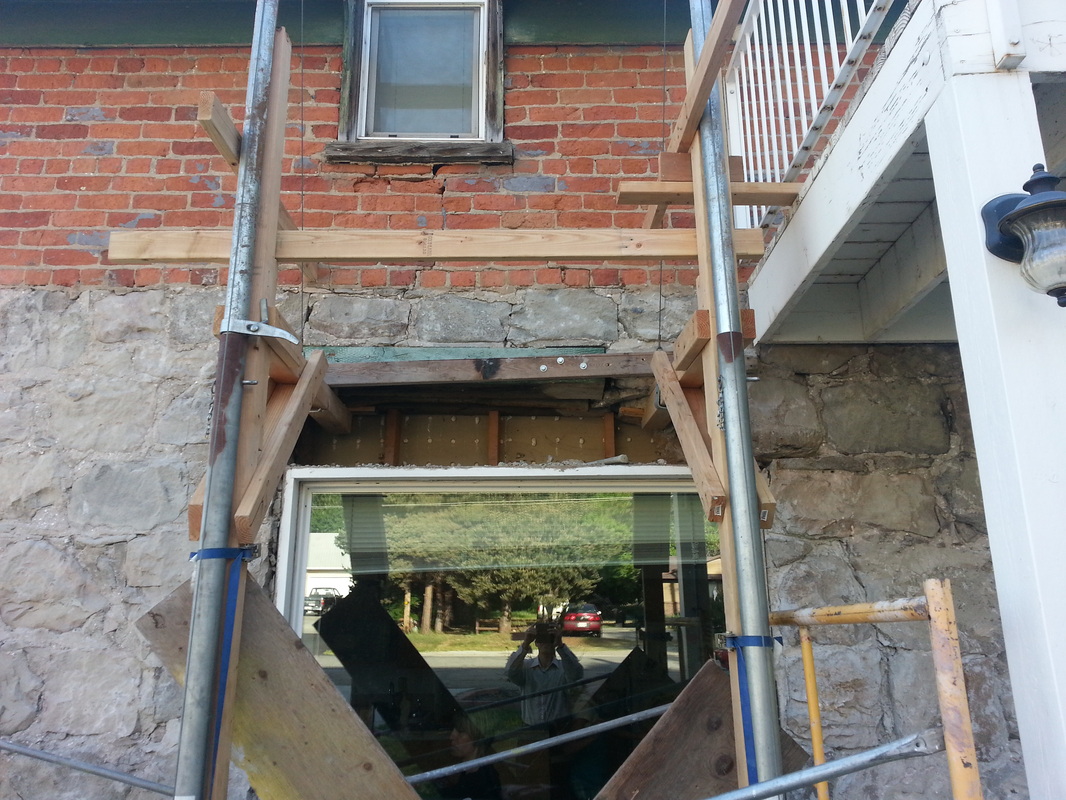
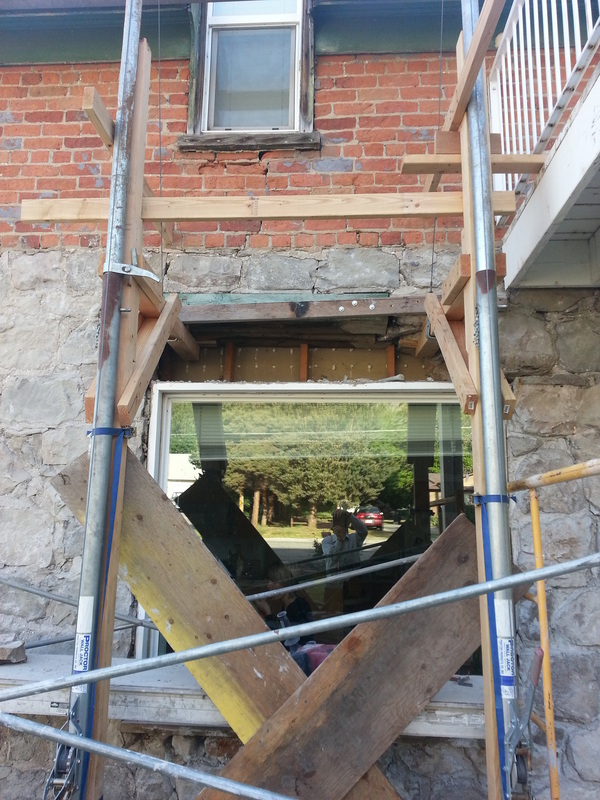
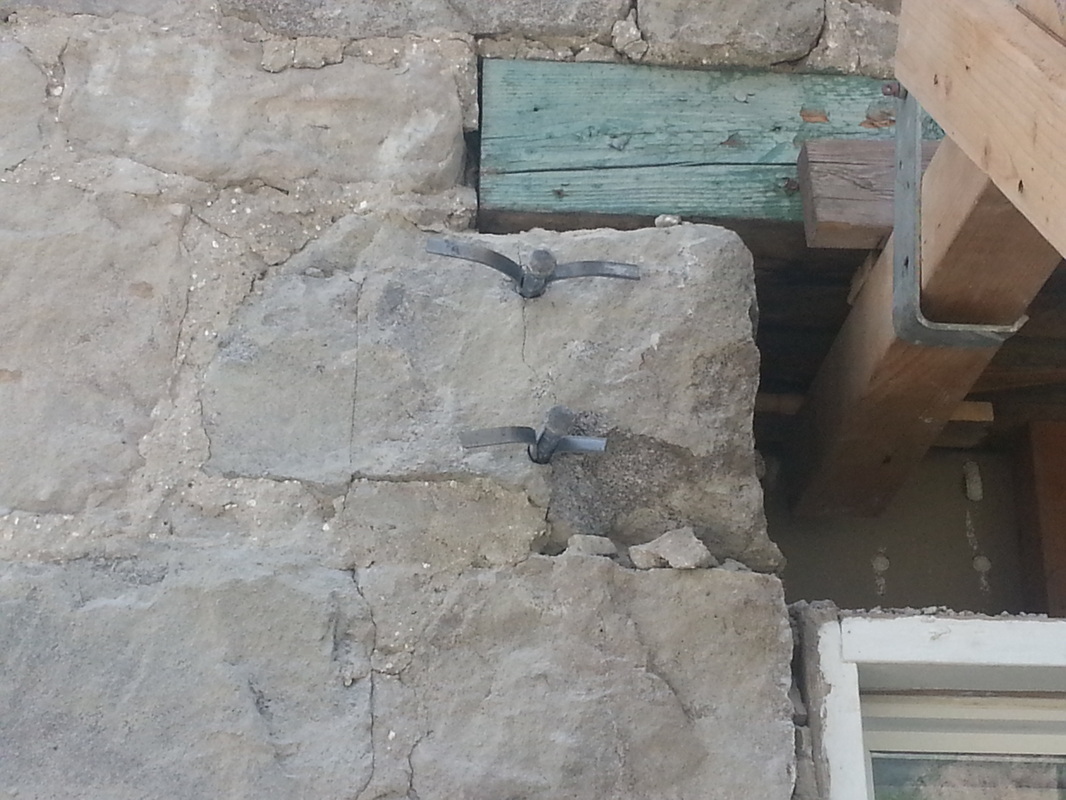
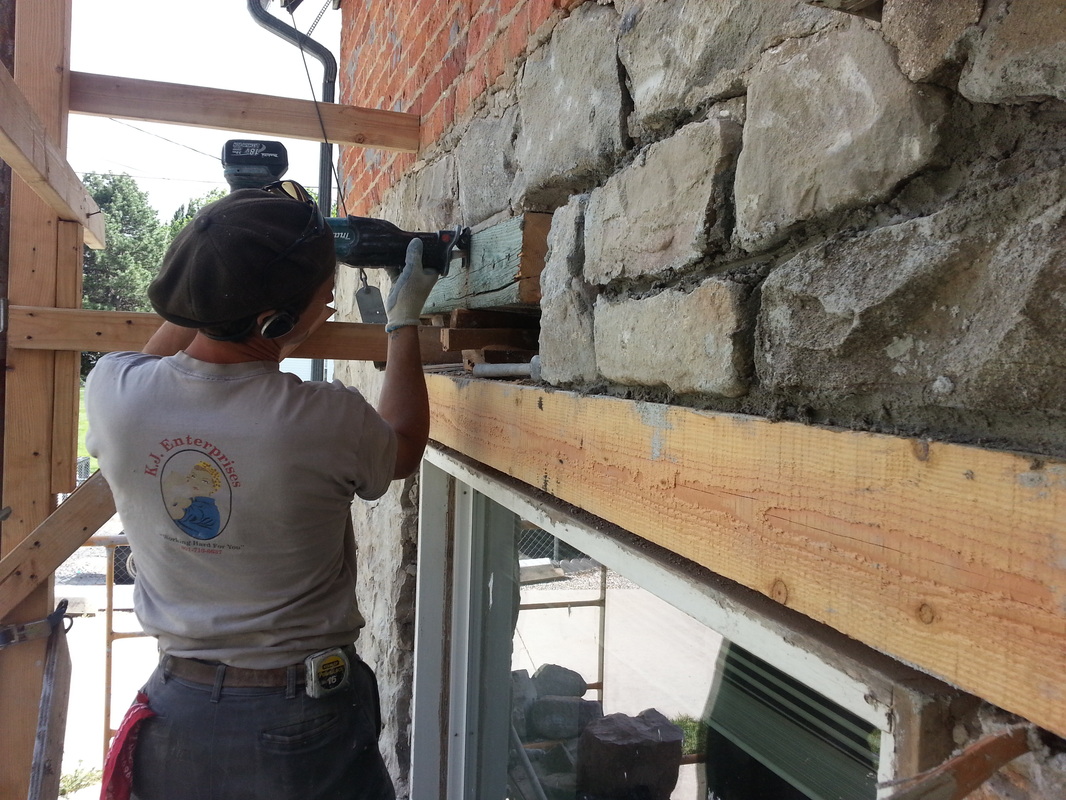
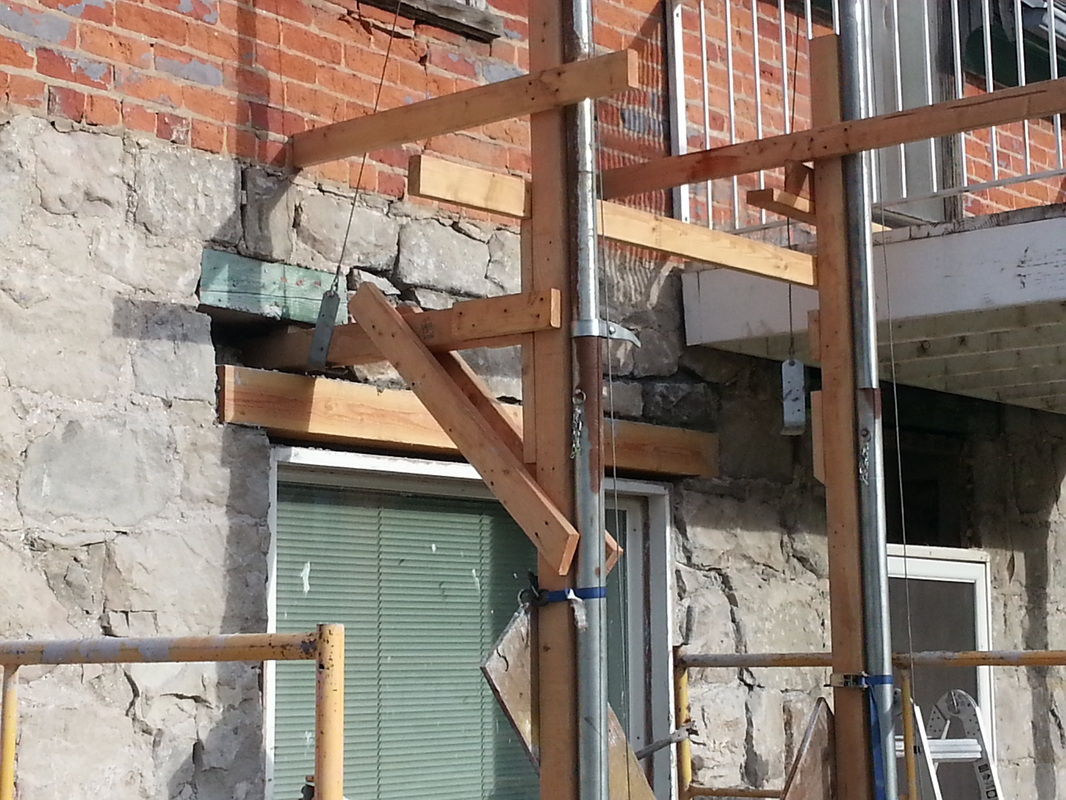
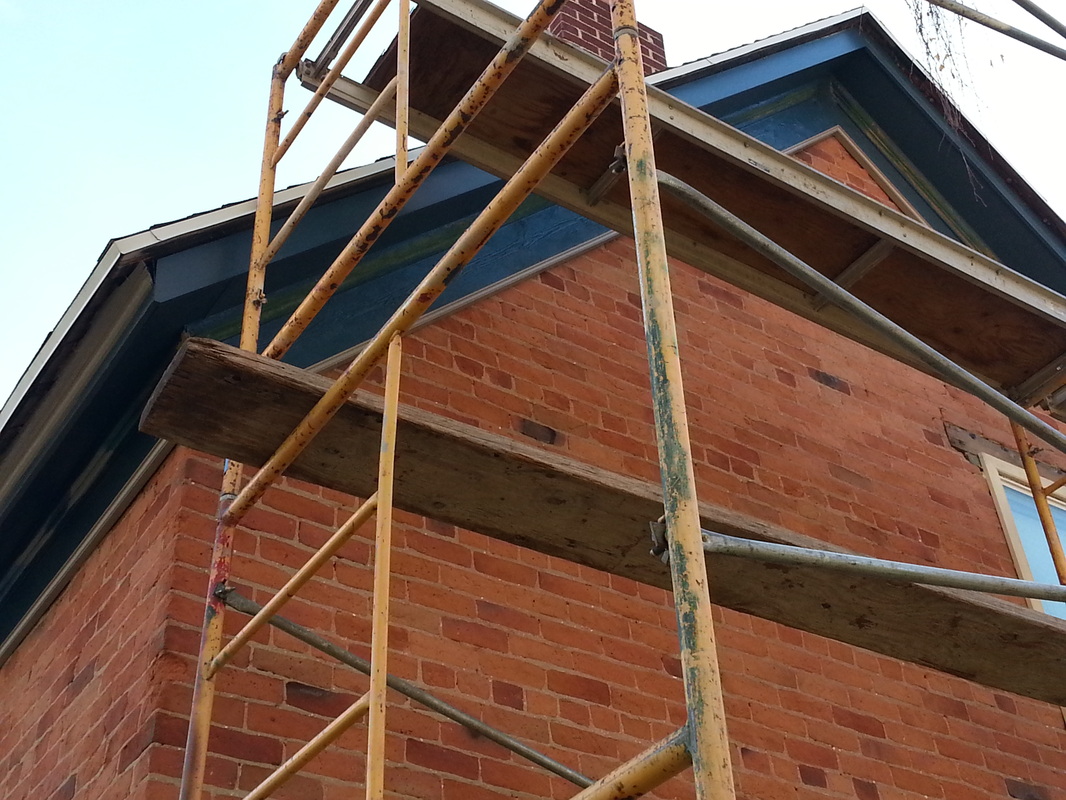
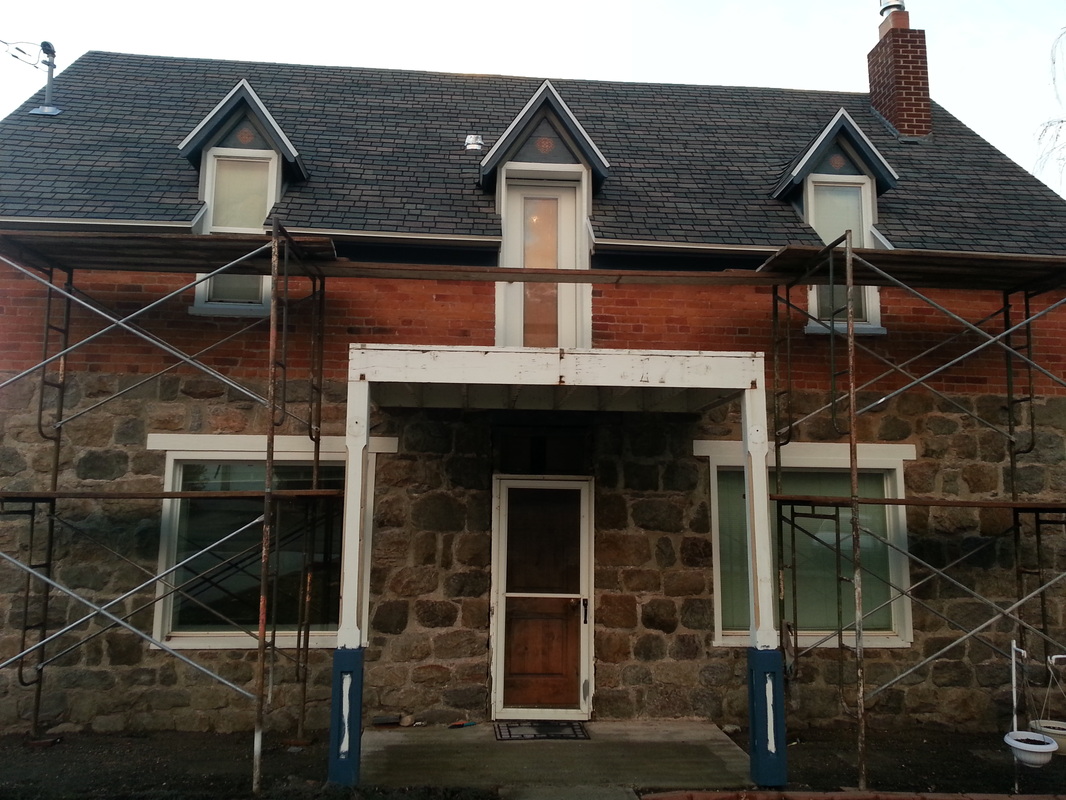
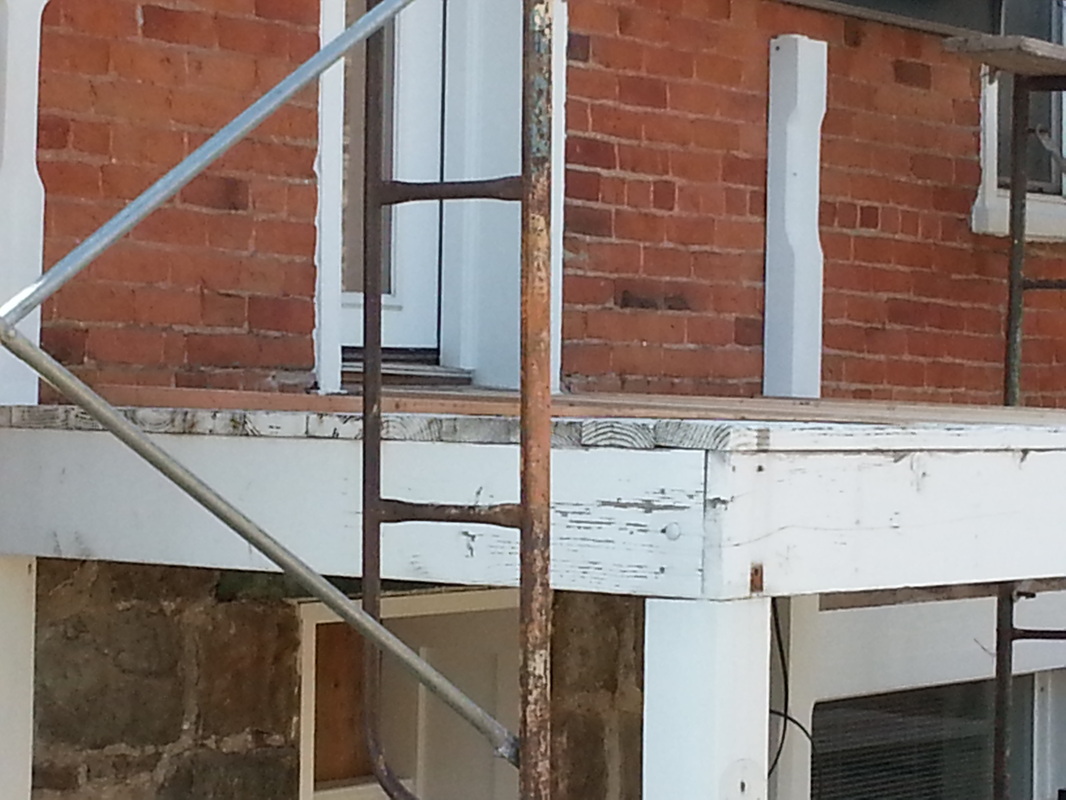
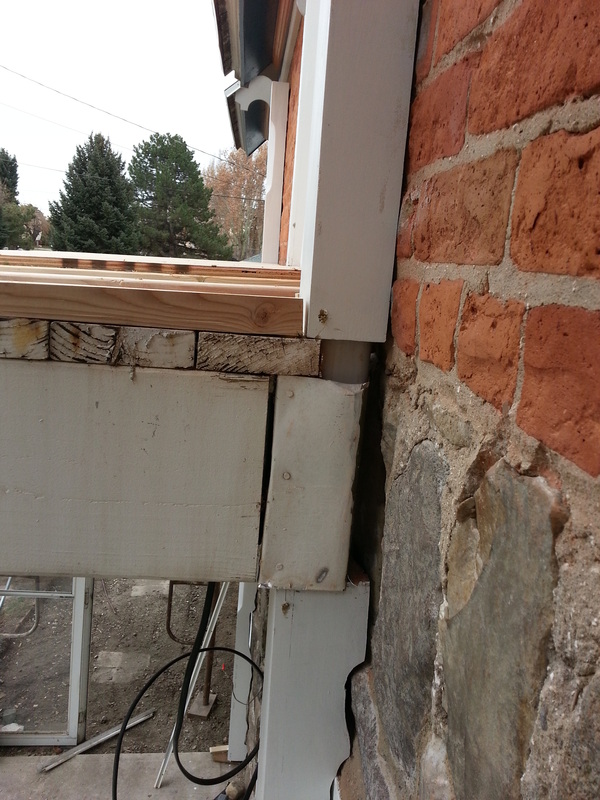
Cody and I worked together on May 17th and tried to figure out how we are going to secure the old header while we take off the angle iron that's "holding" everything up. In my mind...I doubt it is holding much...more like just keeping it in place. :) Anyway, I didn't take pictures of the May 17th day because it started to rain a bunch that evening and it just kept raining through Monday (20th) morning. We're glad we didn't start taking anything a part. As you can see from the photos, we started by making (Cody's idea) a framework to hold everything up. Earlier in the day on the 17th, I was talking with Rebecca Dilg about what we're doing and she told me that her and Carl had a couple of wall jacks so I went over to their house and Carl allowed me to use them. After we build the framework, we were doing some tests on it and felt that we should use the wall jacks as a separate measure to ensure the old headers didn't go anywhere. So far so good...they held well and Cody ended up asking Jeff Weigle (in the ward) to come help with the work. As we were looking at what's up there, most of the boards are 4x4 (probably closer to 4.5x4.5) or they used a smaller (true) 2x4 sandwiched with another (true) 2x4. There are 3 of those from front to back of wall holding up the weight of the rock above the window. We're planning on bringing in (Cody has already purchased and installed a couple of) 6x6 boards to make up the difference of the width of the window they installed in the 60's. After thinking about it for a minute, I decided to contact the City to see if I need a building permit...I should have thought about it sooner, but didn't...I called and they told me that I should have an engineer take a look at what we're doing and give some advice as to what would meet some type of standard. I can say what ever we do will be better than what they did in the 60's... :)
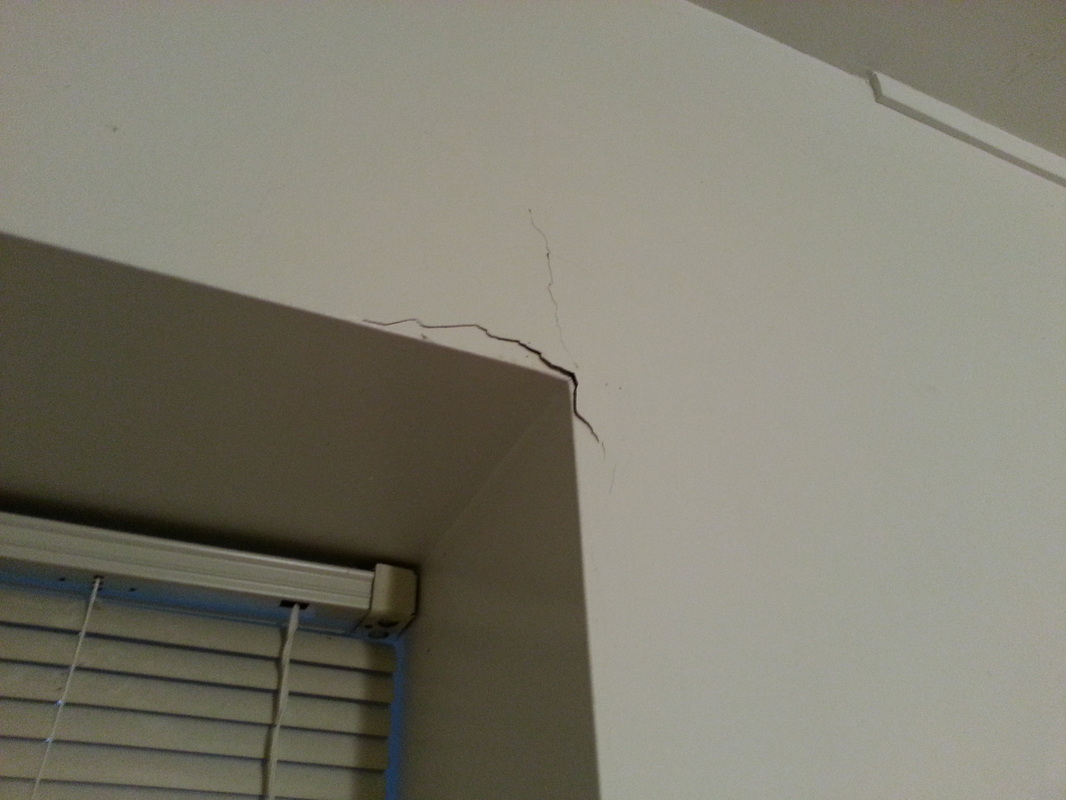
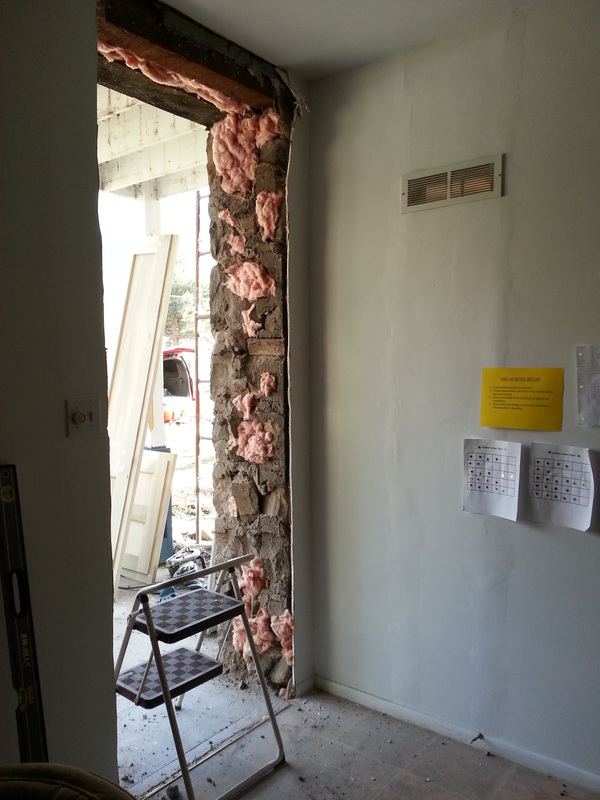
Also, I have taken a couple of pictures of the inside where we've pushed through the walls a bit...just a bit of touch up to be needed here... :)
Also, I have taken a couple of pictures of the inside where we've pushed through the walls a bit...just a bit of touch up to be needed here... :)


May 21, 2013

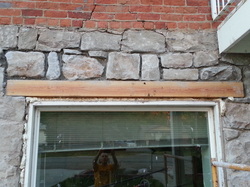
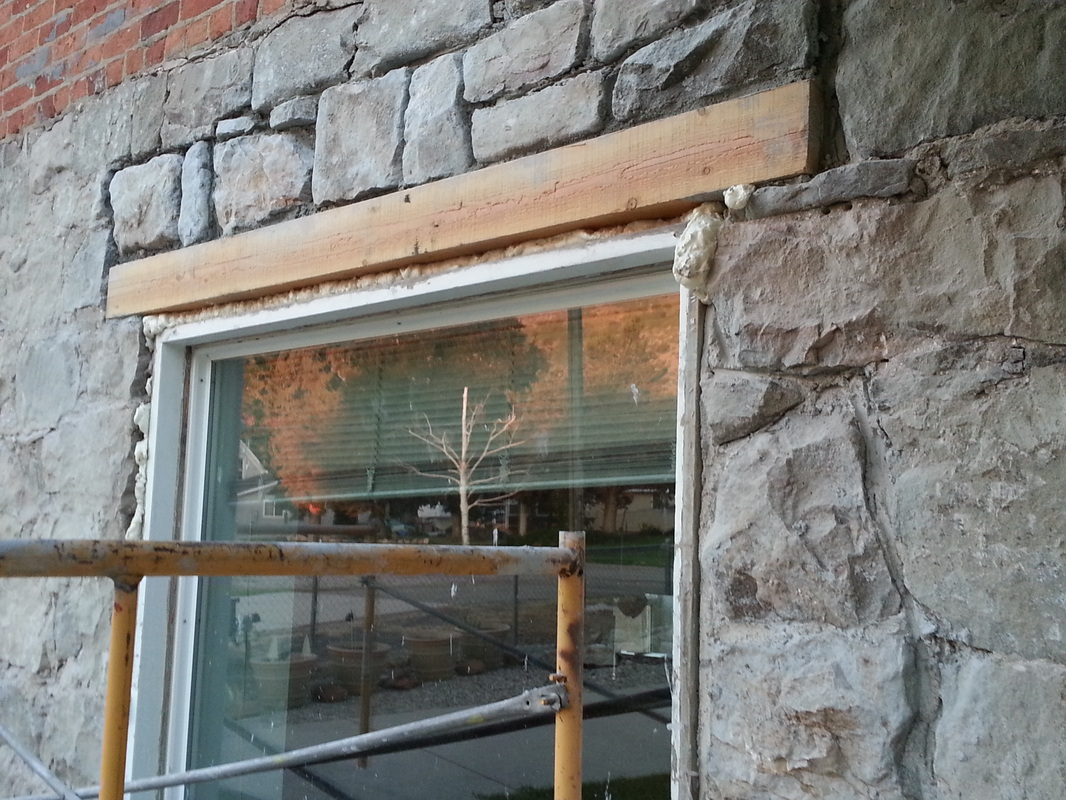
Cody finished up the header and main structural support for the north window. He is very particular as to the height of the rocks and making sure they look like they were meant to be there. Cody also notched in the old angle iron on the top back side of the front 6x6 to give it some extra strength. I'm excited at how well it turned out so far!
May 23, 2013
On May 22, I filled in the gaps with "Great Stuff." It was oozing out probably 7 inches! :) I had to laugh at how much it filled in. Anyway, today Cody cut it all back and filled in the front to make it look good. He is trying to match the mortar with the old mortar by adding in some lime. Hopefully, as it dries, it will match a bit better...right now it a bit brown compared to the first stuff...it's either that or more blue...I would rather have it the way it is. :) We then moved the scaffolding to the south and started putting up the braces. We got to the point we were either knocking out rock and putting in beams so we stopped for the weekend and went over to Cody's house to prepare his shed at his house for shingling...he had to do that by tomorrow so we knocked it out tonight. He did split one rock before he left and he almost had to do a third hole, but on the last hit with the mallet, it cracked in two! :)


May 24-25, 2013
Cody didn't work on our house today, but he did get his roof on his shed... :) I took a picture of him and his daughter on the roof as they were finishing it...
Also, on the 25th, Tom Gillins (engineer) came over and took a look at what we were doing, took down some measurements and (later) let us know that what we were doing would work. I'm sure as we move forward on additions to the home, we'll be contacting him. Super nice guy!
We also had, for the memorial weekend, a number of relatives from John Jacob Zundel come over and take a look at the old house. We gave them a tour of the inside and showed them what we were doing on the outside. I enjoyed meeting them and/or seeing them again. :)
May 29, 2013
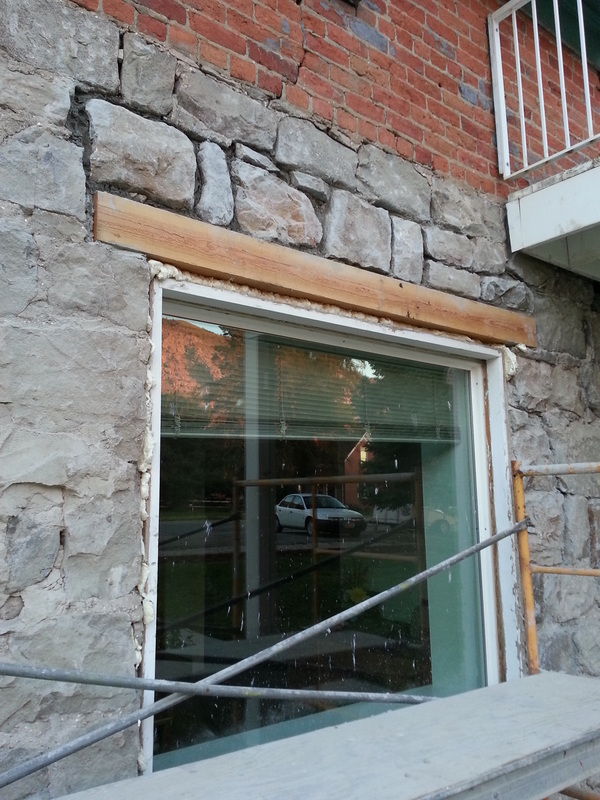
Today we (mostly Cody) focused on the south window...doing the same thing that we did on the north side. I still can't believe how talented Cody Wright is with rock work! He's amazing!


May 30, 2013
Today, Cody finished up the main work on the south header. He had to leave the south side of the old header until the north side set so we didn't squish out all the mortar. Also, I filled in all the gaps with "Great Stuff" so Cody can come back tomorrow and finish it all up...LOOKING FANTASTIC! I can't tell you what a relief it was for me to get to this point! I have worried and worried about how we were going to fix this problem...Cody was able to get it done! I'm super excited!


May 31, 2013
Today was finish work...Cody filled in all the gaps, fixed below the window seal and tried to match the old mortar color and style.


June 1, 2013

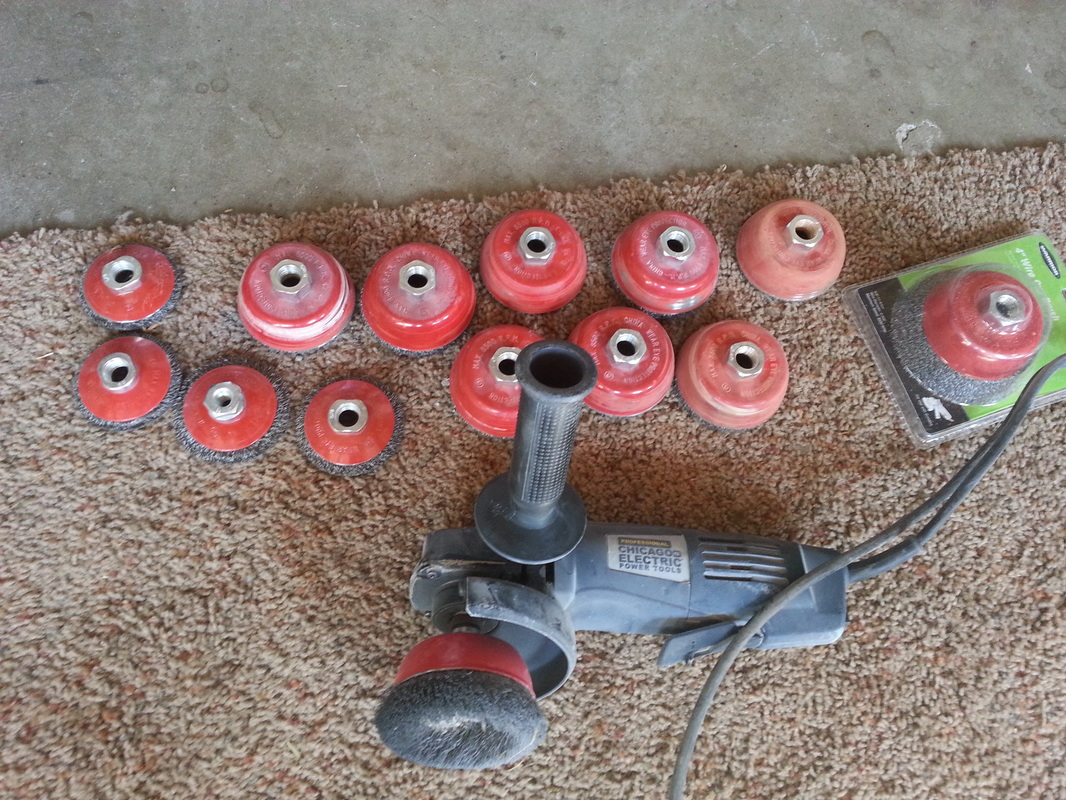
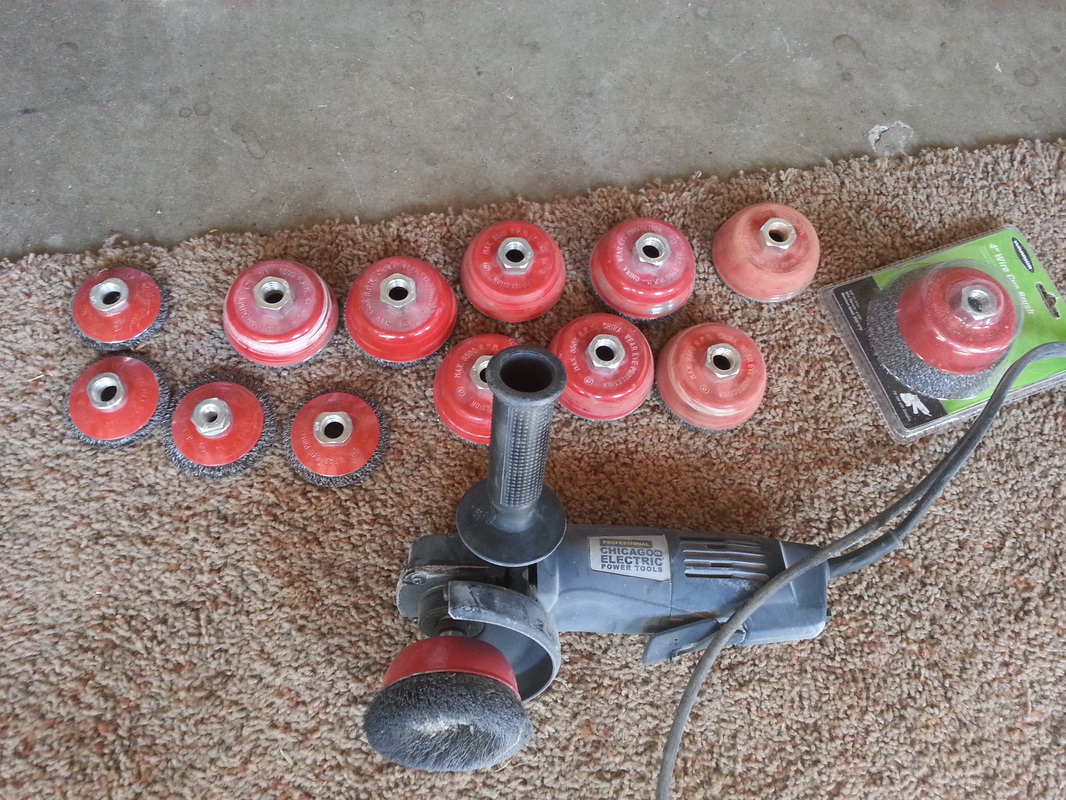
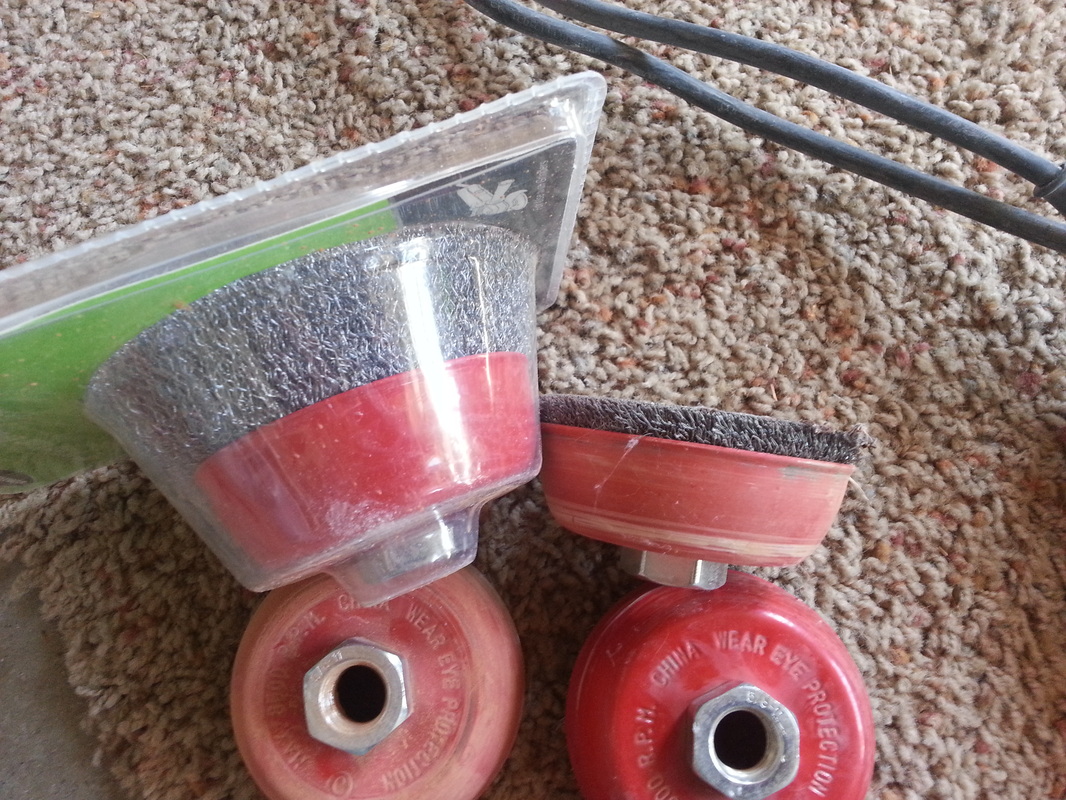
I started grinding today. We went out and purchased a 4" grinder from Harbor Freight (~$50) with the warranty and a couple of grinding brushes. I started up high on the west end of the south side. I ended up grinding off the rock as well. I can tell I will need to do the rocks as well...I wasn't going to grind off the rocks, but after doing a couple I noticed how much stuff is still on them...I guess I just doubled the amount of work I will need to do. :)
I actually have to grind off a fair amount of brick on some of them, but the look a ton better after I'm done.
I actually have to grind off a fair amount of brick on some of them, but the look a ton better after I'm done.


June 8, 2013

More and more grinding! Who needs that "spray-on tan" when you can just grind bricks!?! :)
I started as high as I could because Robert Beebe is telling me he might need the lift soon. So I started on the south side and did what I could from the peak down to the middle of the window (low enough to use scaffolding if Bob needs his lift back). Then I did some of the north side. I'm "pooped" out! It's a lot harder than you would think!
I started as high as I could because Robert Beebe is telling me he might need the lift soon. So I started on the south side and did what I could from the peak down to the middle of the window (low enough to use scaffolding if Bob needs his lift back). Then I did some of the north side. I'm "pooped" out! It's a lot harder than you would think!


June 22, 2013
Today I was able to grind off the rest of the bricks on the north side, grind all of the east side bricks, and the east end of the south side of the house...it's coming...it took me seriously ALL day to do this much! It's crazy how long it takes to grind this cement stuff off! If you look at the pictures you'll see how much dust is on the ground and rocks. I also took some pictures of the house after I rinsed off the brick and rock...one day at a time! :)


June 26, 2013
I took the morning off of work and decided to grind off the brick and see if I could finish...well...the brick is all ground off!! Yipee!!! I ground down each and every brick that is visible on the house! I still have a lot of work grinding, but the brick took a lot longer than the rocks will! I'm super excited at how it is turning out! By the way, we have had a number of "relatives" (uncles, aunts...once, twice, and three time's removed...something like that) come over and take a look at the old house. We're excited to show them the progress and hope to continue to improve the old house. :) I can't guarantee an inside tour, but I would more than welcome an outside tour! :) If you want to see the inside, you must make an appointment with my wife. ha ha!


June 29, 2013

I started early and worked on grinding off the rock on the south side. I'm not sure how many hours I worked on the house, but I can tell you it was many...I even opened up a few of the places where I need to get Cody to come and fill in...they were the holes that were there originally that must have been put in for some reason (again, Cody and I think scaffolding). As you can see from the photos, the rocks are a bit darker from the steel, but it wears off pretty quick after I squirt it down with water...
I then worked on cleaning up all the pine cones and needles to make the yard look a little bit better for the 4th (I think I over did the work today because of how tired I feel...it was over 100 degrees today) I filled up the whole bed of the truck! The poor yard...it definitely isn't getting the attention it needs. :)
I then worked on cleaning up all the pine cones and needles to make the yard look a little bit better for the 4th (I think I over did the work today because of how tired I feel...it was over 100 degrees today) I filled up the whole bed of the truck! The poor yard...it definitely isn't getting the attention it needs. :)


July 12, 2013

More grinding of the rocks...I still can't believe how long it takes to grind off each rock...maybe I'm getting burned out of this. ;) Maybe it's too hot?? Needless to say, I ground off most of the south side head high today. We'll keep plugging away...
July 24, 2013
Decided to do a bit of grinding today...it's so hot that I decided to make myself a shelter to cool things off. Getting closer to having the south side of the home ground off...


August 1, 2013
Grind, grind, grind...this job is endless (at least that's how I feel in the heat! I ended up knocking out the small rock in the hole on the south side...it just didn't fit there, so we'll have to find a rock that it a bit taller than what we would have if I wouldn't have taken it out. It will match a lot better when we get it done. :)


August 2, 2013
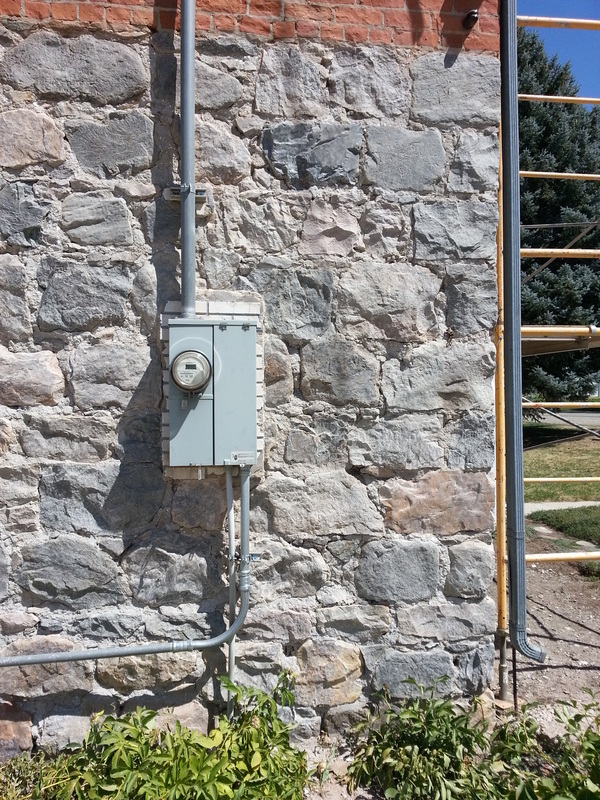
Finished with the south side of the house!! Yipee!!! I still have to figure out what we're going to do around the light box. At first I thought I would take it off and simply remove the fake brick and then put the box back, but after analyzing the situation, I figured I would leave it hooked the way it is and simply remove some of the fake brick around the edges and then we'll mortar around it to make it look like it fits (at least a little bit). It sure feels good to be done with one side but there is still so much to do... at first I thought the rock would take less time than the bricks did, but that doesn't seem to be the case.

August 17, 2013
We did a family vacation to Yellowstone and now we're back. This past July was the hottest July on record...August isn't too far behind! It's super hot!
Darrell Hansen (over on 3rd South) decided to mention to me that he had some time...well, it wasn't hard for me to decide to allow someone else the "pleasure" of grinding away on the rocks...he finished a good portion of the east side (south end) of the house. He worked for 7 hours to do this much...I don't feel too bad about how "slow" I am after seeing his progress today...it's simply not a "fast" thing to do... :)
Darrell Hansen (over on 3rd South) decided to mention to me that he had some time...well, it wasn't hard for me to decide to allow someone else the "pleasure" of grinding away on the rocks...he finished a good portion of the east side (south end) of the house. He worked for 7 hours to do this much...I don't feel too bad about how "slow" I am after seeing his progress today...it's simply not a "fast" thing to do... :)

August 19, 2013

Hired Darrel Hansen to come back...he's awesome! I can't tell you what a lift it is to have someone else working on the house! I don't walk home thinking, "man! I've got to get going on that house!" I would come home placing that burden on my shoulders every day...but not while someone is working on it. :) Darrel put in 4 hours today...He worked on the top of the rock layer and finished the east side up high...now the scaffolding is on the north side of the house and everything is in reach...
August 20, 2013

Darrel came back this evening for a couple of hours...really all that's left of the east side is around the door and below the north window...I owe Darrel! Just having someone else working on the house gives me some motivation to get it finished!
August 21, 2013
I decided to do a little grinding when I got home today...I had to get out a stepping stool to get up high by the top of the door, but I was able to get south of the door (east side of the house) and a little by the ground (next to the door) north of the door. my grinder is getting really hot now...not sure if it's the temperature outside or what. :)


August 24, 2013

Chase Jeppesen came over and we hauled away the fake brick! I'm super excited this is out of the yard! One less thing I have to worry about! :) At first, he came over with a truck to just throw it in with a shovel, but it didn't take long before we made a few phone calls and asked Chris Davis (neighbor to the south) if we could borrow their backhoe. She said yes as long as we knew how to drive it...and boy did Chase know how...Stud! My back feels so much better now that I don't have to throw that material into the back of this truck! :)

September 04, 2013
East side is done...Darrel Hansen came over and finished it up! Yipee!! It is such a good feeling to be done with the grinding on the east side. Only the north side left to do. :) Look at how the rain water has washed a bunch of dirt into the headers...

September 05, 2013
I decided to do some grinding of my own. I went to the west side and started where I had left off (months ago) and went up. It's good to get some of this done, but it sure takes a lot of time! Maybe I'll take some time off now that it's starting to cool down to the lower 90s to get this done...haha


September 06, 2013
Cody Wright (and I have heard that his sister Kenzie) came over and started pointing the house as well as filled in the holes on the east, south, and most of the north hole... Sure looks better, especially the north side! I'm not sure why the north side is so bad?? I'm thinking it's so bad because of the vine that they had growing up the side...


September 09, 2013

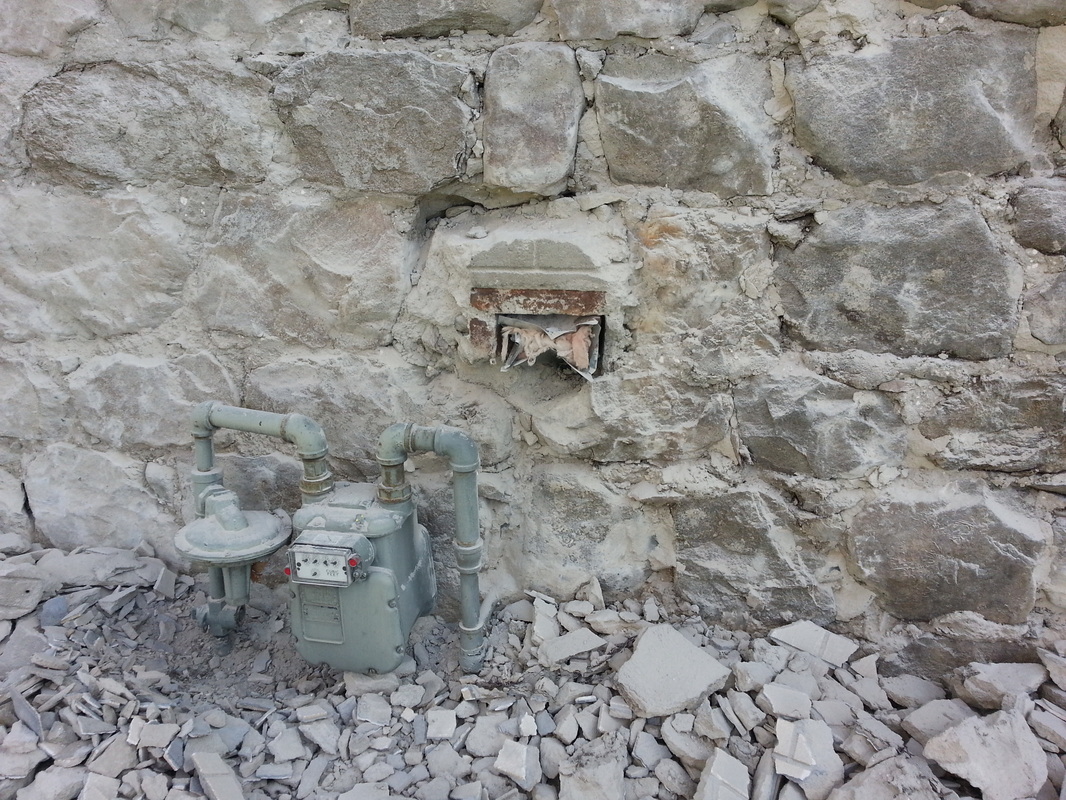
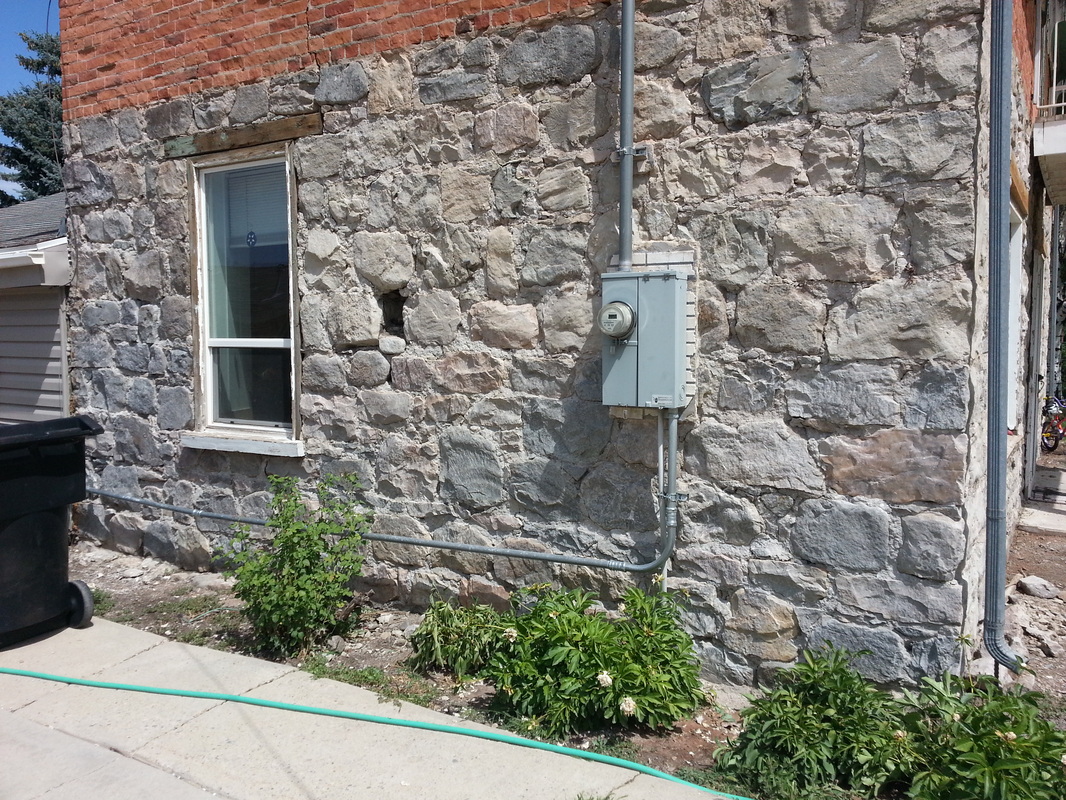
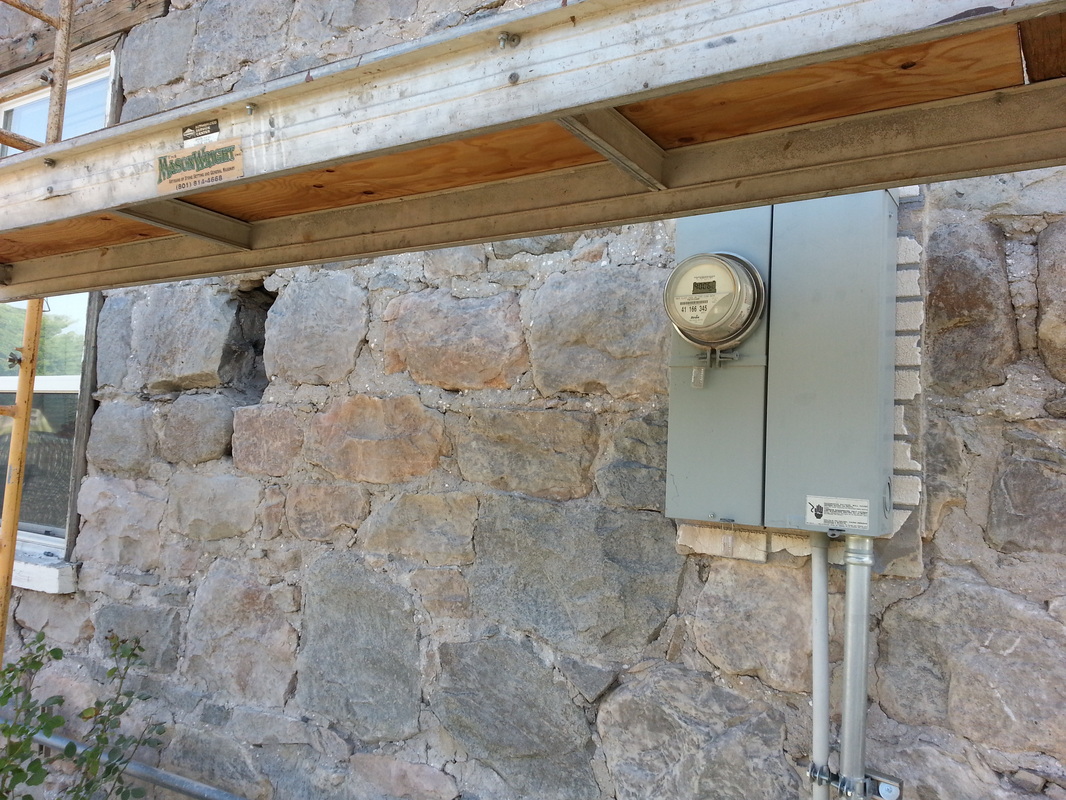
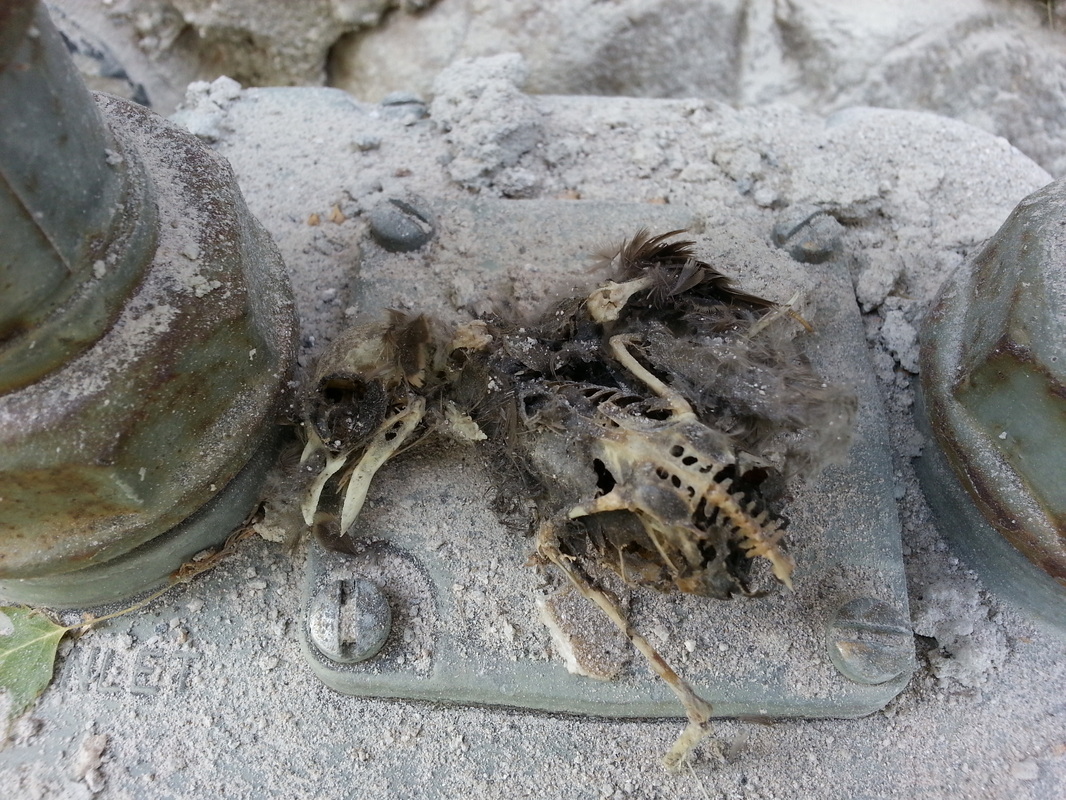
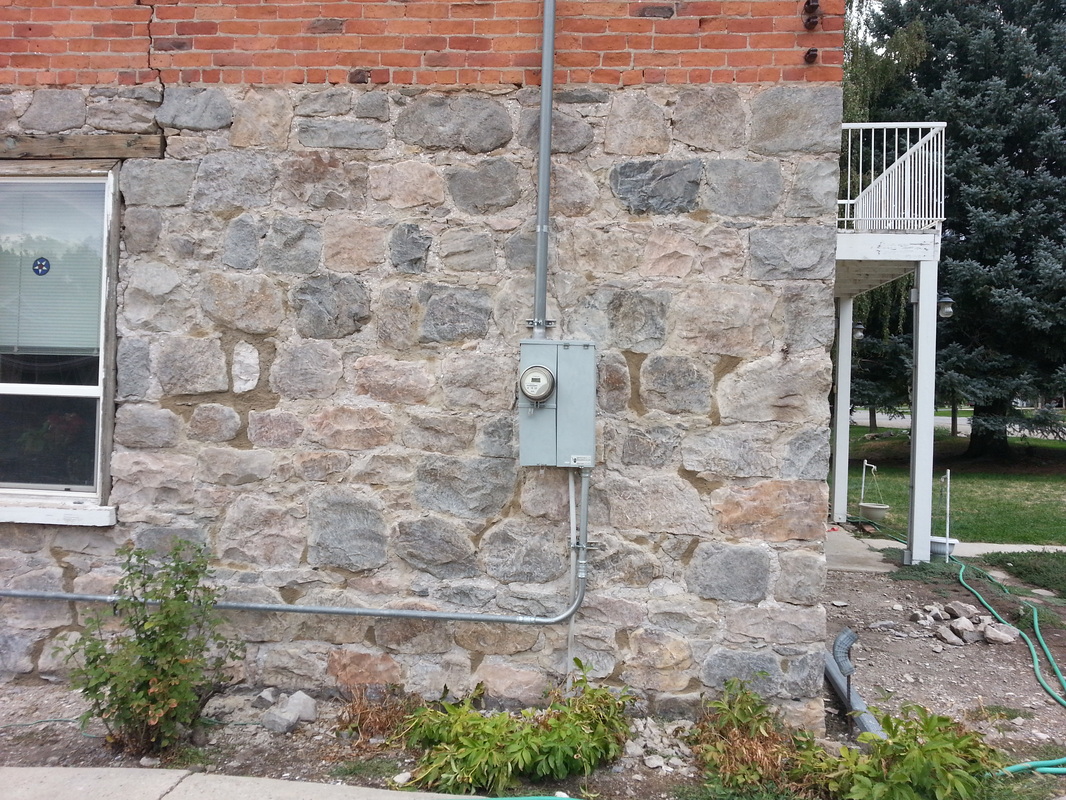
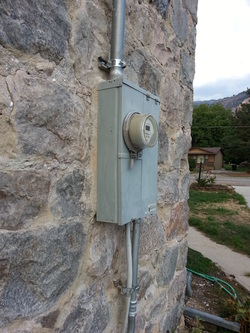
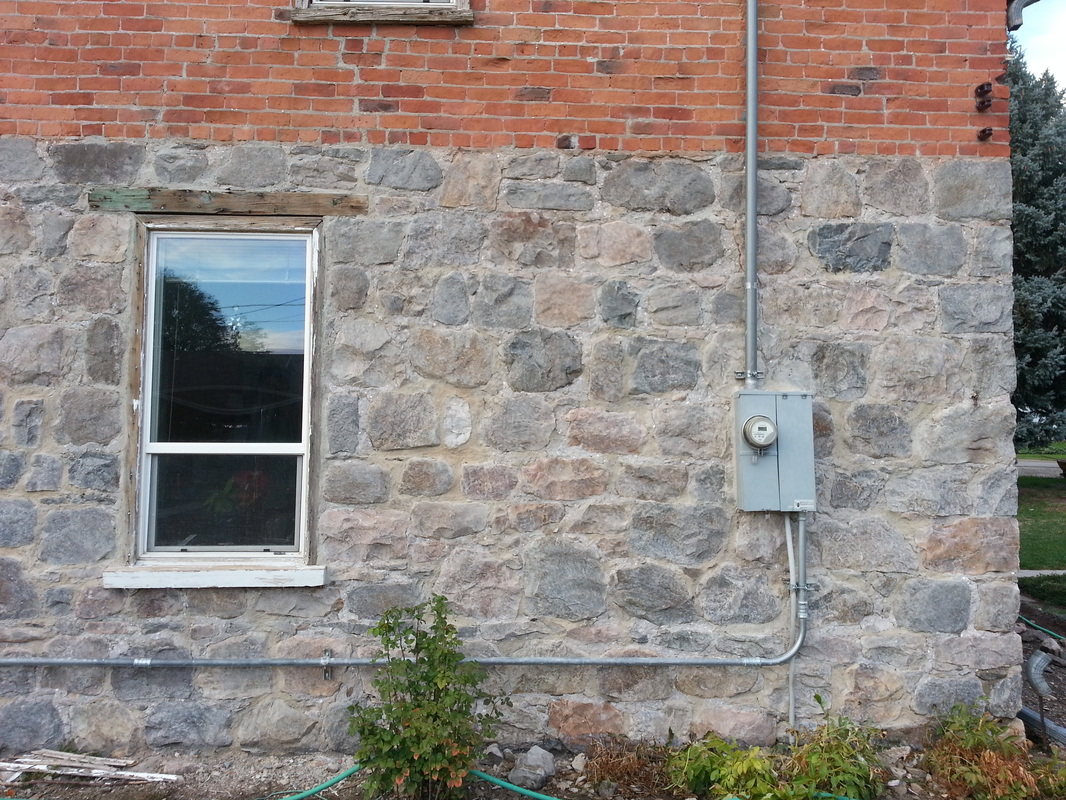
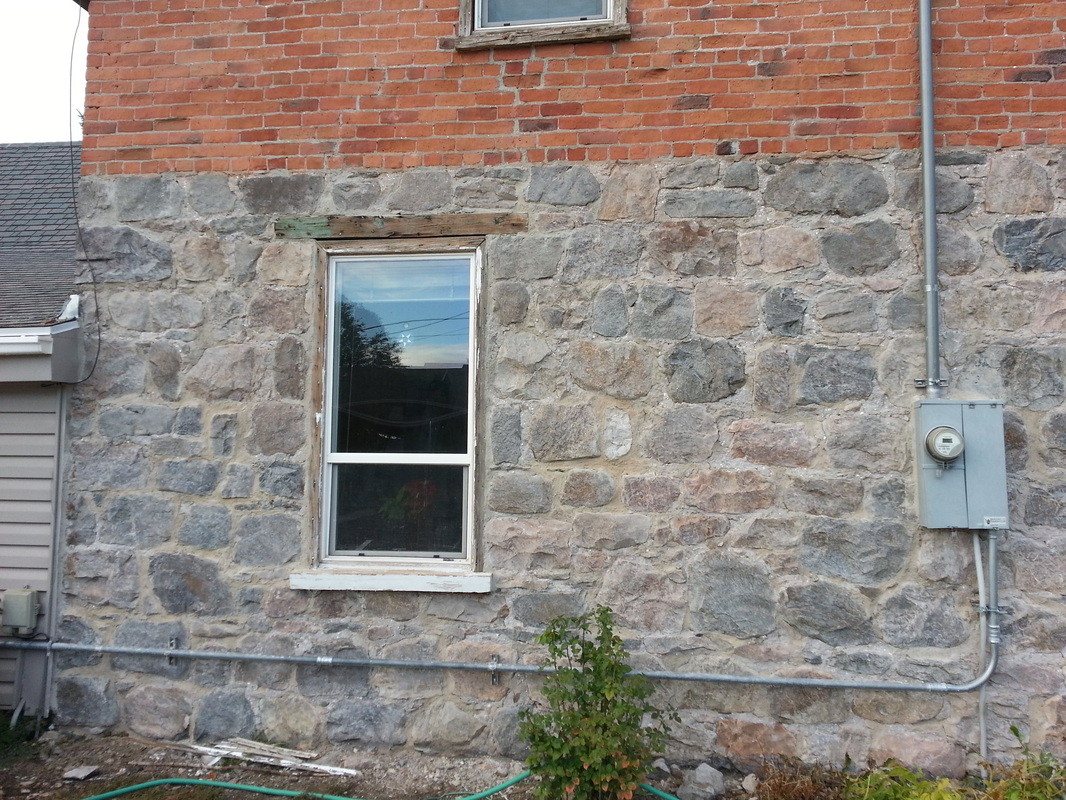
I took the day off today to work on the house. The temperature went from mid 90's to mid 80's today...not supposed to rain...so I went to work on the house. I started on the south side...my thought was to simply knock the boarder around the power box away from the box so Cody could put mortar around it to make it blend a bit better. I was doing fine until I got to the west side of the box. The hammer drill got wedged underneath and all of a sudden the whole box slid down 5-6 inches! I didn't know what I was going to do! What was supposed to be a simple thing, got real bad real quick! I went in and told Ang that I was going to have to shut the power off. Let's just say she didn't give me the best look. I called Cody Wright (he was going to come over and work on the house today) and he came over. In the meantime, I lifted the box back up a couple of inches (it was being held up at first by the plastic pipe (conduit that held the ground wire)) and propped it up by a piece of wood or two. We made a game plan to go down and pick up a drill bit that would work with the hammer drill and put in some anchors. When it was all done, I was glad it came off...it's SO much better now that it's anchored with the anchors! It was being held up by some 1/4 inch screws in the fake brick behind the box! Shouldn't come down now! I was also able to anchor the rest of the bolts for the conduit going into the house. Then I went to work on the north side. I made the hole that was once the fireplace insert, so Cody could come and put it back to the way it should be (he ended up getting caught up on another project and plans to come back tomorrow to fill it in). Then I went to grinding...Looking at the side of the house I could see where the vine was. There is a picture or two of what's left of the vine. There was a pretty big vine growing in the mortar at one time! I was able to get quite a bit done...but still have hours to go! :) Oh...I also found a dead bird (mostly skeleton) in the back by where the fireplace would have been...must have gone down the chimney and couldn't fly out. :(


September 10, 2013
Cody Wright came over and finished doing the point work on the north side and fixed the large hole I made yesterday! Cody is amazing and does amazing work!!! He also did some point work on the south side by filling in some of the cracks that he could reach. I'm SUPER excited at how this is turning out!!!


September 14, 2013
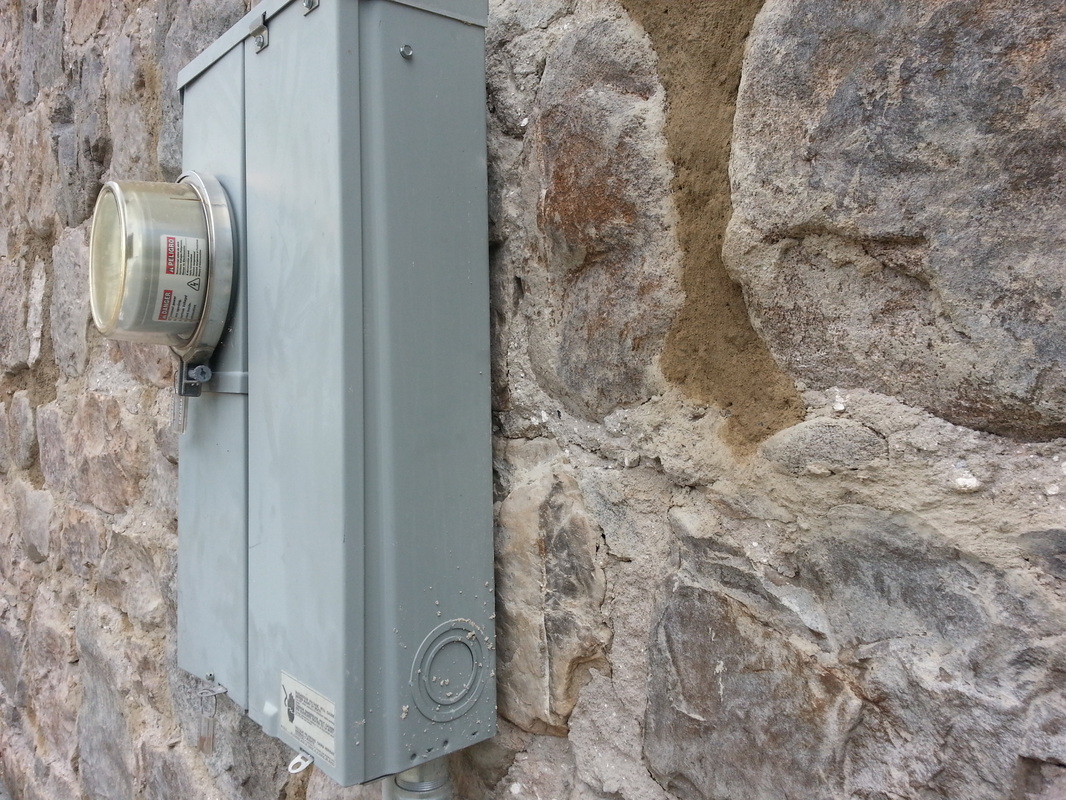
Cody came over and filled in a bunch of holes around the home and pointed the power box on the south side...almost looks like it belonged there! :) He even filled in some of the cracked brick with mortar that was colored to look like the brick. Cody is amazing!


September 16, 2013
Grind, grind, grind!! Getting closer to the finish...I can see the end, but there is still a couple of hours left to go...


September 21, 2013
Happy Birthday, Brandon! I finished the grinding! YIPEEEEE!!! I can't tell you how good that feels! Thanks to Darrel Hansen! :) I've included a couple of before pictures of a rock that is on the northeast corner. The first picture is a closeup of what the rock looked like with the the fake-brick material that is left on it (it also shows the east side which is complete) and later (even though it is a bit dark) shows what it looks like after grinding on the north side.


September 26, 2013

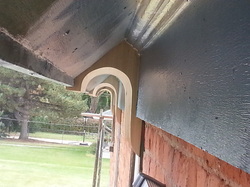
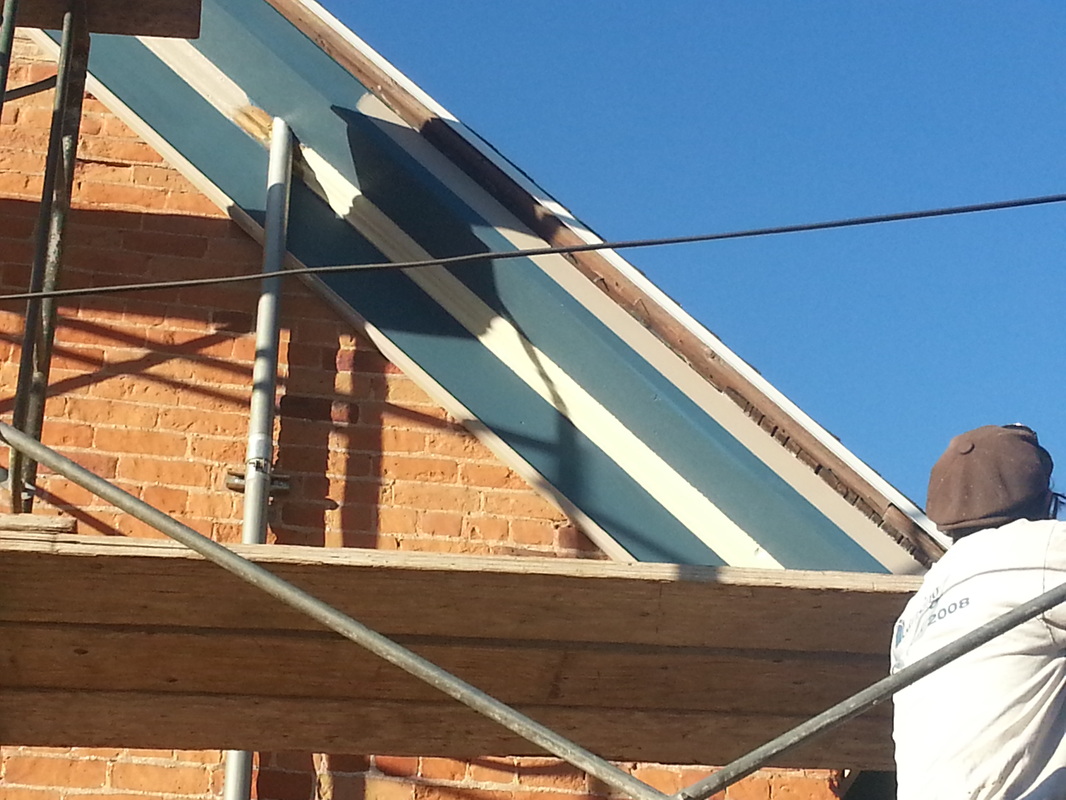
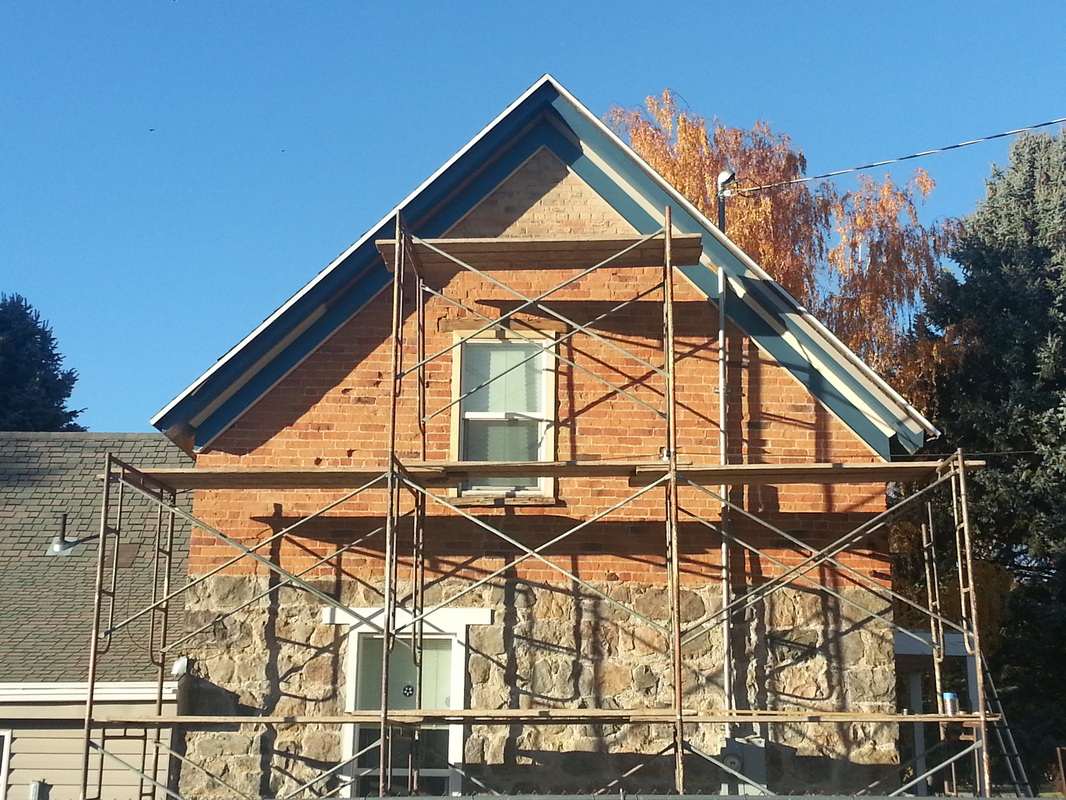
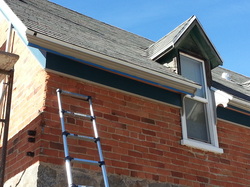
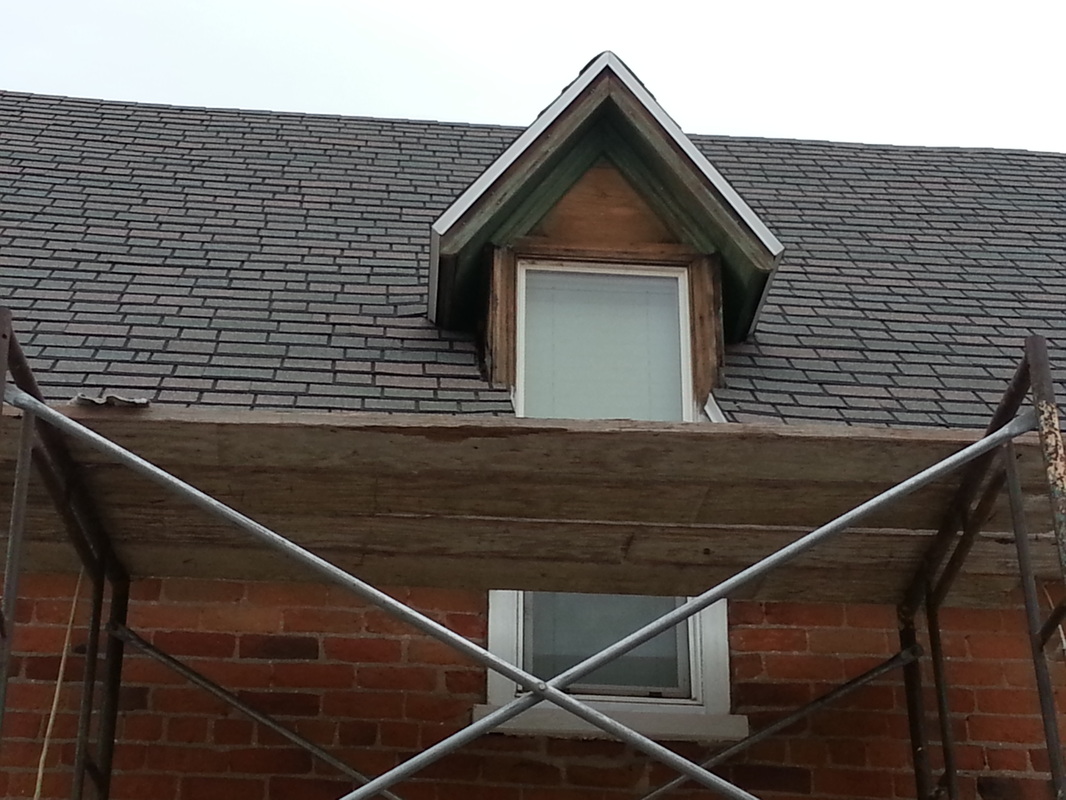
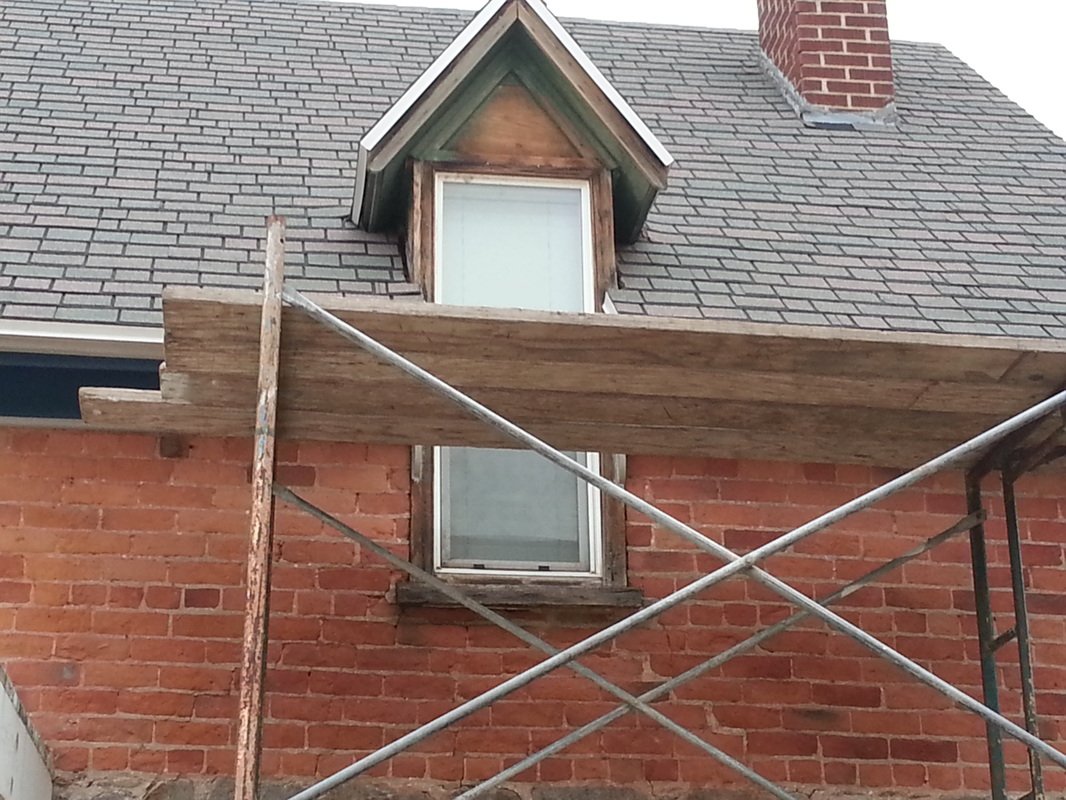
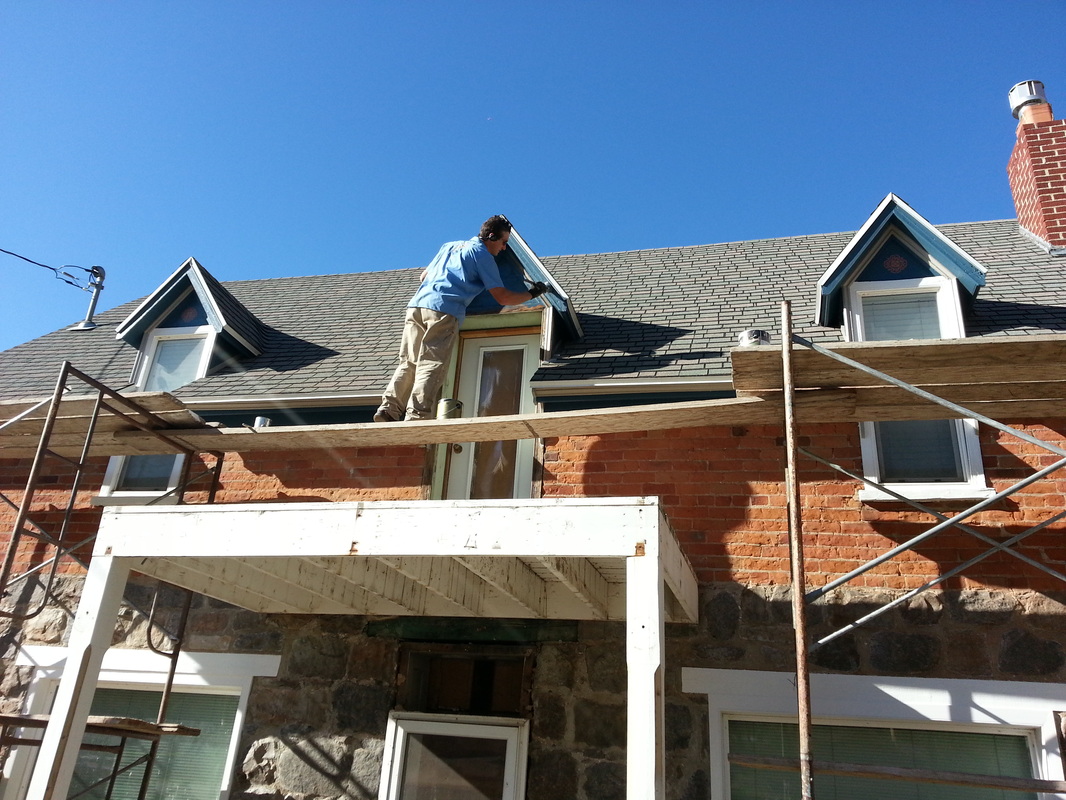
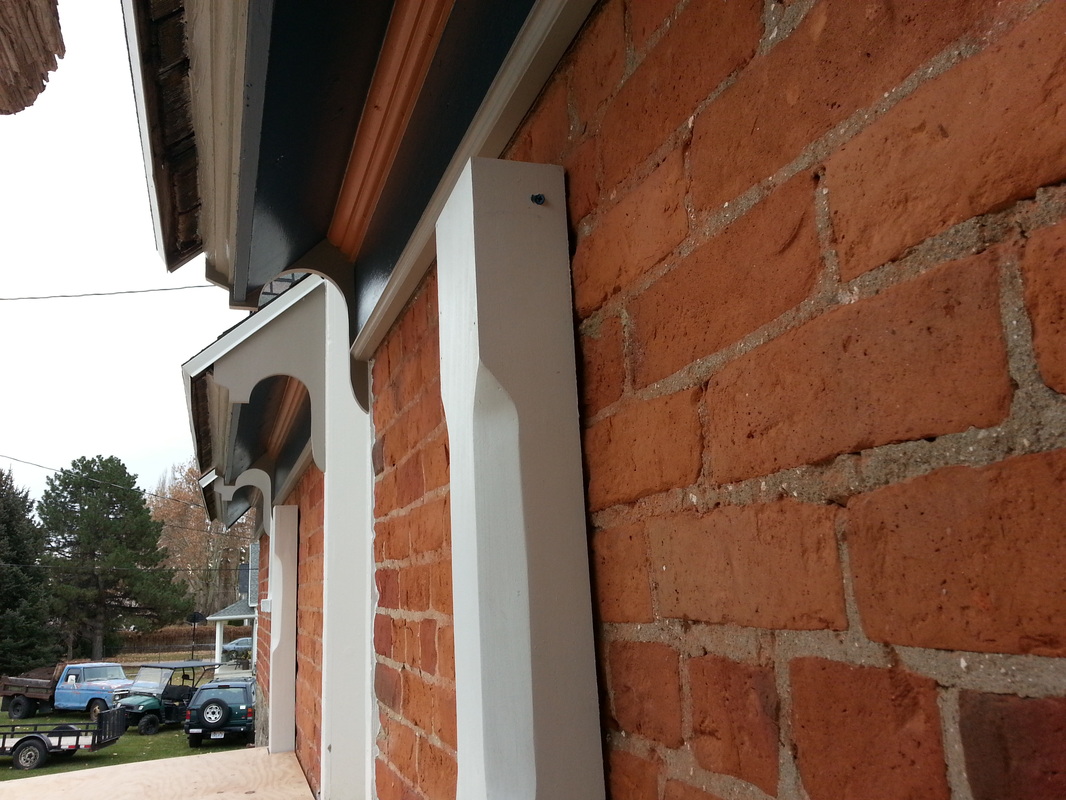
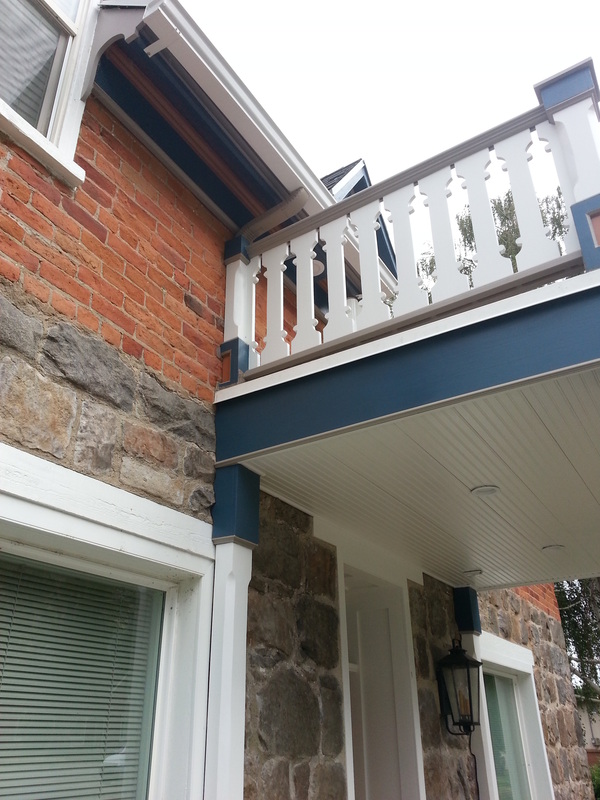
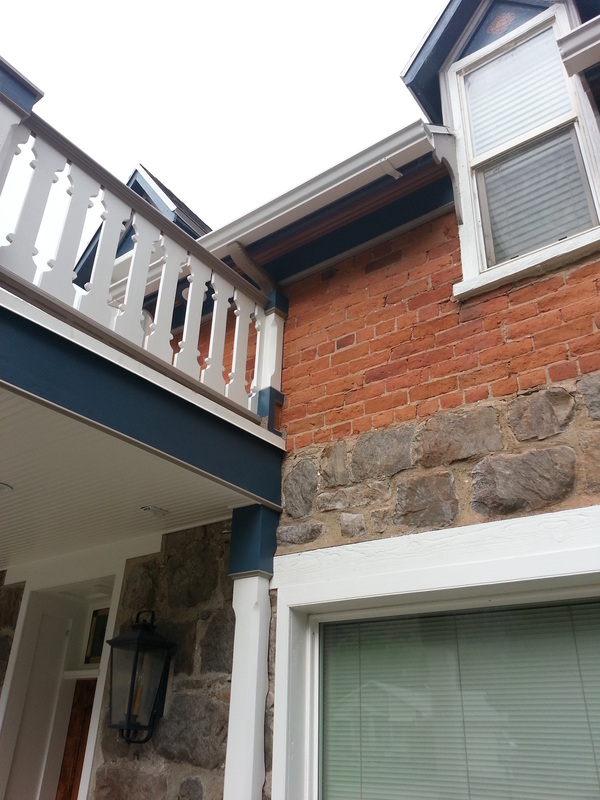
Cody put up the scaffolding on the north side to start the work on the eves...Let the woodwork begin!!
September 28, 2013

I used 12.5 grinding wheels to finish the rock and brick...my hands are not the same as they were...I do have to say, the grinder doesn't owe me anything! :)
September 30, 2013
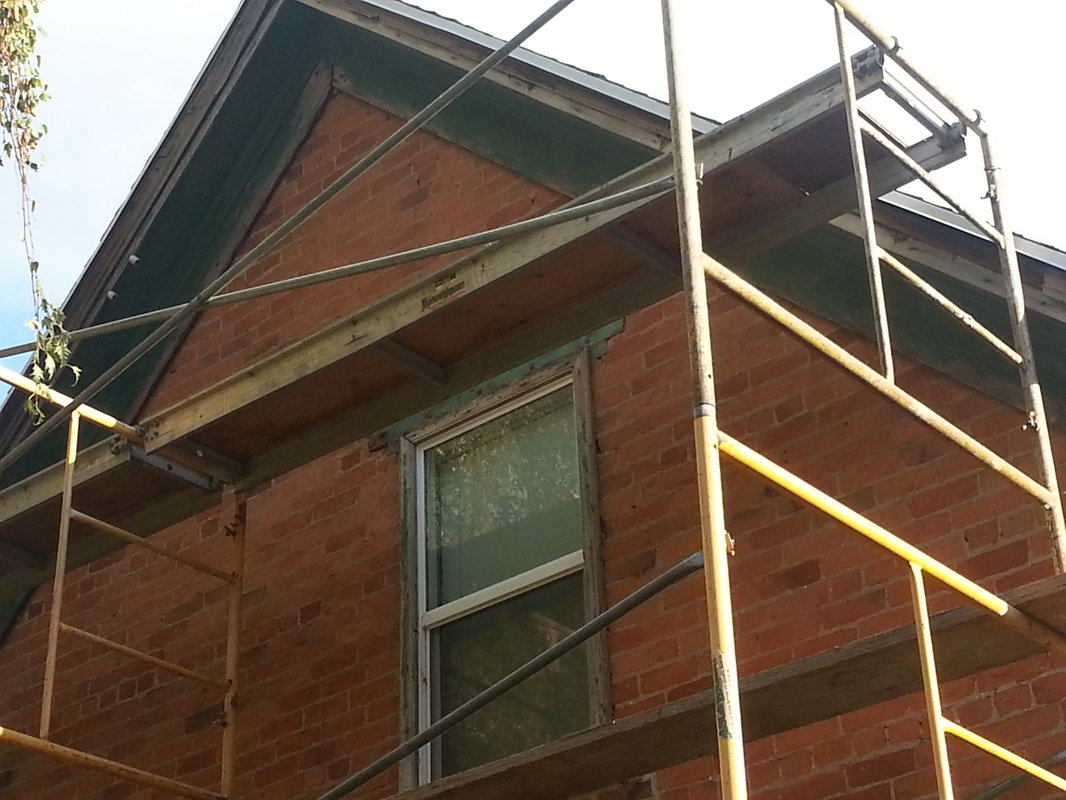
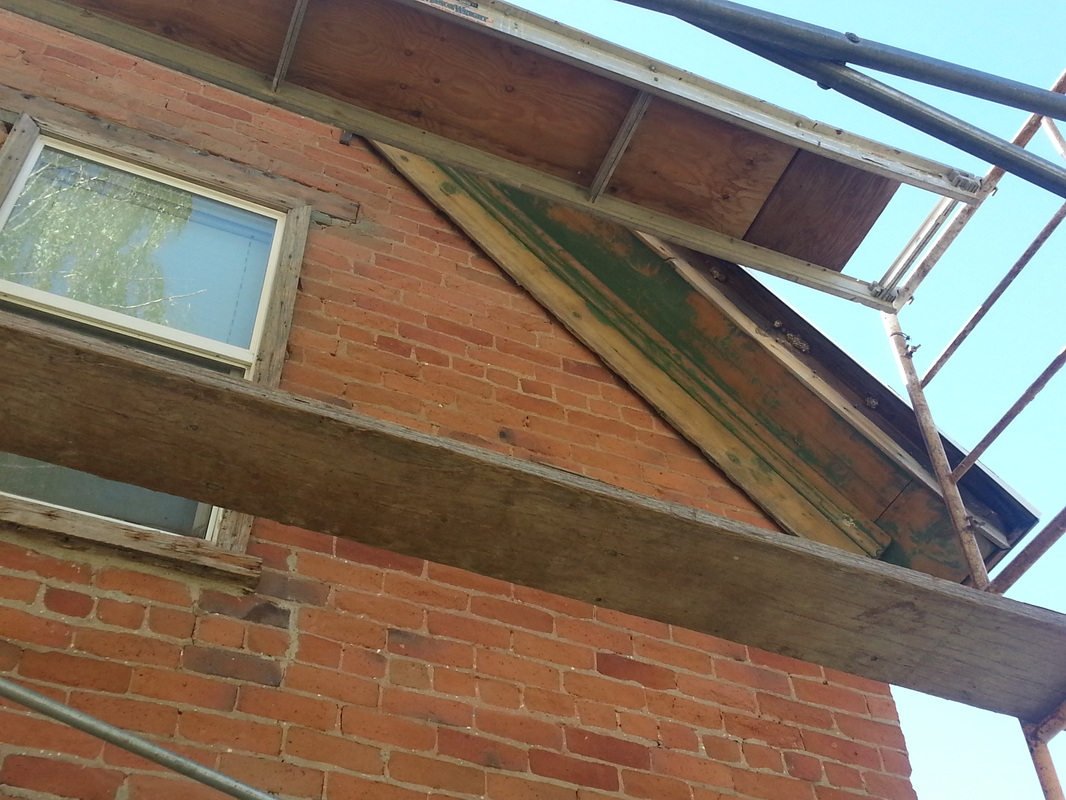
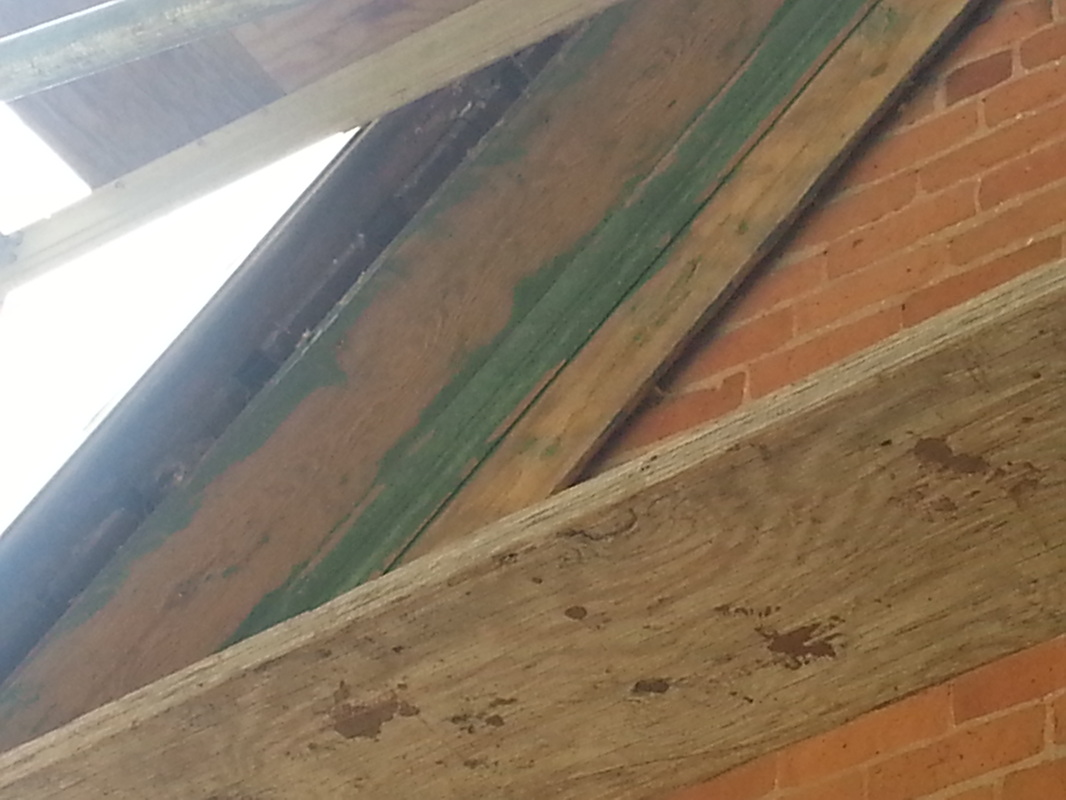
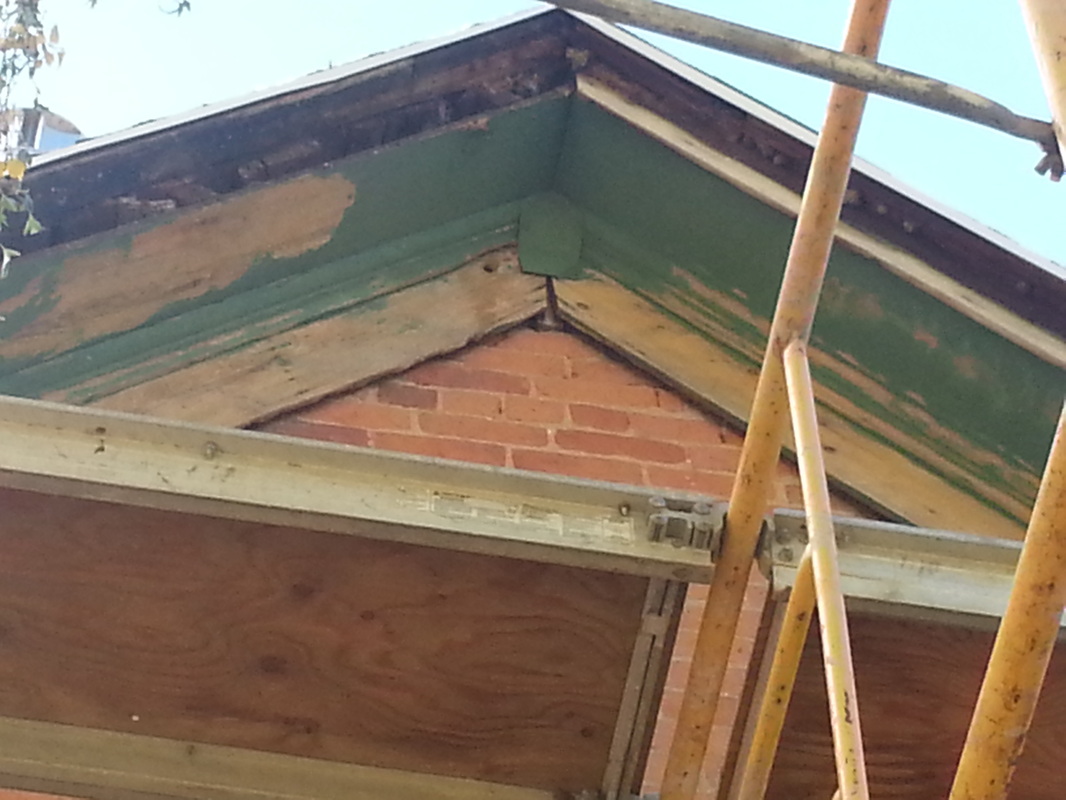
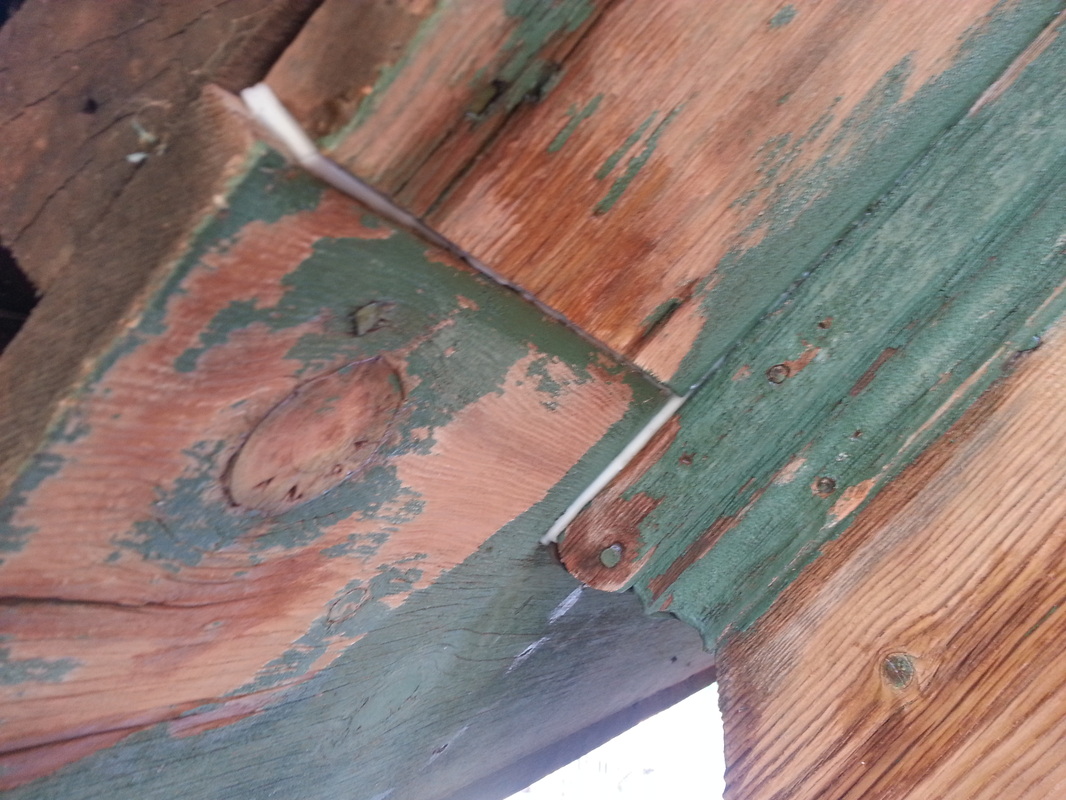
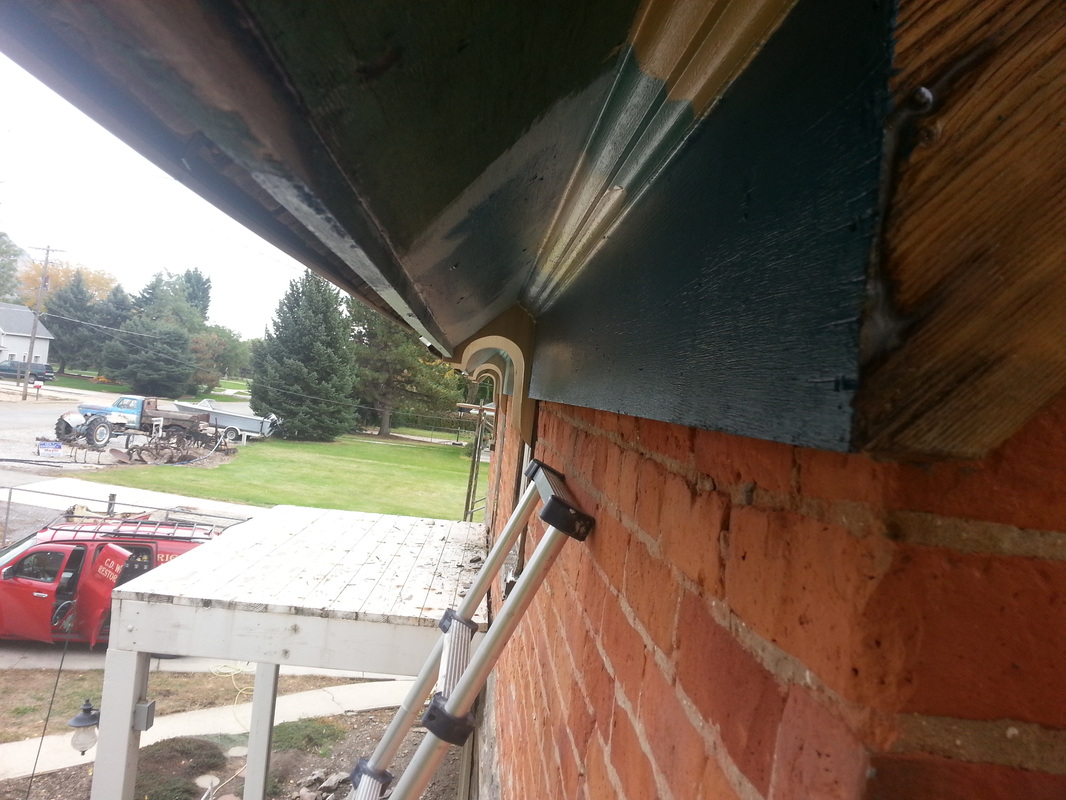
The grinder came back out and started working on taking the old paint off the eves. Cody has started taking off the fascia boards that are too bad to salvage. All in all, the wood looks pretty good on the north and south sides (especially considering how old they are). Cody also calked the larger cracks on the boards that we're keeping...


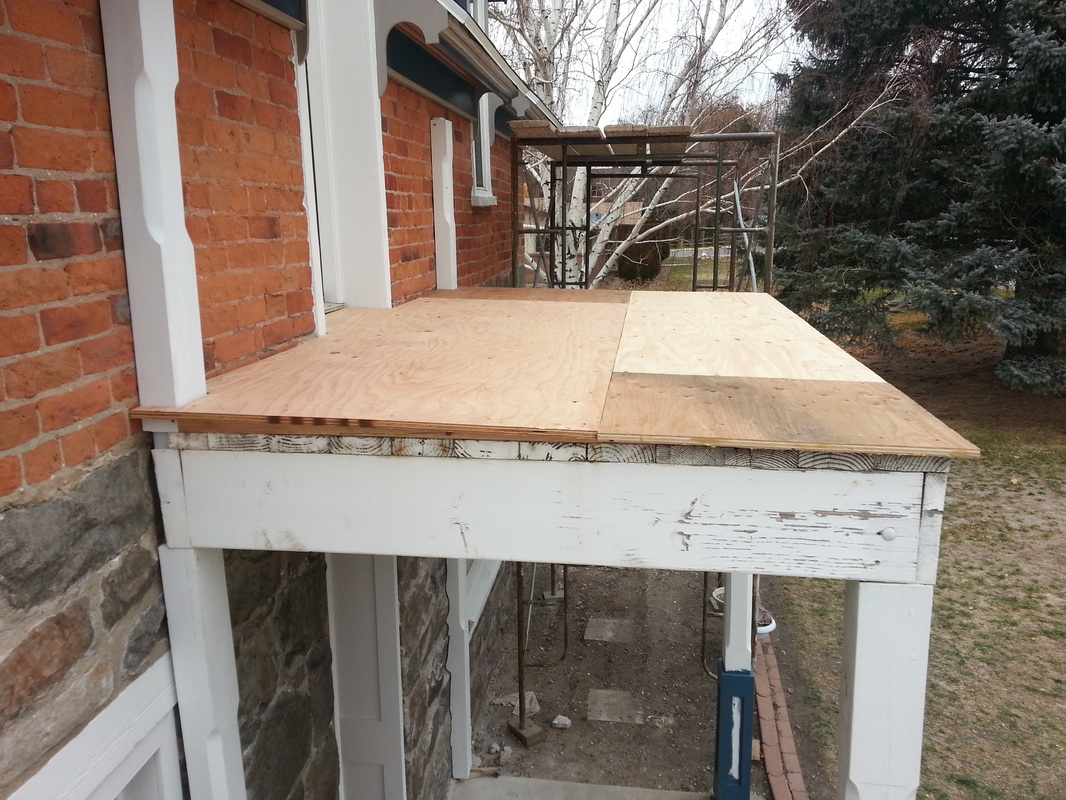
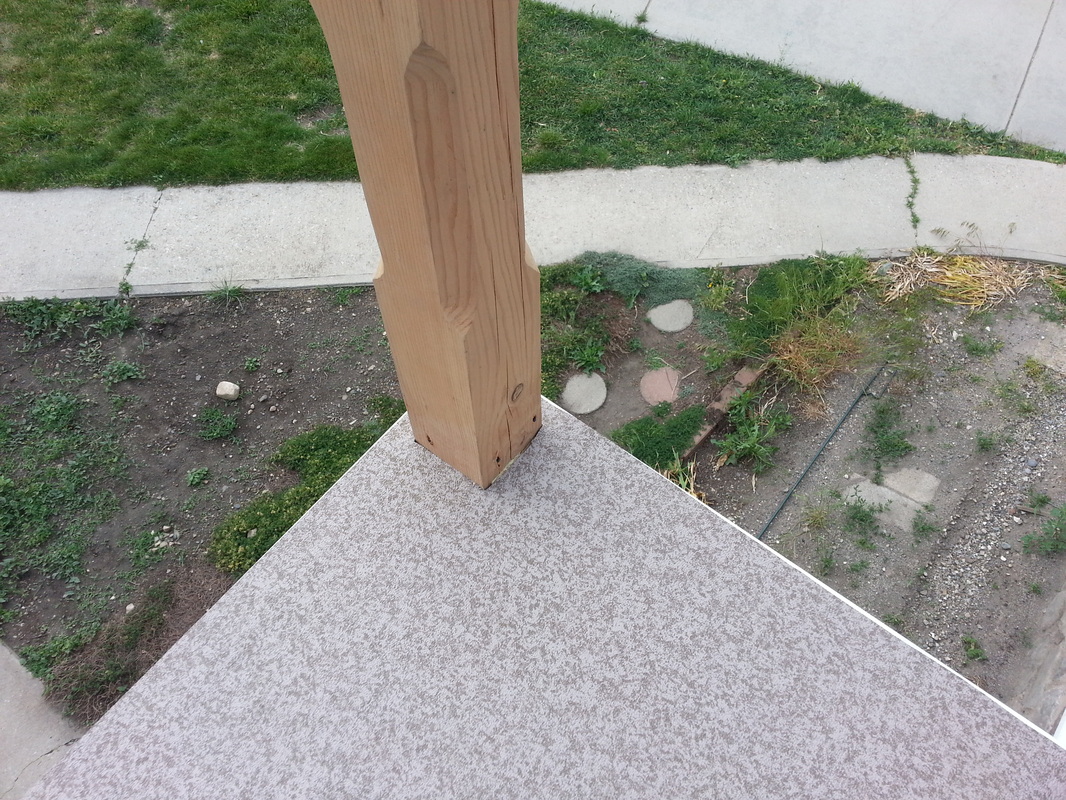
October 3, 2013
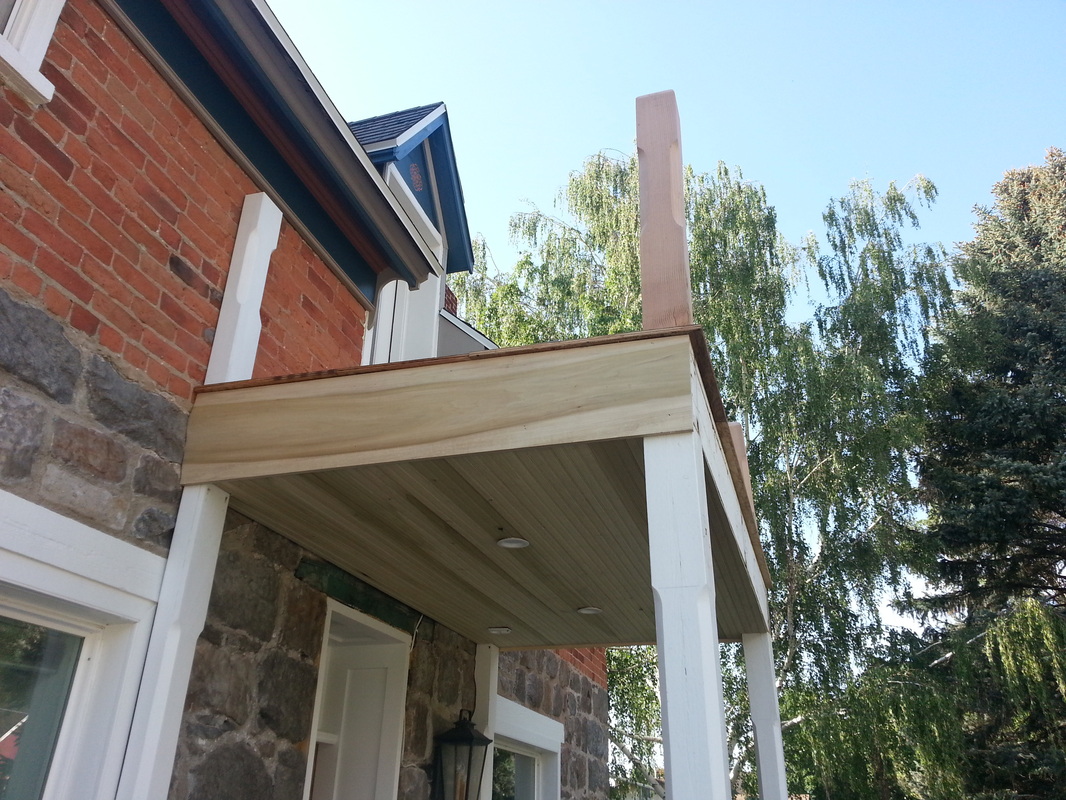
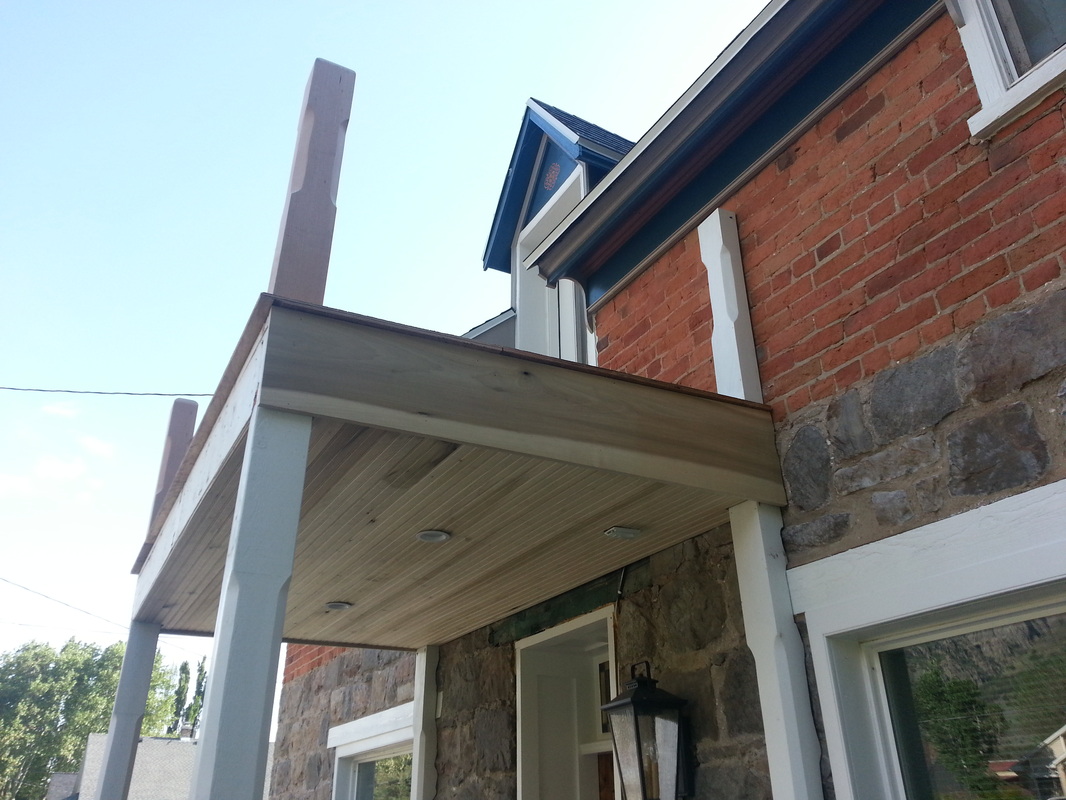
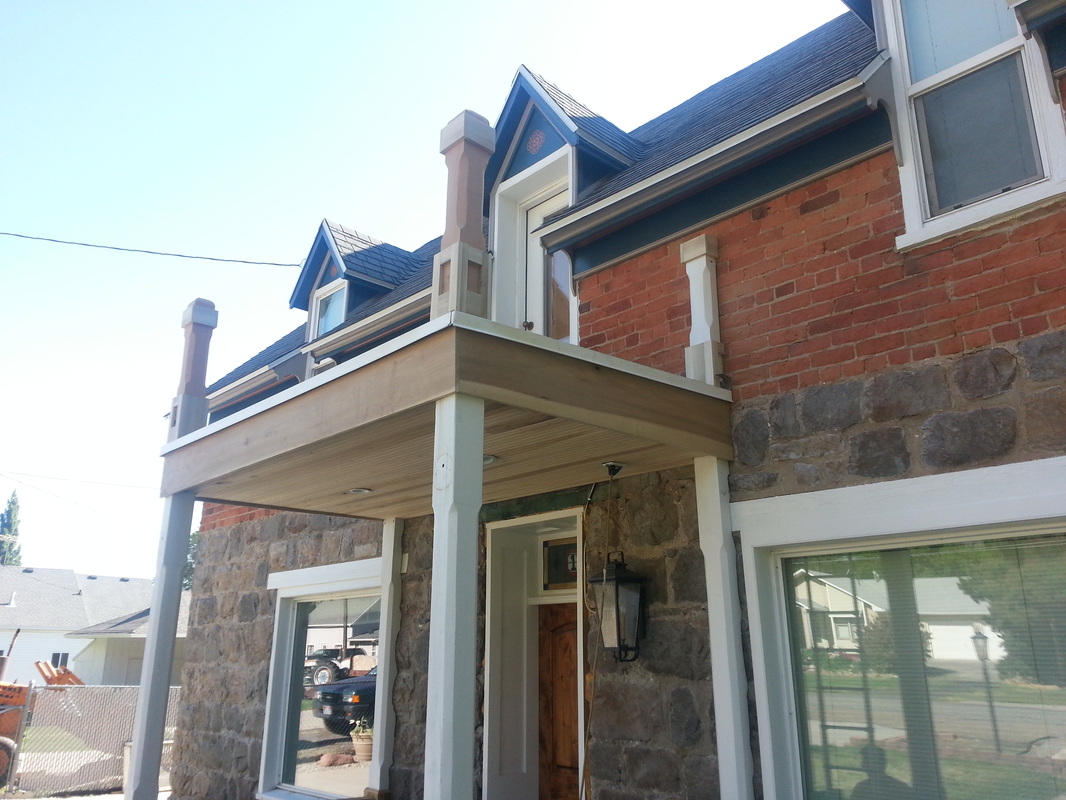
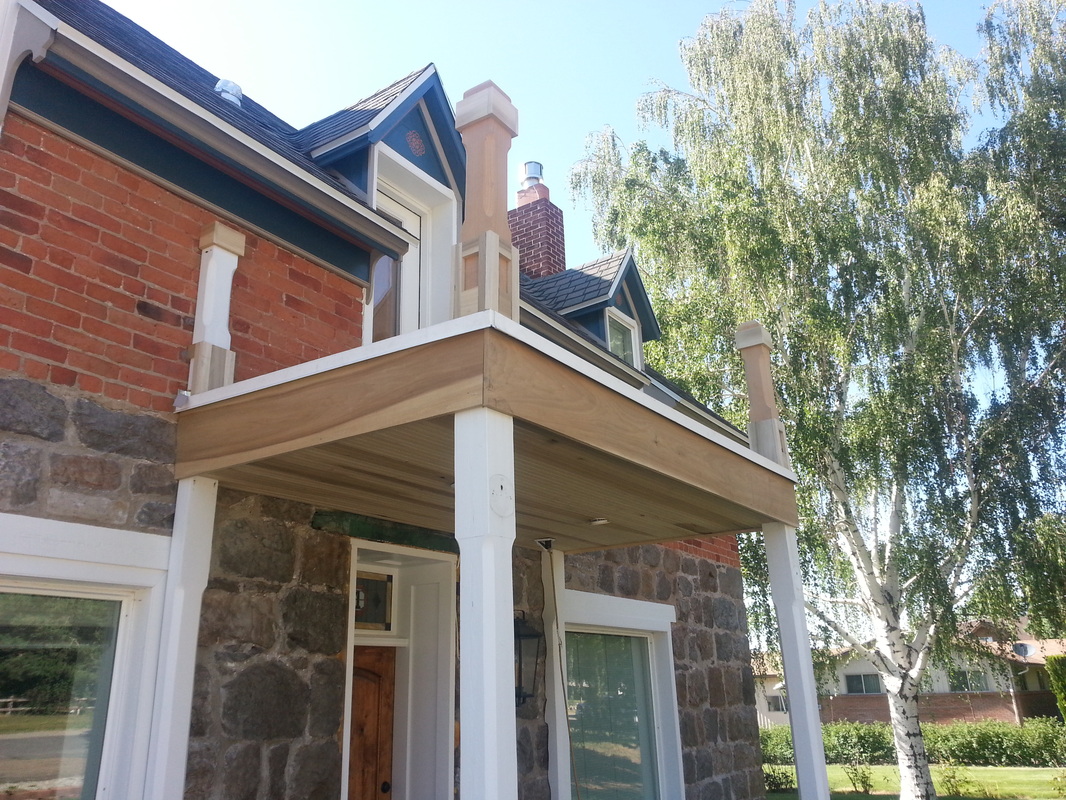
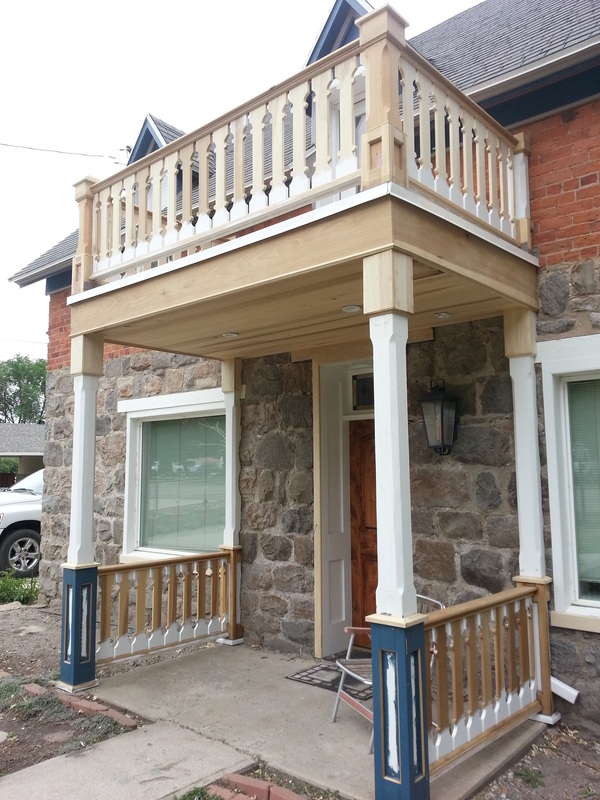
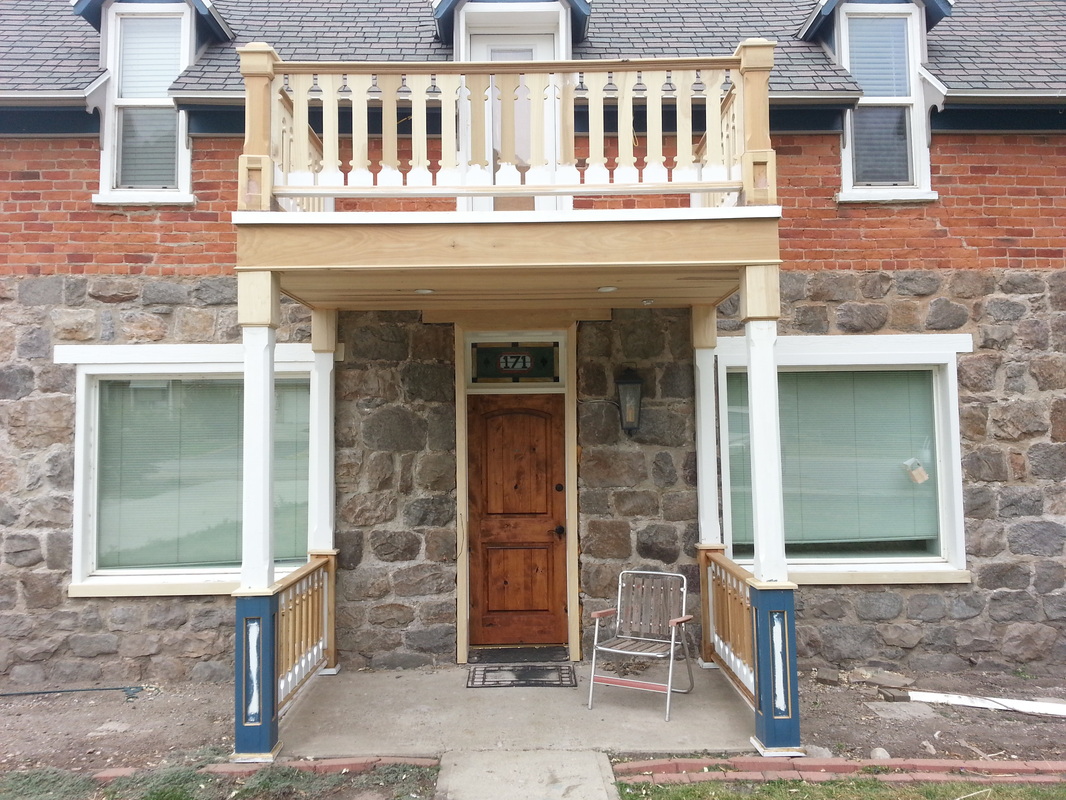
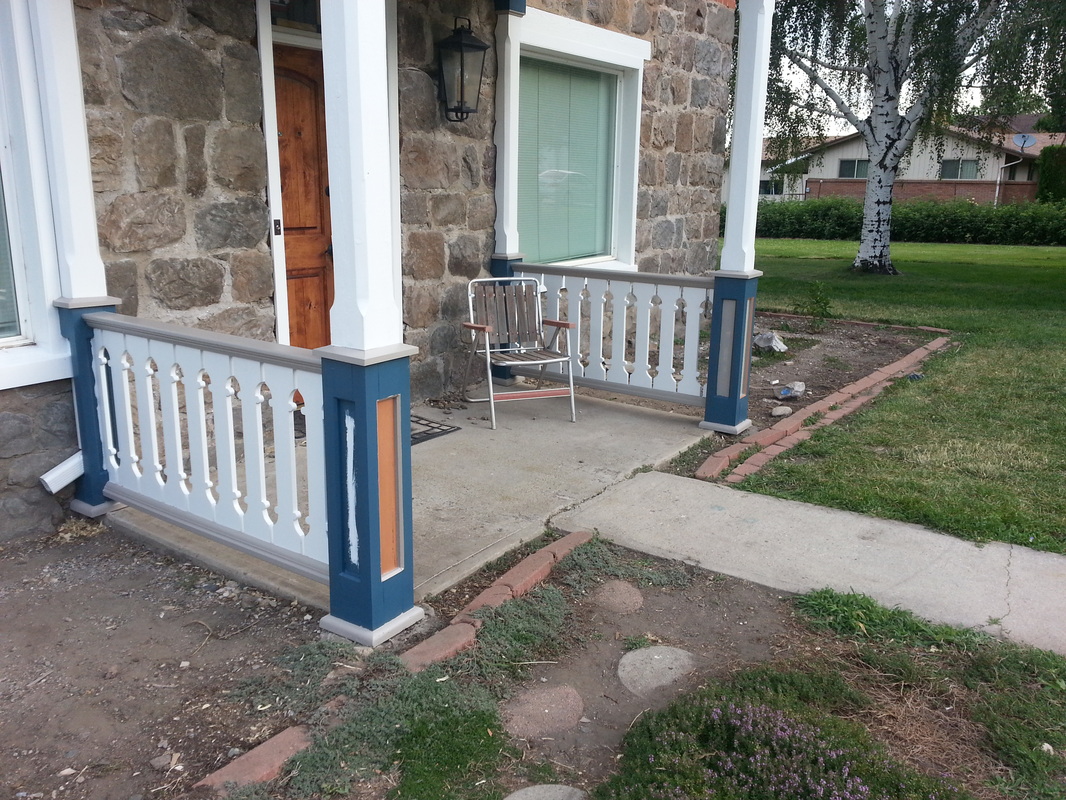
The railing came off today above the front porch...we're making the plans for how this will look as we go. Ang has made a hand drawing (I'll try to get a copy on here) of how we want it to look. We'll see how well this comes together. Still loads of work to do, but it's coming along. :)


October 4, 2013
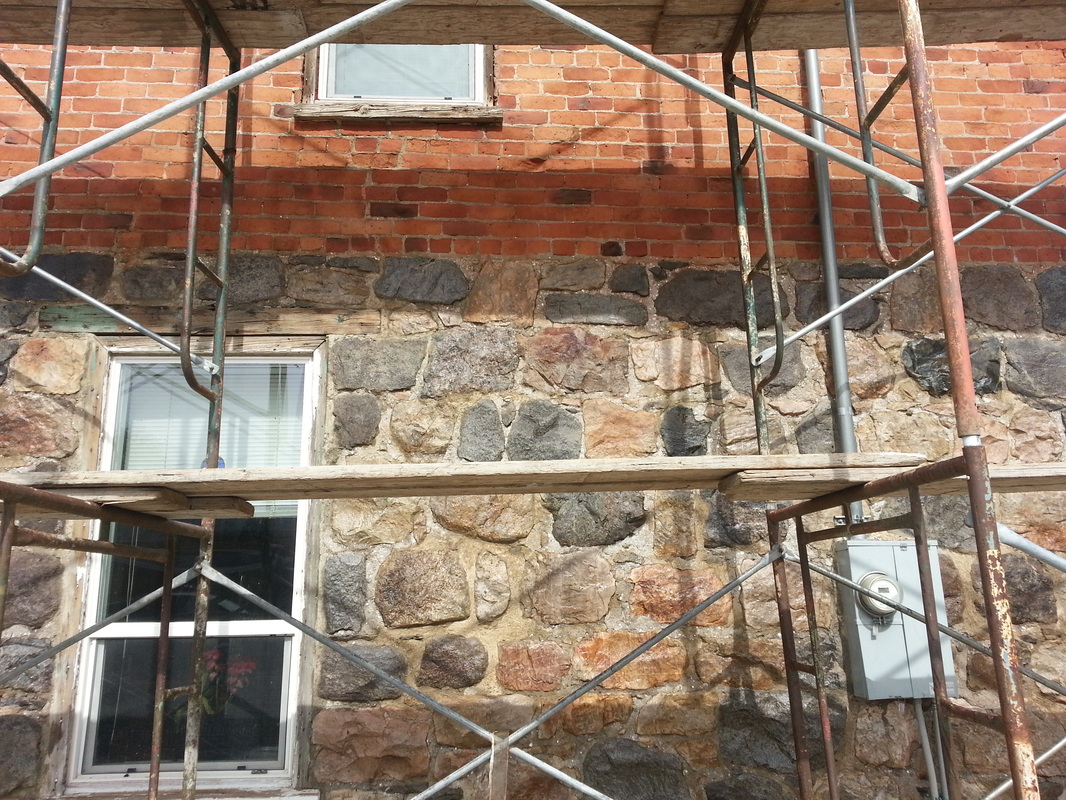
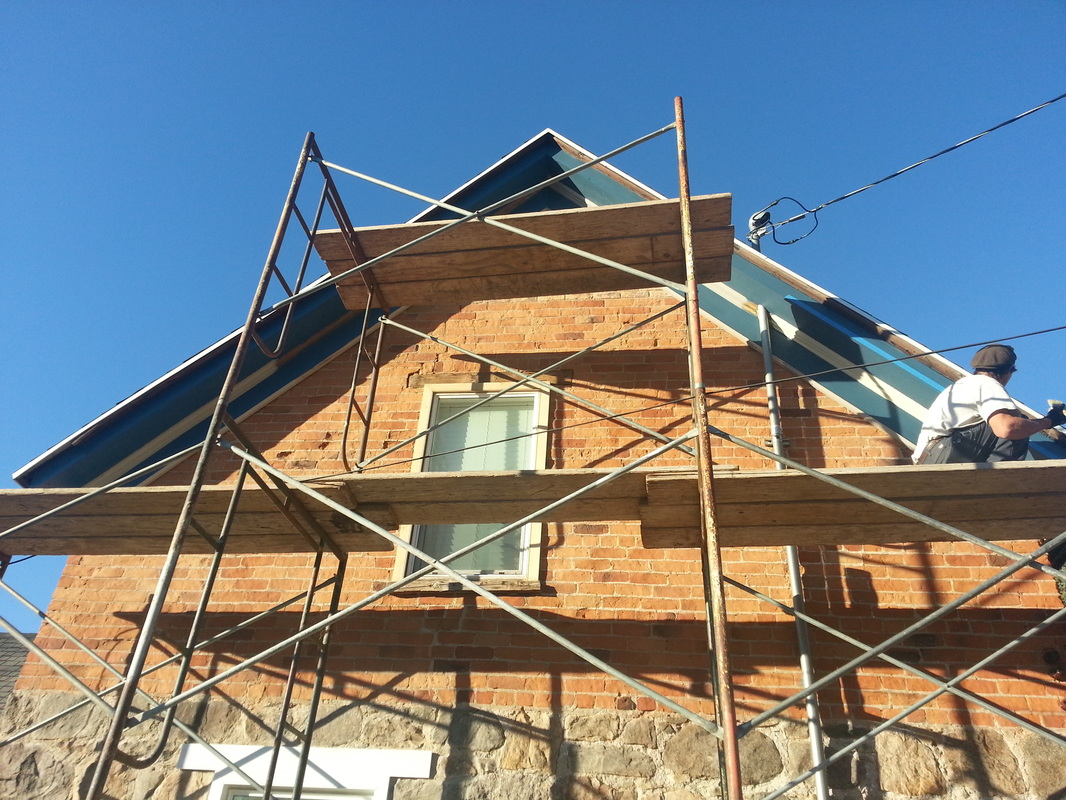
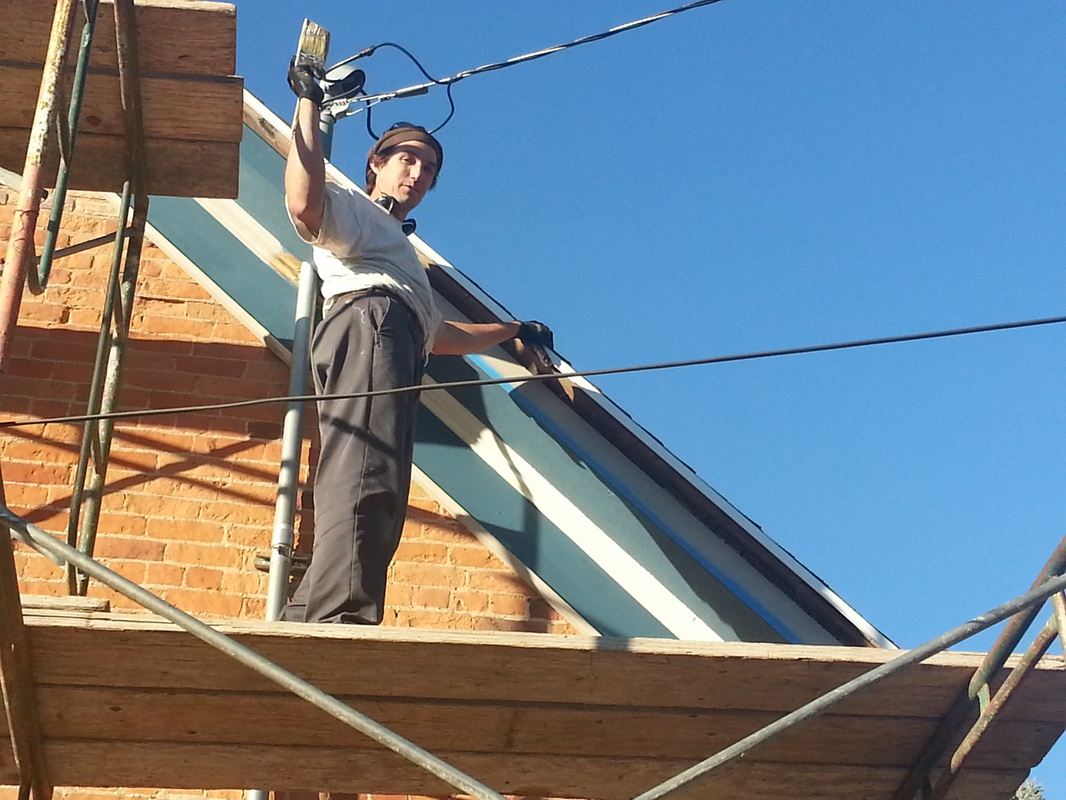
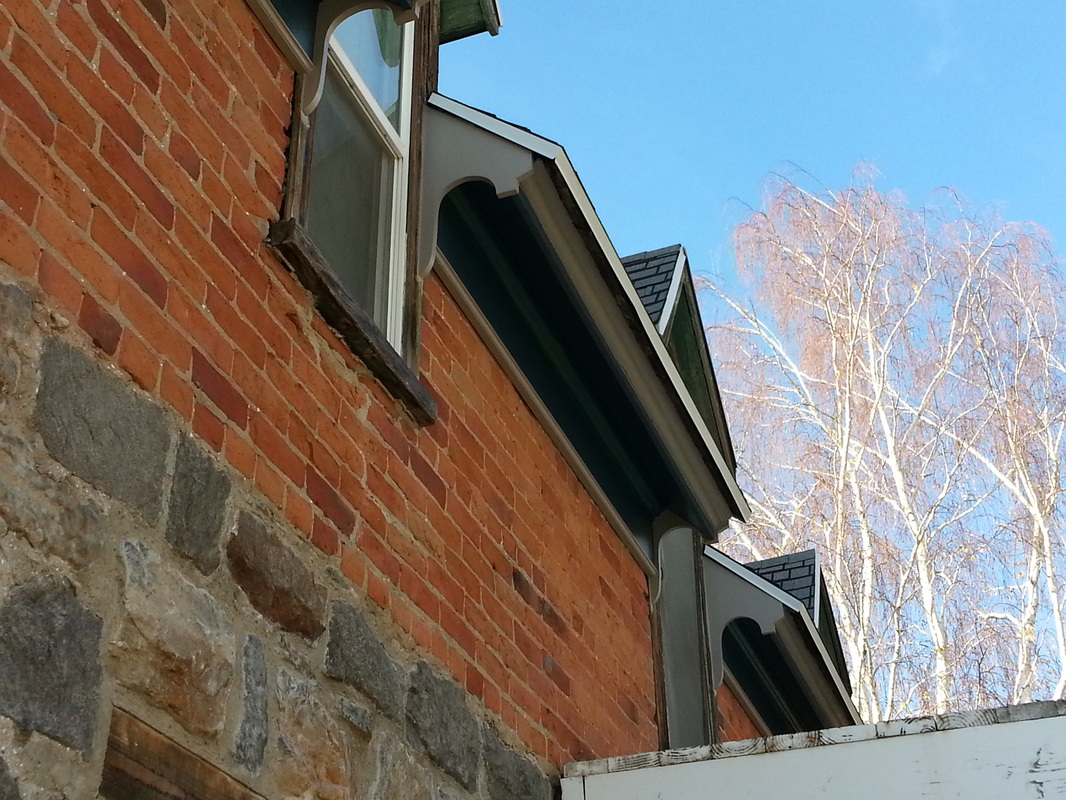
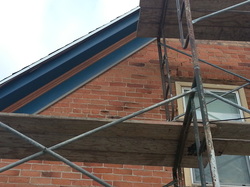
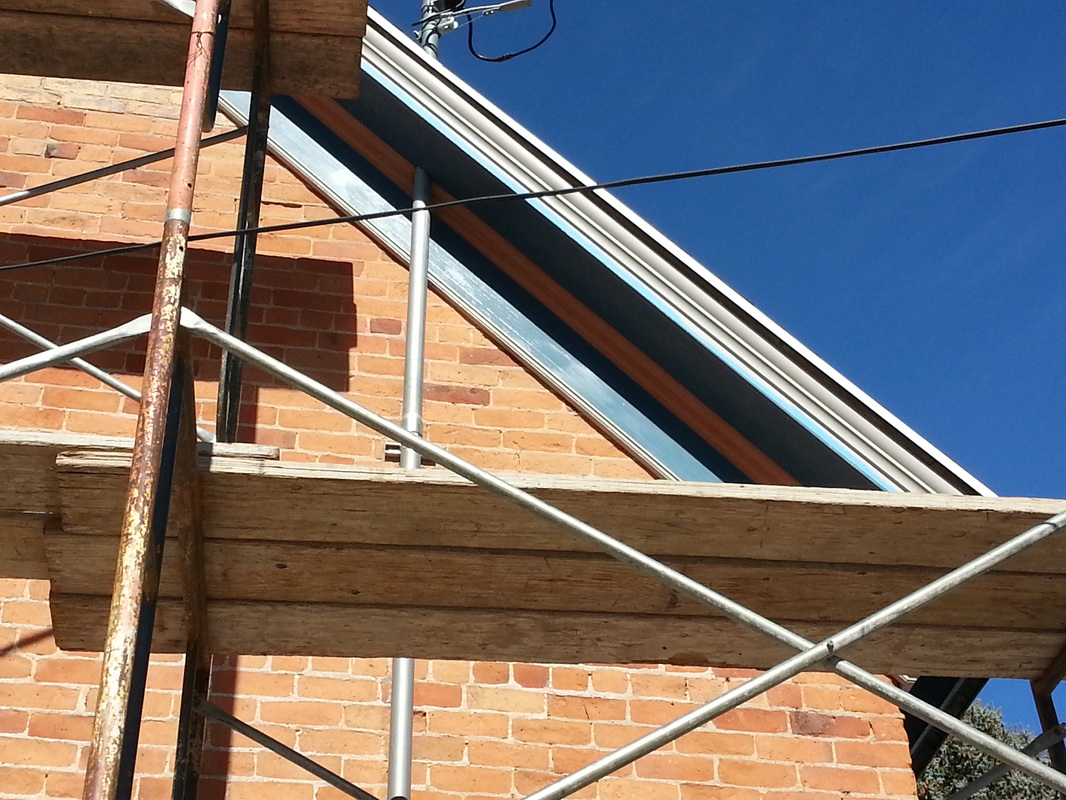
Thanks to Chandler Bingham (in Willard), we have another set of scaffolding. Cody put that up and started working on the woodwork on the south side. He had to take off a few more boards on the south side than he did on the north side. I find it interesting how they attached the roof to the bricks. There are a few rods that tie down the roof inside the bricks in the rooms in the house (upstairs). Also, note the number of wasp nests in the eves! They are all over both sides of the house!!! This was the wasp nation! :)
We also are looking at paint colors. We decided to go blue with the orange brick to pull out the blue in the rocks. The blues that we picked are NOT what we are going to use! They are super ugly against the orange brick!! We'll see what colors we end up with...we're thinking MUCH darker now (see the Graco bag)
We also are looking at paint colors. We decided to go blue with the orange brick to pull out the blue in the rocks. The blues that we picked are NOT what we are going to use! They are super ugly against the orange brick!! We'll see what colors we end up with...we're thinking MUCH darker now (see the Graco bag)


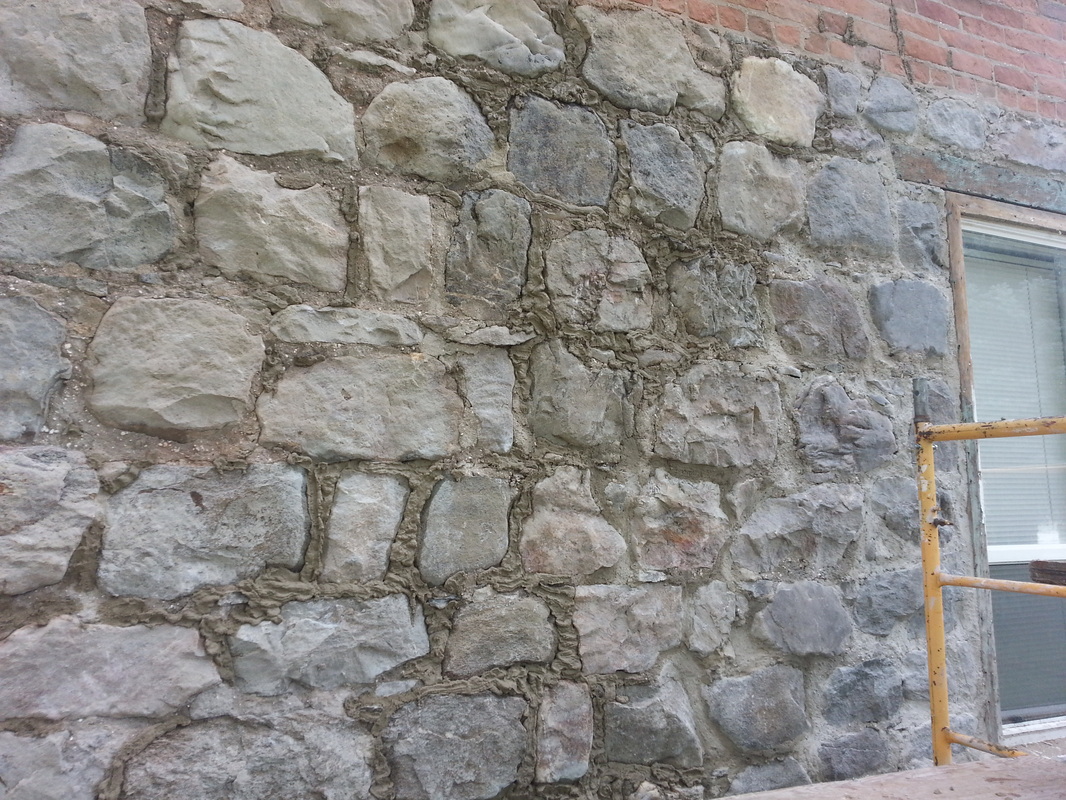
October 8, 2013
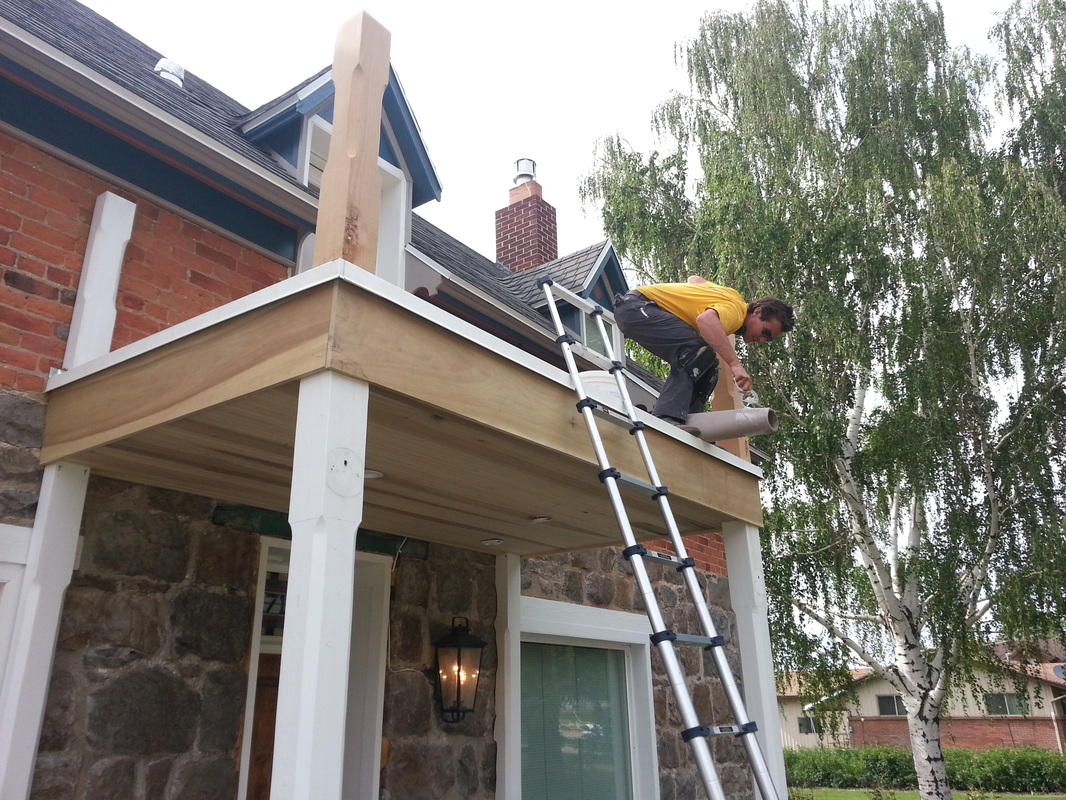
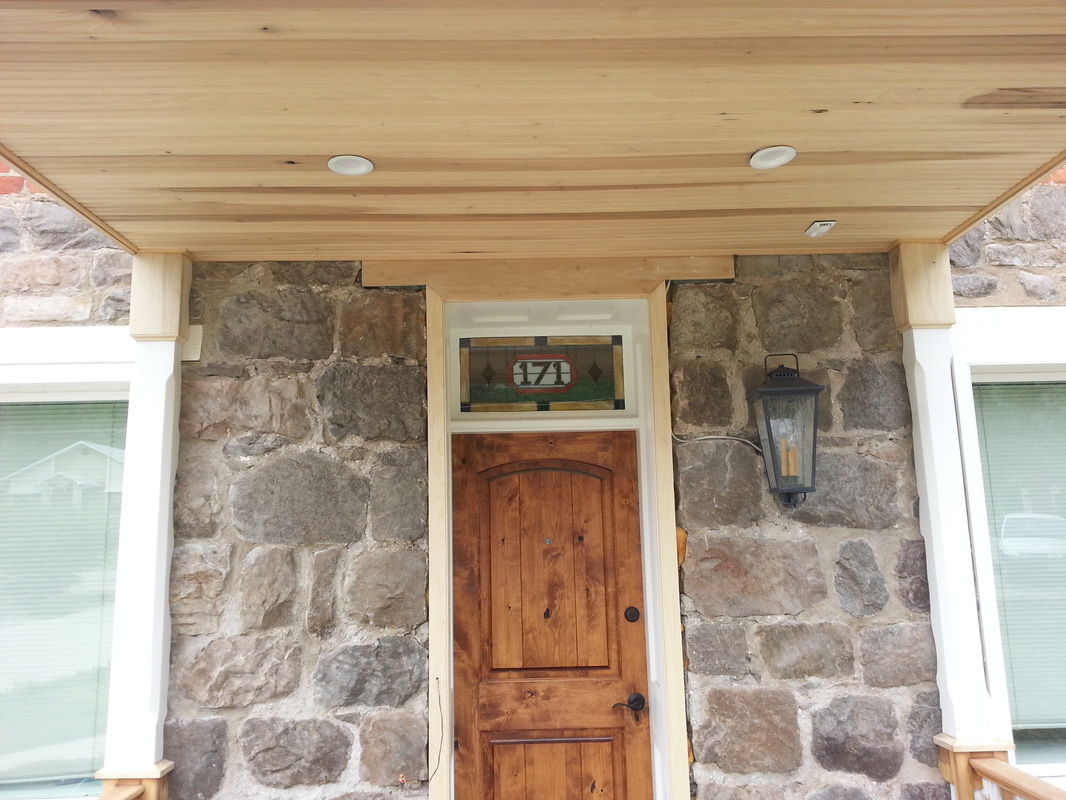
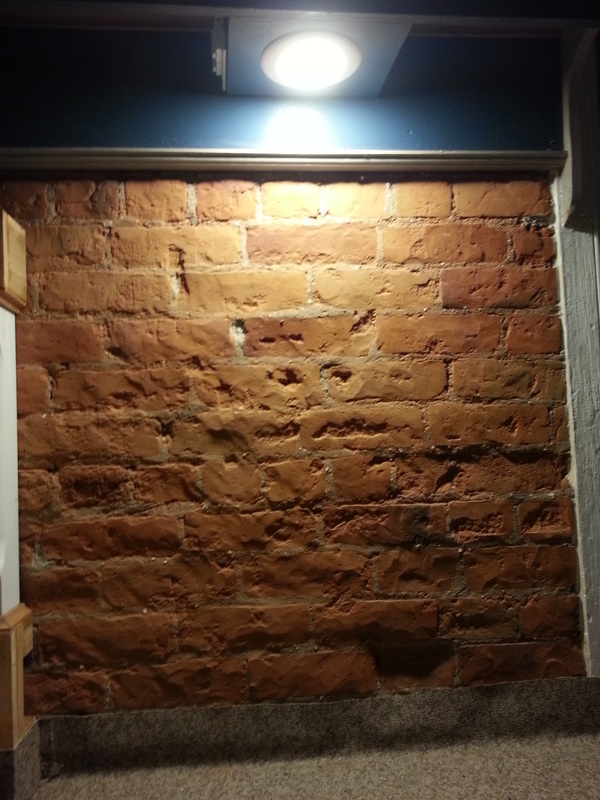
Started sealing the bricks and rock today! I took half the day off yesterday to get things done but spent the bulk of the time in the car getting the sealant. I'm using a product called Lifetime (clear rubber silicone). It permeates into the pours and waterproofs the walls. I bought 5 gallons of the stuff and it cost me $268! Seems expensive to me, but if it does what it says it will do, I'll be glad I did! I think I put it on a bit thick at first because I used way more than the recommended amount on the bucket... the brick just soaked it in!!! Oh well, I guess I have to buy another 5 gallons because I was only able to get the north and south sides of the house done (along with the two triangle pieces above the roof on the west side). The one think I liked about the Lifetime product is the way it made the rocks look wet (even after it dried a bit). It really brings out the color in the rocks!! I'm super pleased so far!!
Cody came over with the wood that he purchased and planed. We installed the wood on the south side...coming together! We also went and picked up some new paint samples...dark blue...we'll look at the colors in the morning light to see which one looks best on the house.
Cody came over with the wood that he purchased and planed. We installed the wood on the south side...coming together! We also went and picked up some new paint samples...dark blue...we'll look at the colors in the morning light to see which one looks best on the house.


October 9, 2013
We took a good look at colors today and didn't come to any conclusion. ha ha Actually, after looking at the blue colors we decided to pick the (I think) Loyal Blue over Rainstorm (more of a blue vs a gray-blue...the color on the right of the window). Then Cody suggested we look at a tan or gold-type color as an accent because we couldn't see the difference between the colors that we picked. Angela has agreed that we should and you can see the colors in one of the pictures...it's the dark blue on the right of the window and the tan or gold color in the middle of the short color samples (I hope this makes sense).
Cody also covered up the south side of the fascia boards. Oh...Jonathan Miller picked up another 5 gallon container of the Lifetime product so I should be able to spray and get it done. Unfortunately, It started to rain this evening so I don't think I'll be doing it for the next couple of days.
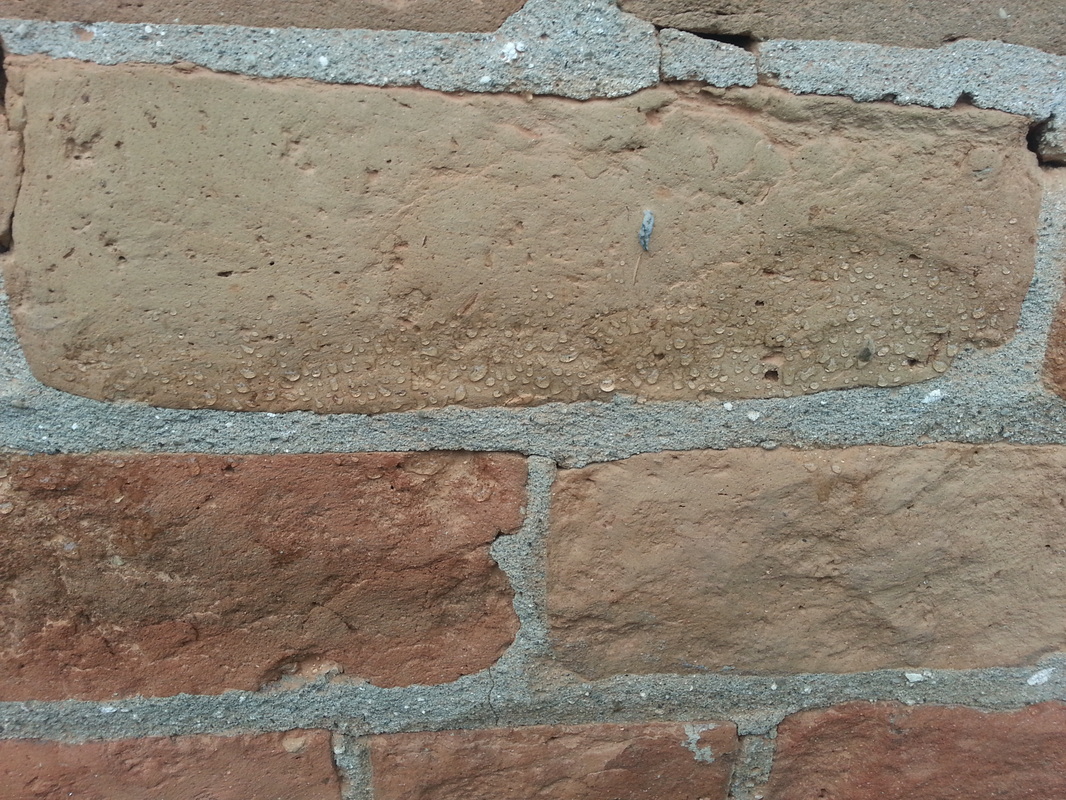
October 10th, 2013...I'm adding one last photo to this entry because it rained today and I wanted to show how well the product works...before, if the bricks got wet, they would simply soak in the water...the last photo shows how well it beads the water or repels the water. :)
Cody also covered up the south side of the fascia boards. Oh...Jonathan Miller picked up another 5 gallon container of the Lifetime product so I should be able to spray and get it done. Unfortunately, It started to rain this evening so I don't think I'll be doing it for the next couple of days.
October 10th, 2013...I'm adding one last photo to this entry because it rained today and I wanted to show how well the product works...before, if the bricks got wet, they would simply soak in the water...the last photo shows how well it beads the water or repels the water. :)


October 12, 2013
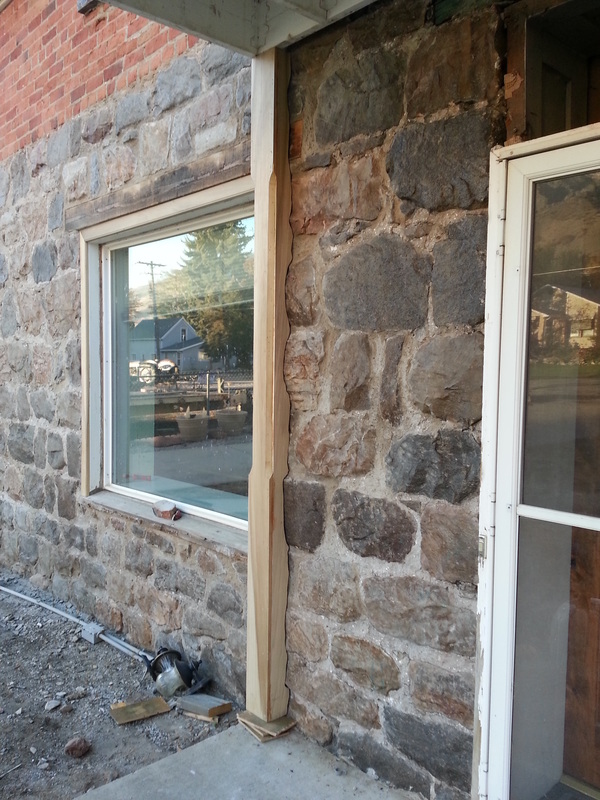
Started spraying the front with the Lifetime product. Looks good to me...I'm hoping the rain will wait until this stuff dries. I wanted to get it on the home before the rain that sounds like it is coming...at least on the bottom where it is getting splashed when it rains...Yesterday, Cody came over and put up some of the wood work around the front windows. He's getting excited to work on the porch...I'm excited to see how well it will turn out. :)

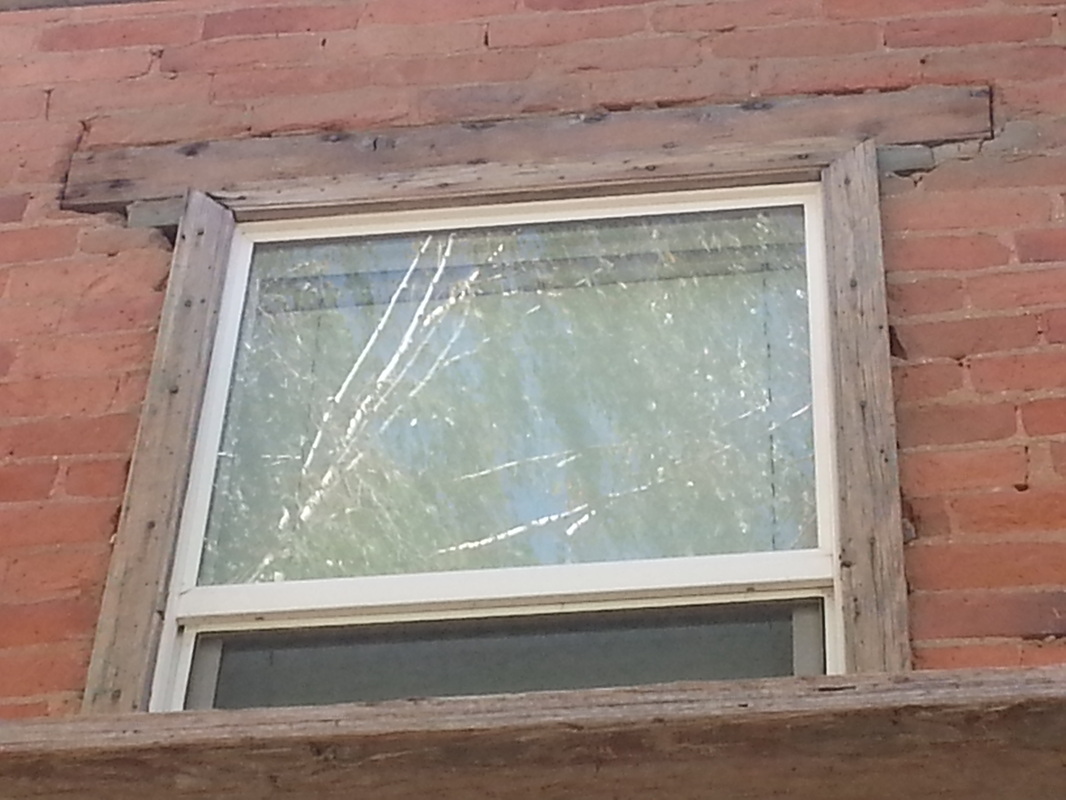
October 14, 2013
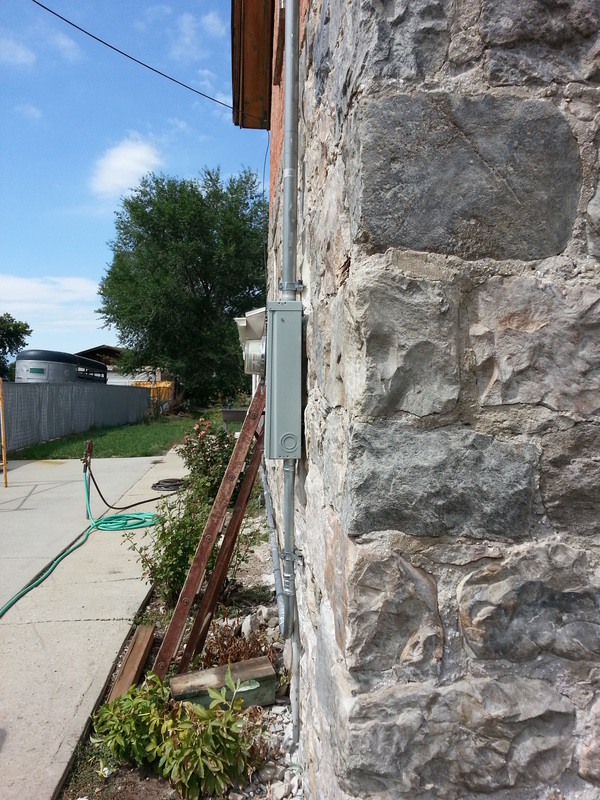
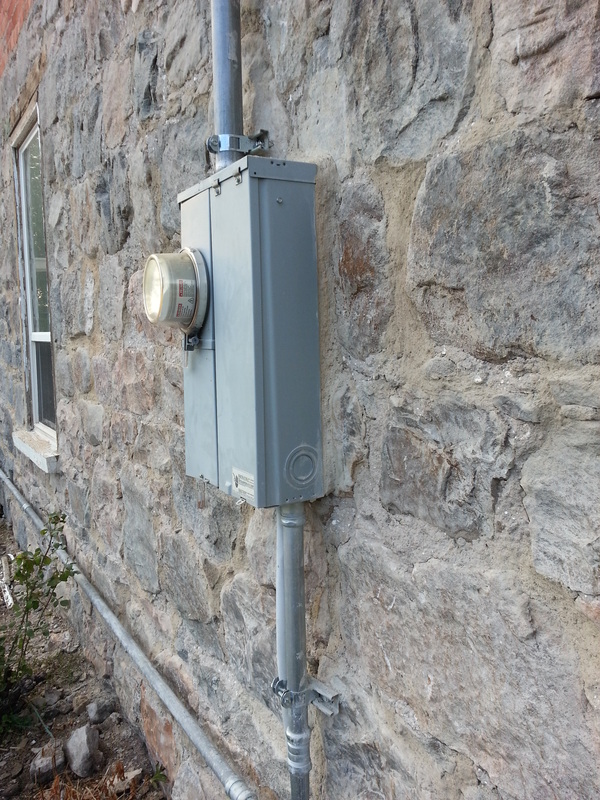
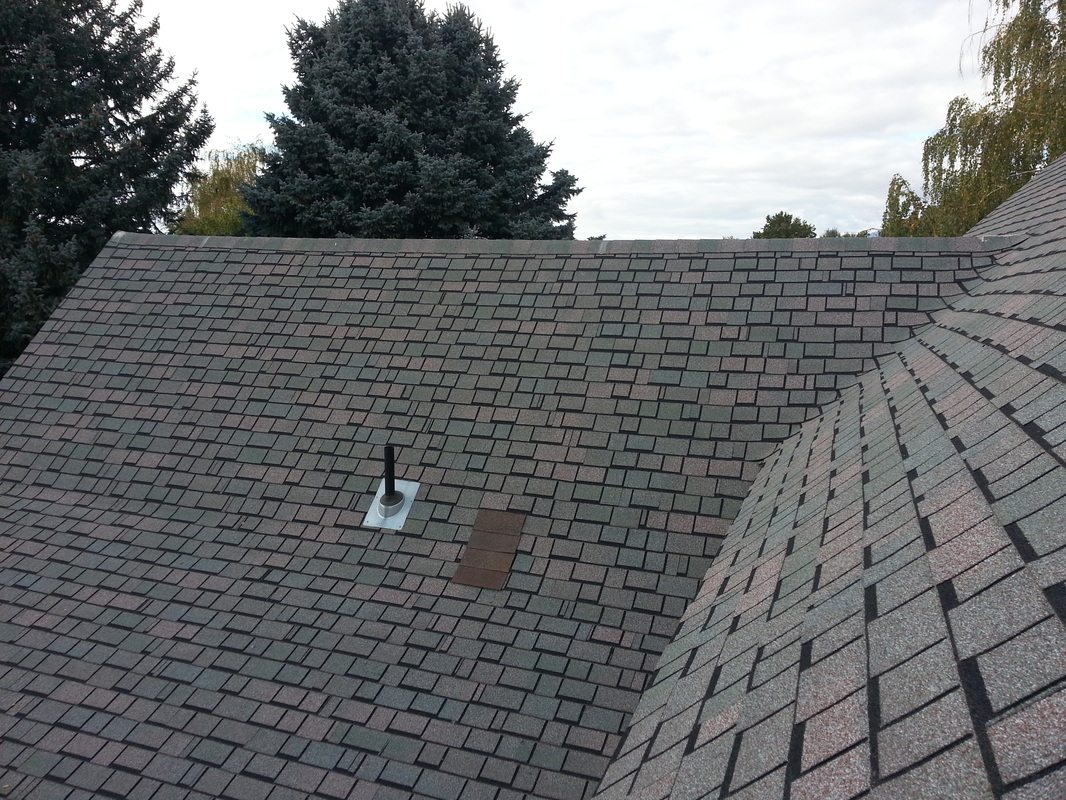
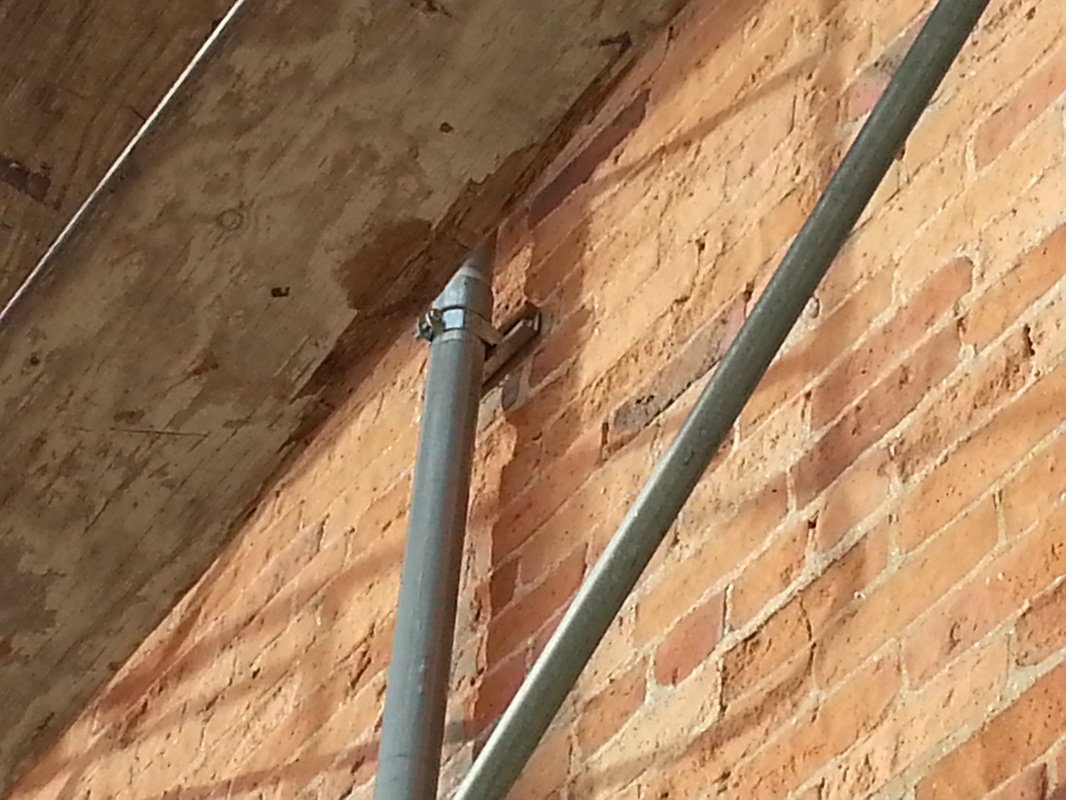
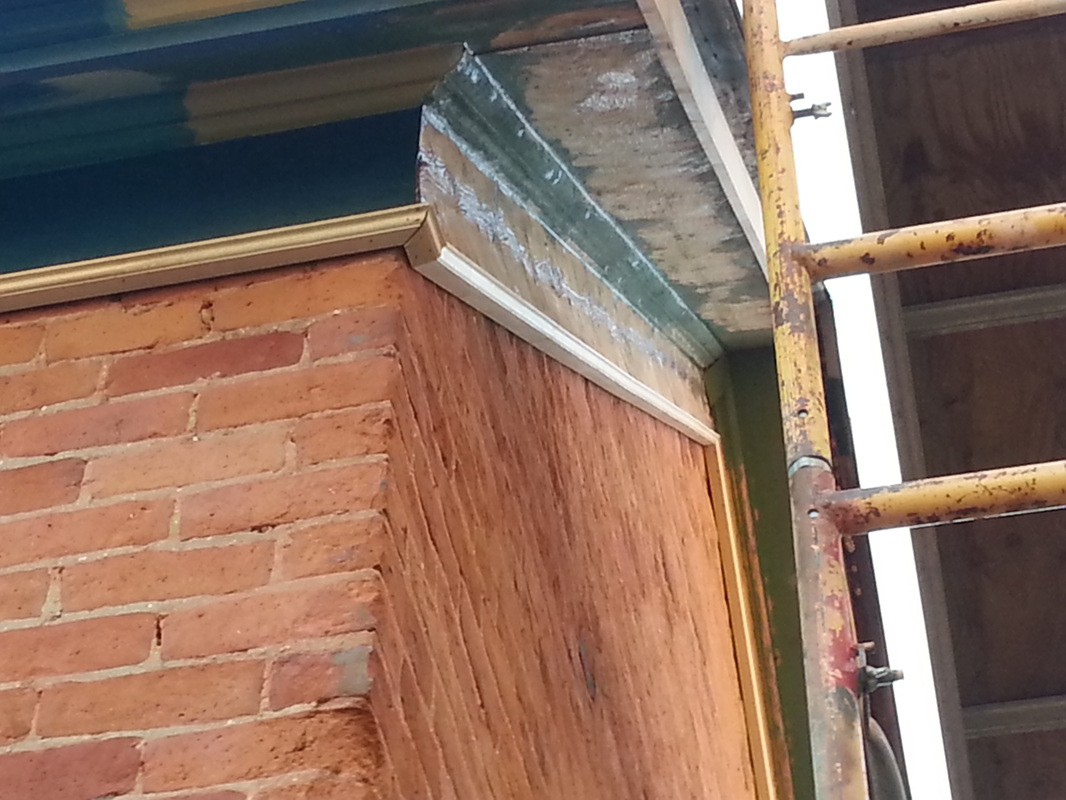
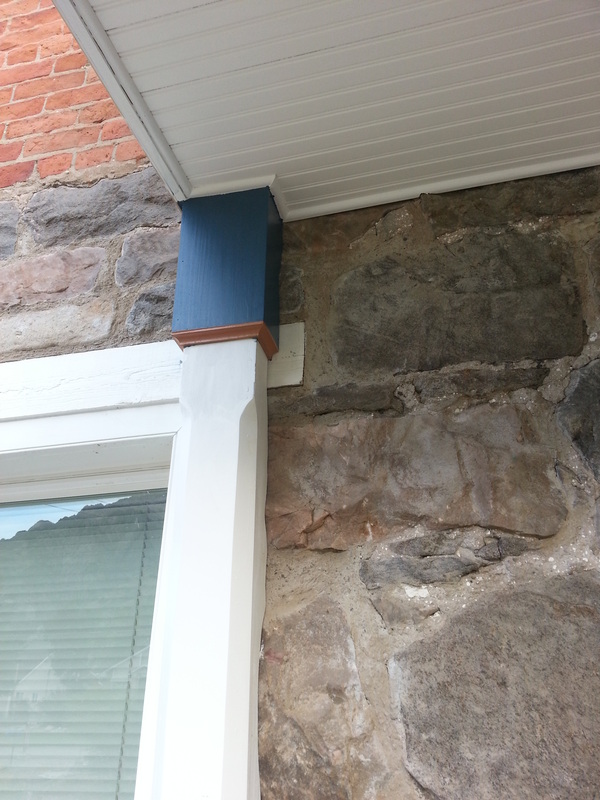
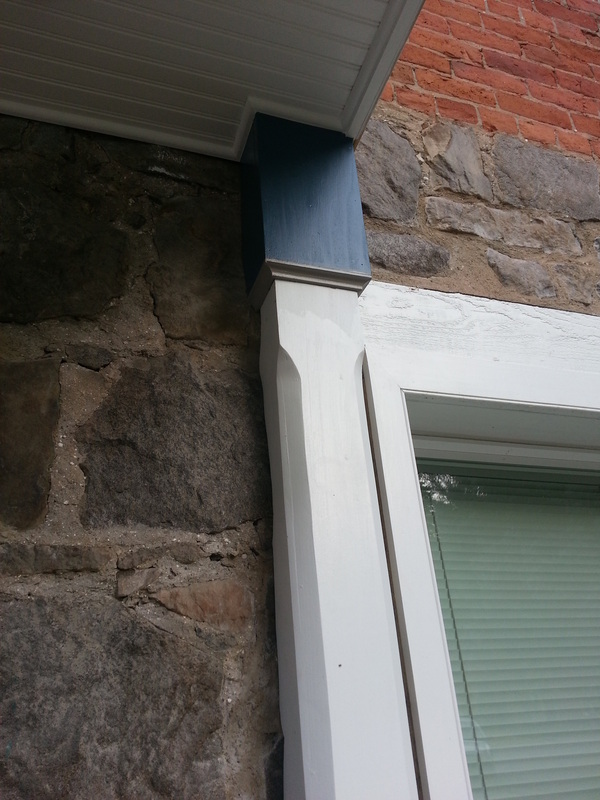
Had the day off and Cody was over working away on the house. He is working diligently on getting the windows finished up. He put the wood around the upper north and south windows. He's also completely done with the wood that attaches the windows to the roof. I'm excited how well that turned out! I also fixed the electrical conduit pole by attaching it to the bricks on the 2nd level, fixed the way the cover on the roof sits or seals the pole to the roof, and purchased paint from AIS called Toasted Almond to see how well that looks with the blue...after we painted it, I think we'll stick with it! :) Only time will surely tell...


October 15, 2013
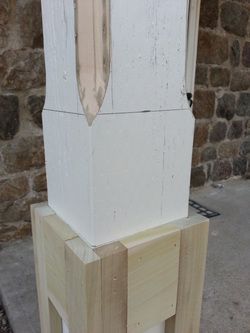
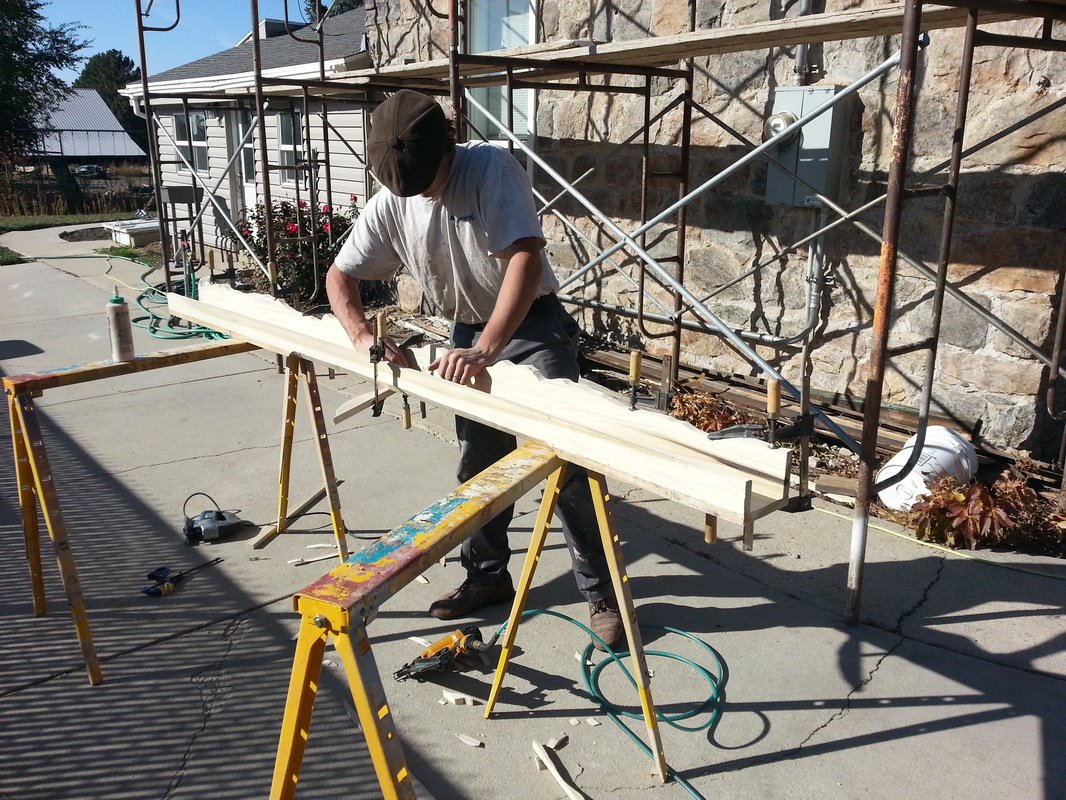
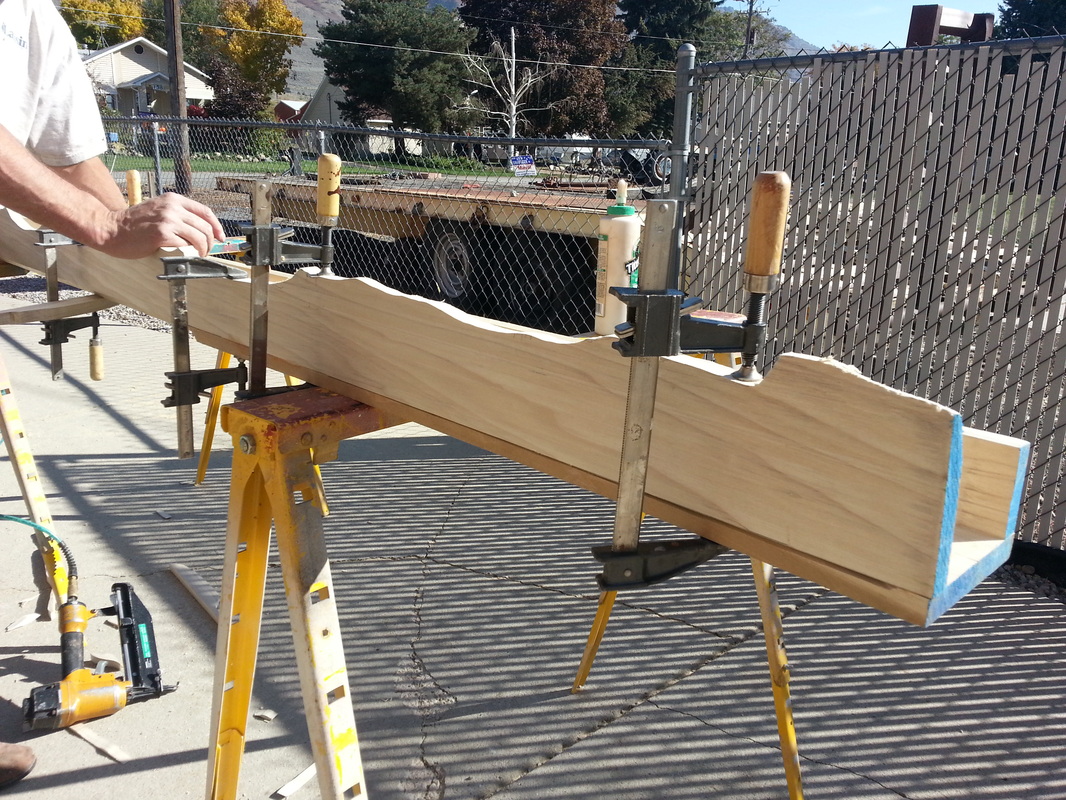
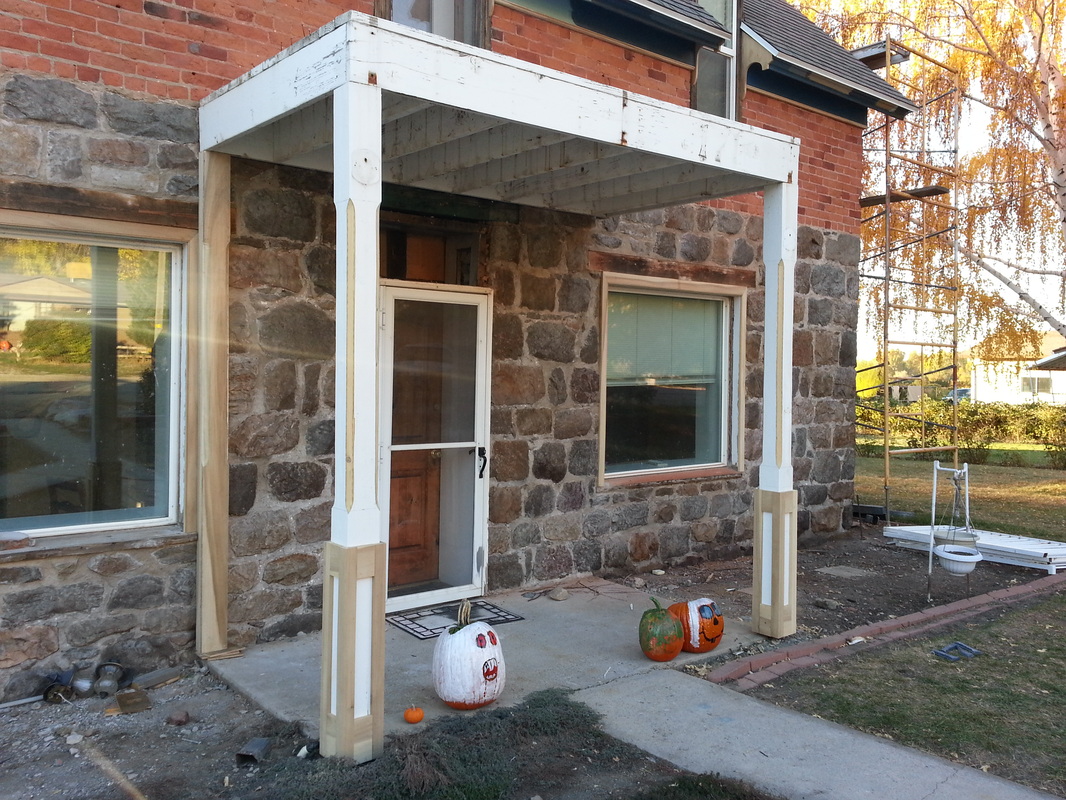
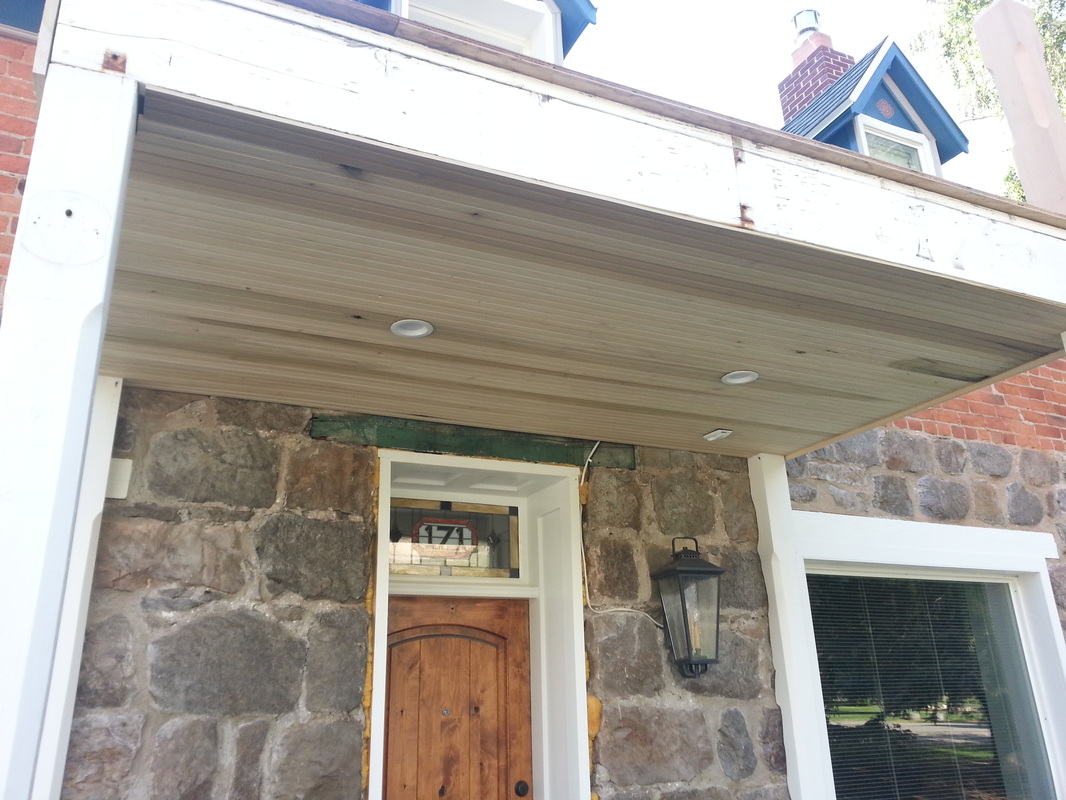
Cody started in on the porch. He's beveling the corners of the front posts and adding some boxes to the bottom and top of the posts...I'm excited how this is going to turn out! Chase even "helped" out a bit by sanding some of the edges of the box at the bottom. :)


October 16, 2013

Today, Cody came over and finished around the bottom windows by putting the trim on them. In the nighttime, I got the sealant (Lifetime) out and sprayed the rest of the east side. I also had forgotten to grind under the upper window on the north side where Cody had repaired the mortar so I ground that part off and sprayed after. I took the pictures the next day...

October 21, 2013

Cody put on a border around the base of the fascia boards today...he didn't get it all complete, but is close.

October 23 - 24, 2013

Cody worked hard on helping Ang pick out colors today, finished the border around the house, and worked on the pillar that will be up against the house...our plan is to put the downspout for the center of the roof in it. There are loads of details that have to go into the rest of the house...stuff that I'm not very good at (especially picking out paint...we'll let Ang work on that detail). :) We have picked out a number of different options and most of them don't look good on the house, but I think we're down to just a couple of different colors...dark blue (went back to a more gray blue than the brighter blue), white around the windows, a taupe (brownish) that will go around the blue. Cody and I tried to convince Ang to use the "toasted almond" to give the boarder some "pop" but she didn't go for that one. Oh well! :)


October 25, 2013
Cody took advantage of some good weather by painting as much as he could with the dark blue around the house. He was able to get most of it done. We're waiting on another paint (orange) to go inside the trim...Ang decided last night to go for that option. :) Cody also put up some additional wood around the north window...it's coming along.
October 26, 2013
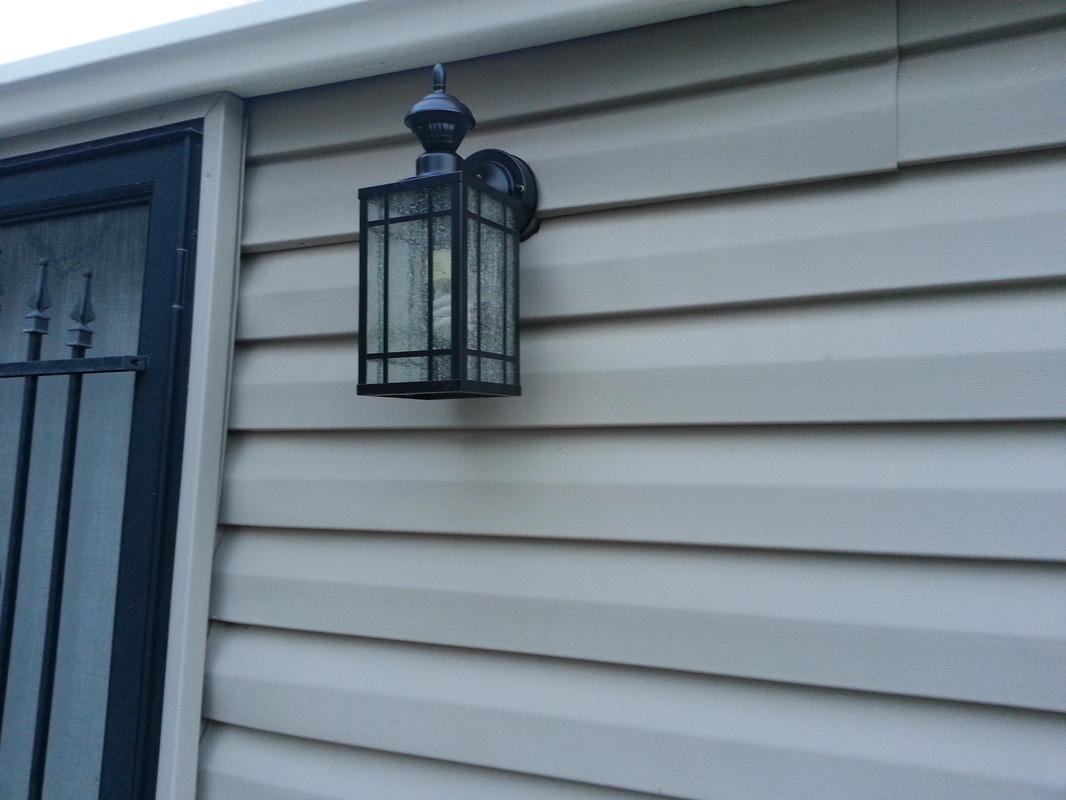
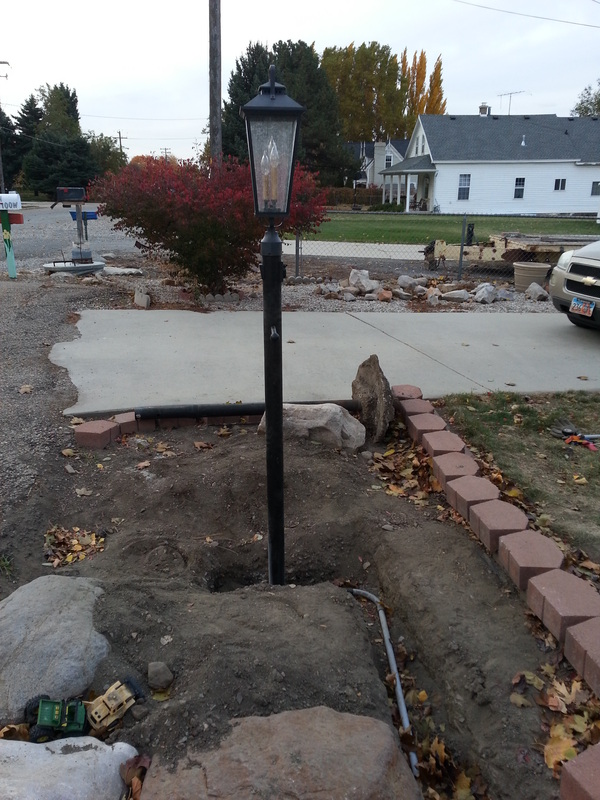
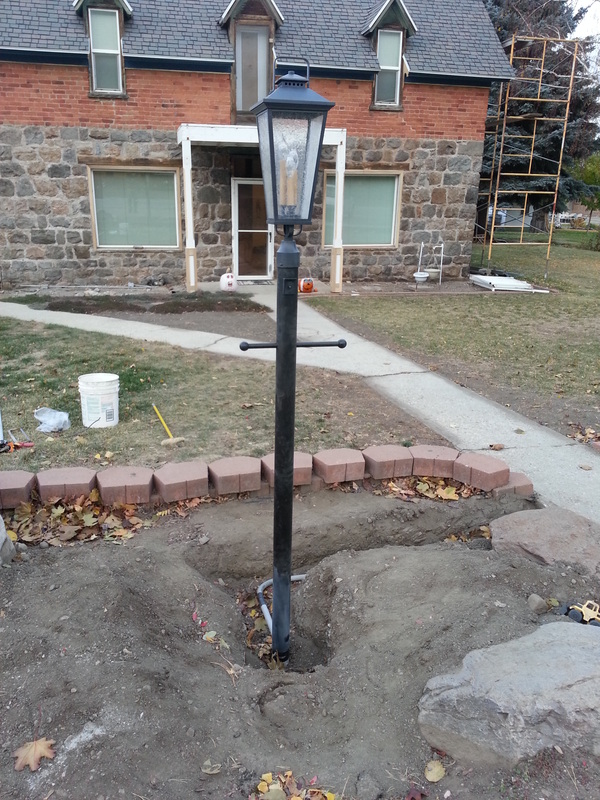
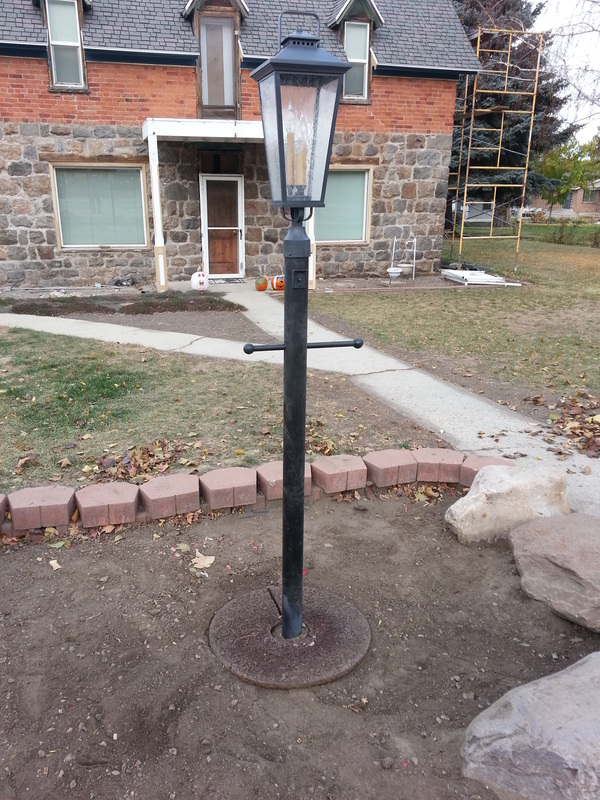
Today I put on new lights on the south side and west side of the house that are motion lights so I don't have to feel like I should leave the light on all night long (my dad came over and helped with the west light). With the light on the south side I had to take off the top and put some tape on it to cover it up because of how close it was to the roof. I also started working on the east light that will be up by the street. We had to find the conduit and then dig it out from under the rocks. It went up the south side of the sidewalk and then when it hit the pavement it turned south for a few feet and then went west to the light. We then ran to Lowe's, purchased some cement mix in a bag, and some conduit. I went back home and, with my headlight, finished clearing out the hole, got the post straight and poured in the mix. I took two levels to it, after it had set for a minute, and made sure it was straight up...I'm excited to get the light on top and see what it looks like. I felt I needed to do this in the night because it is supposed to rain on Monday afternoon...
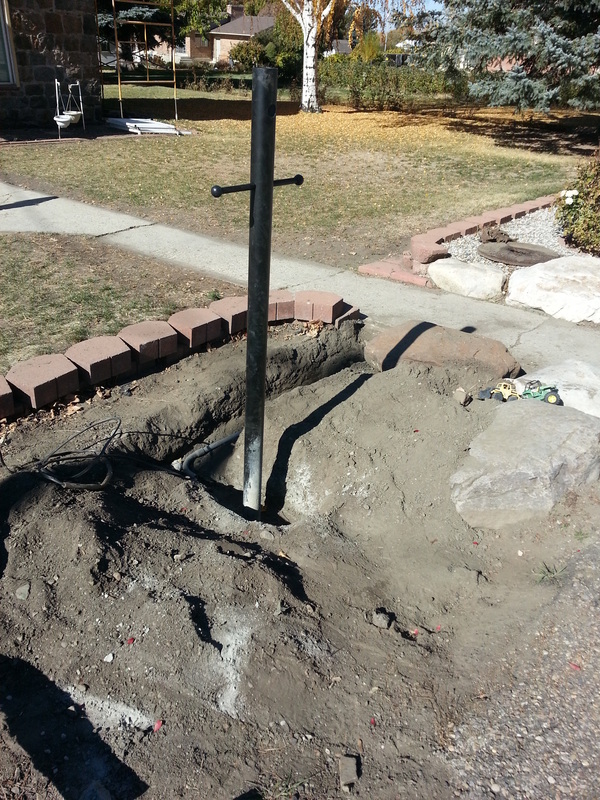
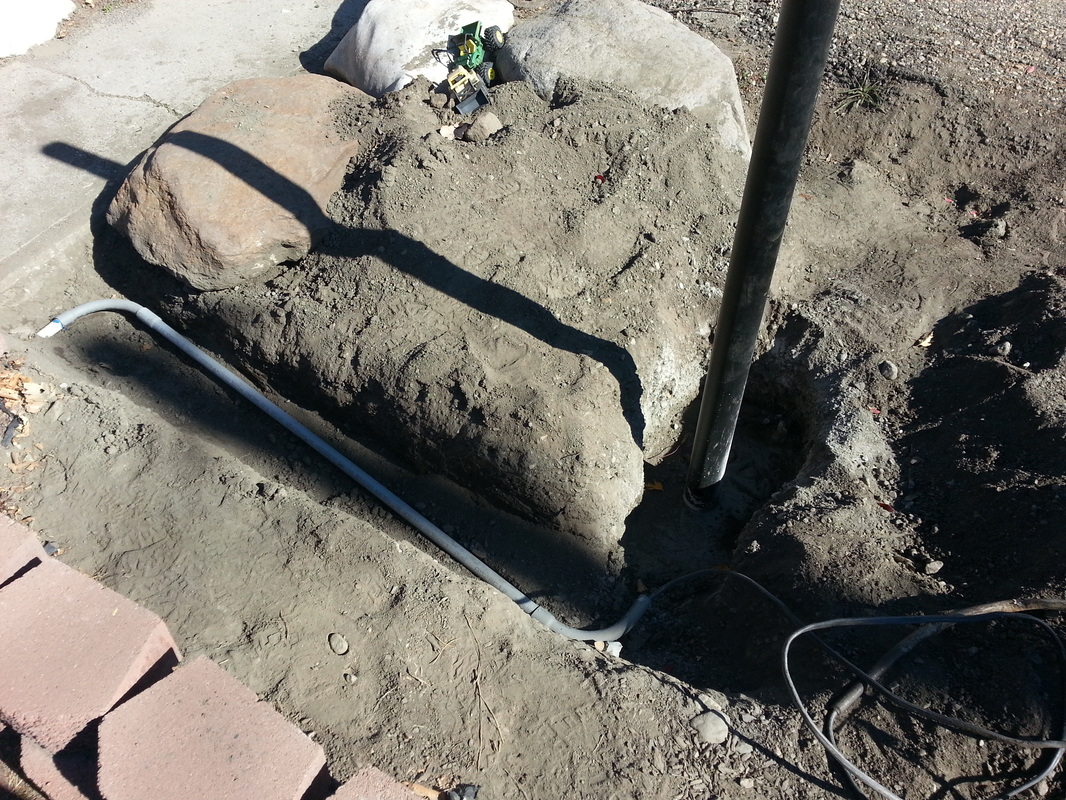
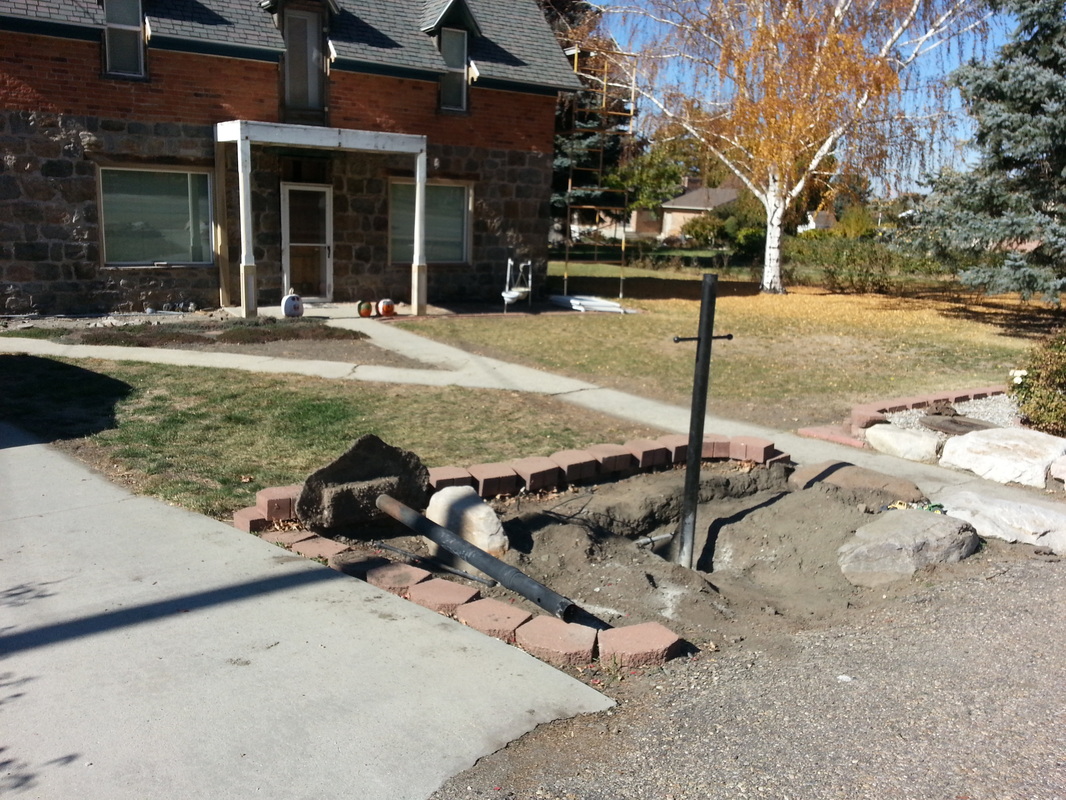

October 28, 2013

I got up early and finished the outside light by the street (even though my stomach wasn't feeling so well...Chase had gotten up super early and has some type of bug)...the pole set quite well and I'm excited to have it done! :) I also found a bunch of pieces of wood in the ground by the pole...I collected them and asked dad if he would like them...I think he'll take them. I'm not sure what kind of wood it is, though...probably from a tree that would have been there... Cody and I also worked on finishing up some of the painting. Cody painted all the Taupe colored trim and I did a final coat of blue on the north side. I also painted the blue part on the front pillars...we were in a hurry to get it done so the rain didn't get too bad.


October 31, 2013
There are a lot of little details being done right now...until we start building the porch, we'll be finishing up the painting, calking, etc... I can say this much, though, Cody Wright does amazing work!

November 4, 2013
Paint, paint, and more paint...


November 5, 2013
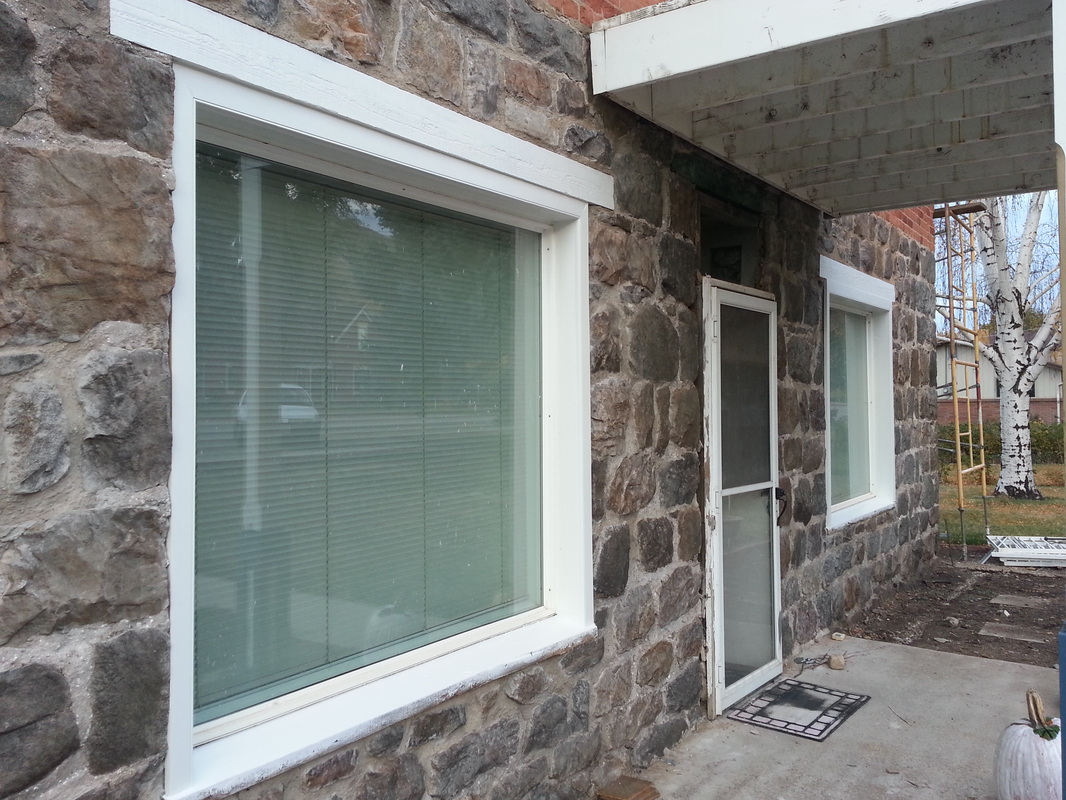
I stopped by on my way through today and just love the way the white looks against the orange brick...the south side is officially done!!! Way cool!


November 6, 2013

Cody moved the scaffolding to the east and starting working on the wood above the windows...


November 9, 2013

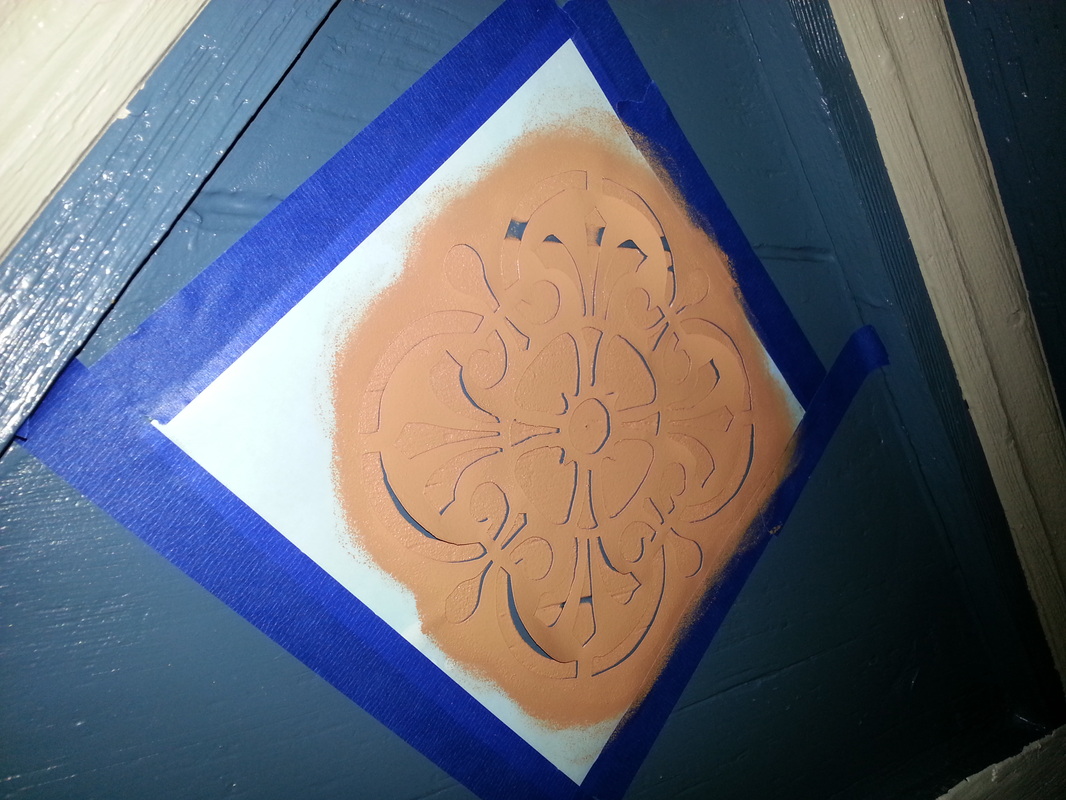
Ang ended up picking up a stencil and after Cody painted around the windows on the front (not to mention removal of the old screen door and fixing the wood around the upper doorway) we painted the stencil above the two windows. We had to do it twice on the south side because I first measured the center to be the halfway point from the top to the bottom but not the center of the triangle. Also, we didn't dab it as lightly so it ended up bleeding around it and didn't turn out so good. We like it now. :)
November 11, 2013

Thanks to the Veterans, I had the day off...ended up cleaning up a lot of the debris around the south and east sides, taking care of the old light pole, painting the mailbox pole to match the blue on the house, fixing a hole on the south side at the bottom, and painted around the south door...all while Cody calked around the windows and repainted the north windows, painted above the upper doorway and did a lot of touch up work...great day of work!
By the way, Happy Birthday, Sydnie! The big # 12! :)
By the way, Happy Birthday, Sydnie! The big # 12! :)


November 12, 2013
Cody worked on the upper doorway. He got it painted and even painted the door. For the next couple of days, Cody is going to work on the door frame downstairs...
Also, the north side of the house is done!! Yipee!!! Now we are down to two screen doors, the door frame downstairs, and the deck!
Also, the north side of the house is done!! Yipee!!! Now we are down to two screen doors, the door frame downstairs, and the deck!
November 13, 2013

When I got home from work I put up the stencil and finished the design above the upper door. What I had to do is take the 6" stencil, put it on the copy machine and make it 125% of the original and then cut it out...I think I did a good job. :) Now all I have to do is some touch-up and it should be done...


November 22, 2013
The past few days, Cody has been working on the doorway in his shop while it's been a bit cold outside...
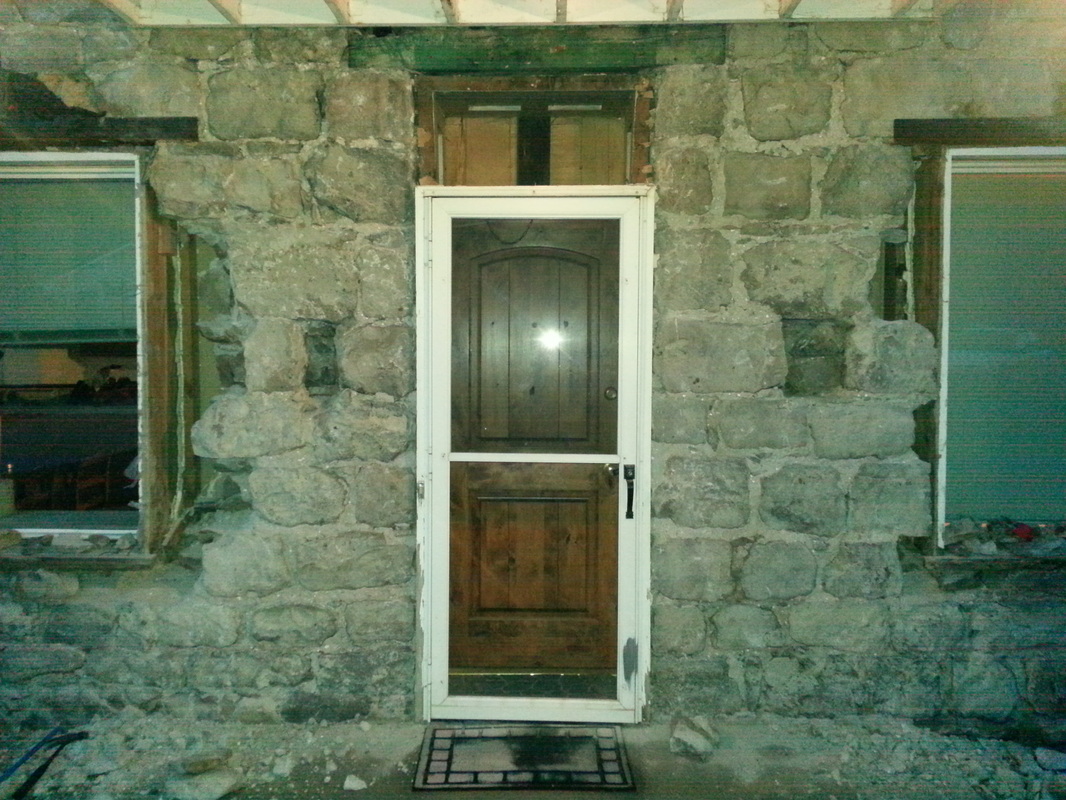
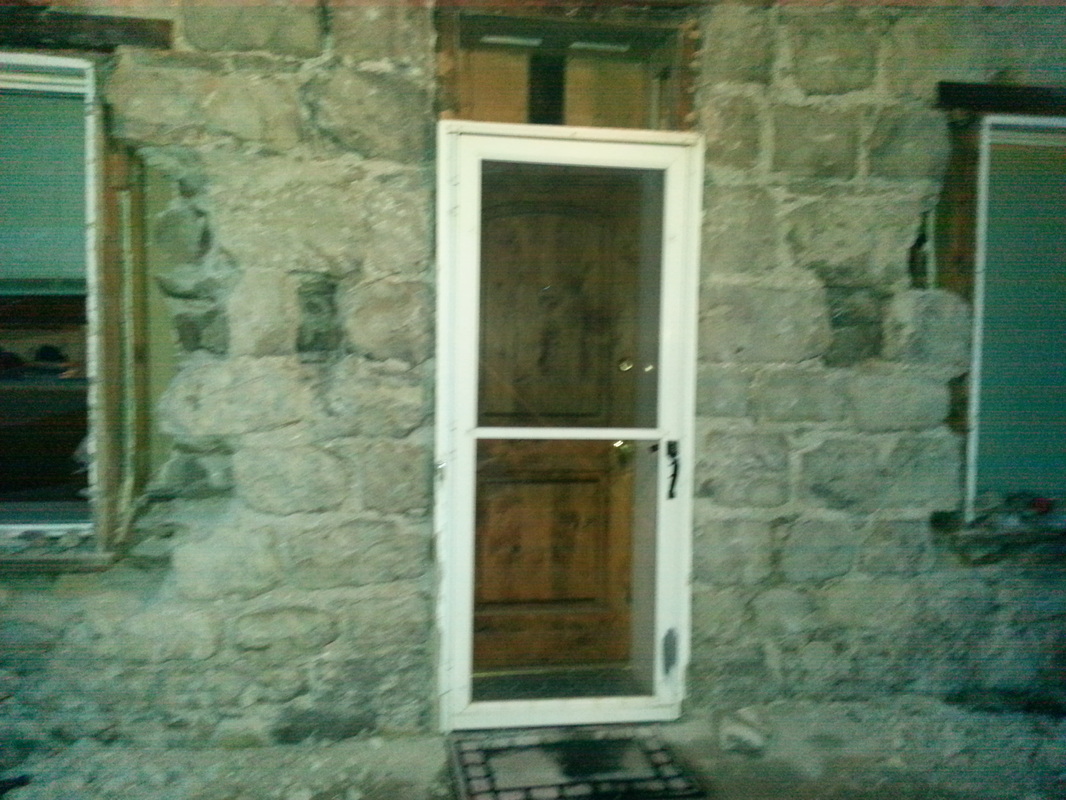
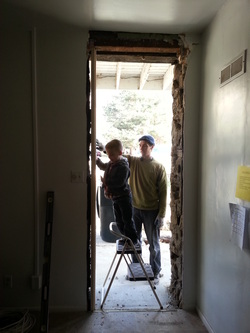
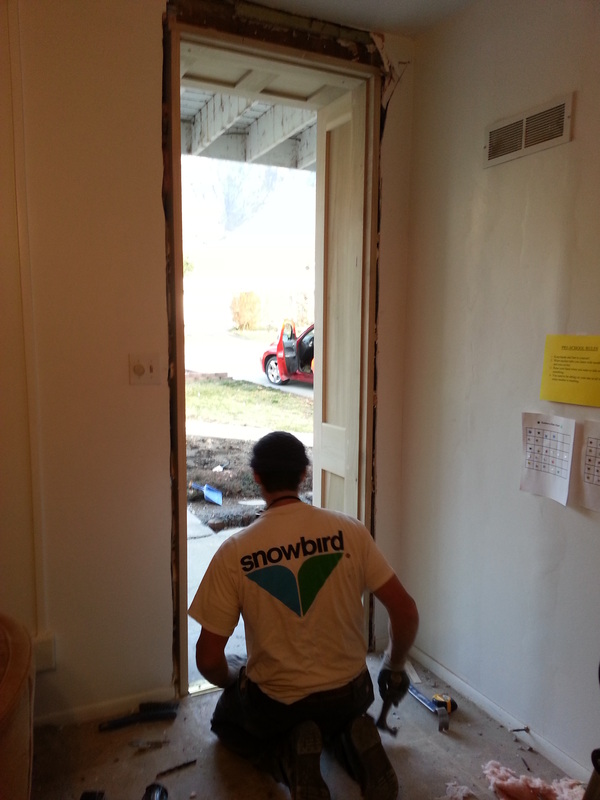
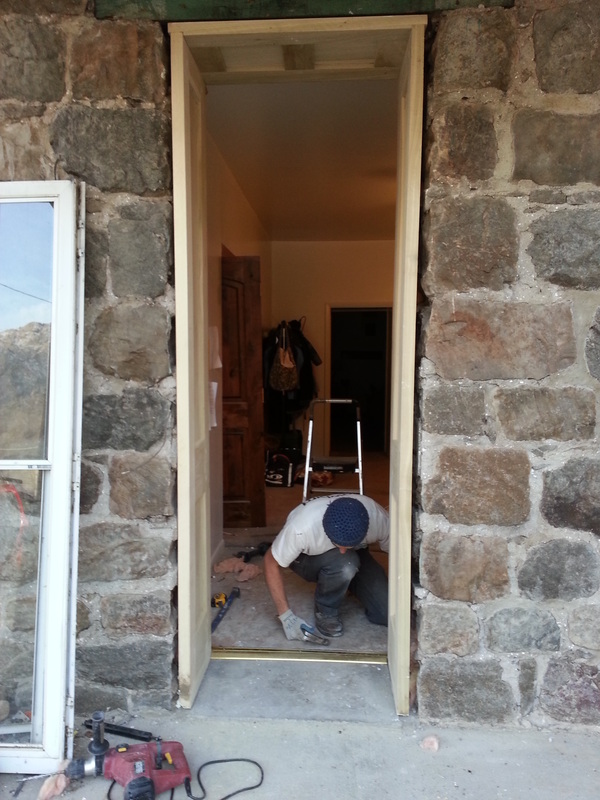
Today we took out the doorway and put in the new one...man! Cody is amazing...the woodwork he put together fit like a glove! It's amazing how well the wood came together and how well Cody works with the wood as well. :) Chase was a big helper...haha...he took some tools and was playing with them. About a half hour later, Cody was looking for the tools...he asked Chase and Chase just said, "I don't know where they are...I lost them" and walked away. We laughed and went on a search...we ended up finding them and got it done, but it's funny how honest he was about the tools...4-year-olds. ;)
Today we took out the doorway and put in the new one...man! Cody is amazing...the woodwork he put together fit like a glove! It's amazing how well the wood came together and how well Cody works with the wood as well. :) Chase was a big helper...haha...he took some tools and was playing with them. About a half hour later, Cody was looking for the tools...he asked Chase and Chase just said, "I don't know where they are...I lost them" and walked away. We laughed and went on a search...we ended up finding them and got it done, but it's funny how honest he was about the tools...4-year-olds. ;)


November 25, 2013

On Saturday (23rd) I painted the doorway and put spray in insulation around the window (except the top north side where we are going to run some wire for the outside lights).
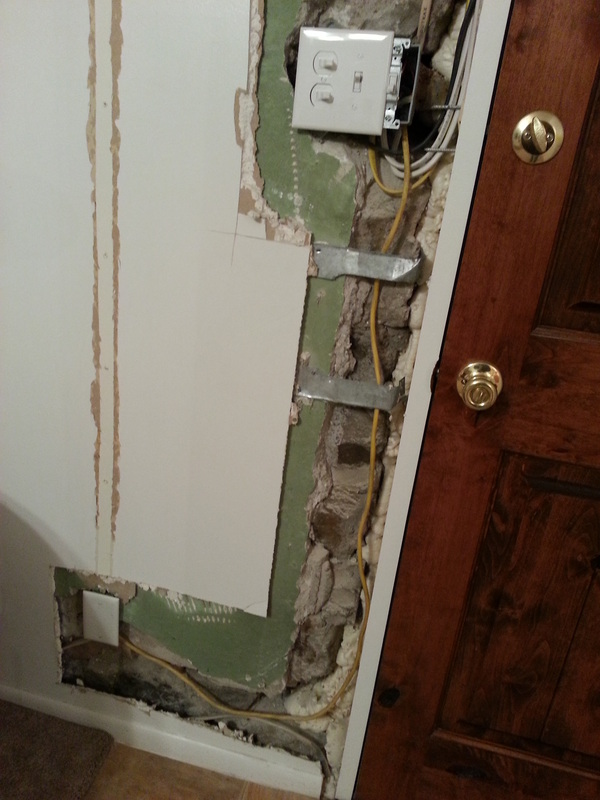
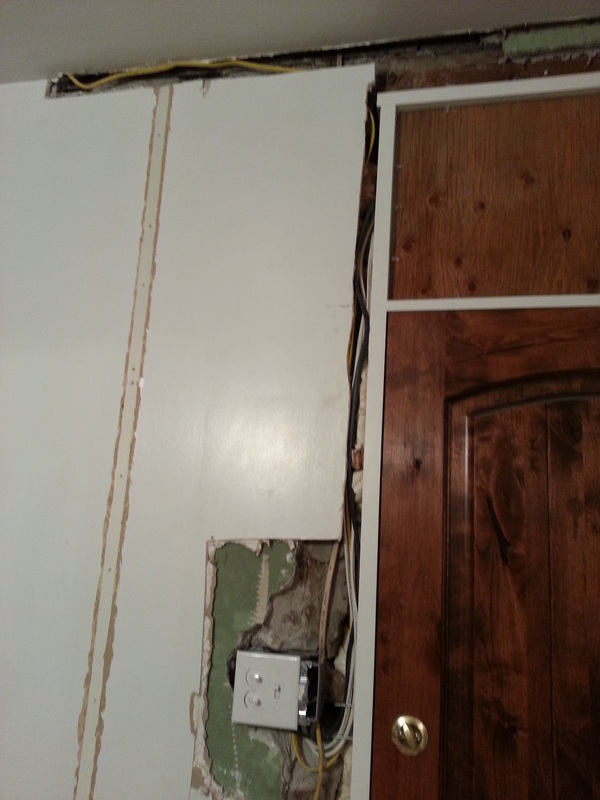
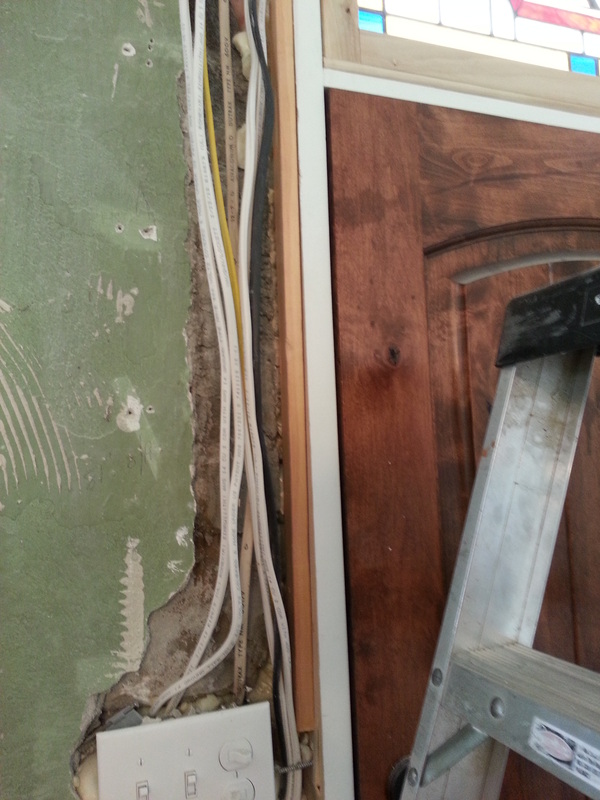
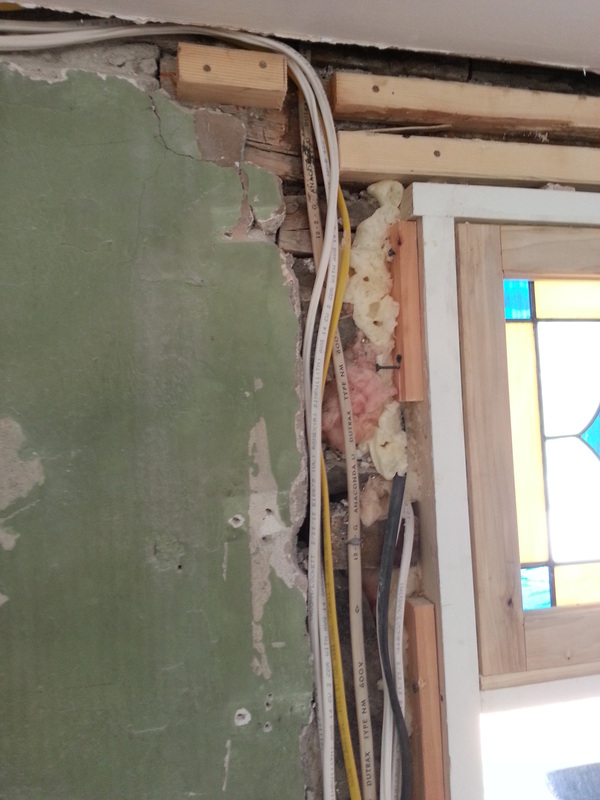
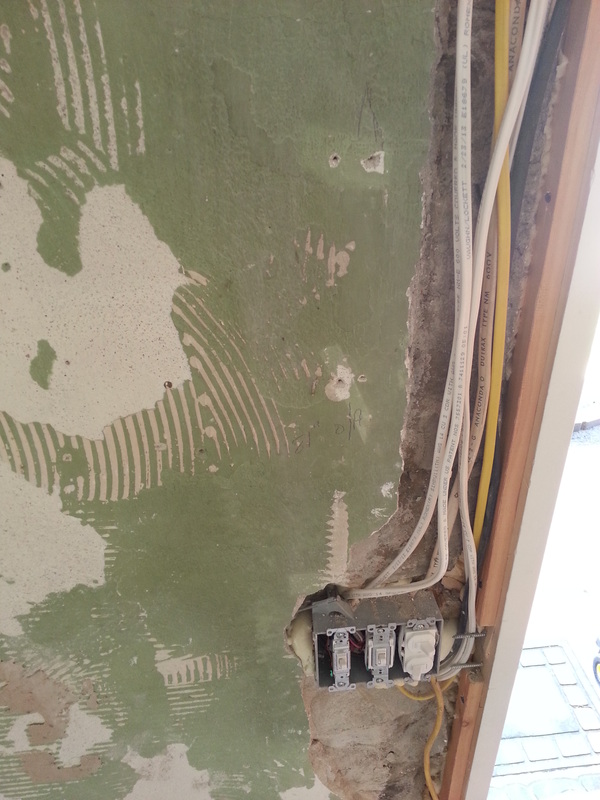
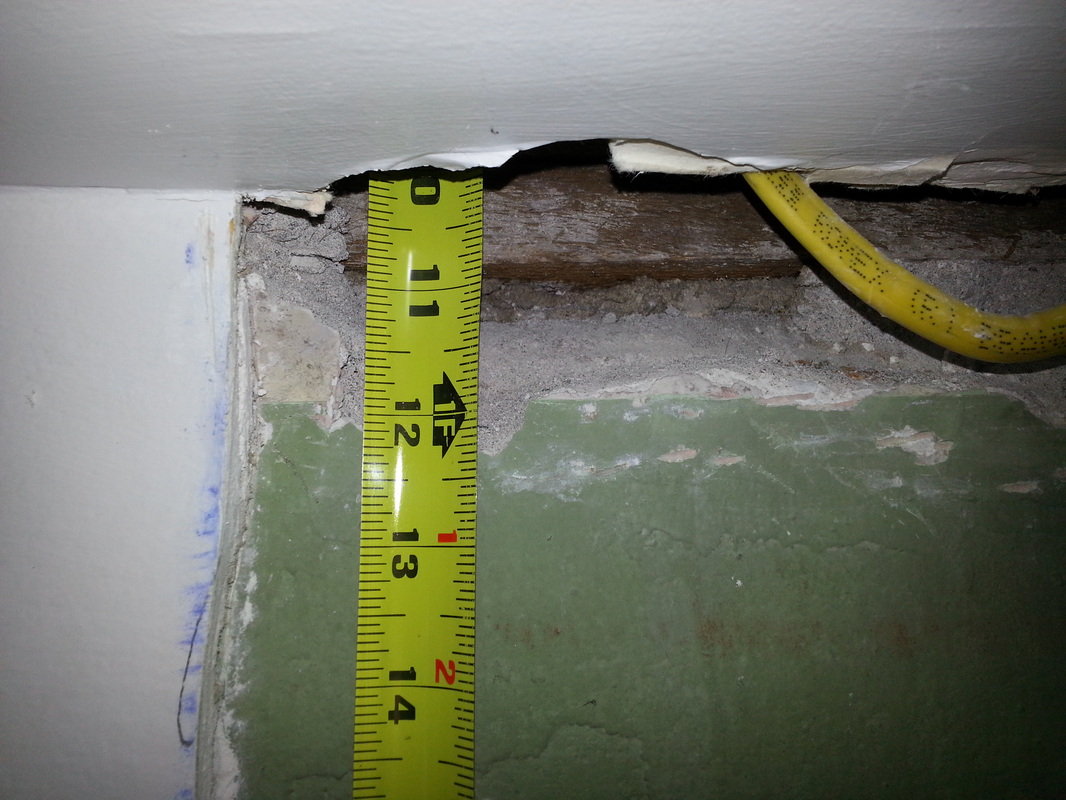
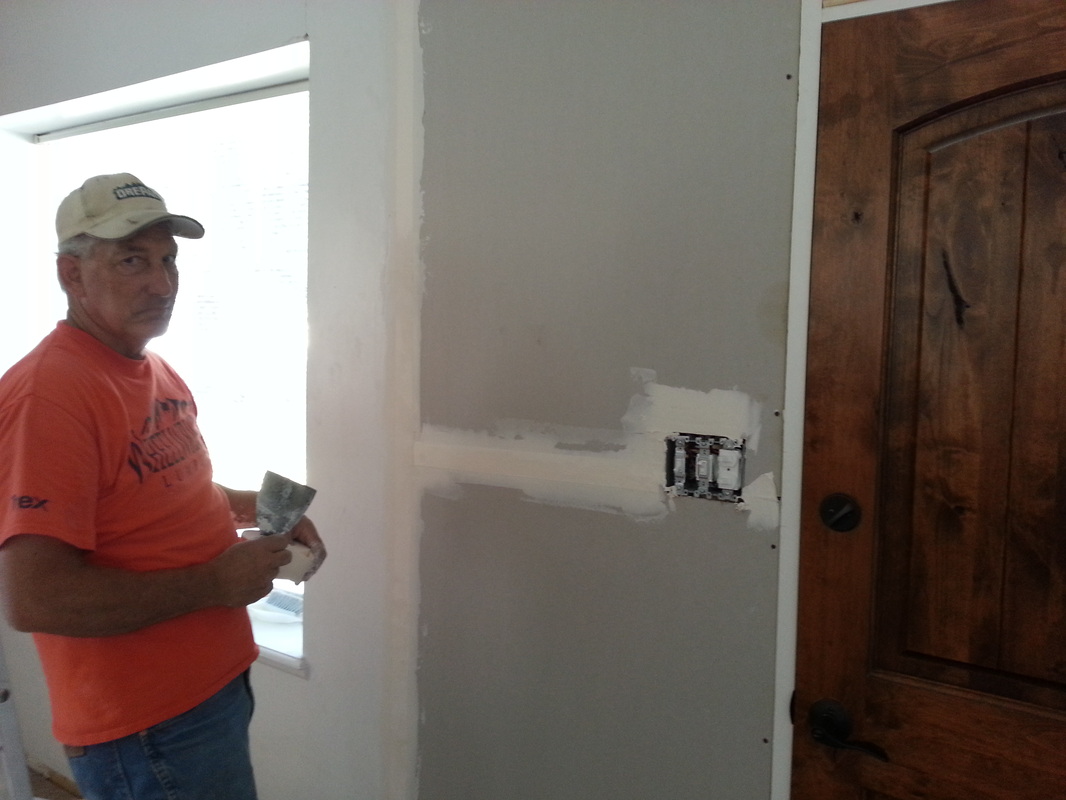
Herman Huntsman came over tonight and helped me put in the power for the outside lights...we had to figure out where the power was coming from so I had to take off some of the sheetrock...we found out that the outside light is a dead end light, meaning there are two powers coming to the switch and the rest of the lights in the living room are on a different circuit that is coming from the ground...so we shared the neutrals and grounds to the switches. I also took off the wire channel that was in the living room and put it in the ceiling and then down the door so we can hang a picture on the wall and fix the sheetrock... I know I wouldn't have been able to do this without Herman...he came over for a bit right after work and then came over at night to help me put it all together. We put in two canned lights and wired for the wall light and a plug under the deck. The next day I filled in the hole on the top. :) It's getting a bit warmer inside.
Herman Huntsman came over tonight and helped me put in the power for the outside lights...we had to figure out where the power was coming from so I had to take off some of the sheetrock...we found out that the outside light is a dead end light, meaning there are two powers coming to the switch and the rest of the lights in the living room are on a different circuit that is coming from the ground...so we shared the neutrals and grounds to the switches. I also took off the wire channel that was in the living room and put it in the ceiling and then down the door so we can hang a picture on the wall and fix the sheetrock... I know I wouldn't have been able to do this without Herman...he came over for a bit right after work and then came over at night to help me put it all together. We put in two canned lights and wired for the wall light and a plug under the deck. The next day I filled in the hole on the top. :) It's getting a bit warmer inside.
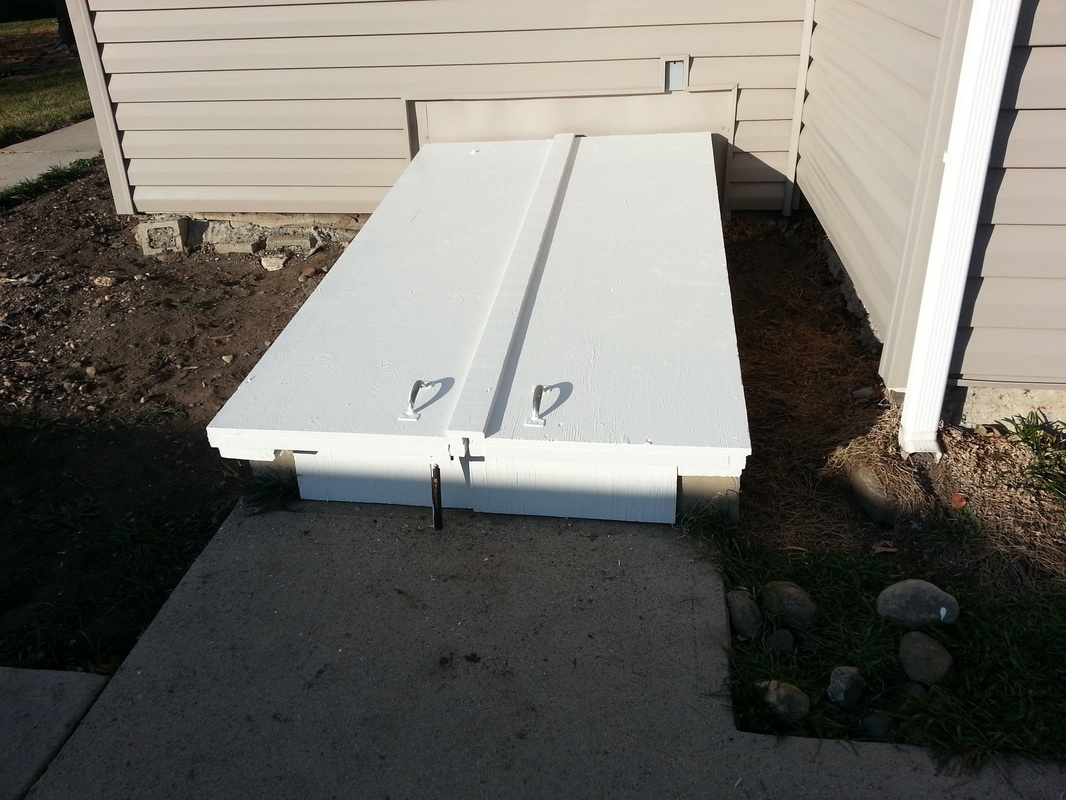
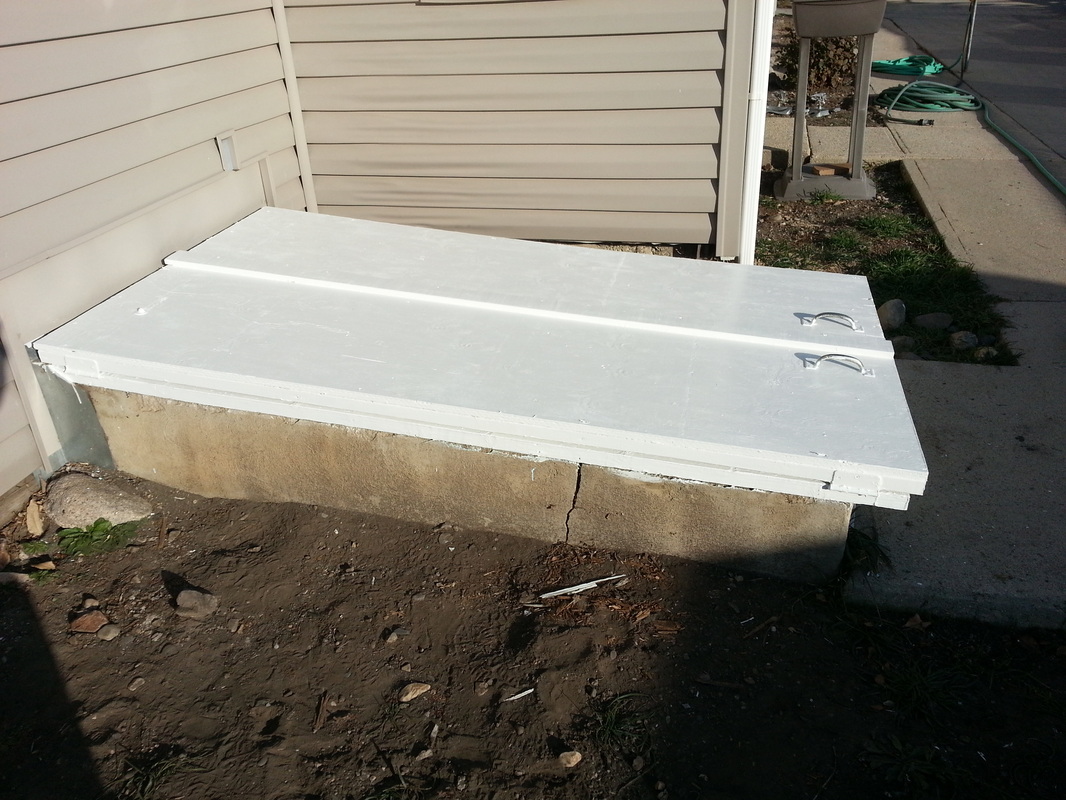
November 30, 2013
Yesterday, dad helped me put new 3/4" plywood on the cellar doors...I didn't take any pictures until I had it painted. Before we took off the wood, however, Sydnie came over and I was going to show her how "springy" or "spongy" the wood was...I put my foot on it and I put my foot right through it...I guess it was time. :) I'm just glad no one went through it (except for my foot). You can see the bad wood in one of the pictures. I ended up using some of the paint we didn't use up on the house as a "primer" coat...it was one of the light blue paints.
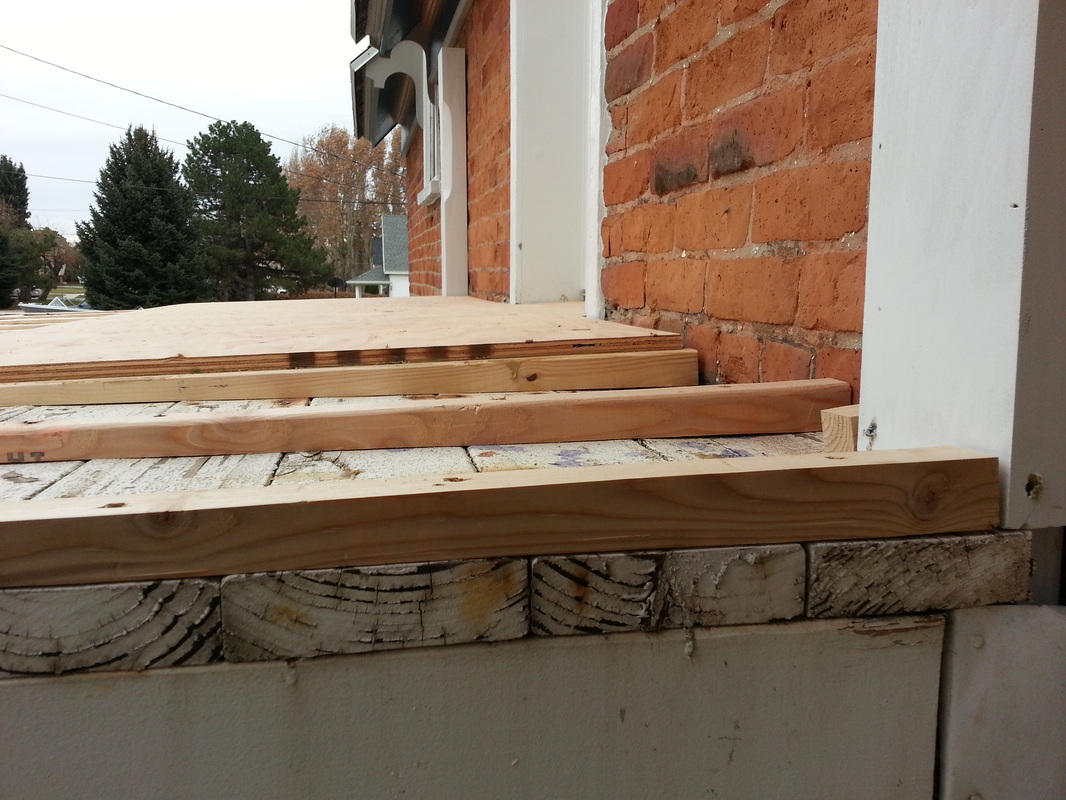
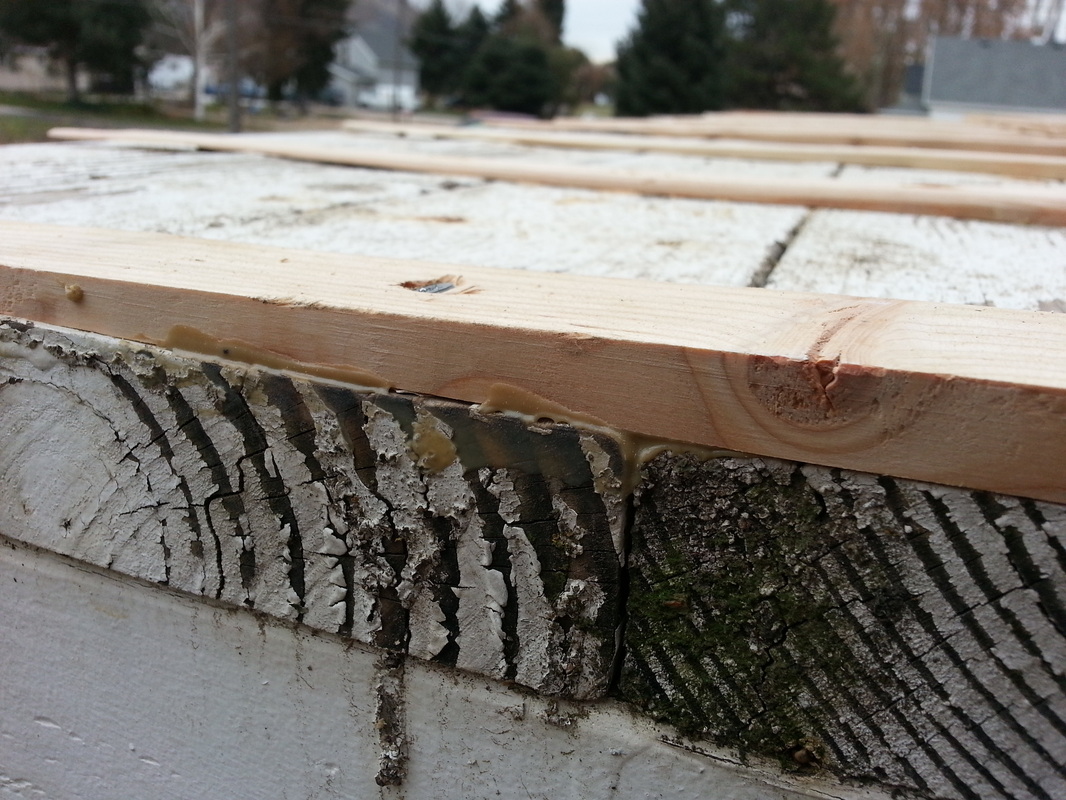
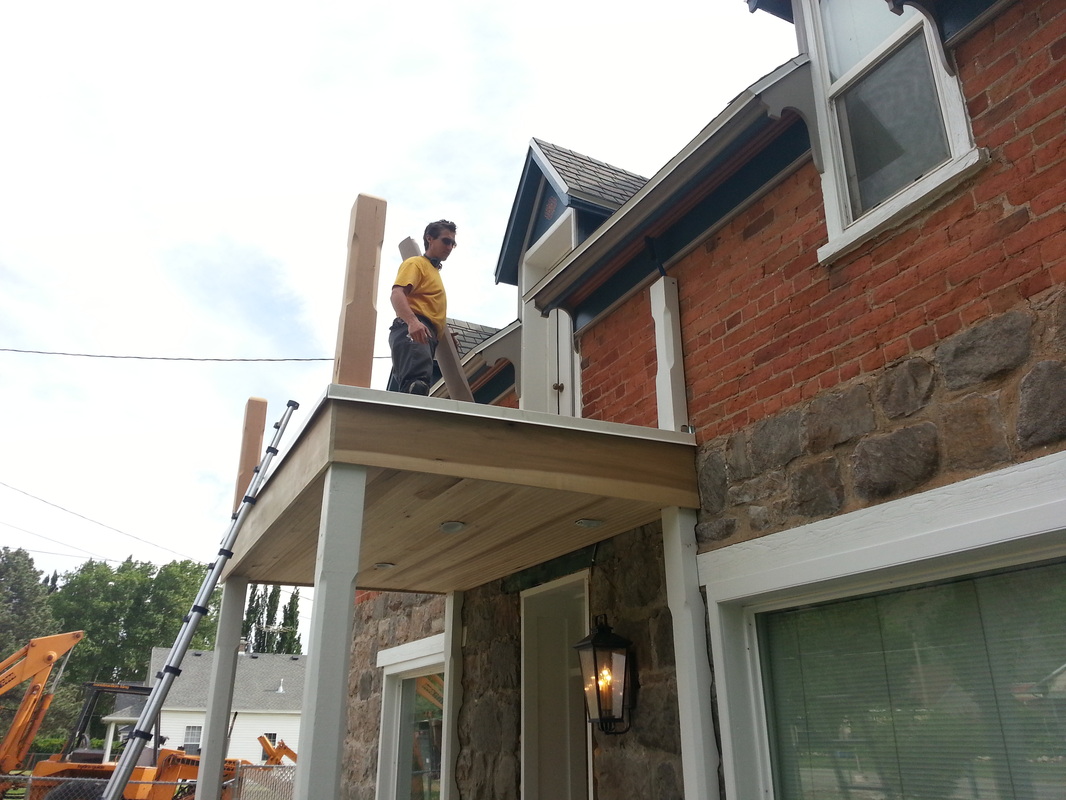
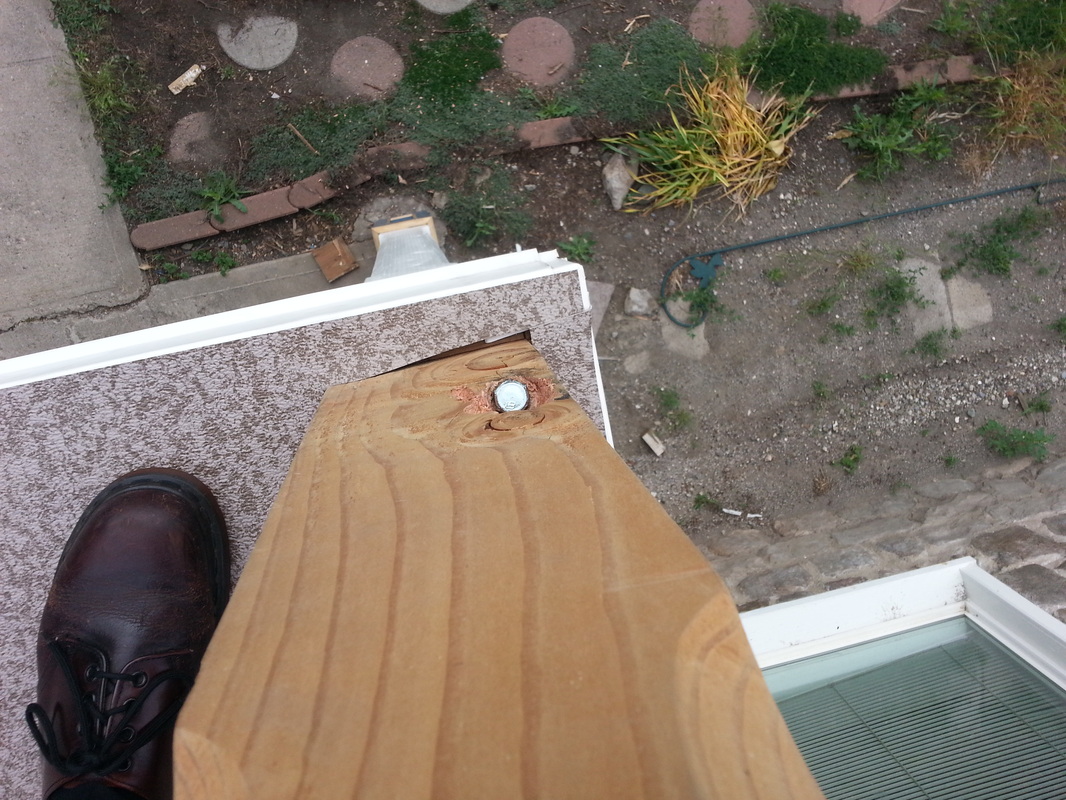
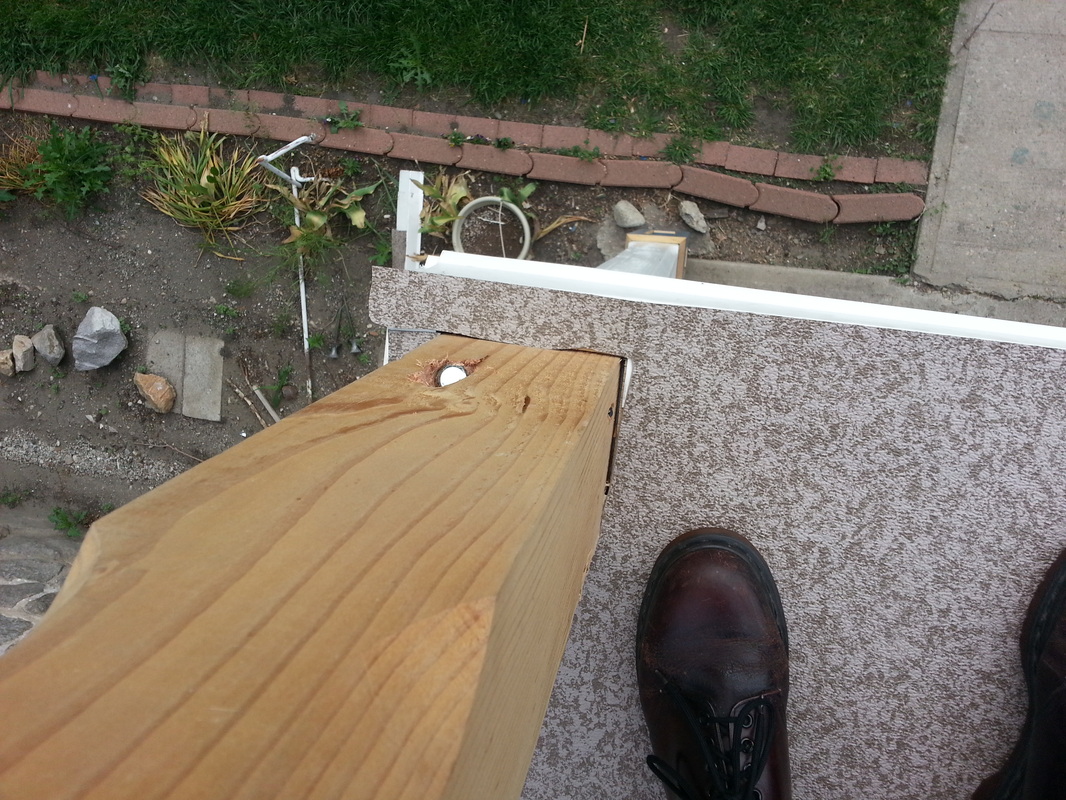
Today I painted the rest of the cellar doors white to cover the light blue and paint the inside of the doors. I got out the hammer drill and chipped away the mortar where the wire will be for the outside light. Cody came over and started putting the pillars up against the home and put in the downspouts inside the pillars. We were lacking a trim around the upper door and Cody put that up and I painted it white. Cody also put down the 2x4's that he cut to put a slope on the deck out front. It feels very solid...he even put glue down and then screwed the boards in place. We're trying to hurry a bit because it is supposed to snow on Monday night and Tuesday so we'll have to get a tarp and cover the deck...
Today I painted the rest of the cellar doors white to cover the light blue and paint the inside of the doors. I got out the hammer drill and chipped away the mortar where the wire will be for the outside light. Cody came over and started putting the pillars up against the home and put in the downspouts inside the pillars. We were lacking a trim around the upper door and Cody put that up and I painted it white. Cody also put down the 2x4's that he cut to put a slope on the deck out front. It feels very solid...he even put glue down and then screwed the boards in place. We're trying to hurry a bit because it is supposed to snow on Monday night and Tuesday so we'll have to get a tarp and cover the deck...


December 2, 2013
|
Cody finished putting the deck boards on.
|


February 15, 2014

|
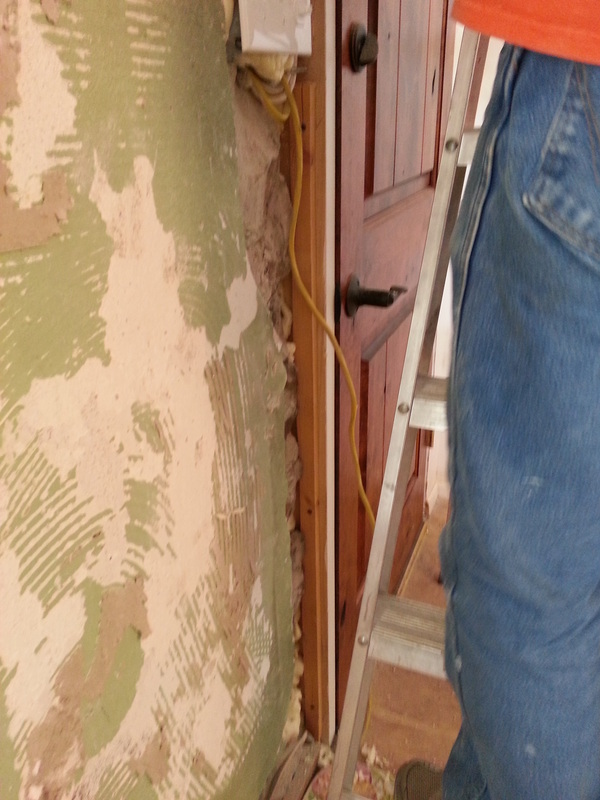
I hooked up the outside light by drilling into the rock and anchoring the metal box to the rock and then connecting the light to the box. We'll have Cody come back and put mortar around the wire to hide it.
|


April 14, 2014
|
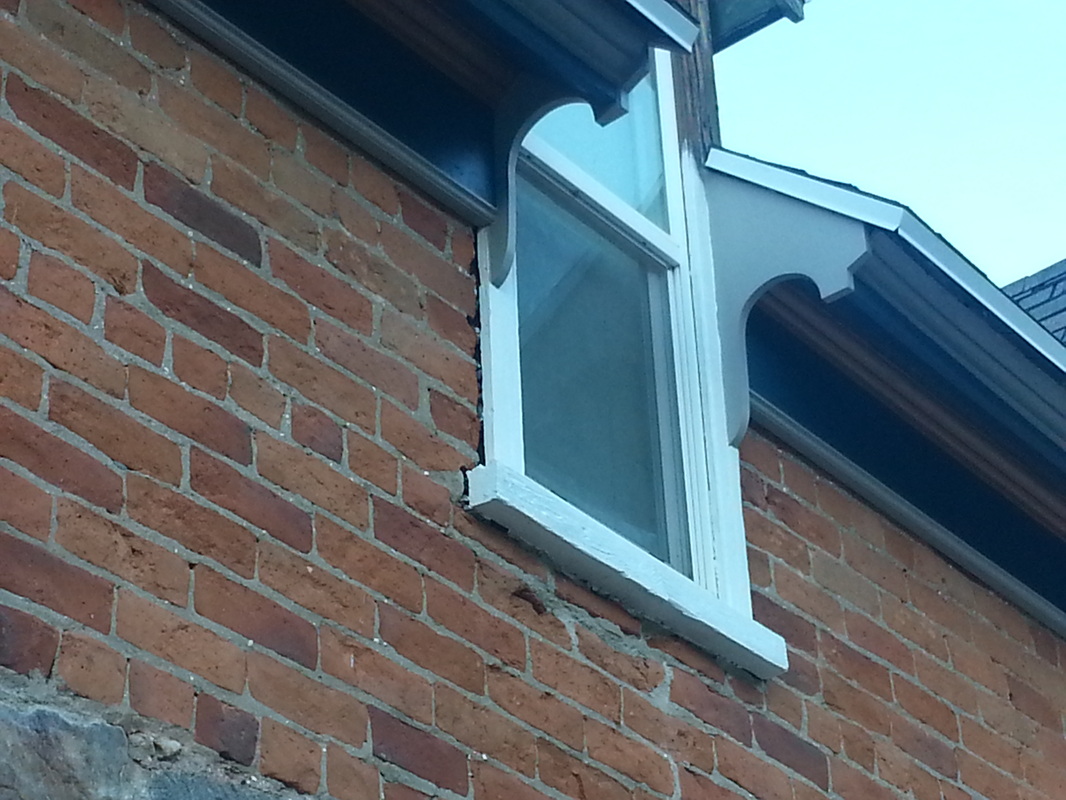
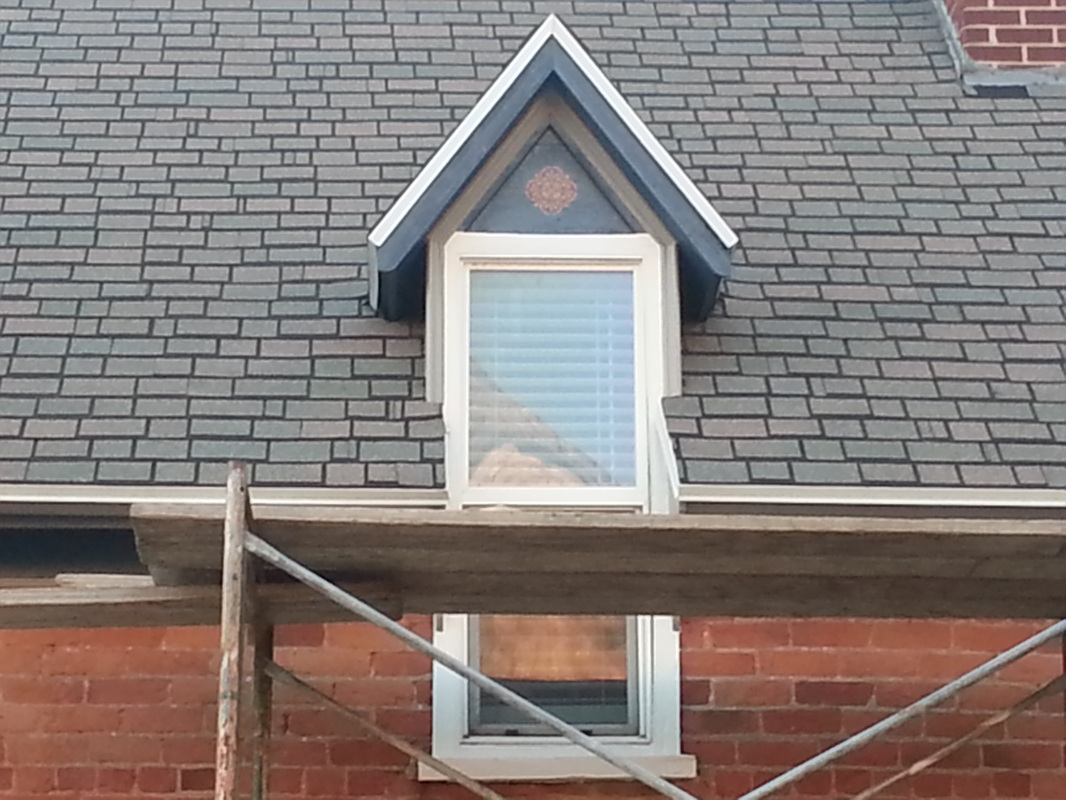
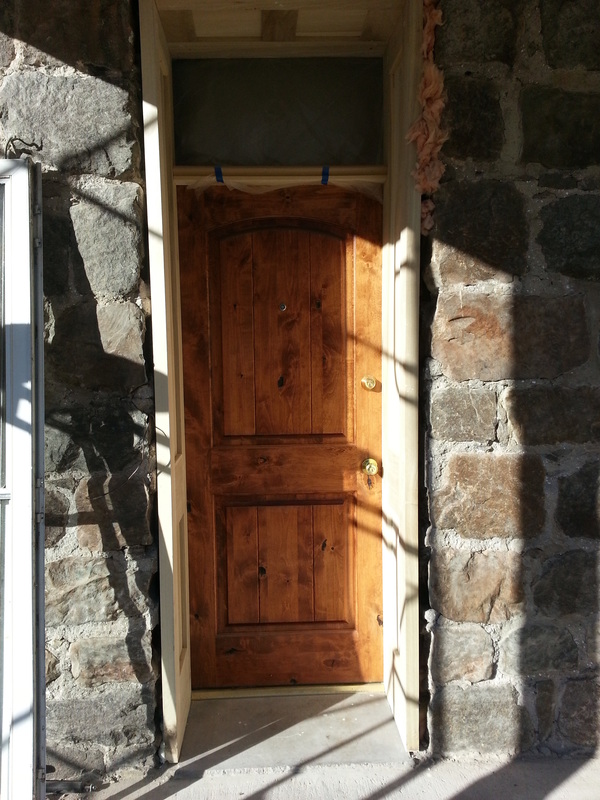
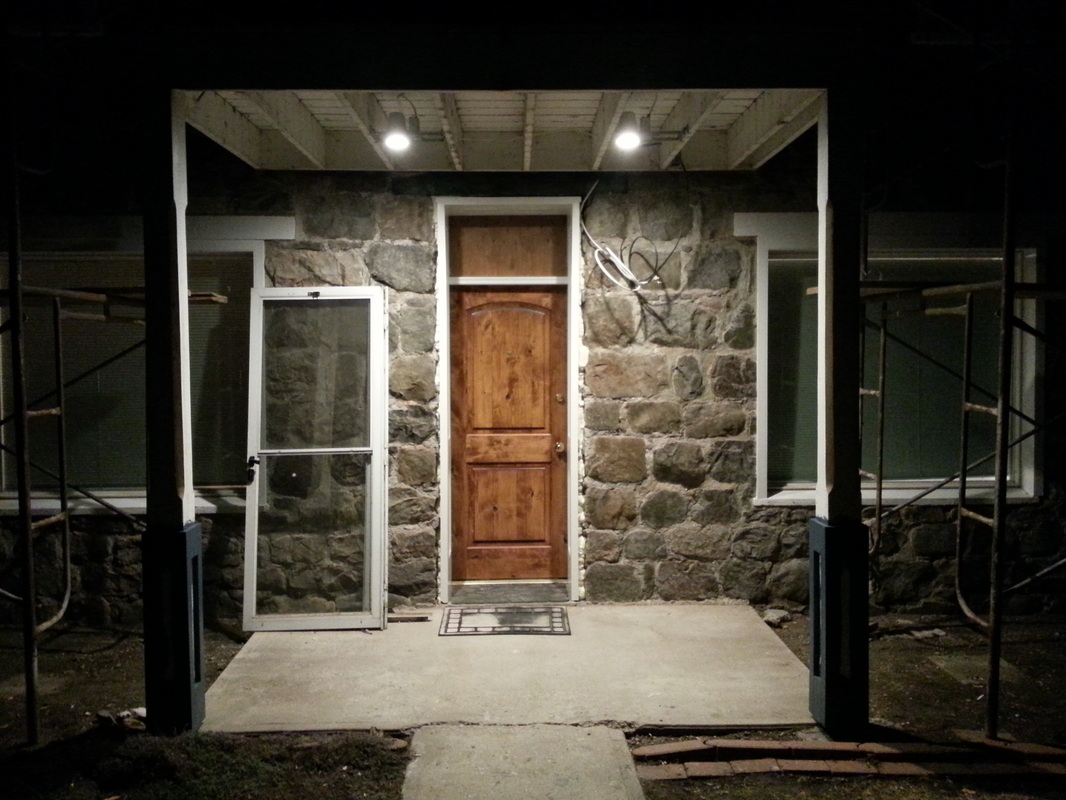
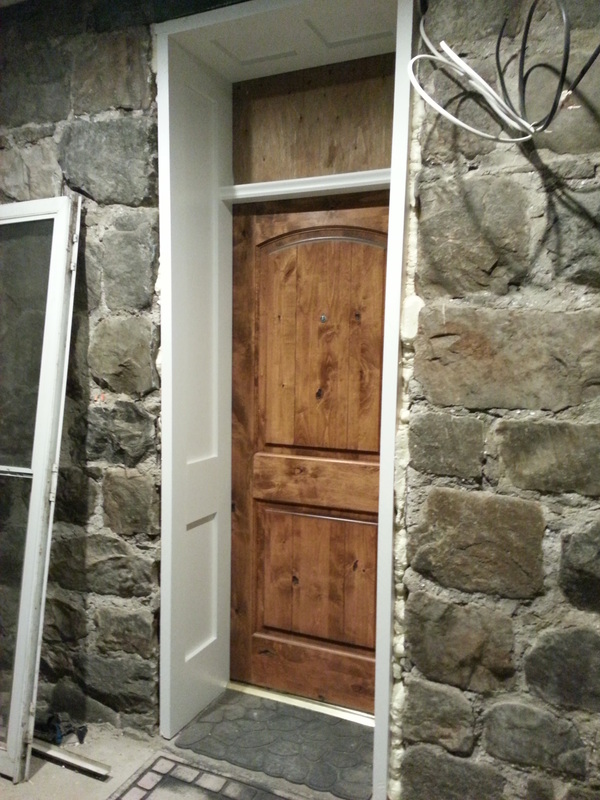
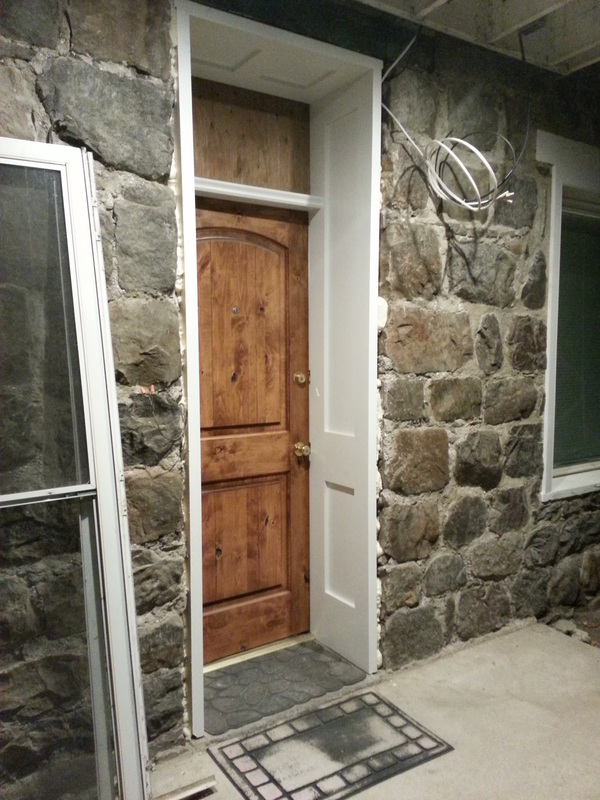
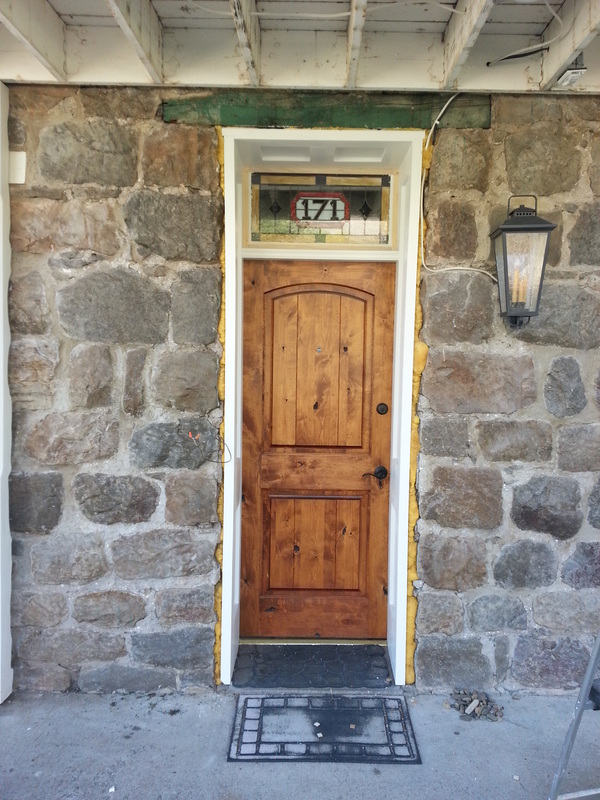
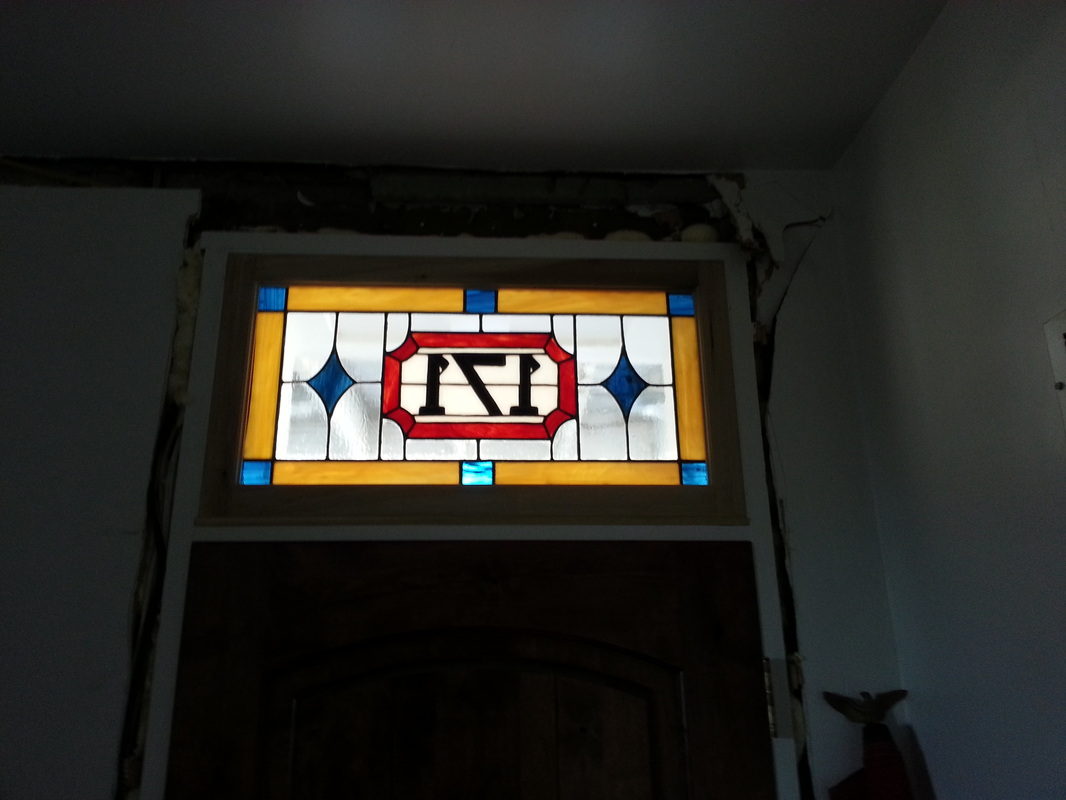
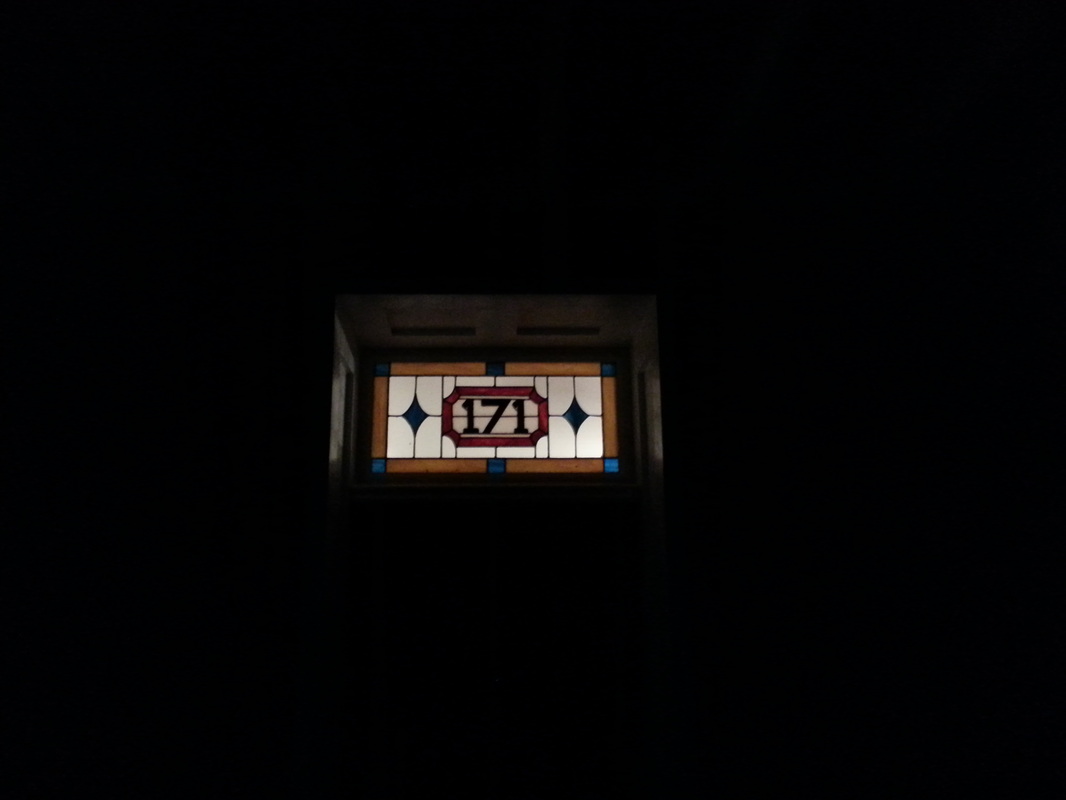
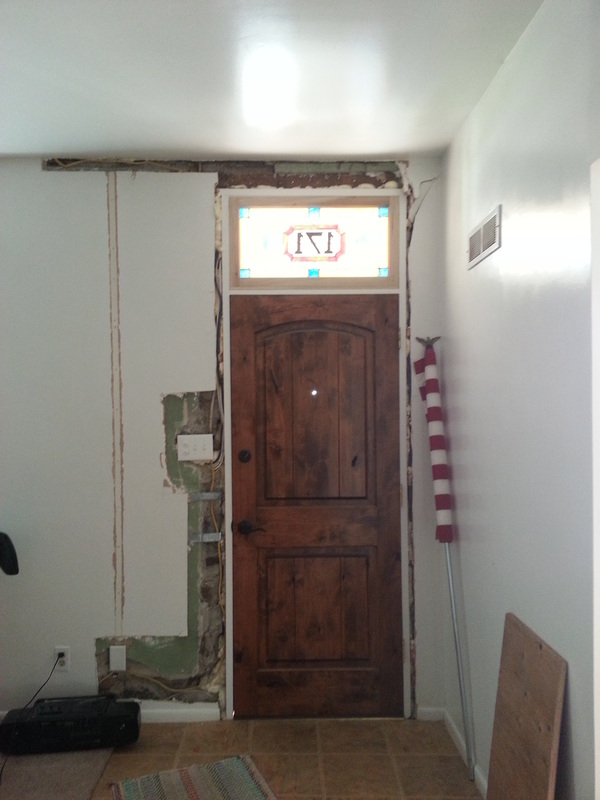
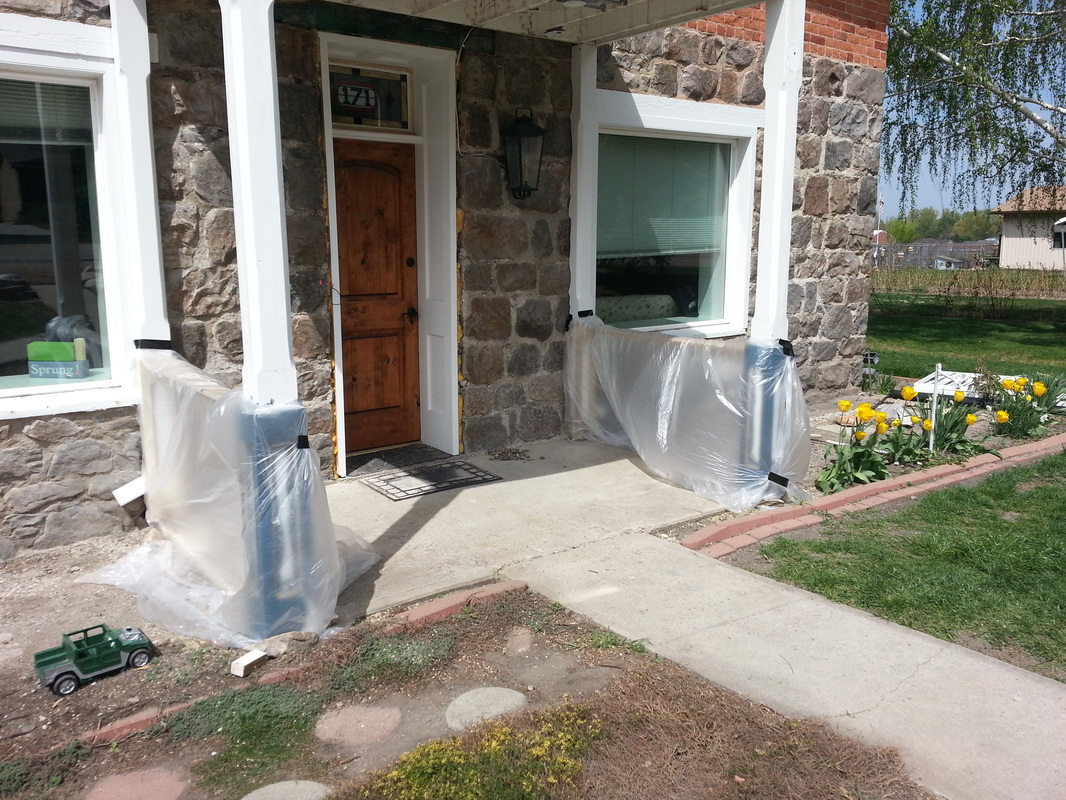
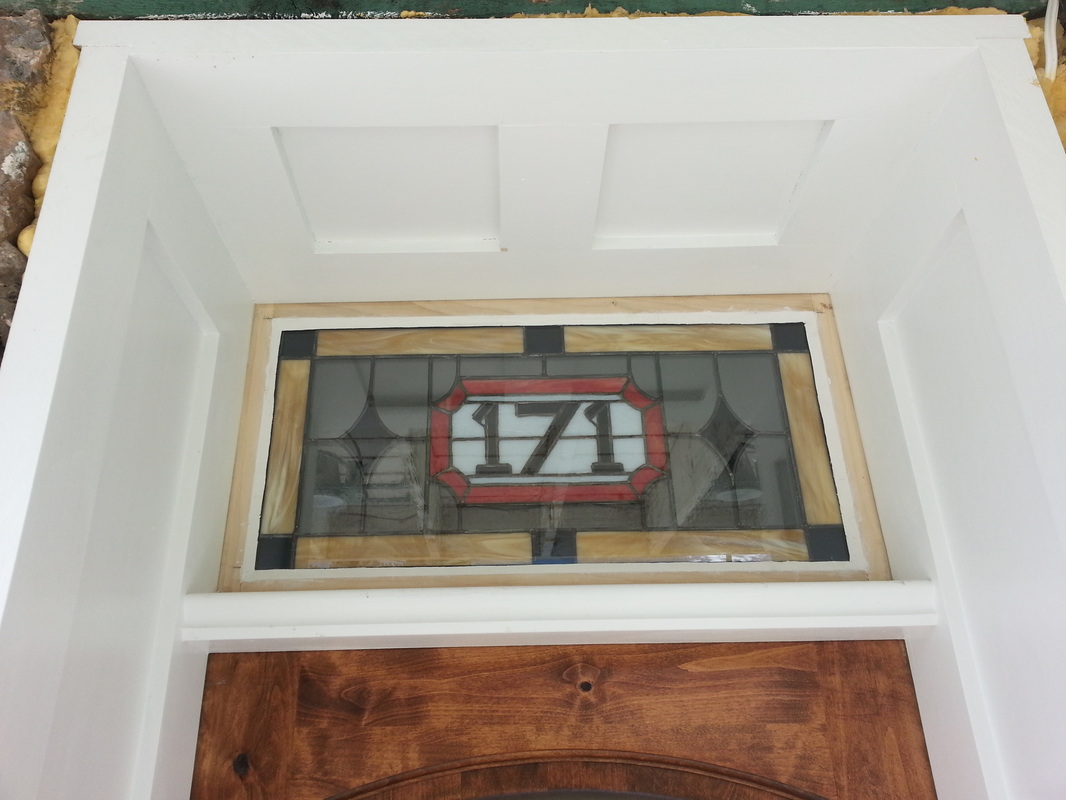
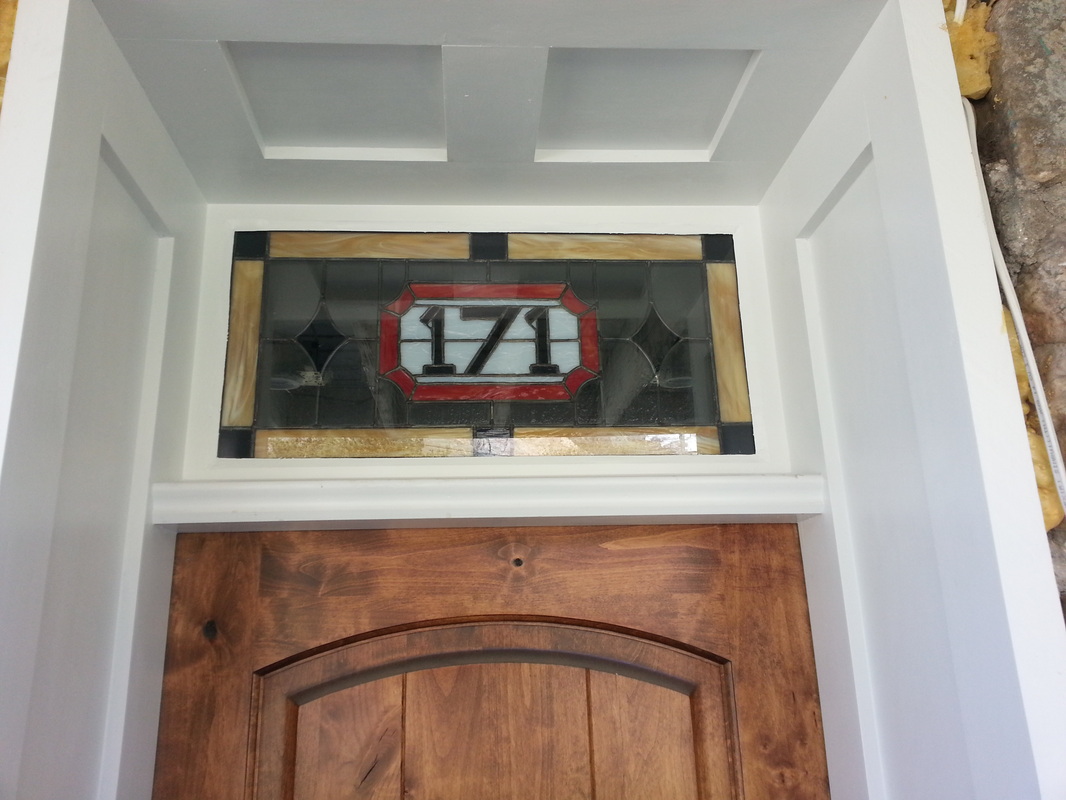
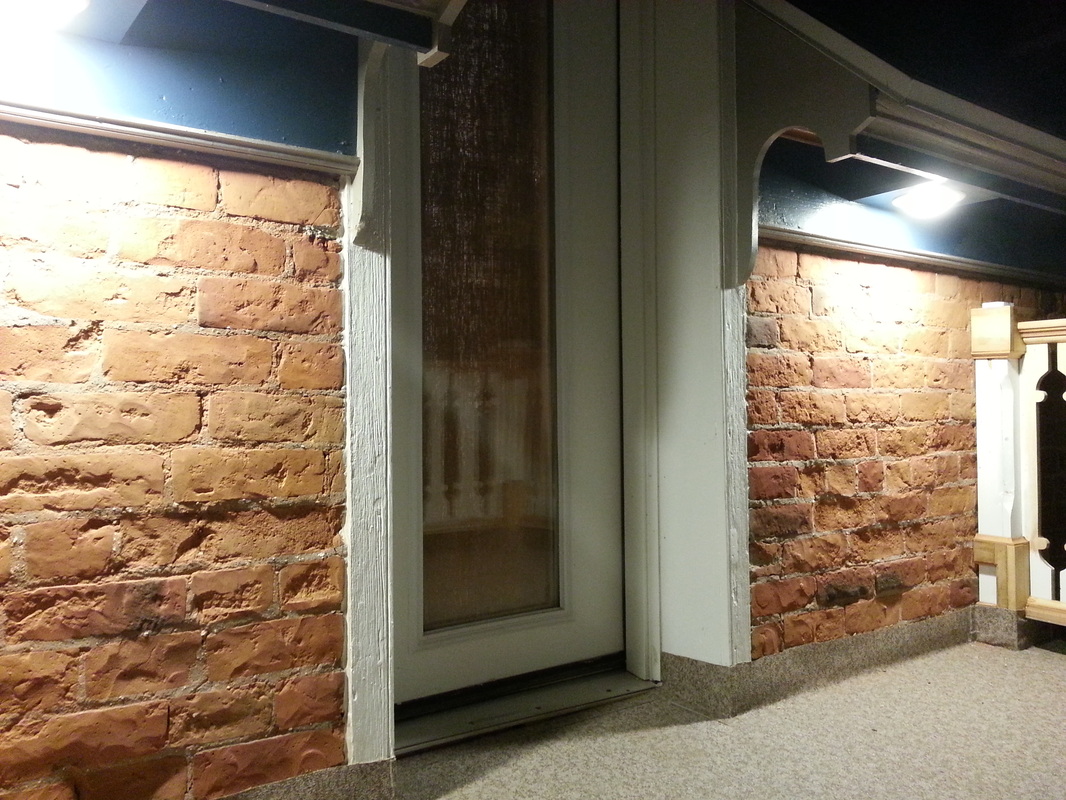
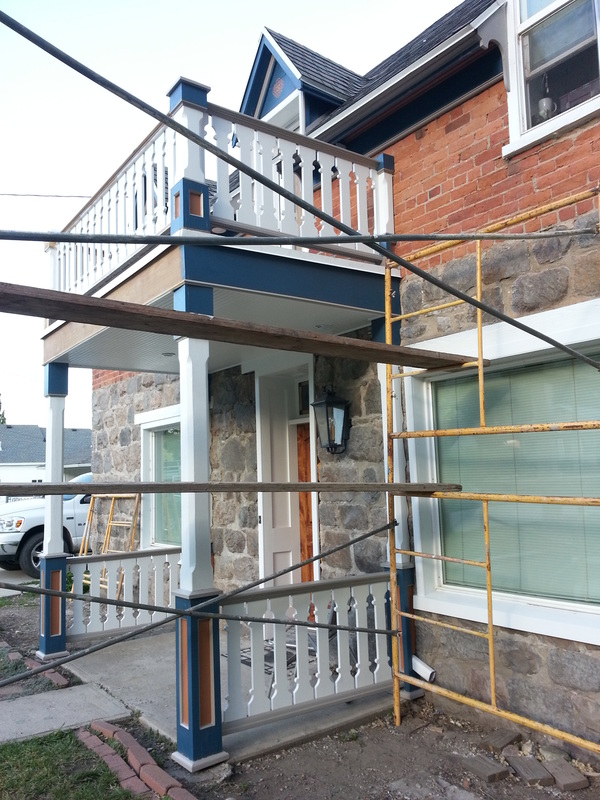
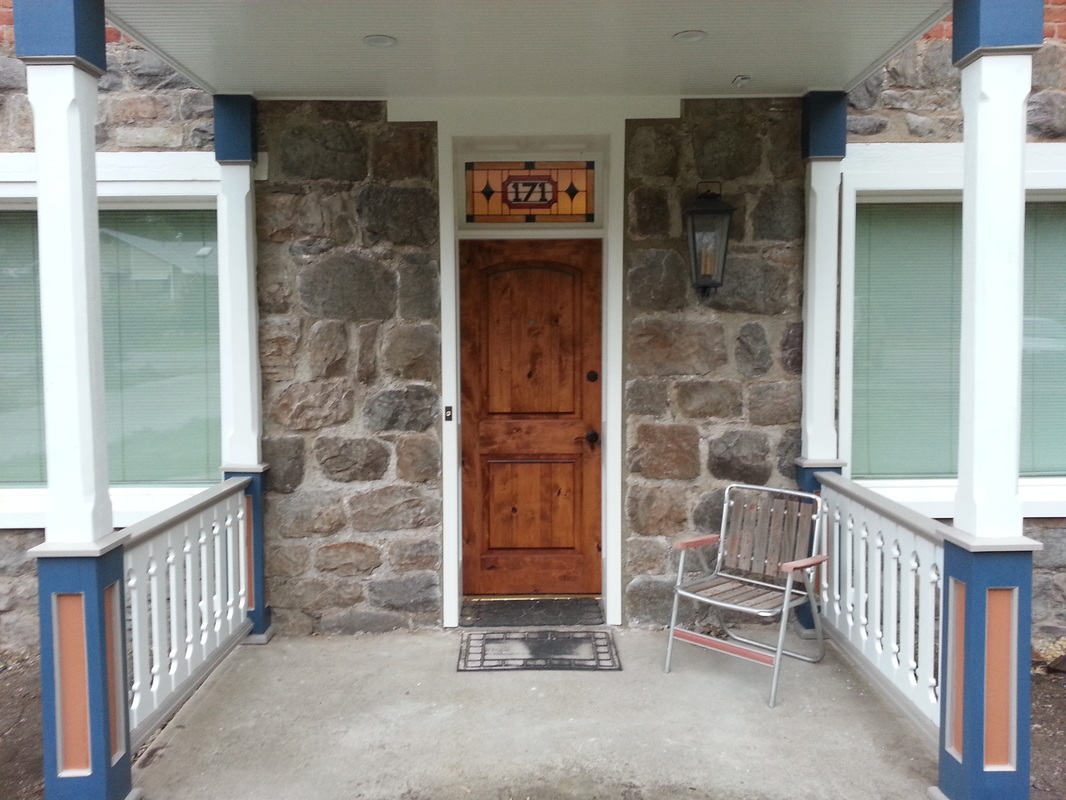
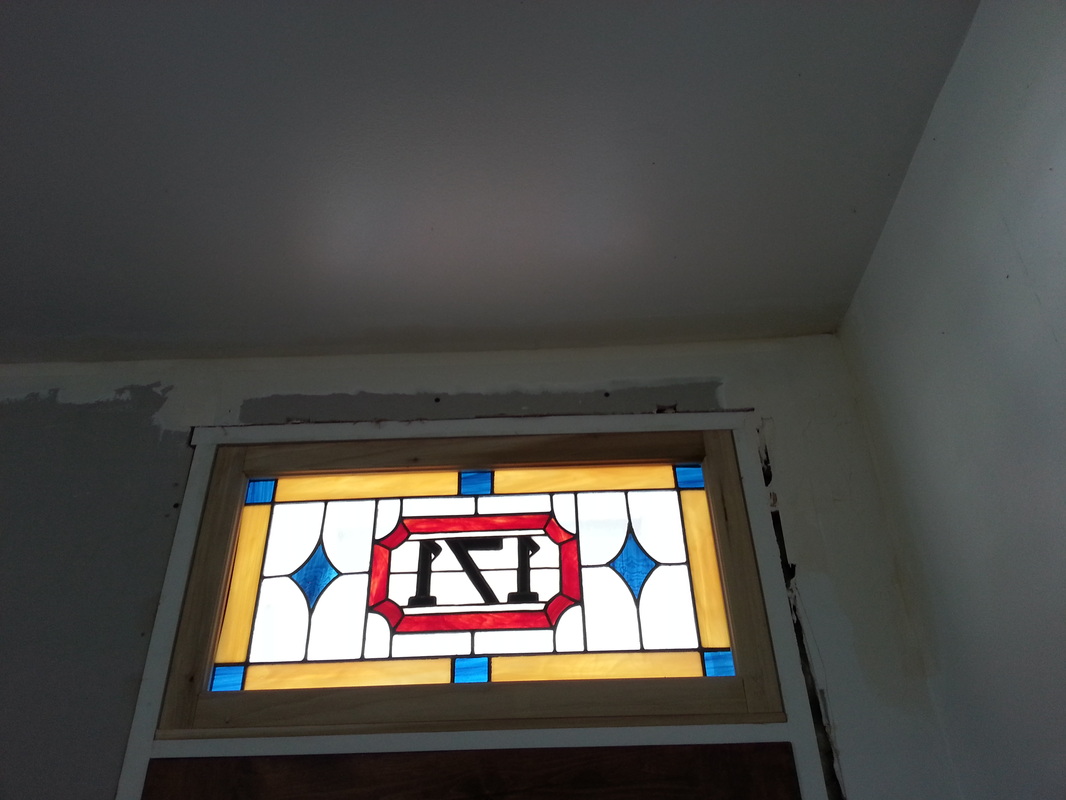
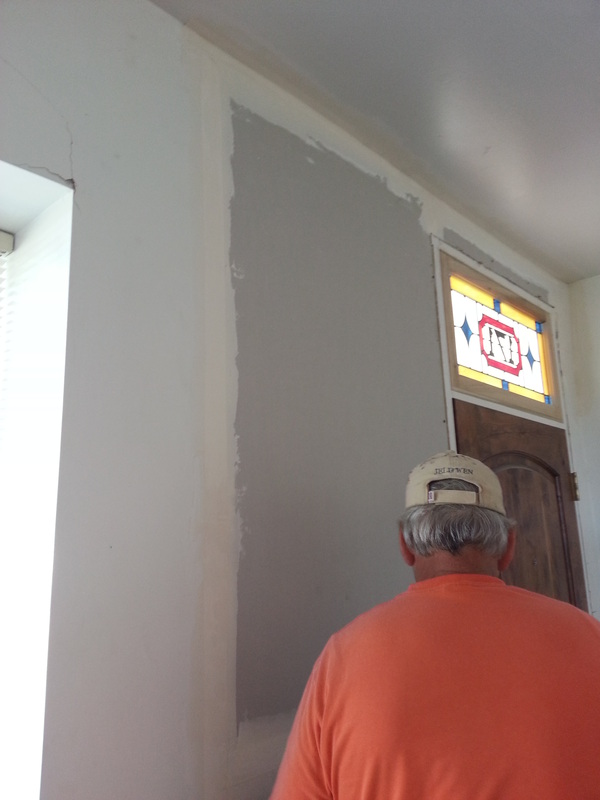
Fun day today!!! Today Cody installed the beautiful stain glass that Angela designed and Kari Wright created! They did such a fantastic job on the stain glass!!! We love it! Cody did a great job installing it as well. Things are starting to really come together!
By the way, sometime in either February or March, David Lloyd came over and helped me put the power to the electrical box outside and fixed an oops with the outside light on the wall. Now, if I could only get the lights under the eaves...we're thinking it though and I'm crossing my fingers. :) |


April 17, 2014

|
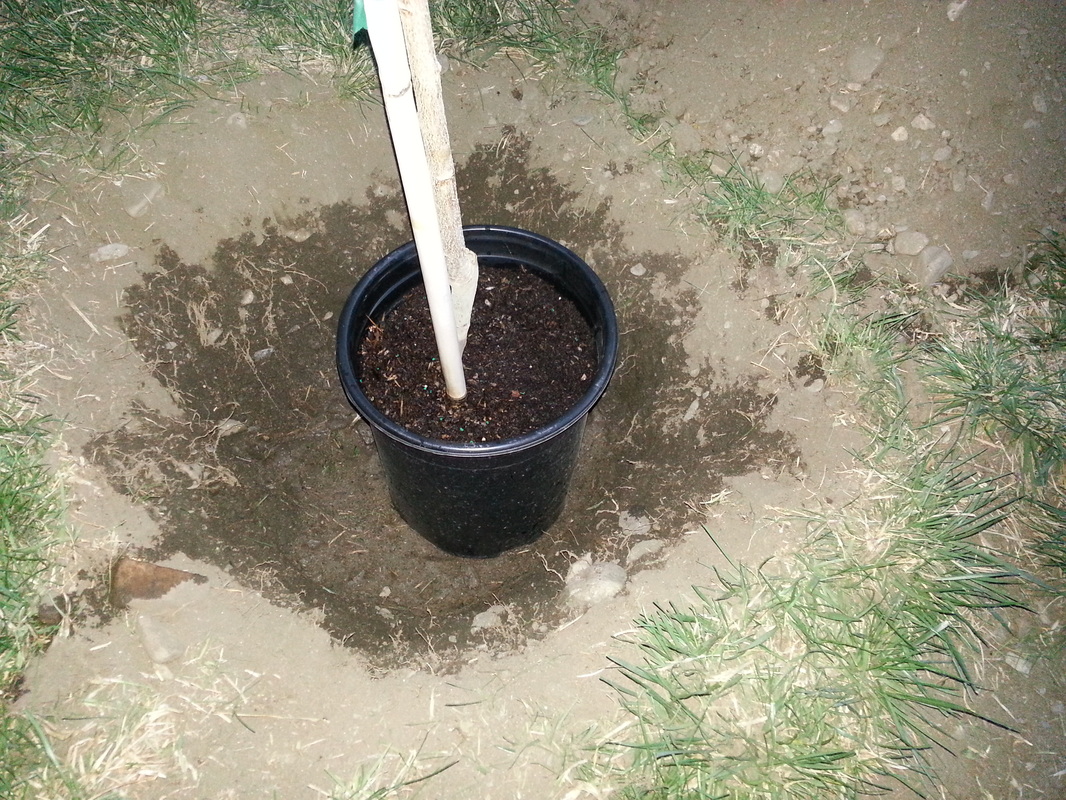
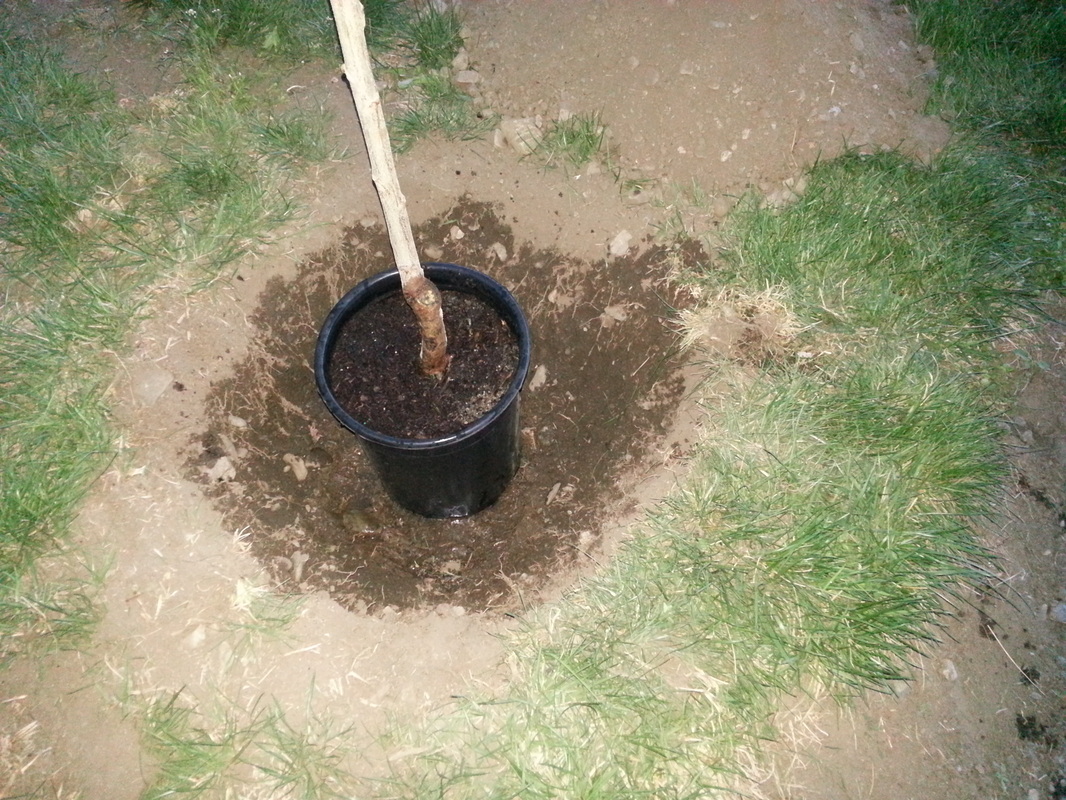
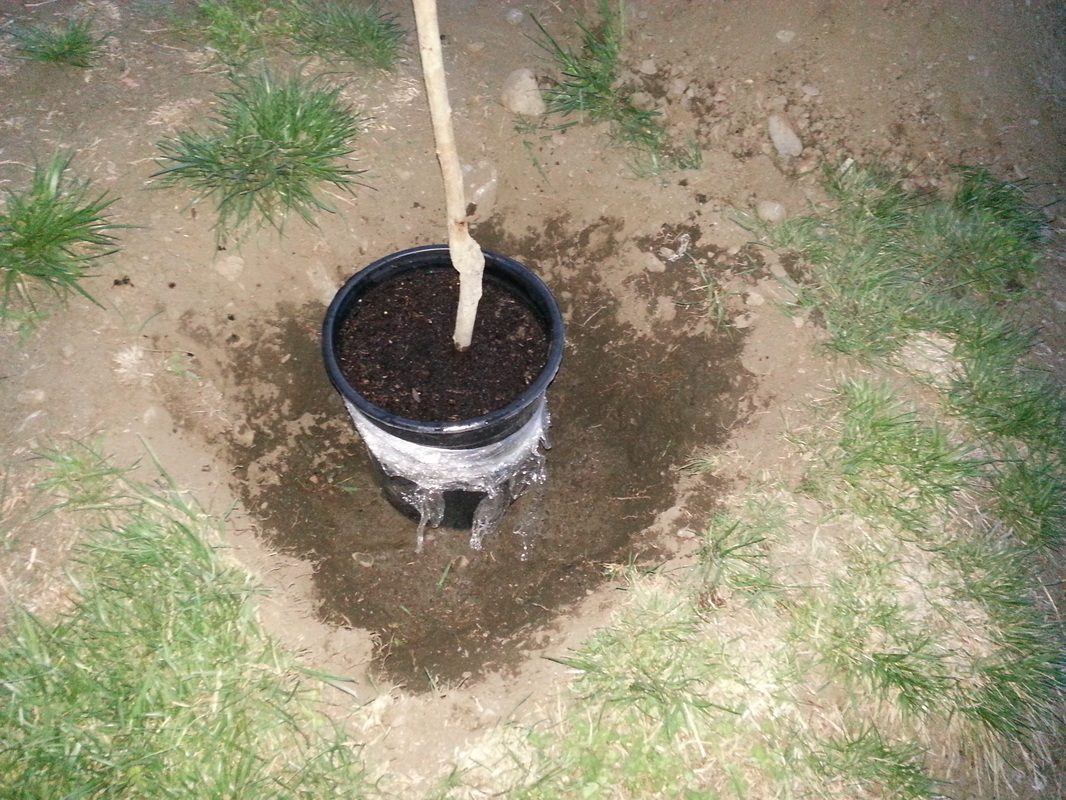
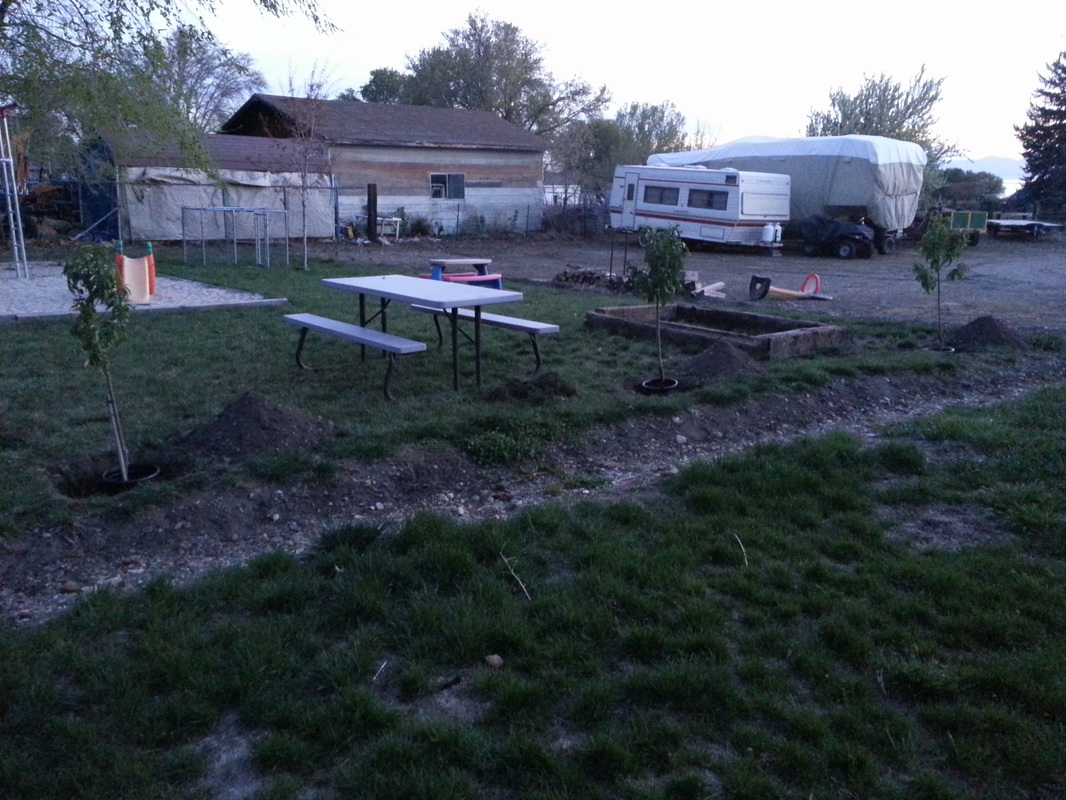
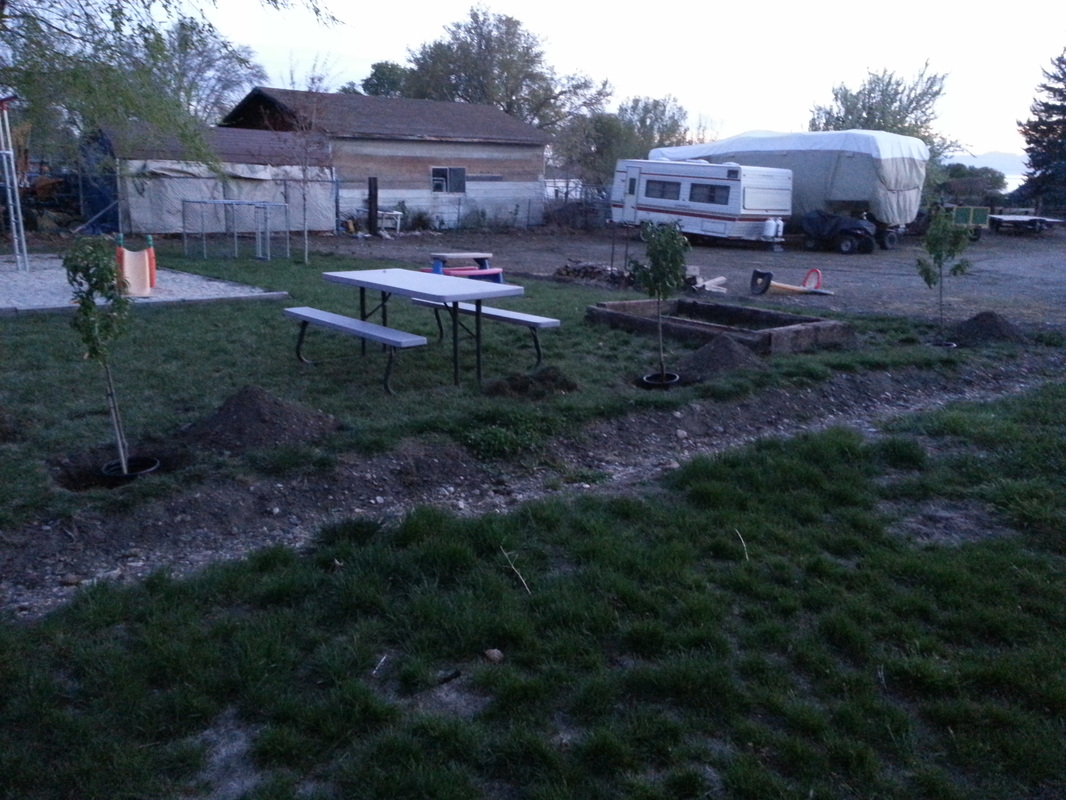
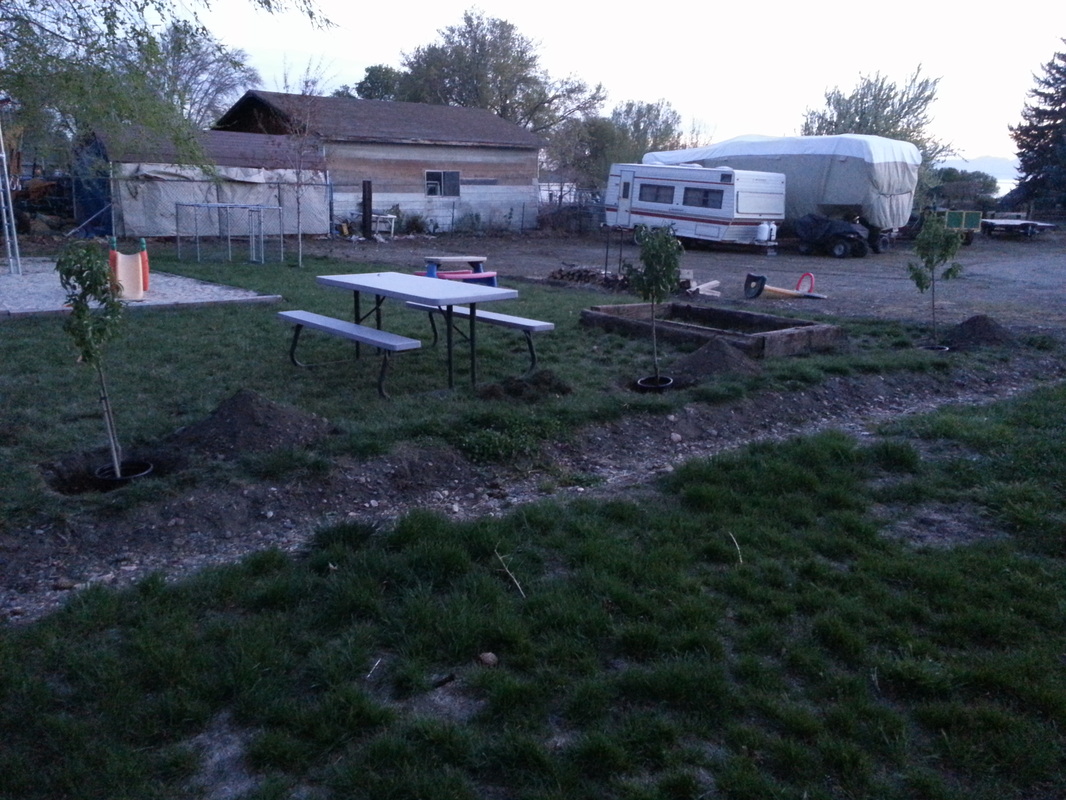
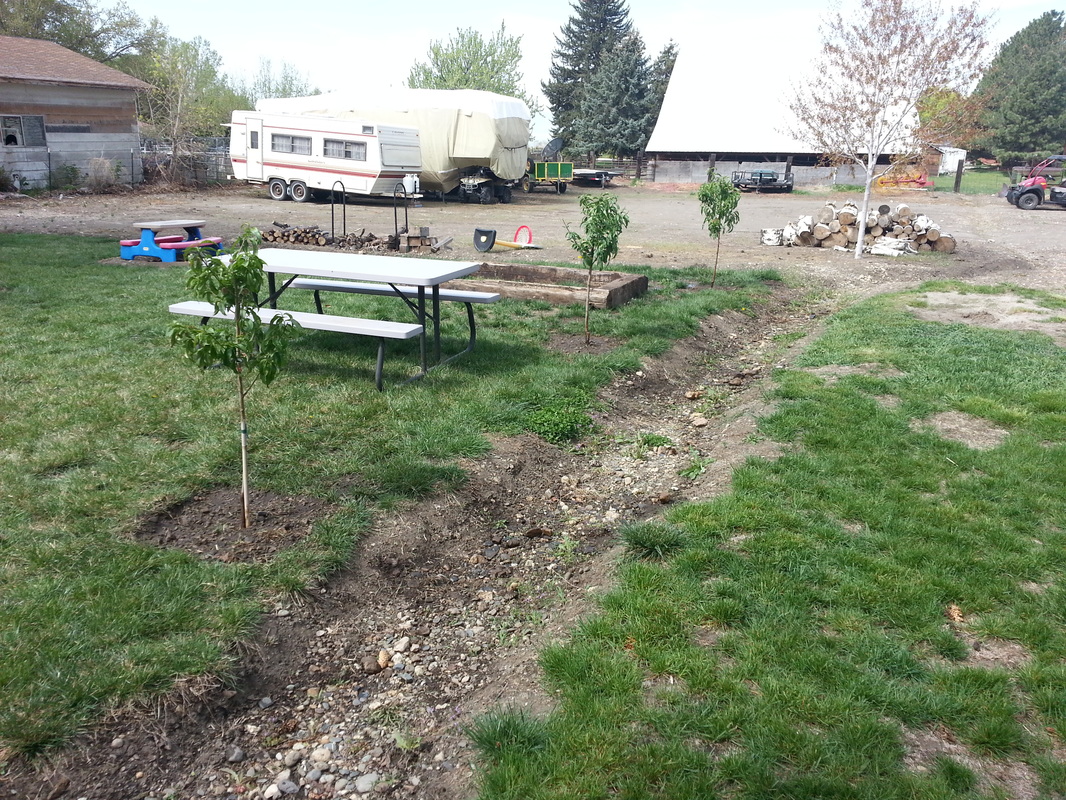
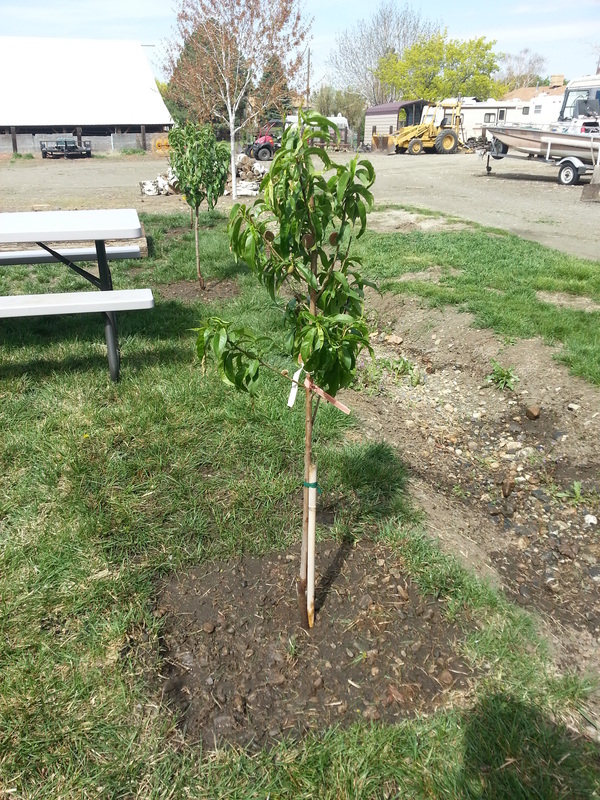
Johnnie Lau gave me a few white peach trees...a number of days ago, I dug the holes for them out back near the ditch. On April 19th, I planted them...
|

April 19, 2014

|
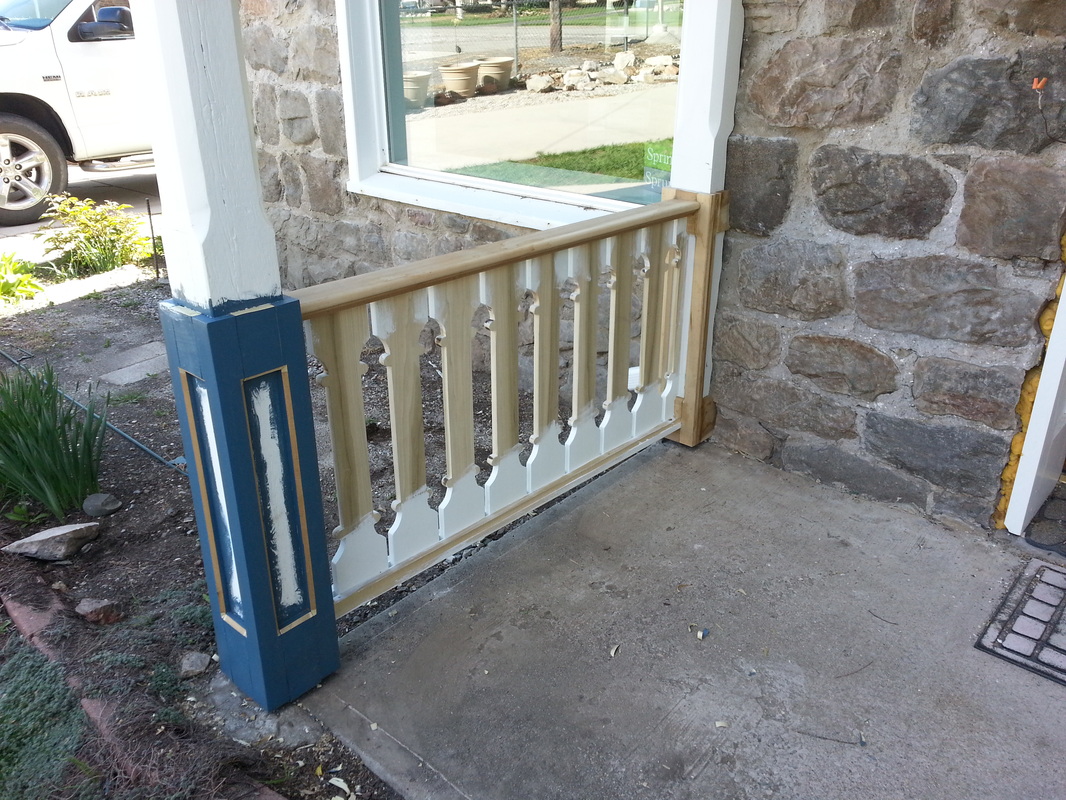
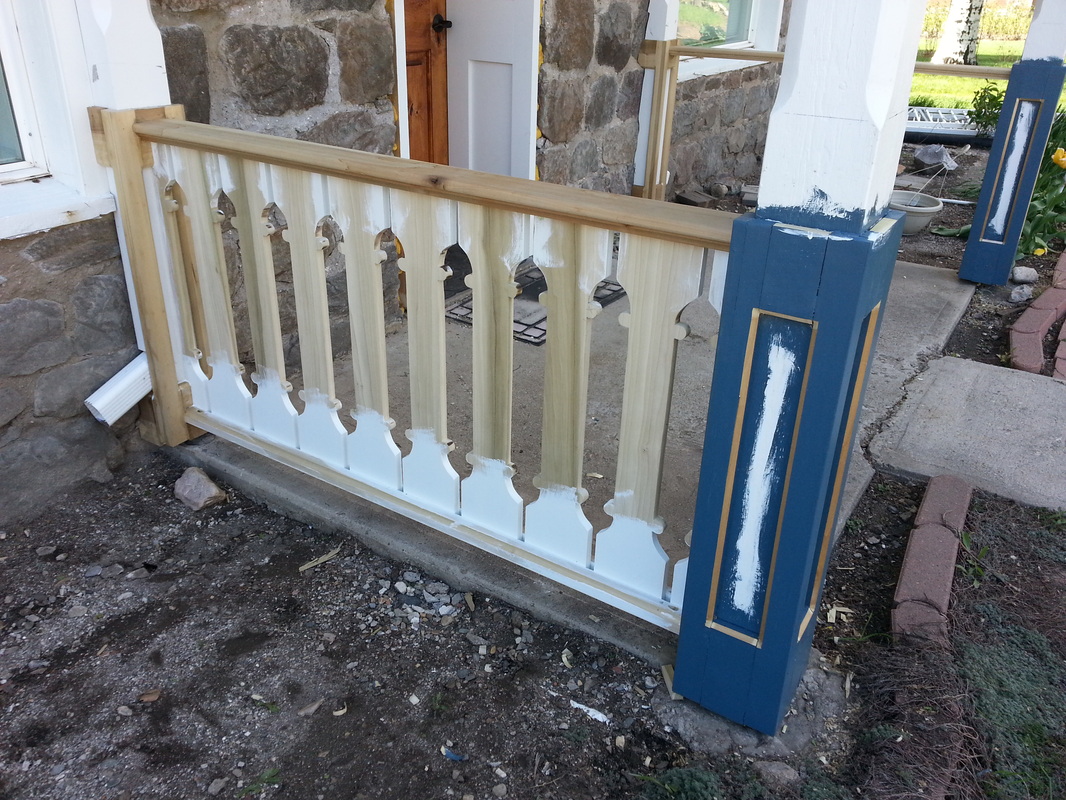
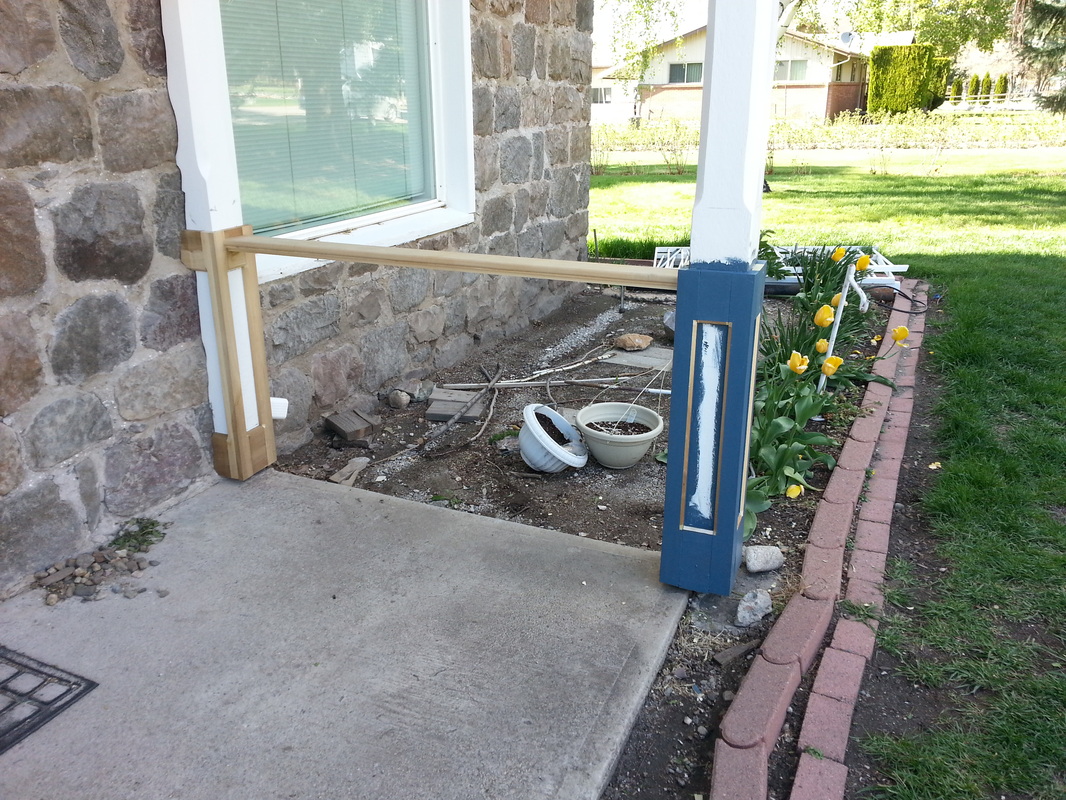
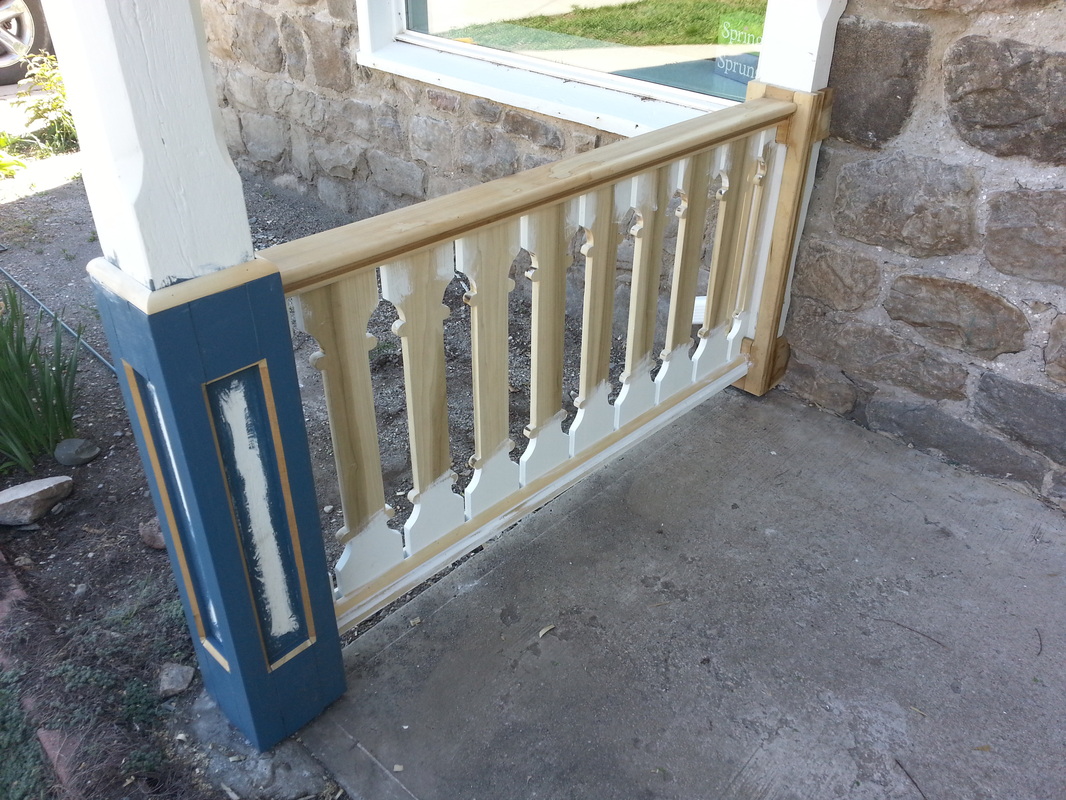
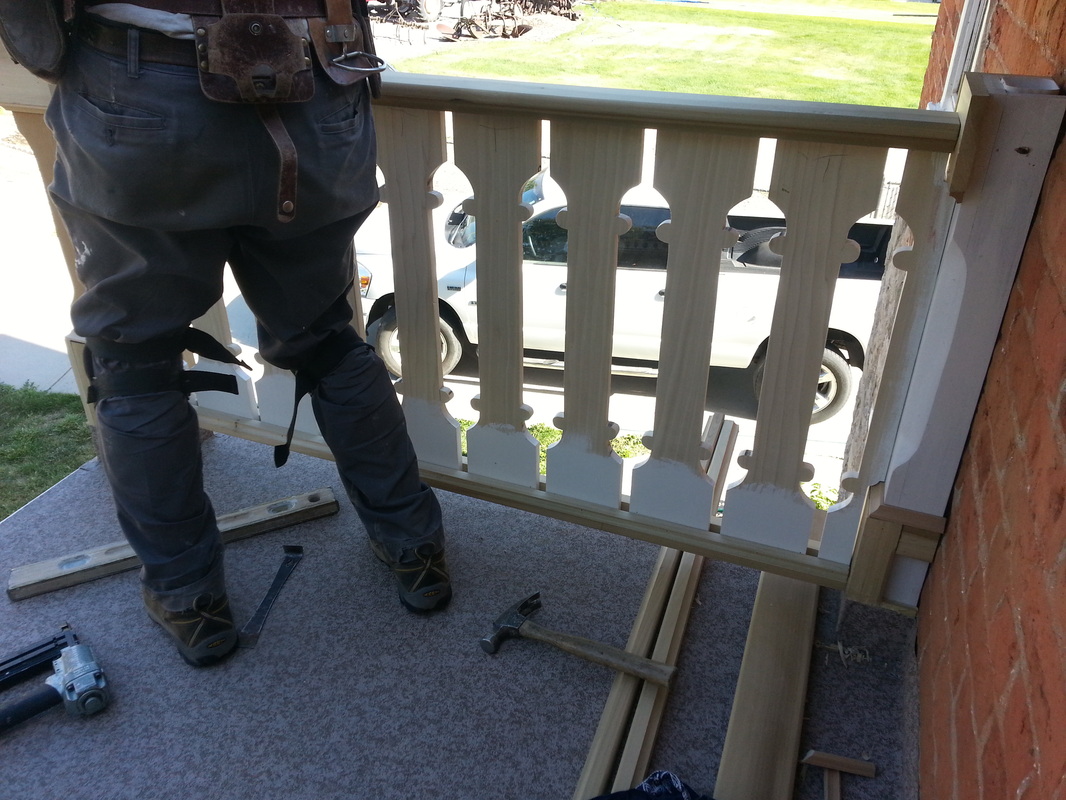
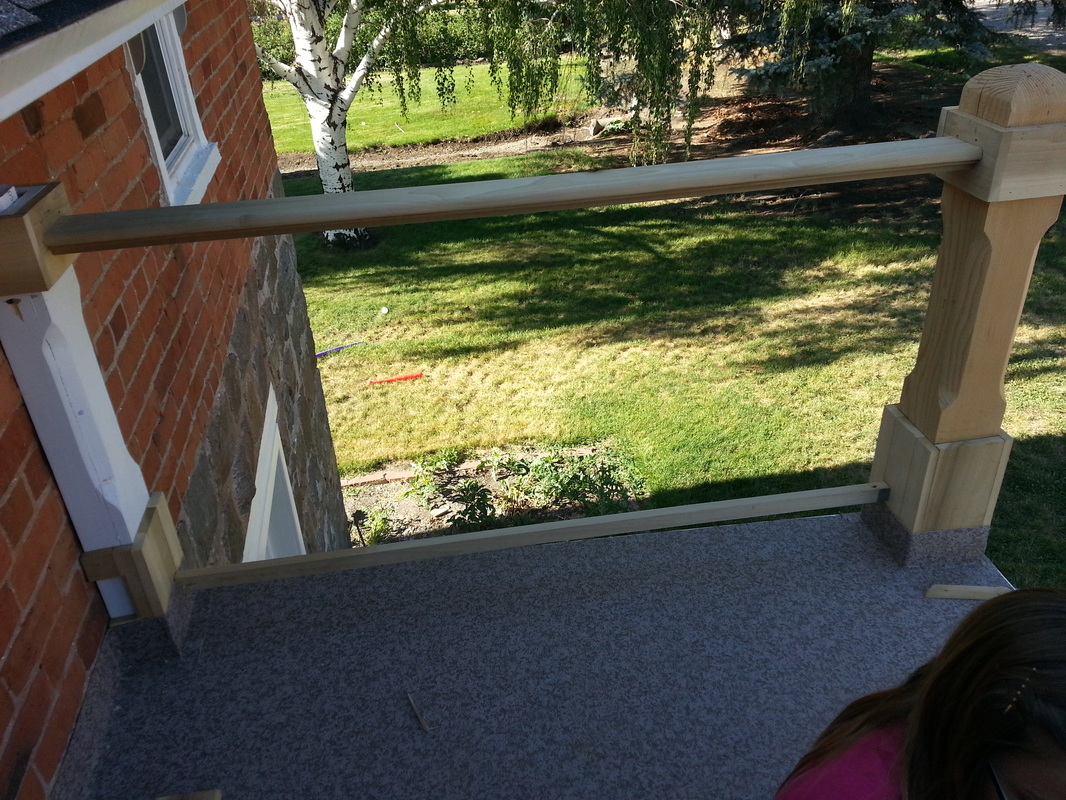
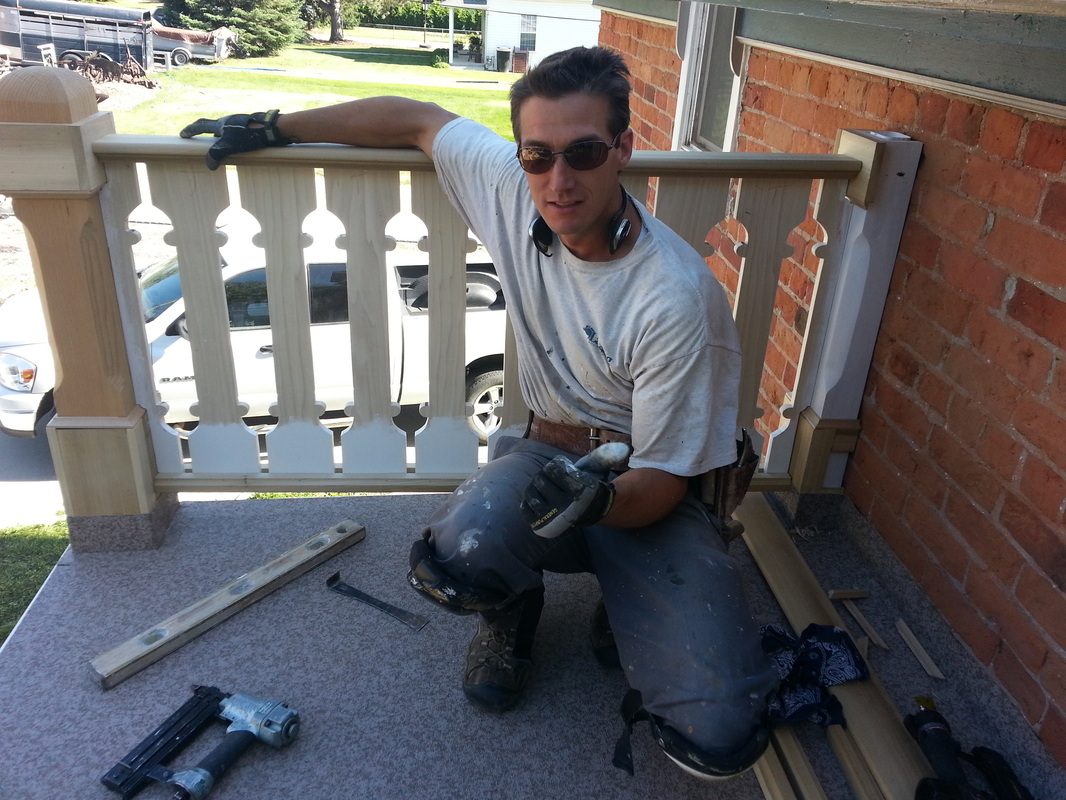
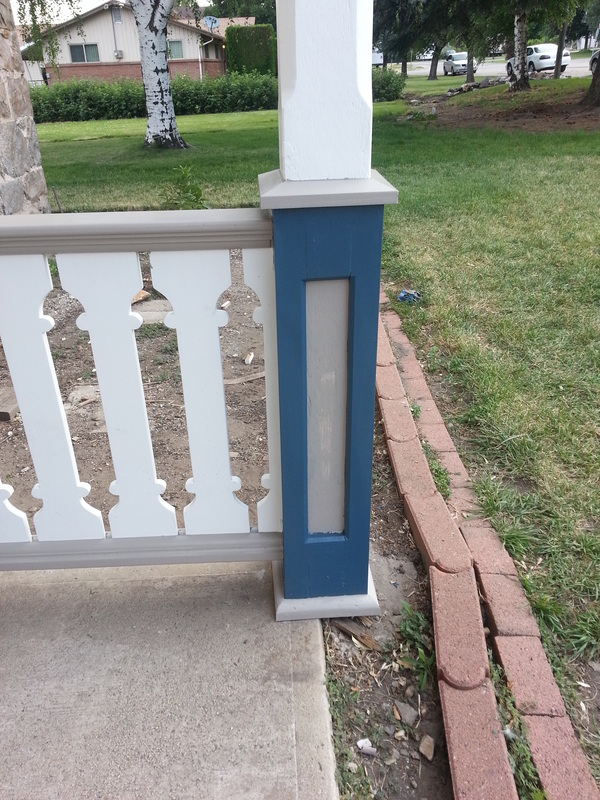
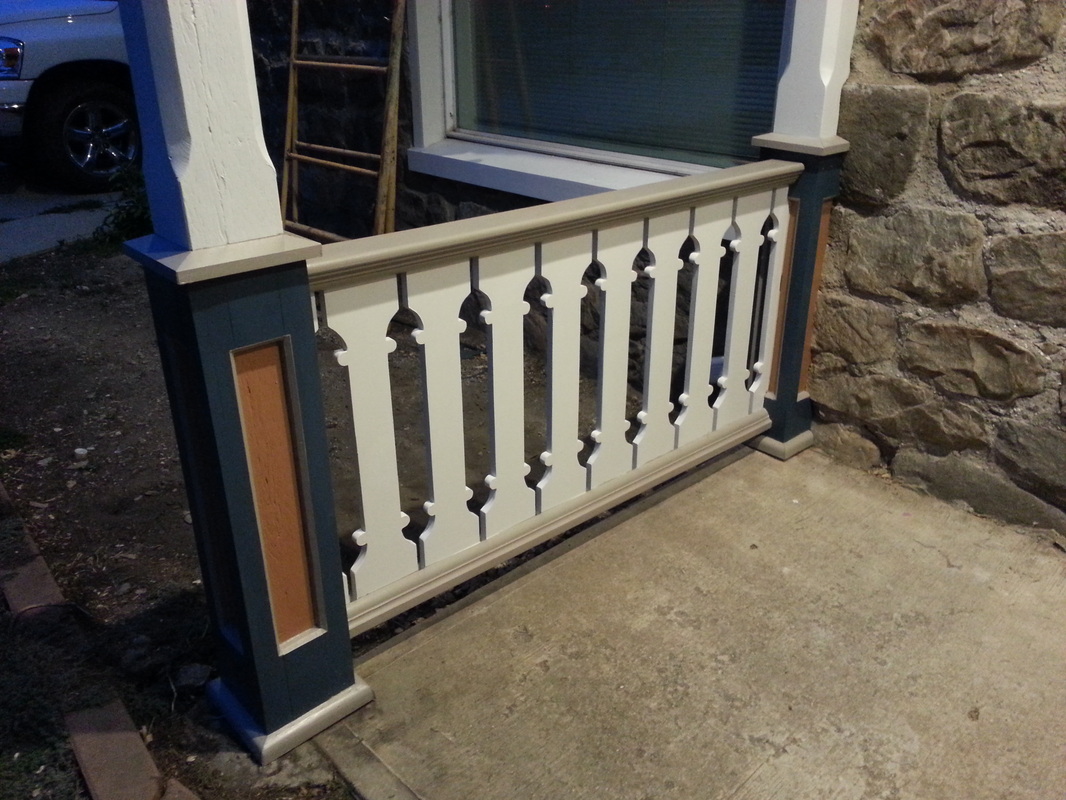
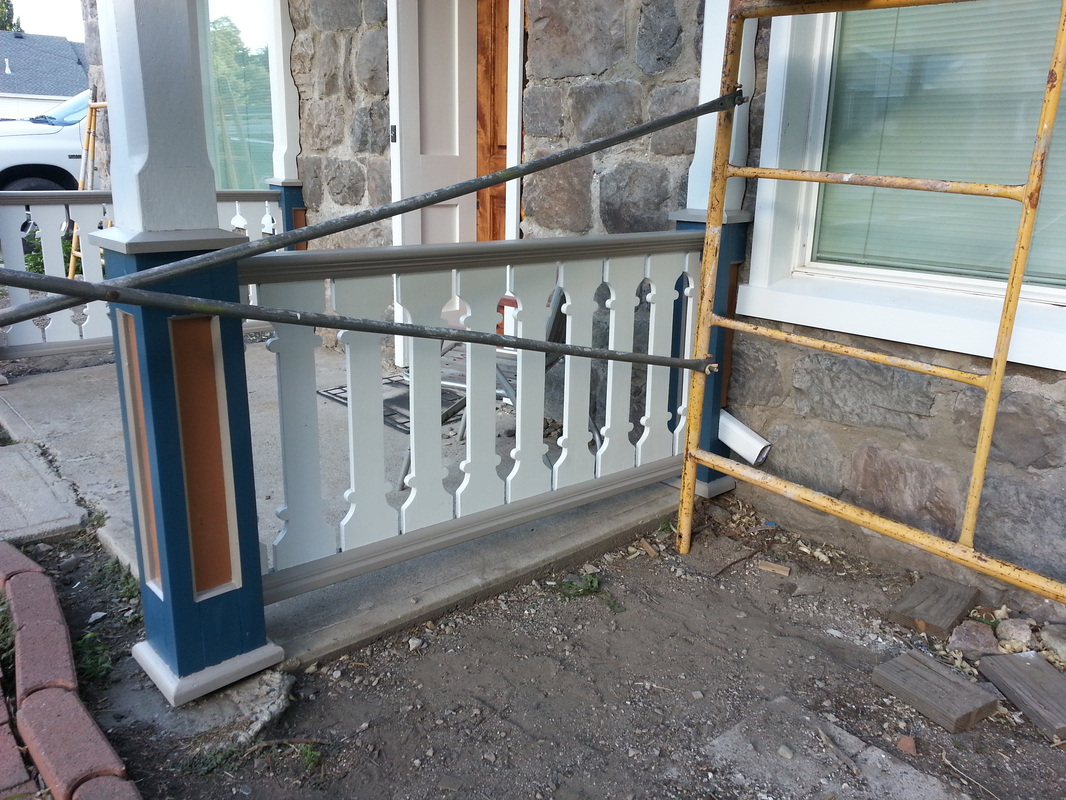
Today was all about putting up the railing on the ground level and a little bit of painting around the stain glass window. Cody does a great job!
|


April 29, 2014

|
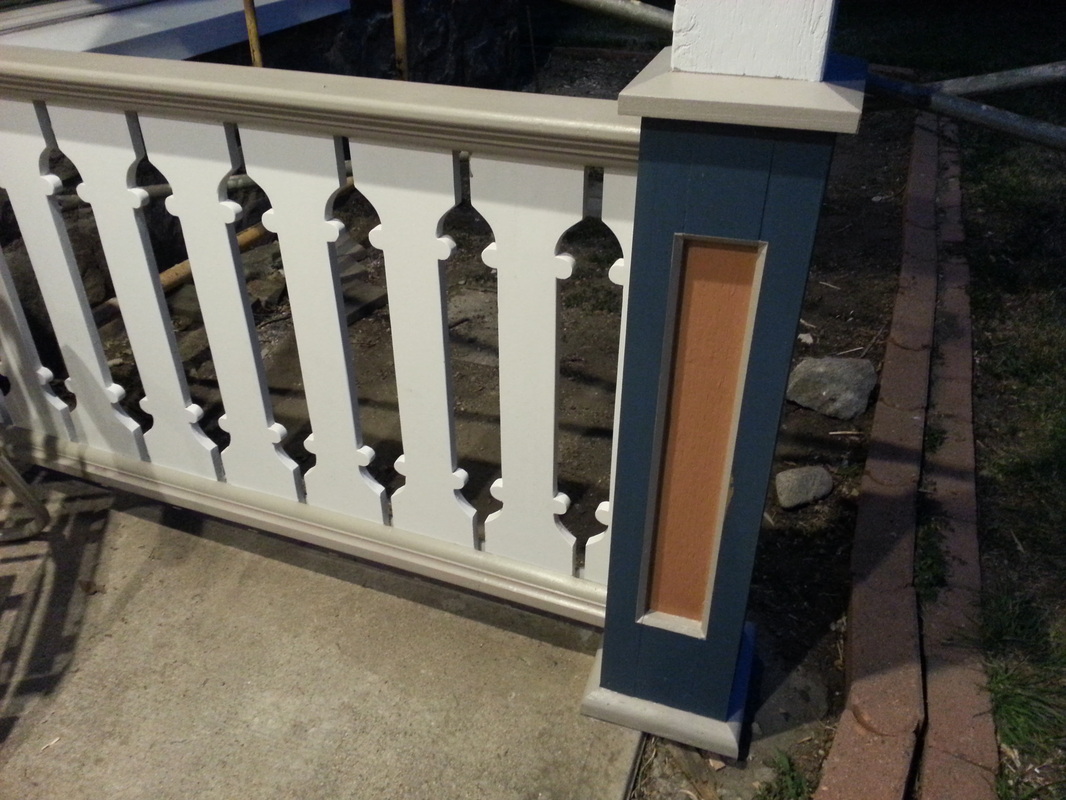
Cody installed the balusters to the new railing on the ground level. He painted the insides of the bottoms and tops so he didn't have to worry about trying to paint it while it was installed... Getting more and more excited to see this completed!
|


May 8, 2014
|
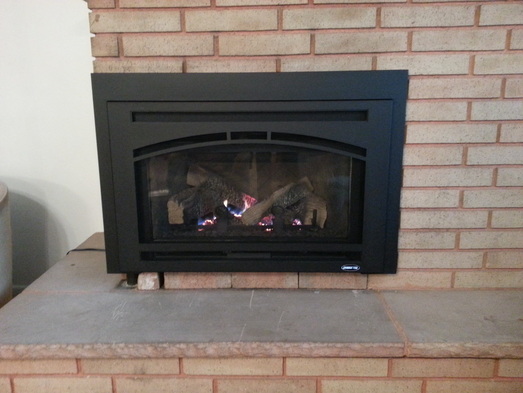
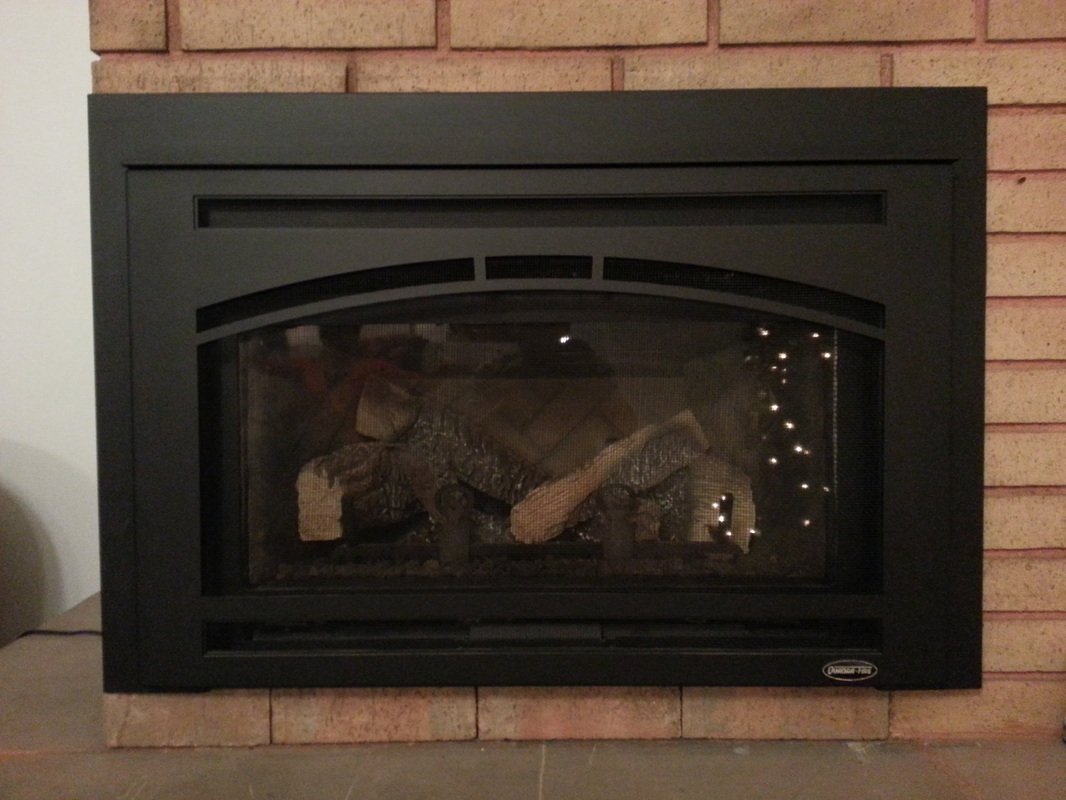
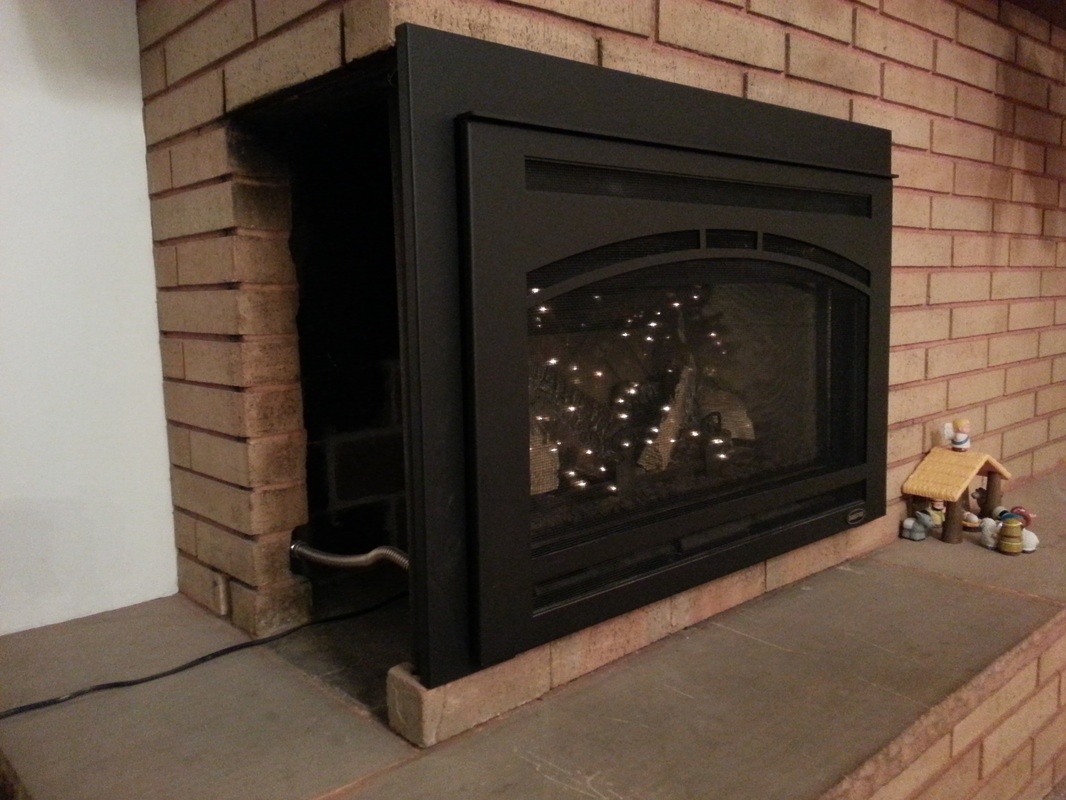
Ryan Tingey gave me a few bricks that seemed to match pretty good. I ended up lifting up the insert so it looked a little better than having the gap above the insert. Some day we would like to replace the whole fireplace, but for now, this will have to do. I had to cut a brick to fit around the pole. The next couple of pictures I took in December just to show what it ended up looking like.
|
May 22, 2014
|
Back outside to finish up the deck. It's been quite wet this spring. We need the weather to hold off until we get the decking material on top now that we have the underlayment.
|

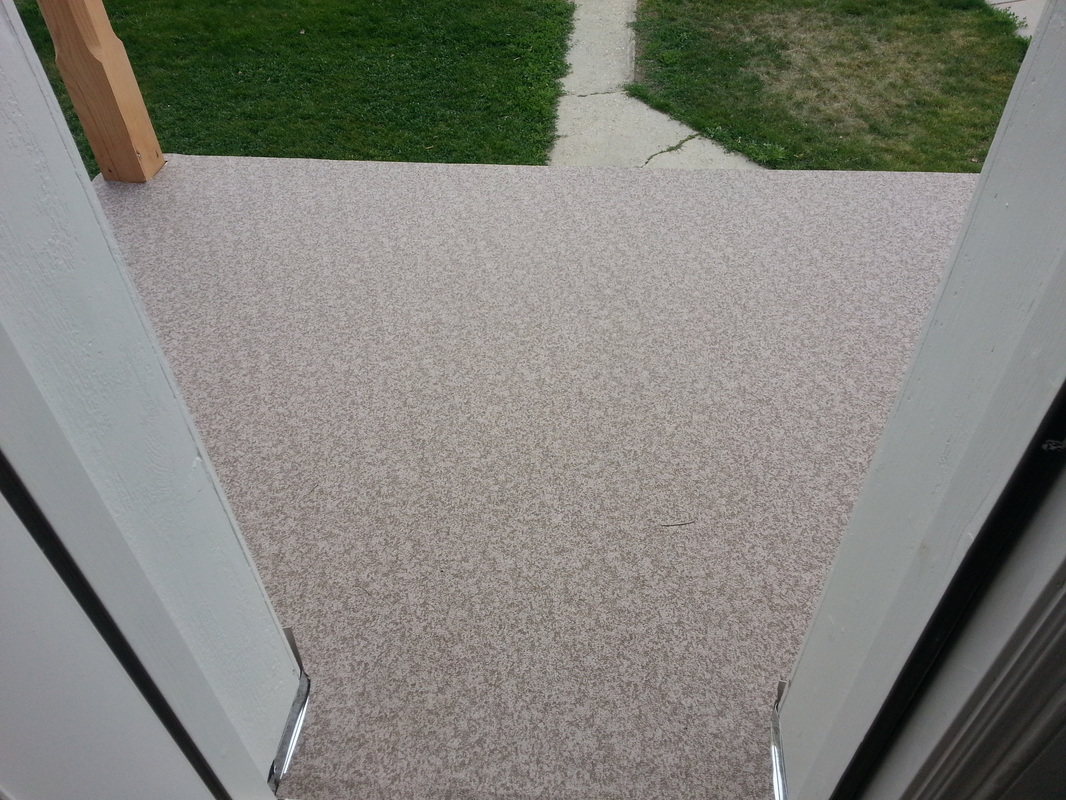
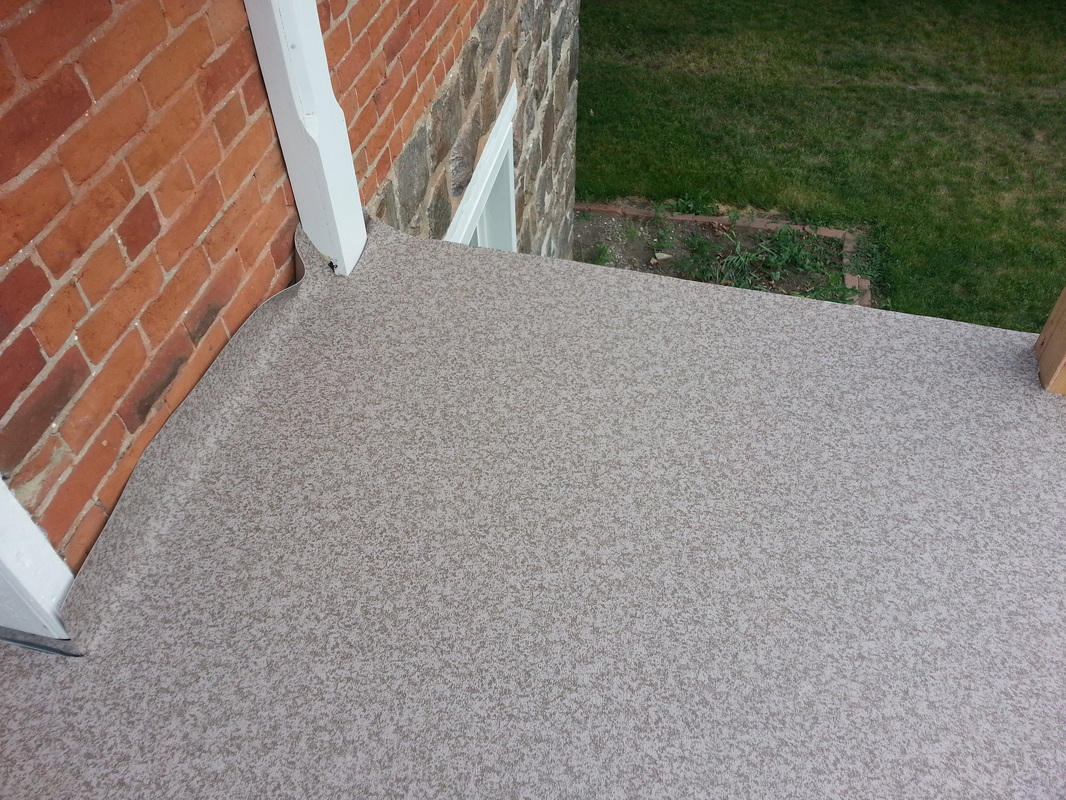
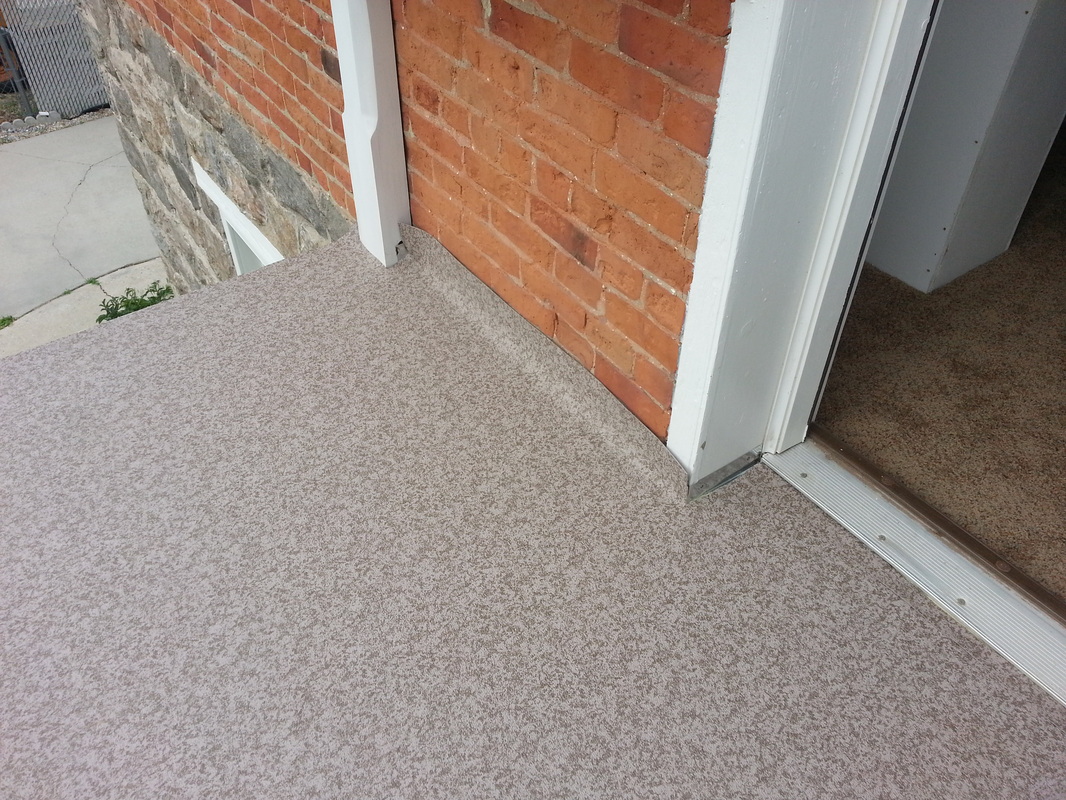
May 28, 2014
|
Cody installed the deck covering today. This should protect the deck for many years! Cody's going to cove it a bit so we don't have any place where it might leak. The water should just run to the east...
|

May 30, 2014
|
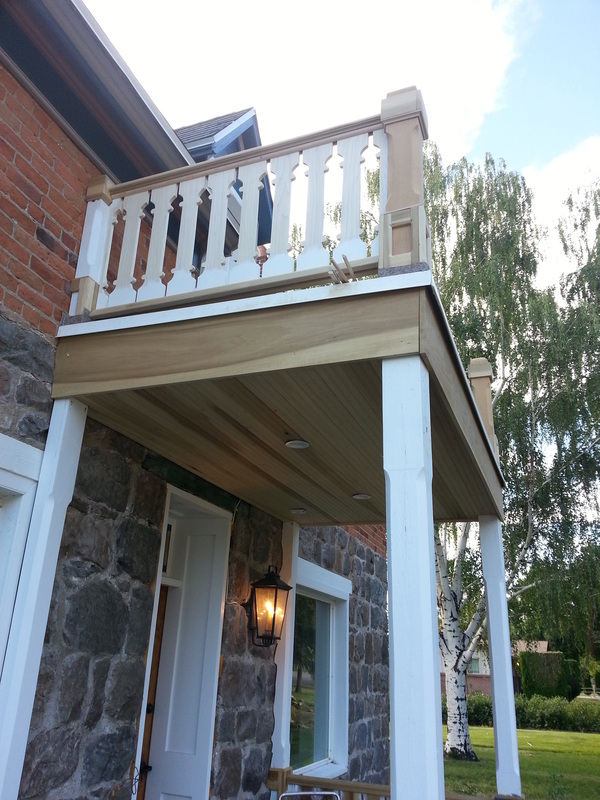
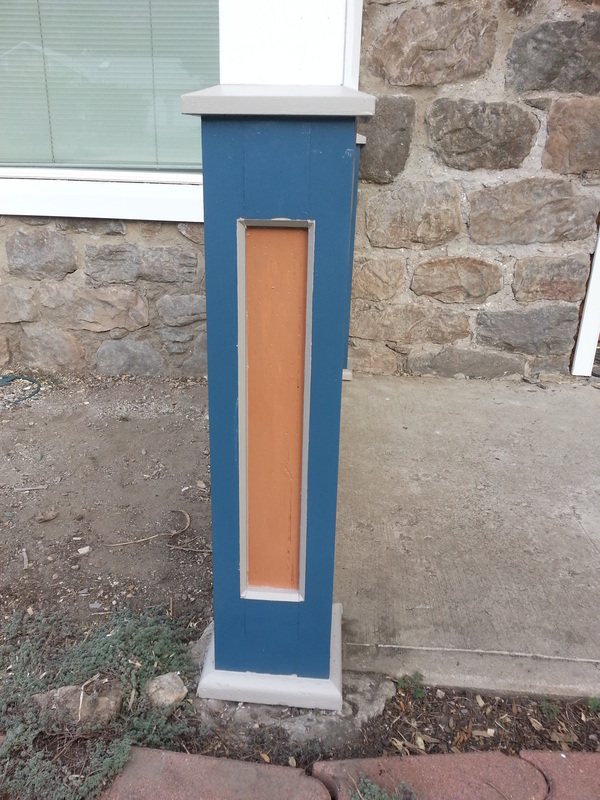
More decking...making the poles look a little beefier... Cody does fine work!
|

June 6, 2014

|
"Deck man!" Notice Cody even painted the parts of the railing he wouldn't be able to paint so they wouldn't get ruined in the rain...
|

June 15, 2014
|
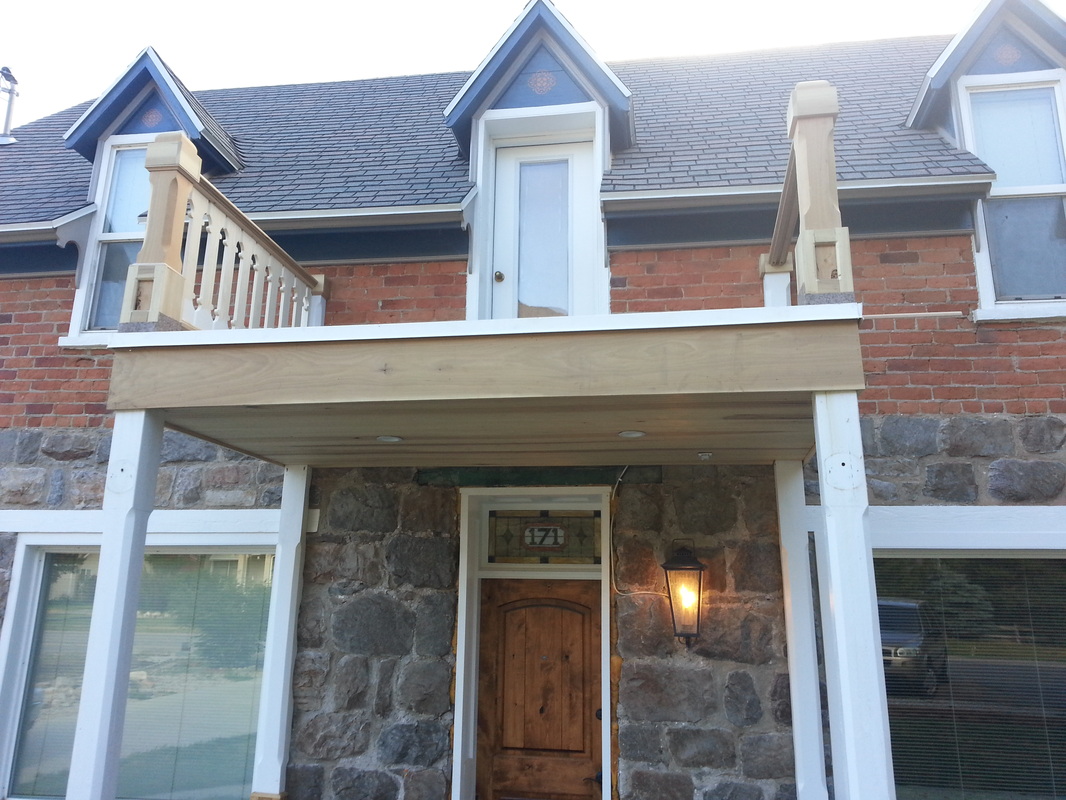
More wood work on the front porch...it's exciting to see it all come together...
|

June 17, 2014

|
We've turned to painting...
|
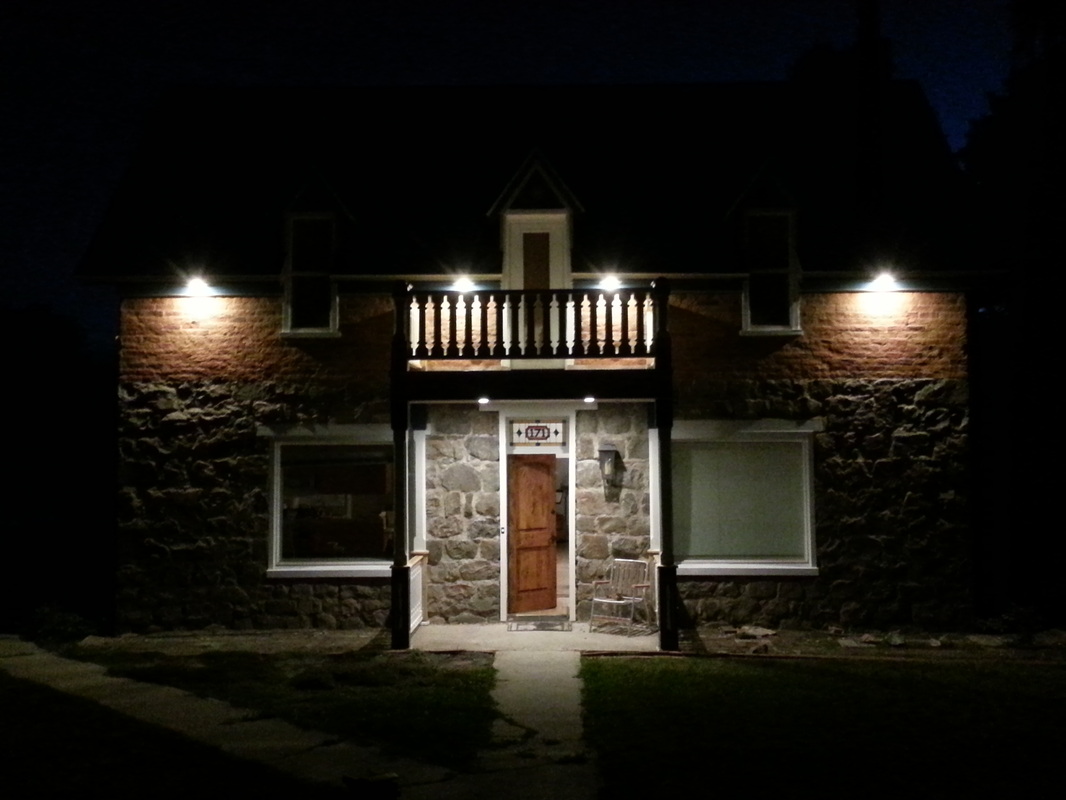
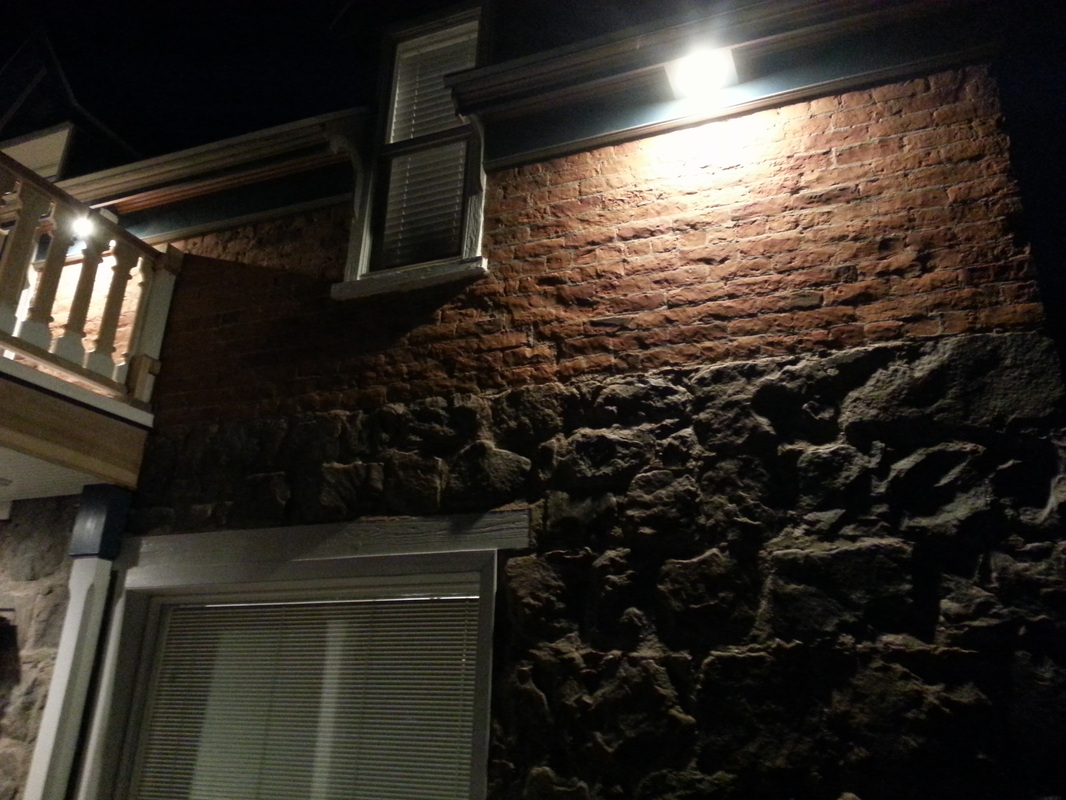
June 18, 2014

|
Most of the painting was done today, but I got home too late to get an image...it sure does look good in the lights at night! :) The doorbell was installed today as well!
|

June 20, 2014
|
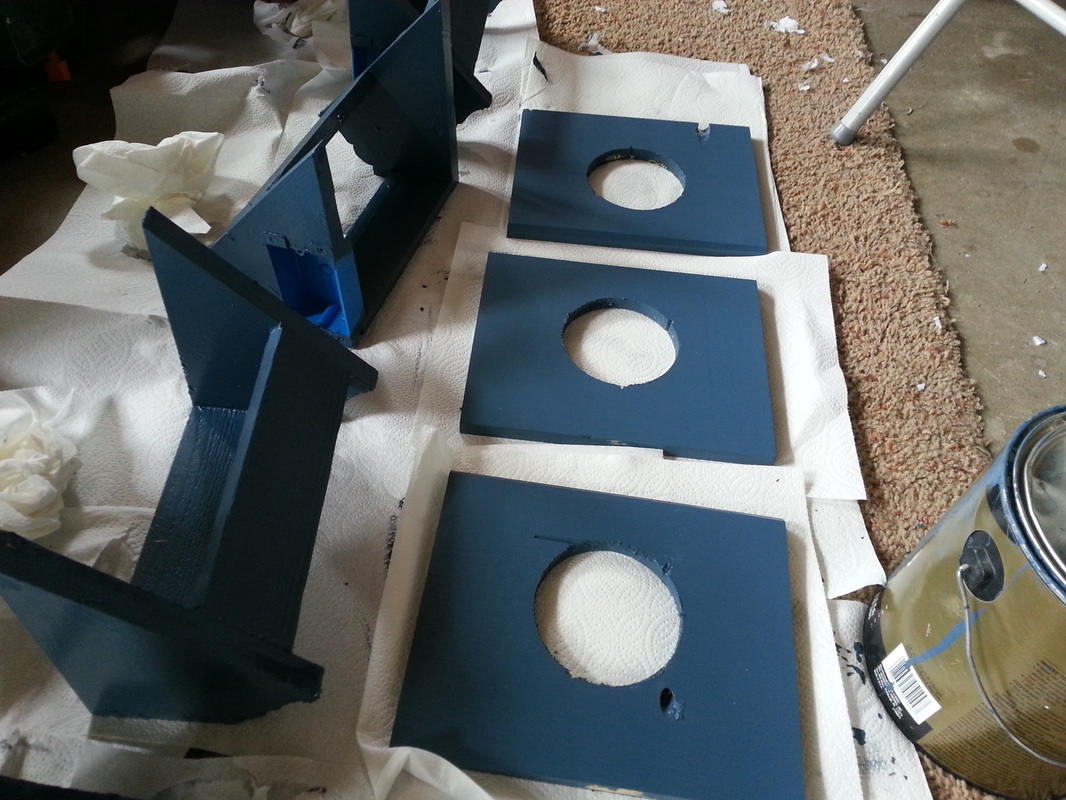
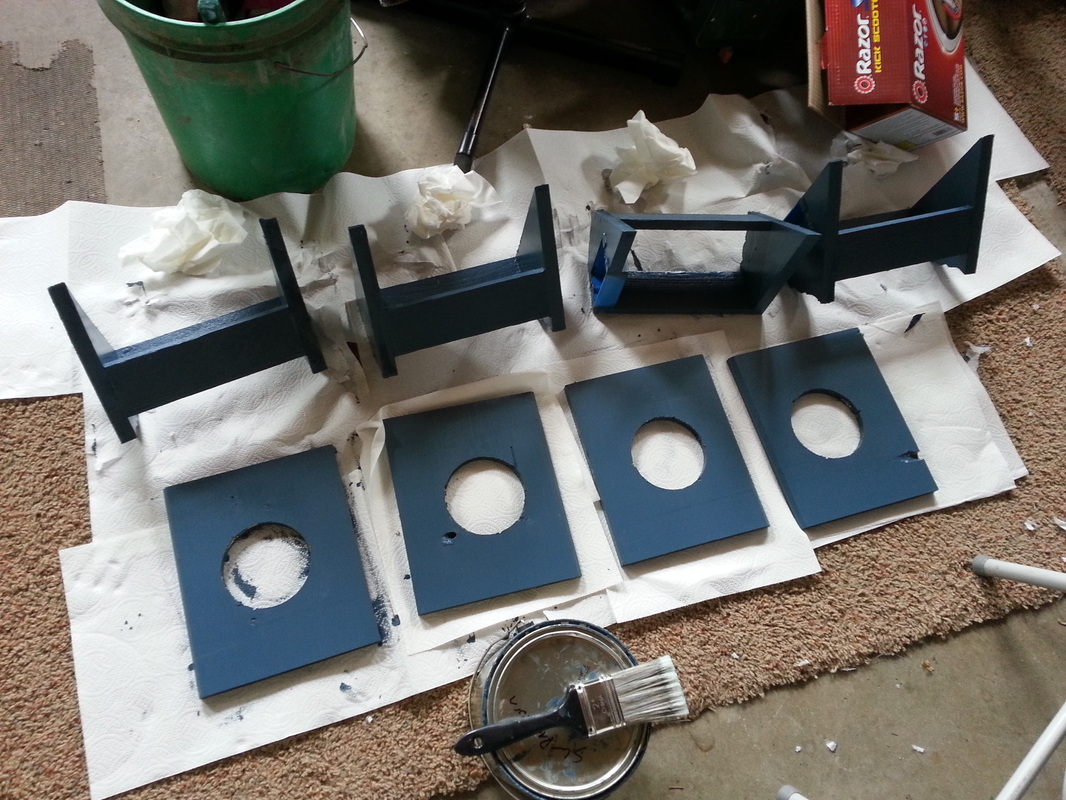
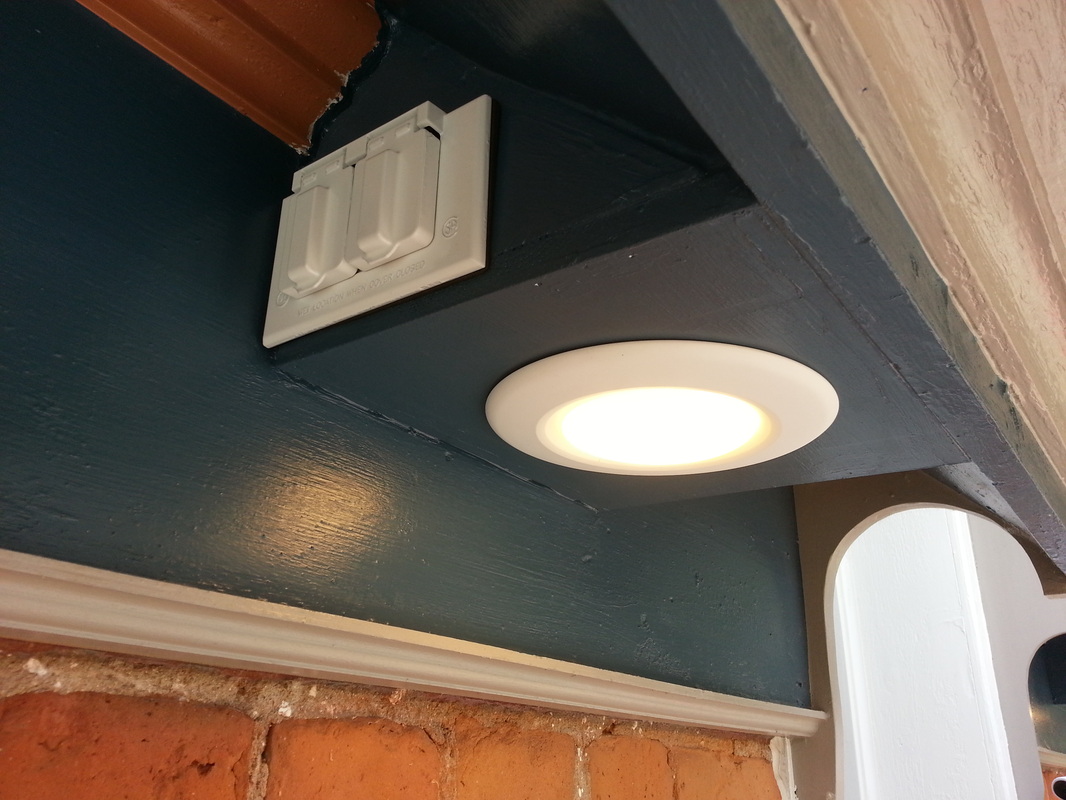
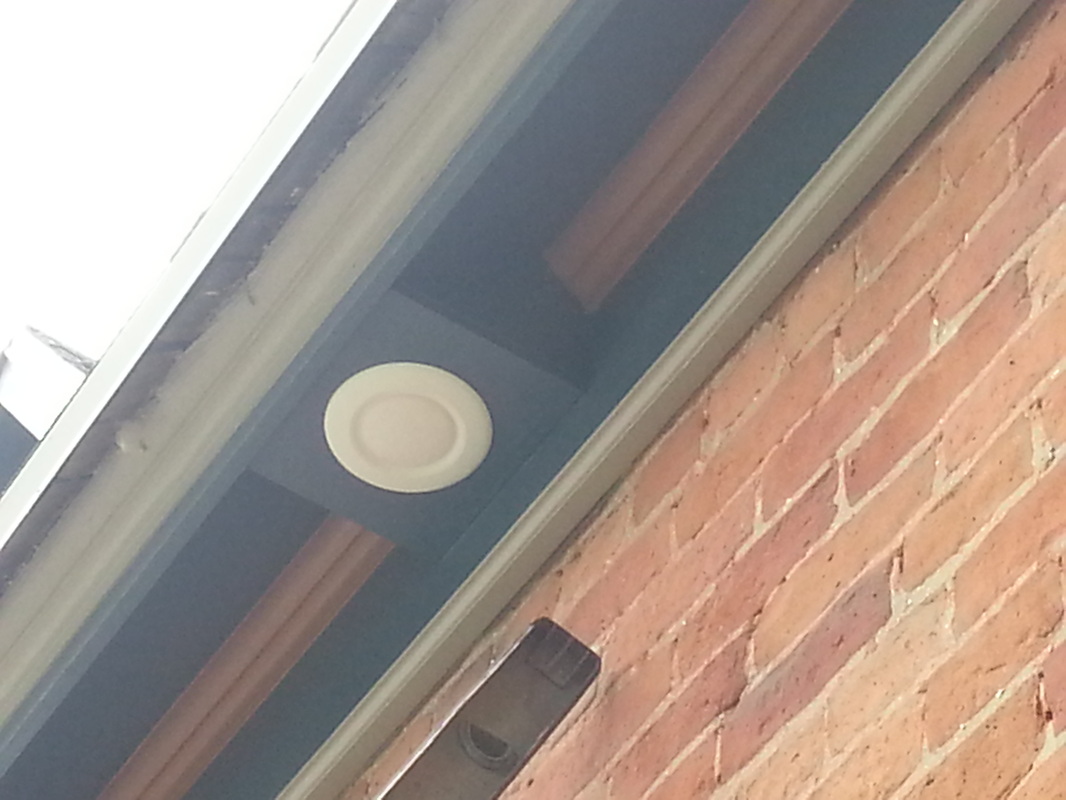
I spent some time painting the boxes for the lights that Dave Lloyd is installing under the eaves....I'm super excited about the lights! Hoping they work well!
|

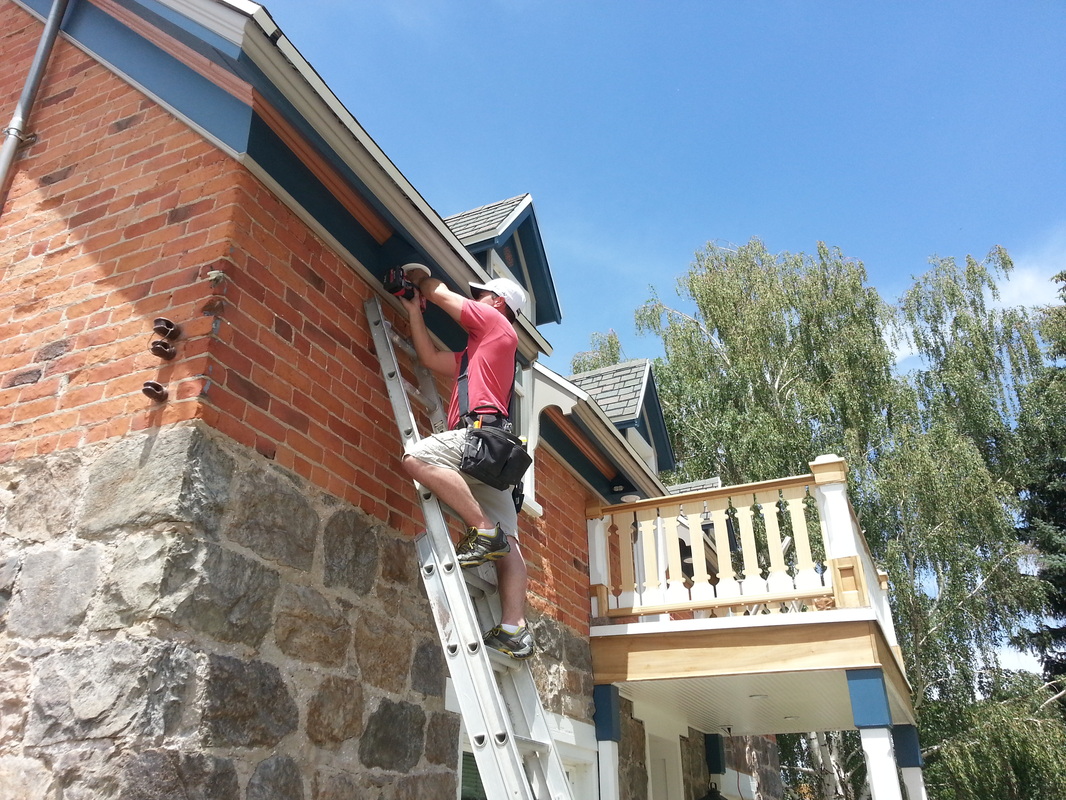
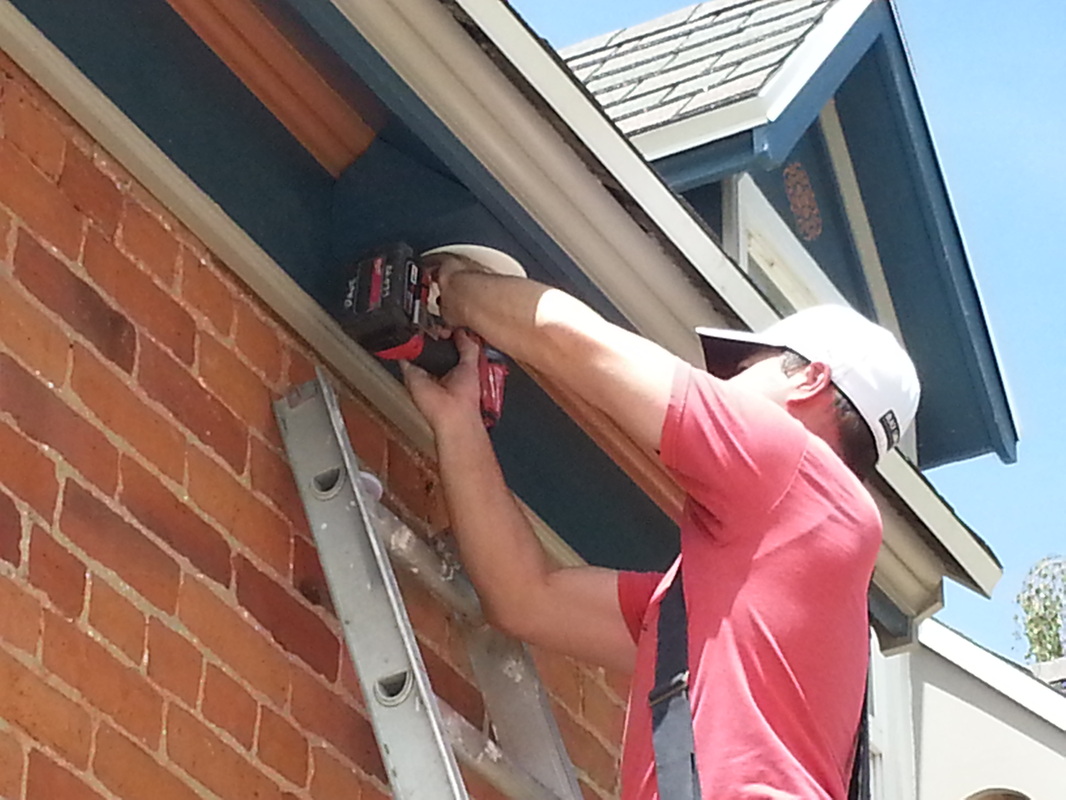
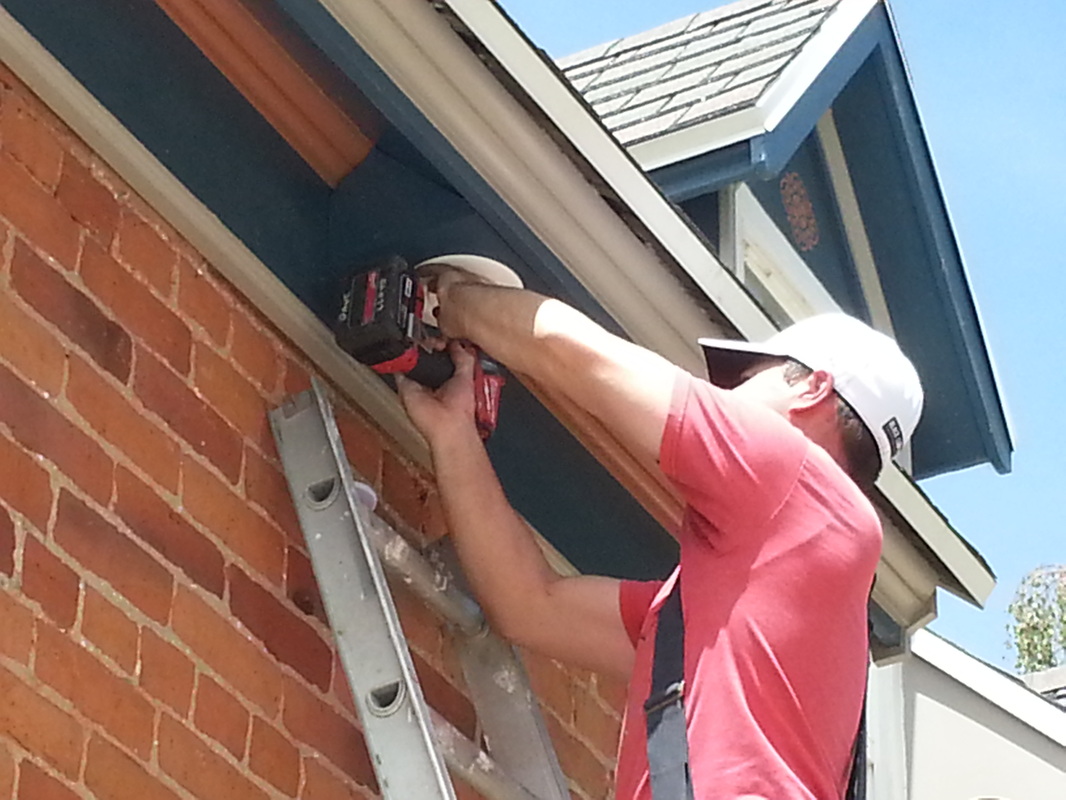
June 21, 2014
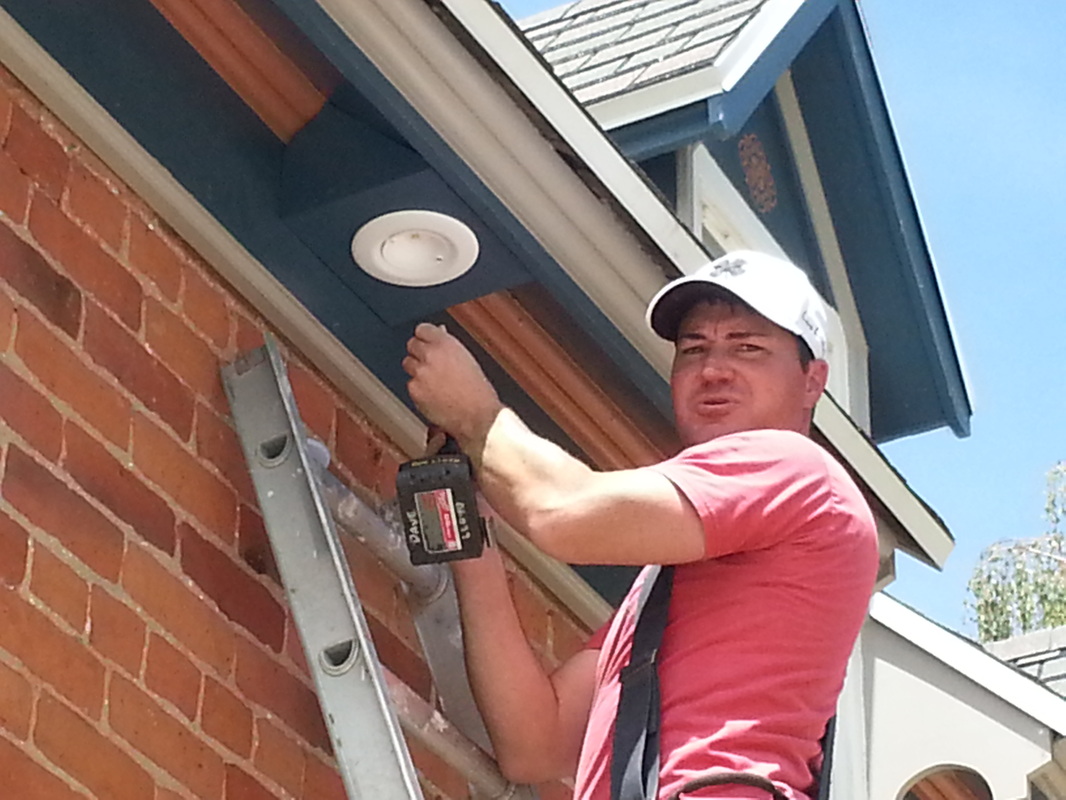
|
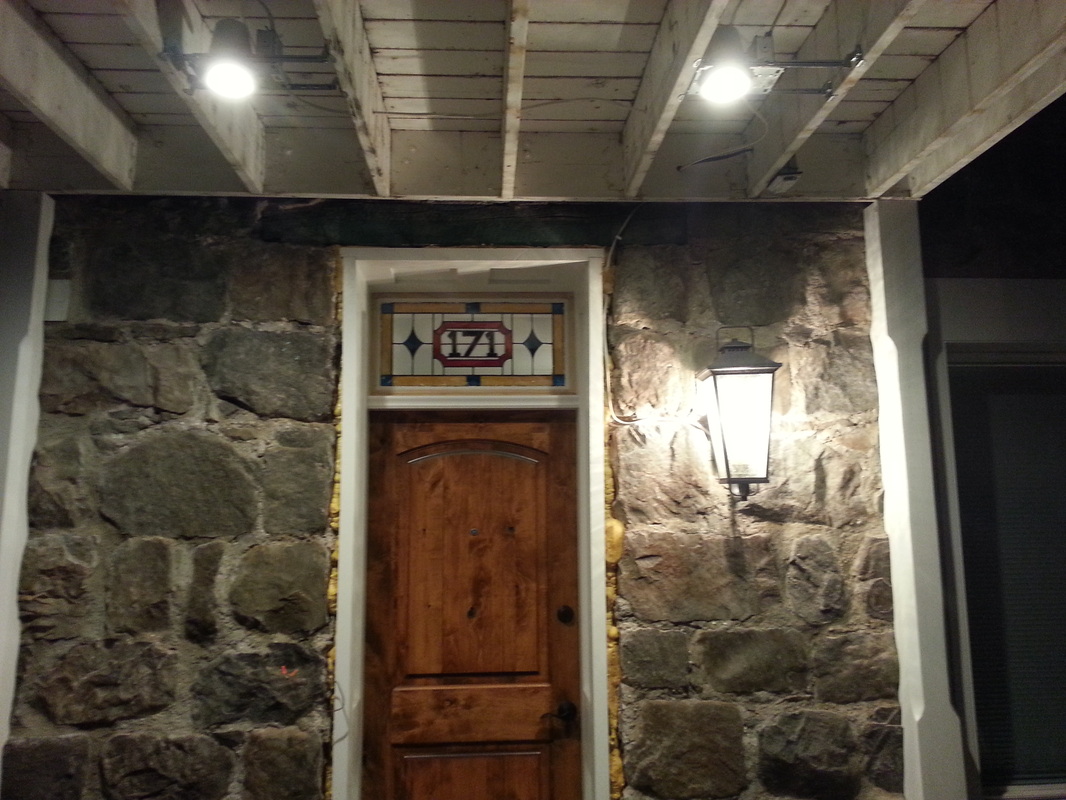
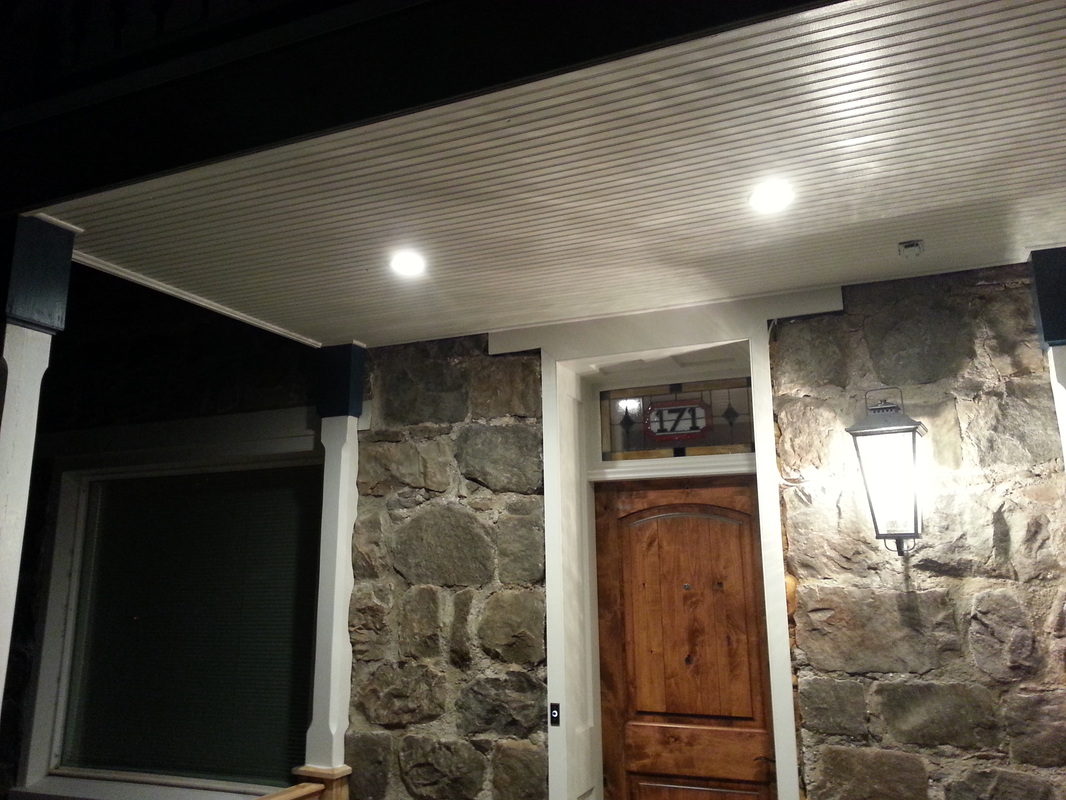
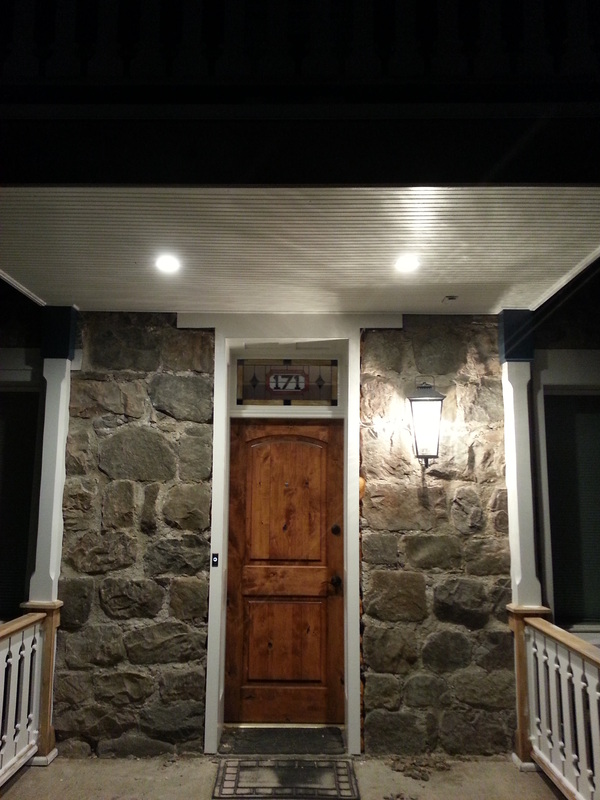
Dave Lloyd came and installed the new lights. I caulked and painted the boxes after he left. MAN! I'm excited about these lights! We installed LED lights. Super glad that I hired the electrical man, Dave Lloyd! He rocks!
|


June 24, 2014
|
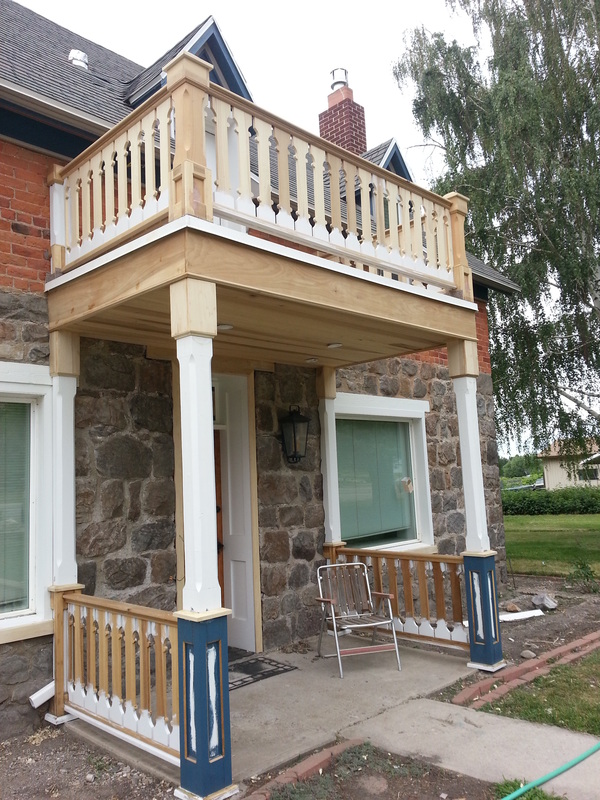
Cody is finishing up the final painting touches...he painted a couple of different ways with the poles. We'll see what Ang likes the best.
|


June 25, 2014

|
Finishing up the painting...Cody is amazing! He does such great work! All the little details...done! It's hard to believe the painting is done! I'm so impressed it's over!
|


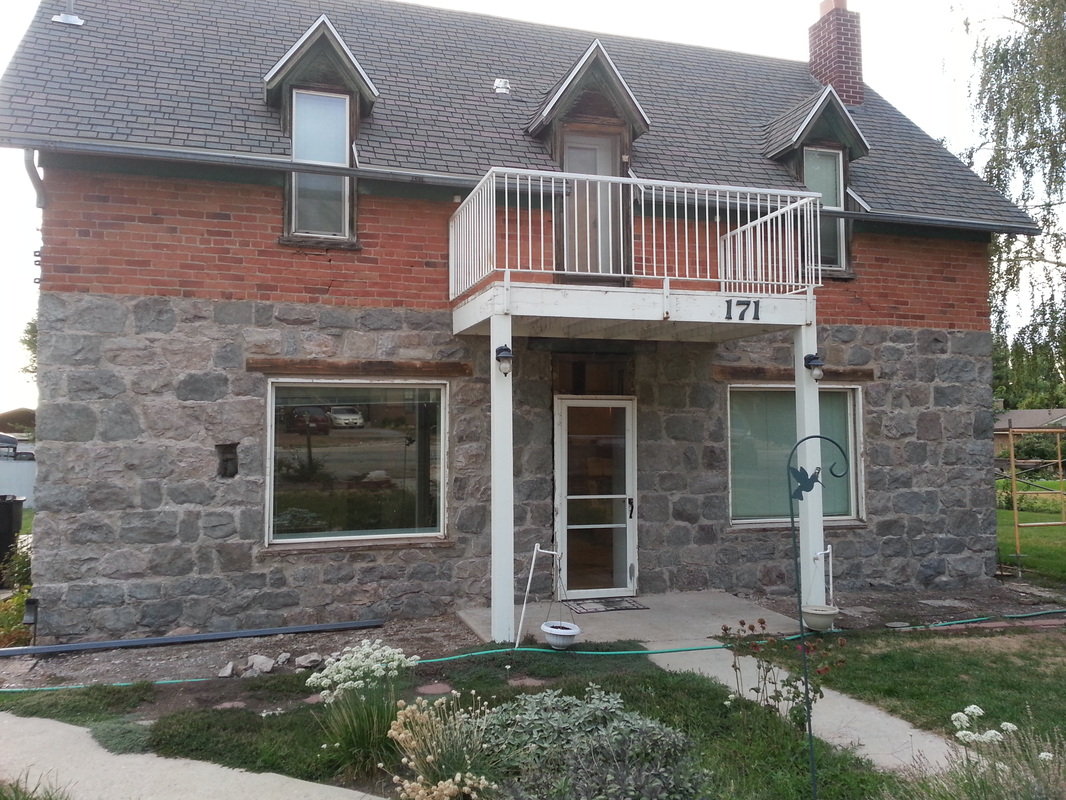
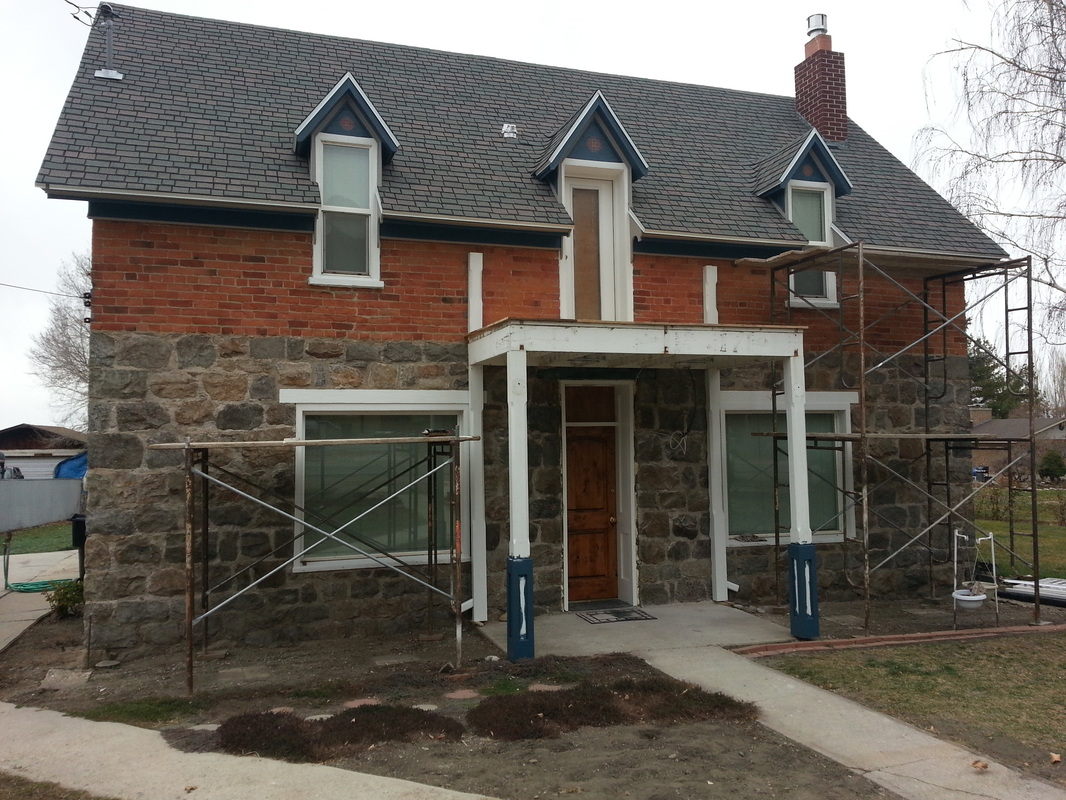
June 26, 2014
|
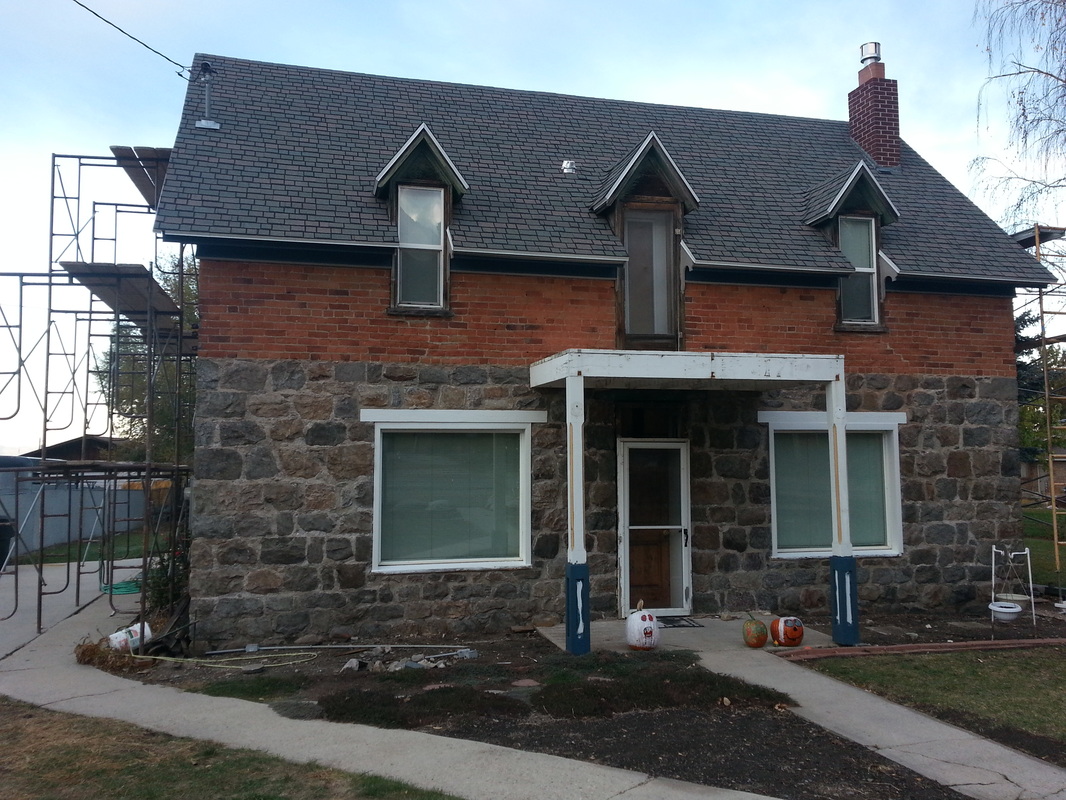
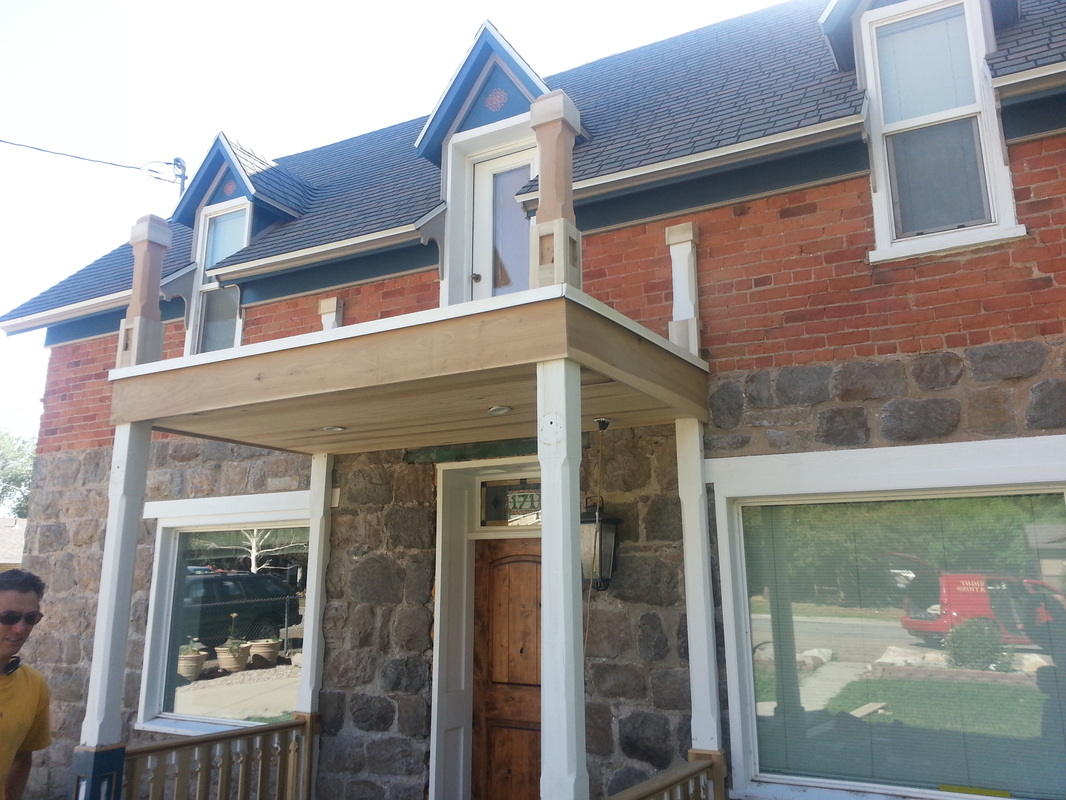
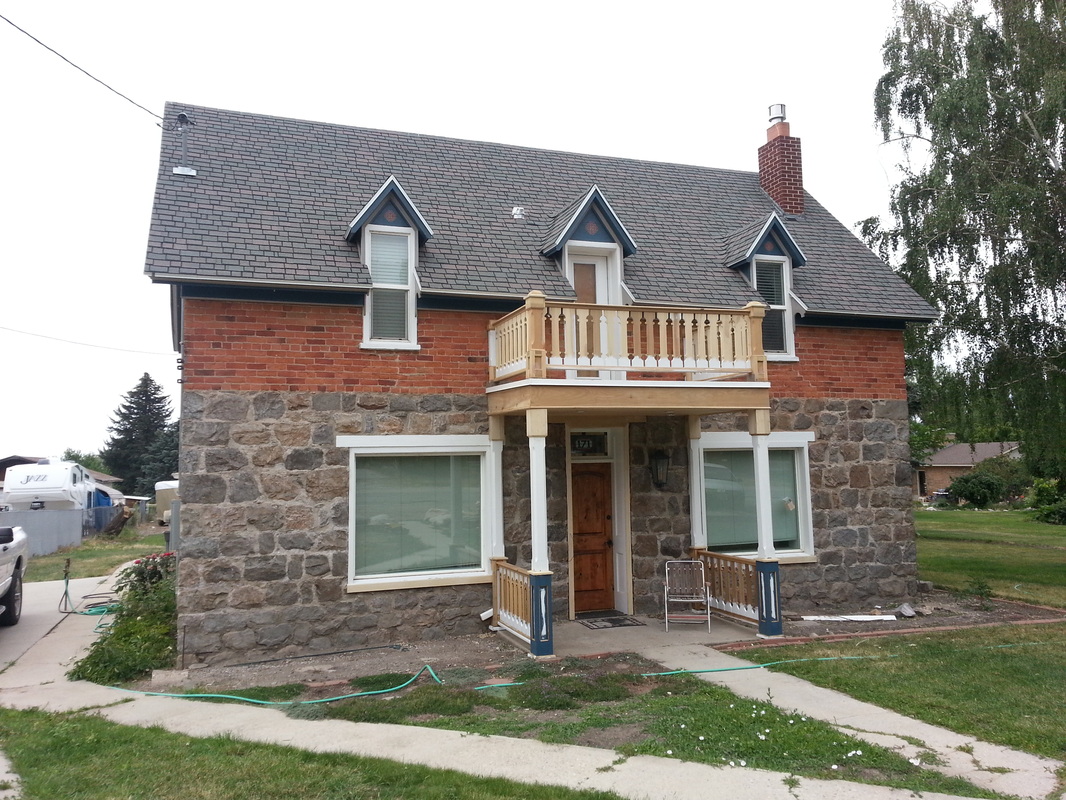
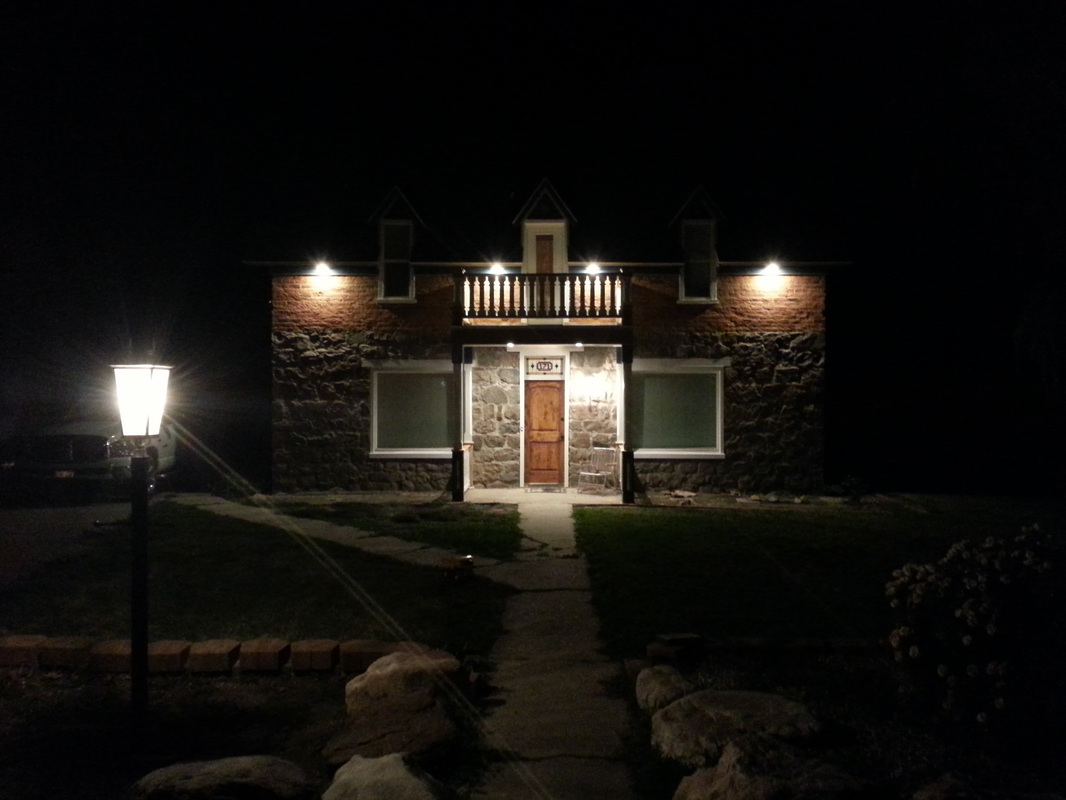
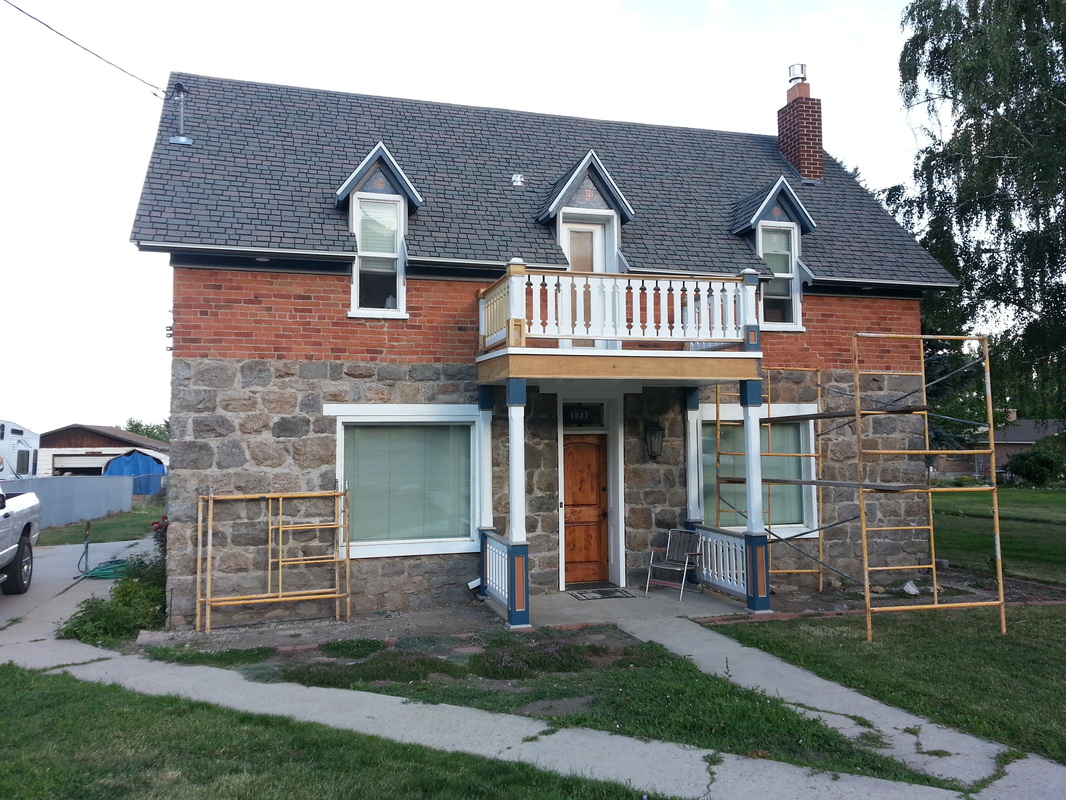
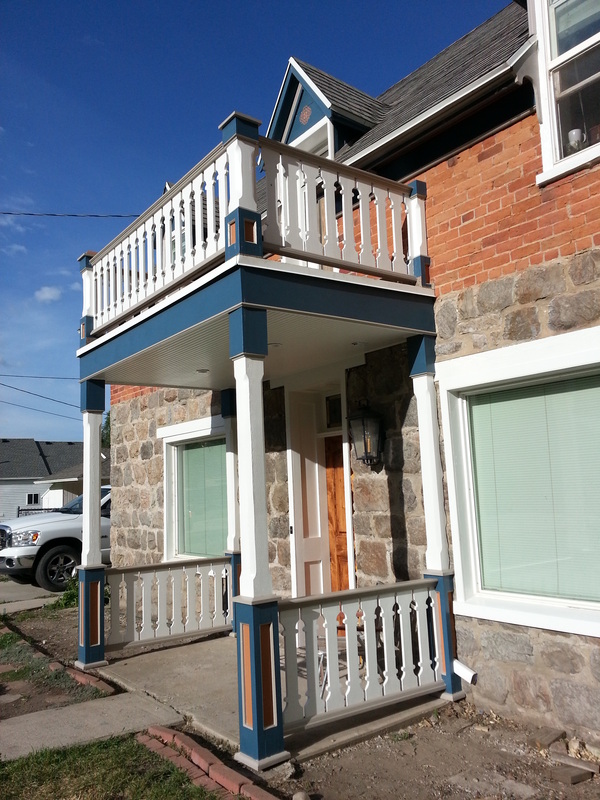
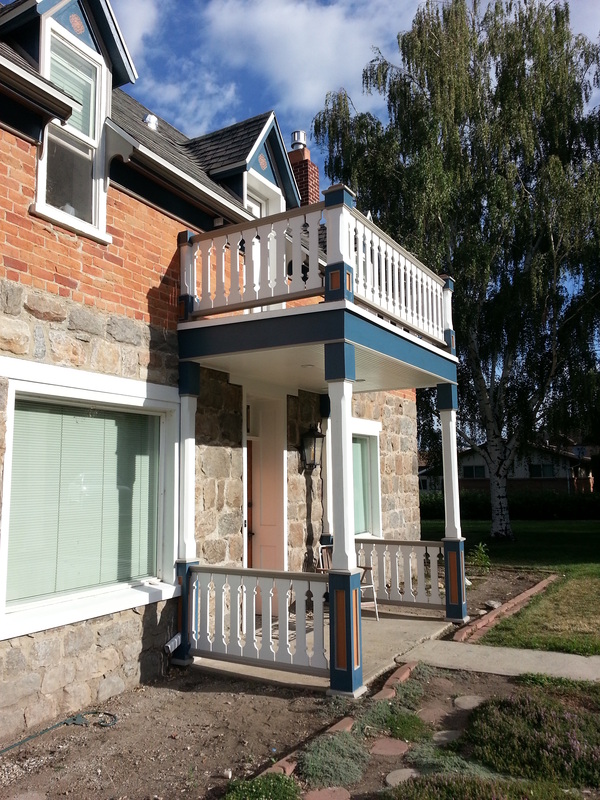
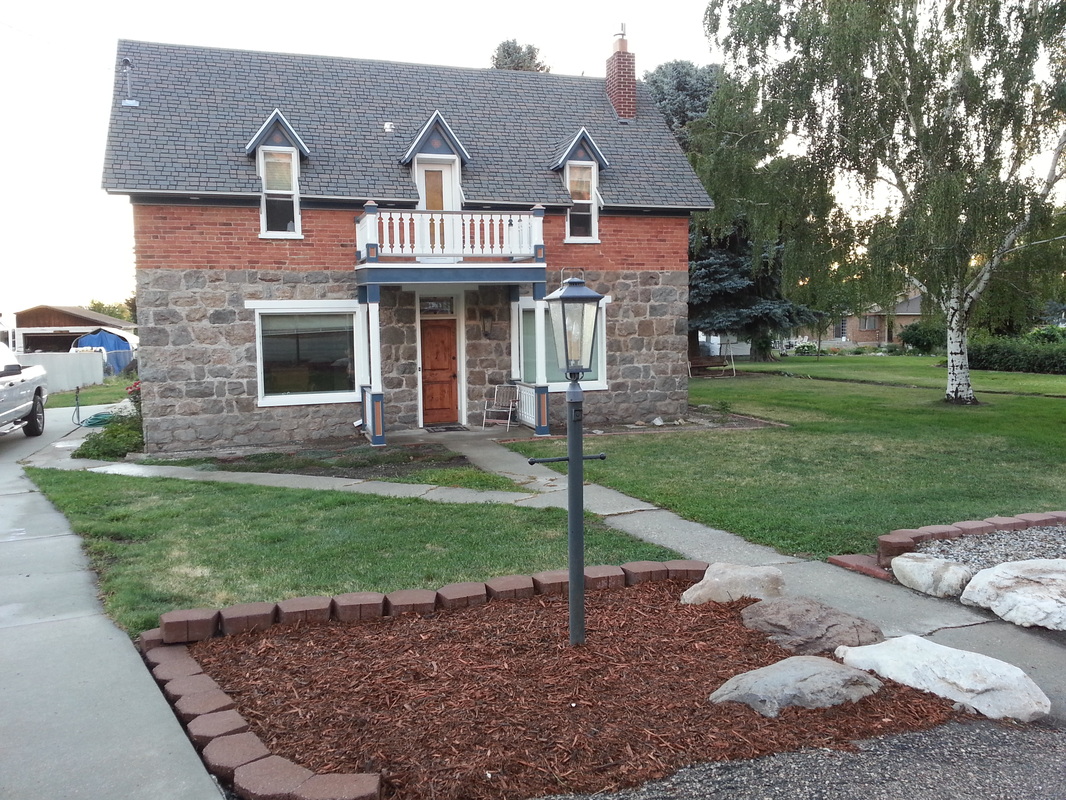
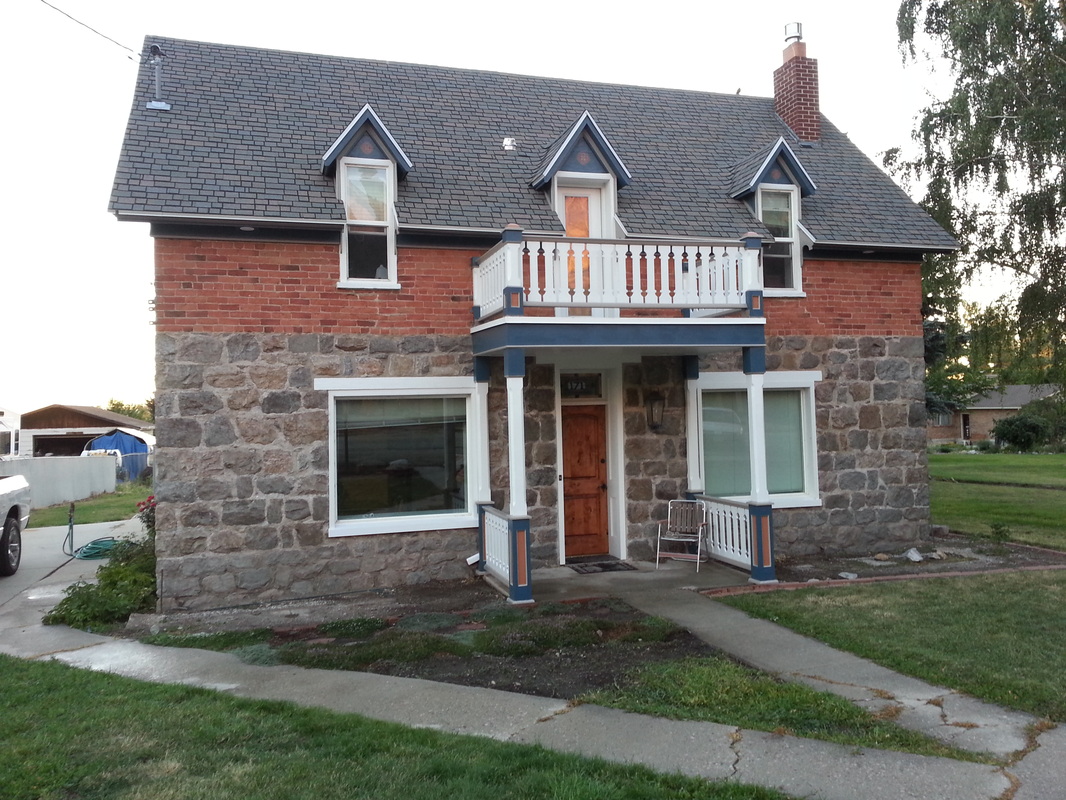
The outside of the home is complete!!! Cody Wright is amazing and does amazing work!!! I'm so glad we hired him to do the work!
|

June 28, 2014

|
We did some final touches before the 4th of July...we have a lot to do to the outside to bring it up to where we want it, but it's been quite a journey to this point. We are planning on putting rock around the home and adding the rain gutters, but the main part of the home is complete.
|


July 6, 2014
|
This is what the home looked like for the 4th of July. :)
|
July 11, 2014

|
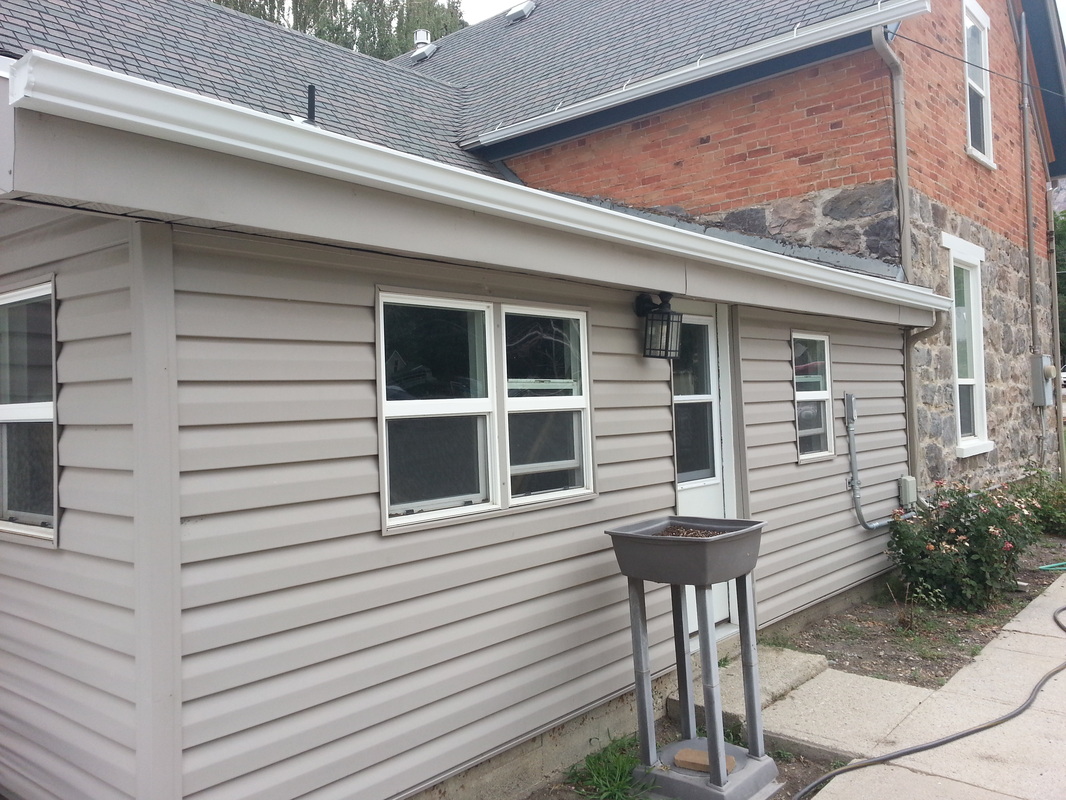
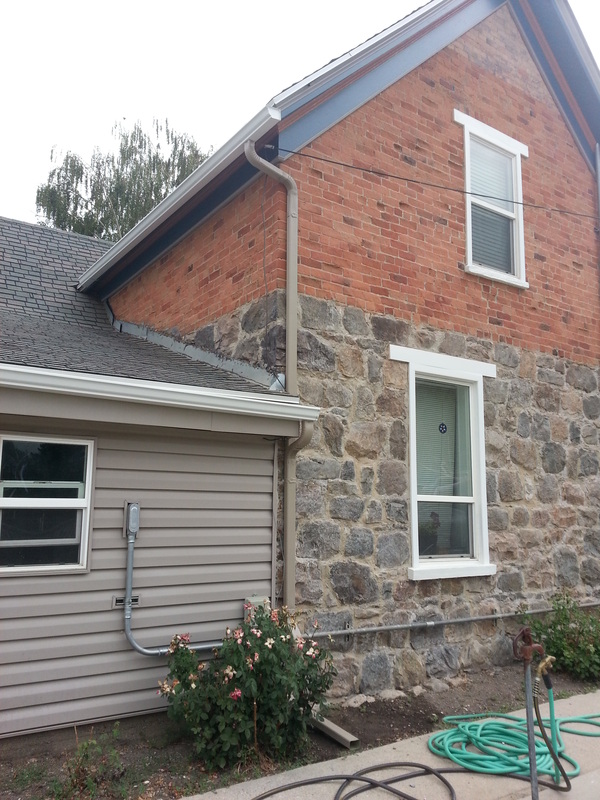
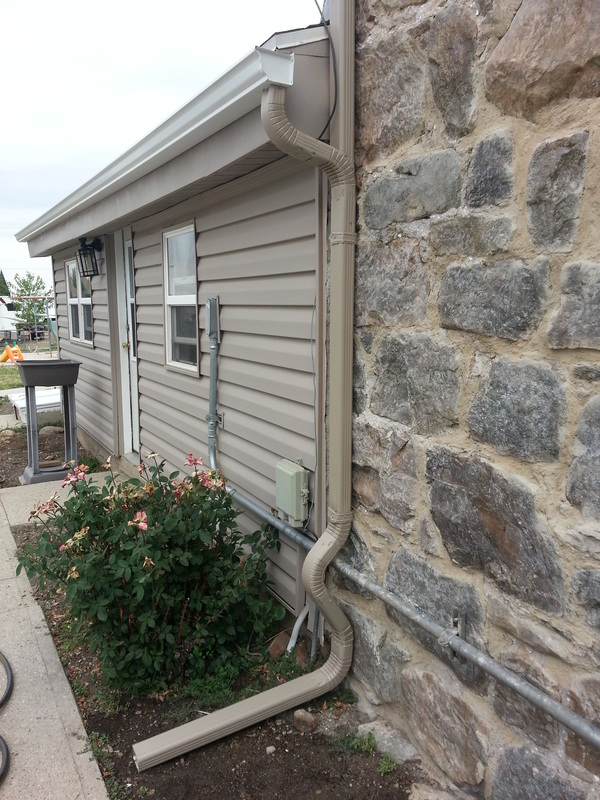
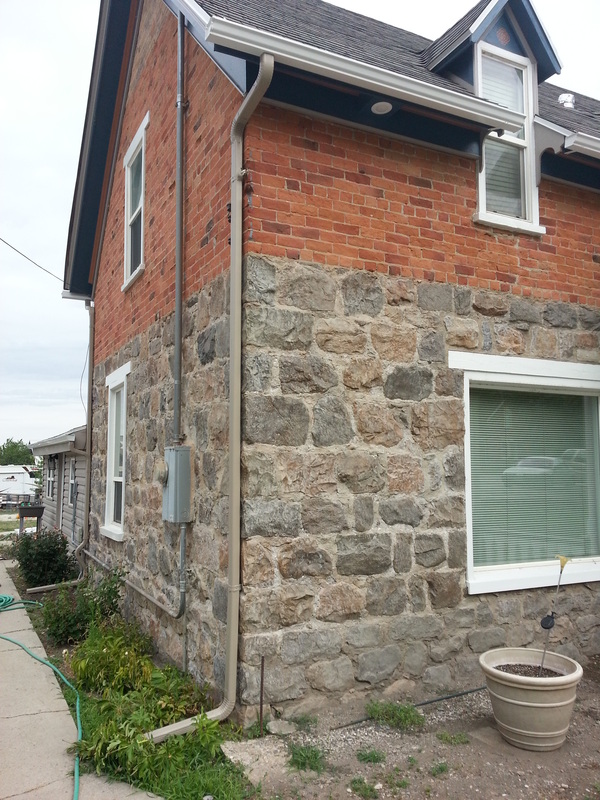
Rain gutters went on today! I was impressed with the guy who installed the gutters...I think he did a great job!
|
July 12, 2014
|
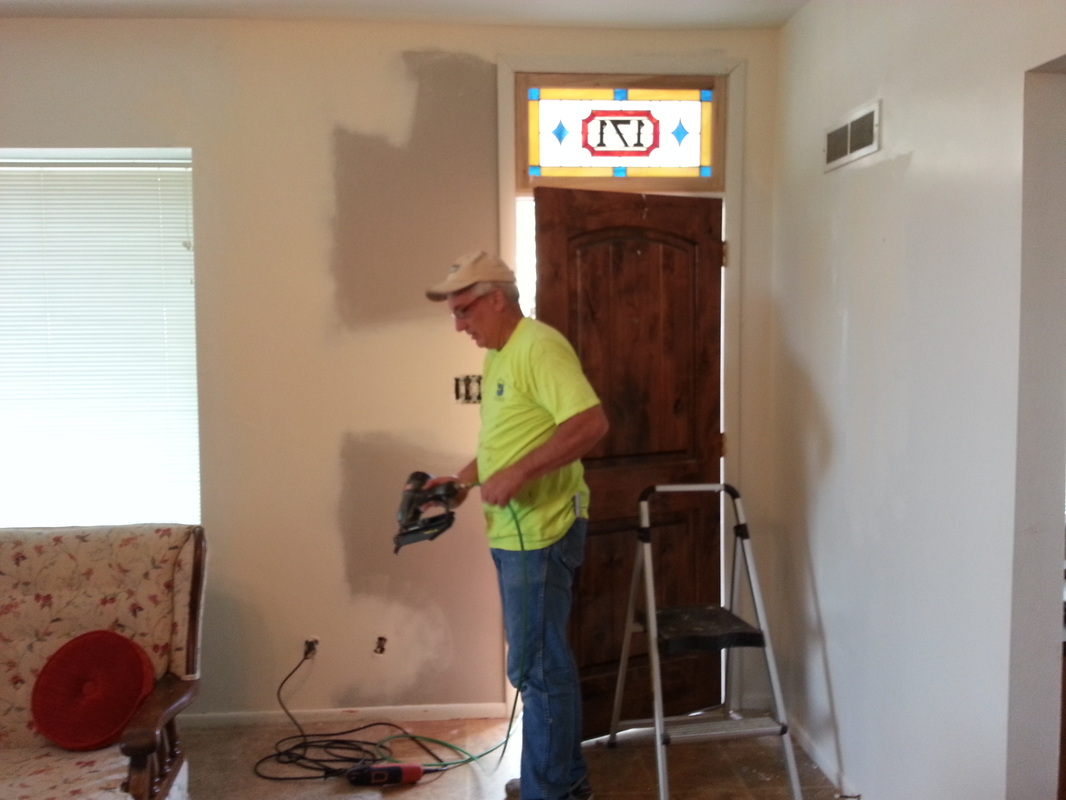
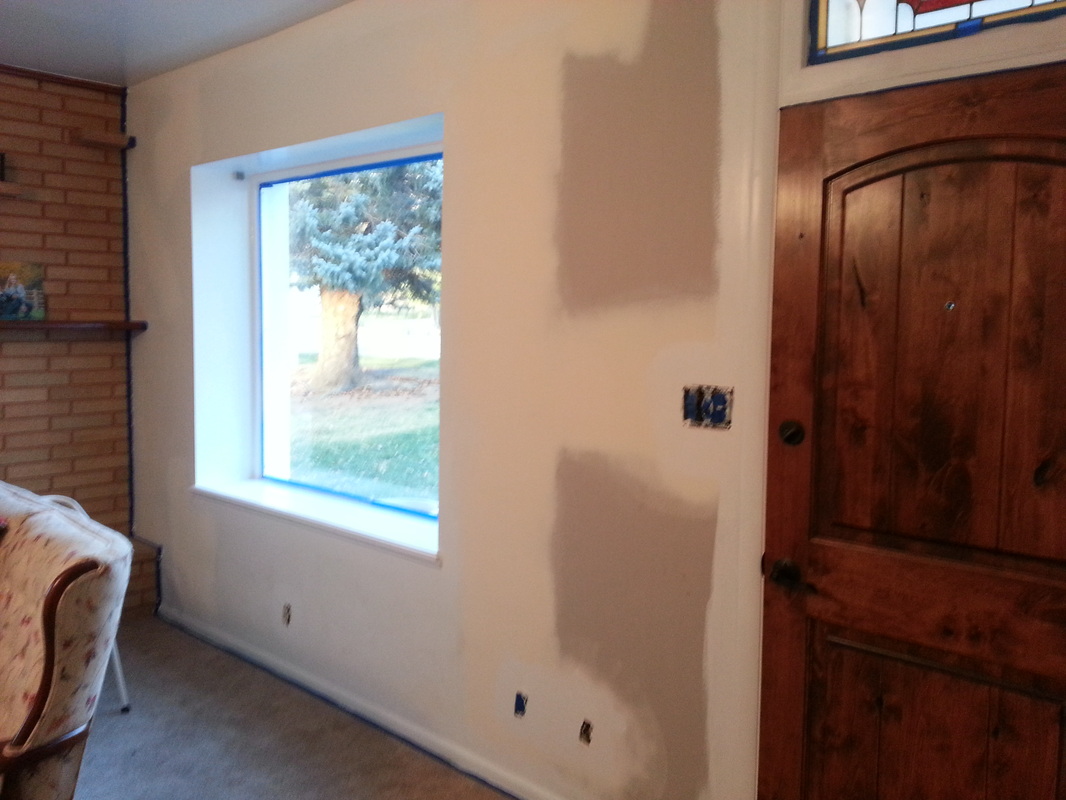
To the inside we go...Bryce Wheelwright is going to help finish up the sheetrock. Excited to be done!
|


July 31, 2014

|
More mudding...and trim...now it's up to me to caulk and paint...
|

November 8, 2014

|
Haha...I guess that's what we get for having me do the caulking and painting...I'm finally getting back to it. I see it daily, but don't do it. :)
|


November 24, 2014

|
Done! Finally, all the disrepair has been painted and finished. I even painted the upstairs in some spots that have been needing paint for over 5 years! :)
|